May 25th, 2014 The Streak Continues: 176
Not to worry. The streak is alive as of 11:02am eastern time. I got in late last night after the long photo session at Nickerson and did not begin working on this post until 5:15am this morning. It took nearly 6 hours to create. Please use our links when buying new photo gear.
Voting on the amazing Flight Category images will be open until early Tuesday morning. Please click here to vote.
This post marks 176 consecutive days with a new educational blog post. With so many folks getting in the habit of using our B&H links and our Amazon logo-links why quit now? April was a record month but May has not been so good. So far…. To show your appreciation for my efforts here, I do ask that you use our the B&H and Amazon affiliate links on the right side of the blog for all of your purchases. Please check the availability of all photographic accessories in the BIRDS AS ART Online Store, especially Gitzo tripods, Wimberley tripod heads, and the like. We sell only what I used, tested, and can depend on. We will not sell you junk. We know the tools that you need to make creating great images easy and fun. And we are always glad to answer your gear questions via e-mail.
You can find the following items in the store: Gitzo tripods, Mongoose M3.6 and Wimberley heads, plates, low feet, and accessories, flash brackets, , Delkin e-film Pro Compact Flash Cards, LensCoat products, and our unique line-up of educational materials including ABP I & II, Digital Basics, Site and Set-up e-Guides, Canon and Nikon Camera Users and AF e-Guides, and MP-4 Photoshop video tutorials among others.
I would of course appreciate your using our B&H affiliate links for all of your major gear, video, and electronic purchases. For the photographic stuff mentioned in the paragraph above we, meaning BAA, would of course greatly appreciate your business. Here is a huge thank you to the many who have been using our links on a regular basis and visiting the BAA Online store as well.
Enjoy!
|
|
|
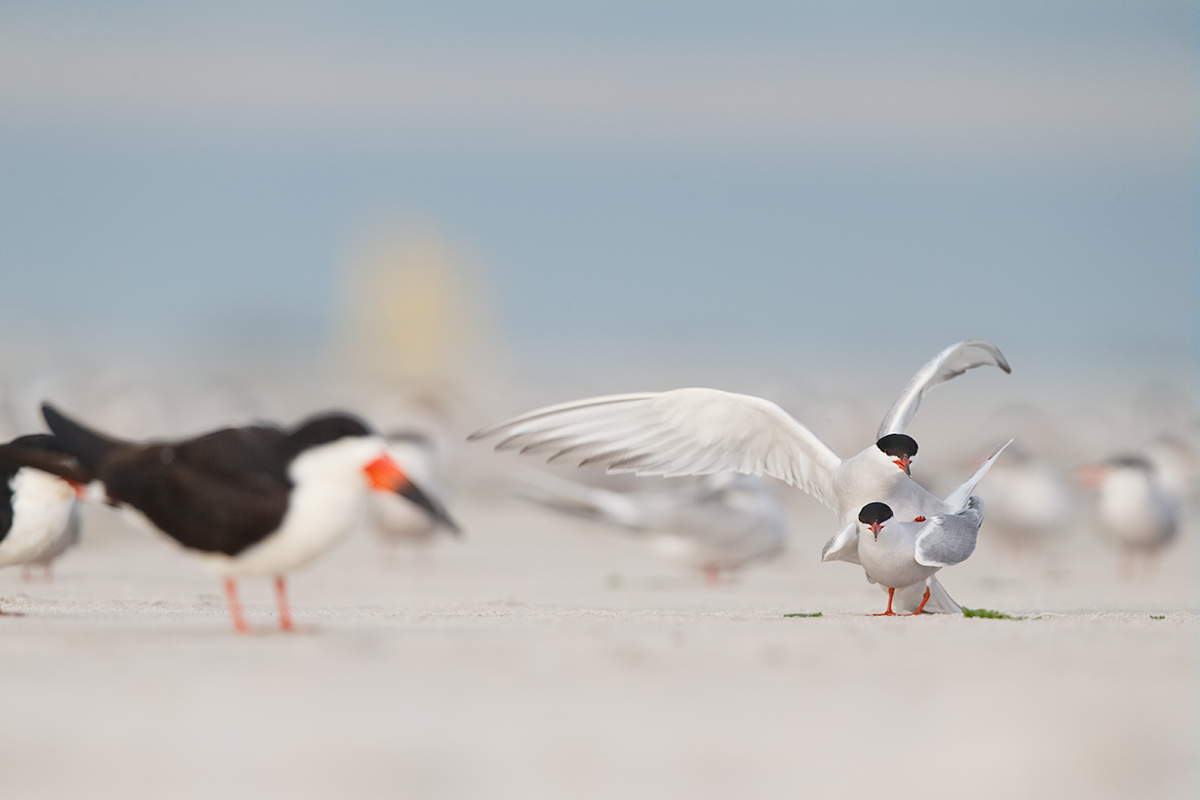
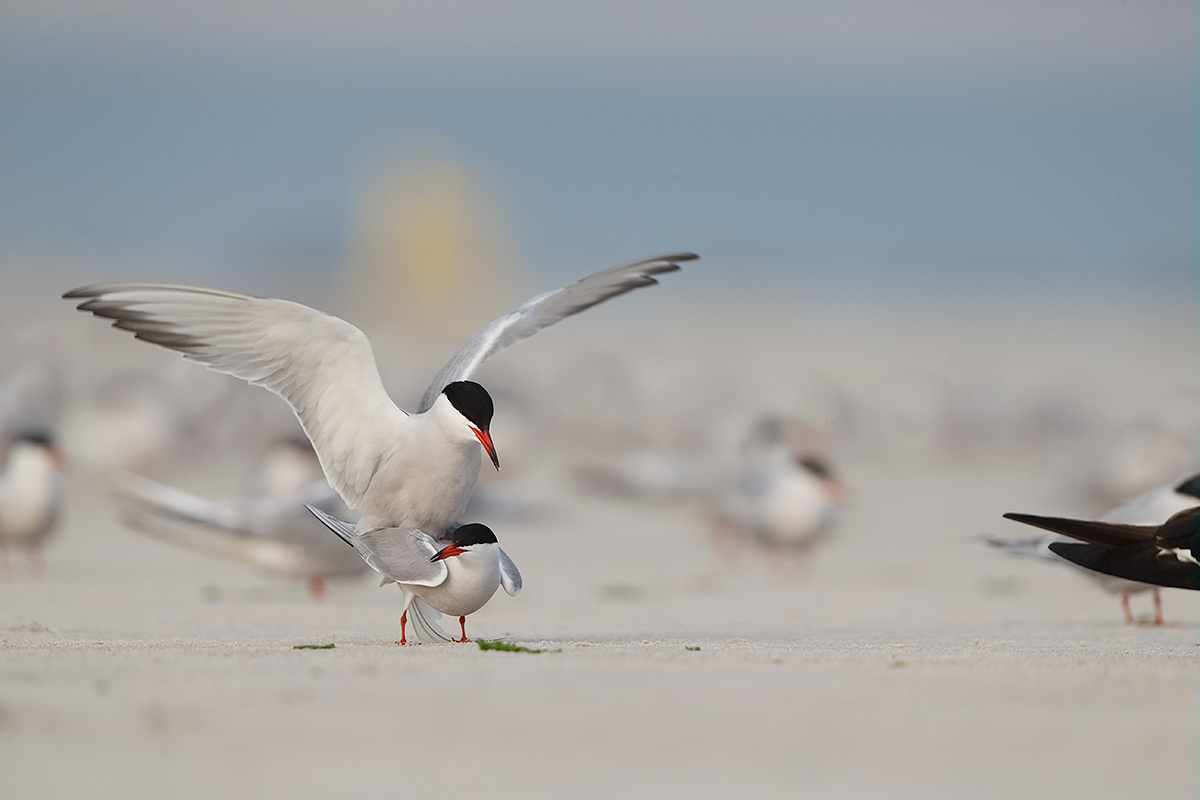
This image was created yesterday afternoon at Nickerson Beach at 7:34:33pm with the hand held Canon EF 300mm f/2.8L IS II USM lens, the Canon Extender EF 2X III, and the Canon EOS-1D X. ISO 800. Evaluative metering +1 1/3 stops as framed: 1/640 sec. at f/5.6 in Manual Av mode. AWB.
One row down and fours sensors to the right of the Central Sensor/AI Servo-Surround/Rear Focus AF as framed active at the moment of exposure. Click here to see the latest version of the Rear Focus Tutorial. Click on the image to see a larger version.
On-camera fill flash with Better Beamer at -1 1/3 stops in ETTL. Canon Speedlite 600EX-RT with the Canon CP-E4 Compact Battery Pack for faster re-charging times.
Original Capture: Common Terns Copulating #1
Note in the optimized version of this image immediately below how the crop from the left and below tightened up the image composition so nicely.
|
The Morning After
I awoke at 5:09am this morning from the pain in my right shoulder. The weather forecast for Lido Beach was perfect: clear skies with a gentle northeast wind. But after re-trashing my chronically problematic right shoulder yesterday afternoon, I did not even think about going back to Nickerson Beach this morning….
|
|
|
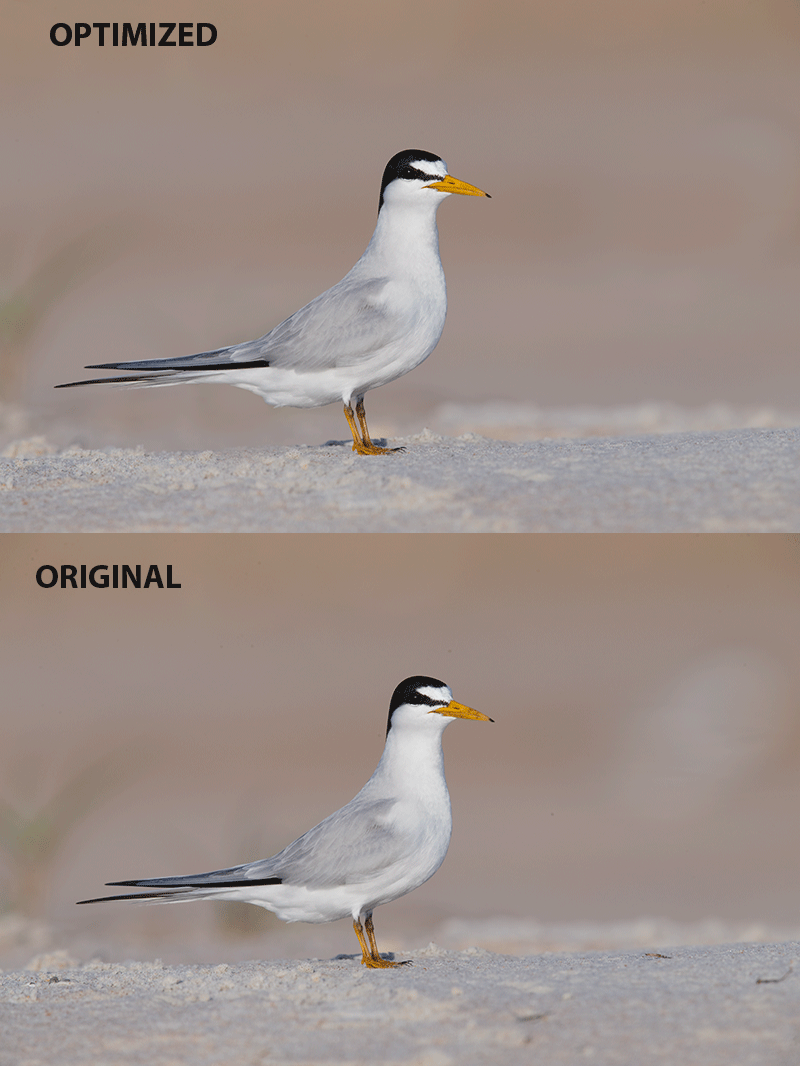
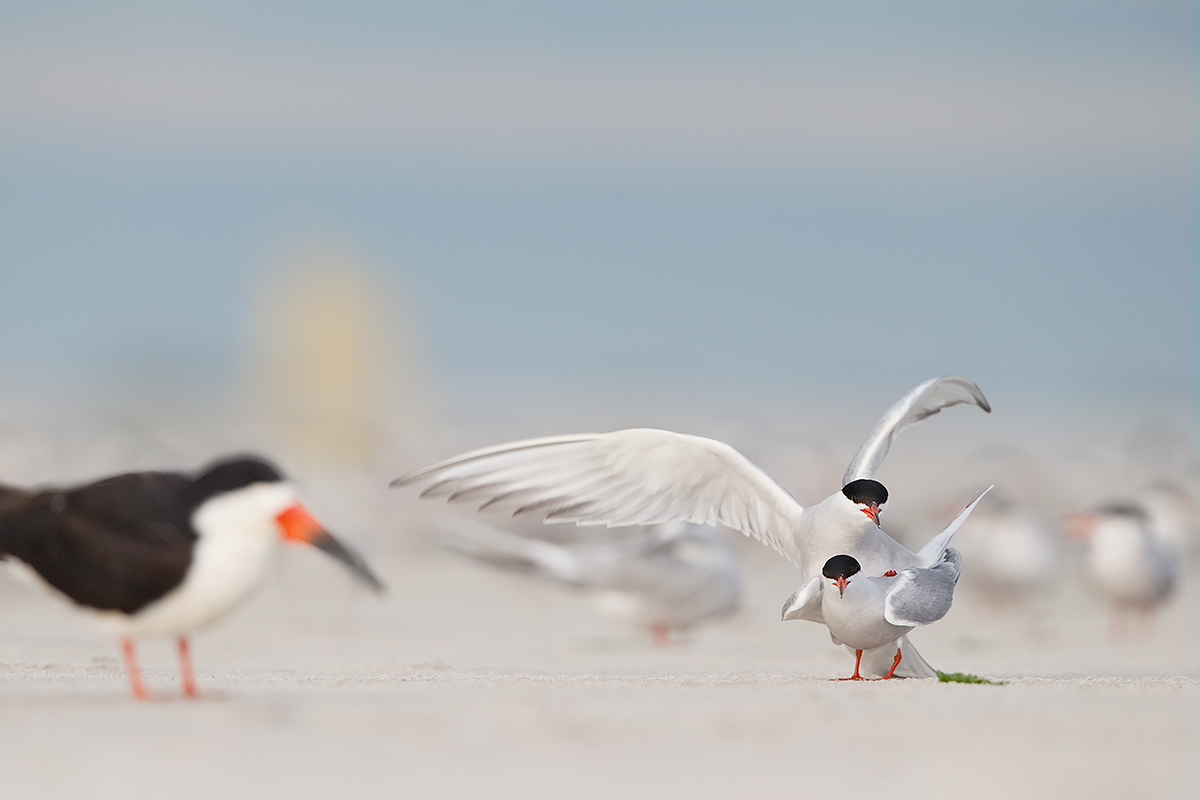
The optimized image here was created from the original image that opened this blog post. There are 3 more before and after image pairs below.
Common Terns Copulating #1
|
The Beyond Memorable Afternoon
Dr. Greg Galbransen had been wanting to do a private session with me at Nickerson Beach for quite some time. With the not-too-great weather forecast for yesterday afternoon and my shoulder already bothering me, I was this close to cancelling. But at lunchtime, sensing his eagerness to improve his photography, we arranged to meet in Point Lookout at 3:45pm and head out to the beach. Greg turned out to be a super-nice guy and I learned many of the details of his totally amazing life. My plan is to write that story today, check the details with Greg later today, and share it with you tomorrow. Trust me, this one will hit you hard and open your eyes. Have you heard the phrase “ordinary people, extraordinary lives”? Greg fits that billing perfectly. Dr. Greg Galbransen is an heroic figure.
Our friendship was pretty much cemented instantly. We started with some resting oystercatchers in full sun but in short order the clouds came and Greg learned the basics of exposure in short order: when the sun is out, the camera’s meter is pretty smart. When the sun is not out, the camera’s meter is pretty dumb. The lighter toned the overall scene the dumber the camera’s meter. From experience I knew that when I was adding 2/3 stop of light to the meter reading off the sand in full sun for the oystercatchers that Greg with his Nikon gear would likely need +1/3 stop. And for photographing the Common Terns in flight when I was reading +2 stops off a grey cloud I advised Greg to add 1 2/3 stops to his reading off that same cloud and set the values manually. Greg was amazed that when he followed my directions to the letter as he did on occasion, his exposures for the terns in flight and for those on the ground were perfect. And yes, he learned a lot about histograms and exposing to the right. At one point the clouds were so thick that I was at ISO 1600 and working at +3 stops off the sky.
|
|
|
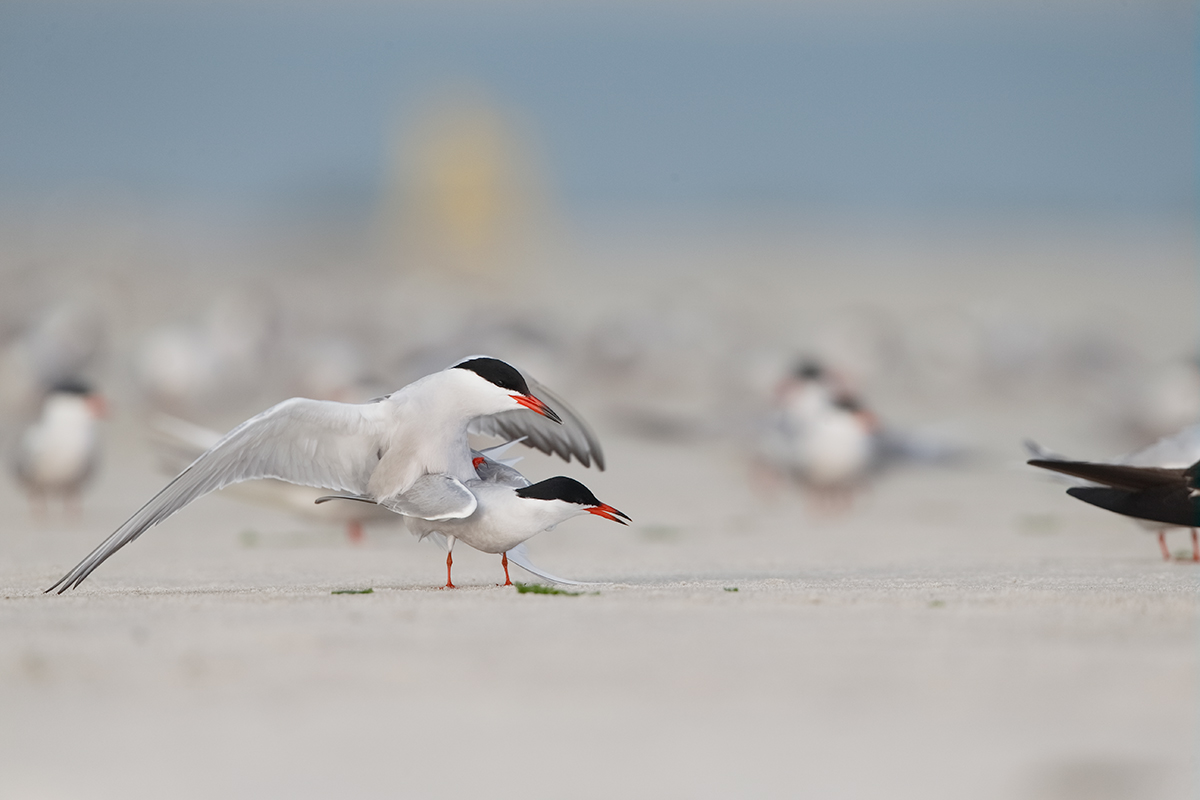
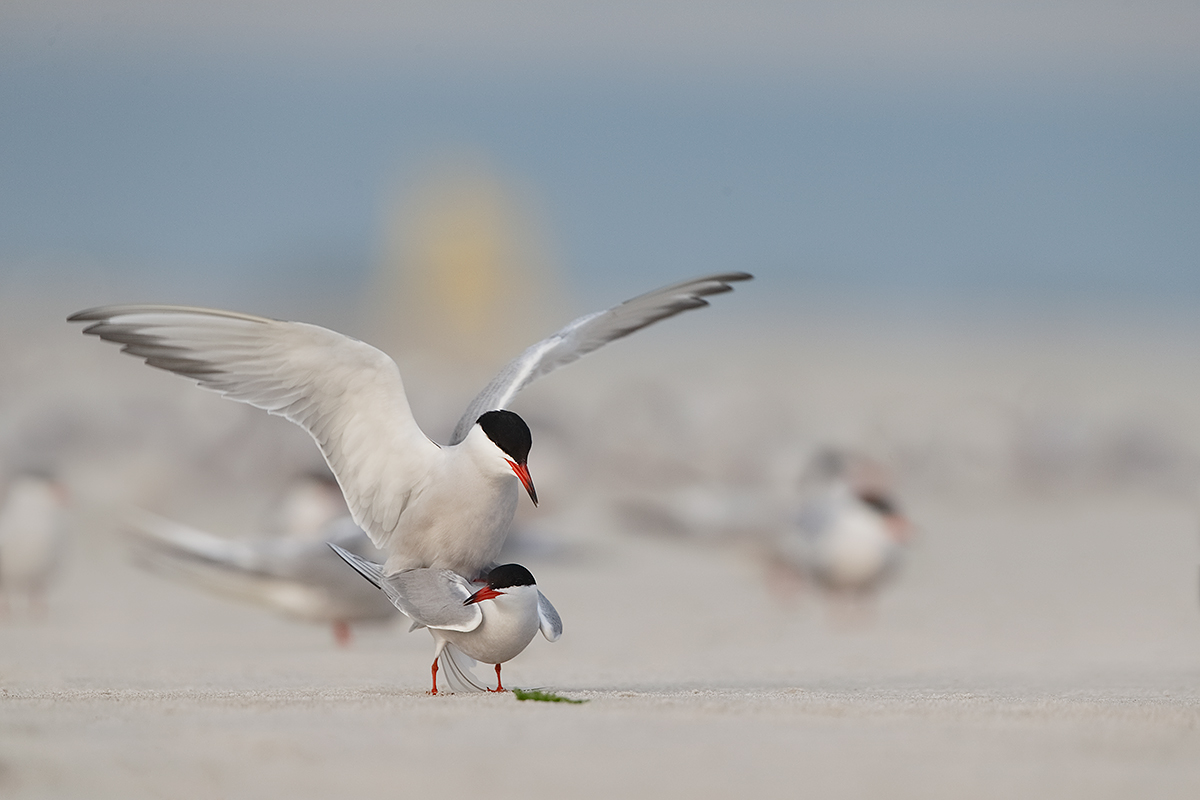
This image was created yesterday afternoon at Nickerson Beach at 7:34:52pm, 19 seconds after the image above, also with the hand held Canon EF 300mm f/2.8L IS II USM lens, the Canon Extender EF 2X III, and the Canon EOS-1D X. ISO 800. Evaluative metering +1 1/3 stops as framed: 1/640 sec. at f/5.6 in Manual Av mode. AWB.
One row down and two sensors to the left of the Central Sensor/AI Servo-Surround/Rear Focus AF as framed active at the moment of exposure. Click here to see the latest version of the Rear Focus Tutorial. Click on the image to see a larger version.
On-camera fill flash with Better Beamer at -1 1/3 stops in ETTL. Canon Speedlite 600EX-RT with the Canon CP-E4 Compact Battery Pack for faster re-charging times.
Original Capture: Common Terns Copulating #2
Note in the optimized version of this image immediately below how the crop and some clean-up work improved the image by eliminating the skimmer butt on the right side of the frame.
|
The Cloudy Period
While the clouds were thick and the light low, we sat by the colony ropes–this year the ropes are quite far from sparse beach grasses where the tern nests begin. I had left my 600 and my tripod in the car opting to work with my 300 II, almost always with the 2X III TC. That in an effort to keep from damaging my long-injured shoulder. Well, that plan did not work well. I had gotten down flat for the oystercatchers. Getting down was bad. Getting up was worse and I felt the strain on my shoulder. On occasion Greg had to hold my rig so that I was able to get up. My good friend and health guru Dr. Cliff Oliver of San Diego asked me a few weeks ago how many body parts and joints touched the floor when I got up off the ground. I answered, “eight.” He said, “Let me check my chart on that.” A moment later he said jokingly, “Death is imminent.”
Anyhoo, the extended flight photography session also took its toll on my right shoulder. At times I needed to lay back and rest on the sand. I kept saying, We gotta go soon.”
|
|
|
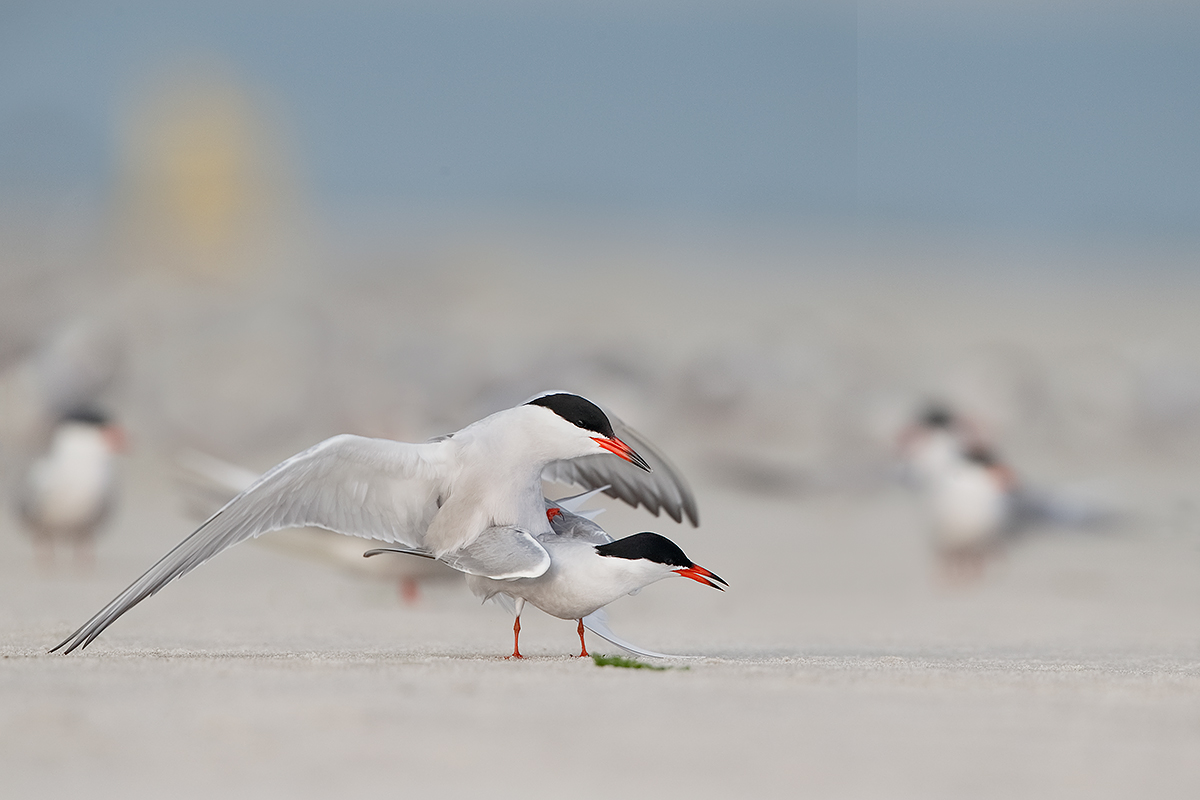
The optimized image here was created from the original image immediately above.
Common Terns Copulating #2
|
But Then…
But then the sun came out. And the south wind had shifted to the west. Perfecto. I took a walk towards the ocean and sat down not-too–close to a flock of skimmers. When a beach vehicle ran by, the flock flushed, flew a short distance, and landed right in front of me in sweet light. With some difficulty, I got back down on the ground. In a few minutes Greg working with his Nikon 600 VR and the 1.4X TCE was right behind me.
|
|
|
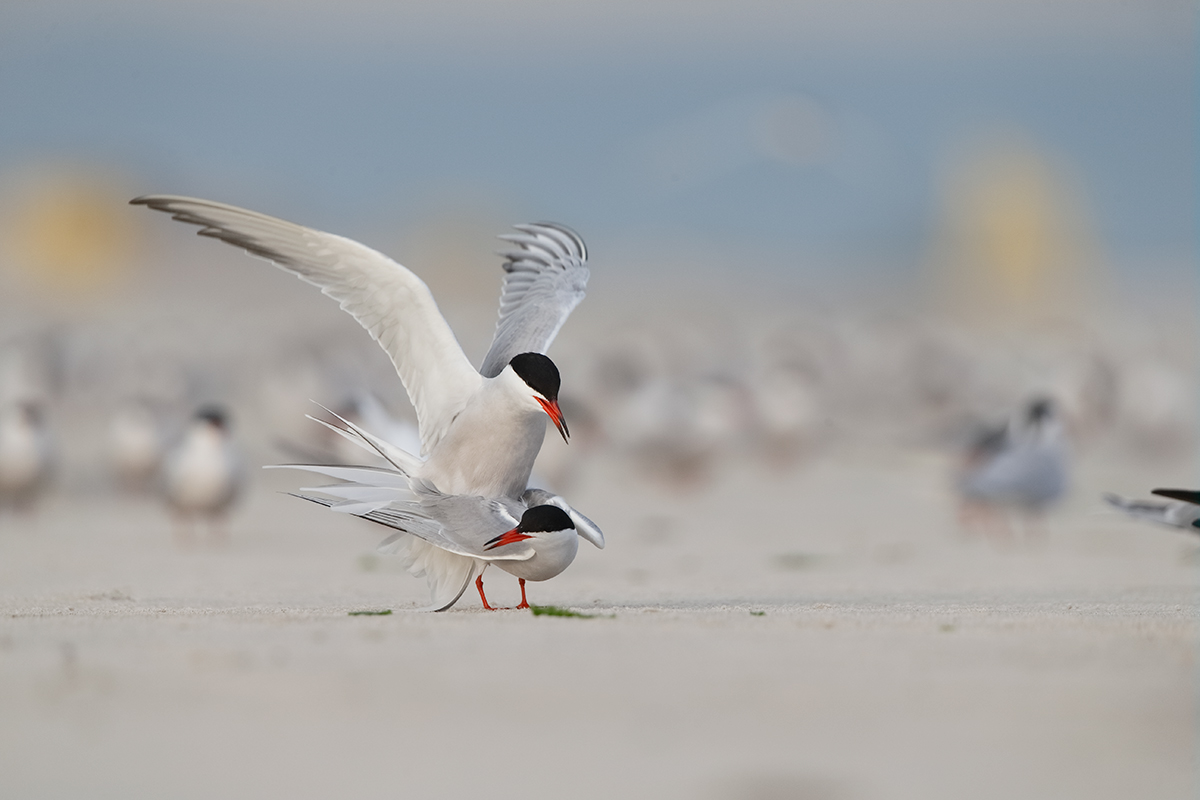
This image was created yesterday afternoon at Nickerson Beach at 7:34:54, 2 seconds after the image above, also with the hand held Canon EF 300mm f/2.8L IS II USM lens, the Canon Extender EF 2X III, and the Canon EOS-1D X. ISO 800. Evaluative metering +1 1/3 stops as framed: 1/640 sec. at f/5.6 in Manual Av mode. AWB.
One row down and fours sensors to the right of the Central Sensor/AI Servo-Surround/Rear Focus AF as framed active at the moment of exposure. Click here to see the latest version of the Rear Focus Tutorial. Click on the image to see a larger version.
Original Capture: Common Terns Copulating #3
Note in the optimized version of this image immediately below how I softened the look of the tern on the left frame-edge to make it less obtrusive.
|
The Copulating Terns
I had already marine-crawled–oh, that was not fun–well to my left to get on sun angle for the terns that were landing just behind and to the left of the skimmer flock. The next thing that I knew, a pair began to copulate. In image 1 above, there was a skimmer in the left part of the frame but I made a few images before crawling back to my right. The sun was soft enough so that being well off light angle was not a problem at all. In a short time frame I created images 2 and 3, each with the butt-end of another skimmer included in the original capture.
|
|
|
The optimized image here was created from the original image immediately above.
Common Terns Copulating #3
|
The Image Optimizaations
After converting the four images in DPP they were brought into Photoshop to be optimized. I used Edit/Copy recipe to clipboard and then Edit/Paste recipe to conveniently speed up RAW conversion process.
Beach clean-up was done with the usual line-up of tools: the Clone Stamp Tool, the Spot Healing Brush, and my beloved Patch Tool. When a bird that I wanted to eliminate–like the forward-facing tern behind the skimmer’s bill in image #1–merged with another bird I used Denise Ippolito’s invaluable Protective Cloning on a Layer techniques to get the job done. I used many small and medium-sized Quick Masks to cover unwanted parts of birds and to move the o-o-f yellow lifeguard tower in image #2. The Quick Masks are of course fine-tuned with Layer Masks. There were a few too bright but not over-exposed WHITEs on the sides of the breasts of some of the terns so I applied a Linear Burn to the whole image (on a new layer via Control J), hid that with an Inverse (Hide-all or Black) Layer Mask, and painted in the effect with a swipe or two of a 10% Opacity Brush. I selected the dark caps of each bird using the Quick Selection Tool, sharpened that layer selectively by applying a Contrast Mask, and then lightened the selection with Curves on a Layer (Control M).
The DPP RAW Conversion Guide
To learn why I use Canon’s Digital Photo Professional (DPP) to convert every image that I work on, click here.
Digital Basics
Everything that I did to optimize today’s images are detailed in my Digital Basics File–written in my easy-to-follow, easy-to-understand style. Are you tired of making your images look worse in Photoshop? Digital Basics File is an instructional PDF that is sent via e-mail. It includes my complete digital workflow, dozens of great Photoshop tips, the use of Contrast Masks, several different ways of expanding and filling in canvas, all of my time-saving Keyboard Shortcuts, Quick Masking, Layer Masking, and NIK Color Efex Pro basics, my killer image clean-up techniques, Digital Eye Doctor, creating time-saving actions, and lots more.
APTATS I & II
Learn the details of advanced Quick Masking techniques in APTATS I. Learn Advanced Layer Masking Techniques in APTATS I. Mention this blog post and apply a $5 discount to either with phone orders only. Buy both APTATS I and APTATS II and we will be glad to apply at $15 discount with phone orders only. Please call Jim or Jennifer at 863-221-2372 on Tuesday to order.
|
|
|
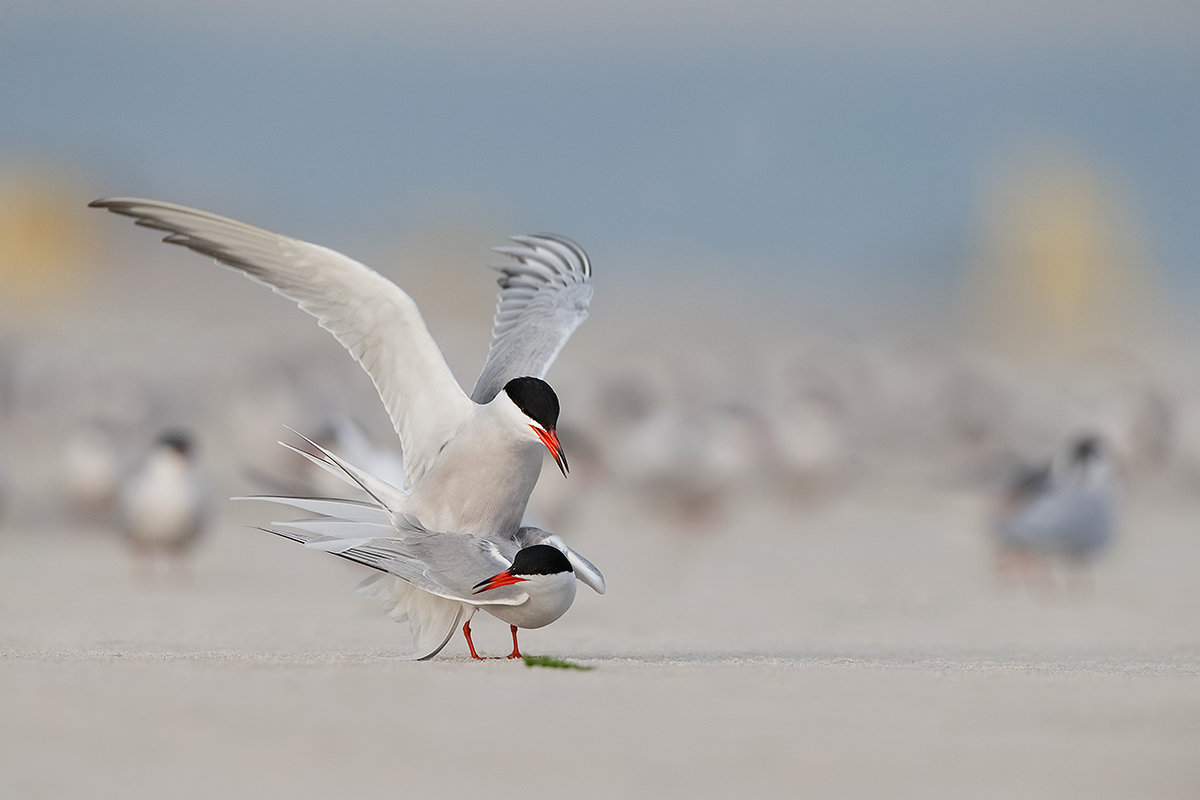
This image was created yesterday afternoon at Nickerson Beach at 7:35:08pm, 14 seconds after the image above, also with the hand held Canon EF 300mm f/2.8L IS II USM lens, the Canon Extender EF 2X III, and the Canon EOS-1D X. ISO 800. Evaluative metering +1 1/3 stops as framed: 1/640 sec. at f/5.6 in Manual Av mode. AWB.
One row down and one sensor to the left of the Central Sensor/AI Servo-Surround/Rear Focus AF as framed active at the moment of exposure. Click here to see the latest version of the Rear Focus Tutorial. Click on the image to see a larger version.
Original Capture: Common Terns Copulating #4
Note in the optimized version of this image immediately below that the crop from below and from the left tidied things up. I used the Clone Stamp Tool to get rid of the o-o-f tern in flight and the intruding tern on the right frame-edge.
|
The Final Move
To create this image I moved painfully once again to my right to get the offending skimmer butt out of the frame. Moments after this image two skimmers landed right in front of the pair. Surprisingly, they kept on copulating for another minute or so. I thank them for their cooperation. With many species or individual pairs copulations may last only a few seconds or less.
|
|
|
The optimized image here was created from the original image immediately above.
Common Terns Copulating #4
|
Was It Worth It?
In a word, “Yes.” Not so much for the images but for the experience. Working with a bright student who is seriously interested in learning is always rewarding. Hearing Greg’s story in person–I had read a bit about it on line–was both wonderful and horrible. And I love when a not-so-great photo session turns spectacular at the very end of the day. Well, not actually the end of the day but that will be another blog post.
I created 775 images yesterday afternoon but have not yet finished editing them. Perhaps there will be a few that make an already memorable afternoon even more memorable. Or not.
As for the right shoulder. The pain is the pain. It is what it is. I love that it reminds me of how good I usually feel and about how lucky I have been to travel and photograph as much as I have for the past 3 decades. The shoulder is about as bad as it has been but I have always been able to re-hab it and am confident that it will be fine in a while. PMA = positive mental attitude. When I get back to Florida it is likely that I will undergo Prolozone therapy as soon as possible.
Your Favorite?
Please take a moment to select your favorite image here. And be sure to let us know why you made your choice.
Nickerson Baby Beach-nesting Birds IPT: 3-Full Days/July 15-17, 2014: $1199. Introductory meet and greet: 8pm, Monday, July 14, 2014. Co-leaders Arthur Morris and Denise Ippolito
Greg Gulbransen is very much looking to this IPT. Join us on Long Island, NY next summer to photograph Black Skimmers, Common Terns with chicks, American Oystercatcher families, and possibly some just-hatched Black Skimmer chicks. Things are looking great. The opportunities will include chances to photograph a variety of breeding behaviors including courtship feeding, display flight and combat, and copulations. Car-pooling is recommended; if we opt to return to the beach before 5pm there is a $30/vehicle parking fee that is not included so it is best to share that expense. Parking in the morning is free.
A $499 non-refundable deposit is required to hold your slot for this IPT. Your balance is due 4 months before the date of the IPT and is also non-refundable. If the trip fills, we will be glad to apply a credit applicable to a future IPT for the full amount less a $100 processing fee. If we do not receive your check for the balance on or before the due date we will try to fill your spot from the waiting list. If your spot is filled, you will lose your deposit. If not, you can secure your spot by paying your balance.
Please print, complete, and sign the form that is linked to here and shoot it to us along with your deposit check (made out to “Arthur Morris.”) Though we prefer a check, you can also leave your deposit with a credit card by calling the office at 863-692-0906. If you register by phone, please print, complete and sign the form as noted above and either mail it to us or e-mail the scan.
If you have any questions, please feel free to contact me via e-mail
Selling Your Used Photo Gear Through BIRDS AS ART
Selling your used (or like-new) photo gear through the BAA Blog or via a BAA Online Bulletin is a great idea. We charge only a 5% commission. One of the more popular used gear for sale sites charges a minimum of 20% plus assorted fees! Yikes. The minimum item price here is $500 (or less for a $25 fee). If you are interested please e-mail with the words Items for Sale Info Request cut and pasted into the Subject line :). Stuff that is priced fairly–I offer free pricing advise, usually sells in no time flat as did Dennis Cassidy’s 500 II recently on the blog. Larry Master’s 400 DO and his 800 f/5.6 sold within a week. From Larry via e-mail: Thanks for helping me sell the lenses so quickly!
A Creative Adventure/BIRDS AS ART friend Kitto Kono sold her Nikon 500 to a Blog subscriber in less than a week. Janet Horton’s 7D sold this week after a $100 price reduction. Denise Ippolito’s 100-400 and her 100 macro sold in one day. Peter Kes sold his 70-200 f/2.8L IS II and his 400 DO through BAA in ten days. In the past two months we have sold a Canon 800, a Canon 500 II, 3 400 DO lenses, a Nikon 500mm, and lots more. If you are interested in using our services, please e-mail.
Used Photography Gear Page
Eagle-eyed readers may have noticed that there is a link to the Used Photography Gear page on the yellow tool bar at the top of each blog page. Folks looking to buy (or to sell) can click on that tab or here. I will on occasion continue to list new gear and great buys in blog posts and in Bulletins and may on rare occasion share all the listings with you on the blog. I will strive to keep the listings current. Great news for Kitty Kono and her Nikon 400mm f/2.8: it sold recently! That made her 2 for 2 on selling her older Nikon super-telephotos with BAA.
Support the BAA Blog. Support the BAA Bulletins: Shop B&H here!
We want and need to keep providing you with the latest free information, photography and Photoshop lessons, and all manner of related information. Show your appreciation by making your purchases immediately after clicking on any of our B&H or Amazon Affiliate links in this blog post. Remember, B&H ain’t just photography!
….. …..
Typos
In all blog posts and Bulletins, feel free to e-mail or to leave a comment regarding any typos, wrong words, misspellings, omissions, or grammatical errors. Just be right. 🙂
May 24th, 2014
The Streak Continues: 175
This post marks 175 consecutive days with a new educational blog post. With so many folks getting in the habit of using our B&H links and our Amazon logo-links why quit now? April was a record month but May has not been so good. So far…. To show your appreciation for my efforts here, I do ask that you use our the B&H and Amazon affiliate links on the right side of the blog for all of your purchases. Please check the availability of all photographic accessories in the BIRDS AS ART Online Store, especially Gitzo tripods, Wimberley tripod heads, and the like. We sell only what I used, tested, and can depend on. We will not sell you junk. We know the tools that you need to make creating great images easy and fun. And we are always glad to answer your gear questions via e-mail.
You can find the following items in the store: Gitzo tripods, Mongoose M3.6 and Wimberley heads, plates, low feet, and accessories, flash brackets, , Delkin e-film Pro Compact Flash Cards, LensCoat products, and our unique line-up of educational materials including ABP I & II, Digital Basics, Site and Set-up e-Guides, Canon and Nikon Camera Users and AF e-Guides, and MP-4 Photoshop video tutorials among others.
I would of course appreciate your using our B&H affiliate links for all of your major gear, video, and electronic purchases. For the photographic stuff mentioned in the paragraph above we, meaning BAA, would of course greatly appreciate your business. Here is a huge thank you to the many who have been using our links on a regular basis and visiting the BAA Online store as well.
This post took more than 4 hours to assemble. Enjoy it! And be sure to vote!
Upgraded Used Mongoose M3.5 Package: $630
Scroll down for details; this great package represents a value of $947.
|
|
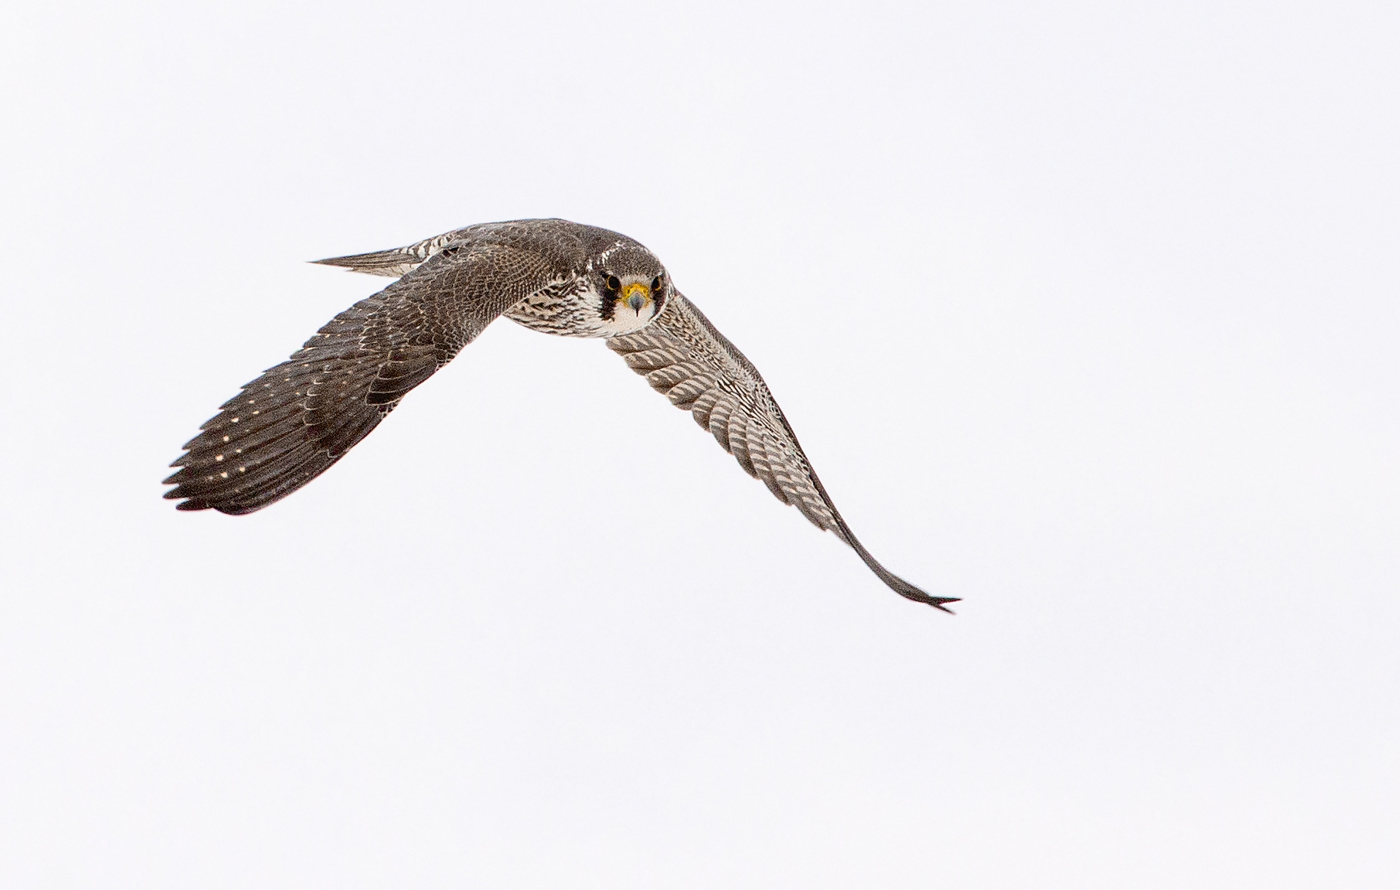
White Sky Peregrine
|
White Sky Peregrine
The BIRDS AS ART 2nd International Bird Photography Competition
The judging of the BIRDS AS ART 2nd International Bird Photography Competition has been complete for a bit more than three weeks. Thanks a stack again to our skilled panel of judges: Sandesh Kadur, Scott Elowitz, Lou Coetzer, Mary Ann McDonald, Michael Frye, Peter Kes, Denise Ippolito, and yours truly. You can learn more about the guest judges here.
From 5 to 18 images in the 8 categories were selected to be sent to the judges’ panel. Each judge voted on each image on a 0-5 scale. The votes were tallied and the results are now final. This will make 6 categories down, 2 to go.
Your Call
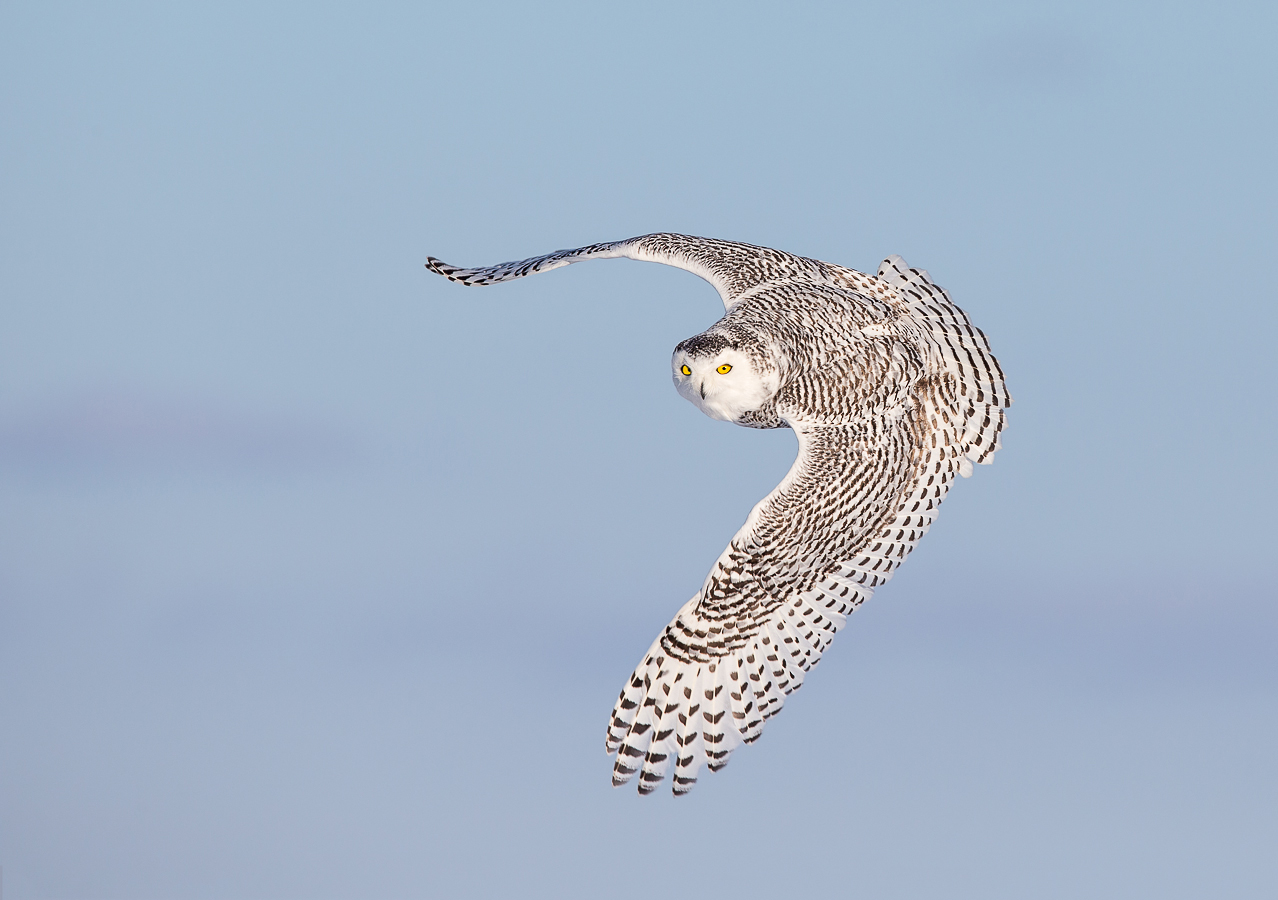
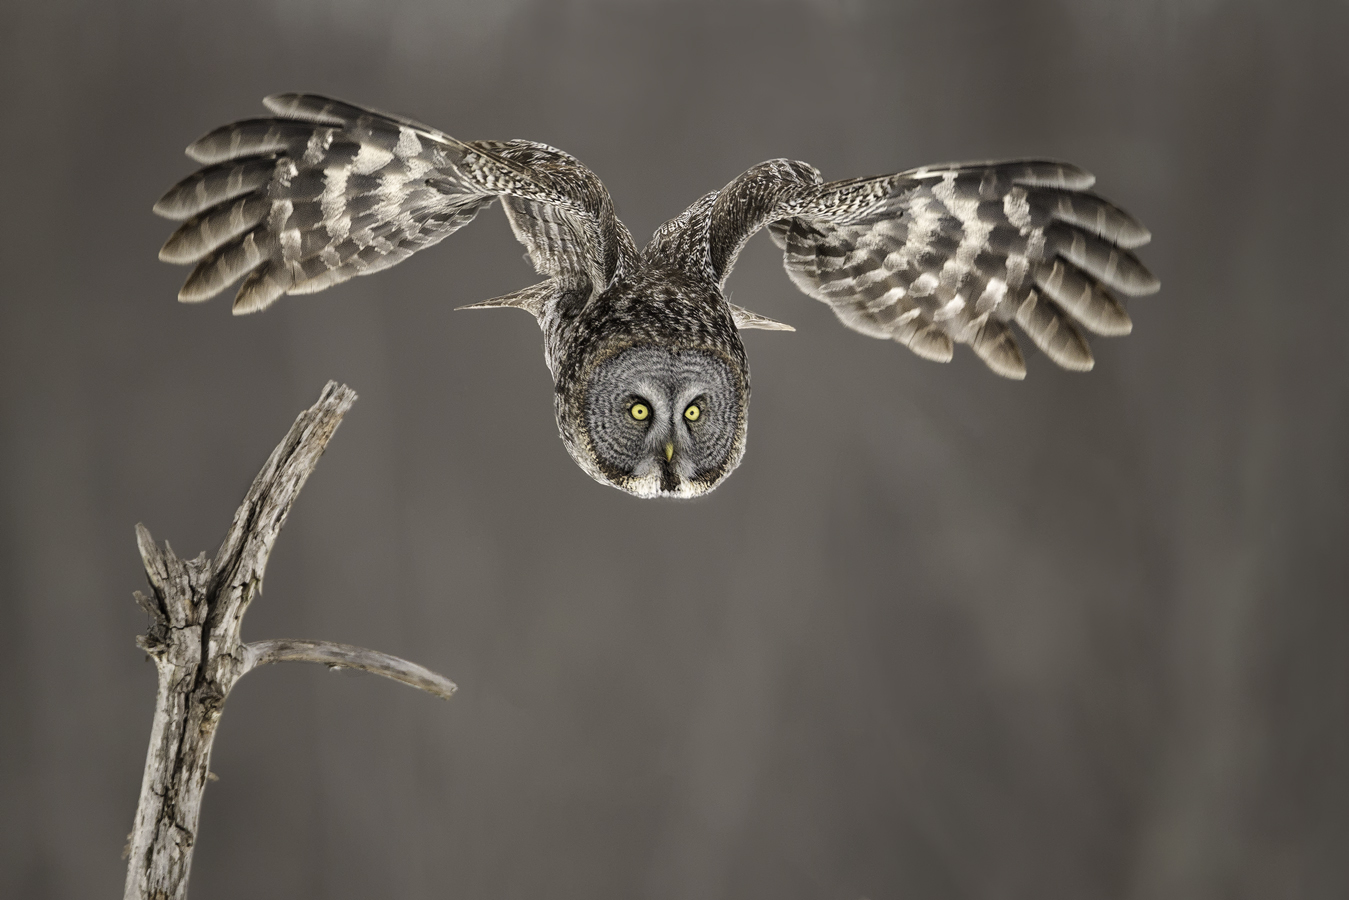
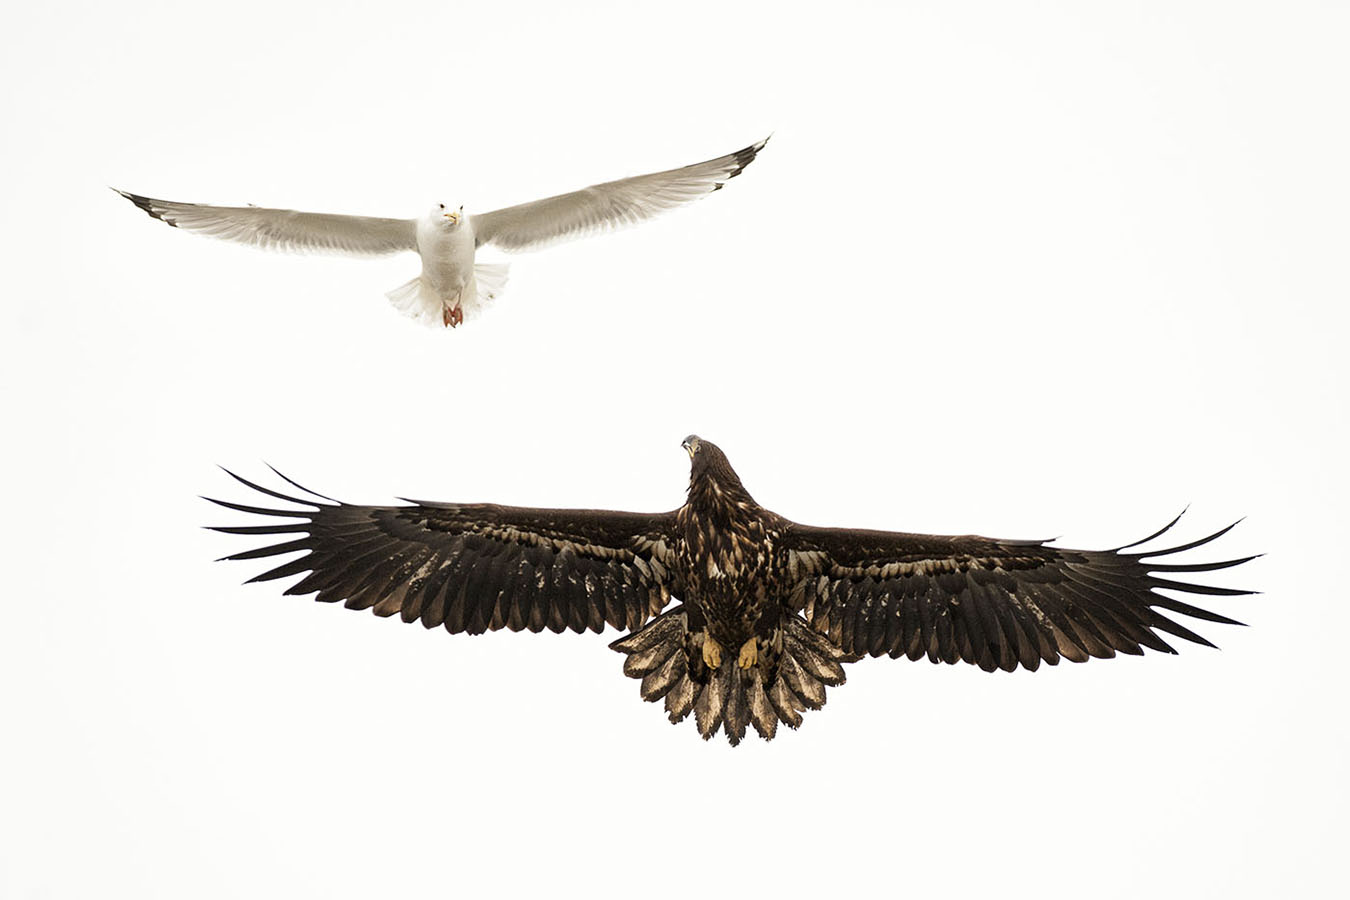
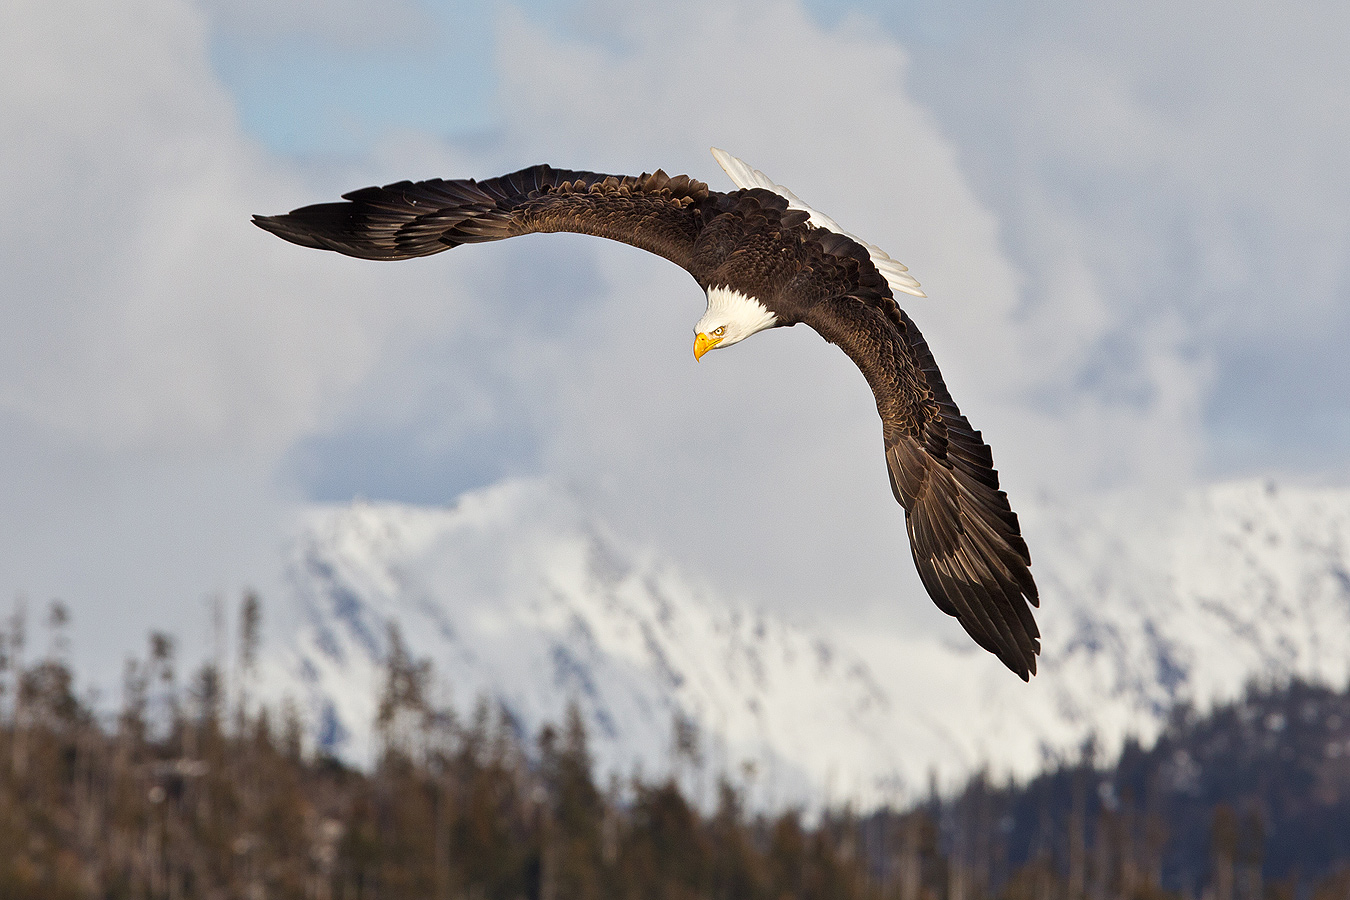
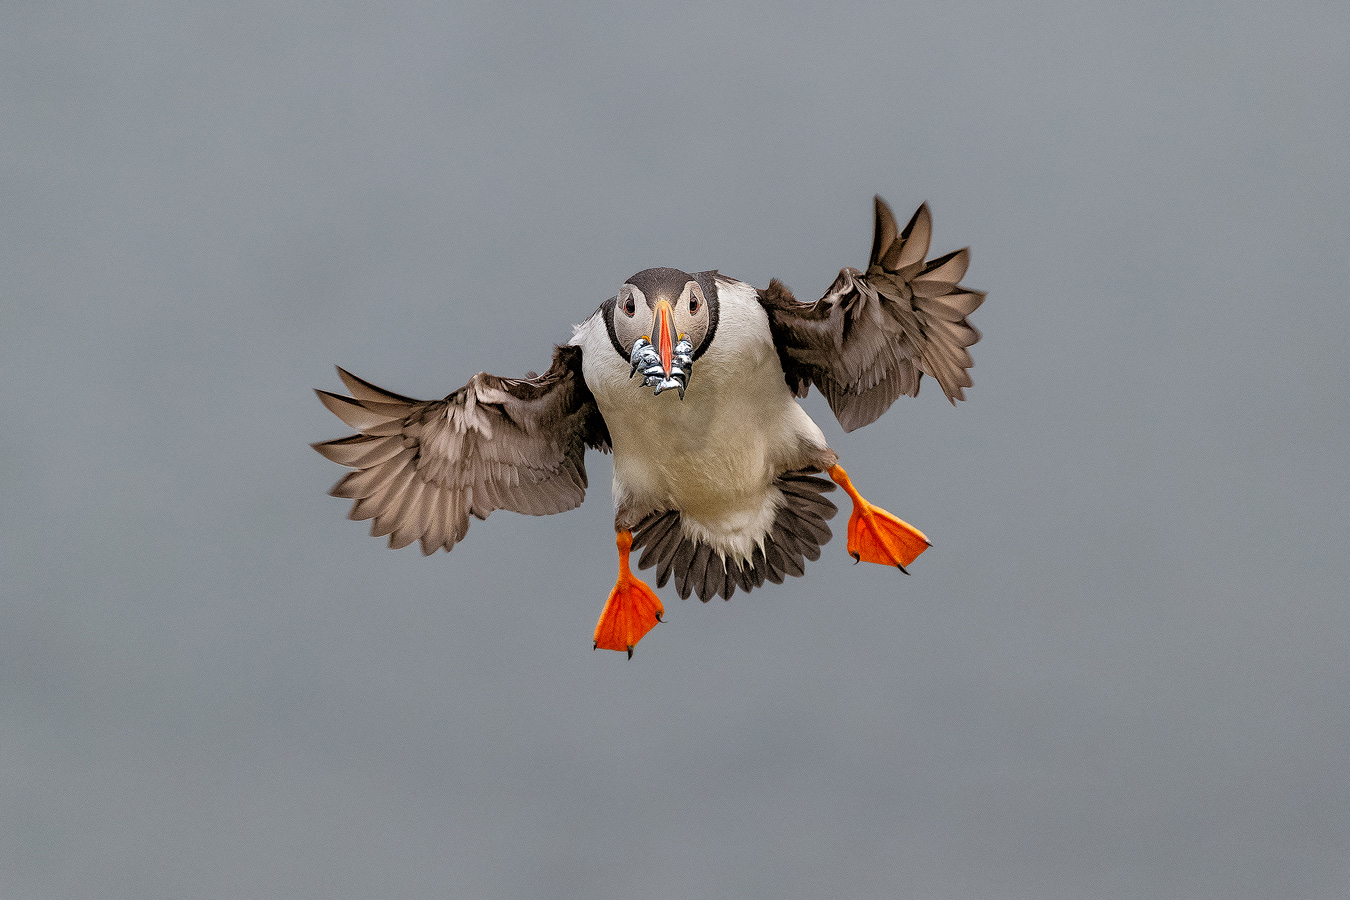
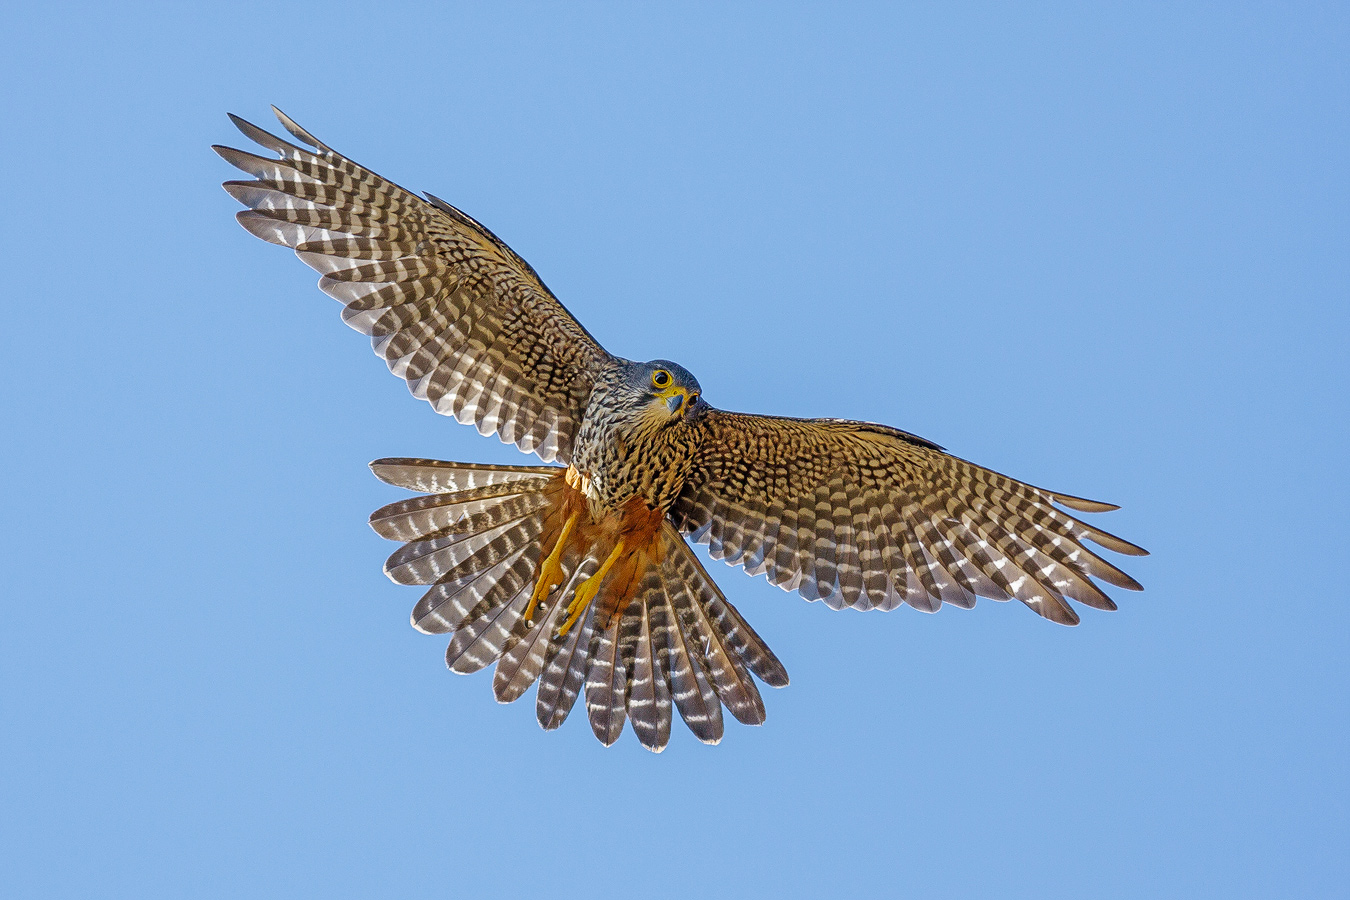
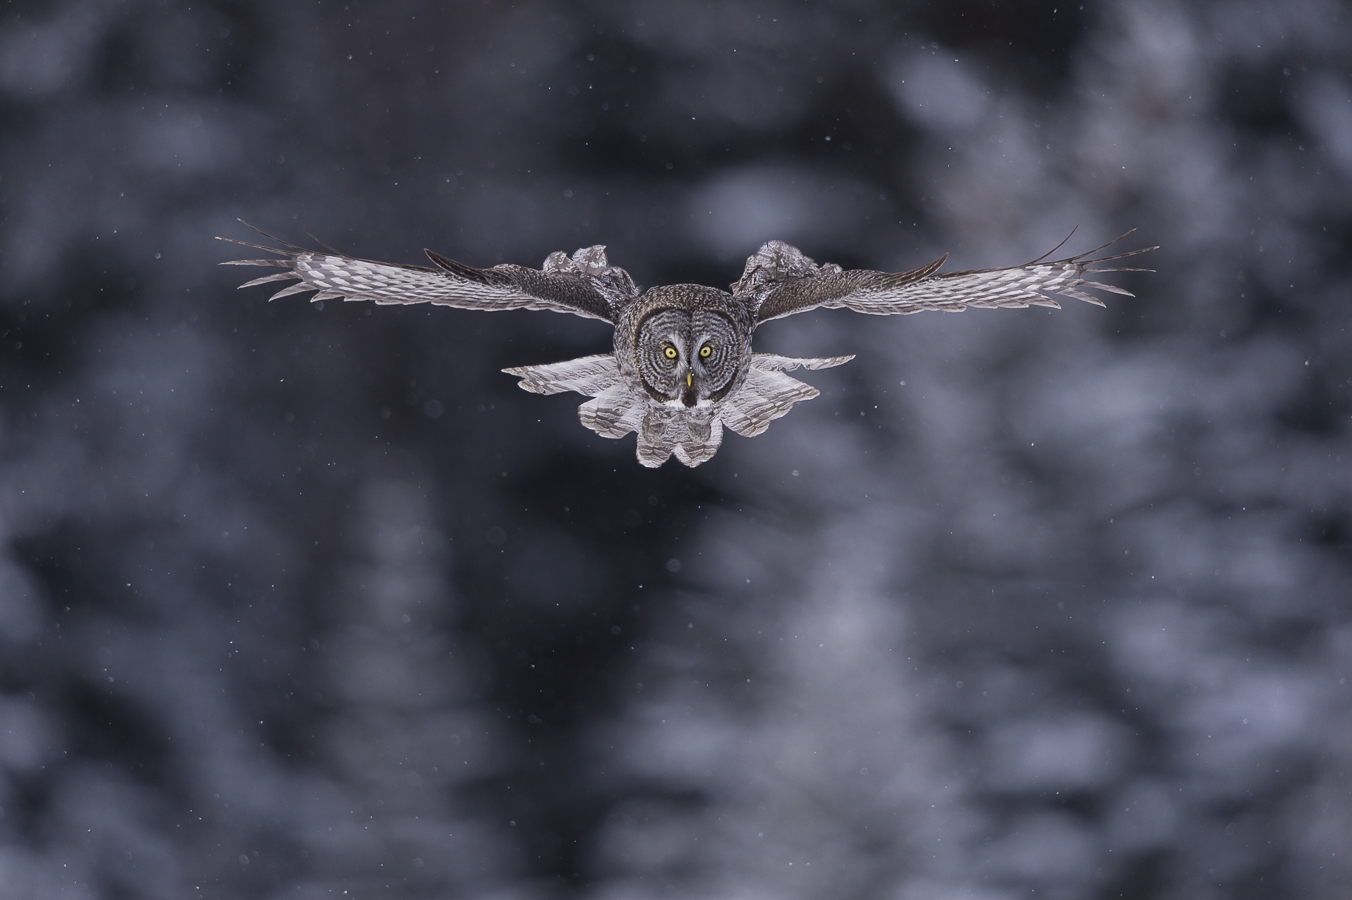
The 13 extremely strong images that were presented to the panel of judges in the Flight category are presented to you today here. Please do understand that many additional strong images were eliminated in the early rounds of judging because of poor image processing, technical issues including over- or under-exposure, over-Saturation, image sharpness, and the failure of folks to take advantage of our lenient digital guidelines that allow for the removal of distracting elements from an image.
After clicking on each image to view the larger size, we ask that each of you pick your five favorite images and vote them 5, 4, 3, 2, 1 with 5 being the strongest, 4 being your second favorite, and so on down to 1. Additional comments are welcome <em>as long as they appear below your selections. The whole thing should look something like this:
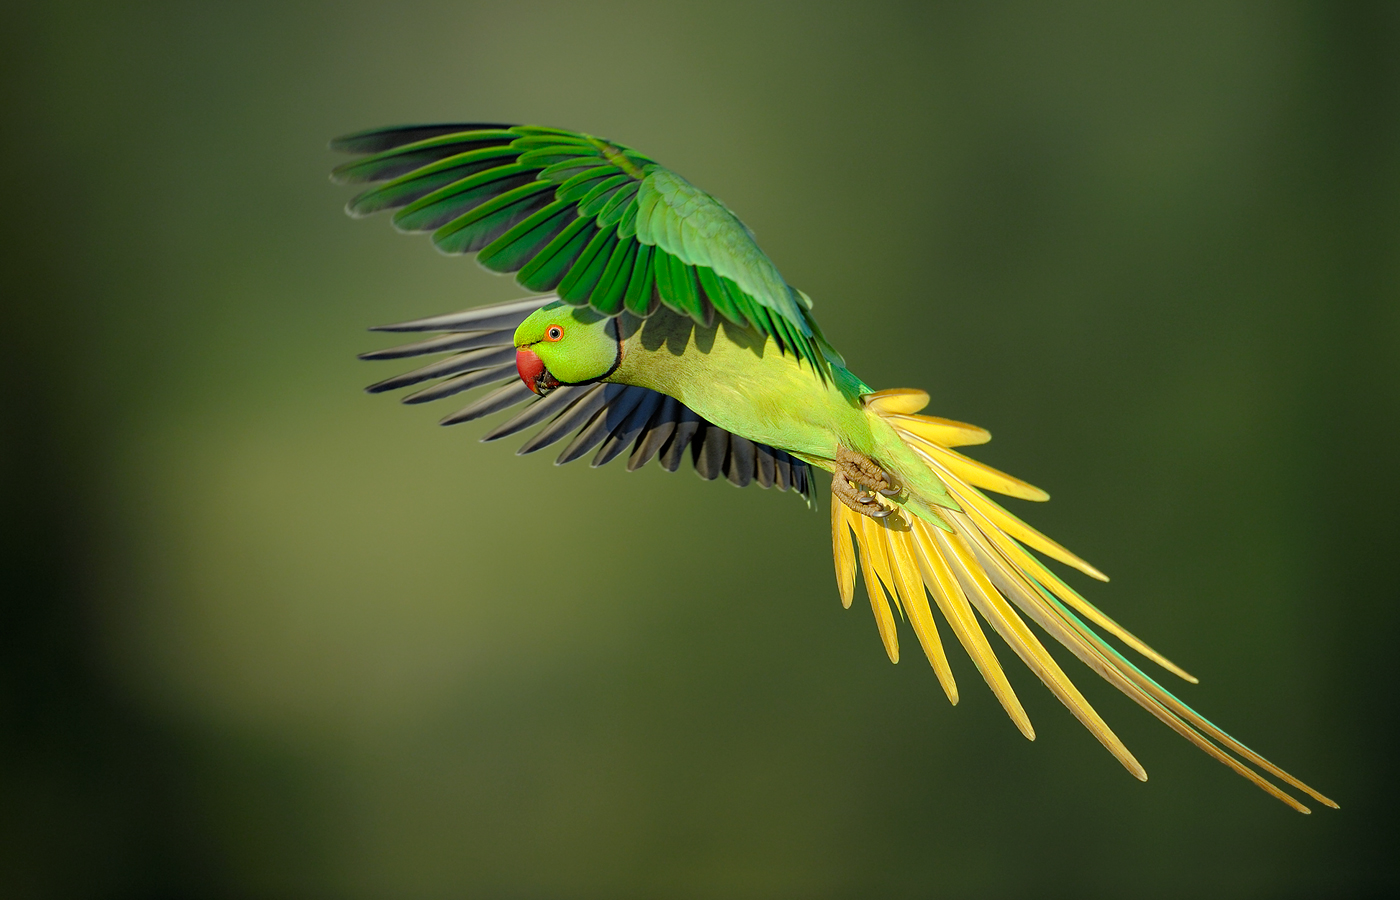
Parakeet Flight: 5
Midair Dispute: 4
Mountain Ridge Eagle: 3
Flared Falcon: 2
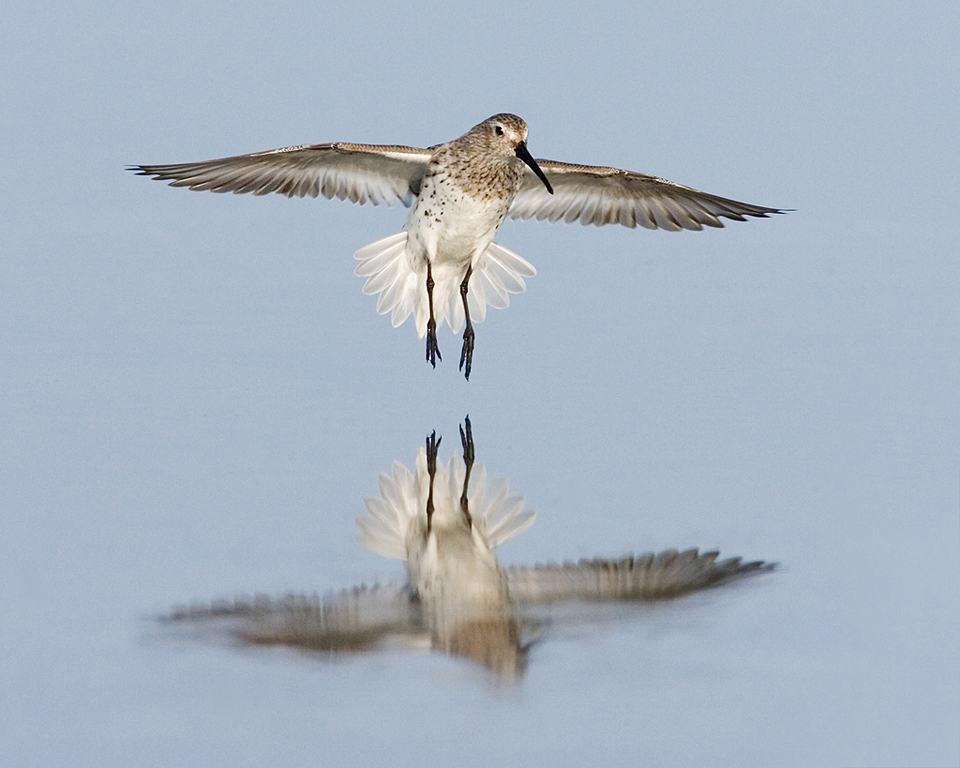
Dunlin After Bath: 1
I love the colors, sharpness, and peek-a-boo poseof Parakeet Flight.
The selections above are of course arbitrary and should not at all influence your votes. Please read the directions carefully as comments that do not follow the format above exactly will be deleted without notice. The three winning images in this category along with the 4 runner up images and the names of the photographers will be announced here soon along with a tally of the public vote.
The Grand Prize winning image, the image that secured the highest total of judge’s votes, will be revealed when the results of the final category are announced.
|
|
Blue Sky Snowy Owl
|
Blue Sky Snowy Owl
|
|
Great Grey Leaving Perch
|
Great Grey Leaving Perch
|
|
Midair Dispute
|
Midair Dispute
|
|
Parakeet Flight
|
Parakeet Flight
|
|
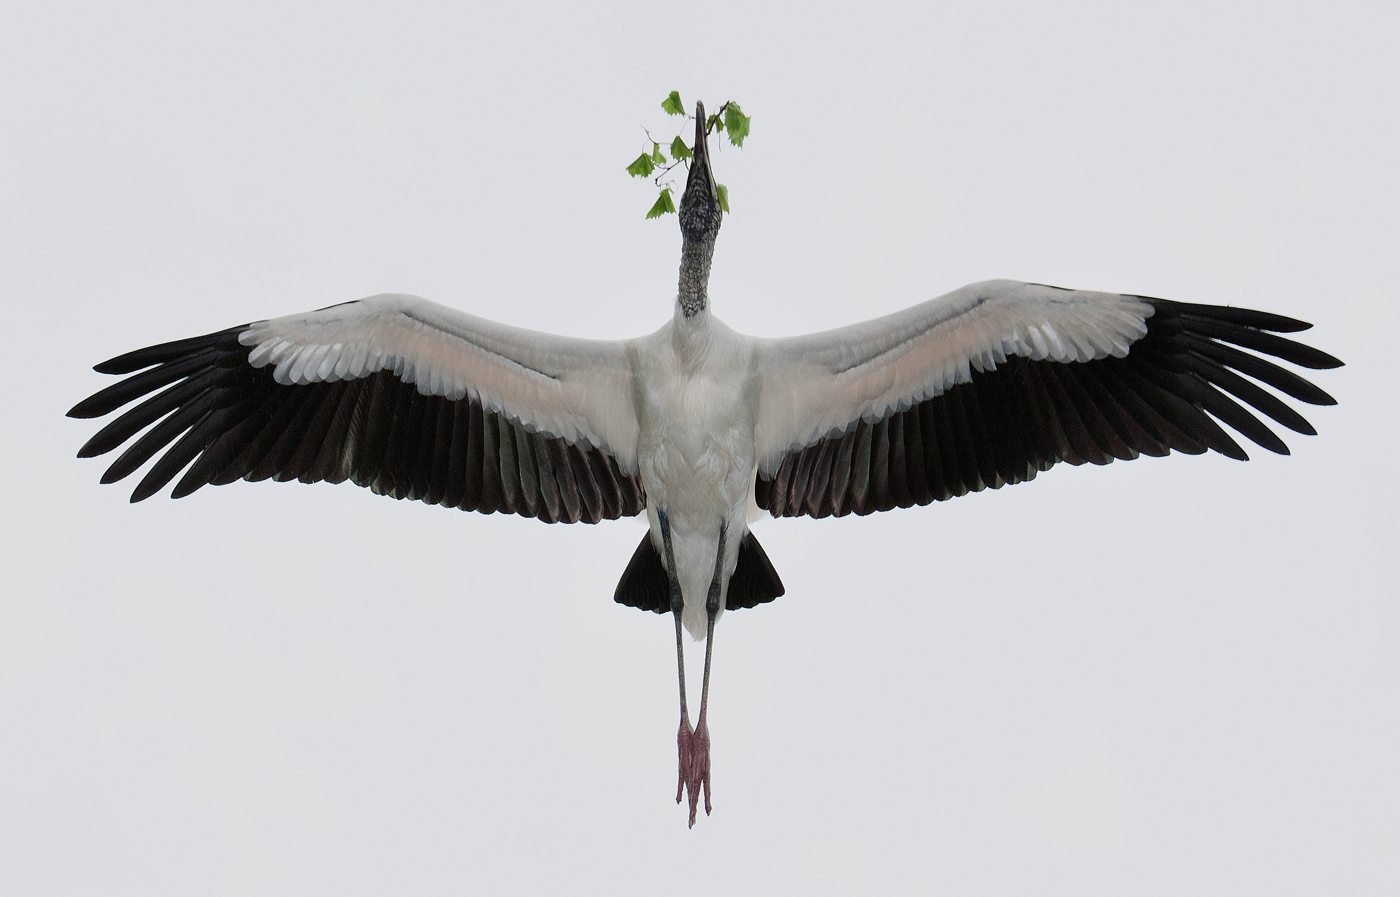
Wood Stork T-shot
|
Wood Stork T-shot
|
|
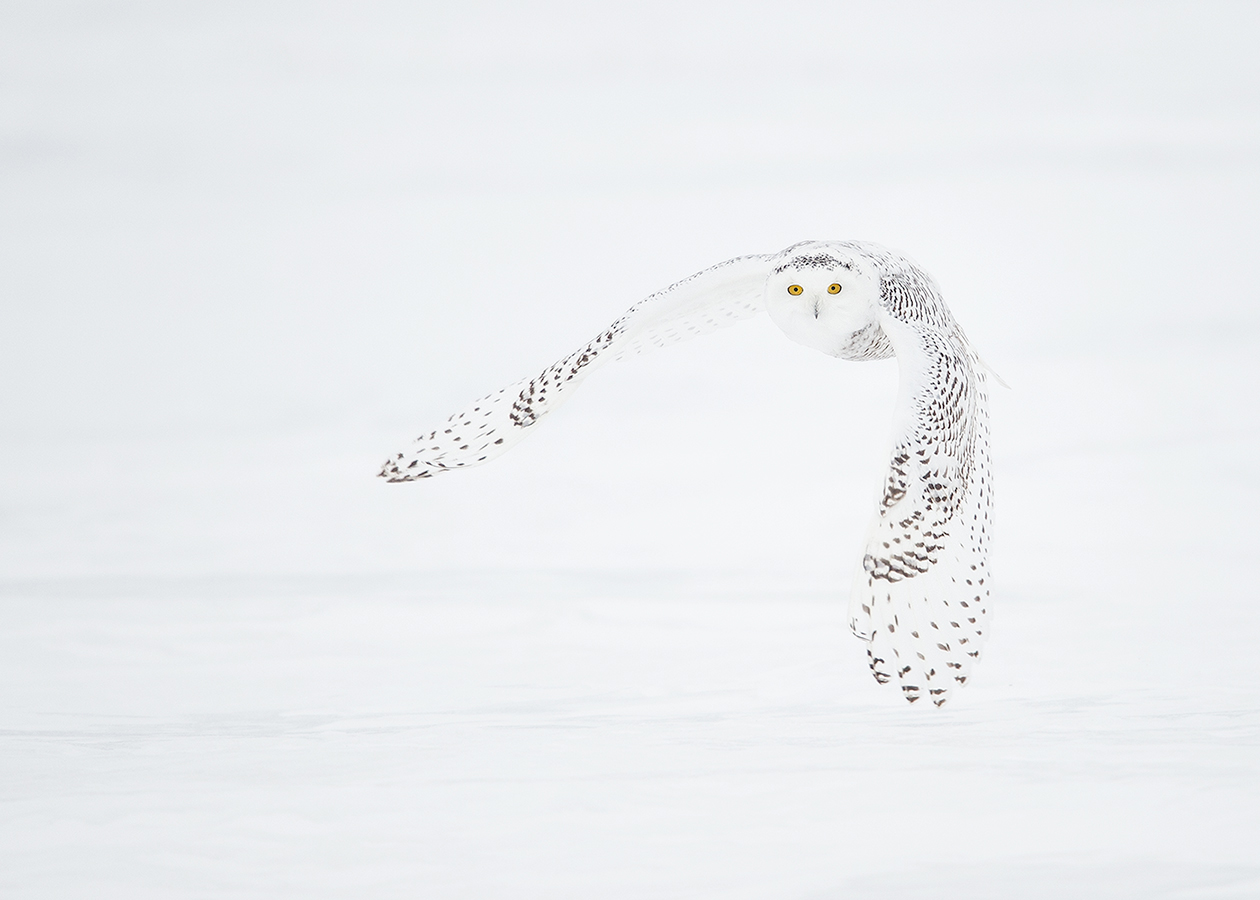
Snowy Owl on Snow
|
Snowy Owl on Snow
|
|
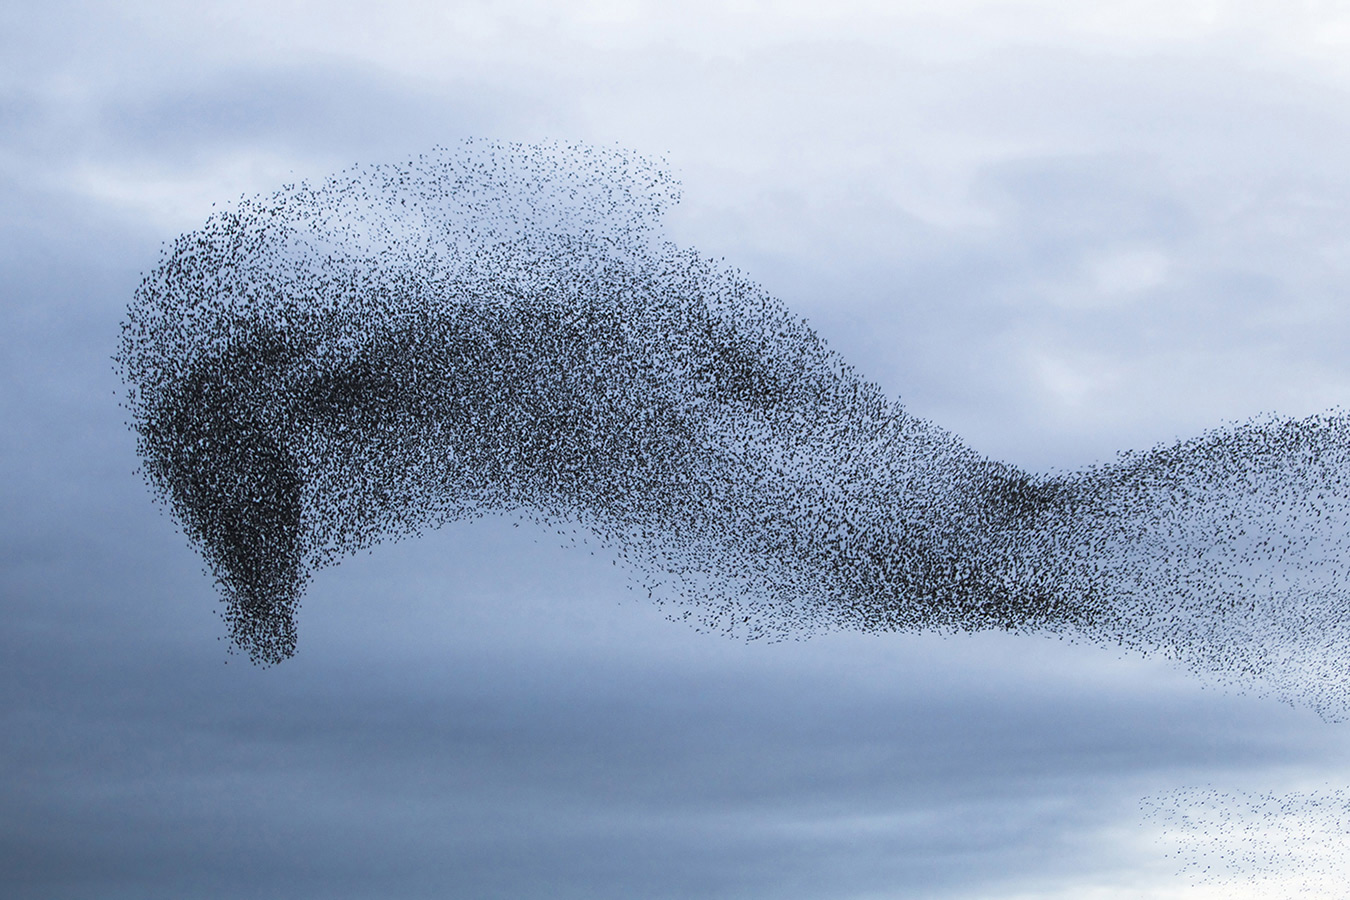
Starling Creature
|
Starling Creature
|
|
Mountain Ridge Eagle
|
Mountain Ridge Eagle
|
|
Incoming Fish-laden Puffin
|
Incoming Fish-laden Puffin
|
|
Flared Falcon
|
Flared Falcon
|
|
Flat Flight Great Grey
|
Flat Flight Great Grey
|
|
Dunlin After Bath
|
Dunlin After Bath
…..
Selling Your Used Photo Gear Through BIRDS AS ART
Selling your used (or like-new) photo gear through the BAA Blog or via a BAA Online Bulletin is a great idea. We charge only a 5% commission. One of the more popular used gear for sale sites charges a minimum of 20% plus assorted fees! Yikes. The minimum item price here is $500 (or less for a $25 fee). If you are interested please e-mail with the words “Items for Sale Info Request” cut and pasted into the Subject line :). Stuff that is priced fairly–I offer free pricing advise, usually sells in no time flat as did Dennis Cassidy’s 500 II recently on the blog. Larry Master’s 400 DO and his 800 f/5.6 sold within a week. From Larry via e-mail: Thanks for helping me sell the lenses so quickly!
A Creative Adventure/BIRDS AS ART friend Kitto Kono sold her Nikon 500 f/4 and her 400 f/2.8 VR lenses in less than 3 weeks. Janet Horton’s 7D sold this week after a $100 price reduction. Denise Ippolito’s 100-400 and her 100 macro sold in one day. Peter Kes sold his 70-200 f/2.8L IS II and his 400 DO through BAA in ten days. In the past two months we have sold a Canon 800, a Canon 500 II, and four 400 DO lenses and lots more. If you are interested in using our services, please e-mail.
Used Photography Gear Page
Eagle-eyed readers may have noticed that there is a link to the Used Photography Gear page on the yellow tool bar at the top of each blog page. Folks looking to buy (or to sell) can click on that tab or here. I will on occasion continue to list new gear and great buys in blog posts and in Bulletins and may on rare occasion share all the listings with you on the blog. I will strive to keep the listings current. Great news for Kitty Kono and her Nikon 400mm f/2.8; it sold yesterday! That made her 2 for 2 on selling her older Nikon super-telephotos with BAA.
Used Mongoose Package for Sale
Upgraded Mongoose M3.5 Package: $630
John Stuhlmuller is offering a used Mongoose M3.5 tripod head that has been upgraded to an M3.6 (approximate value $550). The only differences between a refurbished M3.5 and a new M3.6 is the internal finish of several parts. Otherwise, it functions as an M3.6, the head I have used and depended on for nearly a decade. The sale includes an installed Horizontal) Low Mount Arm (sells new for $90), the Integrated Flash Arm (sells new for $110), a CR-X5 plate, the low foot for the four Series II Canon Super-Telephoto lenses and teh 200-400 (sells for $122 new), a CP16 lens plate for B-tripod ring lenses like the Canon 70-200mm f/2.8L IS (sells for $75 new).
There are some minor scratches on the top of the mounting clamp. Otherwise, there are no other signs of wear and the head works perfectly. John prefers his Wimberley V2 head.
The package is valued at approximately $947. The cost of insured ground shipping to US addresses is included. Sale price: $630. Save $300+.
Contact John via e-mail. Photos available upon request.
Support the BAA Blog. Support the BAA Bulletins: Shop B&H here!
We want and need to keep providing you with the latest free information, photography and Photoshop lessons, and all manner of related information. Show your appreciation by making your purchases immediately after clicking on any of our B&H or Amazon Affiliate links in this blog post. Remember, B&H ain’t just photography!
….. …..
Typos
In all blog posts and Bulletins, feel free to e-mail or to leave a comment regarding any typos, wrong words, misspellings, omissions, or grammatical errors. Just be right. 🙂
May 23rd, 2014 The Streak Continues: 174
This post marks 174 consecutive days with a new educational blog post. With so many folks getting in the habit of using our B&H links and our Amazon logo-links why quit now? April was a record month but May has not been so good. So far…. To show your appreciation for my efforts here, I do ask that you use our the B&H and Amazon affiliate links on the right side of the blog for all of your purchases. Please check the availability of all photographic accessories in the BIRDS AS ART Online Store, especially Gitzo tripods, Wimberley tripod heads, and the like. We sell only what I used, tested, and can depend on. We will not sell you junk. We know the tools that you need to make creating great images easy and fun. And we are always glad to answer your gear questions via e-mail.
You can find the following items in the store: Gitzo tripods, Mongoose M3.6 and Wimberley heads, plates, low feet, and accessories, flash brackets, , Delkin e-film Pro Compact Flash Cards, LensCoat products, and our unique line-up of educational materials including ABP I & II, Digital Basics, Site and Set-up e-Guides, Canon and Nikon Camera Users and AF e-Guides, and MP-4 Photoshop video tutorials among others.
I would of course appreciate your using our B&H affiliate links for all of your major gear, video, and electronic purchases. For the photographic stuff mentioned in the paragraph above we, meaning BAA, would of course greatly appreciate your business. Here is a huge thank you to the many who have been using our links on a regular basis and visiting the BAA Online store as well.
This post took more than five hours to assemble. Enjoy it!
Canon EF 400mm f/4 DO IS II USM Lens
The new and improved version of the original 400 DO lens, the Canon EF 400mm f/4 DO IS II USM lens has been “available” for some time but they are extremely hard to come by. Use my B&H affiliate link and I will do my very best to have your order expedited. It won’t cost you one extra penny and is a great way to thank us for the work that we do here on the blog and for the countless hours spent answering gear e-mails :). The new version is much sharper than the old one and features 4-stop IS (as opposed to 2-stop IS system on the original lens).
The Canon 400mm f/4 IS DO Lens: Fourteen Images that Prove that the Internet Experts are (As Usual) Idiots
We have sold several used 400mm DO lenses in recent weeks2 in the last 2 days. We have at least one more in the pipeline. Why are there so many 400 DO lenses for sale? Many serious photographers with money to spend are opting to purchase the Canon EF 300mm f/2.8L IS II USM lens after either selling or trading in their 400 DO lenses. BTW, trading in your lenses with the major camera stores is the equivalent of putting your money in the toilet and flushing. Yes it is a bit faster and more convenient to trade your valuable lens for 100’s or even a 1,000s of dollars less than what it is worth, but economically, selling (in effect) your used lens to B&H or Adorama is foolhardy.
Over this same time period mentioned above I have received several e-mails asking if the 400 DO was a legitimate, high quality telephoto lens. Without fail, each e-mail included something like this: I have, however, read mixed reviews about the sharpness of that lens and how well it works with teleconverters. Presumably this has something to do with the DO optics.
What can I say? It would be nice if the so-called and oft-quoted internet experts actually went out into the field once in a while to work with the gear that they so eagerly trash. Each of the images in this post was made with my 400 DO. It looks to me as if the optics are just fine. Yes, I eventually sold it to upgrade to the 300 II. Which of these two lenses is right for you? Basically the 400 DO is lighter and will cost you a lot less. The 300 II is heavier, more expensive, and a bit sharper across the board. (Note: the 300 II is a bit sharper than pretty much every other telephoto lens ever made.) But as you can see here, the 400 DO is–in the right hands–can you say operator error?–fully capable of producing sale-able, professionally sharp images on a consistent basis. Stay tuned: I will be doing a blog post here on just the subject of the 300 II vs. the 400 DO within a week or so.
The Canon EF 400mm f/4 DO IS USM lens is currently in production and sells new for $6,469.00 at B&H. The DO (or DOE) stands for Diffractive Optical Elements. Canon’s idea was to create a series of lenses made with composite (rather than glass) lens elements that would be lighter and less expensive than traditional telephoto lenses. They got the lighter part right but this lens sold new for well more than $7,000 for quite a while after its introduction.
|
|
|
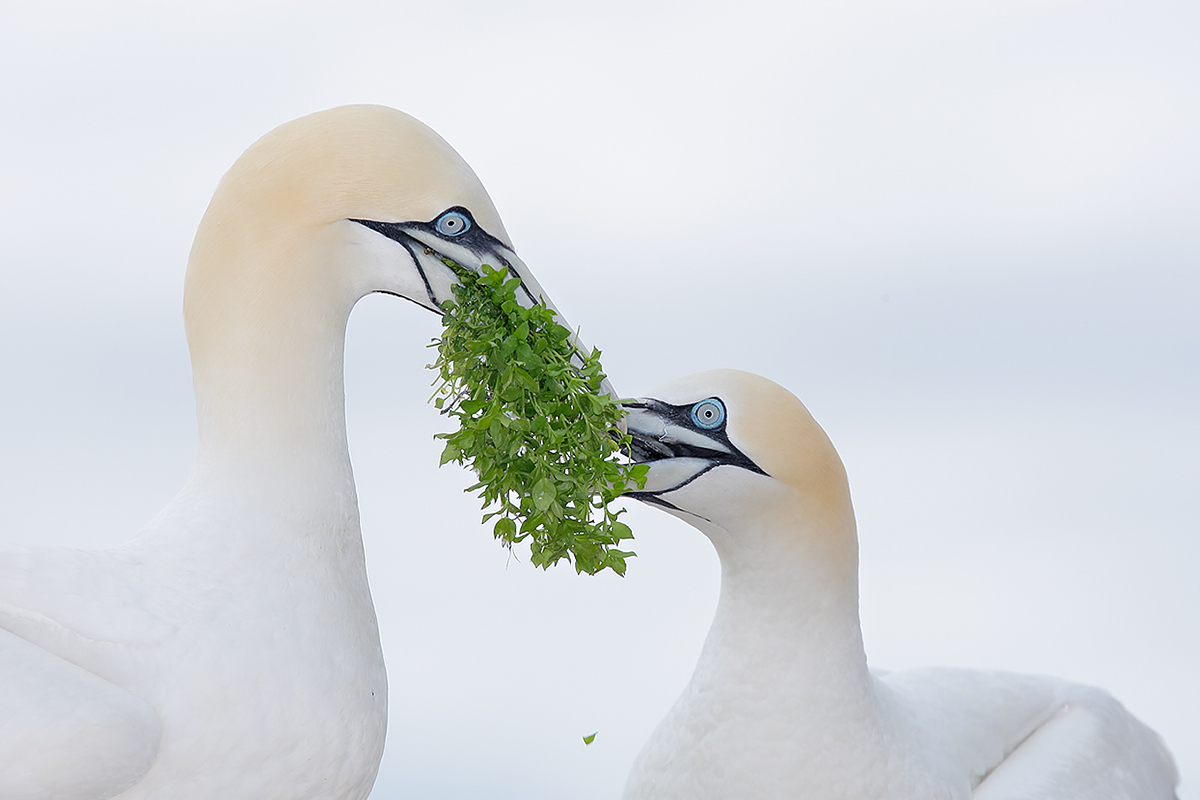
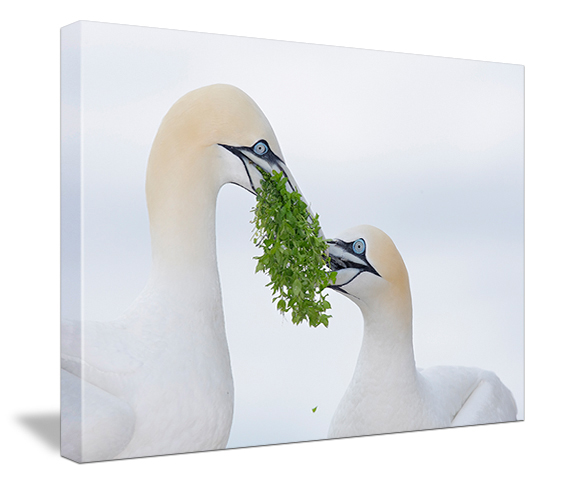
“Gannets in Love” is available both as a signed fine art canvas print (above) and as a signed traditional fine art photographic print (matte or glossy). Learn more or purchase a print for your home, your office, or as a gift here.
|
“Gannets in Love” was created with the tripod-mounted 400 DO and the EOS-1D Mark III. Coincidentally, the EOS-1D Mark III was also maligned by the so-called internet experts…. A few years ago this image was awarded first place in the Art in Nature category of the Nature’s Best Windland Rice Smith International Awards competition and first place in the Birds category of the National Wildlife Photography contest. Where oh where are the internet experts when you need them?
It had been entered in the BBC Wildlife Photographer of the Year Competition that same year and I had really been hoping for a clean sweep but alas, it did not even make the final round of judging in the BBC contest. And once an image is honored in a major contest it cannot be entered in the BBC competition….
The 400 DO on a Zodiac
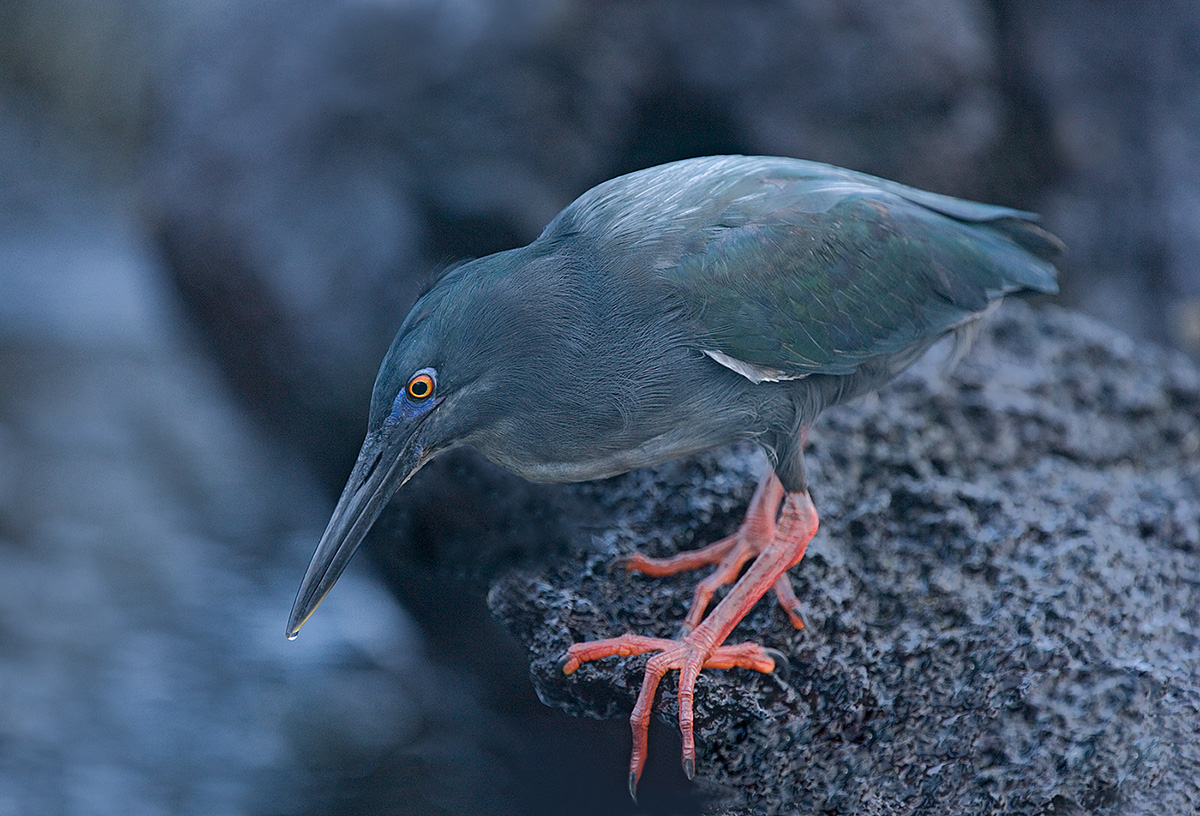
With Image Stabilization and its relatively light weight, the 400 DO is a great lens to use when photographing from any type of watercraft. The image above was created from a Panga on one of my killer Galapagos Photo-Cruises. If you are seriously interested in joining me on the July 2016 voyage, please get in touch via e-mail; six slots are already filled.
400 DO Close Focus
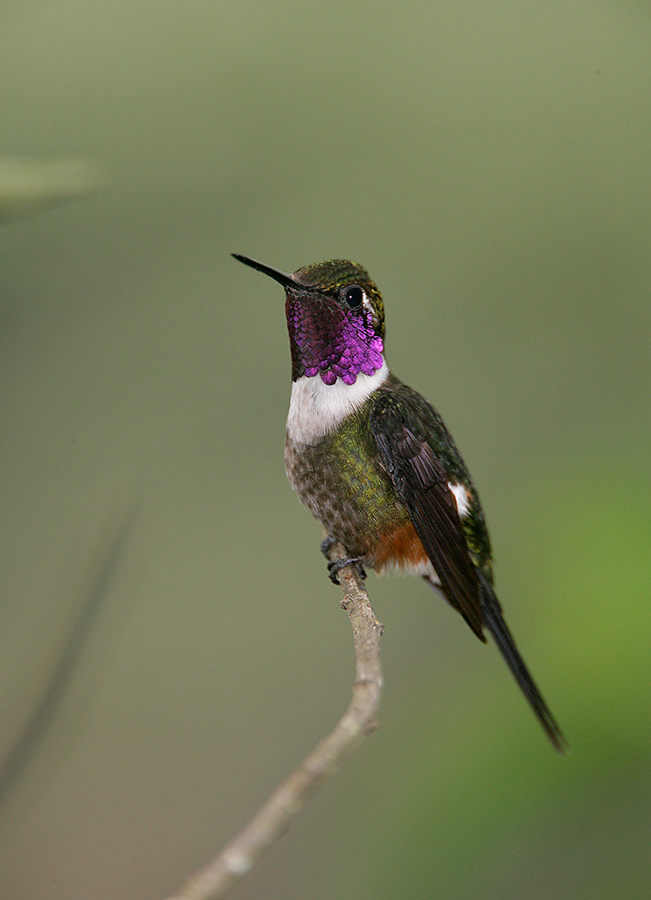
The 400 DO focuses down to a not-too-bad 11.48 feet (3.5 meters). With the addition of a 1.4X TC (as here), it can be used effectively to photograph small birds at close range. Adding one or more extension tubes makes it even more versatile. This hummingbird was photographed on a day trip to Tandayapa Bird Lodge the day before we began our Photo-Cruise.
The 400 DO for Hand Held Flight Photography
With 400mm of full-frame reach, a relatively wide (fast) aperture of f/4, and its light weight, the 400 DO is a great lens for hand held flight photography. This nocturnal gull was photographed at Darwin Bay on Tower Island in the Galapagos. Again, if you are seriously interested in joining me on the July 2016 voyage, please get in touch via e-mail.
The 400DO Hand Held with the 1.4X Teleconvrter
I wanted to go light on my visit to Great Saltee Island, Ireland in 2008 so I went ashore with only the 400 DO, my Canon EOS-40D, and a 1.4X TC. That combination yields an equivalent focal length of 896mm, a magniification of 17.92X. Note that with good sharpness techniques and the 400 DO’s great IS system that hand held results with this combo can be razor sharp.
The 400 DO as a Macro Lens
For the image above, I added two Canon EF 25 II Extension tubes and a single Canon EF 12 II Extension tube. Whenever you use extension tubes with a long lens be sure to stop down to prevent vignetting.
A viable alternative to purchasing several of the more expensive Canon extension tubes is to purchase the Kenko Auto Extension Tube Set DG for Canon EOS Lenses. As there is no glass in an extension tube image quality is not an issue.
One Small 400 DO Negative
One small drawback of the 400 DO is that you cannot zoom out (or in). Had I been able to zoom out just a bit here I would not have clipped the gannet’s rectrices (tail feathers). Another lens in this focal length range is the relatively new Canon EF 200-400mm f/4L IS USM lens with Internal 1.4x Extender. The 200-400 is of course far more versatile than the 400 DO. Heck, it is far more versatile than any other super-telephoto lens ever produced. At 7.98 pounds it is 3.78 pounds heavier than the 400 DO and comes with a nice $11,799.00 price tag….
For folks looking for a sharp, hand holdable, affordable lightweight super-telephoto lens the 400 DO can’t be beat.
Hand Held Flight with the 1.4X TC
As you can see in the image above, the 400 DO is perfectly capable of producing razor sharp images hand held with a 1.4X TC in place. And that with the much maligned EOS-1D Mark III…. This image was made at Coffee Pot Bayou aboard the Hooptie Deux with Captain James Shadle in January of 2008.
Lens Speed Can Matter
The image above was created with the tripod-mounted 400 DO on a cloudy dark afternoon in Katmai National Park. At ISO 1600 with the wide open aperture I was able to get a just-sharp-enough shutter speed of 1/200 sec. The 400 DO is a great lens for photographing large mammals in low light. Compare it with the slightly faster 8.49 pound Canon EF 400mm f/2.8L IS II USM lens: yours for only $11,499.00 at B&H.
Lens Speed is Important When Hand Holding
Working at f/4 here, again in Katmai National Park on a Bear Boat Photo-Cruise, allowed me to get a shutter speed of 1/500 sec. at ISO 800. This relatively fast shutter speed enabled me to create sharp images while seated and hand holding.
Fast Accurate AF at Close Range
This image was created in Panama using the high speed flash as main light techniques described in detail in the great eGuide, “The Hummingbird Guide – How to Photograph Hummingbirds Using High-Speed Multiple Flash” by Linda Robbins with yours truly. Learn more or purchase here.
When I experimented with using the 400 DO on the hummers in Panama, I was somewhat shocked to find that it acquired focus at close range much faster than the old Canon 500mm f/4L IS lens. And yes, the images were super sharp. If you like tropical birds, tropical birding, and tropical bird photography you can learn more about Canopy Lodge and Canopy Tower here.
Weight-restricted Travel?
I have been blessed to have made several trips to the now closed to all tourism Midway Island NWR. On my trip in March 2010 there were severe weight restrictions on our flight from Honolulu, Hawaii, to Midway. As I knew that I needed a long lens but could not figure out a way to get the 800 f/5.6L IS there, I brought the 400 DO and was thrilled that I did. Again, the light weight of the 400 DO can save the day in a variety of situations.
The 400 DO at the Gator Rookeries
The 400 DO is a great lens to use at Gatorland and at the St. Augustine Alligator Farm. It is light. It focuses closely. It focuses even more closely when you add a 25mm extension tube as I did here. And best of all it is sharp with the 1.4X TC. As here.
Here I used flash as main light techniques to create a sharp, fairly well lit image in a very dark, shaded situation. Learn everything that I know about using flash in the Flash Simplified Section of The Art of Bird Photography II. (ABP II: 916 pages, 900+ images on CD only. It is the continuation of the legendary classic The Art of Bird Photography. Save $10 when you buy both here.
The 400 DO on the Front Seat of Your Vehicle
Whenever and wherever you are driving around and the possibility of photographing birds or other wildlife using your car as a blind exists, it is mandatory that you have a light weight, hand holdable lens on the passenger seat. With a camera body on it and the body turned on. I encountered this great situation on the way to the Refuge Headquarters to pick up the permit for a Bosque IPT. I was very glad that the 400 DO with a TC in place was within easy reach.
Both Bosque IPTs are nearly sold out. Learn more by scrolling down here.
Summing Up
The Canon EF 400mm f/4 DO IS USM lens is not a toy. It is a sharp, lightweight super-telephoto lens that offers a relatively low priced option to folks who cannot either afford or carry any of the lenses in the next higher class. It can also serve as a great on the shoulder intermediate telephoto lens for folks carrying either the Canon EF 800mm f/5.6L IS USM lens or the Canon EF 600mm f/4L IS II USM lens into the field on a tripod. It is not as good a fit with the Canon EF 500mm f/4L IS II USM lens. The latter folks who do lots of hand held photography from some type of watercraft might, however, find that the 400 DO is perfect for them.
400 DO Owners
If you own or have owned a 400 DO, we would love to hear from you. Please leave a comment below and share your thoughts.
Your Favorite?
Feel free to leave a comment and let us know which of the fourteen 400 DO images here is your favorite. As always, be sure to let us know why you made your choice(s).
Selling Your Used Photo Gear Through BIRDS AS ART
Selling your used (or like-new) photo gear through the BAA Blog or via a BAA Online Bulletin is a great idea. We charge only a 5% commission. One of the more popular used gear for sale sites charges a minimum of 20% plus assorted fees! Yikes. The minimum item price here is $500 (or less for a $25 fee). If you are interested please e-mail with the words “Items for Sale Info Request” cut and pasted into the Subject line :). Stuff that is priced fairly–I offer free pricing advise, usually sells in no time flat as did Dennis Cassidy’s 500 II recently on the blog. Larry Master’s 400 DO and his 800 f/5.6 sold within a week. From Larry via e-mail: Thanks for helping me sell the lenses so quickly!
A Creative Adventure/BIRDS AS ART friend Kitto Kono sold her Nikon 500 f/4 and her 400 f/2.8 VR lenses in less than 3 weeks. Janet Horton’s 7D sold this week after a $100 price reduction. Denise Ippolito’s 100-400 and her 100 macro sold in one day. Peter Kes sold his 70-200 f/2.8L IS II and his 400 DO through BAA in ten days. In the past two months we have sold a Canon 800, a Canon 500 II, and four 400 DO lenses and lots more. If you are interested in using our services, please e-mail.
Used Photography Gear Page
Eagle-eyed readers may have noticed that there is a link to the Used Photography Gear page on the yellow tool bar at the top of each blog page. Folks looking to buy (or to sell) can click on that tab or here. I will on occasion continue to list new gear and great buys in blog posts and in Bulletins and may on rare occasion share all the listings with you on the blog. I will strive to keep the listings current. Great news for Kitty Kono and her Nikon 400mm f/2.8; it sold yesterday! That made her 2 for 2 on selling her older Nikon super-telephotos with BAA.
Support the BAA Blog. Support the BAA Bulletins: Shop B&H here!
We want and need to keep providing you with the latest free information, photography and Photoshop lessons, and all manner of related information. Show your appreciation by making your purchases immediately after clicking on any of our B&H or Amazon Affiliate links in this blog post. Remember, B&H ain’t just photography!
….. …..
Typos
In all blog posts and Bulletins, feel free to e-mail or to leave a comment regarding any typos, wrong words, misspellings, omissions, or grammatical errors. Just be right. 🙂
May 22nd, 2014 The Streak Continues: 173
This post marks 173 consecutive days with a new educational blog post. With so many folks getting in the habit of using our B&H links and our Amazon logo-links why quit now? April was a record month but May has not been so good. So far…. To show your appreciation for my efforts here, I do ask that you use our the B&H and Amazon affiliate links on the right side of the blog for all of your purchases. Please check the availability of all photographic accessories in the BIRDS AS ART Online Store, especially Gitzo tripods, Wimberley tripod heads, and the like. We sell only what I used, tested, and can depend on. We will not sell you junk. We know the tools that you need to make creating great images easy and fun. And we are always glad to answer your gear questions via e-mail.
You can find the following items in the store: Gitzo tripods, Mongoose M3.6 and Wimberley heads, plates, low feet, and accessories, flash brackets, , Delkin e-film Pro Compact Flash Cards, LensCoat products, and our unique line-up of educational materials including ABP I & II, Digital Basics, Site and Set-up e-Guides, Canon and Nikon Camera Users and AF e-Guides, and MP-4 Photoshop video tutorials among others.
I would of course appreciate your using our B&H affiliate links for all of your major gear, video, and electronic purchases. For the photographic stuff mentioned in the paragraph above we, meaning BAA, would of course greatly appreciate your business. Here is a huge thank you to the many who have been using our links on a regular basis and visiting the BAA Online store as well.
This post took 1 hour to assemble. Enjoy it!
BIRDS AS ART BULLETIN #461
BIRDS AS ART BULLETIN #461 has been online here for a few days. I have been remiss in not posting a notice here sooner. IAC, here you go:
- St. Augustine Alligator Farm IPT Report
- The New Essence of the St. Augustine Alligator Farm: Roseate SpoonBILL
- Silhouette Soup From a Stone
- Speaking of Spoonbills
- The Weather and the Food
- Fort DeSoto IPT Report
- Selling Your Used Photo Gear Through BIRDS AS ART
- Used Photography Gear Page
- UK Puffins and Gannets IPT July 2-9, 2014
- Jim Neiger West Coast Flight Workshops, July 2014, Orange County, California
- Flight Plan eGuide
|
|
|
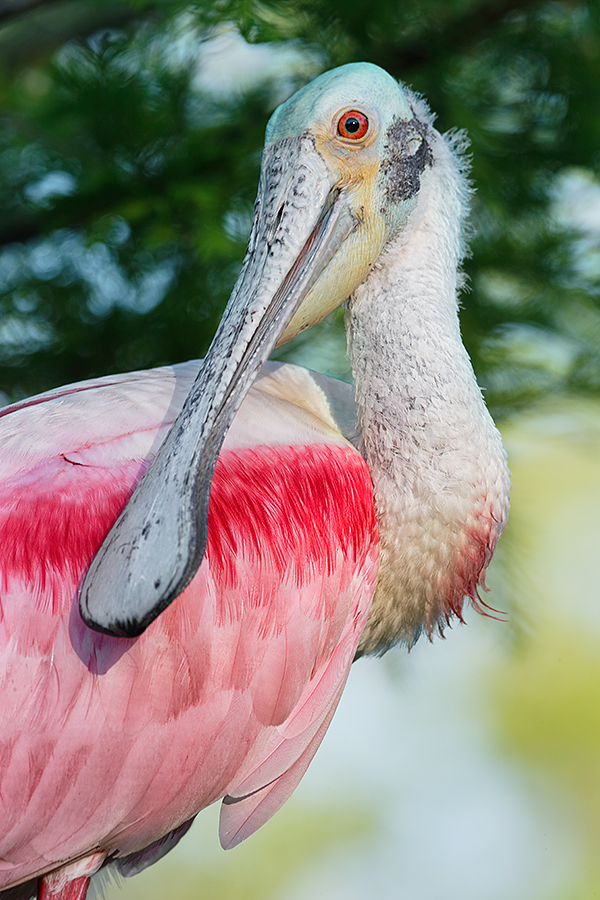
This image was created on the St. Augustine Alligator Farm IPT on a mostly sunny early morning with the Canon EF 200-400mm f/4L IS USM Lens with Internal 1.4x Extender (hand held with the internal TC in place at 560mm) and the Canon EOS-1D X. ISO 400. Evaluative metering +1/3 stop as framed: 1/160 sec. at f/10 in Av mode. AWB.
61-Point/AI Servo/Rear Focus AF active at the moment of exposure performed perfectly selecting a tight cluster of sensors on the bird’s upper bill. Learning which AF Area Selection mode to use in different situations helps you maximize the efficiency of the great AF systems of the 1D X and 5D III. Learn everything that I know about the various AF Area Selection Modes, when to use which one, several ways to move the AF sensor, and tons more in the 1D X AF Guide and the 5D Mark III User’s Guide. Click here to see the latest version of the Rear Focus Tutorial. Click on the image to see a larger version.
Roseate Spoonbill vertical front-end portrait
|
Problems, Problems, Problems
This was the lead image in BAA Bulletin #461. There I wrote, I have three problems with this image. If you think that you know what any of them are, please feel free to leave a comment. I will respond. Several folks commented but nobody hit that nail on the head. So I thought that I would run it by the blog readership as there is one very important lesson here, one that I have never seen or heard mentioned by anyone but me. I will give everyone a few days to see if they can come up with the 3 things that bug me and then I will come clean.
For this version I lightened the face, bill, and neck as compared to the image that originally appeared in the Bulletin here.
Your Thoughts?
Please leave a comment and let us know What things about this image bother you. There is one major problem that plagues this vertical image and many horizontal images as well. As always, please be specific and explain your reasoning. Several folks who commented on this image in the Bulletin half hit the nail on the head without being able to identify the problematic concept….
|
|
|
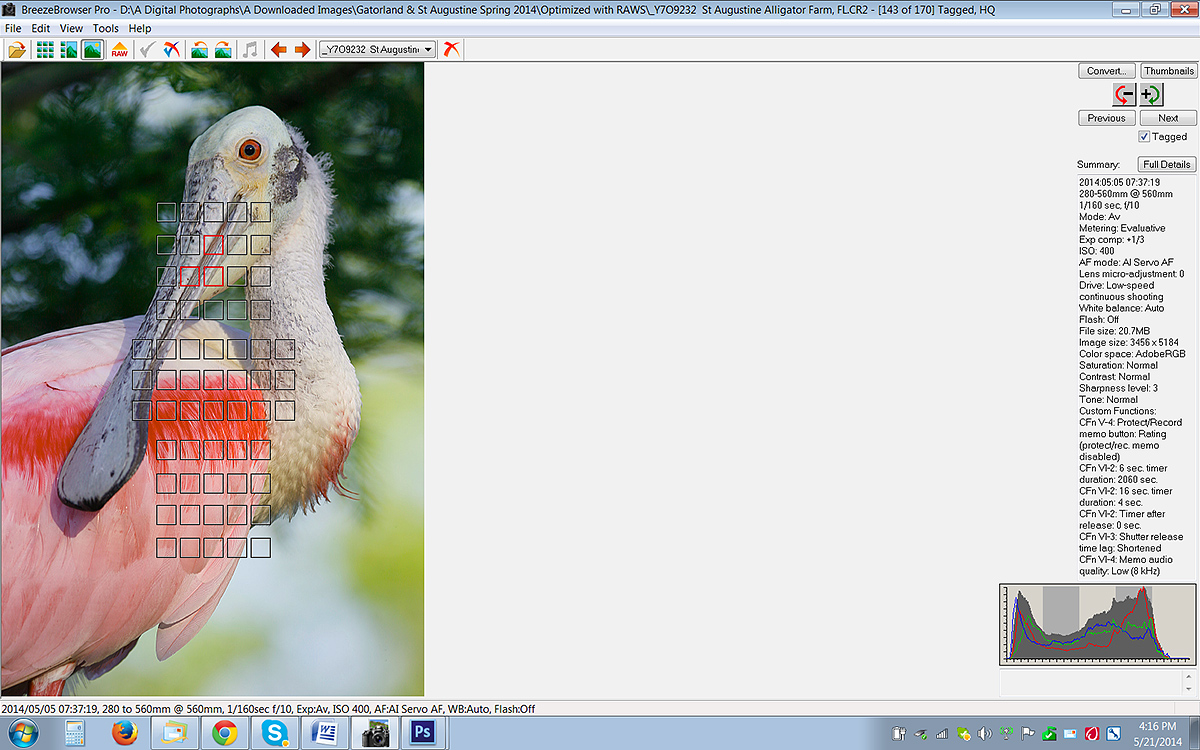
This is the BreezeBrowser Main View screen capture for today’s image.
|
The Breezebrowser Main View Screen Capture
Note that the illuminated red squares show the AF point sensors that were activated by 61-Point AF. Not bad at all. Note: in Breezebrowser you need to check “Show Focus Points” under View to activate this feature. To see the focus points in DPP check “AF Point” under View or hit Alt L. Hit Alt M to see Highlight Alert. To learn how and why I use DPP (Canon Digital Photo Professional) to convert my RAW files, see the info on our DPP RAW Conversion Guide here.
Note the histogram with the WHITEs well into the rightmost histogram box. Regular readers know that I use and depend on BreezeBrowser every day of the year. It allows me to sort my keepers and delete the rejects faster than any other Windows browsing program. We use it on the main computer in the home office to catalog our images file-drawer style. And the companion program, Downloader Pro allows me to download my images quickly and conveniently. It automatically adds my IPTC data and the shooting location. I have it set up to create a folder named by the Month/date/year. The Breezebrowser/Downloader Pro combo saves me many hours each week. To learn more or to purchase this great PC only program, click here. As far as the BreezeBrowser/Downloader Pro Combo goes, if you are using a Windows platform and are not using these two great programs you are at best, wasting your valuable time. My understanding is that Photo Mechanic is best for Mac-users who do not opt to run Parallels or VM Ware fusion on their Macs so that they can enjoy the many advantages of BreezeBrowser. See BreezeBrowswer on a Mac for details.
61-Point AF Area Selection Mode
If you do not know how and when to use 61-Point then you need a copy of either the 1D X AF Guide or the 5D Mark III User’s Guide. And here’s the great news: purchase either camera using one of our B&H Affiliate links, send me your B&H receipt via e-mail and I will be glad to send you a free copy of the corresponding eGuide. Buy both and get two free e-Guides. I own and use two EOS-1D X bodies and one EOS-5D Mark III body.
Coming Tomorrow
The lowdown on the Canon 400mm f/4 IS DO(E) (Diffractive Optical Elements) Lens.
Selling Your Used Photo Gear Through BIRDS AS ART
Selling your used (or like-new) photo gear through the BAA Blog or via a BAA Online Bulletin is a great idea. We charge only a 5% commission. One of the more popular used gear for sale sites charges a minimum of 20% plus assorted fees! Yikes. The minimum item price here is $500 (or less for a $25 fee). If you are interested please e-mail with the words “Items for Sale Info Request” cut and pasted into the Subject line :). Stuff that is priced fairly–I offer free pricing advise, usually sells in no time flat as did Dennis Cassidy’s 500 II recently on the blog. Larry Master’s 400 DO and his 800 f/5.6 sold within a week. From Larry via e-mail: Thanks for helping me sell the lenses so quickly!
A Creative Adventure/BIRDS AS ART friend Kitto Kono sold her Nikon 500 to a Blog subscriber in less than a week. Janet Horton’s 7D sold this week after a $100 price reduction. Denise Ippolito’s 100-400 and her 100 macro sold in one day. Peter Kes sold his 70-200 f/2.8L IS II and his 400 DO through BAA in ten days. In the past two months we have sold a Canon 800, a Canon 500 II, 3 400 DO lenses, a Nikon 500mm, and lots more. If you are interested in using our services, please e-mail.
Used Photography Gear Page
Eagle-eyed readers may have noticed that there is a link to the Used Photography Gear page on the yellow tool bar at the top of each blog page. Folks looking to buy (or to sell) can click on that tab or here. I will on occasion continue to list new gear and great buys in blog posts and in Bulletins and may on rare occasion share all the listings with you on the blog. I will strive to keep the listings current. Great news for Kitty Kono and her Nikon 400mm f/2.8; it sold yesterday! That made her 2 for 2 on selling her older Nikon super-telephotos with BAA.
Both of these items are priced to sell fast!
EOS-1D Mark IV
BAA friend Nancy Bell is offering a used Canon EOS-1D Mark IV camera body for sale for $3200. The body is in excellent condition. It enjoyed annual routine cleaning and service at a Canon Factory Service Center; the last one was done on 5/30/13. The sale includes the original box, battery charger, 3 Canon batteries, the instruction manual, all connection cables, a Canon neck strap, and insured Fed-Ex Ground shipping to US addresses only.
Payment by personal or teller’s check; the item will ship item only after the check clears. Please contact Nancy via e-mail or by phone at 970-484-8791–Colorado, MDT.
Canon 400mm f/4 DO IS Lens
BAA friend Nancy Bell is also offering a used Canon 400mm f/4 DO IS USM lens for sale for only $4499. The lens is in very good to excellent condition with some minor blemishes on the exterior finish and some signs of wear on lens hood interior rim. The glass is perfect and he lens is both light and sharp. The last yearly routine cleaning and service at a Canon Factory Service Center was on 5/30/13.
The sale includes the leather lens hood, the lens trunk, and insured Fed-Ex Ground shipping to US addresses only.
Payment by personal or teller’s check; the item will ship item only after the check clears. Please contact Nancy via e-mail or by phone at 970-484-8791–Colorado, MDT.
Price Reduced
Used Canon 100-400mm f/4.5-5.6L IS USM Lens for Sale/Price Reduced $300!
Multiple IPT veteran Bill Wingfield is offering a Canon 100-400mm f/4.5-5.6L IS USM lens in excellent condition for $1125! The glass is clean and the lens is in perfect working condition. The sale includes the lens hood, the fabric case, and insured shipping by UPS Ground to US addresses only. Personal checks only; your new lens will be shipped after your check clears.
For more than a decade I used the 100-400 to create hundreds of sharp, sale-able image. It is a very versatile lens.
You can reach Bill via e-mail or by phone at 843-729-6670.
Best Super-telephoto Lens Value
Used Canon 800mm f/5.6L IS Lens for Sale
Multiple IPT veteran, the too-kind Jim Bicket, is offering a Canon EF 800mm f/5.6L IS USM lens in excellent condition for $8750. The lens is like new except for some wear on the bottom of the lens hood near the forward edge when the hood is reversed. The sales includes the LensCoat that has protected the lens since day 1, the leather hood, the original hard case and key, and insured shipping via UPS Ground to US addresses only. Personal checks only; your new lens will be shipped only after your check clears.
This great lens, my favorite for 3 years, sells new at B&H for $13,999.00. A month ago B&H was offering one in mint condition for a ridiculous $10,249.90; it sold overnight. Go figure. Jim’s lens will save you a ton of dough and you will have a great lens with lots of reach. I can’t believe that this one has not sold yet as Jim is practically giving it away!
Interested folks can contact Jim via e-mail or try him at 501-915-9336.
Support the BAA Blog. Support the BAA Bulletins: Shop B&H here!
We want and need to keep providing you with the latest free information, photography and Photoshop lessons, and all manner of related information. Show your appreciation by making your purchases immediately after clicking on any of our B&H or Amazon Affiliate links in this blog post. Remember, B&H ain’t just photography!
….. …..
Typos
In all blog posts and Bulletins, feel free to e-mail or to leave a comment regarding any typos, wrong words, misspellings, omissions, or grammatical errors. Just be right. 🙂
May 21st, 2014
|
|
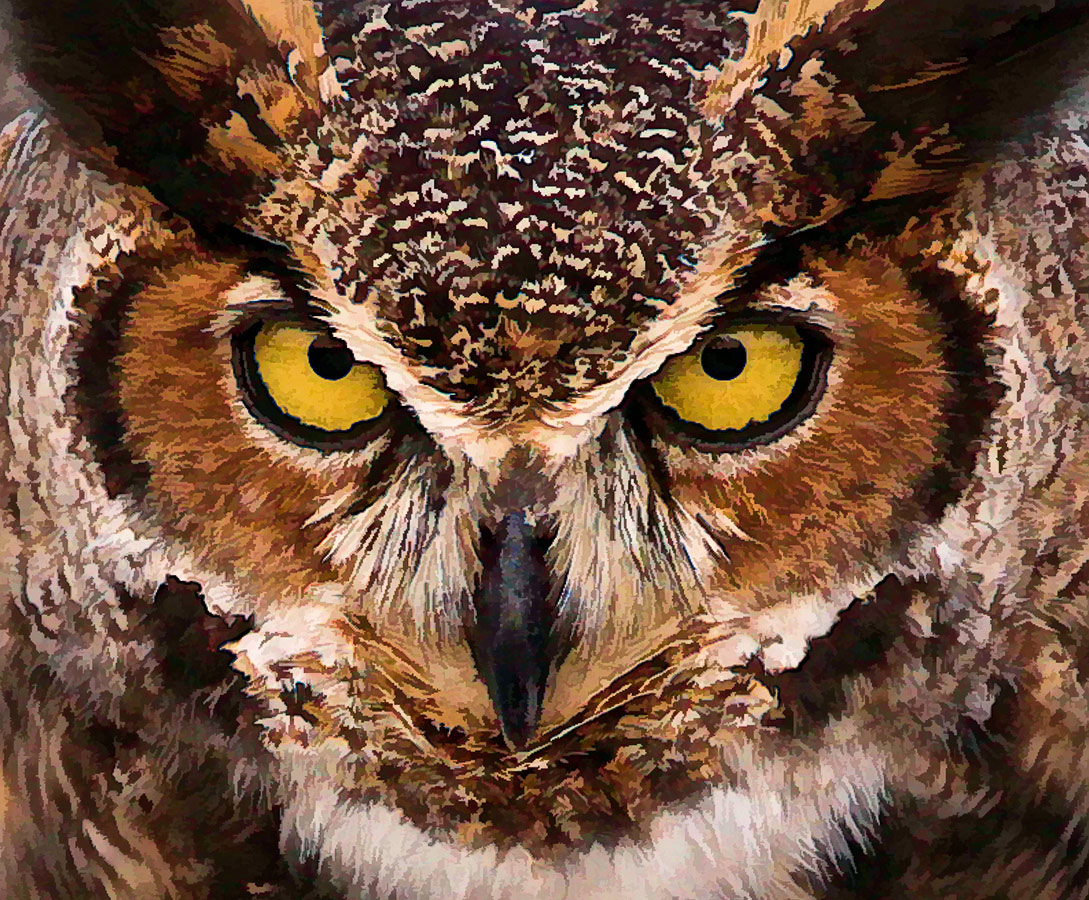
First Place: Great Horned Owl Painted/25 points
|
Great Horned Owl Painted
Congratulations to Carol Nichols
|
|
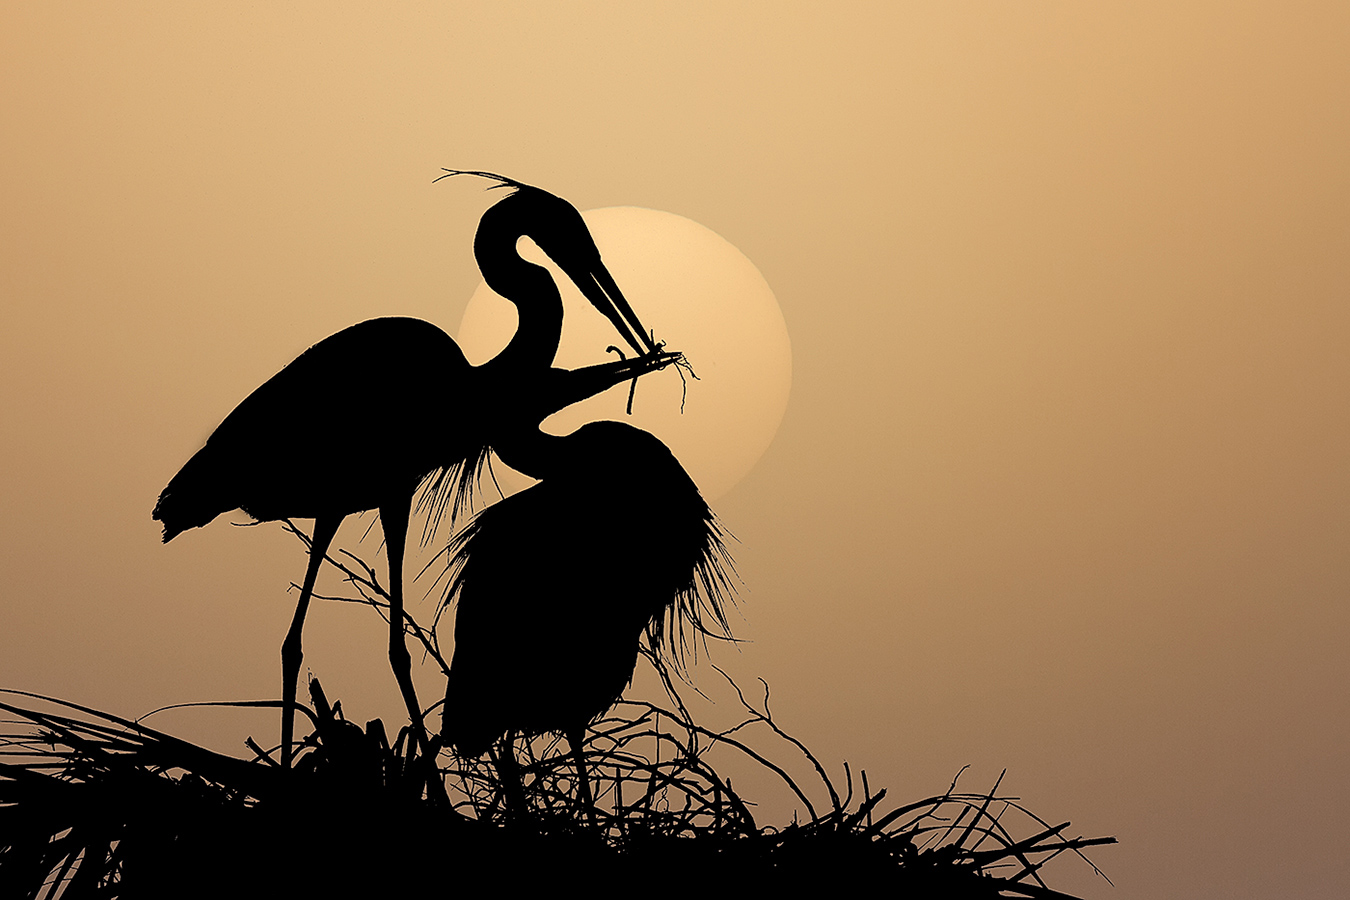
Second Place: Great Blue Heron Sun/24 points
|
Great Blue Heron Sun
Congratulations to Michael Libbe
|
|
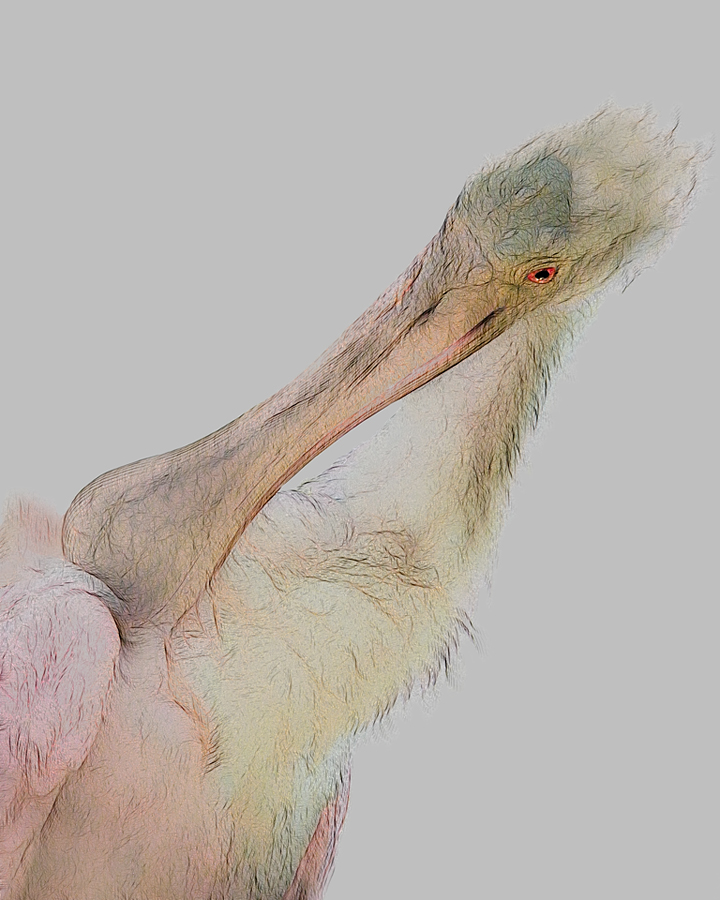
Third Place: Delicate Spoonbill/23 points
|
Delicate Spoonbill
Congratulations to Angie Luzader
Pleasing Blurs Category Prizes
Thanks a stack to our great sponsors. Please note that prizes will not be sent until all of the category winners and the Grand Prize winner have been announced.
| First Prize |
Second Place |
Highly Commended |
Sponsor |
| Magnum Xtrahand Vest |
. |
. |
Vested Interest |
| $150 Gift Certificate |
$75 Gift Certificate |
$40 Gift Certificate |
B&H PHOTO VIDEO |
| $60 Gift Certificate |
$40 Gift Certificate |
$25 Gift Certificate |
Delkin Devices |
| Level 3 Gift Subscription |
Level 2 Gift Subscription |
Level 1 Gift Subscription |
Nature Photographer Magazine |
| $75 Gift Certificate |
$50 Gift Certificate |
$25 Gift Certificate |
Lens Coat |
|
|
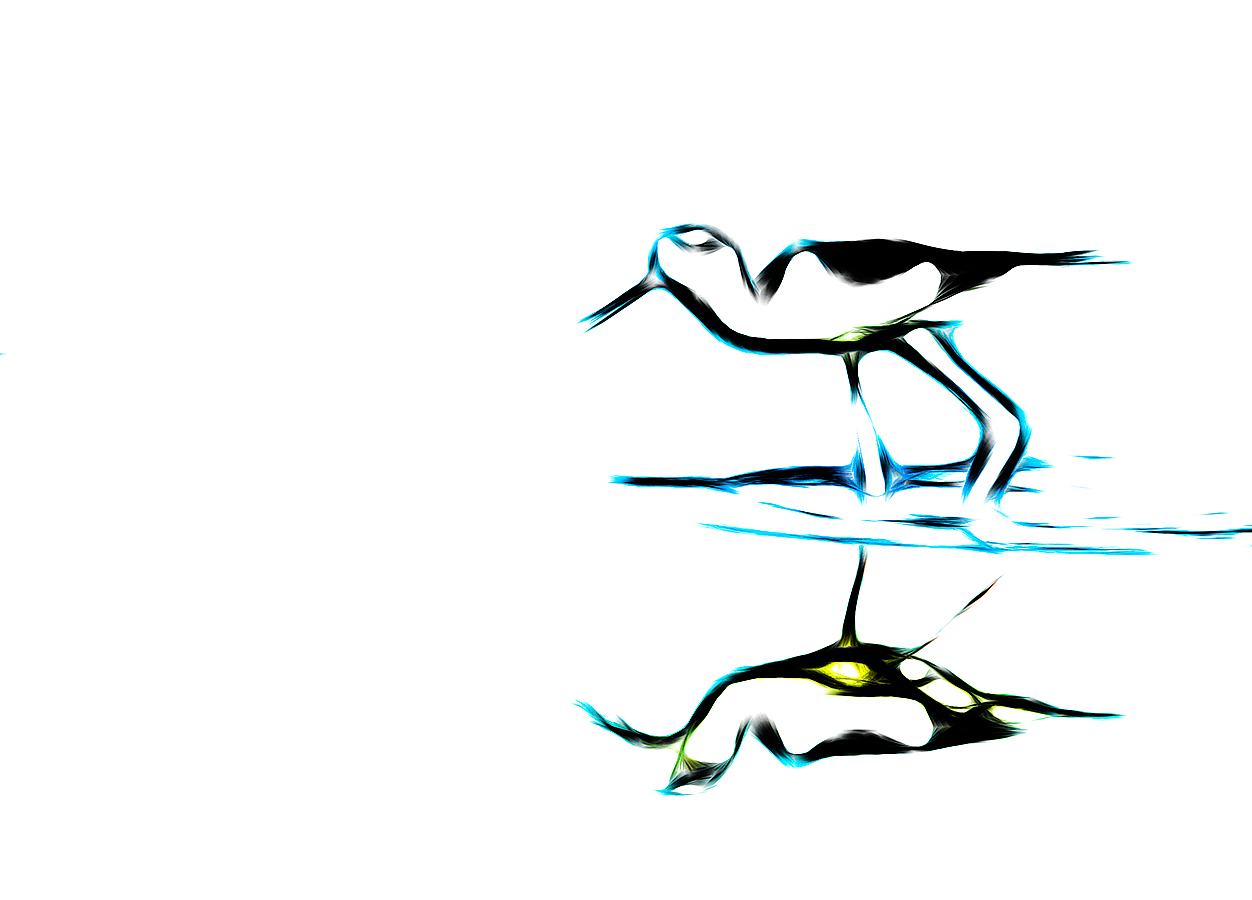
First Runner-up (tie): Black-necked Stilt Fract/22 points
|
Black-necked Stilt Fract
Congratulations to Andrew McLachlan
|
|
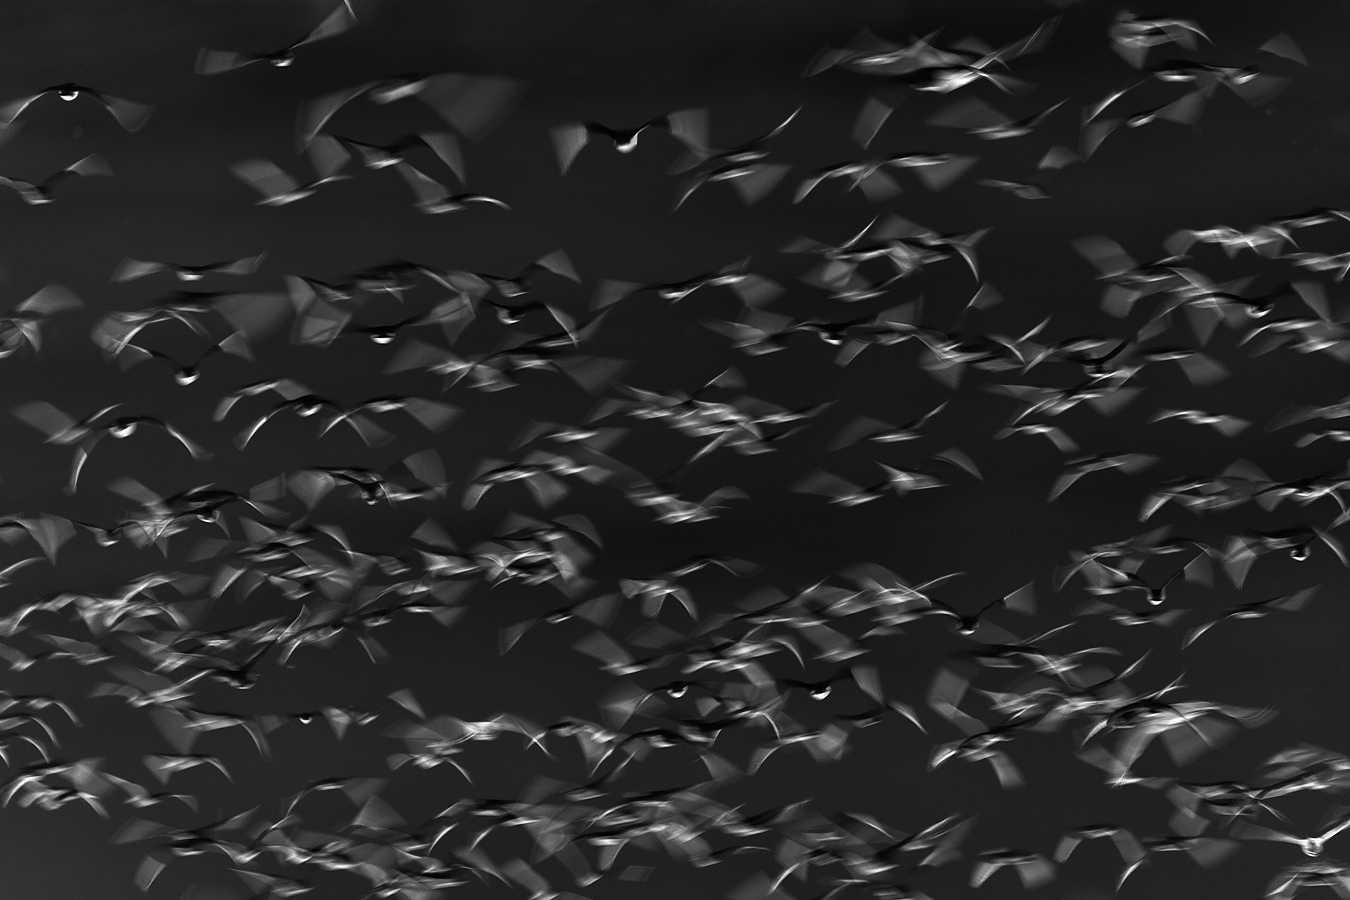
First Runner-up (tie): Inverted Snow Geese Blur/22 points
|
Inverted Snow Geese Blur
Congratulations to Cheryl Slechta
|
|
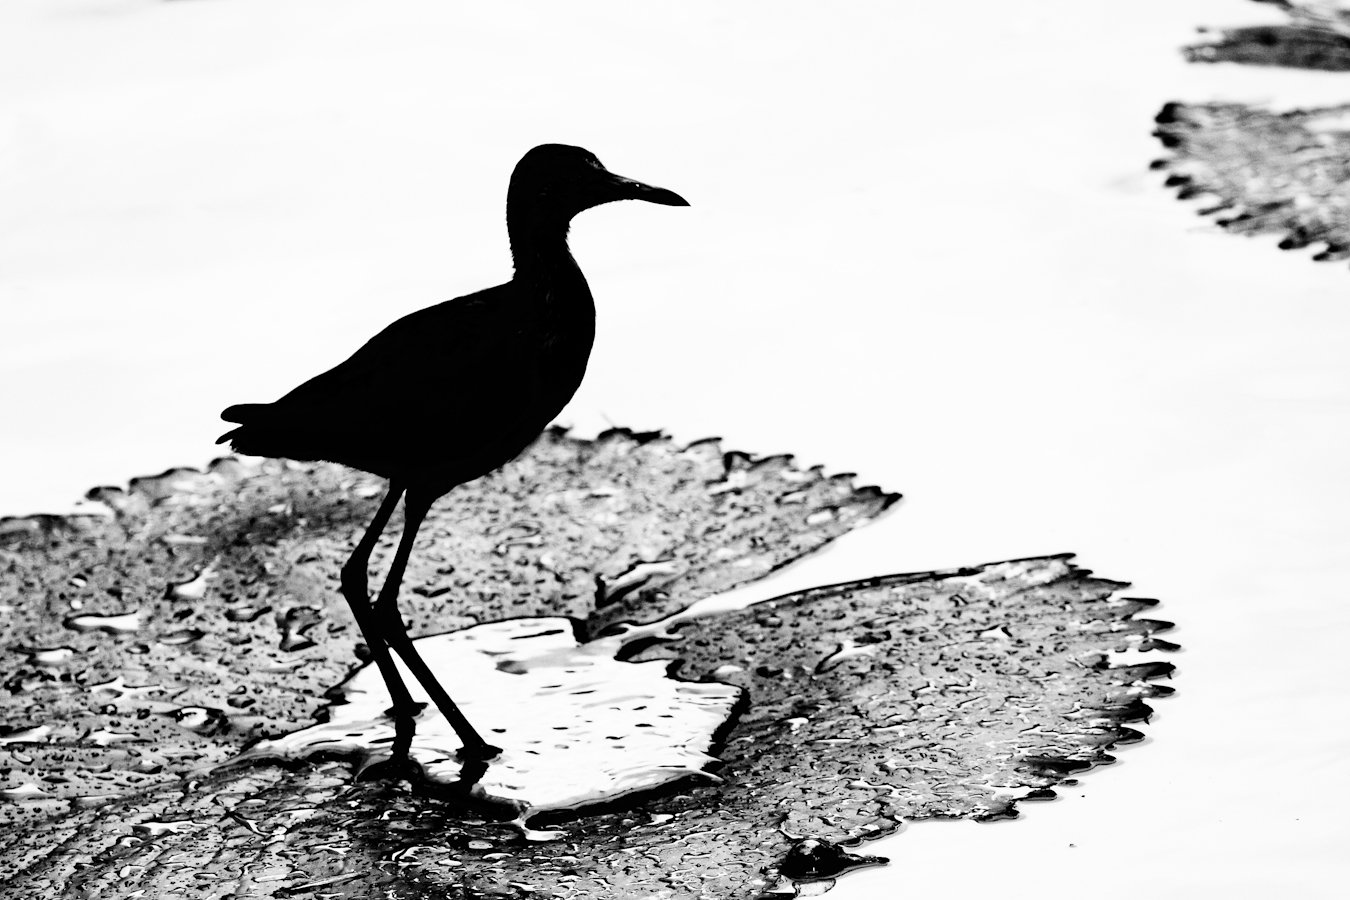
Third Runner-up (tie): Jacana Silhouette/21 points)
|
Jacana Silhouette
Congratulations to Faraaz Abdool
|
|
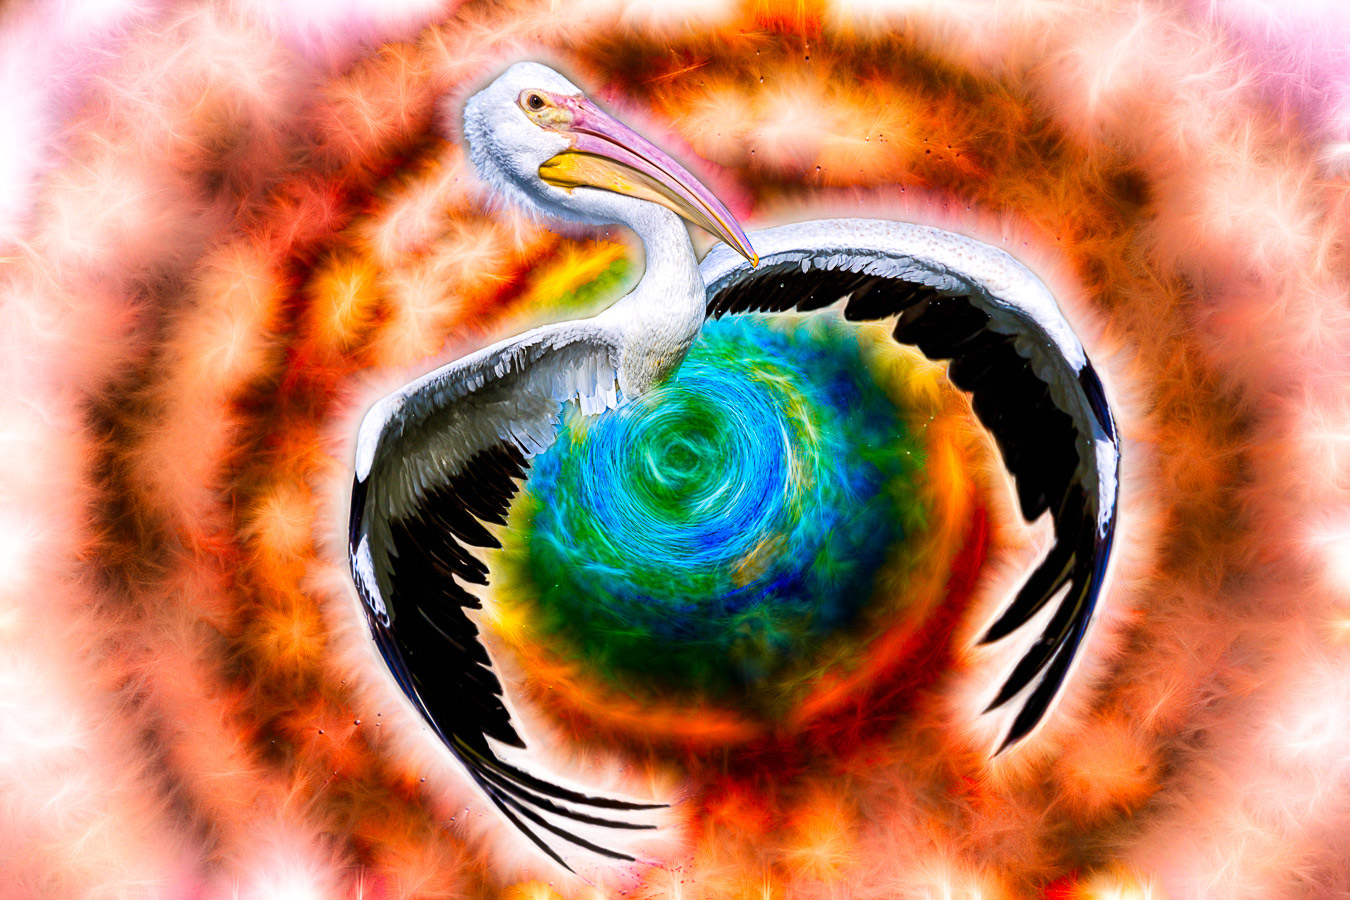
Third Runner-up (tie): Pelican World/21 points
|
Pelican World
Congratulations to Jessy Arnell
|
|
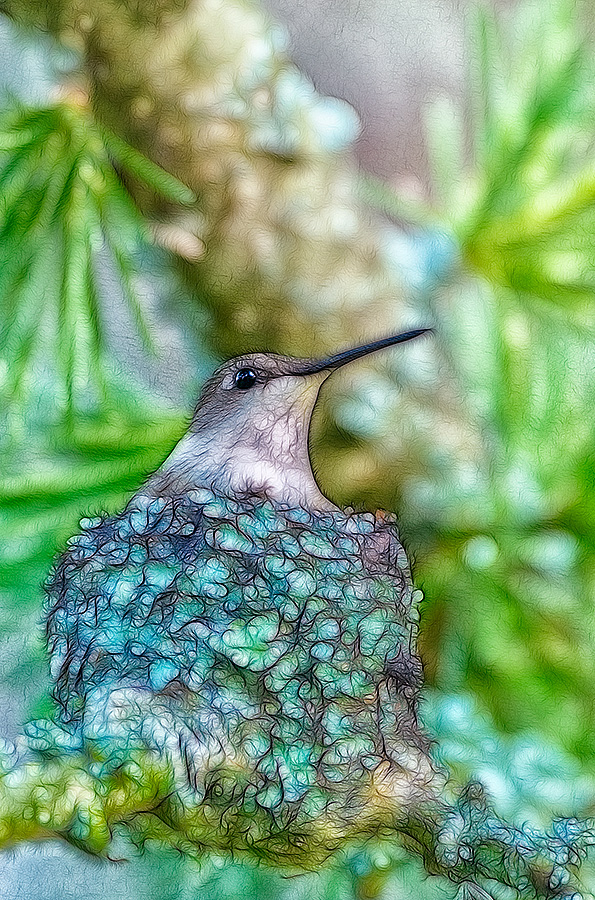
Fifth Runner-up (tie): Hummingbird Nest/20 points
|
Hummingbird Nest
Congratulations to Andrew McLachlan
|
|
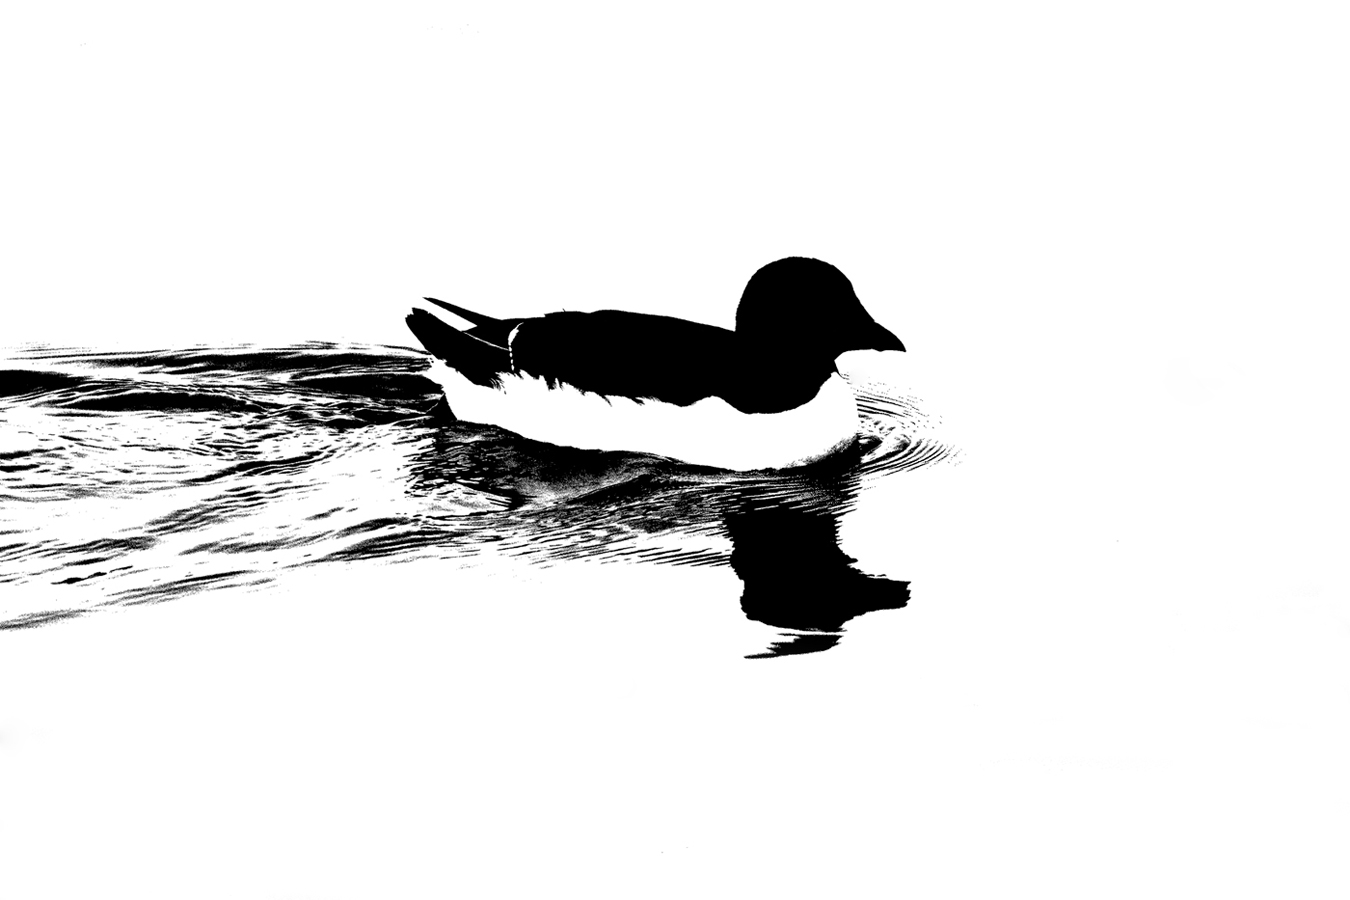
Fifth Runner-up (tie): Razorbill Silhouette/20 points
|
Razorill Sihouette
Congratulations to Rachel Hollander
|
|
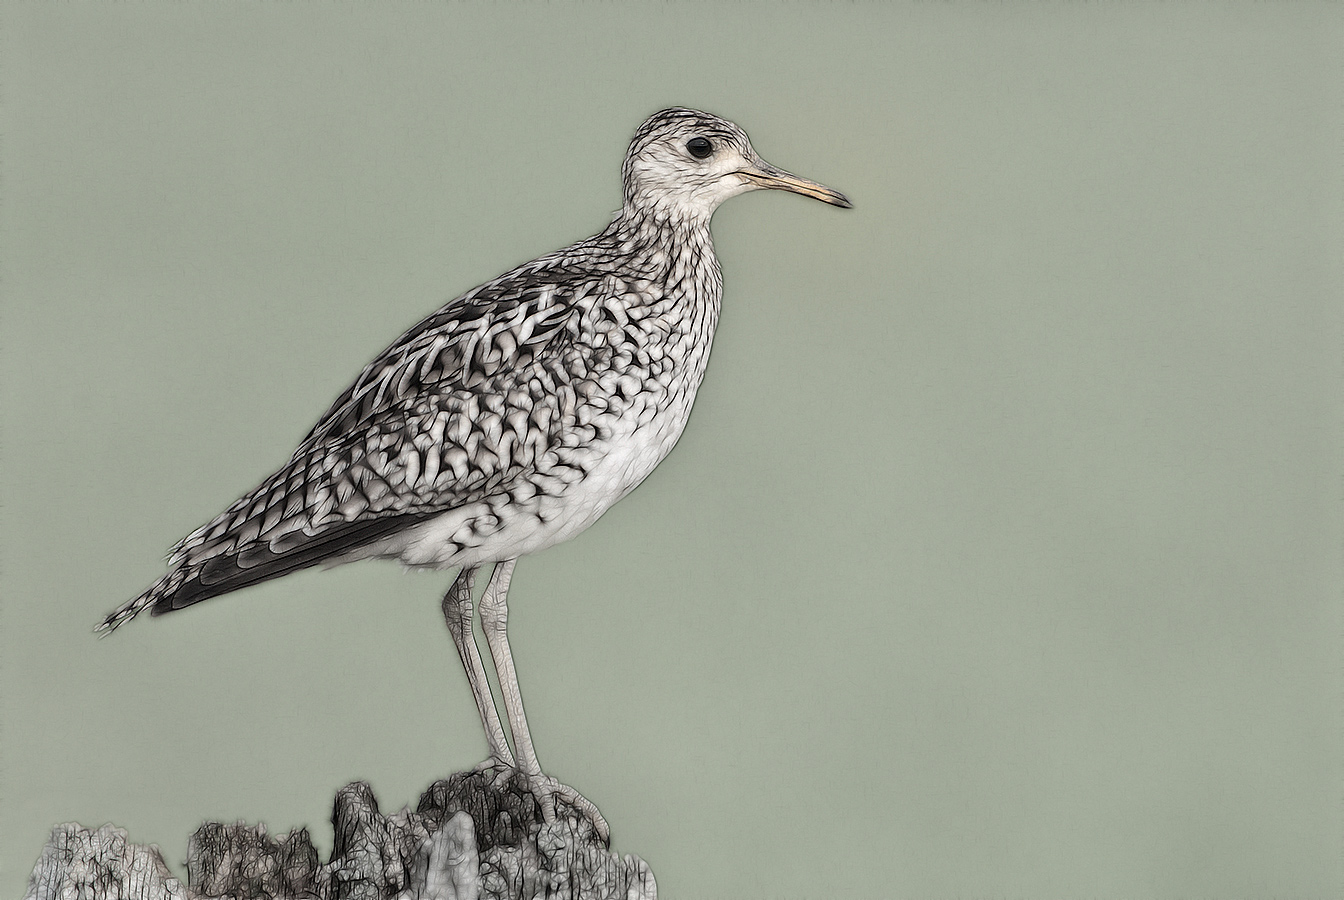
10th Place (tie): Upland Sandpiper Fract Sketch/19 points
|
Upland Sandpiper Fract Sketch
Congratulations to Andrew McLachlan
|
|
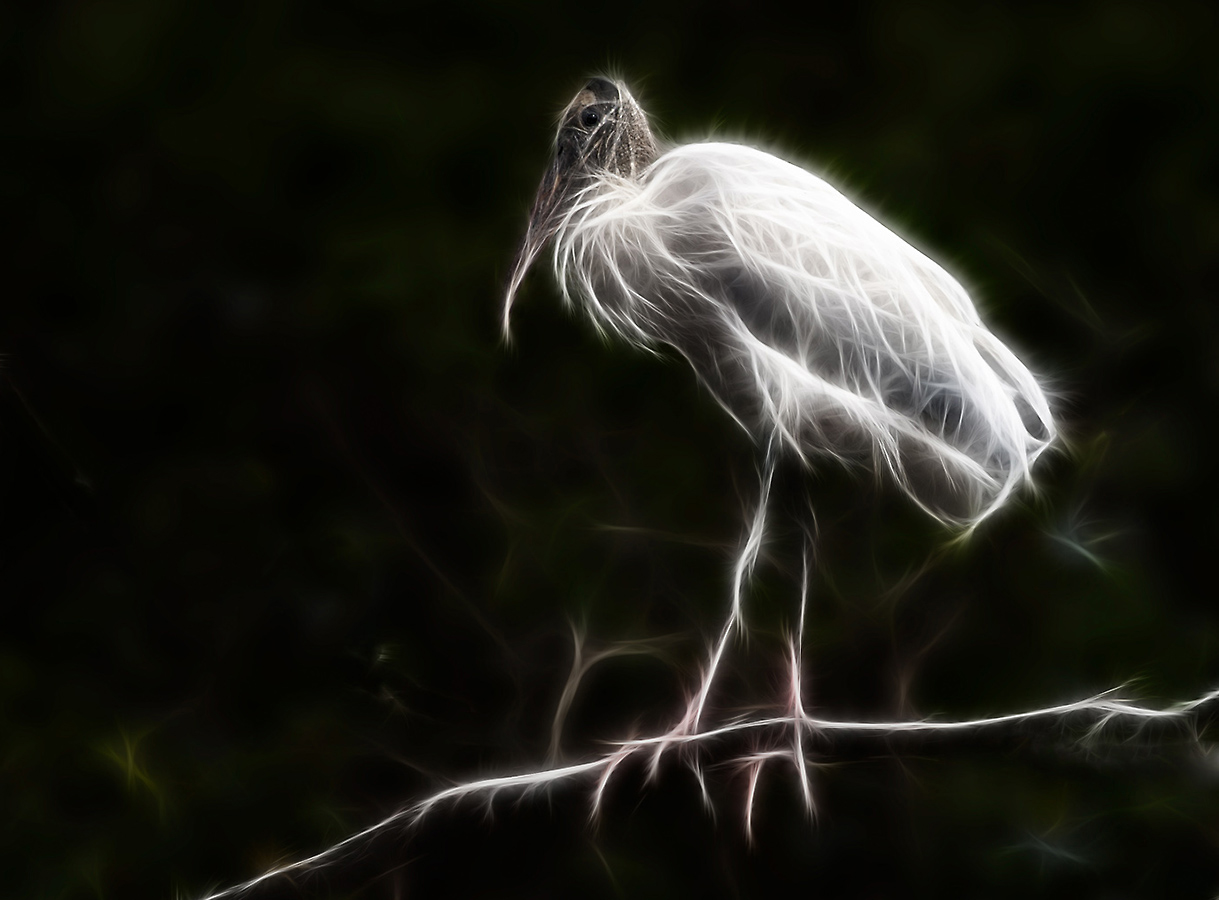
10th Place {tie): Wood Stork Fract/19 points
|
Wood Stork Fract
Congratulations to Don Poulton
|
|
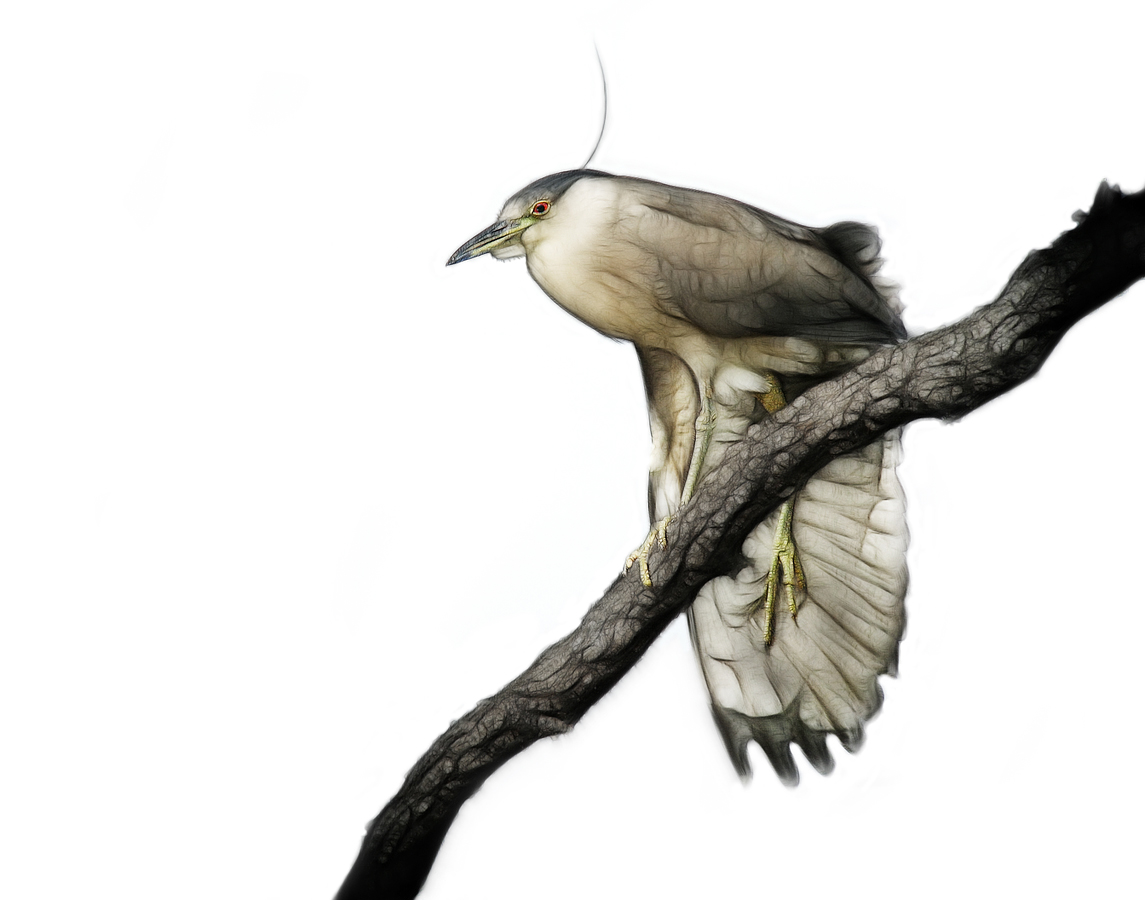
12th Place (tie): Night-Heron Wing Stretch/18 points
|
Night-Heron Wing Stretch
Congratulations to Angie Luzader
|
|
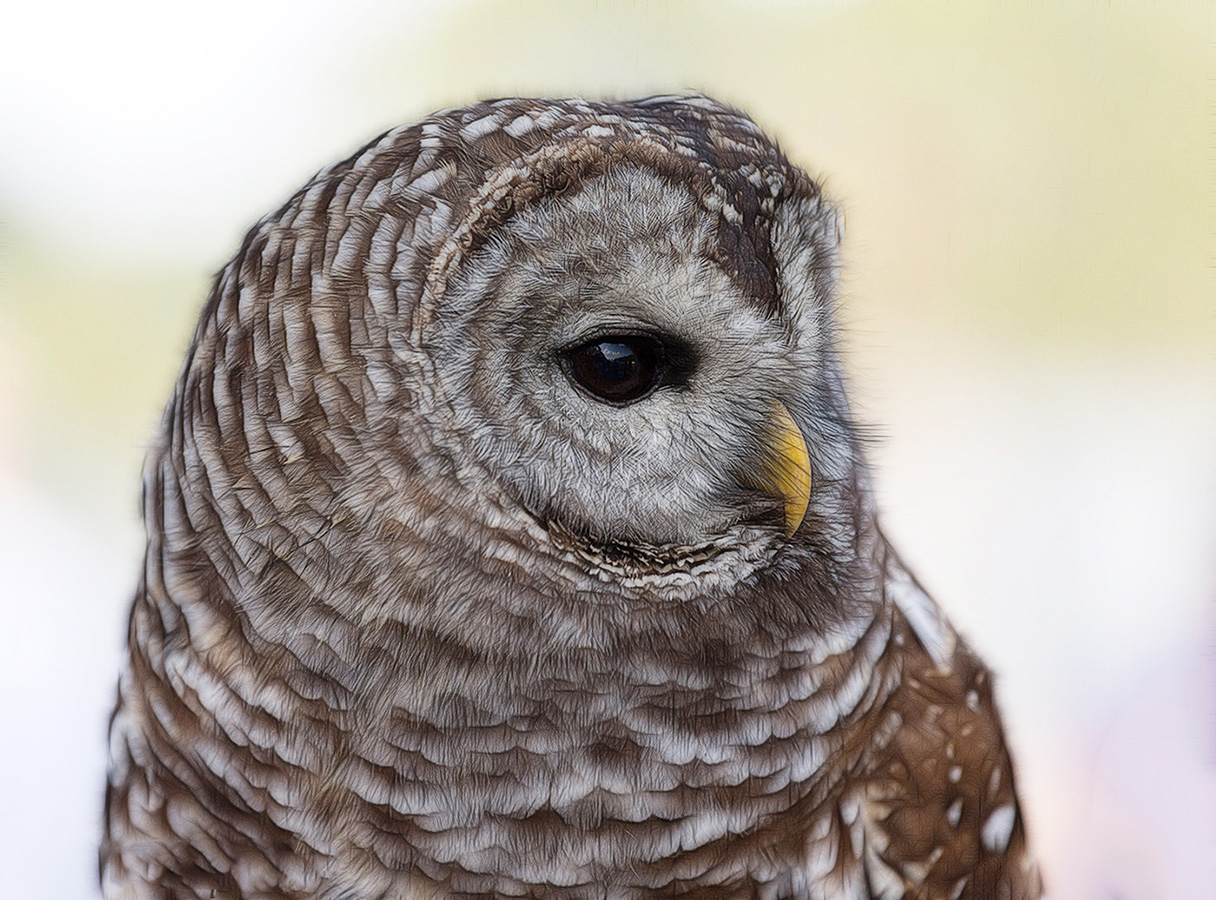
12th Place (tie): Barred Owl Sketched Look/18 points
|
Barred Owl Sketched Look
Congratulations to Cheryl Slechta
Stuff
Getting even a single image to the final round of judging in any category is a huge accomplishment. All of the photographs in the Digital Creations finals were extremely well done. Ironically, the first place tie in the public votes was made up of the first choice of the judges and an image that tied for last on the judges’ ballot. Congrats again to all the winning and honored photographers. To the public voters: for what it’s worth: I loved the Razorbill creation 🙂
Thanks to all the readers who voted. And thanks again to our sponsors and to the panel of judges. Special thanks to Denise Ippolito and Peter Kes who helped me with the early rounds of judging. Please feel free to comment on the any of the images or to analyze and compare the judging; please remember that judging any contest or voting on the images is purely subjective.
The Public Vote
1-(tie)-Barred Owl Sketched Look: 50 points.
2-(tie)-Great Horned Owl Painted: 50 points.
3-Great Blue Heron Sun: 33 points.
4-Delicate Spoonbill: 29 points.
5-Night-Heron Wing Stretch: 28 points.
6-Inverted Snow Geese Blur: 27 points.
7-Black-necked Stilt Fract: 20 points.
8-Hummingbird Nest: 19 points.
9-Wood Stork Fract: 13 points.
10:Jacana Silhouette: 12 points.
11-Upland Sandpiper Fract Sketch:11 points.
12-Pelican World: 8
13: Razorbill Silhouette: 3
The Streak Continues: 172
This post marks 172 consecutive days with a new educational blog post. With so many folks getting in the habit of using our B&H links and our Amazon logo-links why quit now? April was a record month but May has not been so good. So far…. To show your appreciation for my efforts here, I do ask that you use our the B&H and Amazon affiliate links on the right side of the blog for all of your purchases. Please check the availability of all photographic accessories in the BIRDS AS ART Online Store, especially Gitzo tripods, Wimberley tripod heads, and the like. We sell only what I used, tested, and can depend on. We will not sell you junk. We know the tools that you need to make creating great images easy and fun. And we are always glad to answer your gear questions via e-mail.
You can find the following items in the store: Gitzo tripods, Mongoose M3.6 and Wimberley heads, plates, low feet, and accessories, flash brackets, , Delkin e-film Pro Compact Flash Cards, LensCoat products, and our unique line-up of educational materials including ABP I & II, Digital Basics, Site and Set-up e-Guides, Canon and Nikon Camera Users and AF e-Guides, and MP-4 Photoshop video tutorials among others.
I would of course appreciate your using our B&H affiliate links for all of your major gear, video, and electronic purchases. For the photographic stuff mentioned in the paragraph above we, meaning BAA, would of course greatly appreciate your business. Here is a huge thank you to the many who have been using our links on a regular basis and visiting the BAA Online store as well.
With continuing but now rectified laptop problems, this labor-intensive post took 4 hours to put together. Enjoy it!
Selling Your Used Photo Gear Through BIRDS AS ART
Selling your used (or like-new) photo gear through the BAA Blog or via a BAA Online Bulletin is a great idea. We charge only a 5% commission. One of the more popular used gear for sale sites charges a minimum of 20% plus assorted fees! Yikes. The minimum item price here is $500 (or less for a $25 fee). If you are interested please e-mail with the words Items for Sale Info Request cut and pasted into the Subject line :). Stuff that is priced fairly–I offer free pricing advise, usually sells in no time flat as did Dennis Cassidy’s 500 II recently on the blog. Larry Master’s 400 DO and his 800 f/5.6 sold within a week. From Larry via e-mail: Thanks for helping me sell the lenses so quickly!
A Creative Adventure/BIRDS AS ART friend Kitto Kono sold her Nikon 500 to a Blog subscriber in less than a week. Janet Horton’s 7D sold this week after a $100 price reduction. Denise Ippolito’s 100-400 and her 100 macro sold in one day. Peter Kes sold his 70-200 f/2.8L IS II and his 400 DO through BAA in ten days. In the past two months we have sold a Canon 800, a Canon 500 II, 3 400 DO lenses, a Nikon 500mm, and lots more. If you are interested in using our services, please e-mail.
Used Photography Gear Page
Eagle-eyed readers may have noticed that there is a link to the Used Photography Gear page on the yellow tool bar at the top of each blog page. Folks looking to buy (or to sell) can click on that tab or here. I will on occasion continue to list new gear and great buys in blog posts and in Bulletins and may on rare occasion share all the listings with you on the blog. I will strive to keep the listings current. Great news for Kitty Kono and her Nikon 400mm f/2.8; it sold yesterday! That made her 2 for 2 on selling her older Nikon super-telephotos with BAA.
Support the BAA Blog. Support the BAA Bulletins: Shop B&H here!
We want and need to keep providing you with the latest free information, photography and Photoshop lessons, and all manner of related information. Show your appreciation by making your purchases immediately after clicking on any of our B&H or Amazon Affiliate links in this blog post. Remember, B&H ain’t just photography!
….. …..
Typos
In all blog posts and Bulletins, feel free to e-mail or to leave a comment regarding any typos, wrong words, misspellings, omissions, or grammatical errors. Just be right. 🙂
May 20th, 2014 The Streak Continues: 171
This post marks 171 consecutive days with a new educational blog post. With so many folks getting in the habit of using our B&H links and our Amazon logo-links why quit now? April was a record month but May has not been so good. So far…. To show your appreciation for my efforts here, I do ask that you use our the B&H and Amazon affiliate links on the right side of the blog for all of your purchases. Please check the availability of all photographic accessories in the BIRDS AS ART Online Store, especially Gitzo tripods, Wimberley tripod heads, and the like. We sell only what I used, tested, and can depend on. We will not sell you junk. We know the tools that you need to make creating great images easy and fun. And we are always glad to answer your gear questions via e-mail.
You can find the following items in the store: Gitzo tripods, Mongoose M3.6 and Wimberley heads, plates, low feet, and accessories, flash brackets, , Delkin e-film Pro Compact Flash Cards, LensCoat products, and our unique line-up of educational materials including ABP I & II, Digital Basics, Site and Set-up e-Guides, Canon and Nikon Camera Users and AF e-Guides, and MP-4 Photoshop video tutorials among others.
I would of course appreciate your using our B&H affiliate links for all of your major gear, video, and electronic purchases. For the photographic stuff mentioned in the paragraph above we, meaning BAA, would of course greatly appreciate your business. Here is a huge thank you to the many who have been using our links on a regular basis and visiting the BAA Online store as well.
Due to laptop problems last night, this post took 5 hours to put together. Enjoy it!
Last Day for Digital Creations Voting
Join in the fun by voting on the Digital Creations Category of the BIRDS AS ART 2nd International Bird Photography Competition by clicking here. It seems likely that this will be the second category in which the public’s favorite will not match the judge’s first choice. The deadline for voting on this category is be 6am Wednesday, May 21. The winners and the results of the public vote will be announced in tomorrow morning’s blog post.
Wow to May!
I have long been planning to visit my 91-year old Mom in July. She will be 92 in September. I call her pretty much every day. Lately she has been hinting that she would love for me to visit before July. Two days ago I went to Southwest.com and bought a ticket to Islip, leaving on Friday afternoon and returning early on Wednesday. I plan on surprising her. Arna, if you happen to read this–Arna is the younger of my two sisters–please do not spill the beans.
|
|
|
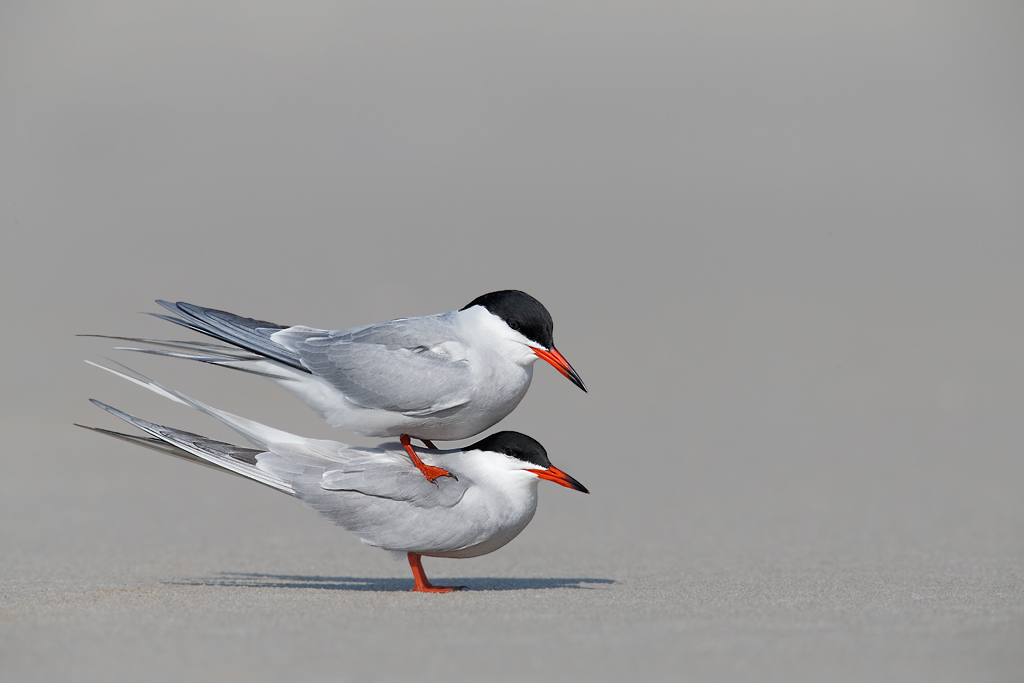
This image was created at Nickerson Beach at 4:41pm on the sunny afternoon of May 15, 2013 while seated behind the Gitzo 3532 LS carbon fiber tripod, the Mongoose M3.6 head with the Canon EF 600mm f/4L IS II USM lens, the Canon Extender EF 2X III, and the Canon EOS-1D X. ISO 400. Evaluative metering at zero: 1/1000 sec. at f/10 in Manual mode. AWB.
Central Sensor (by necessity)/AI Servo-Expand/Rear Focus AF as framed on the male’s neck was active at the moment of exposure. When you add the 2X TC to an f/4 lens with the 1DX or the 5D III hit the MFn button once to toggle to AF Expand and enjoy 4 extra AF sensors. Learn everything there is to know about the 1D X and 5D III AF systems including how to manage the various AF Area Selection Modes, when to use which one, and several ways to move the AF sensor around in the 1D X AF Guide and the 5D Mark III User’s Guide. Click here to see the latest version of the Rear Focus Tutorial. Click on the image to see a larger version. .
Common Terns: pre-copulatory stand
|
Nickerson Beach in May
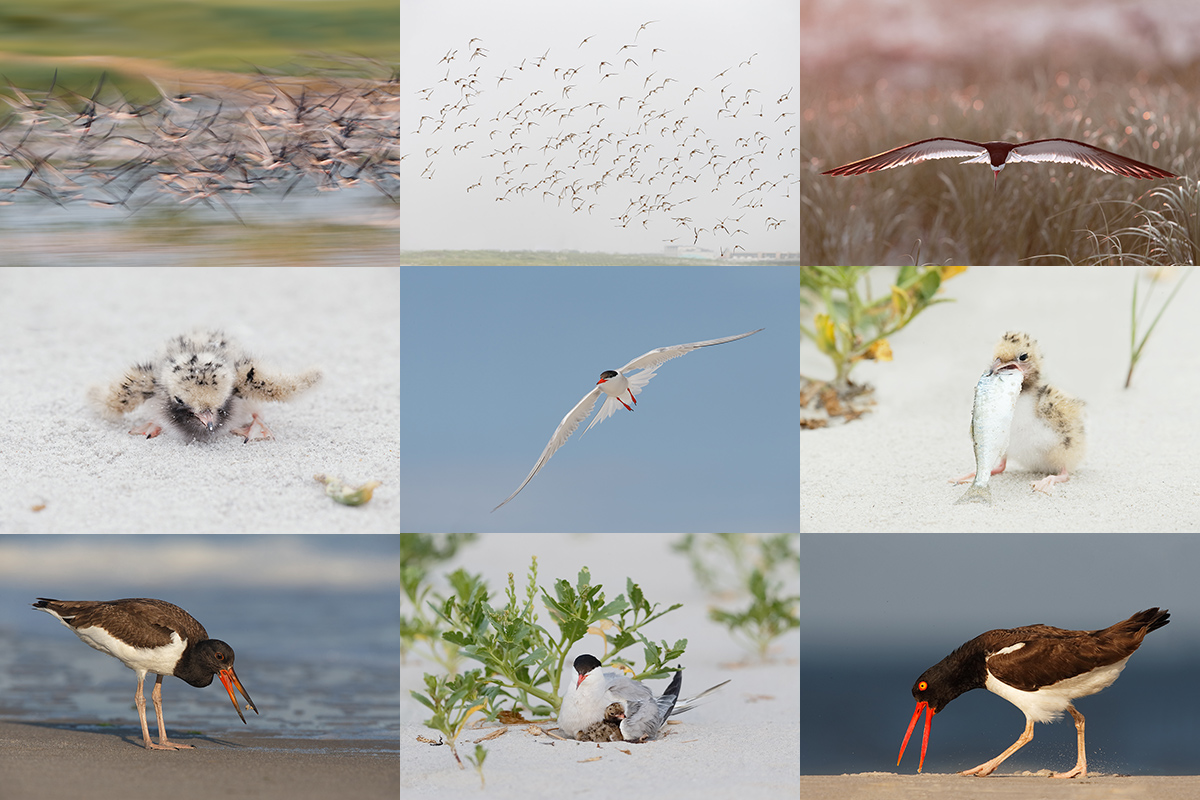
When you think of bird photography on Long Island in May you think of Nickerson Beach on the Lido strip. I realized that I had visited both my Mom and Nickerson in May of 2013 and had run a few In-the-Field Workshops. So I went to the office Drobo, found and opened the May 2013 Long Island to Transfer folder, and was totally amazed. There were lots of great images–no surprise there. I was however surprised that there were dozens of excellent images that had never been optimized. (I need to do a third edit and create a folder of images for Jim to work on.) I grabbed four of the missed jewels and optimized them last night. In today’s blog post I share those along with five images that I had already processed.
|
|
|
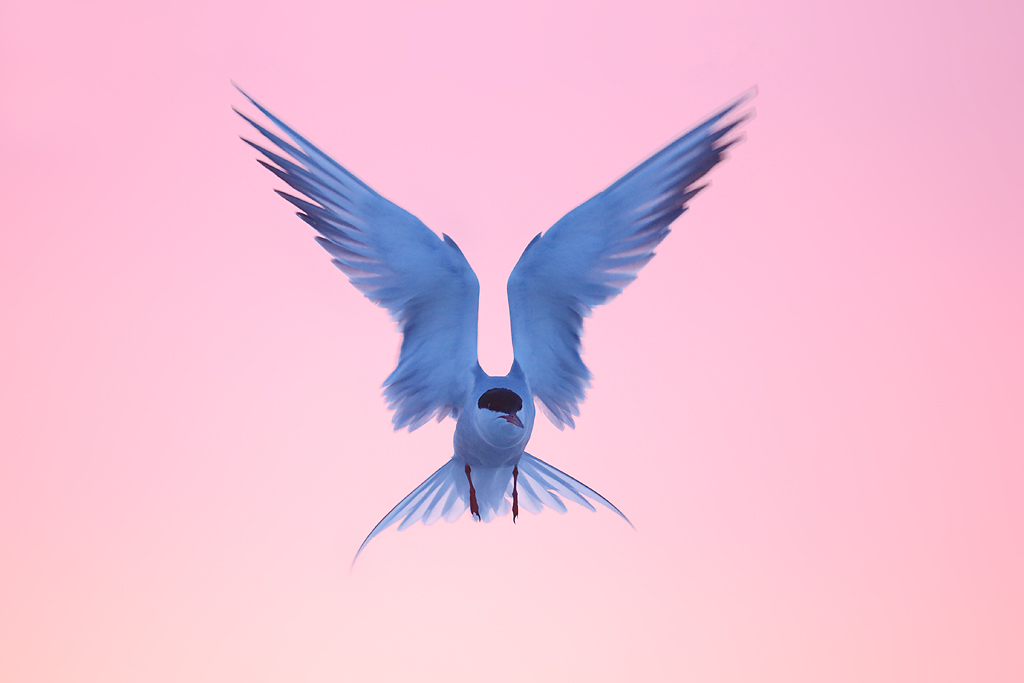
This image was created in pre-dawn light at 5:27am on May 28, 2013 at Nickerson Beach with the tripod-mounted Canon EF 600mm f/4L IS II USM lens and the Canon EOS-1D X Digital SLR camera. ISO 2000 (ISO Safety Shift). Evaluative metering +1 stop: 1/500 sec. at f/4.5 in TV Mode.
Central sensor Surround/AI Servo/Rear Focus as framed active at the moment of exposure. Click here if you missed the Rear Focus Tutorial. Click on the image to see a larger version.
Common Tern kiting in pink sky
|
Getting Up Early
If I may be frank, most folks simply do not get up early enough when going out to photograph nature.
|
|
|
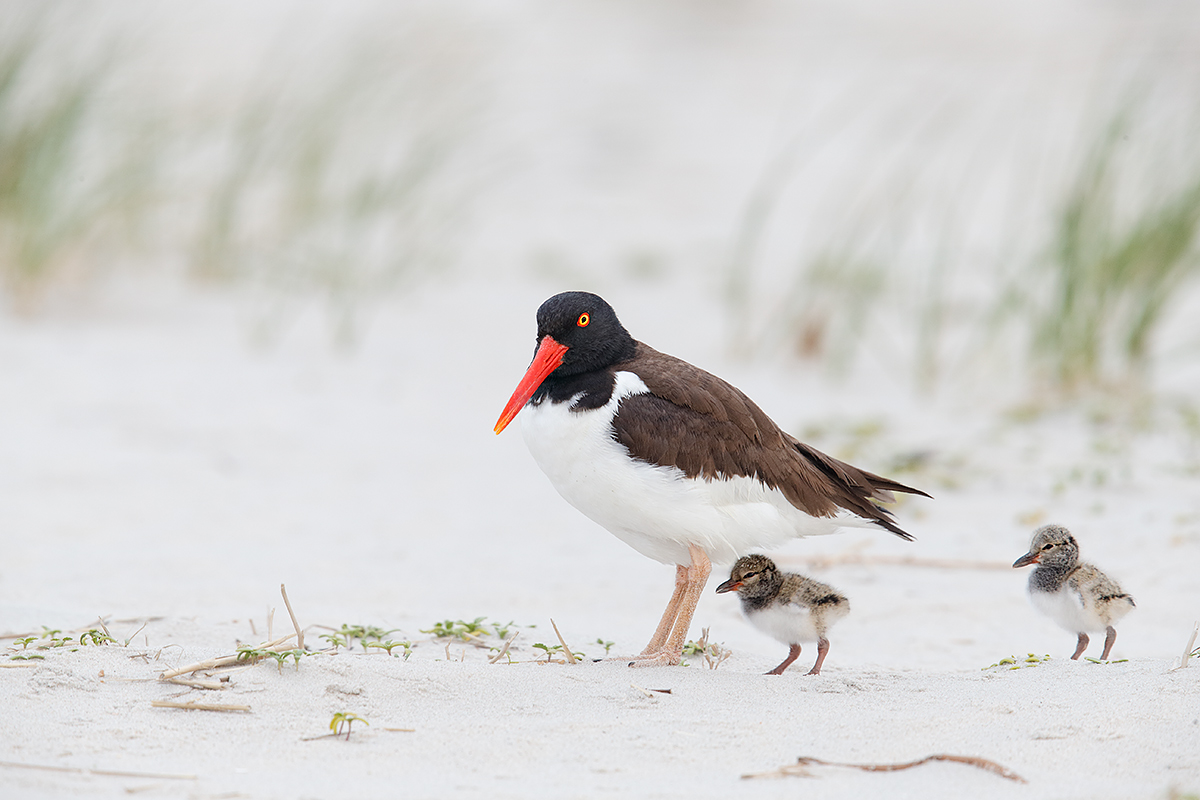
This image was created at Nickerson Beach at 6:42am on the mostly cloudy morning of May 15, 2013 while standing behind my tripod with the Canon EF 600mm f/4L IS II USM lens, the Canon 2x EF Extender III (Teleconverter), and the Canon EOS-1D X Digital SLR camera. ISO 800. Evaluative metering +1 1/3 stops: 1/125 sec. at f/9 in Manual Mode.
Central sensor (by necessity) Expand/AI Servo/Rear Focus on the adult’s neck active at the moment of exposure. Click here if you missed the Rear Focus Tutorial. Click on the image to see a larger version.
American Oystercatcher with two small chicks
|
Perfect Timing
The In-the-Field Workshop sessions are timed perfectly for those wishing to photograph oystercatchers on eggs or with tiny chicks–the latter if we are just a bit lucky. And there should be lots of breeding plumage Sanderlings and lots of courting Common Terns.
Clean Sand
Many of the nests at Nickerson feature pure white sand. Image clean-up here was minimal.
|
|
|
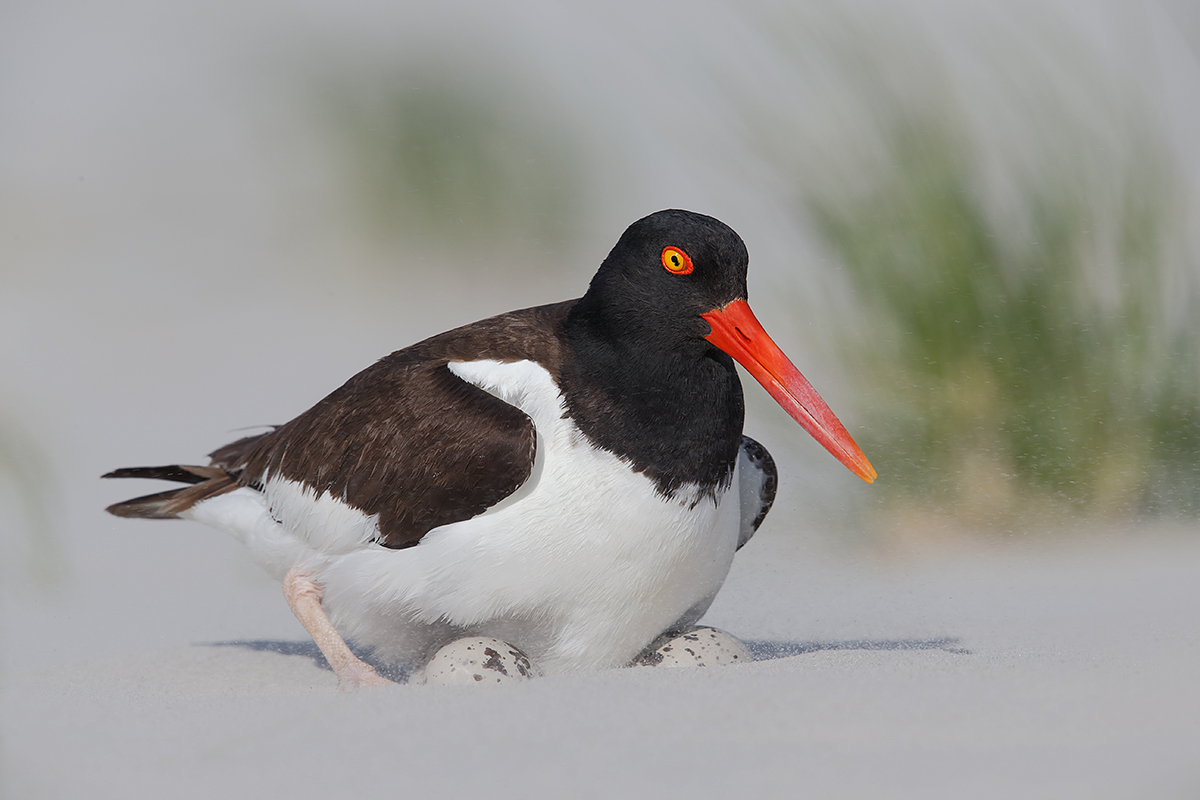
This image was created at Nickerson Beach on the sunny, windy afternoon of May 14, 2013 while seated behind my tripod. This image was created with the Canon EF 600mm f/4L IS II USM lens, the Canon 2x EF Extender III (Teleconverter), and the Canon EOS-1D X Digital SLR camera. ISO 400. Evaluative metering at zero: 1/1250 sec. at f/10 in Manual Mode.
American Oystercatcher on eggs in windstorm
Central sensor (by necessity) Expand/AI Servo/Rear Focus on the lower rear part of the bird’s black hood active at the moment of exposure. Click here if you missed the Rear Focus Tutorial. Click on the image to see a larger version.
|
Working the Nests
Assuming that we will find multiple American Oystercatcher nests I will teach you how to work the roped off nest areas while eliminating or minimizing disturbance. Most of the birds are quite used to people as Nickerson is a very popular beach.
Tv Mode
I will teach you when and why working in Tv mode as I did with the image above and the tern kiting image is often the best choice. If you think that real photographers work in Manual mode 100% of the time you are dead wrong. To learn why, see the “At Long Last, As Promised: the Greatest, Most Educational Blog Post Ever? Manual… Av… Tv… Program… Which is The Best Shooting Mode?” blog post here.
|
|
|
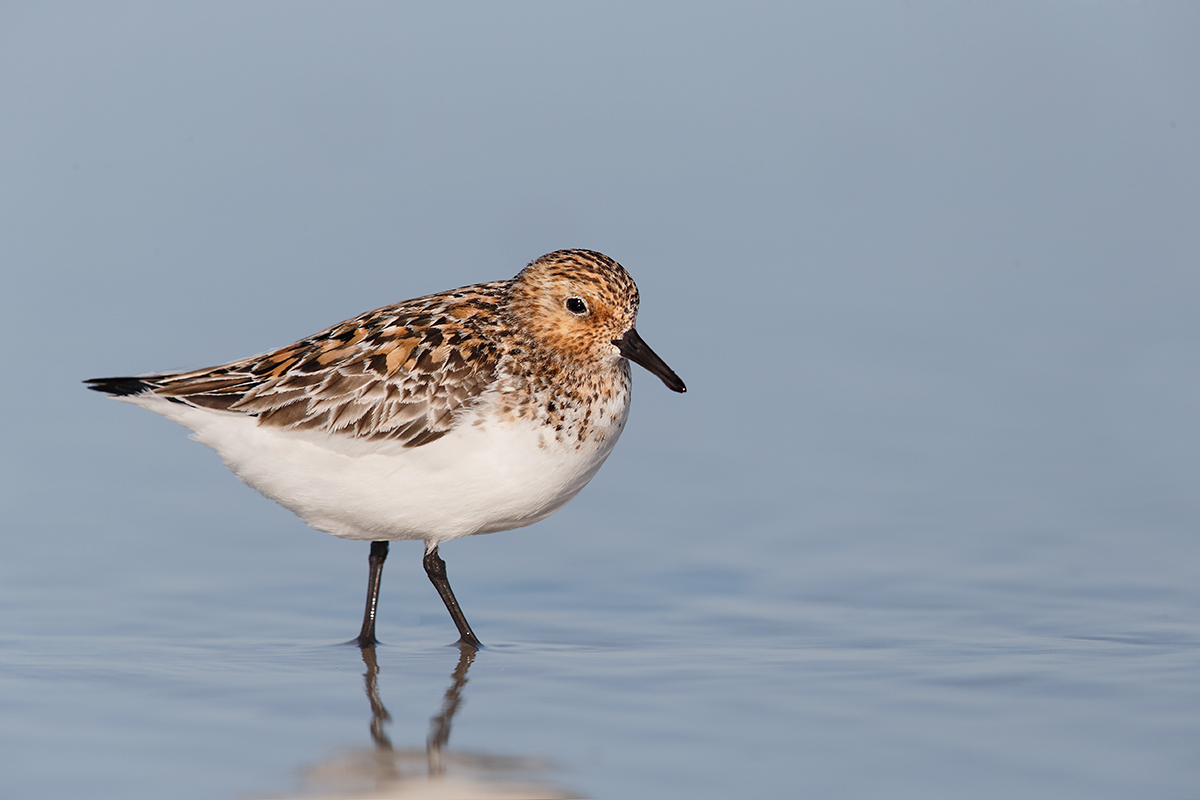
This image was created at Nickerson Beach at 10:07am on the sunny morning of May 27, 2013 while I was seated behind my Gitzo 3532 LS carbon fiber tripod with the Mongoose M3.6 head with the Canon EF 600mm f/4L IS II USM lens, Canon Extender EF 1.4X III, and the Canon EOS-1D X. ISO 400. Evaluative metering +1/3 stop as framed: 1/2000 sec. at f/7.1 in Manual mode. AWB.
61-Point/AI Servo-Surround/Rear Focus AF selected two AF points that fell on the front of the bird’s breast and were active at the moment of exposure. Click here to see the latest version of the Rear Focus Tutorial. Click on the image to see a larger version.
Breeding plumage Sanderling
|
Getting Close
I will teach you how to get close to the shorebirds feeding actively along the Atlantic surf and alert you to the great variety of issues that need to be considered.
|
|
|
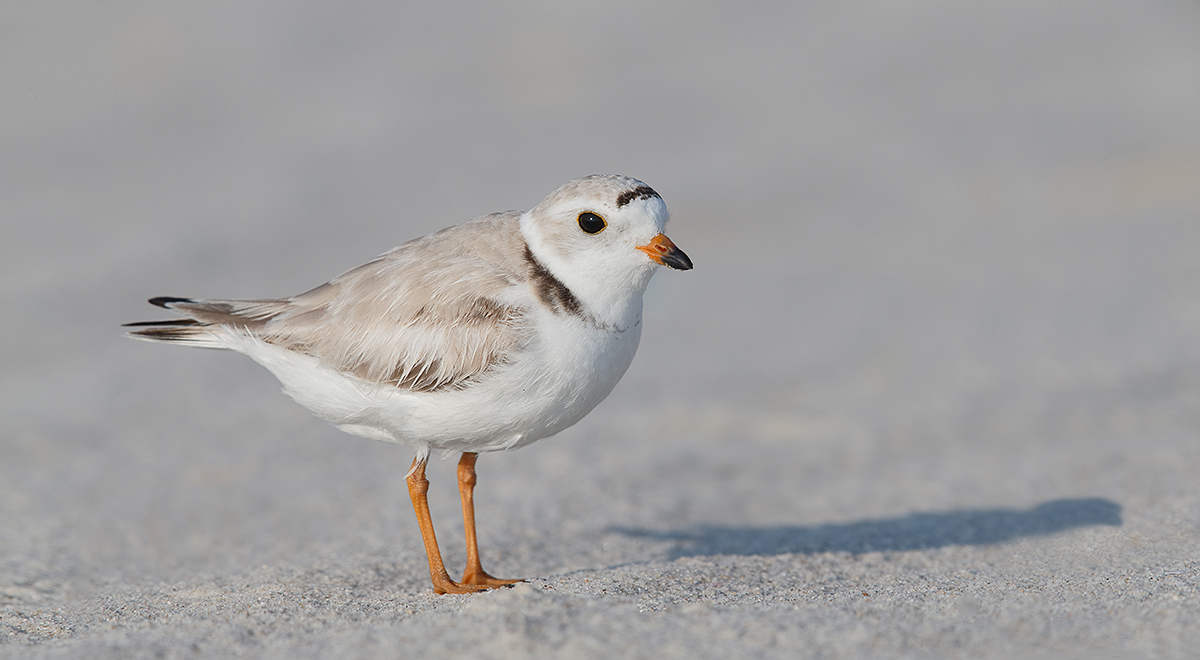
This image was created on Nickerson Beach at 6:27pm on the sunny afternoon of May 20, 2013 while I was seated behind my Gitzo 3532 LS carbon fiber tripod with the Mongoose M3.6 head with the Canon EF 600mm f/4L IS II USM lens, Canon Extender EF 1.4X III, and the Canon EOS-1D X. ISO 400. Evaluative metering +2/3 stop: 1/500 sec. at f/13 in Manual mode. AWB.
Central Sensor/AI Servo-Expand/Rear Focus AF on the bird’s eye and re-compose. When you add the 2X TC to an f/4 lens with the 1DX or the 5D III hit the MFn button once to toggle to AF Expand and enjoy 4 extra AF sensors. Learn everything there is to know about the 1D X and 5D III AF systems including how to manage the various AF Area Selection Modes, when to use which one, and several ways to move the AF sensor around in the 1D X AF Guide and the 5D Mark III User’s Guide. Click here to see the latest version of the Rear Focus Tutorial. Click on the image to see a larger version. .
Breeding plumage Piping Plover
|
Your Favorites?
Please take a moment to select your three favorite images here and rate them 3 for the best, 2 for your next favorite, and 1 for your third pick.
Nickerson Baby Beach-nesting Birds IPT: 3-Full Days/July 15-17, 2014: $1199. Introductory meet and greet: 8pm, Monday, July 14, 2014. Co-leaders Arthur Morris and Denise Ippolito
Join us on Long Island, NY next summer to photograph Black Skimmers, Common Terns with chicks, American Oystercatcher families, and possibly some just-hatched Black Skimmer chicks. The opportunities will include chances to photograph a variety of breeding behaviors including courtship feeding, display flight and combat, and copulations. Car-pooling is recommended; if we opt to return to the beach before 5pm there is a $30/vehicle parking fee that is not included so it is best to share that expense. Parking in the morning is free.
A $499 non-refundable deposit is required to hold your slot for this IPT. Your balance is due 4 months before the date of the IPT and is also non-refundable. If the trip fills, we will be glad to apply a credit applicable to a future IPT for the full amount less a $100 processing fee. If we do not receive your check for the balance on or before the due date we will try to fill your spot from the waiting list. If your spot is filled, you will lose your deposit. If not, you can secure your spot by paying your balance.
Please print, complete, and sign the form that is linked to here and shoot it to us along with your deposit check (made out to “Arthur Morris.”) Though we prefer a check, you can also leave your deposit with a credit card by calling the office at 863-692-0906. If you register by phone, please print, complete and sign the form as noted above and either mail it to us or e-mail the scan.
If you have any questions, please feel free to contact me via e-mail
Selling Your Used Photo Gear Through BIRDS AS ART
Selling your used (or like-new) photo gear through the BAA Blog or via a BAA Online Bulletin is a great idea. We charge only a 5% commission. One of the more popular used gear for sale sites charges a minimum of 20% plus assorted fees! Yikes. The minimum item price here is $500 (or less for a $25 fee). If you are interested please e-mail with the words Items for Sale Info Request cut and pasted into the Subject line :). Stuff that is priced fairly–I offer free pricing advise, usually sells in no time flat as did Dennis Cassidy’s 500 II recently on the blog. Larry Master’s 400 DO and his 800 f/5.6 sold within a week. From Larry via e-mail: Thanks for helping me sell the lenses so quickly!
A Creative Adventure/BIRDS AS ART friend Kitto Kono sold her Nikon 500 to a Blog subscriber in less than a week. Janet Horton’s 7D sold this week after a $100 price reduction. Denise Ippolito’s 100-400 and her 100 macro sold in one day. Peter Kes sold his 70-200 f/2.8L IS II and his 400 DO through BAA in ten days. In the past two months we have sold a Canon 800, a Canon 500 II, 3 400 DO lenses, a Nikon 500mm, and lots more. If you are interested in using our services, please e-mail.
Used Photography Gear Page
Eagle-eyed readers may have noticed that there is a link to the Used Photography Gear page on the yellow tool bar at the top of each blog page. Folks looking to buy (or to sell) can click on that tab or here. I will on occasion continue to list new gear and great buys in blog posts and in Bulletins and may on rare occasion share all the listings with you on the blog. I will strive to keep the listings current. Great news for Kitty Kono and her Nikon 400mm f/2.8; it sold yesterday! That made her 2 for 2 on selling her older Nikon super-telephotos with BAA.
Support the BAA Blog. Support the BAA Bulletins: Shop B&H here!
We want and need to keep providing you with the latest free information, photography and Photoshop lessons, and all manner of related information. Show your appreciation by making your purchases immediately after clicking on any of our B&H or Amazon Affiliate links in this blog post. Remember, B&H ain’t just photography!
….. …..
Typos
In all blog posts and Bulletins, feel free to e-mail or to leave a comment regarding any typos, wrong words, misspellings, omissions, or grammatical errors. Just be right. 🙂
May 19th, 2014 Important UK Puffin IPT News
Guys or couples considering joining us for the UK Puffins and Gannets IPT need to register no later than Thursday, May 22 as we need to give up our last empty room on Friday. Scroll down for details.
The Streak Continues: 170
This post marks 170 consecutive days with a new educational blog post. With so many folks getting in the habit of using our B&H links and our Amazon logo-links why quit now? April was a record month but May has not been so good. So far…. To show your appreciation for my efforts here, I do ask that you use our the B&H and Amazon affiliate links on the right side of the blog for all of your purchases. Please check the availability of all photographic accessories in the BIRDS AS ART Online Store, especially Gitzo tripods, Wimberley tripod heads, and the like. We sell only what I used, tested, and can depend on. We will not sell you junk. We know the tools that you need to make creating great images easy and fun. And we are always glad to answer your gear questions via e-mail.
You can find the following items in the store: Gitzo tripods, Mongoose M3.6 and Wimberley heads, plates, low feet, and accessories, flash brackets, , Delkin e-film Pro Compact Flash Cards, LensCoat products, and our unique line-up of educational materials including ABP I & II, Digital Basics, Site and Set-up e-Guides, Canon and Nikon Camera Users and AF e-Guides, and MP-4 Photoshop video tutorials among others.
I would of course appreciate your using our B&H affiliate links for all of your major gear, video, and electronic purchases. For the photographic stuff mentioned in the paragraph above we, meaning BAA, would of course greatly appreciate your business. Here is a huge thank you to the many who have been using our links on a regular basis and visiting the BAA Online store as well.
This post took 2+ hours to put together. Enjoy it!
Digital Creations Voting Continues Today
Join in the fun by voting on the Digital Creations Category of the BIRDS AS ART 2nd International Bird Photography Competition by clicking here. As with the Pleasing Blurs category, the public vote in Digital Creations bears little to no resemblance to the results of the judges voting. It seems likely that this will be the secoond category in which the public’s favorite will not match the judge’s first choice. Thirteen strong images made it to the final round in this category. Do take a peek.
|
|
|
This image was created on the St. Augustine IPT in the very early morning of May 6 with the Gitzo 3532 LS carbon fiber tripod, the Mongoose M3.6 head, the Canon EF 600mm f/4L IS II USM lens, the Canon Extender EF 2X III, and the Canon EOS-1D X. ISO 1600. Evaluative metering minus about stops: 1/250 sec. at f/10 in Manual mode. AWB.
Central Sensor/AI Servo/Rear Focus AF on the closest bird’s eye and re-compose. Normally, When I add the 2XIII TC to an f/4 lens with the 1DX or the 5D III I hit the MFn button once to toggle to AF Expand and enjoy 4 extra AF sensors with Expand. And that is what I did here. Learn everything there is to know about the 1D X and 5D III AF systems including how to manage the various AF Area Selection Modes, when to use which one, and several ways to move the AF sensor around in the 1D X AF Guide and the 5D Mark III User’s Guide. Click here to see the latest version of the Rear Focus Tutorial.
|
What Would You Do With This Image?
What would you do with this 3-stops underexposed image? For many this would be an insta-delete. And I will admit that I almost failed to give this one the blue check mark that I use to indicate my keepers when editing a my images from a morning or afternoon shooting session in BreezeBrowser. But I did, and please pardon the pun, eventually see the light. It is important to realize the great potential of digital RAW files….
The Dramatic Image Rescue
No. The baby spoonbills were not in any danger. And yes, though the EV (ambient light) level was very low, that did not cause the 3-stop underexposure. That was a result of operator error. Not sure why other than that I was excited to see the chicks getting fed. (There were four chicks in all in the nest.) As I said in a previous blog post, photographing the chicks in the tree nests was nearly impossible with extremely cluttered and limited sight-lines into the nests… Seeing that this image was sharp and given the scarcity of images of small spoonbill chicks in the nest, I decided to try to save it.
|
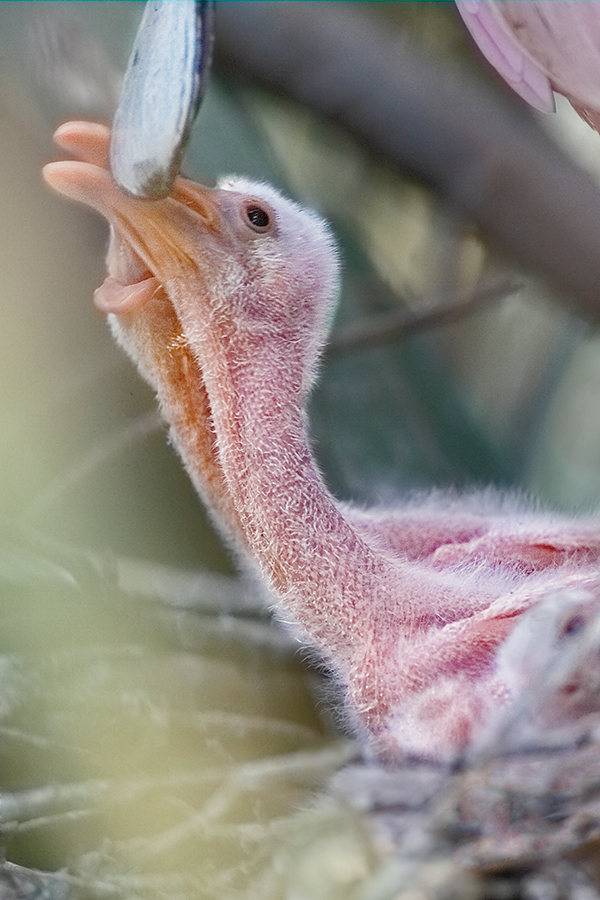
|
|
Believe it or not, the optimized image here was created from the original capture that opened this blog post. The green haze in the lower left portion of the image was the result of out-of-focus vegetation between the lens and the image as framed. Moving my tripod about 1 1/2 inches to my right would likely have helped a bit with that. Folks often show up on IPTs asking “What’s the single biggest secret to creating great natural history images?” I always respond, “The big secret to creating great natural history images is attention to small detail….”
|
The Image Optimization
During conversion of the RAW file in DPP (Canon’s Digital Photo Professional) I increased the Brightness 2 stops (the maximum), moved both the Highlight and the Shadow sliders to +2, set the chrominance noise reduction slider to 16, and, on the Lens tab under Lens aberration correction, tuned the Peripheral illumination to 100. Total elapsed time to make those changes: less than 30 seconds.
The TIFF was brought into Photoshop 6. I dealt with the bright highlights in the lower right-center of the frame with the Clone Stamp Tool at 50% Hardness with the Opacity set between 10 and 60% depending…. I eschewed my usual NIK 50-50 pre-set opting instead to first run Tonal Contrast and then Detail Extractor on separate layers. They were applied only to the birds by painting the effects in with an Inverse (Black or Hide-All) Mask. I pulled the curve (Control M) up on the Tonal Contrast layer and added a Contrast Mask as well. The opacity of the Detail Extractor layer was reduced to 50%. Next was some simple Eye Doctor work; I selected the entire eye with a Quick Mask and blackened it by pulling the curve down. That was followed by applying Image/Blur Surface Blur (as taught to me by Denise Ippolito) at about 5/8 to the whole image to further control the noise.
All in all I was thrilled with the result.
The DPP RAW Conversion Guide
To learn why I use Canon’s Digital Photo Professional (DPP) to convert every image that I work on, click here.
Digital Basics
Everything that I did to optimize today’s image is detailed in my Digital Basics File–written in my easy-to-follow, easy-to-understand style. Are you tired of making your images look worse in Photoshop? Digital Basics File is an instructional PDF that is sent via e-mail. It includes my complete digital workflow, dozens of great Photoshop tips, the use of Contrast Masks, several different ways of expanding and filling in canvas, all of my time-saving Keyboard Shortcuts, Quick Masking, Layer Masking, and NIK Color Efex Pro basics, my killer image clean-up techniques, Digital Eye Doctor, creating time-saving actions, and lots more.
APTATS I & II
Learn the details of advanced Quick Masking techniques in APTATS I. Learn Advanced Layer Masking Techniques in APTATS I. Mention this blog post and apply a $5 discount to either with phone orders only. Buy both APTATS I and APTATS II and we will be glad to apply at $15 discount with phone orders only.
Selling Your Used Photo Gear Through BIRDS AS ART
Selling your used (or like-new) photo gear through the BAA Blog or via a BAA Online Bulletin is a great idea. We charge only a 5% commission. One of the more popular used gear for sale sites charges a minimum of 20% plus assorted fees! Yikes. The minimum item price here is $500 (or less for a $25 fee). If you are interested please e-mail with the words Items for Sale Info Request cut and pasted into the Subject line :). Stuff that is priced fairly–I offer free pricing advise, usually sells in no time flat as did Dennis Cassidy’s 500 II recently on the blog. Larry Master’s 400 DO and his 800 f/5.6 sold within a week. From Larry via e-mail: Thanks for helping me sell the lenses so quickly!
A Creative Adventure/BIRDS AS ART friend Kitto Kono sold her Nikon 500 to a Blog subscriber in less than a week. Janet Horton’s 7D sold this week after a $100 price reduction. Denise Ippolito’s 100-400 and her 100 macro sold in one day. Peter Kes sold his 70-200 f/2.8L IS II and his 400 DO through BAA in ten days. In the past two months we have sold a Canon 800, a Canon 500 II, 3 400 DO lenses, a Nikon 500mm, and lots more. If you are interested in using our services, please e-mail.
Used Photography Gear Page
Eagle-eyed readers may have noticed that there is a link to the Used Photography Gear page on the yellow tool bar at the top of each blog page. Folks looking to buy (or to sell) can click on that tab or here. I will on occasion continue to list new gear and great buys in blog posts and in Bulletins and may on rare occasion share all the listings with you on the blog. I will strive to keep the listings current. Great news for Kitty Kono and her Nikon 400mm f/2.8; it sold yesterday! That made her 2 for 2 on selling her older Nikon super-telephotos with BAA.
Support the BAA Blog. Support the BAA Bulletins: Shop B&H here!
We want and need to keep providing you with the latest free information, photography and Photoshop lessons, and all manner of related information. Show your appreciation by making your purchases immediately after clicking on any of our B&H or Amazon Affiliate links in this blog post. Remember, B&H ain’t just photography!
….. …..
Typos
In all blog posts and Bulletins, feel free to e-mail or to leave a comment regarding any typos, wrong words, misspellings, omissions, or grammatical errors. Just be right. 🙂
May 18th, 2014 The Streak Continues: 169
This post marks 169 consecutive days with a new blog post. With so many folks getting in the habit of using our B&H links and our Amazon logo-links why quit now? April was a record month but May has not been so good. So far…. To show your appreciation for my efforts here, I do ask that you use our the B&H and Amazon affiliate links on the right side of the blog for all of your purchases. Please check the availability of all photographic accessories in the BIRDS AS ART Online Store, especially Gitzo tripods, Wimberley tripod heads, and the like. We sell only what I used, tested, and can depend on. We will not sell you junk. We know the tools that you need to make creating great images easy and fun. And we are always glad to answer your gear questions via e-mail.
You can find the following items in the store: Gitzo tripods, Mongoose M3.6 and Wimberley heads, plates, low feet, and accessories, flash brackets, , Delkin e-film Pro Compact Flash Cards, LensCoat products, and our unique line-up of educational materials including ABP I & II, Digital Basics, Site and Set-up e-Guides, Canon and Nikon Camera Users and AF e-Guides, and MP-4 Photoshop video tutorials among others.
I would of course appreciate your using our B&H affiliate links for all of your major gear, video, and electronic purchases. For the photographic stuff mentioned in the paragraph above we, meaning BAA, would of course greatly appreciate your business. Here is a huge thank you to the many who have been using our links on a regular basis and visiting the BAA Online store as well.
This post took about 2 hours to put together. Enjoy!
|

|
Jacana Silhouette
|
Jacana Silhouette
BIRDS AS ART 2nd International Bird Photography Competition
The judging of the BIRDS AS ART 2nd International Bird Photography Competition has been complete for three weeks. Thanks a stack again to our panel of judges: Sandesh Kadur, Scott Elowitz, Lou Coetzer, Mary Ann McDonald, Michael Frye, Peter Kes, Denise Ippolito, and yours truly. You can learn more about the guest judges here.
From 5 to 18 images in the 8 categories were selected to be sent to the judges’ panel. Each judge voted on each image on a 0-5 scale. The votes were tallied and the results are now final. This will make 4 categories down, 4 to go.
Your Call
The images that were presented to the panel of judges in the Digital Creations category are presented to you today here. Please do understand that many very strong images were eliminated in the early rounds of judging because of poor image processing, technical issues including over- or under-exposure, over-Saturation, image sharpness, and the failure of folks to take advantage of our lenient digital guidelines that allow for the removal of distracting elements from an image.
After clicking on each image to view the larger size, we ask that each of you pick your five favorite images and vote them 5, 4, 3, 2, 1 with 5 being the strongest, 4 being your second favorite, and so on down to 1. Additional comments are welcome <em>as long as they appear below your selections. The whole thing should look something like this:
Delicate Spoonbill: 5
Wood Stork Fracts: 4
Black-necked Stilt Fract: 3
Pelican World: 2
Great Blue Heron Sun: 1
I love the soft colors and all that detail in Delicate Spoonbill.
The selections above are of course arbitrary and should not at all influence your votes. Please read the directions carefully as comments that do not follow the format above exactly will be deleted without notice. The three winning images in this category along with the 4 runner up images and the names of the photographers will be announced here soon along with a tally of the public vote.
The Grand Prize winning image, the image that secured the highest total of judge’s votes, will be revealed when the results of the final category are announced.
|

|
Pelican World
|
Pelican World
|

|
Razorbill Silhouette
|
Razorill Sihouette
|

|
Wood Stork Fract
|
Wood Stork Fract
|

|
Inverted Snow Geese Blur
|
Inverted Snow Geese Blur
|

|
Delicate Spoonbill
|
Delicate Spoonbill
|

|
Night-Heron Wing Stretch
|
Night-Heron Wing Stretch
|

|
Hummingbird Nest
|
Hummingbird Nest
|

|
Upland Sandpiper Fract Sketch
|
|

|
Black-necked Stilt Fract
|
Black-necked Stilt Fract
|

|
Great Horned Owl Painted
|
Great Horned Owl Painted
|

|
Great Blue Heron Sun
|
Great Blue Heron Sun
|

|
Barred Owl Sketched Look
|
Barred Owl Sketched Look
|
…..
|
|
|
Fractastic is the latest in a long line of eGuides published by BAA Books. Kudos to Andrew and denise.
|
Fractalius
Note that many of the image here were created in Fractalius, a Windows-only plug-in that can–as you have seen above–be used to create a fantastic variety of out-of-the-box looks. Click here to learn more about Fractastic, A Creative User eGuide for the Redfield Fractalius Filter by Denise Ippolito, Andrew McLachland with yours truly. You can see more Fractalius creations here.
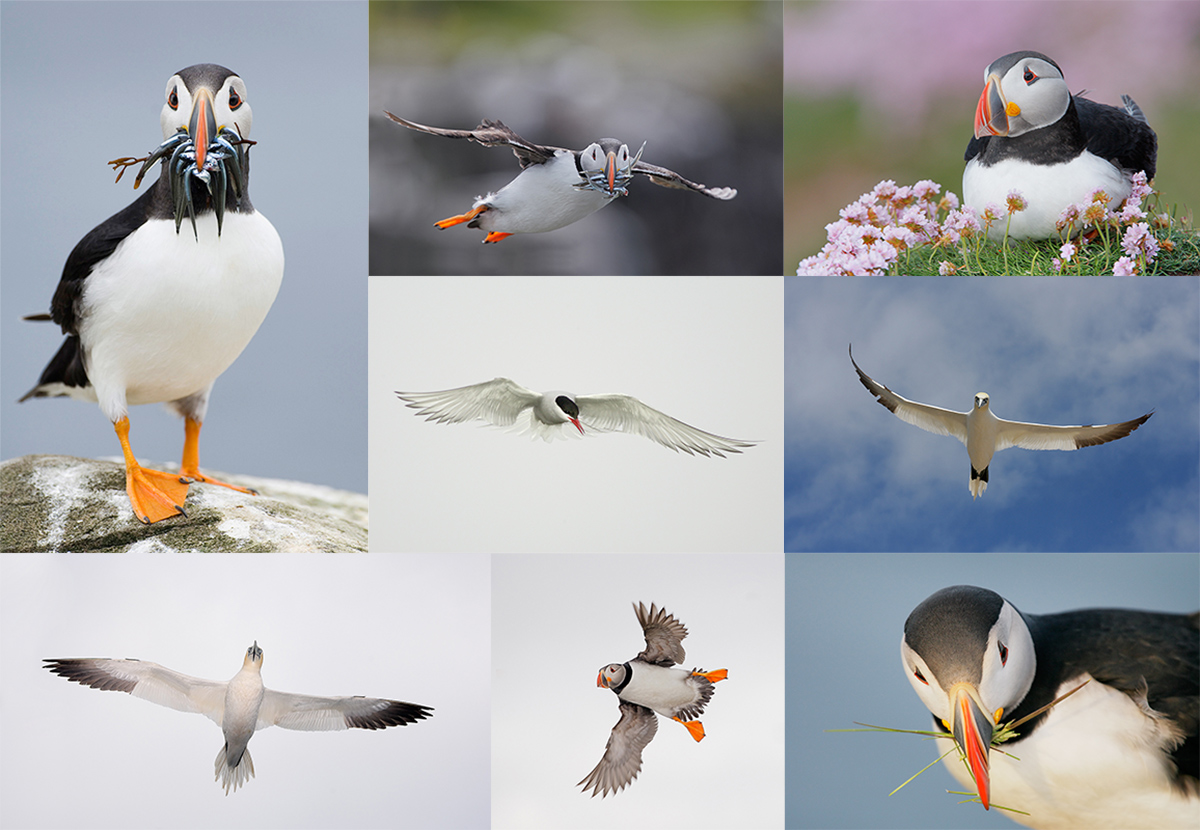
|
|
I hope that you can join us on this great trip. The vertical puffin image was created by David Tipling. The rest–almost all from the UK, are mine :).
|
UK Puffins and Gannets IPT July 2-9, 2014. 5 full days of puffins and two half-days of gannet boat photography: $4,999 USD. Limit 10 + the 2 leaders.
Desperately needed: 1 female and 1 male roommate. Please inquire as to the roommate-needed discount.
Fly to Edinburgh (say “ED-in-BUR-row”), Scotland on a red eye flight on July 1st arriving on the early morning of July 2 or certainly before 10am. UK folks who plan on driving please contact me via e-mail immediately.
There are direct flights to Edinburgh from both Philadelphia and Toronto. If you learn of any others please advise via e-mail so that I may share with all the interested folks. Fly home mid-morning on July 9. UK locals and our many European friends are of course welcome.
With the needed 5 deposits in hand, this trip is a go; you can buy your flights now :).
What’s included:
5 full DAYS on the best UK puffin boat; trips to 2 different islands–all dependent on decent weather, i.e, no major storms. Seabirds including scads of Atlantic Puffin both in flight and perched, Razorbill, Great Cormorant, Shag, and others likely. The trip is timed to maximize the opportunities for photographing the puffins bringing fish back to the nests. All boat fares and landing fees are included. The boat leaves at 9:30am. We have two hours on the first island. We are then picked up and head to the 2nd island for a 2+ hour session. The weather is typically cloudy bright.
One late-afternoon (2 July) and one early morning (probably 8 July) trip on a gannet photography boat where the birds are fed and dive very close to the boat. Both are dependent on good weather but we do have some flexibility. Boat fares and the cost of the fish are covered. Each will consist of a one hour outbound ride, two hours of diving Northern Gannet photography (with 6 boxes of fish) and the one hour return trip.
The tentative, weather-dependent itinerary:
July 2: airport pick-up no later than 10am UK time. Lunch on your dime. Drive to hotel. Afternoon gannet boat trip/time TBD.
July 3, 4, 5, 6, & 7: Full Day Puffin Boat trips as noted above.
July 8: early morning Gannet Boat trip. Afternoon: Small group Image review and Photoshop sessions. Pack for the trip home.
July 9: early morning departure for Edinburgh Airport (EDI).
The itinerary is subject to change to ensure the best possible photographic opportunities.
A super-telephoto lens is not required on this trip. The 300mm f/2.8s are ideal. I will be bringing one along with my 200-400mm with Internal Extender, my 70-200 f/2.8L IS II, and a shorter zoom lenses. Plus three 1.4X and two 2X TCs, a Gitzo 3532 LS Carbon Fiber tripod, and my Mongoose M3.6. I may go tripod-less on the puffin trips at times…. Or not…. All photography on the gannet boat will be hand held. It is likely that the 70-200s will be ideal for the gannets.
7 nights lodging in an older but excellent hotel just a few minutes from the puffin boat dock with about a 70 minute ride to the gannet boat. Double occupancy will be the rule though we might be able to offer a single supplement at an exorbitant price. See the hotel info here.
All breakfasts and dinner (at the hotel) from dinner on July 2 through dinner on July 8. And breakfast on our get-away day unless we need to leave earlier than they serve to make our flights home…
Airport pick-up until 10am on July 2–this should not be a problem as there are lots of red-eye flights from the US to Edinburgh.
All ground transportation. Airport return on the early morning of July 9. We may be getting up very early on July 9th.
Two great leaders; Denise Ippolito and yours truly will provide personalized and small group in-the-field instruction. As usual, the closer you stay to us and the more questions that you ask the more you will learn. We will of course point out the best situations. You will learn to see these great situations for yourself, to get the right exposure every time after making a single test exposure, to work in Manual mode, and to design pleasing images by mastering your camera’s AF system. You will learn the basics of photographing birds in flight and how the relationship between light direction and wind direction impacts the photography of both birds in flight and perched puffins. And tons more.
We will be conducting informal, small group image review and Photoshop sessions after dinner. All are invited to bring their laptops. Image critiques of your five best images will be done after the trip upon request.
Early morning castle photography right near the hotel is an option for the early risers. In the event of inclement weather or stormy seas there is the possibility of bird photography along the coast. Early evening bird photography along the coast is also optional.
Not included: all lunches–for the most part we will need to pack lunches for the puffin trips, or you may opt to skip lunch. Your round trip airfare from home to Scotland. Booze, wine, and any other beverages other than coffee and tea at breakfast.
A non-refundable deposit of $2,000 USD is required to hold your spot so please check on flights and your schedule before committing. The balance will be due on 15 May so you may wish to pay the whole thing at once. Overseas folks may e-mail for wire transfer info. Our $15 wire transfer fee will be added to your balance.
Trip insurance is highly recommended as your deposit (less a $200 cancellation fee) will not be refunded unless the trip fills completely. I, and my family, use Travel Insurance Services.
After letting us know via e-mail that you will be coming, please send your deposit check made out to “Arthur Morris” to us as follows:
Arthur Morris/BIRDS AS ART
PO Box 7245 (US mail) or 4041 Granada Drive (if by courier).
Indian Lake Estates, FL 33855
My friend David Tipling, with multiple BBC honored images and the author of dozens of photo illustrated books, helped with the planning and arrangements for this trip.
If you have any questions, please contact me via e-mail.
Selling Your Used Photo Gear Through BIRDS AS ART
Selling your used (or like-new) photo gear through the BAA Blog or via a BAA Online Bulletin is a great idea. We charge only a 5% commission. One of the more popular used gear for sale sites charges a minimum of 20% plus assorted fees! Yikes. The minimum item price here is $500 (or less for a $25 fee). If you are interested please e-mail with the words Items for Sale Info Request cut and pasted into the Subject line :). Stuff that is priced fairly–I offer free pricing advise, usually sells in no time flat as did Dennis Cassidy’s 500 II recently on the blog. Larry Master’s 400 DO and his 800 f/5.6 sold within a week. From Larry via e-mail: Thanks for helping me sell the lenses so quickly!
A Creative Adventure/BIRDS AS ART friend Kitto Kono sold her Nikon 500 to a Blog subscriber in less than a week. Janet Horton’s 7D sold this week after a $100 price reduction. Denise Ippolito’s 100-400 and her 100 macro sold in one day. Peter Kes sold his 70-200 f/2.8L IS II and his 400 DO through BAA in ten days. In the past two months we have sold a Canon 800, a Canon 500 II, 3 400 DO lenses, a Nikon 500mm, and lots more. If you are interested in using our services, please e-mail.
New Used Photography Gear Page
Eagle-eyed readers may have noticed that there is now a link to a Used Photography Gear page on the yellow tool bar at the top of each blog page. Folks looking to buy (or to sell) can click on that tab or here. I will on occasion continue to list new gear and great buys in blog posts (as below) and in Bulletins and may on rare occasion share all the listings with you on the blog. I will strive to keep the listings current. Great news for Kitty Kono and her Nikon 400mm f/2.8; it sold yesterday! That made her 2 for 2 in selling her older Nikon super-telephotos with BAA.
Two Brand New Listings
Both of these items are priced to sell fast
EOS-1D Mark IV
BAA friend Nancy Bell is offering a used Canon EOS-1D Mark IV camera body for sale for $3200. The body is in excellent condition. It enjoyed annual routine cleaning and service at a Canon Factory Service Center; the last one was done on 5/30/13. The sale includes the original box, battery charger, 3 Canon batteries, the instruction manual, all connection cables, a Canon neck strap, and insured Fed-Ex Ground shipping to US addresses only.
Payment by personal or teller’s check; the item will ship item only after the check clears. Please contact Nancy via e-mail or by phone at 970-484-8791–Colorado, MDT.
Canon 400mm f/4 DO IS Lens
BAA friend Nancy Bell is also offering a used Canon 400mm f/4 DO IS USM lens for sale for only $4499. The lens is in very good to excellent condition with some minor blemishes on the exterior finish and some signs of wear on lens hood interior rim. The glass is perfect and he lens is both light and sharp. The last yearly routine cleaning and service at a Canon Factory Service Center was on 5/30/13.
The sale includes the leather lens hood, the lens trunk, and insured Fed-Ex Ground shipping to US addresses only.
Payment by personal or teller’s check; the item will ship item only after the check clears. Please contact Nancy via e-mail or by phone at 970-484-8791–Colorado, MDT.
Price Reduced
Used Canon 100-400mm f/4.5-5.6L IS USM Lens for Sale/Price Reduced $300!
Multiple IPT veteran Bill Wingfield is offering a Canon 100-400mm f/4.5-5.6L IS USM lens in excellent condition for $1125! The glass is clean and the lens is in perfect working condition. The sale includes the lens hood, the fabric case, and insured shipping by UPS Ground to US addresses only. Personal checks only; your new lens will be shipped after your check clears.
For more than a decade I used the 100-400 to create hundreds of sharp, sale-able image. It is a very versatile lens.
You can reach Bill via e-mail or by phone at 843-729-6670.
Best Super-telephoto Lens Value
Used Canon 800mm f/5.6L IS Lens for Sale
Multiple IPT veteran, the too-kind Jim Bicket, is offering a Canon EF 800mm f/5.6L IS USM lens in excellent condition for $8750. The lens is like new except for some wear on the bottom of the lens hood near the forward edge when the hood is reversed. The sales includes the LensCoat that has protected the lens since day 1, the leather hood, the original hard case and key, and insured shipping via UPS Ground to US addresses only. Personal checks only; your new lens will be shipped only after your check clears.
This great lens, my favorite for 3 years, sells new at B&H for $13,999.00. A month ago B&H was offering one in mint condition for a ridiculous $10,249.90; it sold overnight. Go figure. Jim’s lens will save you a ton of dough and you will have a great lens with lots of reach. I can’t believe that this one has not sold yet as Jim is practically giving it away!
Interested folks can contact Jim via e-mail or try him at 501-915-9336.
Support the BAA Blog. Support the BAA Bulletins: Shop B&H here!
We want and need to keep providing you with the latest free information, photography and Photoshop lessons, and all manner of related information. Show your appreciation by making your purchases immediately after clicking on any of our B&H or Amazon Affiliate links in this blog post. Remember, B&H ain’t just photography!
….. …..
Typos
In all blog posts and Bulletins, feel free to e-mail or to leave a comment regarding any typos, wrong words, misspellings, omissions, or grammatical errors. Just be right. 🙂
May 17th, 2014 The Streak Continues: 168
This post marks 168 consecutive days with a new educational blog post. With so many folks getting in the habit of using our B&H links and our Amazon logo-links why quit now? April was a record month but May has not been so good. So far…. To show your appreciation for my efforts here, I do ask that you use our the B&H and Amazon affiliate links on the right side of the blog for all of your purchases. Please check the availability of all photographic accessories in the BIRDS AS ART Online Store, especially Gitzo tripods, Wimberley tripod heads, and the like. We sell only what I used, tested, and can depend on. We will not sell you junk. We know the tools that you need to make creating great images easy and fun. And we are always glad to answer your gear questions via e-mail.
You can find the following items in the store: Gitzo tripods, Mongoose M3.6 and Wimberley heads, plates, low feet, and accessories, flash brackets, , Delkin e-film Pro Compact Flash Cards, LensCoat products, and our unique line-up of educational materials including ABP I & II, Digital Basics, Site and Set-up e-Guides, Canon and Nikon Camera Users and AF e-Guides, and MP-4 Photoshop video tutorials among others.
I would of course appreciate your using our B&H affiliate links for all of your major gear, video, and electronic purchases. For the photographic stuff mentioned in the paragraph above we, meaning BAA, would of course greatly appreciate your business. Here is a huge thank you to the many who have been using our links on a regular basis and visiting the BAA Online store as well.
This post took 1 1/2 hours to put together. Enjoy!
|
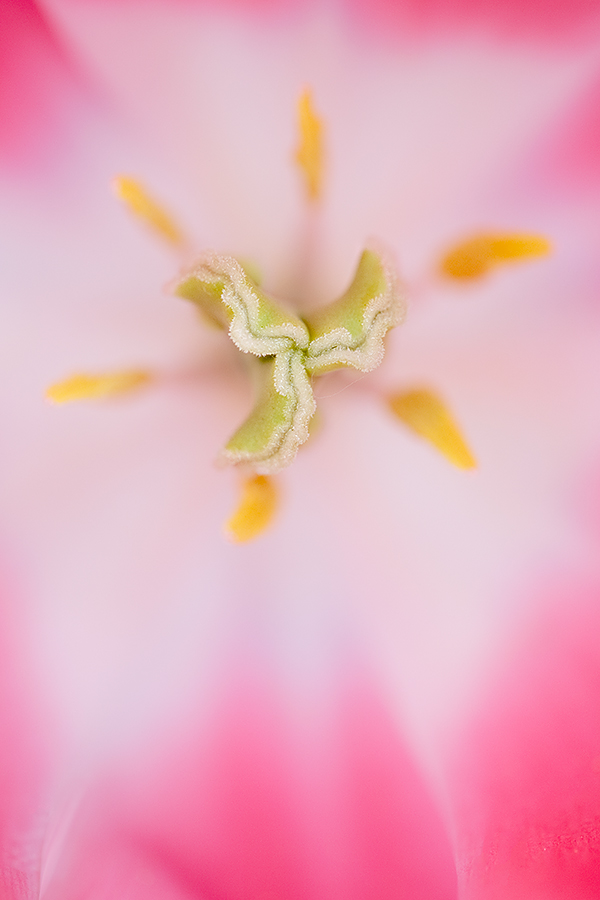
|
|
This tulip center image was created at the Willem Alexander Pavilion at Keukenhof Gardens on last April’s Holland Tulip IPT with the hand held Canon EF 100mm f/2.8L IS macro lens and the Canon EOS 5D Mark III Digital camera body. ISO 800. Evaluative metering +1 1/3 stops: 1/250 sec. at f/2.8 in Av mode.
Two sensors up from the Central Sensor/AI Servo-Surround/Rear Focus AF squarely on the tip of the anther as originally framed was active at the moment of exposure. See more at the BreezeBrowser screen capture below. Click here to see the latest version of the Rear Focus Tutorial. Click on the image to see a larger version.
|
Active AF When Hand Holding the 100 Macro
Hand holding any lens gives you a lot more freedom than working on a tripod. It is faster and easier to frame the image and without being encumbered by a tripod allows you to explore any and all perspectives. When you are on a tripod these choices are greatly restricted.
My great preference when hand holding the new 100mm macro is to work with active AF provided that there is enough contrast to acquire focus. If in doubt, it is a simple matter to select the sensor that will give you the desired composition and try to acquire focus. If the system consistently acquires and holds focus then you are fine to hand hold with active AF. This ensures that the image will be sharp where you want it to be sharp assuming a fast enough shutter speed. With this image I had more than enough shutter speed (1/250 sec.) to create a sharp image. With the 100 macro’s excellent Image Stabilization feature going a lot slower is possible. With a bit of practice most folks are able to create consistently sharp images with this lens while hand holding at shutter speeds down to 1/30 sec.
|
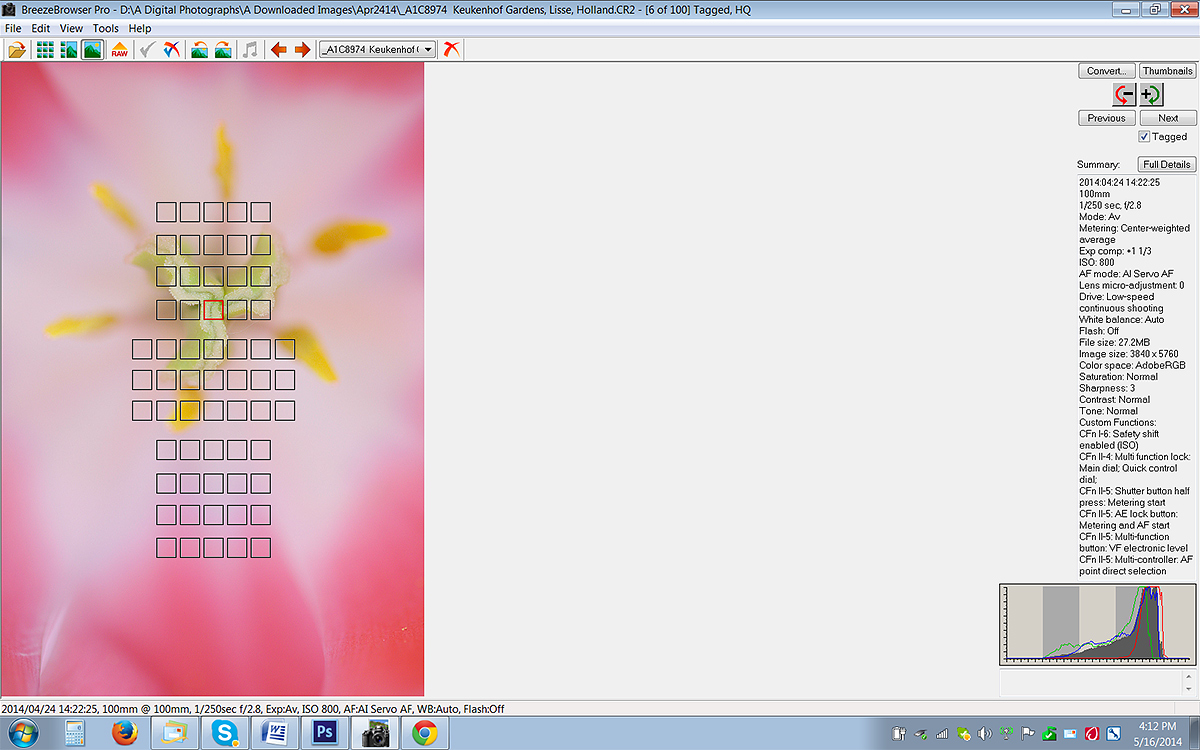
|
The Breezebrowser Main View Screen Capture
Most folks will need to enlarge the image by clicking on it so that they can see that the active sensor, two sensors up from the central sensor, is illuminated in red.
|
The BreezeBrowser Main View Screen Capture
Above is the BreezeBrowser Main View screen capture for today’s image. Note that the illuminated red square shows the AF point that was selected and active at the moment of exposure; if you wear reading glasses you will likely have to enlarge the image to see that.
In BreezeBrowser you need to check “Show Focus Points” under View to activate this feature. To see the focus points in DPP check “AF Point” under View or hit Alt L. Hit Alt M to see Highlight Alert. To learn how and why I use DPP (Canon Digital Photo Professional) to convert all of my RAW files, see the info on our DPP RAW Conversion Guide here.
Note as usual the perfect histogram the WHITEs well into the rightmost histogram box. Regular readers know that I use and depend on BreezeBrowser every day of the year. It allows me to sort my keepers and delete the rejects faster than any other Windows browsing program. We use it on the main computer in the home office to catalog our images file-drawer style. And the companion program, Downloader Pro allows me to download my images quickly and conveniently. It automatically adds my IPTC data and the shooting location. I have it set up to create a folder named by the Month/date/year. The Breezebrowser/Downloader Pro combo saves me many hours each week. To learn more or to purchase this great PC only program, click here. As far as the BreezeBrowser/Downloader Pro Combo goes, if you are using a Windows platform and are not using these two great programs you are at best, wasting your valuable time. My understanding is that Photo Mechanic is best for Mac-users who do not opt to run Parallels or VM Ware fusion on their Macs so that they can enjoy the many advantages of BreezeBrowser. See BreezeBrowswer on a Mac for details.
Hand Holding with Manual Focus
On every flower trip that I have done with Denise Ippolito, she encouraged everyone to hand hold while focusing manually. She is so skilled at staying still and controlling her breathing that she can consistently make sharp images using this technique. I cannot stay still enough to do that so when I want to or need to hand hold (when there is not enough contrast to acquire AF) I try the following: Get the approximate focus manually. Take a good stance. Breathe slowly. Allow my body to move naturally and slowly so that the focus goes in and out. Then, I press the shutter button when the image is focused where I want it to be. I did not think that I would be capable of using this technique successfully, but I was wrong. I first tried it on the Swan Island Dahlia Farm IPT and by the end of the trip I was able to make some sharp and pleasing images like the one above. Note that the image stabilization surely helped me to produce a sharp image at the 1/25 sec. shutter speed.
Holland 2015
Denise and I will be returning to Holland in April 2015 to conduct our third straight A Creative Adventure/BIRDS AS ART/Tulips & A Touch of Holland IPT. Details will be announced here soon. If you would like early notice please shoot me an e-mail.
Selling Your Used Photo Gear Through BIRDS AS ART
Selling your used (or like-new) photo gear through the BAA Blog or via a BAA Online Bulletin is a great idea. We charge only a 5% commission. One of the more popular used gear for sale sites charges a minimum of 20% plus assorted fees! Yikes. The minimum item price here is $500 (or less for a $25 fee). If you are interested please e-mail with the words Items for Sale Info Request cut and pasted into the Subject line :). Stuff that is priced fairly–I offer free pricing advise, usually sells in no time flat as did Dennis Cassidy’s 500 II recently on the blog. Larry Master’s 400 DO and his 800 f/5.6 sold within a week. From Larry via e-mail: Thanks for helping me sell the lenses so quickly!
A Creative Adventure/BIRDS AS ART friend Kitto Kono sold her Nikon 500 to a Blog subscriber in less than a week. Janet Horton’s 7D sold this week after a $100 price reduction. Denise Ippolito’s 100-400 and her 100 macro sold in one day. Peter Kes sold his 70-200 f/2.8L IS II and his 400 DO through BAA in ten days. In the past two months we have sold a Canon 800, a Canon 500 II, 3 400 DO lenses, a Nikon 500mm, and lots more. If you are interested in using our services, please e-mail.
New Used Photography Gear Page
Eagle-eyed readers may have noticed that there is now a link to a Used Photography Gear page on the yellow tool bar at the top of each blog page. Folks looking to buy (or to sell) can click on that tab or here. I will on occasion continue to list new gear and great buys in blog posts (as below) and in Bulletins and may on rare occasion share all the listings with you on the blog. I will strive to keep the listings current. Great news for Kitty Kono and her Nikon 400mm f/2.8; it sold yesterday! That made her 2 for 2 in selling her older Nikon super-telephotos with BAA.
Two Brand New Listings
Both of these items are priced to sell fast
EOS-1D Mark IV
BAA friend Nancy Bell is offering a used Canon EOS-1D Mark IV camera body for sale for $3200. The body is in excellent condition. It enjoyed annual routine cleaning and service at a Canon Factory Service Center; the last one was done on 5/30/13. The sale includes the original box, battery charger, 3 Canon batteries, the instruction manual, all connection cables, a Canon neck strap, and insured Fed-Ex Ground shipping to US addresses only.
Payment by personal or teller’s check; the item will ship item only after the check clears. Please contact Nancy via e-mail or by phone at 970-484-8791–Colorado, MDT.
Canon 400mm f/4 DO IS Lens
BAA friend Nancy Bell is also offering a used Canon 400mm f/4 DO IS USM lens for sale for only $4499. The lens is in very good to excellent condition with some minor blemishes on the exterior finish and some signs of wear on lens hood interior rim. The glass is perfect and the lens is both light and sharp. The last yearly routine cleaning and service at a Canon Factory Service Center was on 5/30/13.
The sale includes the leather lens hood, the lens trunk, and insured Fed-Ex Ground shipping to US addresses only.
Payment by personal or teller’s check; the item will ship item only after the check clears. Please contact Nancy via e-mail or by phone at 970-484-8791–Colorado, MDT.
Price Reduced
Used Canon 100-400mm f/4.5-5.6L IS USM Lens for Sale/Price Reduced $300!
Multiple IPT veteran Bill Wingfield is offering a Canon 100-400mm f/4.5-5.6L IS USM lens in excellent condition for $1125! The glass is clean and the lens is in perfect working condition. The sale includes the lens hood, the fabric case, and insured shipping by UPS Ground to US addresses only. Personal checks only; your new lens will be shipped after your check clears.
For more than a decade I used the 100-400 to create hundreds of sharp, sale-able image. It is a very versatile lens.
You can reach Bill via e-mail or by phone at 843-729-6670.
Best Super-telephoto Lens Value
Used Canon 800mm f/5.6L IS Lens for Sale
Multiple IPT veteran, the too-kind Jim Bicket, is offering a Canon EF 800mm f/5.6L IS USM lens in excellent condition for $8750. The lens is like new except for some wear on the bottom of the lens hood near the forward edge when the hood is reversed. The sales includes the LensCoat that has protected the lens since day 1, the leather hood, the original hard case and key, and insured shipping via UPS Ground to US addresses only. Personal checks only; your new lens will be shipped only after your check clears.
This great lens, my favorite for 3 years, sells new at B&H for $13,999.00. A month ago B&H was offering one in mint condition for a ridiculous $10,249.90; it sold overnight. Go figure. Jim’s lens will save you a ton of dough and you will have a great lens with lots of reach. I can’t believe that this one has not sold yet as Jim is practically giving it away!
Interested folks can contact Jim via e-mail or try him at 501-915-9336.
Support the BAA Blog. Support the BAA Bulletins: Shop B&H here!
We want and need to keep providing you with the latest free information, photography and Photoshop lessons, and all manner of related information. Show your appreciation by making your purchases immediately after clicking on any of our B&H or Amazon Affiliate links in this blog post. Remember, B&H ain’t just photography!
….. …..
Typos
In all blog posts and Bulletins, feel free to e-mail or to leave a comment regarding any typos, wrong words, misspellings, omissions, or grammatical errors. Just be right. 🙂
May 16th, 2014 The Streak Continues: 167
This post marks 167 consecutive days with a new educational blog post. With so many folks getting in the habit of using our B&H links and our Amazon logo-links why quit now? April was a record month! To show your appreciation for my efforts here, we do ask that you use our the B&H and Amazon affiliate links on the right side of the blog for all of your purchases. Please check the availability of all photographic accessories in the BIRDS AS ART Online Store, especially Gitzo tripods, Wimberley tripod heads, and the like. We sell only what I used, tested, and can depend on. We will not sell you junk. We know the tools that you need to make creating great images easy and fun. And we are always glad to answer your gear questions via e-mail.
You can find the following items in the store: Gitzo tripods, Mongoose M3.6 and Wimberley heads, plates, low feet, and accessories, flash brackets, , Delkin e-film Pro Compact Flash Cards, LensCoat products, and our unique line-up of educational materials including ABP I & II, Digital Basics, Site and Set-up e-Guides, Canon and Nikon Camera Users and AF e-Guides, and MP-4 Photoshop video tutorials among others.
I would of course appreciate your using our B&H affiliate links for all of your major gear, video, and electronic purchases. For the photographic stuff mentioned in the paragraph above we, meaning BAA, would of course greatly appreciate your business. Here is a huge thank you to the many who have been using our links on a regular basis and visiting the BAA Online store as well.
This post took 2 1/2 hours to put together. Enjoy!
|
|
|
This image was created at Matanzas Inlet the early sunny morning after the St. Augustine IPT ended with the splayed Gitzo 3532 LS carbon fiber tripod, the Mongoose M3.6 head, the Canon EF 600mm f/4L IS II USM lens, the Canon Extender EF 2X III, and the Canon EOS-1D X. ISO 400. Evaluative metering +1 2/3 stops as framed: 1/500 sec. at f/10 in Av mode. AWB.
Central Sensor/AI Servo/Rear Focus AF on the bird’s eye and re-compose. Normally, When I add the 2XIII TC to an f/4 lens with the 1DX or the 5D III I hit the MFn button once to toggle to AF Expand and enjoy 4 extra AF sensors with Expand. But with the bird’s eye right behind the sand ridge I left only the central sensor active to ensure being able to attain AF in a possibly difficult situation. Learn everything there is to know about the 1D X and 5D III AF systems including how to manage the various AF Area Selection Modes, when to use which one, and several ways to move the AF sensor around in the 1D X AF Guide and the 5D Mark III User’s Guide. Click here to see the latest version of the Rear Focus Tutorial. Click on the image to see a larger version. .
Image #1: Least Tern on nest in heaven
|
Creating the “In Heaven” Look
It is fairly easy to create the “In Heaven” look if you are able to lie in the sand on a beach where there are birds. Simply look for a situation where there is a ridge or a berm of sand between you and the subject. Above, I was photographing a closer nest when I saw another Least Tern on a nest just behind a ridge of sand. I was able to attain AF as noted in the image caption above; I had been worried that the intervening ridge of sand might hamper my efforts. By luck, I was at the perfect height.
|
|
|
This image was created on a cloudy morning on the Fort DeSoto IPT with the hand held Canon EF 300mm f/2.8L IS II USM lens, the Canon Extender EF 2X III, and the Canon EOS-1D X. ISO 800. Evaluative metering +1 1/3 stops as framed: 1/800 sec. at f/9 in Manual Av mode. AWB.
One sensor up from the Central Sensor (not sure why on that…)/AI Servo-Surround/Rear Focus AF as originally framed (on the spot where the hood met the near wing) was active at the moment of exposure. Click here to see the latest version of the Rear Focus Tutorial. Click on the image to see a larger version.
Image #2: American Oystercatcher–adult ruffling in heaven
|
More Flexibility When Hand Holding
With the oystercatcher image, I would have pretty much been dead in the water had I been on a tripod; I would have been much too low and most of the bird would have been hidden behind the berm. Hand holding the 300II/2X III TC combo allowed me to easily get well higher by propping myself up on my elbows. Then the bird ruffled and made my day.
The Stronger Image?
Please take a moment to leave a comment and let us know which of the 2 images here is the stronger image. And why.
Dealing with Sand
Whenever folks see or hear of my getting down and dirty on a beach they usually say, often in a whiny voice, “But I’d get sand on my camera and lens if I did that!” Well guess what. I always get sand and mud and dirt on my camera and lens when I get low on a beach or in a field. I keep a paint brush in my vest and brush off the sand when I have a chance. If I get the camera body really dirty I will take an old t-shirt with some Lens Clens and clean it up. Most days I have both in one of the large pockets of my Xtrahand vest so that I can do a fast and dirty job right there on the beach. Denise’s private client Brent Bridges had a can of compressed air with him on the beach and kindly shared it with others. Though I almost always have the Lens Clens with me in the field along with my old tattered t-shirt, I rarely remember to throw in a small plastic bag with a few Q-tips in it. They are great for cleaning viewfinders….
The only excuse for not getting down flat while photographing on a beach is that you are physically unable to get back up. I am not there yet 🙂
|
|
|
Lens Clens
|
Lens Clens
I have been using Lens Clens to clean my gear for about 15 years. Their #1 version is designed for coated optics. That is all that I use and is the only Lens Clens product that we carry. I keep a bottle on my desk to clean my laptop screen, a bottle in my X-tra Hand vest for use in the field, a bottle in the Think Tank Rolling Bag that holds an amazing amount of my gear most of the time (including the time that I spend on planes), and,when I am not flying, a bottle in my laptop bag and my luggage for emergency use, i.e., when I can’t find one of the other bottles (which is often).
In the field I put a few drops of Lens Clens on the absorbent cotton that I keep in my vest or on an old, clean, t-shirt, clean the front element of the lens that needs cleaning, and then use a second dry piece of cotton or a dry section of the t-shirt to polish the surface. If I am cleaning the lenses inside at home, I always use an old cotton undershirt. If I am in a motel I use a dirty cotton undershirt. I moisten one part of the shirt, clean the front element, and then use a dry portion of the shirt to polish it.
Now here’s the best part: on rare occasion, I actually do clean the outer surfaces of my camera bodies and lenses, especially if I have abused them with dirt or mud (as I do often…) Same deal except that I put more of the Lens Clens fluid on the the undershirt than I do when cleaning the front elements of the lenses. I also keep a few Q-tips in my vest. I moisten one end of a Q-tip to clean the viewfinder. Then I polish it with the dry end. Lastly I break the cotton off one end, wrap some cotton or a corner of the undershirt around the shaft, and finish polishing the viewfinder at the same time as I get into the corners. For the laptop screen it’s moisten-the-t-shirt time again.
Not only is the stuff designed to be 100% safe with all the glass and all the surfaces of your gear, it will get your stuff cleaner than you have ever seen it since it came out of the box. And it dries in seconds. (Do not of course be tempted to use it on the sensor of your camera; that’s what Lens Pens and Sensor Scopes are for.)
I began to investigate the possibility of adding Lens Clens to our mail order line-up as it met the two major criteria: I use it all the time and it works. The final straw was a comment by IPT veteran Myer Bornstein at Nickerson Beach after I loaned him a few drops (generous fellow that I am ; actually, a few drops is all it takes). He said something to the effect that the Lens Clens worked about a hundred times better than the stuff he had been using.
You can get your own small bottle of Lens Clens by clicking here
|
|
|
This is the original image file after being converted in DPP. Be sure to click on the image to see the larger version.
|
The Image Optimization
Your turn. After clicking on the optimized and the original oystercatcher images above so that you can closely inspect the photos, please leave a comment and let me know what changes I made. Please be as specific as possible.
I am sort of hoping that folks miss the most dramatic change….
The DPP RAW Conversion Guide
To learn why I use Canon’s Digital Photo Professional (DPP) to convert every image that I work on, click here.
Digital Basics
Everything that I did to optimize the oystercatcher image is detailed in my Digital Basics File–written in my easy-to-follow, easy-to-understand style. Are you tired of making your images look worse in Photoshop? Digital Basics File is an instructional PDF that is sent via e-mail. It includes my complete digital workflow, dozens of great Photoshop tips, the use of Contrast Masks, several different ways of expanding and filling in canvas, all of my time-saving Keyboard Shortcuts, Quick Masking, Layer Masking, and NIK Color Efex Pro basics, my killer image clean-up techniques, Digital Eye Doctor, creating time-saving actions, and lots more.
Fort DeSoto Site Guide
The Fort DeSoto Site Guide describes several locations where you can look for today’s featured species. I had checked this spot in the morning for naught, but in the afternoon the second time was the charm. You can get yourself a copy of the Fort DeSoto Site Guide here. Learn the best spots, where to be when in what season in what weather. Learn the best wind directions for the various locations. BAA Site Guides are the next best thing to being on an IPT. You can see all of them here. I am hoping to get a short update of the Fort DeSoto Site Guide done within the next two weeks.
Selling Your Used Photo Gear Through BIRDS AS ART
Selling your used (or like-new) photo gear through the BAA Blog or via a BAA Online Bulletin is a great idea. We charge only a 5% commission. One of the more popular used gear for sale sites charges a minimum of 20% plus assorted fees! Yikes. The minimum item price here is $500 (or less for a $25 fee). If you are interested please e-mail with the words Items for Sale Info Request cut and pasted into the Subject line :). Stuff that is priced fairly–I offer free pricing advise, usually sells in no time flat as did Dennis Cassidy’s 500 II recently on the blog. Larry Master’s 400 DO and his 800 f/5.6 sold within a week. From Larry via e-mail: Thanks for helping me sell the lenses so quickly!
A Creative Adventure/BIRDS AS ART friend Kitto Kono sold her Nikon 500 to a Blog subscriber in less than a week. Janet Horton’s 7D sold this week after a $100 price reduction. Denise Ippolito’s 100-400 and her 100 macro sold in one day. Peter Kes sold his 70-200 f/2.8L IS II and his 400 DO through BAA in ten days. In the past two months we have sold a Canon 800, a Canon 500 II, 3 400 DO lenses, a Nikon 500mm, and lots more. If you are interested in using our services, please e-mail.
New Used Photography Gear Page
Eagle-eyed readers may have noticed that there is now a link to a Used Photography Gear page on the yellow tool bar at the top of each blog page. Folks looking to buy (or to sell) can click on that tab or here. I will on occasion continue to list new gear and great buys in blog posts (as below) and in Bulletins and may on rare occasion share all the listings with you on the blog. I will strive to keep the listings current. Great news for Kitty Kono and her Nikon 400mm f/2.8; the sale should be finalized tomorrow. That will make her 2 for 2 in selling her older Nikon super-telephotos.
Two Brand New Listings
Both of these items are priced to sell fast
EOS-1D Mark IV
BAA friend Nancy Bell is offering a used Canon EOS-1D Mark IV camera body for sale for $3200. The body is in excellent condition. It enjoyed annual routine cleaning and service at a Canon Factory Service Center; the last one was done on 5/30/13. The sale includes the original box, battery charger, 3 Canon batteries, the instruction manual, all connection cables, a Canon neck strap, and insured Fed-Ex Ground shipping to US addresses only.
Payment by personal or teller’s check; the item will ship item only after the check clears. Please contact Nancy via e-mail or by phone at 970-484-8791–Colorado, MDT.
Canon 400mm f/4 DO IS Lens
BAA friend Nancy Bell is also offering a used Canon 400mm f/4 DO IS USM lens for sale for only $4499. The lens is in very good to excellent condition with some minor blemishes on the exterior finish and some signs of wear on lens hood interior rim. The glass is perfect and he lens is both light and sharp. The last yearly routine cleaning and service at a Canon Factory Service Center was on 5/30/13.
The sale includes the leather lens hood, the lens trunk, and insured Fed-Ex Ground shipping to US addresses only.
Payment by personal or teller’s check; the item will ship item only after the check clears. Please contact Nancy via e-mail or by phone at 970-484-8791–Colorado, MDT.
Price Reduced
Used Canon 100-400mm f/4.5-5.6L IS USM Lens for Sale/Price Reduced $200!
Multiple IPT veteran Bill Wingfield is offering a Canon 100-400mm f/4.5-5.6L IS USM lens in excellent condition for $1225! The glass is clean and the lens is in perfect working condition. The sale includes the lens hood, the fabric case, and insured shipping by UPS Ground to US addresses only. Personal checks only; your new lens will be shipped after your check clears.
For more than a decade I used the 100-400 to create hundreds of sharp, sale-able image. It is a very versatile lens.
You can reach Bill via e-mail or by phone at 843-729-6670.
Best Super-telephoto Lens Value
Used Canon 800mm f/5.6L IS Lens for Sale
Multiple IPT veteran, the too-kind Jim Bicket, is offering a Canon EF 800mm f/5.6L IS USM lens in excellent condition for $8750. The lens is like new except for some wear on the bottom of the lens hood near the forward edge when the hood is reversed. The sales includes the LensCoat that has protected the lens since day 1, the leather hood, the original hard case and key, and insured shipping via UPS Ground to US addresses only. Personal checks only; your new lens will be shipped only after your check clears.
This great lens, my favorite for 3 years, sells new at B&H for $13,999.00. A month ago B&H was offering one in mint condition for a ridiculous $10,249.90; it sold overnight. Go figure. Jim’s lens will save you a ton of dough and you will have a great lens with lots of reach. I can’t believe that this one has not sold yet as Jim is practically giving it away!
Interested folks can contact Jim via e-mail or try him at 501-915-9336.
Support the BAA Blog. Support the BAA Bulletins: Shop B&H here!
We want and need to keep providing you with the latest free information, photography and Photoshop lessons, and all manner of related information. Show your appreciation by making your purchases immediately after clicking on any of our B&H or Amazon Affiliate links in this blog post. Remember, B&H ain’t just photography!
….. …..
Typos
In all blog posts and Bulletins, feel free to e-mail or to leave a comment regarding any typos, wrong words, misspellings, omissions, or grammatical errors. Just be right. 🙂
May 15th, 2014 The Streak Continues: 166
This post marks 166 consecutive days with a new educational blog post. With so many folks getting in the habit of using our B&H links and our Amazon logo-links why quit now? April was a record month! To show your appreciation for my efforts here, we do ask that you use our the B&H and Amazon affiliate links on the right side of the blog for all of your purchases. Please check the availability of all photographic accessories in the BIRDS AS ART Online Store, especially Gitzo tripods, Wimberley tripod heads, and the like. We sell only what I used, tested, and can depend on. We will not sell you junk. We know the tools that you need to make creating great images easy and fun. And we are always glad to answer your gear questions via e-mail.
You can find the following items in the store: Gitzo tripods, Mongoose M3.6 and Wimberley heads, plates, low feet, and accessories, flash brackets, , Delkin e-film Pro Compact Flash Cards, LensCoat products, and our unique line-up of educational materials including ABP I & II, Digital Basics, Site and Set-up e-Guides, Canon and Nikon Camera Users and AF e-Guides, and MP-4 Photoshop video tutorials among others.
I would of course appreciate your using our B&H affiliate links for all of your major gear, video, and electronic purchases. For the photographic stuff mentioned in the paragraph above we, meaning BAA, would of course greatly appreciate your business. Here is a huge thank you to the many who have been using our links on a regular basis and visiting the BAA Online store as well.
This post took 1 1/2 hours to put together. Enjoy!
|
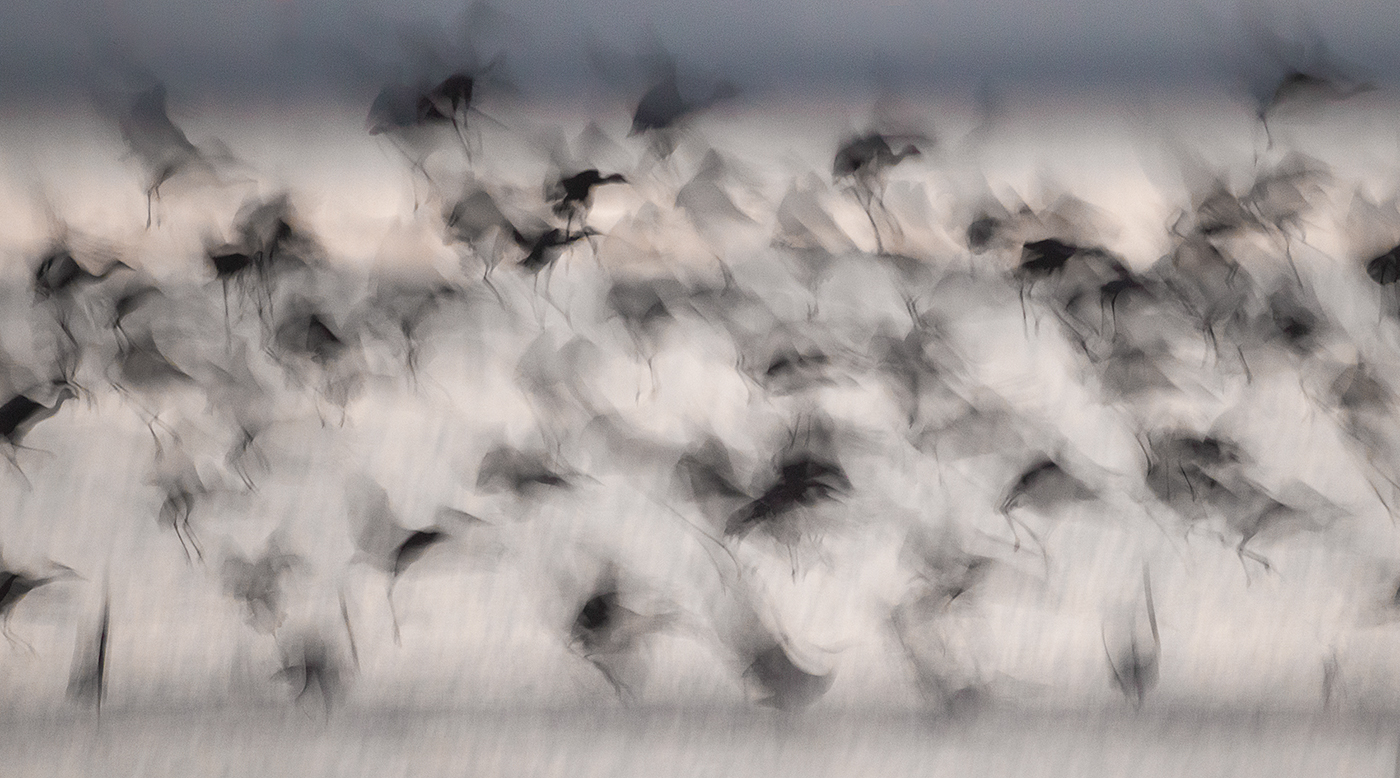
|
First Place: Hooded Cranes/29 points
|
Hooded Cranes
Congratulations to Seungho Cho.
|
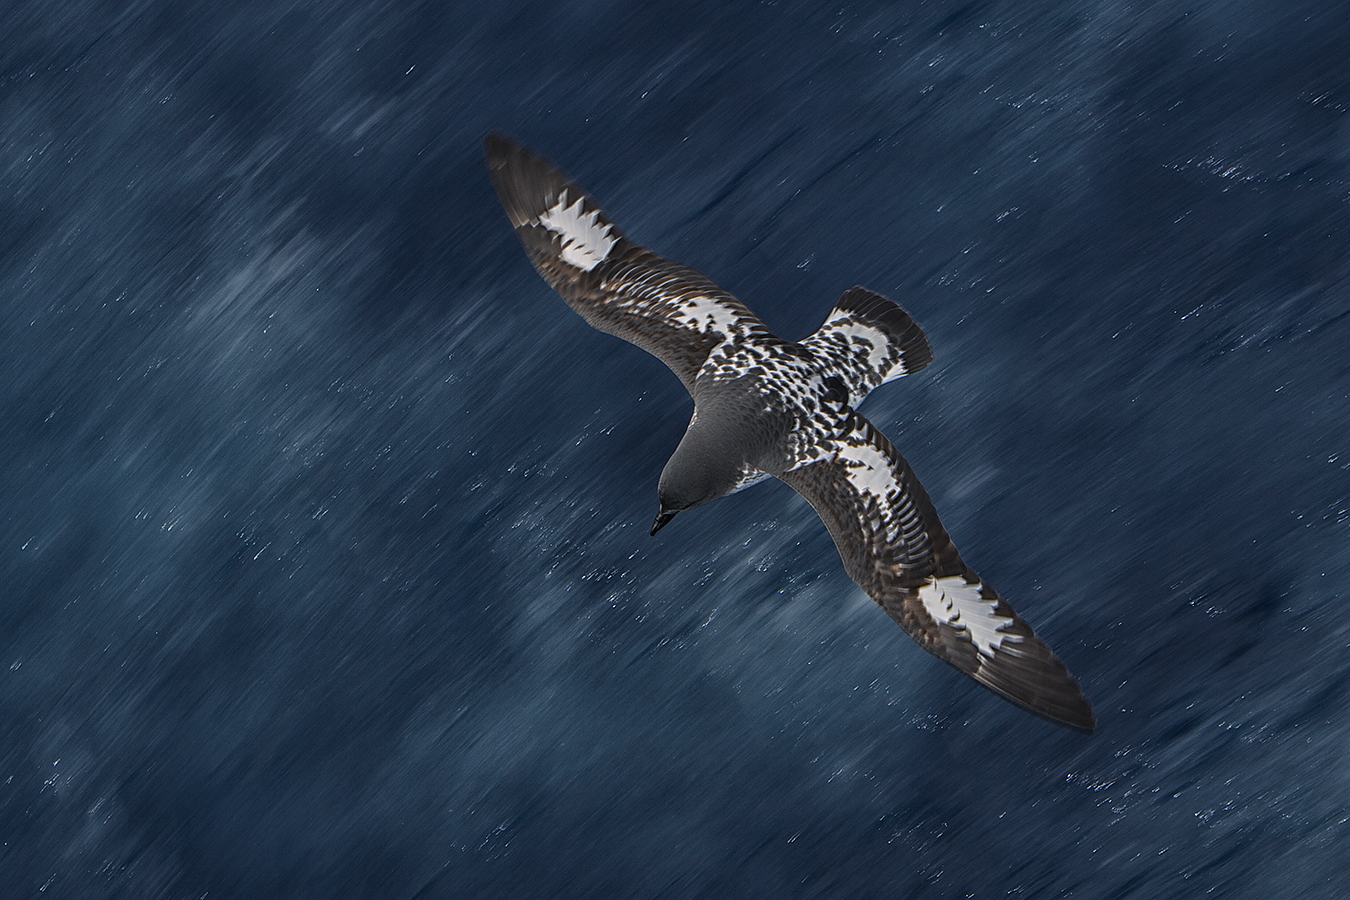
|
Second Place: Cape Petrel/28 points
|
Cape Petrel
Congratulations to Paul McKenzie.
|
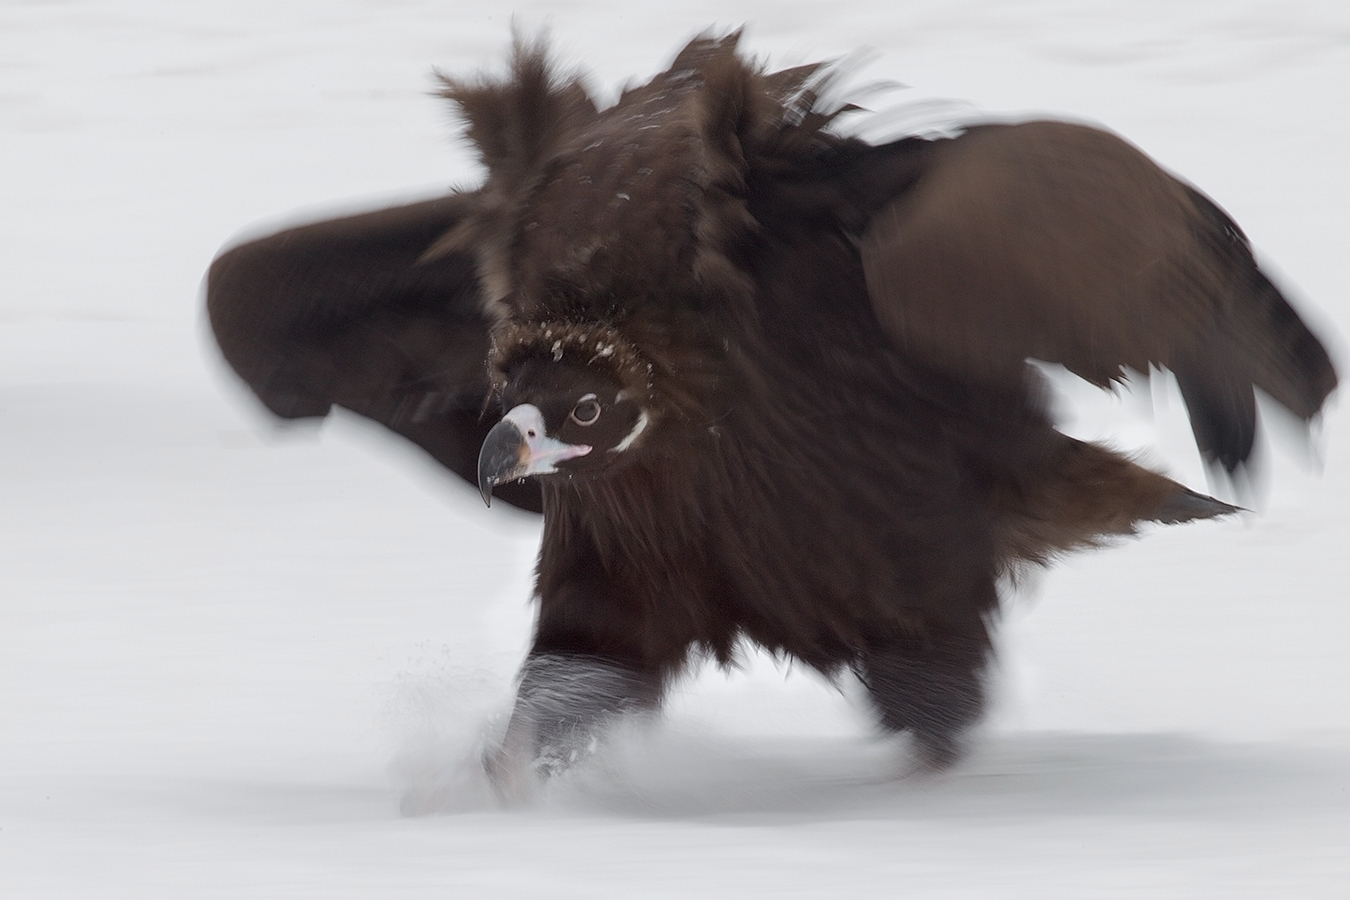
|
Third Place: Cinereous Vulture/25 points
|
Cinereous Vulture
Congratulations to Seungho Cho.
Pleasing Blurs Category Prizes
Thanks a stack to our great sponsors. Please note that prizes will not be sent until all of the category winners and the Grand Prize winner have been announced.
|
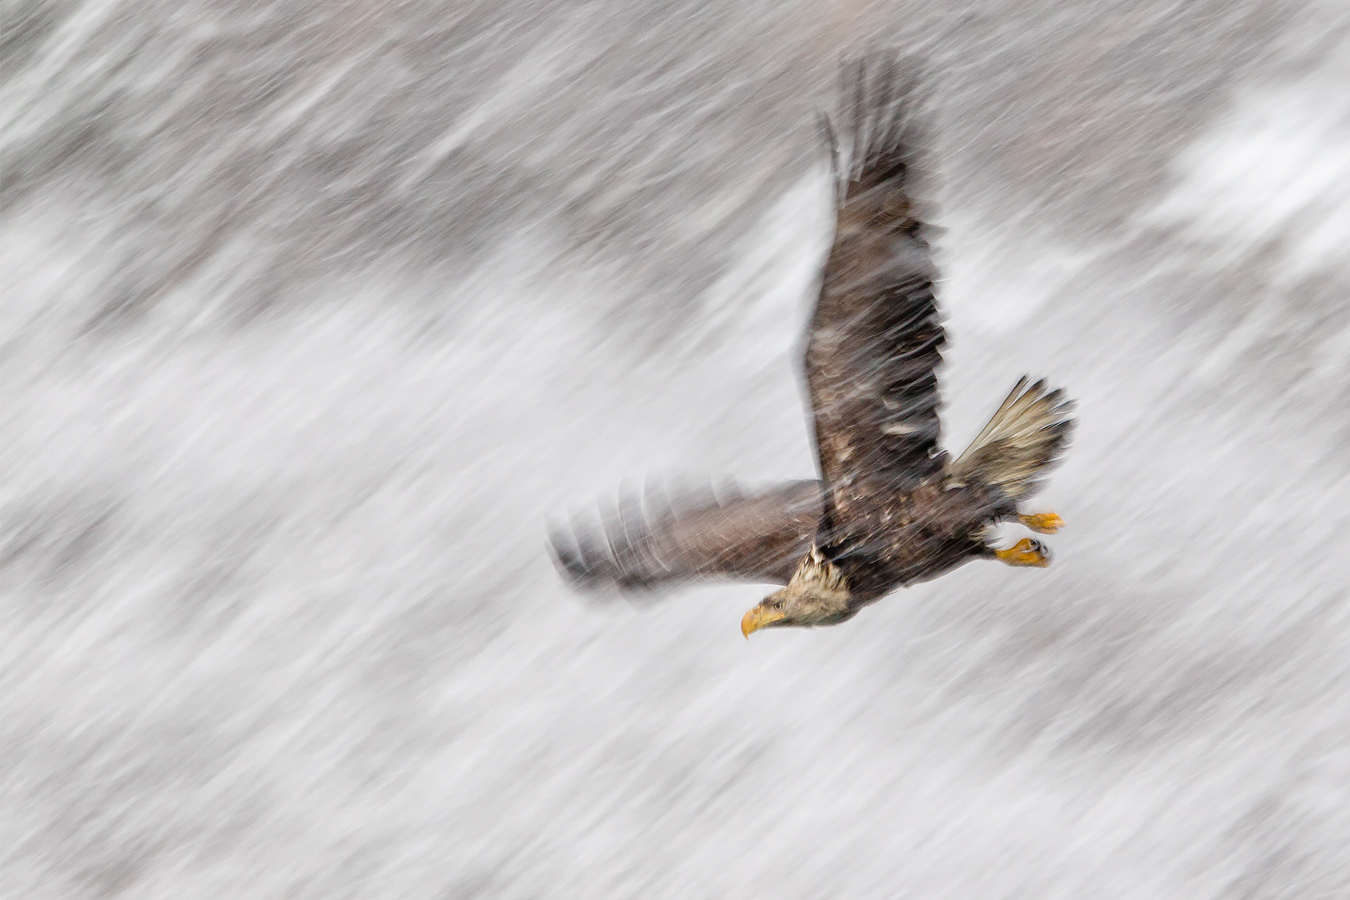
|
First Runner Up: Bald Eagle in Snow/24 points
|
Bald Eagle in Snow
Congratulations to Clemens Van der Werf.
|
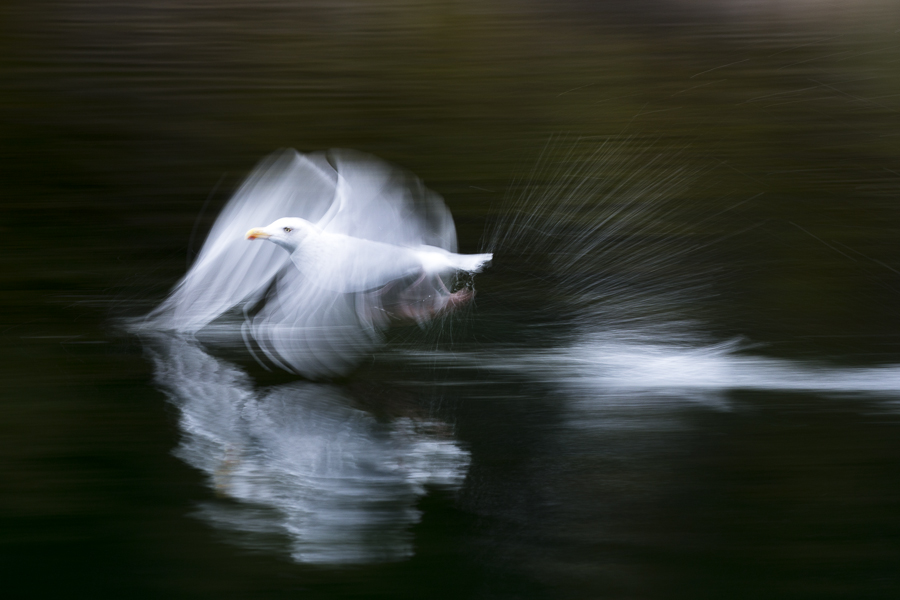
|
Second Runner-up: Gull in Norway/22 points
|
Gull in Norway
Congratulations to Felipe Foncueva.
|
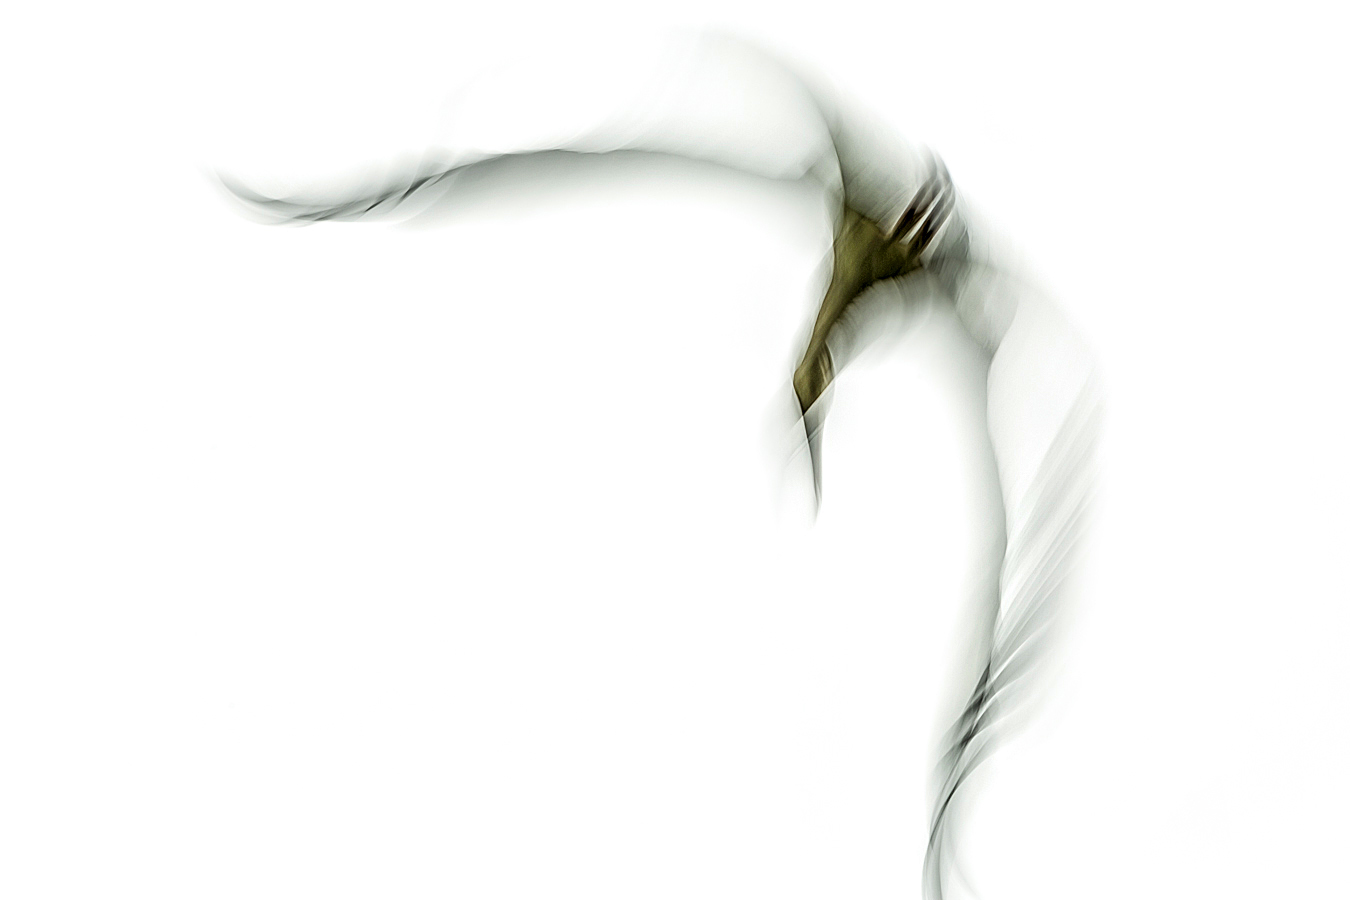
|
Third Runner-up: White Stork/19 points
|
White Stork
Congratulations to Reto Puppetti.
|
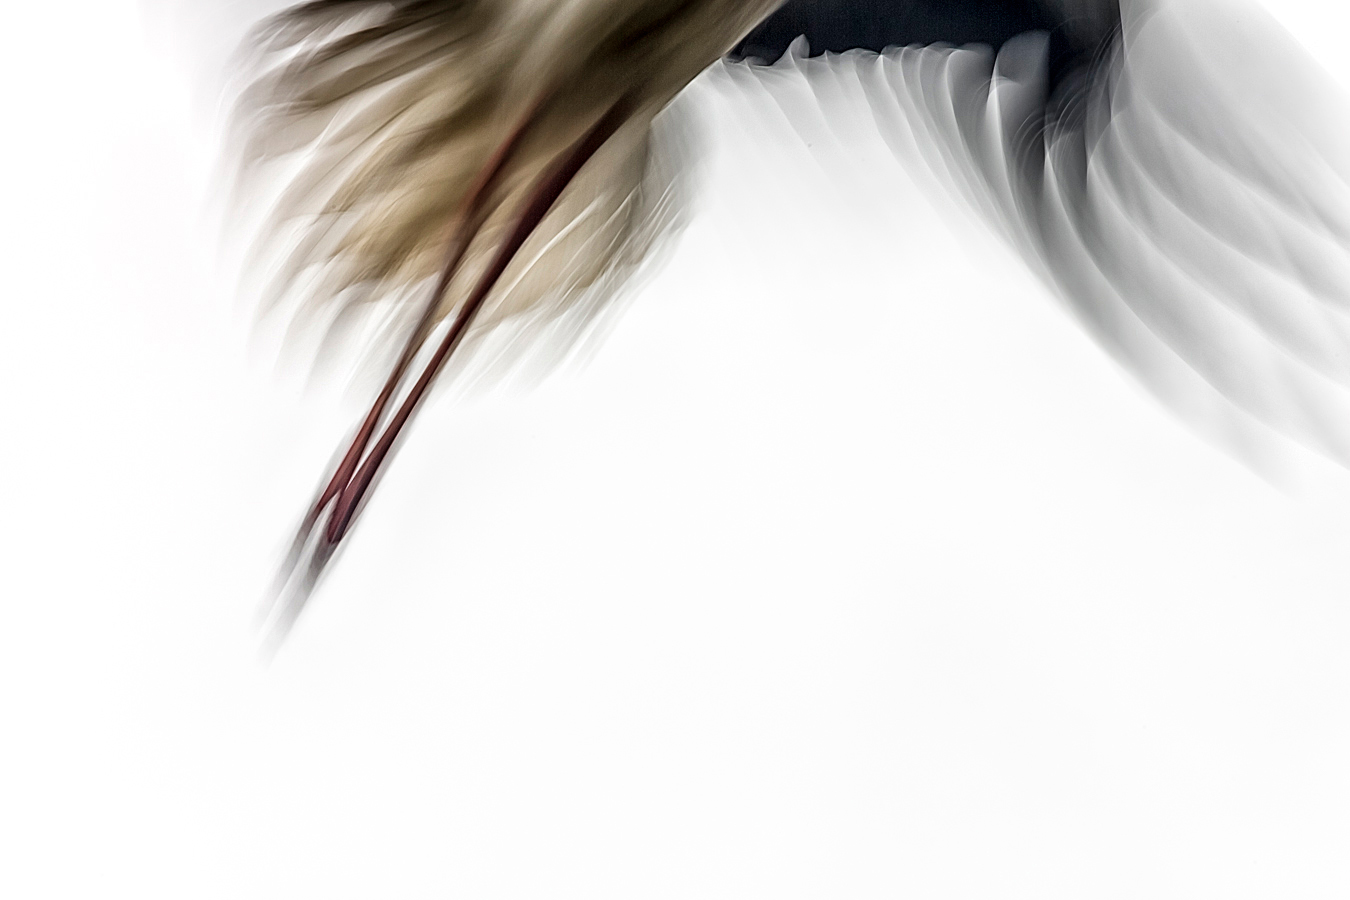
|
Fourth Runner-up: White Stork Legs/16 points
|
White Stork Legs
Congratulations to Reto Puppetti.
Stuff
Getting even a single image to the final round of judging in any category is a huge accomplishment. All of the photographs in the Pleasing Blurs finals were extremely creative. Ironically the only image not to receive a first place vote in the public ballot was the First Place image selected by the judges. Amazingly, the winning Hooded Cranes image finished a distant last in the public voting. Go figure. This was the first category where the contest winner was not selected first by the public. Congrats again to all the winning and honored photographers.
Thanks to all the readers who voted. And thanks again to our sponsors and to the panel of judges. Special thanks to Denise Ippolito and Peter Kes who helped me with the early rounds of judging. Please feel free to comment on the any of the images or to analyze and compare the judging; please remember that judging any contest or voting on the images is purely subjective.
Though I liked the vulture best in this category I loved the creativity of the two stork images.
The Public Vote
1-Gull in Norway: 87 points.
2-Cape Petrel: 85 points.
3-White Stork: 83 points.
4-Bald Eagle in Snow: 67 points.
5-Cinereous Vulture: 60 points.
6-White Stork Legs: 49 points.
7-Hooded Cranes: 39 points.
|

|
|
I hope that you can join us on this great trip. The vertical puffin image was created by David Tipling. The rest–almost all from the UK, are mine :).
|
UK Puffins and Gannets IPT July 2-9, 2014. 5 full days of puffins and two half-days of gannet boat photography: $4,999 USD. Limit 10 + the 2 leaders.
Desperately needed: 1 female and 1 male roommate. Please inquire as to the roommate-needed discount.
Fly to Edinburgh (say “ED-in-BUR-row”), Scotland on a red eye flight on July 1st arriving on the early morning of July 2 or certainly before 10am. UK folks who plan on driving please contact me via e-mail immediately.
There are direct flights to Edinburgh from both Philadelphia and Toronto. If you learn of any others please advise via e-mail so that I may share with all the interested folks. Fly home mid-morning on July 9. UK locals and our many European friends are of course welcome.
With the needed 5 deposits in hand, this trip is a go; you can buy your flights now :).
What’s included:
5 full DAYS on the best UK puffin boat; trips to 2 different islands–all dependent on decent weather, i.e, no major storms. Seabirds including scads of Atlantic Puffin both in flight and perched, Razorbill, Great Cormorant, Shag, and others likely. The trip is timed to maximize the opportunities for photographing the puffins bringing fish back to the nests. All boat fares and landing fees are included. The boat leaves at 9:30am. We have two hours on the first island. We are then picked up and head to the 2nd island for a 2+ hour session. The weather is typically cloudy bright.
One late-afternoon (2 July) and one early morning (probably 8 July) trip on a gannet photography boat where the birds are fed and dive very close to the boat. Both are dependent on good weather but we do have some flexibility. Boat fares and the cost of the fish are covered. Each will consist of a one hour outbound ride, two hours of diving Northern Gannet photography (with 6 boxes of fish) and the one hour return trip.
The tentative, weather-dependent itinerary:
July 2: airport pick-up no later than 10am UK time. Lunch on your dime. Drive to hotel. Afternoon gannet boat trip/time TBD.
July 3, 4, 5, 6, & 7: Full Day Puffin Boat trips as noted above.
July 8: early morning Gannet Boat trip. Afternoon: Small group Image review and Photoshop sessions. Pack for the trip home.
July 9: early morning departure for Edinburgh Airport (EDI).
The itinerary is subject to change to ensure the best possible photographic opportunities.
A super-telephoto lens is not required on this trip. The 300mm f/2.8s are ideal. I will be bringing one along with my 200-400mm with Internal Extender, my 70-200 f/2.8L IS II, and a shorter zoom lenses. Plus three 1.4X and two 2X TCs, a Gitzo 3532 LS Carbon Fiber tripod, and my Mongoose M3.6. I may go tripod-less on the puffin trips at times…. Or not…. All photography on the gannet boat will be hand held. It is likely that the 70-200s will be ideal for the gannets.
7 nights lodging in an older but excellent hotel just a few minutes from the puffin boat dock with about a 70 minute ride to the gannet boat. Double occupancy will be the rule though we might be able to offer a single supplement at an exorbitant price. See the hotel info here.
All breakfasts and dinner (at the hotel) from dinner on July 2 through dinner on July 8. And breakfast on our get-away day unless we need to leave earlier than they serve to make our flights home…
Airport pick-up until 10am on July 2–this should not be a problem as there are lots of red-eye flights from the US to Edinburgh.
All ground transportation. Airport return on the early morning of July 9. We may be getting up very early on July 9th.
Two great leaders; Denise Ippolito and yours truly will provide personalized and small group in-the-field instruction. As usual, the closer you stay to us and the more questions that you ask the more you will learn. We will of course point out the best situations. You will learn to see these great situations for yourself, to get the right exposure every time after making a single test exposure, to work in Manual mode, and to design pleasing images by mastering your camera’s AF system. You will learn the basics of photographing birds in flight and how the relationship between light direction and wind direction impacts the photography of both birds in flight and perched puffins. And tons more.
We will be conducting informal, small group image review and Photoshop sessions after dinner. All are invited to bring their laptops. Image critiques of your five best images will be done after the trip upon request.
Early morning castle photography right near the hotel is an option for the early risers. In the event of inclement weather or stormy seas there is the possibility of bird photography along the coast. Early evening bird photography along the coast is also optional.
Not included: all lunches–for the most part we will need to pack lunches for the puffin trips, or you may opt to skip lunch. Your round trip airfare from home to Scotland. Booze, wine, and any other beverages other than coffee and tea at breakfast.
A non-refundable deposit of $2,000 USD is required to hold your spot so please check on flights and your schedule before committing. The balance will be due on 15 May so you may wish to pay the whole thing at once. Overseas folks may e-mail for wire transfer info. Our $15 wire transfer fee will be added to your balance.
Trip insurance is highly recommended as your deposit (less a $200 cancellation fee) will not be refunded unless the trip fills completely. I, and my family, use Travel Insurance Services.
After letting us know via e-mail that you will be coming, please send your deposit check made out to “Arthur Morris” to us as follows:
Arthur Morris/BIRDS AS ART
PO Box 7245 (US mail) or 4041 Granada Drive (if by courier).
Indian Lake Estates, FL 33855
My friend David Tipling, with multiple BBC honored images and the author of dozens of photo illustrated books, helped with the planning and arrangements for this trip.
If you have any questions, please contact me via e-mail.
Support the BAA Blog. Support the BAA Bulletins: Shop B&H here!
We want and need to keep providing you with the latest free information, photography and Photoshop lessons, and all manner of related information. Show your appreciation by making your purchases immediately after clicking on any of our B&H or Amazon Affiliate links in this blog post. Remember, B&H ain’t just photography!
….. …..
Typos
In all blog posts and Bulletins, feel free to e-mail or to leave a comment regarding any typos, wrong words, misspellings, omissions, or grammatical errors. Just be right. 🙂
May 14th, 2014 Great Contest News
We decided retroactively that all the folks who paid to enter the BIRDS AS ART 2nd International Bird Photography Competition would receive a complementary 3-month BPN Membership. Bird Photographers.net is an amazing resource; a staff of skilled moderators offer honest critiques done gently. You can check out the hugely popular (49,252 threads, 445,962 replies) Avian Forum here. There is a wealth of free tutorials available in the Educational Resources Forum and you can have your questions answered there as well. And BPN is not just birds. Other forums of note include General Photography Discussion, Digital Photography Workflow, Eager to Learn, Macro and Flora, Wildlife, Landscapes, Cityscapes and Travel, and Out Of The Box, In Camera and Post Processing Techniques. You can find a complete list of the Forums and a link to each including those mentioned immediately above by clicking here.
A User account has been be created for each paying contest entrant if they were not previously part of BPN. Forum Participants were automatically upgraded to BPN Member with a 3 month expiration date. Existing BPN members received a 3 month extension.
If you have any questions or did not receive your e-mail, please contact Peter Kes via e-mail.
DeSoto Help Needed
If anyone knows of any good restaurants in St. Petersburg or of a decent motel that is close to the park either in St. Pete or on St. Petersburg Beach, please let me know via e-mail.
Used Canon 100-400mm f/4.5-5.6L IS USM Lens for Sale/Price Reduced $200!
Multiple IPT veteran Bill Wingfield is offering a Canon 100-400mm f/4.5-5.6L IS USM lens in excellent condition for $1225! The glass is clean and the lens is in perfect working condition. The sale includes the lens hood, the fabric case, and insured shipping by UPS Ground to US addresses only. Personal checks only; your new lens will be shipped after your check clears.
See more used camera gear below.
Pleasing Blurs Voting Extended One Day
Join in the fun by voting on the Pleasing Blurs Category of the BIRDS AS ART 2nd International Bird Photography Competition by clicking here. It seems likely that this will be the first category in which the public’s favorite will not match the judge’s first choice. Though only 7 images made it to the final round in this category, they are all remarkably strong images. Do take a peek. The deadline for voting on this category is be 6am Thursday, May 15. The winners and the results of the public vote will be announced in tomorrow morning’s blog post.
The Streak Continues: 165
This post marks 165 consecutive days with a new educational blog post. With so many folks getting in the habit of using our B&H links and our Amazon logo-links why quit now? April was a record month! To show your appreciation for my efforts here, we do ask that you use our the B&H and Amazon affiliate links on the right side of the blog for all of your purchases. Please check the availability of all photographic accessories in the BIRDS AS ART Online Store, especially Gitzo tripods, Wimberley tripod heads, and the like. We sell only what I used, tested, and can depend on. We will not sell you junk. We know the tools that you need to make creating great images easy and fun. And we are always glad to answer your gear questions via e-mail.
You can find the following items in the store: Gitzo tripods, Mongoose M3.6 and Wimberley heads, plates, low feet, and accessories, flash brackets, , Delkin e-film Pro Compact Flash Cards, LensCoat products, and our unique line-up of educational materials including ABP I & II, Digital Basics, Site and Set-up e-Guides, Canon and Nikon Camera Users and AF e-Guides, and MP-4 Photoshop video tutorials among others.
I would of course appreciate your using our B&H affiliate links for all of your major gear, video, and electronic purchases. For the photographic stuff mentioned in the paragraph above we, meaning BAA, would of course greatly appreciate your business. Here is a huge thank you to the many who have been using our links on a regular basis and visiting the BAA Online store as well.
This post took 2 1/2 hours to put together. Enjoy!
|
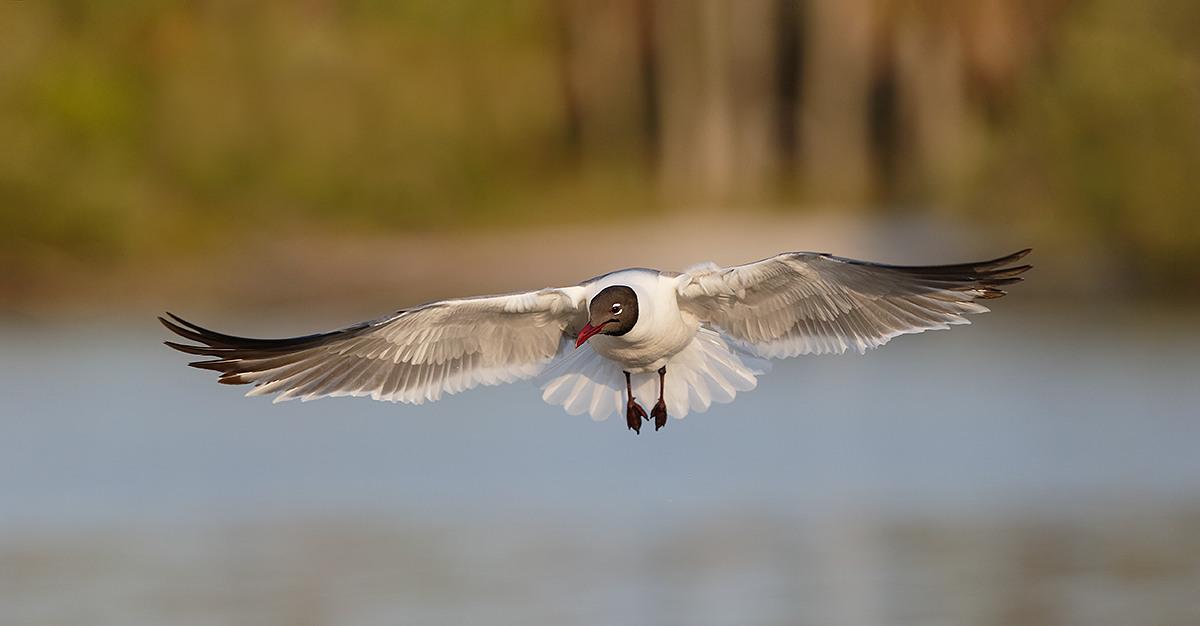
|
|
This image was created at 7:12pm on the last afternoon of the Fort DeSoto IPT with the hand held Canon EF 300mm f/2.8L IS II USM lens and the Canon EOS-1D X. ISO 400. Evaluative metering -1/3 stop off the blue water in late afternoon light: 1/3200 sec. at f/4 in Manual Av mode. AWB.
Central Sensor/AI Servo-Surround/Rear Focus AF on the bird’s right foot as originally framed was active at the moment of exposure. Click here to see the latest version of the Rear Focus Tutorial. Click on the image to see a larger version.
Image #1: Breeding Plumage Laughing Gull braking in flight
|
Physical Limitations
As we age, we may encounter physical problems that place restrictions on the gear that we carry into the field. With my left knee still bothering me and my right shoulder chronically sore–lots more on that in a coming post, I left the Canon EF 600mm f/4L IS II USM lens and my Gitzo 3532 LS carbon fiber tripodin the back of my Sequoia on 2 of our 6 photo sessions at DeSoto. On those occasions I headed out with only the 300II in hand and both TCs in my vest pocket.
The 200-400 also languished in the rear storage area of my SUV for 2.79 very good reasons; the new 300 is 2.79 pounds lighter than the vaunted and more versatile 200-400. I had so much fun the first time that I went out hand-holding the 300II that I wound up stashing it in the large rear pouch of my Xtrahand vest on several occasions when I ventured forth with the 600II and the tripod. And I unpacked and used it often. You can learn more about my great vest here or by shooting me an e-mail with the words Xtrahand Vest Info Please cut and pasted into the subject line.
|
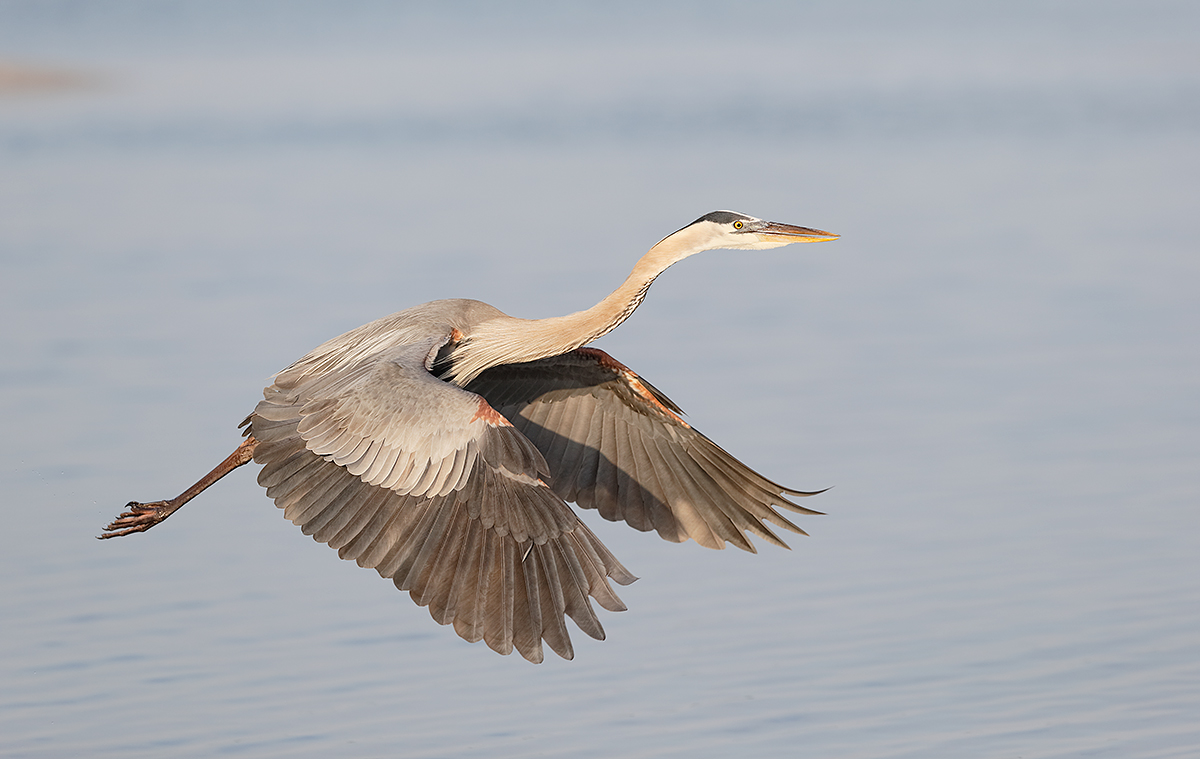
|
|
This image was also created on the last afternoon of the Fort DeSoto IPT, this one at 7:16pm. Again I used the hand held Canon EF 300mm f/2.8L IS II USM lens and the Canon EOS-1D X. ISO 400. Two clicks open from the Laughing Gull image above: 1/2000 sec. at f/4 in Manual Av mode. AWB.
Central Sensor/AI Servo-Surround/Rear Focus AF on the middle of the bird’s neck as originally framed was active at the moment of exposure. Click here to see the latest version of the Rear Focus Tutorial. Click on the image to see a larger version.
Image #2: Great Blue Heron in flight/full downstroke wing position
|
The Prime Lens Alone
I have rarely used the 300 II alone. In fact, I cannot remember ever doing so. Do note that as my Dad used to say, “My memory is not such good.” For most bird and nature photography applications it is most commonly used with either the Canon Extender EF 1.4X III or the Canon Extender EF 2X III. Folks who photograph large mammals, especially those who work in low light, may find themselves using the naked lens quite often.
On our last afternoon, there were Laughing Gulls landing and bathing at close range so I took off the 2X TC and began photographing them in flight with just the 300II and the 1D X. They were soon joined by two Great Blue Herons. They hinted at performing their age-old threat display but never became fully engaged. They did however chase each other around quite a bit. And as you can see above and below, they provided some nice flight and landing opportunities.
The 300 II is light enough for me to hand hold for extended shooting sessions. Hand holding offers huge advantages in mobility. It is far easier to stay on a drunken-sailor-dancing Reddish Egret and to stay low while working a flock of shorebirds feeding along the Gulf than to be lugging a big lens and having to set up your tripod each time that you get in position. And I find that following the action when hand holding is far easier than when using a tripod-mounted super-telephoto lens. Not to mention that the prime lens alone so sharp as to be barely believable.
Image Question
I wrote above that I went “two clicks open from the Laughing Gull image above” for the Great Blue Heron. That means that I needed more light for the GBH image to be properly exposed than I did for the Laughing Gull to be properly exposed. Opening up two clicks meant that I went from 1/3200 sec. at f/4 to 1/2000 sec. at f/4. The 2 clicks slower shutter speed meant that I added 2/3 stop of light to the exposure.
Why did the Laughing Gull image need less light than the GBH image?
|
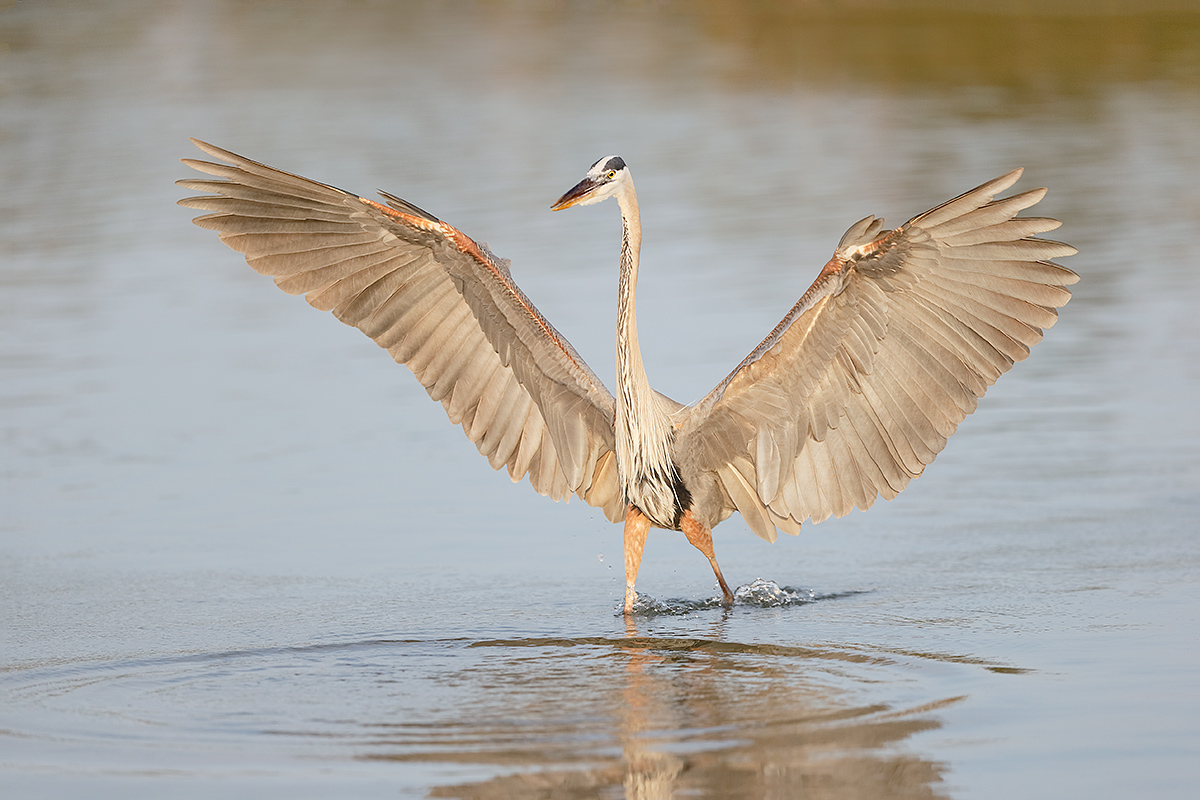
|
|
You guessed it. This image was also created on the last afternoon of the Fort DeSoto IPT, this one at 7:26pm. Again I used the hand held Canon EF 300mm f/2.8L IS II USM lens and the Canon EOS-1D X. ISO 400. Evaluative metering +2/3 stop off the light blue water: 1/3200 sec. at f/2.8 in Manual Av mode. AWB.
One sensor to the right of the central Sensor/AI Servo-Surround/Rear Focus AF on the base of the bird’s left wing was active at the moment of exposure. Click here to see the latest version of the Rear Focus Tutorial. Click on the image to see a larger version.
Image #3: Great Blue Heron landing wing spread
|
Your Favorite?
Please take a moment to leave a comment and let us know which of the three images presented here today is your favorite. And be sure to let us know why you think that it is stronger than the other two.
Inspired?
If reading this post or subsequent posts in this series inspires you to purchase a 300II, please use one of the product-specific links in each image caption or use the logo link below. Your doing so would of course be greatly appreciated.
|

|
|
I hope that you can join us on this great trip. The vertical puffin image was created by David Tipling. The rest–almost all from the UK, are mine :).
|
UK Puffins and Gannets IPT July 2-9, 2014. 5 full days of puffins and two half-days of gannet boat photography: $4,999 USD. Limit 10 + the 2 leaders.
Desperately needed: 1 female and 1 male roommate. Please inquire as to the roommate-needed discount.
Fly to Edinburgh (say “ED-in-BUR-row”), Scotland on a red eye flight on July 1st arriving on the early morning of July 2 or certainly before 10am. UK folks who plan on driving please contact me via e-mail immediately.
There are direct flights to Edinburgh from both Philadelphia and Toronto. If you learn of any others please advise via e-mail so that I may share with all the interested folks. Fly home mid-morning on July 9. UK locals and our many European friends are of course welcome.
With the needed 5 deposits in hand, this trip is a go; you can buy your flights now :).
What’s included:
5 full DAYS on the best UK puffin boat; trips to 2 different islands–all dependent on decent weather, i.e, no major storms. Seabirds including scads of Atlantic Puffin both in flight and perched, Razorbill, Great Cormorant, Shag, and others likely. The trip is times to maximize the opportunities for photographing the puffins bringing fish back to the nests. All boat fares and landing fees are included. The boat leaves at 9:30am. We have two hours on the first island. We are then picked up and head to the 2nd island for a 2+ hour session. The weather is typically cloudy bright.
One late-afternoon (2 July) and one early morning (probably 8 July) trip on a gannet photography boat where the birds are fed and dive very close to the boat. Both are dependent on good weather but we do have some flexibility. Boat fares and the cost of the fish are covered. Each will consist of a one hour outbound ride, two hours of diving Northern Gannet photography (with 6 boxes of fish) and the one hour return trip.
The tentative, weather-dependent itinerary:
July 2: airport pick-up no later than 10am UK time. Lunch on your dime. Drive to hotel. Afternoon gannet boat trip/time TBD.
July 3, 4, 5, 6, & 7: Full Day Puffin Boat trips as noted above.
July 8: early morning Gannet Boat trip. Afternoon: Small group Image review and Photoshop sessions. Pack for the trip home.
July 9: early morning departure for Edinburgh Airport (EDI).
The itinerary is subject to change to ensure the best possible photographic opportunities.
A super-telephoto lens is not required on this trip. The 300mm f/2.8s are ideal. I will be bringing one along with my 200-400mm with Internal Extender, my 70-200 f/2.8L IS II, and a shorter zoom lenses. Plus three 1.4X and two 2X TCs, a Gitzo 3532 LS Carbon Fiber tripod, and my Mongoose M3.6. I may go tripod-less on the puffin trips at times…. Or not…. All photography on the gannet boat will be hand held. It is likely that the 70-200s will be ideal for the gannets.
7 nights lodging in an older but excellent hotel just a few minutes from the puffin boat dock with about a 70 minute ride to the gannet boat. Double occupancy will be the rule though we might be able to offer a single supplement at an exorbitant price. See the hotel info here.
All breakfasts and dinner (at the hotel) from dinner on July 2 through dinner on July 8. And breakfast on our get-away day unless we need to leave earlier than they serve to make our flights home…
Airport pick-up until 10am on July 2–this should not be a problem as there are lots of red-eye flights from the US to Edinburgh.
All ground transportation. Airport return on the early morning of July 9. We may be getting up very early on July 9th.
Two great leaders; Denise Ippolito and yours truly will provide personalized and small group in-the-field instruction. As usual, the closer you stay to us and the more questions that you ask the more you will learn. We will of course point out the best situations. You will learn to see these great situations for yourself, to get the right exposure every time after making a single test exposure, to work in Manual mode, and to design pleasing images by mastering your camera’s AF system. You will learn the basics of photographing birds in flight and how the relationship between light direction and wind direction impacts the photography of both birds in flight and perched puffins. And tons more.
We will be conducting informal, small group image review and Photoshop sessions after dinner. All are invited to bring their laptops. Image critiques of your five best images will be done after the trip upon request.
Early morning castle photography right near the hotel is an option for the early risers. In the event of inclement weather or stormy seas there is the possibility of bird photography along the coast. Early evening bird photography along the coast is also optional.
Not included: all lunches–for the most part we will need to pack lunches for the puffin trips, or you may opt to skip lunch. Your round trip airfare from home to Scotland. Booze, wine, and any other beverages other than coffee and tea at breakfast.
A non-refundable deposit of $2,000 USD is required to hold your spot so please check on flights and your schedule before committing. The balance will be due on 15 May so you may wish to pay the whole thing at once. Overseas folks may e-mail for wire transfer info. Our $15 wire transfer fee will be added to your balance.
Trip insurance is highly recommended as your deposit (less a $200 cancellation fee) will not be refunded unless the trip fills completely. I, and my family, use Travel Insurance Services.
After letting us know via e-mail that you will be coming, please send your deposit check made out to “Arthur Morris” to us as follows:
Arthur Morris/BIRDS AS ART
PO Box 7245 (US mail) or 4041 Granada Drive (if by courier).
Indian Lake Estates, FL 33855
My friend David Tipling, with multiple BBC honored images and the author of dozens of photo illustrated books, helped with the planning and arrangements for this trip.
If you have any questions, please contact me via e-mail.
Selling Your Used Photo Gear Through BIRDS AS ART
Selling your used (or like-new) photo gear through the BAA Blog or via a BAA Online Bulletin is a great idea. We charge only a 5% commission. One of the more popular used gear for sale sites charges a minimum of 20% plus assorted fees! Yikes. The minimum item price here is $500 (or less for a $25 fee). If you are interested please e-mail with the words Items for Sale Info Request cut and pasted into the Subject line :). Stuff that is priced fairly–I offer free pricing advise, usually sells in no time flat as did Dennis Cassidy’s 500 II recently on the blog. Larry Master’s 400 DO and his 800 f/5.6 sold within a week. From Larry via e-mail: Thanks for helping me sell the lenses so quickly!
A Creative Adventure/BIRDS AS ART friend Kitto Kono sold her Nikon 500 to a Blog subscriber in less than a week. Janet Horton’s 7D sold this week after a $100 price reduction. Denise Ippolito’s 100-400 and her 100 macro sold in one day. Peter Kes sold his 70-200 f/2.8L IS II and his 400 DO through BAA in ten days. In the past two months we have sold a Canon 800, a Canon 500 II, 3 400 DO lenses, a Nikon 500mm, and lots more. If you are interested in using our services, please e-mail.
Fort DeSoto Site Guide
The Fort DeSoto Site Guide describes several locations where you can look for today’s featured species. I had checked this spot in the morning for naught, but in the afternoon the second time was the charm. You can get yourself a copy of the Fort DeSoto Site Guide here. Learn the best spots, where to be when in what season in what weather. Learn the best wind directions for the various locations. BAA Site Guides are the next best thing to being on an IPT. You can see all of them here. I am hoping to get a short update of the Fort DeSoto Site Guide done within the next two weeks.
Used Nikon Super-Telephoto Lens for Sale
Nikon AF-S 400mm f/2.8G ED VR AF Lens
The first is a used Nikon AF-S NIKKOR 400mm f/2.8G ED VR AF lens for $5999.00. This lens sells new from B&H for $8999.00. The price includes UPS insured Ground shipping to the continental US. The lens comes with just about everything that came with the original purchase including the lens trunk, monopod collar, front lens cover, rear lens cap, slip on HK 33 Lens Hood, Slip-in Filter Holder, 52mm screw-in NC Filter, and LN – 1 Strap. The lens is in excellent condition with some minor blemishes and scratches on the exterior body and lens hood. Photos upon request. Potential buyers can contact Kitty via e-mail or by phone: 610-995-2339. Your check must clear before the lens is shipped.
The 400 f/2.8 is superb for large mammals, for birds at close range, and for work at bird feeders. Priced at $3,000 less than new this one should sell quickly.
Used Canon Gear for Sale
Used Canon 100-400mm f/4.5-5.6L IS USM Lens for Sale/Price Reduced $100!
Multiple IPT veteran Bill Wingfield is offering a Canon 100-400mm f/4.5-5.6L IS USM lens in excellent condition for $1325! The glass is clean and the lens is in perfect working condition. The sale includes the lens hood, the fabric case, and insured shipping by UPS Ground to US addresses only. Personal checks only; your new lens will be shipped after your check clears.
For more than a decade I used the 100-400 to create hundreds of sharp, sale-able image. It is a very versatile lens.
You can reach Bill via e-mail or by phone at 843-729-6670.
Used Canon 800mm f/5.6L IS Lens for Sale
Multiple IPT veteran, the too-kind Jim Bicket, is offering a Canon EF 800mm f/5.6L IS USM lens in excellent condition for $8750. The lens is like new except for some wear on the bottom of the lens hood near the forward edge when the hood is reversed. The sales includes the LensCoat that has protected the lens since day 1, the leather hood, the original hard case and key, and insured shipping via UPS Ground to US addresses only. Personal checks only; your new lens will be shipped only after your check clears.
This great lens, my favorite for 3 years, sells new at B&H for $13,999.00. A month ago B&H was offering one in mint condition for a ridiculous $10,249.90; it sold overnight. Go figure. Jim’s lens will save you a ton of dough and you will have a great lens with lots of reach.
Interested folks can contact Jim via e-mail or try him at 501-915-9336.
Used EOS-5D Mark II for Sale/Price Reduced $100!
Doug Bolt’s 400 DO sold early last week. Doug is offering a used EOS-5D Mark II in very good to excellent condition for $1099! There is a shallow scratch on the body and a faint smudge on the top LCD. The sale includes a RRS L-plate, an off-brand vertical grip, and the original box and all the stuff that came in it. The seller will pay shipping to US addresses only. This one is a great body for flowers and landscapes. Mine saved me on a Southern Oceans cruise when I trashed two EOS-1D Mark IV bodies in a rainstorm; it was a great back-up camera body. The item will ship only when the check clears.
Please contact Doug for a link to photos of the camera and for additional info via e-mail or try him by phone at home: at 301-937-3112 or on his cell at 301-537-8073.
Used Canon EOS-7D for Sale
Doug Bolt loves his 5D Mark III so much that he is also offering a used EOS-7D camera body for $799. The sale includes a RRS camera body plate. The seller will pay shipping to US addresses only. This one is a great starter body. The item will ship only when the check clears.
Please contact Doug for additional info via e-mail or try him by phone at home: at 301-937-3112 or on his cell at 301-537-8073.
Support the BAA Blog. Support the BAA Bulletins: Shop B&H here!
We want and need to keep providing you with the latest free information, photography and Photoshop lessons, and all manner of related information. Show your appreciation by making your purchases immediately after clicking on any of our B&H or Amazon Affiliate links in this blog post. Remember, B&H ain’t just photography!
….. …..
Typos
In all blog posts and Bulletins, feel free to e-mail or to leave a comment regarding any typos, wrong words, misspellings, omissions, or grammatical errors. Just be right. 🙂
May 13th, 2014 Used Canon 100-400mm f/4.5-5.6L IS USM Lens for Sale/Price Reduced $200!
Multiple IPT veteran Bill Wingfield is offering a Canon 100-400mm f/4.5-5.6L IS USM lens in excellent condition for $1225! The glass is clean and the lens is in perfect working condition. The sale includes the lens hood, the fabric case, and insured shipping by UPS Ground to US addresses only. Personal checks only; your new lens will be shipped after your check clears.
Pleasing Blurs Voting Continues Today
Join in the fun by voting on the Pleasing Blurs Category of the BIRDS AS ART 2nd International Bird Photography Competition by clicking here. It seems likely that this will be the first category in which the public’s favorite will not match the judge’s first choice. Though only 7 images made it to the final round in this category, they are all strong images. Do take a peek.
The Streak Continues: 164
This post marks 164 consecutive days with a new educational blog post. With so many folks getting in the habit of using our B&H links and our Amazon logo-links why quit now? April was a record month! To show your appreciation for my efforts here, we do ask that you use our the B&H and Amazon affiliate links on the right side of the blog for all of your purchases. Please check the availability of all photographic accessories in the BIRDS AS ART Online Store, especially Gitzo tripods, Wimberley tripod heads, and the like. We sell only what I used, tested, and can depend on. We will not sell you junk. We know the tools that you need to make creating great images easy and fun. And we are always glad to answer your gear questions via e-mail.
You can find the following items in the store: Gitzo tripods, Mongoose M3.6 and Wimberley heads, plates, low feet, and accessories, flash brackets, , Delkin e-film Pro Compact Flash Cards, LensCoat products, and our unique line-up of educational materials including ABP I & II, Digital Basics, Site and Set-up e-Guides, Canon and Nikon Camera Users and AF e-Guides, and MP-4 Photoshop video tutorials among others.
I would of course appreciate your using our B&H affiliate links for all of your major gear, video, and electronic purchases. For the photographic stuff mentioned in the paragraph above we, meaning BAA, would of course greatly appreciate your business. Here is a huge thank you to the many who have been using our links on a regular basis and visiting the BAA Online store as well.
This post took 1 1/2 hours to put together. Enjoy!
|
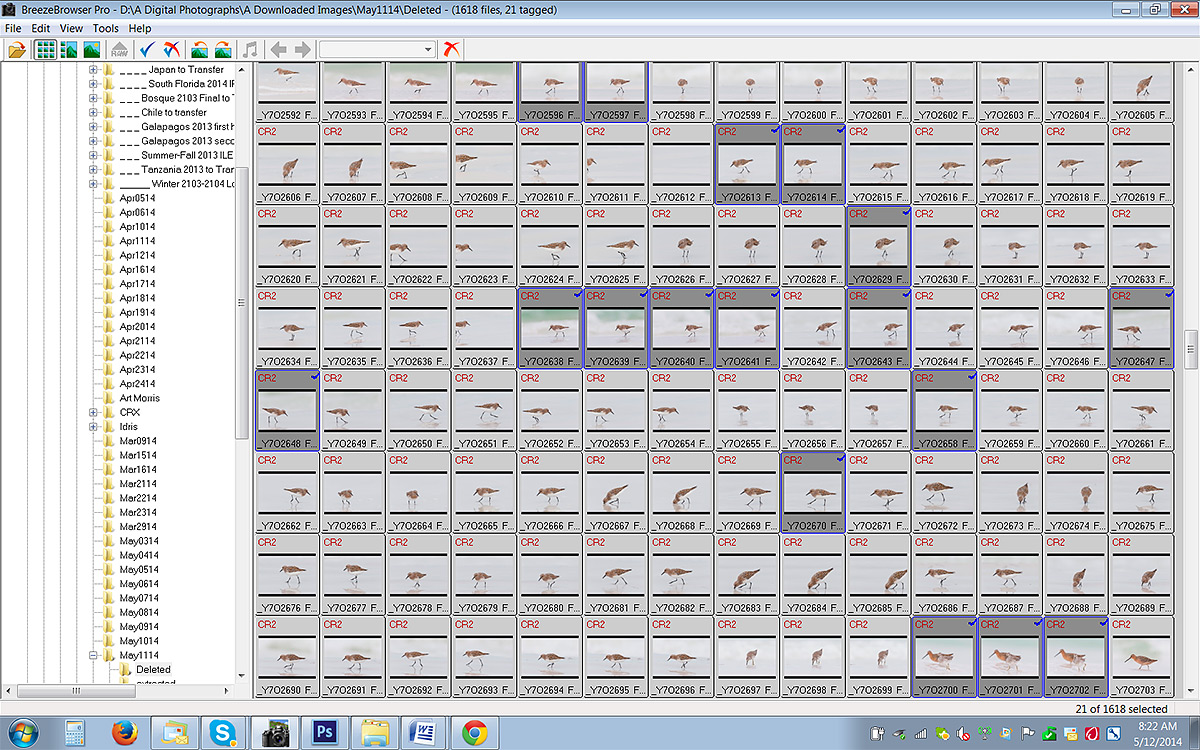
|
|
Here you see 112 of the 1,961 images that I created on Sunday, May 11th (happy Mother’s Day Mom!), the last day of the Fort DeSoto IPT. The highlighted images are the keepers from this group of 112.
|
Easy Editing
Editing (choosing the keepers) is an easy chore for the fortunate folks using BreezeBrowser. Even when you create 1,961 images in a single day. I view my images with the High Quality setting checked so that I almost never need to enlarge an image (Control B) to check on sharpness. I Select All (Control A) and view the images in Slide Show Mode (Control S). The right pointing arrow goes to the next image. Keepers get a blue check-mark (up arrow). If I change my mind on an image, I can un-check it with the down arrow. When I am done I Only Select Tagged (F6) and then Invert the Selection (Control I). That leaves all the rejects checked. I hit Delete and the unwanted images are relegated to a Deleted sub-folder. Done deal.
Fort DeSoto participant Mary Anderson was totally amazed when she watched me edit 1168 images from our morning session in less than 25 minutes at lunch. That while I was explaining the reasons for my choices to her in detail. It would have taken me half that time to do the job in solitude. See more on BreezeBrowser below.
I borrowed the idea for the editing screen shot above from the incredibly creative Denise Ippolito who posted a similar image somewhere recently.
|
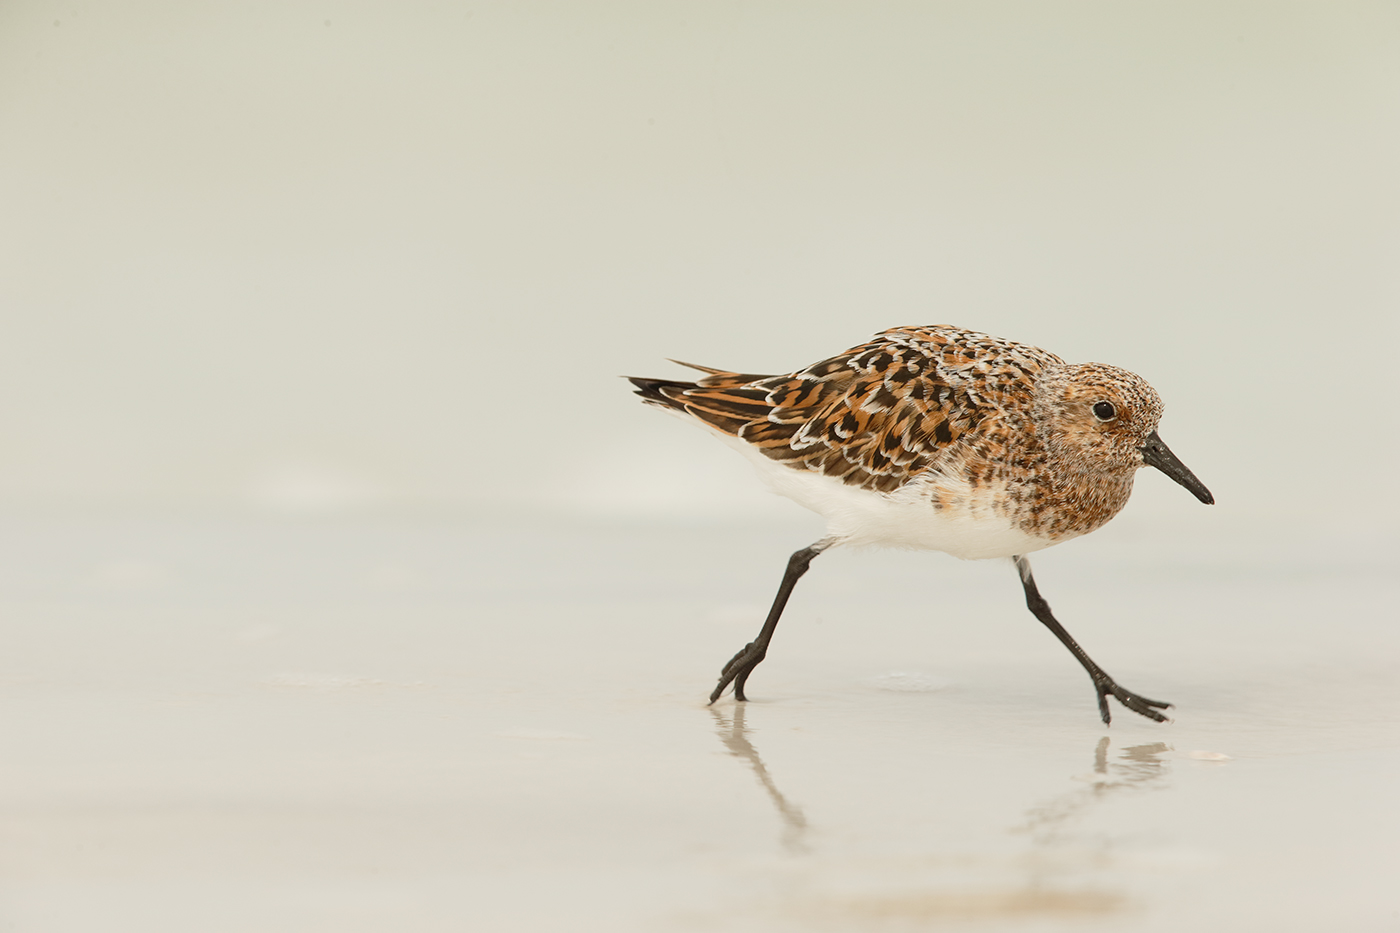
|
|
This JPEG represents the original image capture. It was created on the Fort DeSoto IPT on a hazy, partly sunny morning while sitting behind my lowered Gitzo 3532 LS carbon fiber tripod with the Mongoose M3.6 head, the Canon EF 600mm f/4L IS II USM lens, Canon Extender EF 1.4X III, and the Canon EOS-1D X. ISO 640. Evaluative metering +1/3 stop as framed: 1/1000 sec. at f/9 in Manual Av mode. AWB.
Central Sensor/AI Servo-Expand/Rear Focus AF as framed active at the moment of exposure. Two of the four active sensors must have just caught the rear end of the bird–or not. See the BreezeBrowser screen capture below. Learn everything that there is to know about the 1D X and 5D III AF systems including how to manage the various AF Area Selection Modes, when to use which one, and several ways to move the AF sensor around in the 1D X AF Guide and the 5D Mark III User’s Guide. Click here to see the latest version of the Rear Focus Tutorial. Click on the image to see a larger version. .
|
Universal Advice for Photographing Speeding Sanderlings
Here is the best advice I can give you for photographing running shorebirds: pan faster. Actually, you need to try to match your panning rate to the speed of the bird. The problem here is that after these northbound migrants stopped to feed for a few seconds they would run to the next tidbit at high speed. And then stop abruptly without warning.
That’s why I wound up with this bird running out of the frame instead of into it. But it was the sharpest such image that I created. So it needed saving.
Image Question?
Why ISO 640 in relatively bright conditions?
|
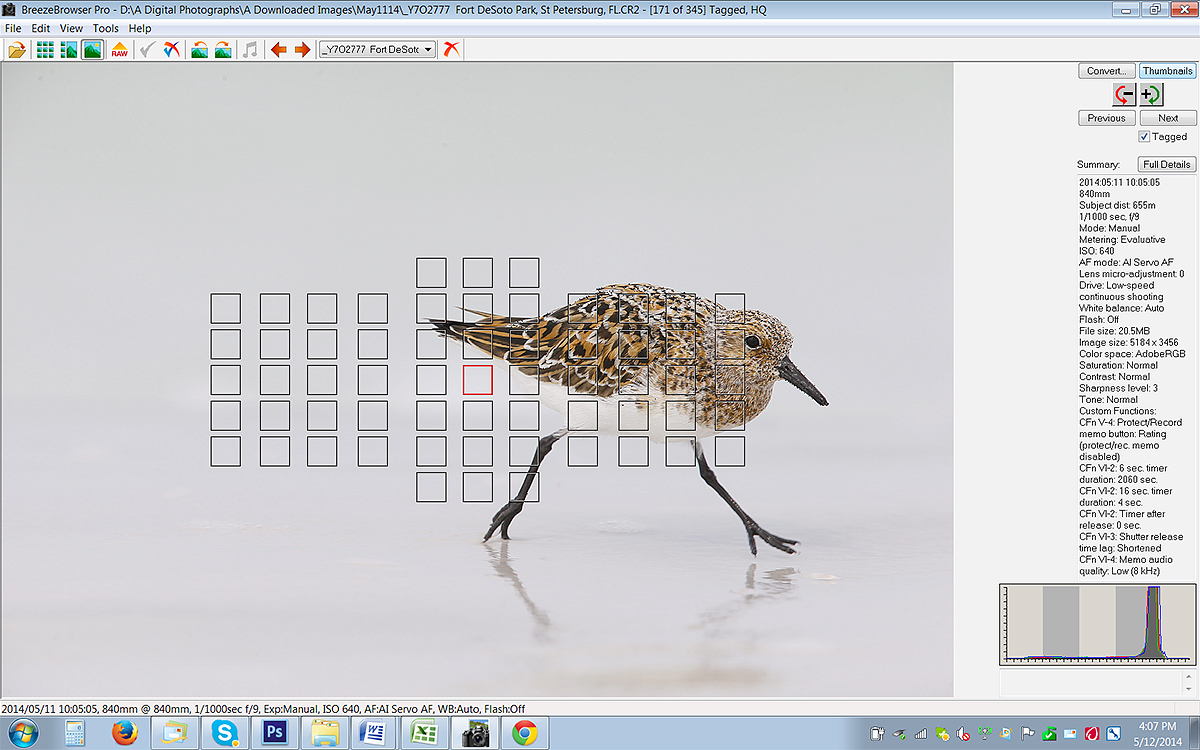
|
|
This is the BreezeBrowser Main View screen capture for today’s image.
|
AF Expand
I usually go with AF Surround in situations like this. I am not sure how I wound up in AF Expand. With the latter, I get only four additional points around the central sensor: one left and right and one above and below. With the former, I get all 8 surrounding points. In any case, by hook or by crook, the result here was a very sharp image of a fast-moving, erratic subject.
The Breezebrowser Main View Screen Capture
Above is the BreezeBrowser Main View screen capture for today’s image. Note that the illuminated red square shows the AF point that was selected. Remember that with Expand four additional sensors are active but are not illuminated. Note: in Breezebrowser you need to check “Show Focus Points” under View to activate this feature. To see the focus points in DPP check “AF Point” under View or hit Alt L. Hit Alt M to see Highlight Alert. To learn how and why I use only DPP (Canon Digital Photo Professional) to convert my RAW files, see the info on our DPP RAW Conversion Guide here.
Note the perfect histogram the WHITEs of the bird’s belly well into the rightmost histogram box. Regular readers know that I use and depend on BreezeBrowser every day of the year. It allows me to sort my keepers and delete the rejects faster than any other Windows browsing program. We use it on the main computer in the home office to catalog our images file-drawer style. And the companion program, Downloader Pro allows me to download my images quickly and conveniently. It automatically adds my IPTC data and the shooting location. I have it set up to create a folder named by the Month/date/year. The Breezebrowser/Downloader Pro combo saves me many hours each week. To learn more or to purchase this great PC only program, click here. As far as the BreezeBrowser/Downloader Pro Combo goes, if you are using a Windows platform and are not using these two great programs you are at best, wasting your valuable time. My understanding is that Photo Mechanic is best for Mac-users who do not opt to run Parallels or VM Ware fusion on their Macs so that they can enjoy the many advantages of BreezeBrowser. See BreezeBrowswer on a Mac for details on the latter.
|
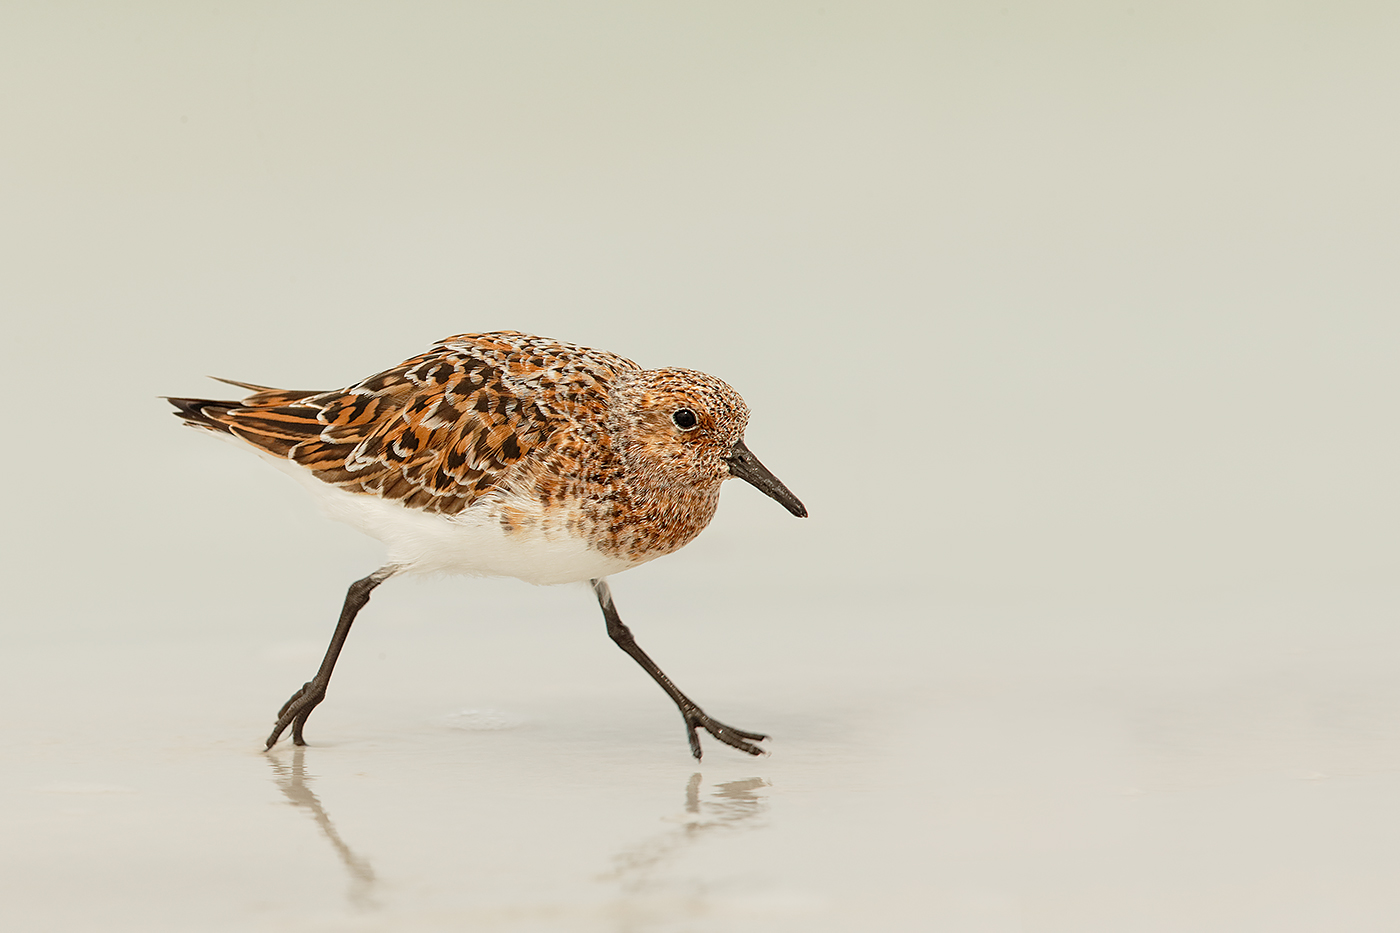
|
|
This 1200 wide JPEG represents the optimized image: Sanderling breeding plumage running bird moved back in frame _Y7O2777 Fort DeSoto Park, St Petersburg, FL.tif
|
The Image Optimization
The image optimization process here–done during our after-lunch session in the Sea Porch Cafe at the Don Cesar Hotel on St. Pete Beach, was a bit more involved than most. After converting the image in DPP, I brought it into CS-6 and dust-spotted it. Next I leveled the image going by the line of foam that you can see in the original image. Then I used techniques from APTATS II to move the bird back in the frame seamlessly. That required four moves. Next was my artistic 3X2 crop. After that I eliminated the line of foam using the protective cloning on a layer technique taught to me by Denise Ippolito. I opted not to clean the bird’s bill. I applied my NIK 50-50 layer at 80% to the bird only that was selected via the Quick Selection Tool. After saving the selection I increased the Vibrance on the bird only.
The DPP RAW Conversion Guide
To learn why I use Canon’s Digital Photo Professional (DPP) to convert every image that I work on, click here.
APTATS I & II
Learn the details of advanced Quick Masking techniques in APTATS I. Learn Advanced Layer Masking Techniques in APTATS I. Mention this blog post and apply a $5 discount to either with phone orders only. Buy both APTATS I and APTATS II and we will be glad to apply at $15 discount with phone orders only.
Digital Basics
Everything above (except as noted) is detailed in my Digital Basics File–written in my easy-to-follow, easy-to-understand style. Are you tired of making your images look worse in Photoshop? Have you no clue as to how I optimized the image above? The Photoshop techniques mentioned above plus tons more are covered in my Digital Basics File, an instructional PDF that is sent via e-mail. It includes my complete digital workflow, dozens of great Photoshop tips, the use of Contrast Masks, several different ways of expanding and filling in canvas, all of my time-saving Keyboard Shortcuts, Quick Masking, Layer Masking, and NIK Color Efex Pro basics, my killer image clean-up techniques, Digital Eye Doctor, creating time-saving actions, and lots more.
Selling Your Used Photo Gear Through BIRDS AS ART
Selling your used (or like-new) photo gear through the BAA Blog or via a BAA Online Bulletin is a great idea. We charge only a 5% commission. One of the more popular used gear for sale sites charges a minimum of 20% plus assorted fees! Yikes. The minimum item price here is $500 (or less for a $25 fee). If you are interested please e-mail with the words Items for Sale Info Request cut and pasted into the Subject line :). Stuff that is priced fairly–I offer free pricing advise, usually sells in no time flat as did Dennis Cassidy’s 500 II recently on the blog. Larry Master’s 400 DO and his 800 f/5.6 sold within a week. From Larry via e-mail: Thanks for helping me sell the lenses so quickly!
A Creative Adventure/BIRDS AS ART friend Kitto Kono sold her Nikon 500 to a Blog subscriber in less than a week. Janet Horton’s 7D sold this week after a $100 price reduction. Denise Ippolito’s 100-400 and her 100 macro sold in one day. Peter Kes sold his 70-200 f/2.8L IS II and his 400 DO through BAA in ten days. In the past two months we have sold a Canon 800, a Canon 500 II, 3 400 DO lenses, a Nikon 500mm, and lots more. If you are interested in using our services, please e-mail.
Fort DeSoto Site Guide
The Fort DeSoto Site Guide describes several locations where you can look for today’s featured species. I had checked this spot in the morning for naught, but in the afternoon the second time was the charm. You can get yourself a copy of the Fort DeSoto Site Guide here. Learn the best spots, where to be when in what season in what weather. Learn the best wind directions for the various locations. BAA Site Guides are the next best thing to being on an IPT. You can see all of them here. I am hoping to get a short update of the Fort DeSoto Site Guide done within the next two weeks.
Used Nikon Super-Telephoto Lens for Sale
Nikon AF-S 400mm f/2.8G ED VR AF Lens
The first is a used Nikon AF-S NIKKOR 400mm f/2.8G ED VR AF lens for $5999.00. This lens sells new from B&H for $8999.00. The price includes UPS insured Ground shipping to the continental US. The lens comes with just about everything that came with the original purchase including the lens trunk, monopod collar, front lens cover, rear lens cap, slip on HK 33 Lens Hood, Slip-in Filter Holder, 52mm screw-in NC Filter, and LN – 1 Strap. The lens is in excellent condition with some minor blemishes and scratches on the exterior body and lens hood. Photos upon request. Potential buyers can contact Kitty via e-mail or by phone: 610-995-2339. Your check must clear before the lens is shipped.
The 400 f/2.8 is superb for large mammals, for birds at close range, and for work at bird feeders. Priced at $3,000 less than new this one should sell quickly.
Used Canon Gear for Sale
Used Canon 100-400mm f/4.5-5.6L IS USM Lens for Sale/Price Reduced $100!
Multiple IPT veteran Bill Wingfield is offering a Canon 100-400mm f/4.5-5.6L IS USM lens in excellent condition for $1325! The glass is clean and the lens is in perfect working condition. The sale includes the lens hood, the fabric case, and insured shipping by UPS Ground to US addresses only. Personal checks only; your new lens will be shipped after your check clears.
For more than a decade I used the 100-400 to create hundreds of sharp, sale-able image. It is a very versatile lens.
You can reach Bill via e-mail or by phone at 843-729-6670.
Used Canon 800mm f/5.6L IS Lens for Sale
Multiple IPT veteran, the too-kind Jim Bicket, is offering a Canon EF 800mm f/5.6L IS USM lens in excellent condition for $8750. The lens is like new except for some wear on the bottom of the lens hood near the forward edge when the hood is reversed. The sales includes the LensCoat that has protected the lens since day 1, the leather hood, the original hard case and key, and insured shipping via UPS Ground to US addresses only. Personal checks only; your new lens will be shipped only after your check clears.
This great lens, my favorite for 3 years, sells new at B&H for $13,999.00. A month ago B&H was offering one in mint condition for a ridiculous $10,249.90; it sold overnight. Go figure. Jim’s lens will save you a ton of dough and you will have a great lens with lots of reach.
Interested folks can contact Jim via e-mail or try him at 501-915-9336.
This sale will be made through BAA. Please call Jim at 863-221-2372 (weekdays) or shoot me an if you have any questions.
Used EOS-5D Mark II for Sale/Price Reduced $100!
Doug Bolt’s 400 DO sold early last week. Doug is offering a used EOS-5D Mark II in very good to excellent condition for $1099! There is a shallow scratch on the body and a faint smudge on the top LCD. The sale includes a RRS L-plate, an off-brand vertical grip, and the original box and all the stuff that came in it. The seller will pay shipping to US addresses only. This one is a great body for flowers and landscapes. Mine saved me on a Southern Oceans cruise when I trashed two EOS-1D Mark IV bodies in a rainstorm; it was a great back-up camera body. The item will ship only when the check clears.
Please contact Doug for a link to photos of the camera and for additional info via e-mail or try him by phone at home: at 301-937-3112 or on his cell at 301-537-8073.
Used Canon EOS-7D for Sale
Doug Bolt loves his 5D Mark III so much that he is also offering a used EOS-7D camera body for $799. The sale includes a RRS camera body plate. The seller will pay shipping to US addresses only. This one is a great starter body. The item will ship only when the check clears.
Please contact Doug for additional info via e-mail or try him by phone at home: at 301-937-3112 or on his cell at 301-537-8073.
Support the BAA Blog. Support the BAA Bulletins: Shop B&H here!
We want and need to keep providing you with the latest free information, photography and Photoshop lessons, and all manner of related information. Show your appreciation by making your purchases immediately after clicking on any of our B&H or Amazon Affiliate links in this blog post. Remember, B&H ain’t just photography!
….. …..
Typos
In all blog posts and Bulletins, feel free to e-mail or to leave a comment regarding any typos, wrong words, misspellings, omissions, or grammatical errors. Just be right. 🙂
May 12th, 2014 The Streak Continues: 163
This post marks 163 consecutive days with a new educational blog post. With so many folks getting in the habit of using our B&H links and our Amazon logo-links why quit now? April was a record month! To show your appreciation for my efforts here, we do ask that you use our the B&H and Amazon affiliate links on the right side of the blog for all of your purchases. Please check the availability of all photographic accessories in the BIRDS AS ART Online Store, especially Gitzo tripods, Wimberley tripod heads, and the like. We sell only what I used, tested, and can depend on. We will not sell you junk. We know the tools that you need to make creating great images easy and fun. And we are always glad to answer your gear questions via e-mail.
You can find the following items in the store: Gitzo tripods, Mongoose M3.6 and Wimberley heads, plates, low feet, and accessories, flash brackets, , Delkin e-film Pro Compact Flash Cards, LensCoat products, and our unique line-up of educational materials including ABP I & II, Digital Basics, Site and Set-up e-Guides, Canon and Nikon Camera Users and AF e-Guides, and MP-4 Photoshop video tutorials among others.
I would of course appreciate your using our B&H affiliate links for all of your major gear, video, and electronic purchases. For the photographic stuff mentioned in the paragraph above we, meaning BAA, would of course greatly appreciate your business. Here is a huge thank you to the many who have been using our links on a regular basis and visiting the BAA Online store as well.
This post took 1 1/2 hours to put together. Enjoy!
|

|
Cinereous Vulture
|
BIRDS AS ART 2nd International Bird Photography Competition
The judging of the BIRDS AS ART 2nd International Bird Photography Competition has been complete for about two weeks. Thanks a stack to our panel of judges: Sandesh Kadur, Scott Elowitz, Lou Coetzer, Mary Ann McDonald, Michael Frye, Peter Kes, Denise Ippolito, and yours truly. You can learn more about the guest judges here.
From 5 to 18 images in the 8 categories were selected to be sent to the judges’ panel. Each judge voted on each image on a 0-5 scale. The votes were tallied and the results are now final. Three categories down, five to go.
Your Call
The images that were presented to the panel of judges in the Pleasing Blurs category are presented to you today here. Please do understand that many very strong images were eliminated in the early rounds of judging because of poor image processing, technical issues including over- or under-exposure, image sharpness, and the failure of folks to take advantage of our lenient digital guidelines that allow for removing distracting elements from an image.
After clicking on each image to view the larger size, we ask that each of you pick your five favorite images and vote them 5, 4, 3, 2, 1 with 5 being the strongest, 4 being your second favorite, and so on down to 1. You can click on each image to view a larger size. Additional comments are welcome as long as they appear below your selections that should look something like this:
Cinereous Vulture: 5
White Stork Legs: 4
Gull in Norway: 3
New Mexico: 2
Cape Petrel: 1
White Stork legs is quite creative!
The selections above are of course arbitrary and should not at all influence your votes. Please read the directions carefully as comments that do not follow the format above exactly will be deleted without notice. The three winning images in this category along with the 4 runner up images and the names of the photographers will be announced here soon along with a tally of the public vote.
The Grand Prize winning image, the image that secured the highest total of judge’s votes, will be revealed when the results of the final category are announced.
|

|
Hooded Cranes
|
Hooded Cranes
|

|
White Stork
|
White Stork
|

|
Gull in Norway
|
Gull in Norway
|

|
White Stork Legs
|
White Stork Legs
|

|
Bald Eagle in Snow
|
Bald Eagle in Snow
|

|
Cape Petrel
|
Cape Petrel
Selling Your Used Photo Gear Through BIRDS AS ART
Selling your used (or like-new) photo gear through the BAA Blog or via a BAA Online Bulletin is a great idea. We charge only a 5% commission. One of the more popular used gear for sale sites charges a minimum of 20% plus assorted fees! Yikes. The minimum item price here is $500 (or less for a $25 fee). If you are interested please e-mail with the words Items for Sale Info Request cut and pasted into the Subject line :). Stuff that is priced fairly–I offer free pricing advise, usually sells in no time flat as did Dennis Cassidy’s 500 II recently on the blog. Larry Master’s 400 DO and his 800 f/5.6 sold within a week. From Larry via e-mail: Thanks for helping me sell the lenses so quickly!
A Creative Adventure/BIRDS AS ART friend Kitto Kono sold her Nikon 500 to a Blog subscriber in less than a week. Janet Horton’s 7D sold this week after a $100 price reduction. Denise Ippolito’s 100-400 and her 100 macro sold in one day. Peter Kes sold his 70-200 f/2.8L IS II and his 400 DO through BAA in ten days. In the past two months we have sold a Canon 800, a Canon 500 II, 3 400 DO lenses, a Nikon 500mm, and lots more. If you are interested in using our services, please e-mail.
Click here and scroll down for the current listings.
Typos
In all blog posts and Bulletins, feel free to e-mail or to leave a comment regarding any typos, wrong words, misspellings, omissions, or grammatical errors. Just be right. 🙂
|

|
|
I hope that you can join us on this great trip. The vertical puffin image was created by David Tipling. The rest–almost all from the UK, are mine :).
|
UK Puffins and Gannets IPT July 2-9, 2014. 5 full days of puffins and two half-days of gannet boat photography: $4,999 USD. Limit 10 + the 2 leaders.
Desperately needed: 1 female roommate.
Fly to Edinburgh (say “ED-in-BUR-row”), Scotland on a red eye flight on July 1st arriving on the early morning of July 2 or certainly before 10am. UK folks who plan on driving please contact me via e-mail immediately.
There are direct flights to Edinburgh from both Philadelphia and Toronto. If you learn of any others please advise via e-mail so that I may share with all the interested folks. Fly home mid-morning on July 9. UK locals and our many European friends are of course welcome.
With the needed 5 deposits in hand, this trip is a go; you can buy your flights now :).
What’s included:
5 full DAYS on the best UK puffin boat; trips to 2 different islands–all dependent on decent weather, i.e, no major storms. Seabirds including scads of Atlantic Puffin both in flight and perched, Razorbill, Great Cormorant, Shag, and others likely. The trip is times to maximize the opportunities for photographing the puffins bringing fish back to the nests. All boat fares and landing fees are included. The boat leaves at 9:30am. We have two hours on the first island. We are then picked up and head to the 2nd island for a 2+ hour session. The weather is typically cloudy bright.
One late-afternoon (2 July) and one early morning (probably 8 July) trip on a gannet photography boat where the birds are fed and dive very close to the boat. Both are dependent on good weather but we do have some flexibility. Boat fares and the cost of the fish are covered. Each will consist of a one hour outbound ride, two hours of diving Northern Gannet photography (with 6 boxes of fish) and the one hour return trip.
The tentative, weather-dependent itinerary:
July 2: airport pick-up no later than 10am UK time. Lunch on your dime. Drive to hotel. Afternoon gannet boat trip/time TBD.
July 3, 4, 5, 6, & 7: Full Day Puffin Boat trips as noted above.
July 8: early morning Gannet Boat trip. Afternoon: Small group Image review and Photoshop sessions. Pack for the trip home.
July 9: early morning departure for Edinburgh Airport (EDI).
The itinerary is subject to change to ensure the best possible photographic opportunities.
A super-telephoto lens is not required on this trip. The 300mm f/2.8s are ideal. I will be bringing one along with my 200-400mm with Internal Extender, my 70-200 f/2.8L IS II, and a shorter zoom lenses. Plus three 1.4X and two 2X TCs, a Gitzo 3532 LS Carbon Fiber tripod, and my Mongoose M3.6. I may go tripod-less on the puffin trips at times…. Or not…. All photography on the gannet boat will be hand held. It is likely that the 70-200s will be ideal for the gannets.
7 nights lodging in an older but excellent hotel just a few minutes from the puffin boat dock with about a 70 minute ride to the gannet boat. Double occupancy will be the rule though we might be able to offer a single supplement at an exorbitant price. See the hotel info here.
All breakfasts and dinner (at the hotel) from dinner on July 2 through dinner on July 8. And breakfast on our get-away day unless we need to leave earlier than they serve to make our flights home…
Airport pick-up until 10am on July 2–this should not be a problem as there are lots of red-eye flights from the US to Edinburgh.
All ground transportation. Airport return on the early morning of July 9. We may be getting up very early on July 9th.
Two great leaders; Denise Ippolito and yours truly will provide personalized and small group in-the-field instruction. As usual, the closer you stay to us and the more questions that you ask the more you will learn. We will of course point out the best situations. You will learn to see these great situations for yourself, to get the right exposure every time after making a single test exposure, to work in Manual mode, and to design pleasing images by mastering your camera’s AF system. You will learn the basics of photographing birds in flight and how the relationship between light direction and wind direction impacts the photography of both birds in flight and perched puffins. And tons more.
We will be conducting informal, small group image review and Photoshop sessions after dinner. All are invited to bring their laptops. Image critiques of your five best images will be done after the trip upon request.
Early morning castle photography right near the hotel is an option for the early risers. In the event of inclement weather or stormy seas there is the possibility of bird photography along the coast. Early evening bird photography along the coast is also optional.
Not included: all lunches–for the most part we will need to pack lunches for the puffin trips, or you may opt to skip lunch. Your round trip airfare from home to Scotland. Booze, wine, and any other beverages other than coffee and tea at breakfast.
A non-refundable deposit of $2,000 USD is required to hold your spot so please check on flights and your schedule before committing. The balance will be due on 15 May so you may wish to pay the whole thing at once. Overseas folks may e-mail for wire transfer info. Our $15 wire transfer fee will be added to your balance.
Trip insurance is highly recommended as your deposit (less a $200 cancellation fee) will not be refunded unless the trip fills completely. I, and my family, use Travel Insurance Services.
After letting us know via e-mail that you will be coming, please send your deposit check made out to “Arthur Morris” to us as follows:
Arthur Morris/BIRDS AS ART
PO Box 7245 (US mail) or 4041 Granada Drive (if by courier).
Indian Lake Estates, FL 33855
My friend David Tipling, with multiple BBC honored images and the author of dozens of photo illustrated books, helped with the planning and arrangements for this trip.
If you have any questions, please contact me via e-mail.
May 11th, 2014 Selling Your Used Photo Gear Through BIRDS AS ART
Selling your used (or like-new) photo gear through the BAA Blog or via a BAA Online Bulletin is a great idea. We charge only a 5% commission. One of the more popular used gear for sale sites charges a minimum of 20% plus assorted fees! Yikes. The minimum item price here is $500 (or less for a $25 fee). If you are interested please e-mail with the words Items for Sale Info Request cut and pasted into the Subject line :). Stuff that is priced fairly–I offer free pricing advise, usually sells in no time flat as did Dennis Cassidy’s 500 II recently on the blog. Larry Master’s 400 DO and his 800 f/5.6 sold within a week. From Larry via e-mail: Thanks for helping me sell the lenses so quickly!
A Creative Adventure/BIRDS AS ART friend Kitto Kono sold her Nikon 500 to a Blog subscriber in less than a week. Janet Horton’s 7D sold this week after a $100 price reduction. Denise Ippolito’s 100-400 and her 100 macro sold in one day. Peter Kes sold his 70-200 f/2.8L IS II and his 400 DO through BAA in ten days. In the past two months we have sold a Canon 800, a Canon 500 II, 3 400 DO lenses, a Nikon 500mm, and lots more. If you are interested in using our services, please e-mail.
The Streak Continues: 162
This post marks 162 consecutive days with a new educational blog post. With so many folks getting in the habit of using our B&H links and our Amazon logo-links why quit now? April was a record month! To show your appreciation for my efforts here, we do ask that you use our the B&H and Amazon affiliate links on the right side of the blog for all of your purchases. Please check the availability of all photographic accessories in the BIRDS AS ART Online Store, especially Gitzo tripods, Wimberley tripod heads, and the like. We sell only what I used, tested, and can depend on. We will not sell you junk. We know the tools that you need to make creating great images easy and fun. And we are always glad to answer your gear questions via e-mail.
You can find the following items in the store: Gitzo tripods, Mongoose M3.6 and Wimberley heads, plates, low feet, and accessories, flash brackets, , Delkin e-film Pro Compact Flash Cards, LensCoat products, and our unique line-up of educational materials including ABP I & II, Digital Basics, Site and Set-up e-Guides, Canon and Nikon Camera Users and AF e-Guides, and MP-4 Photoshop video tutorials among others.
I would of course appreciate your using our B&H affiliate links for all of your major gear, video, and electronic purchases. For the photographic stuff mentioned in the paragraph above we, meaning BAA, would of course greatly appreciate your business. Here is a huge thank you to the many who have been using our links on a regular basis and visiting the BAA Online store as well.
This post took 1 1/2 hours to put together. Enjoy!
|
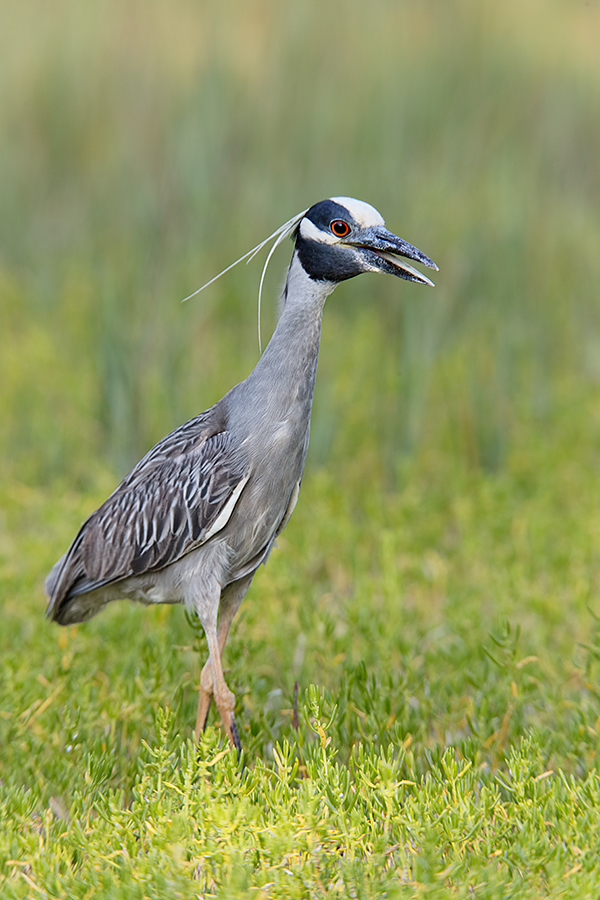
|
|
This image was created at Fort DeSoto Park in the shade with the slightly lowered Gitzo 3532 LS carbon fiber tripod, the Mongoose M3.6 head, the Canon EF 600mm f/4L IS II USM lens, Canon Extender EF 1.4X III, and the Canon EOS-1D X. ISO 400. Evaluative metering +1/3 stop as framed: 1/200 sec. at f/6.3 in Manual Av mode. AWB.
Four sensors up from the central Sensor/AI Servo-Surround/Rear Focus AF as framed active at the moment of exposure. I keep Orientation-Linked AF active at all times and find it very helpful. Learn about this CF and everything else there is to know about the 1D X and 5D III AF systems including how to manage the various AF Area Selection Modes, when to use which one, and several ways to move the AF sensor around in the 1D X AF Guide and the 5D Mark III User’s Guide. Click here to see the latest version of the Rear Focus Tutorial. Click on the image to see a larger version. .
|
Teleconverter Versatility
Many folks are reluctant to add a TC or to change TCs in the field. I routinely do either and both dozens of time each day. Just be sure to turn your camera off when doing so. I always remember to do that. But most of the time I forget to turn it back on. 🙁 Above, I began with the 600/1.4X combo to create a vertical portrait of this obliging adult Yellow-crowned Night-Heron. Then, after the four of us–Denise Ippolito, Brent Bridges, Mary Anderson, and yours truly had our fill of portraits, I switched out the 1.4X TC for the 2X TC and moved in for a tight head shot. When the bird yawned, I got the active sensor on the lower mandible and created two frames. The first one, above, was the sharpest. Variety is the spice of bird photography.
|
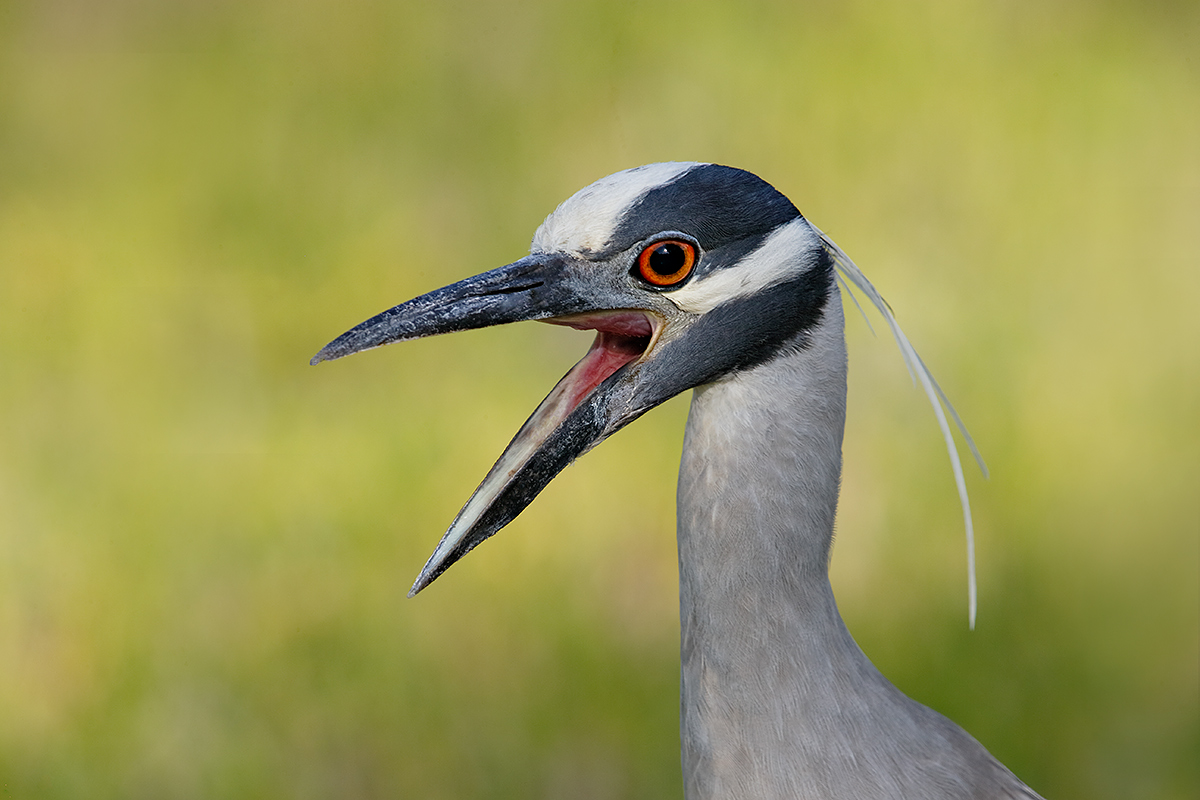
|
|
This image was created at Fort DeSoto with the Gitzo 3532 LS carbon fiber tripod, the Mongoose M3.6 head, the Canon EF 600mm f/4L IS II USM lens, the Canon Extender EF 2X III, and the Canon EOS-1D X. ISO 400. Evaluative metering +1/3 stop as framed: 1/320 sec. at f/11 in Manual Av mode. AWB.
Central Sensor/AI Servo-Expand/Rear Focus AF as framed was active at the moment of exposure. When you add the 2X TC to an f/4 lens with the 1DX or the 5D III hit the MFn button once to toggle to AF Expand and enjoy 4 extra AF sensors. Learn everything there is to know about the 1D X and 5D III AF systems including how to manage the various AF Area Selection Modes, when to use which one, and several ways to move the AF sensor around in the 1D X AF Guide and the 5D Mark III User’s Guide. Click here to see the latest version of the Rear Focus Tutorial. Click on the image to see a larger version. .
|
Your Favorite?
Which of the two images above is the strongest? Please leave a comment and let us know why as well.
Fort DeSoto Site Guide
The Fort DeSoto Site Guide describes several locations where you can look for today’s featured species. I had checked this spot in the morning for naught, but in the afternoon the second time was the charm. You can get yourself a copy of the Fort DeSoto Site Guide here. Learn the best spots, where to be when in what season in what weather. Learn the best wind directions for the various locations. BAA Site Guides are the next best thing to being on an IPT. You can see all of them here.
Used Nikon Super-Telephoto Lens for Sale
Nikon AF-S 400mm f/2.8G ED VR AF Lens
The first is a used Nikon AF-S NIKKOR 400mm f/2.8G ED VR AF lens for $5999.00. This lens sells new from B&H for $8999.00. The price includes UPS insured Ground shipping to the continental US. The lens comes with just about everything that came with the original purchase including the lens trunk, monopod collar, front lens cover, rear lens cap, slip on HK 33 Lens Hood, Slip-in Filter Holder, 52mm screw-in NC Filter, and LN – 1 Strap. The lens is in excellent condition with some minor blemishes and scratches on the exterior body and lens hood. Photos upon request. Potential buyers can contact Kitty via e-mail or by phone: 610-995-2339. Your check must clear before the lens is shipped.
The 400 f/2.8 is superb for large mammals, for birds at close range, and for work at bird feeders. Priced at $3,000 less than new this one should sell quickly.
Used Canon Gear for Sale
Used Canon 100-400mm f/4.5-5.6L IS USM Lens for Sale/Price Reduced $100!
Multiple IPT veteran Bill Wingfield is offering a Canon 100-400mm f/4.5-5.6L IS USM lens in excellent condition for $1325! The glass is clean and the lens is in perfect working condition. The sale includes the lens hood, the fabric case, and insured shipping by UPS Ground to US addresses only. Personal checks only; your new lens will be shipped after your check clears.
For more than a decade I used the 100-400 to create hundreds of sharp, sale-able image. It is a very versatile lens.
You can reach Bill via e-mail or by phone at 843-729-6670.
Used Canon 800mm f/5.6L IS Lens for Sale
Multiple IPT veteran, the too-kind Jim Bicket, is offering a Canon EF 800mm f/5.6L IS USM lens in excellent condition for $8750. The lens is like new except for some wear on the bottom of the lens hood near the forward edge when the hood is reversed. The sales includes the LensCoat that has protected the lens since day 1, the leather hood, the original hard case and key, and insured shipping via UPS Ground to US addresses only. Personal checks only; your new lens will be shipped only after your check clears.
This great lens, my favorite for 3 years, sells new at B&H for $13,999.00. A month ago B&H was offering one in mint condition for a ridiculous $10,249.90; it sold overnight. Go figure. Jim’s lens will save you a ton of dough and you will have a great lens with lots of reach.
Interested folks can contact Jim via e-mail or try him at 501-915-9336.
This sale will be made through BAA. Please call Jim at 863-221-2372 (weekdays) or shoot me an if you have any questions.
Used EOS-5D Mark II for Sale/Price Reduced $100!
Doug Bolt’s 400 DO sold early last week. Doug is offering a used EOS-5D Mark II in very good to excellent condition for $1099! There is a shallow scratch on the body and a faint smudge on the top LCD. The sale includes a RRS L-plate, an off-brand vertical grip, and the original box and all the stuff that came in it. The seller will pay shipping to US addresses only. This one is a great body for flowers and landscapes. Mine saved me on a Southern Oceans cruise when I trashed two EOS-1D Mark IV bodies in a rainstorm; it was a great back-up camera body. The item will ship only when the check clears.
Please contact Doug for a link to photos of the camera and for additional info via e-mail or try him by phone at home: at 301-937-3112 or on his cell at 301-537-8073.
Used Canon EOS-7D for Sale
Doug Bolt loves his 5D Mark III so much that he is also offering a used EOS-7D camera body for $799. The sale includes a RRS camera body plate. The seller will pay shipping to US addresses only. This one is a great starter body. The item will ship only when the check clears.
Please contact Doug for additional info via e-mail or try him by phone at home: at 301-937-3112 or on his cell at 301-537-8073.
Support the BAA Blog. Support the BAA Bulletins: Shop B&H here!
We want and need to keep providing you with the latest free information, photography and Photoshop lessons, and all manner of related information. Show your appreciation by making your purchases immediately after clicking on any of our B&H or Amazon Affiliate links in this blog post. Remember, B&H ain’t just photography!
….. …..
Typos
In all blog posts and Bulletins, feel free to e-mail or to leave a comment regarding any typos, wrong words, misspellings, omissions, or grammatical errors. Just be right. 🙂
May 10th, 2014 The Streak Continues: 161
This post marks 161 consecutive days with a new educational blog post. With so many folks getting in the habit of using our B&H links and our Amazon logo-links why quit now? April was a record month! To show your appreciation for my efforts here, we do ask that you use our the B&H and Amazon affiliate links on the right side of the blog for all of your purchases. Please check the availability of all photographic accessories in the BIRDS AS ART Online Store, especially Gitzo tripods, Wimberley tripod heads, and the like. We sell only what I used, tested, and can depend on. We will not sell you junk. We know the tools that you need to make creating great images easy and fun. And we are always glad to answer your gear questions via e-mail.
You can find the following items in the store: Gitzo tripods, Mongoose M3.6 and Wimberley heads, plates, low feet, and accessories, flash brackets, , Delkin e-film Pro Compact Flash Cards, LensCoat products, and our unique line-up of educational materials including ABP I & II, Digital Basics, Site and Set-up e-Guides, Canon and Nikon Camera Users and AF e-Guides, and MP-4 Photoshop video tutorials among others.
I would of course appreciate your using our B&H affiliate links for all of your major gear, video, and electronic purchases. For the photographic stuff mentioned in the paragraph above we, meaning BAA, would of course greatly appreciate your business. Here is a huge thank you to the many who have been using our links on a regular basis and visiting the BAA Online store as well.
This post took 2 hours to put together. Enjoy!
Thanks Bobby V!
Denise and I met Bobby V (Robert van Mierop) on our recent trip to the St. Augustine Alligator Farm. Nice guy. Local guy. Makes lots of great images with the hand held Nikon AF-S Nikkor 70-200mm f/2.8G ED VR II lens, the Nikon TC-14E II 1.4x Teleconverter for D-AF-S & AF-I Lenses ONLY, and the Nikon D300 (now replaced by the Nikon D300s SLR Digital Camera (Body Only). Doubt me? You can check out his images here. He shoots lots of birds, wildlife, people, sports, and family events.
Anyhoo, he asks us out of the blue if we would like to do some nesting Least Terns. Is the sky blue? We joined him on our get-away day, Thursday past, and had a ball. With my shoulder not getting any better I trotted my Beach Rolly onto the beach. As the sand was fairly hard, it worked very well. More on that soon including some Bobby V images of yours truly in action. That afternoon we drove to Fort DeSoto where we met newcomer Mary Anderson from Kansas City and old friend and multiple IPT veteran Brent Bridges for 3 days of fun and learning. Lots on that too soon.
Thanks Bobby!
The Image Optimization
The image optimization process here–done after lunch in the lobby of the Comfort Inn North in St. Pete was fairly straightforward. After converting the image in DPP, I brought it into CS-6 and dust spotted it. I did some beach clean-up and eliminated the large dark area of sand behind the base of the bird’s tail using Denise Ippolito’s protective cloning on a Layer and fine tuning that with a Regular Layer mask. Then painted in some Linear Burn on the whitest WHITEs with a 5% opacity brush strokes using a Black, Hide-all, or Inverse Layer Mask. I cleaned up the bill and then applied my NIK 50-50 layer at 50% and a Contrast Mask to the black cap and the bill after selecting them with the Quick Selection Tool.
Throughout the process I used my usual cadre of clean-up tools: the Clone Stamp Tool, the Spot Healing Brush, and the amazing Patch Tool. And even cleaned a group of dust spots with Content Aware Fill. Last was my artistic crop from below and the left. You can see all of the changes in the Animated Gif above.
The Beach Rolly
You can learn more about this great product or purchase one by clicking here. You can learn more about the Beach Rolly and various accessories here.
Digital Basics
Everything above is detailed in my Digital Basics File–written in my easy-to-follow, easy-to-understand style. Are you tired of making your images look worse in Photoshop? Have you no clue as to how I optimized the image above? The Photoshop techniques mentioned above plus tons more are covered in my Digital Basics File, an instructional PDF that is sent via e-mail. It includes my complete digital workflow, dozens of great Photoshop tips, the use of Contrast Masks, several different ways of expanding and filling in canvas, all of my time-saving Keyboard Shortcuts, Quick Masking, Layer Masking, and NIK Color Efex Pro basics, my killer image clean-up techniques, Digital Eye Doctor, creating time-saving actions, and lots more.
The DPP RAW Conversion Guide
To learn why I use Canon’s Digital Photo Professional (DPP) to convert every image that I work on, click here.
APTATS I & II
Learn the details of advanced Quick Masking techniques in APTATS I. Learn Advanced Layer Masking Techniques in APTATS I. Mention this blog post and apply a $5 discount to either with phone orders only. Buy both APTATS I and APTATS II and we will be glad to apply at $15 discount with phone orders only.
|

|
|
I hope that you can join us on this great trip. The vertical puffin image was created by David Tipling. The rest–almost all from the UK, are mine :).
|
UK Puffins and Gannets IPT July 2-9, 2014. 5 full days of puffins and two half-days of gannet boat photography: $4,999 USD. Limit 10 + the 2 leaders.
Desperately needed: 1 female roommate.
Fly to Edinburgh (say “ED-in-BUR-row”), Scotland on a red eye flight on July 1st arriving on the early morning of July 2 or certainly before 10am. UK folks who plan on driving please contact me via e-mail immediately.
There are direct flights to Edinburgh from both Philadelphia and Toronto. If you learn of any others please advise via e-mail so that I may share with all the interested folks. Fly home mid-morning on July 9. UK locals and our many European friends are of course welcome.
With the needed 5 deposits in hand, this trip is a go; you can buy your flights now :).
What’s included:
5 full DAYS on the best UK puffin boat; trips to 2 different islands–all dependent on decent weather, i.e, no major storms. Seabirds including scads of Atlantic Puffin both in flight and perched, Razorbill, Great Cormorant, Shag, and others likely. The trip is times to maximize the opportunities for photographing the puffins bringing fish back to the nests. All boat fares and landing fees are included. The boat leaves at 9:30am. We have two hours on the first island. We are then picked up and head to the 2nd island for a 2+ hour session. The weather is typically cloudy bright.
One late-afternoon (2 July) and one early morning (probably 8 July) trip on a gannet photography boat where the birds are fed and dive very close to the boat. Both are dependent on good weather but we do have some flexibility. Boat fares and the cost of the fish are covered. Each will consist of a one hour outbound ride, two hours of diving Northern Gannet photography (with 6 boxes of fish) and the one hour return trip.
The tentative, weather-dependent itinerary:
July 2: airport pick-up no later than 10am UK time. Lunch on your dime. Drive to hotel. Afternoon gannet boat trip/time TBD.
July 3, 4, 5, 6, & 7: Full Day Puffin Boat trips as noted above.
July 8: early morning Gannet Boat trip. Afternoon: Small group Image review and Photoshop sessions. Pack for the trip home.
July 9: early morning departure for Edinburgh Airport (EDI).
The itinerary is subject to change to ensure the best possible photographic opportunities.
A super-telephoto lens is not required on this trip. The 300mm f/2.8s are ideal. I will be bringing one along with my 200-400mm with Internal Extender, my 70-200 f/2.8L IS II, and a shorter zoom lenses. Plus three 1.4X and two 2X TCs, a Gitzo 3532 LS Carbon Fiber tripod, and my Mongoose M3.6. I may go tripod-less on the puffin trips at times…. Or not…. All photography on the gannet boat will be hand held. It is likely that the 70-200s will be ideal for the gannets.
7 nights lodging in an older but excellent hotel just a few minutes from the puffin boat dock with about a 70 minute ride to the gannet boat. Double occupancy will be the rule though we might be able to offer a single supplement at an exorbitant price. See the hotel info here.
All breakfasts and dinner (at the hotel) from dinner on July 2 through dinner on July 8. And breakfast on our get-away day unless we need to leave earlier than they serve to make our flights home…
Airport pick-up until 10am on July 2–this should not be a problem as there are lots of red-eye flights from the US to Edinburgh.
All ground transportation. Airport return on the early morning of July 9. We may be getting up very early on July 9th.
Two great leaders; Denise Ippolito and yours truly will provide personalized and small group in-the-field instruction. As usual, the closer you stay to us and the more questions that you ask the more you will learn. We will of course point out the best situations. You will learn to see these great situations for yourself, to get the right exposure every time after making a single test exposure, to work in Manual mode, and to design pleasing images by mastering your camera’s AF system. You will learn the basics of photographing birds in flight and how the relationship between light direction and wind direction impacts the photography of both birds in flight and perched puffins. And tons more.
We will be conducting informal, small group image review and Photoshop sessions after dinner. All are invited to bring their laptops. Image critiques of your five best images will be done after the trip upon request.
Early morning castle photography right near the hotel is an option for the early risers. In the event of inclement weather or stormy seas there is the possibility of bird photography along the coast. Early evening bird photography along the coast is also optional.
Not included: all lunches–for the most part we will need to pack lunches for the puffin trips, or you may opt to skip lunch. Your round trip airfare from home to Scotland. Booze, wine, and any other beverages other than coffee and tea at breakfast.
A non-refundable deposit of $2,000 USD is required to hold your spot so please check on flights and your schedule before committing. The balance will be due on 15 May so you may wish to pay the whole thing at once. Overseas folks may e-mail for wire transfer info. Our $15 wire transfer fee will be added to your balance.
Trip insurance is highly recommended as your deposit (less a $200 cancellation fee) will not be refunded unless the trip fills completely. I, and my family, use Travel Insurance Services.
After letting us know via e-mail that you will be coming, please send your deposit check made out to “Arthur Morris” to us as follows:
Arthur Morris/BIRDS AS ART
PO Box 7245 (US mail) or 4041 Granada Drive (if by courier).
Indian Lake Estates, FL 33855
My friend David Tipling, with multiple BBC honored images and the author of dozens of photo illustrated books, helped with the planning and arrangements for this trip.
If you have any questions, please contact me via e-mail.
Used Nikon Super-Telephoto Lens for Sale
A Creative Adventure/BIRDS AS ART friend Kitto Kono sold her Nikon 500 yesterday to a Blog subscriber!
Nikon AF-S 400mm f/2.8G ED VR AF Lens
The first is a used Nikon AF-S NIKKOR 400mm f/2.8G ED VR AF lens for $5999.00. This lens sells new from B&H for $8999.00. The price includes UPS insured Ground shipping to the continental US. The lens comes with just about everything that came with the original purchase including the lens trunk, monopod collar, front lens cover, rear lens cap, slip on HK 33 Lens Hood, Slip-in Filter Holder, 52mm screw-in NC Filter, and LN – 1 Strap. The lens is in excellent condition with some minor blemishes and scratches on the exterior body and lens hood. Photos upon request. Potential buyers can contact Kitty via e-mail or by phone: 610-995-2339. Your check must clear before the lens is shipped.
The 400 f/2.8 is superb for large mammals, for birds at close range, and for work at bird feeders. Priced at $3,000 less than new this one should sell quickly.
Used Canon Gear for Sale
Janet Horton’s 7D sold this morning after a $100 price reduction. Denise Ippolito’s 100-400 and her 100 macro sold in one day. Peter Kes sold his 70-200 f/2.8L IS II and his 400 DO through BAA in just more than one week. In the past two months we have sold a Canon 800, a Canon 500 II, 3 400 DO lenses, a Nikon 500mm, and lots more. If you are interested in using our services, please e-mail.
Used Canon 100-400mm f/4.5-5.6L IS USM Lens for Sale/Price Reduced $100!
Multiple IPT veteran Bill Wingfield is offering a Canon 100-400mm f/4.5-5.6L IS USM lens in excellent condition for $1325! The glass is clean and the lens is in perfect working condition. The sale includes the lens hood, the fabric case, and insured shipping by UPS Ground to US addresses only. Personal checks only; your new lens will be shipped after your check clears.
For more than a decade I used the 100-400 to create hundreds of sharp, sale-able image. It is a very versatile lens.
You can reach Bill via e-mail or by phone at 843-729-6670.
Used Canon 800mm f/5.6L IS Lens for Sale
Multiple IPT veteran, the too-kind Jim Bicket, is offering a Canon EF 800mm f/5.6L IS USM lens in excellent condition for $8750. The lens is like new except for some wear on the bottom of the lens hood near the forward edge when the hood is reversed. The sales includes the LensCoat that has protected the lens since day 1, the leather hood, the original hard case and key, and insured shipping via UPS Ground to US addresses only. Personal checks only; your new lens will be shipped only after your check clears.
This great lens, my favorite for 3 years, sells new at B&H for $13,999.00. A month ago B&H was offering one in mint condition for a ridiculous $10,249.90; it sold overnight. Go figure. Jim’s lens will save you a ton of dough and you will have a great lens with lots of reach.
Interested folks can contact Jim via e-mail or try him at 501-915-9336.
This sale will be made through BAA. Please call Jim at 863-221-2372 (weekdays) or shoot me an if you have any questions.
Used EOS-5D Mark II for Sale/Price Reduced $100!
Doug Bolt’s 400 DO sold early last week. Doug is offering a used EOS-5D Mark II in very good to excellent condition for $1099! There is a shallow scratch on the body and a faint smudge on the top LCD. The sale includes a RRS L-plate, an off-brand vertical grip, and the original box and all the stuff that came in it. The seller will pay shipping to US addresses only. This one is a great body for flowers and landscapes. Mine saved me on a Southern Oceans cruise when I trashed two EOS-1D Mark IV bodies in a rainstorm; it was a great back-up camera body. The item will ship only when the check clears.
Please contact Doug for a link to photos of the camera and for additional info via e-mail or try him by phone at home: at 301-937-3112 or on his cell at 301-537-8073.
Used Canon EOS-7D for Sale
Doug Bolt loves his 5D Mark III so much that he is also offering a used EOS-7D camera body for $799. The sale includes a RRS camera body plate. The seller will pay shipping to US addresses only. This one is a great starter body. The item will ship only when the check clears.
Please contact Doug for additional info via e-mail or try him by phone at home: at 301-937-3112 or on his cell at 301-537-8073.
Typos
In all blog posts and Bulletins, feel free to e-mail or to leave a comment regarding any typos, wrong words, misspellings, omissions, or grammatical errors. Just be right. 🙂
May 9th, 2014 The Streak Continues: 160
This post marks 160 consecutive days with a new educational blog post. With so many folks getting in the habit of using our B&H links and our Amazon logo-links why quit now? April was a record month! To show your appreciation for my efforts here, we do ask that you use our the B&H and Amazon affiliate links on the right side of the blog for all of your purchases. Please check the availability of all photographic accessories in the BIRDS AS ART Online Store, especially Gitzo tripods, Wimberley tripod heads, and the like. We sell only what I used, tested, and can depend on. We will not sell you junk. We know the tools that you need to make creating great images easy and fun. And we are always glad to answer your gear questions via e-mail.
You can find the following items in the store: Gitzo tripods, Mongoose M3.6 and Wimberley heads, plates, low feet, and accessories, flash brackets, , Delkin e-film Pro Compact Flash Cards, LensCoat products, and our unique line-up of educational materials including ABP I & II, Digital Basics, Site and Set-up e-Guides, Canon and Nikon Camera Users and AF e-Guides, and MP-4 Photoshop video tutorials among others.
I would of course appreciate your using our B&H affiliate links for all of your major gear, video, and electronic purchases. For the photographic stuff mentioned in the paragraph above we, meaning BAA, would of course greatly appreciate your business. Here is a huge thank you to the many who have been using our links on a regular basis and visiting the BAA Online store as well.
This post took 2 hours to put together. Enjoy!
Used Canon and Nikon Gear for Sale
There are some great buys available on a variety of super-telephotos lenses as well as a few camera bodies. Scroll down for details. Kitty Kono’s Nikon 500 sold yesterday. Her 400 f/2.8 is still there for the taking at a great price.
|
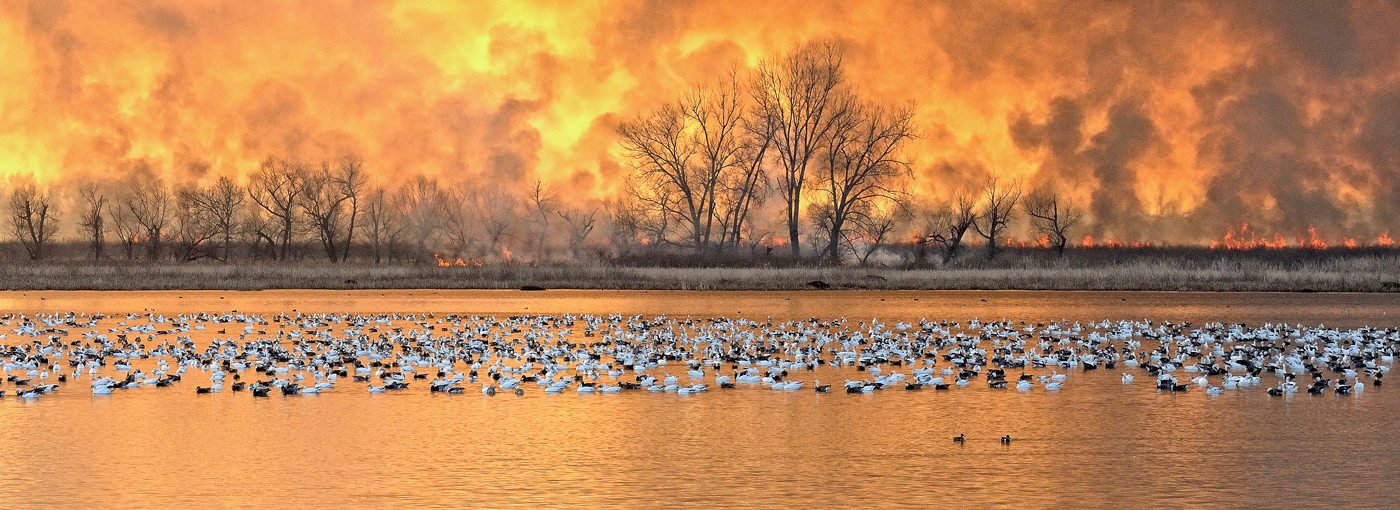
|
First Place:: Snow Goose Fire/34 points.
|
Snow Goose Fire
Congratulations to Dave Klein
|
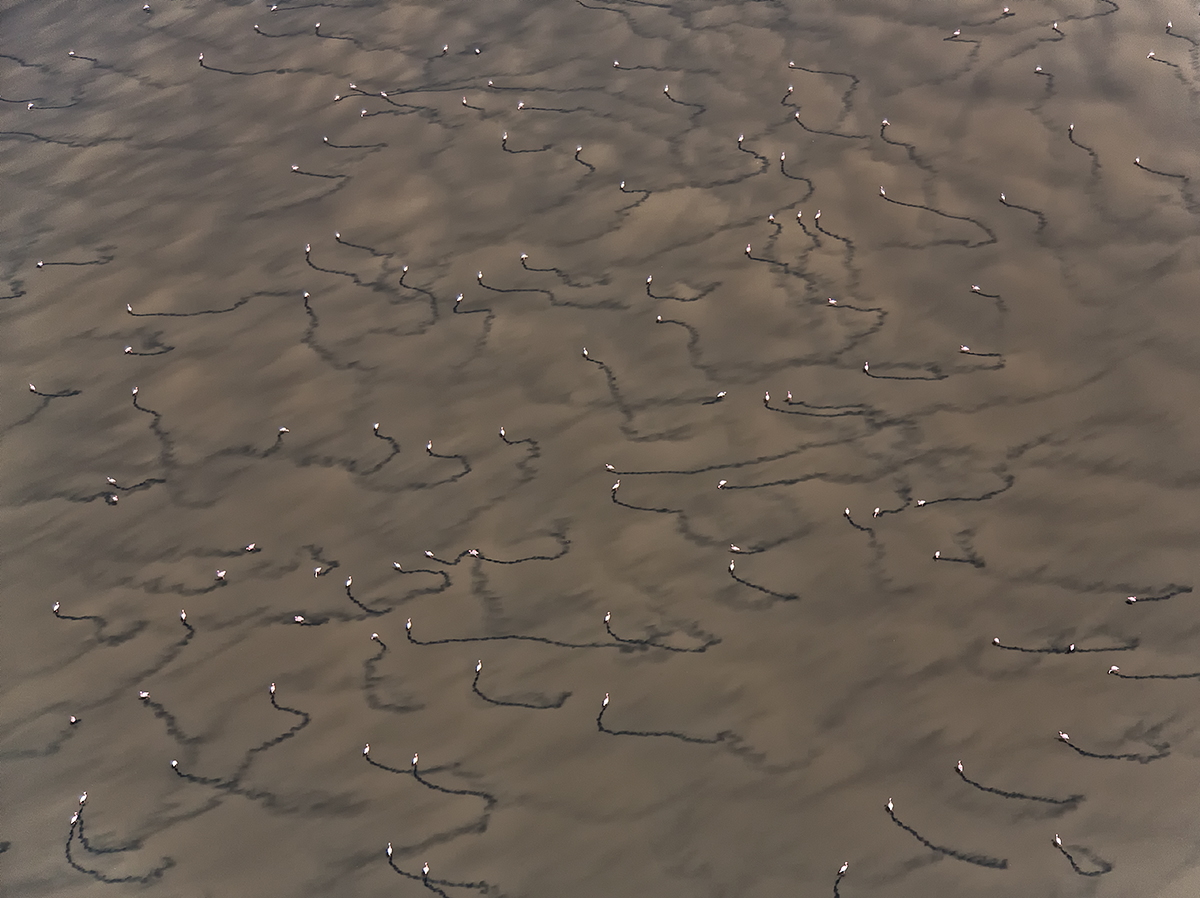
|
2nd Place: Flamingo Trails/31 points
|
Flamingo Trails
Congratulations to Paul McKenzie
|
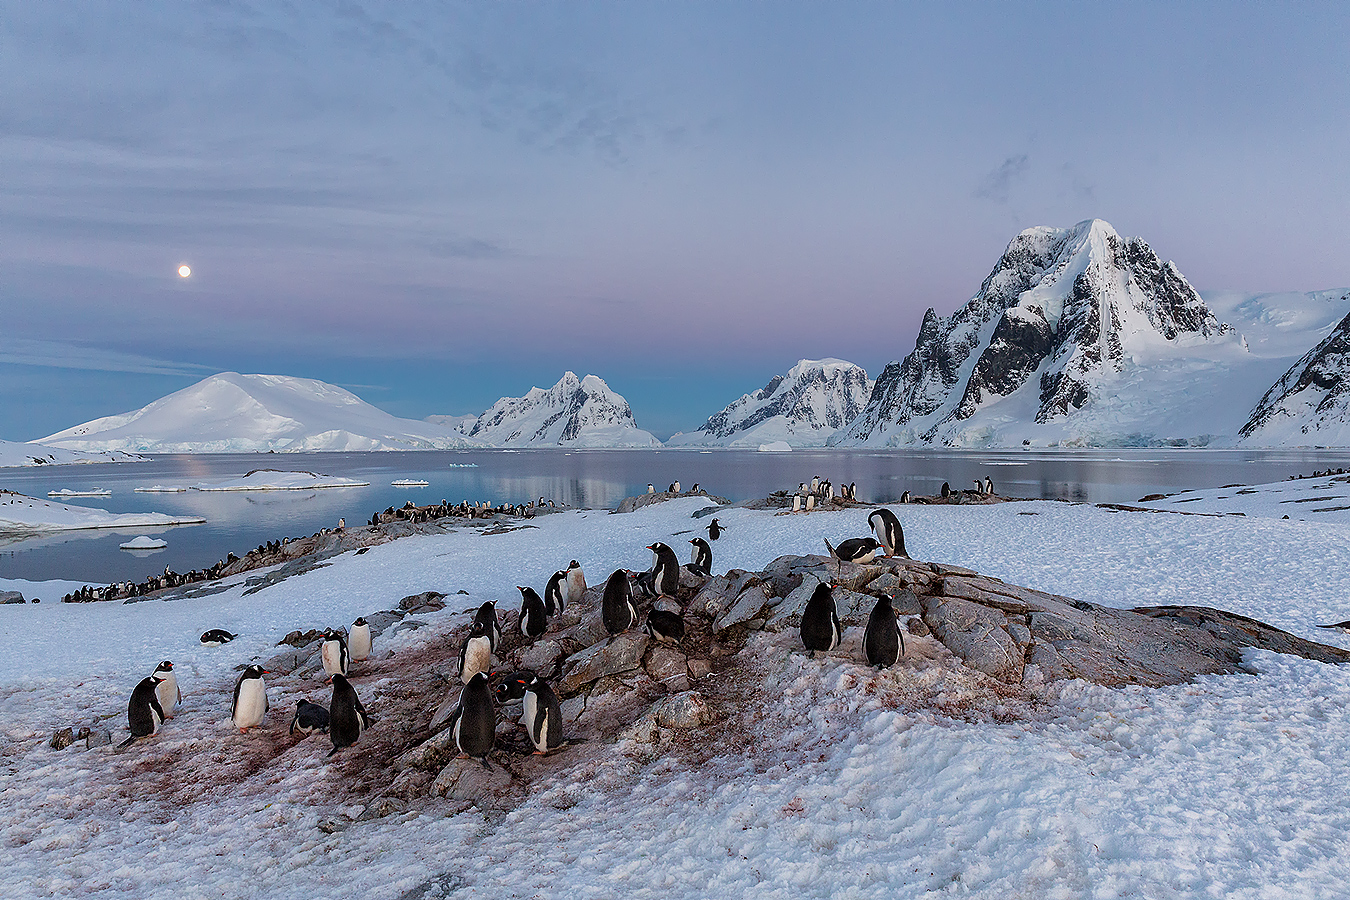
|
Third Place: Earth Shadow Gentoos/28 points
|
Earth Shadow Gentoos
Congratulations to Clemens Van der Werf.
Small in the Frame Category Prizes
Thanks a stack to our great sponsors. Please note that prizes will not be sent until all of the category winners and the Grand Prize winner have been announced.
|
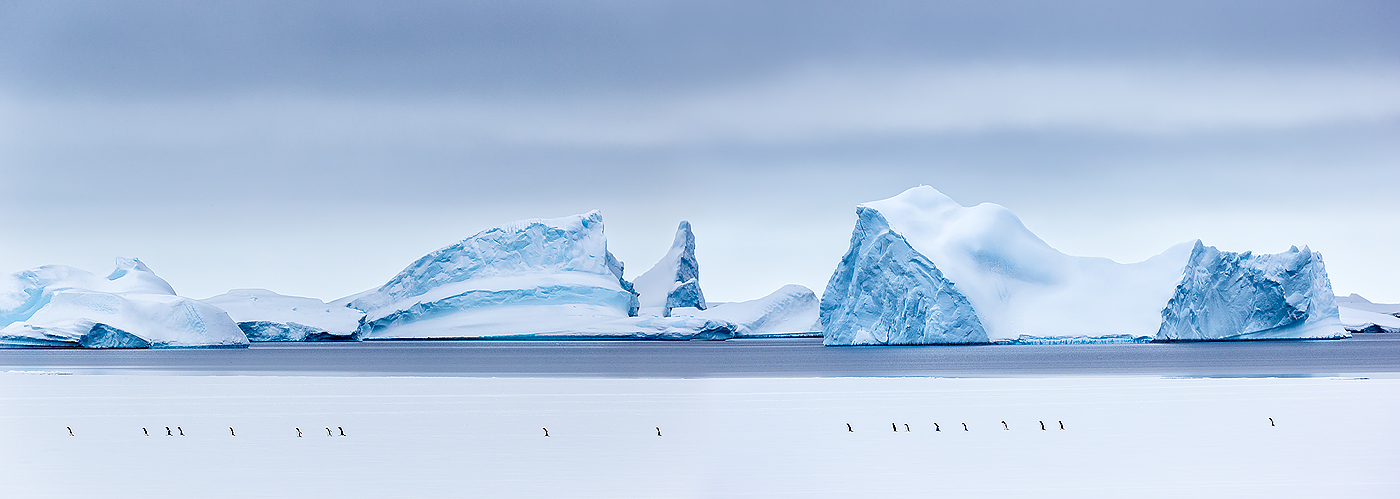
|
First Runner-up (tie): March of the Penguins/27 points.
|
March of the Penguins
Congratulations to Clemens Van der Werf.
|
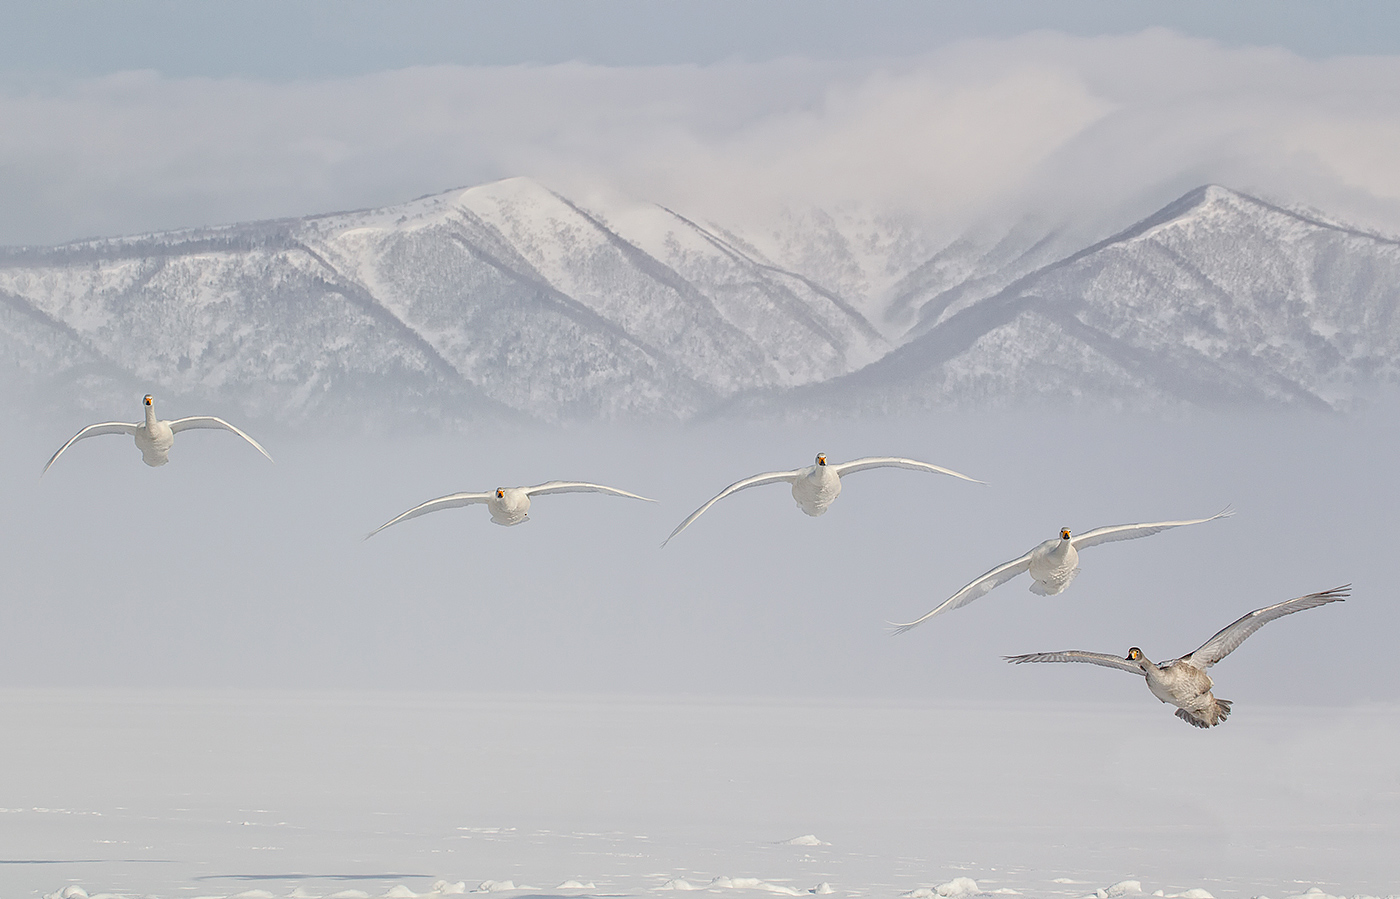
|
First Runner-up (tie): Landing Whooper Swans/27 points.
|
Landing Whooper Swans
Congratulations to Paul McKenzie.
|
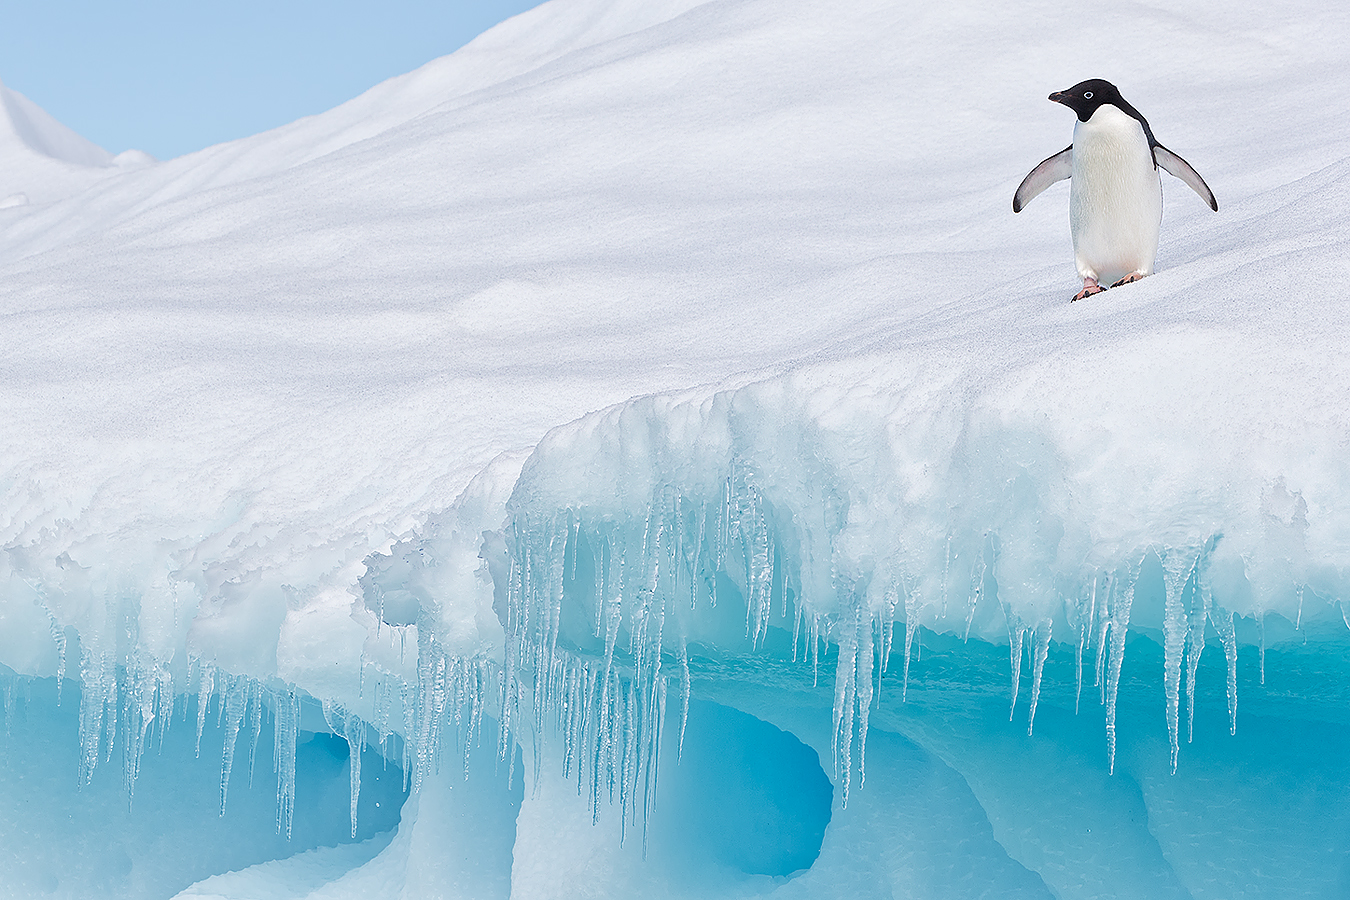
|
Third Runner-up: Icicle Adelie/26 points.
|
Icicle Adelie
Congratulations to Clemens Van der Werf.
|
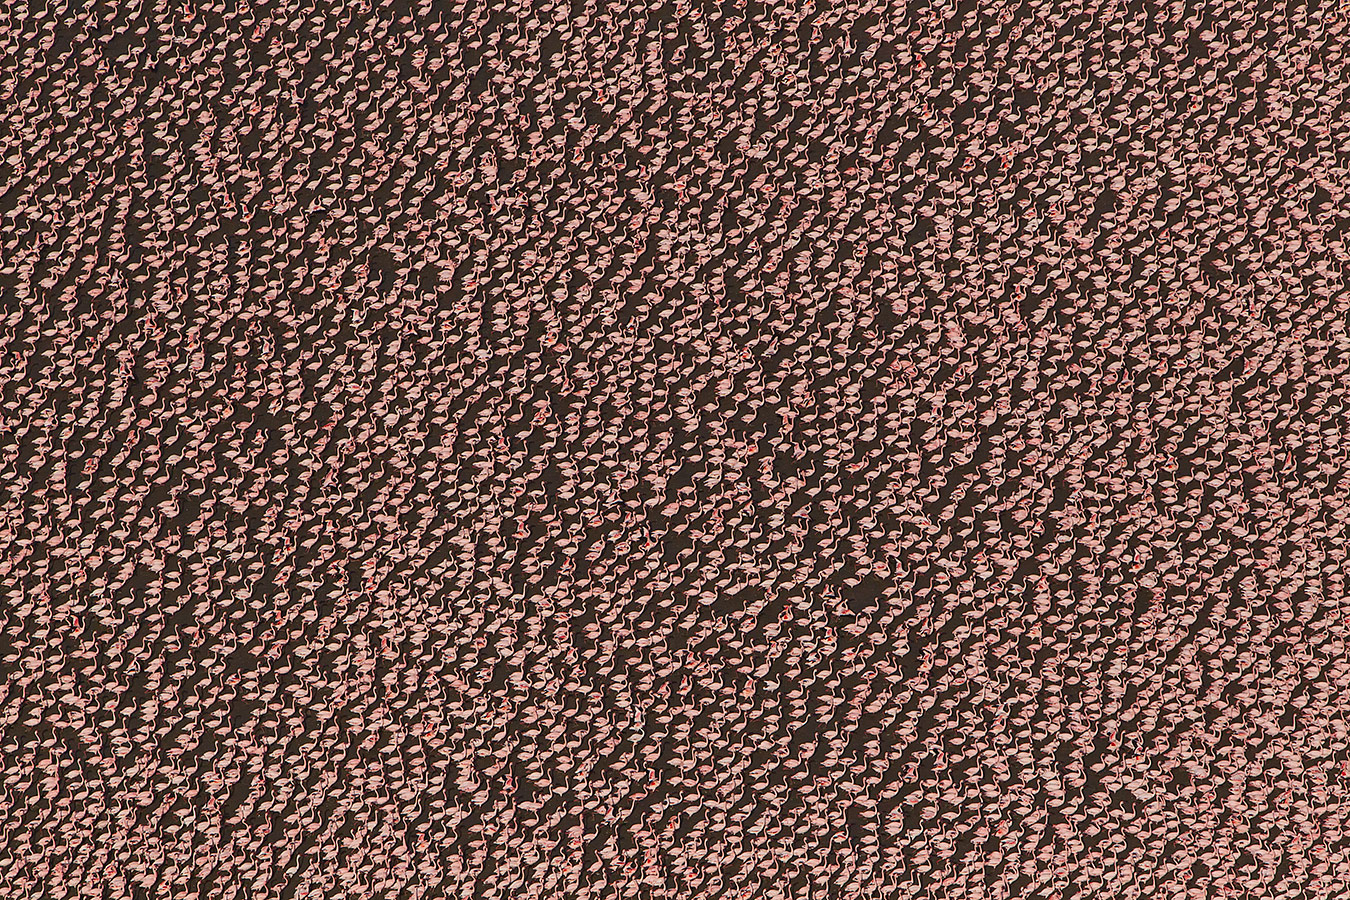
|
Fourth Runner-up: Wall to Wall/25 points.
|
Congratulations to Paul McKenzie.
Wall to Wall
|
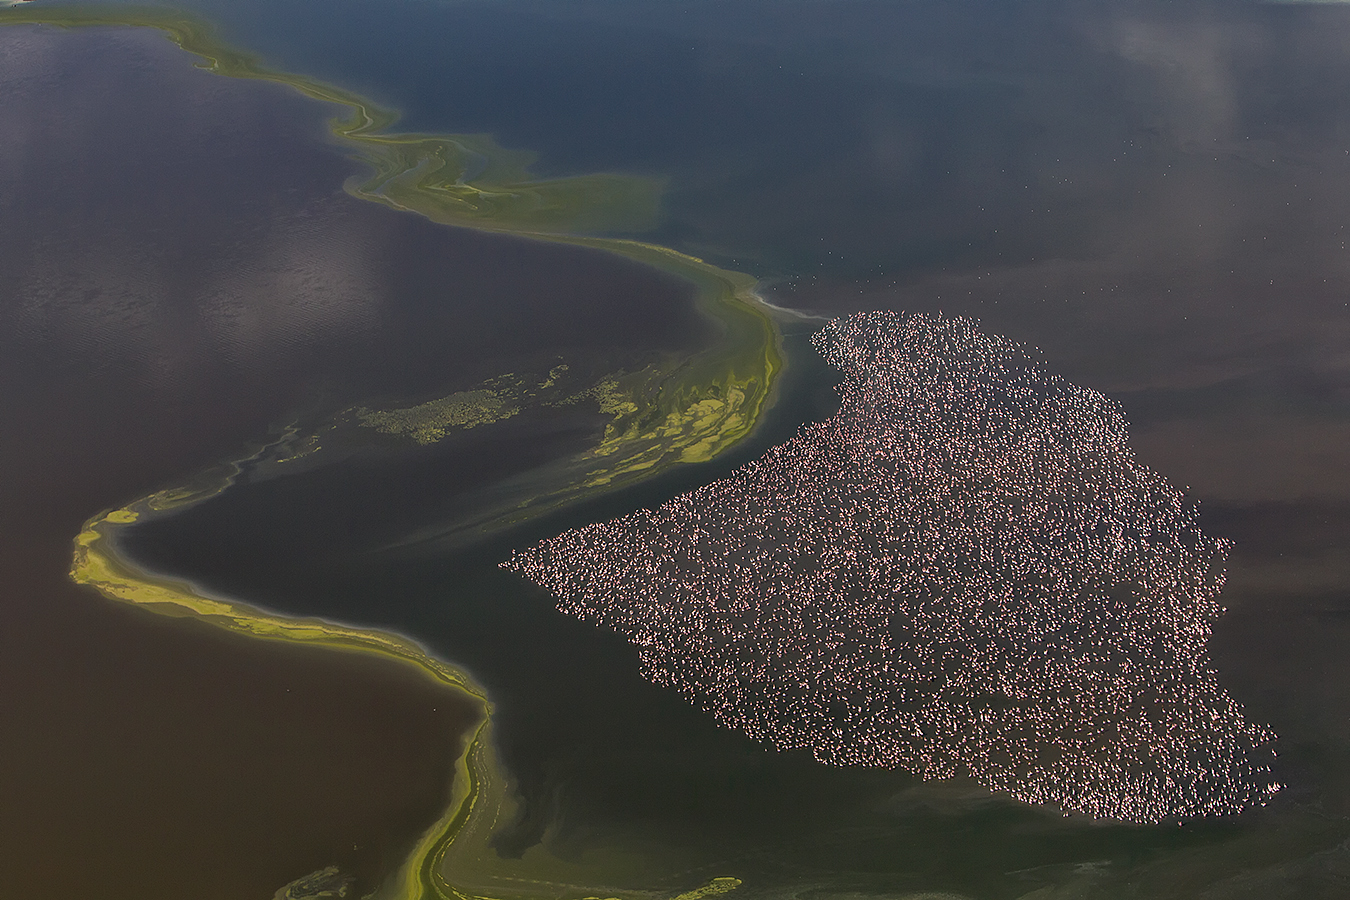
|
Fifth Runner-up: Flamingo Abstract/24 points.
|
Flamingo Abstract
Congratulations to Paul McKenzie.
|
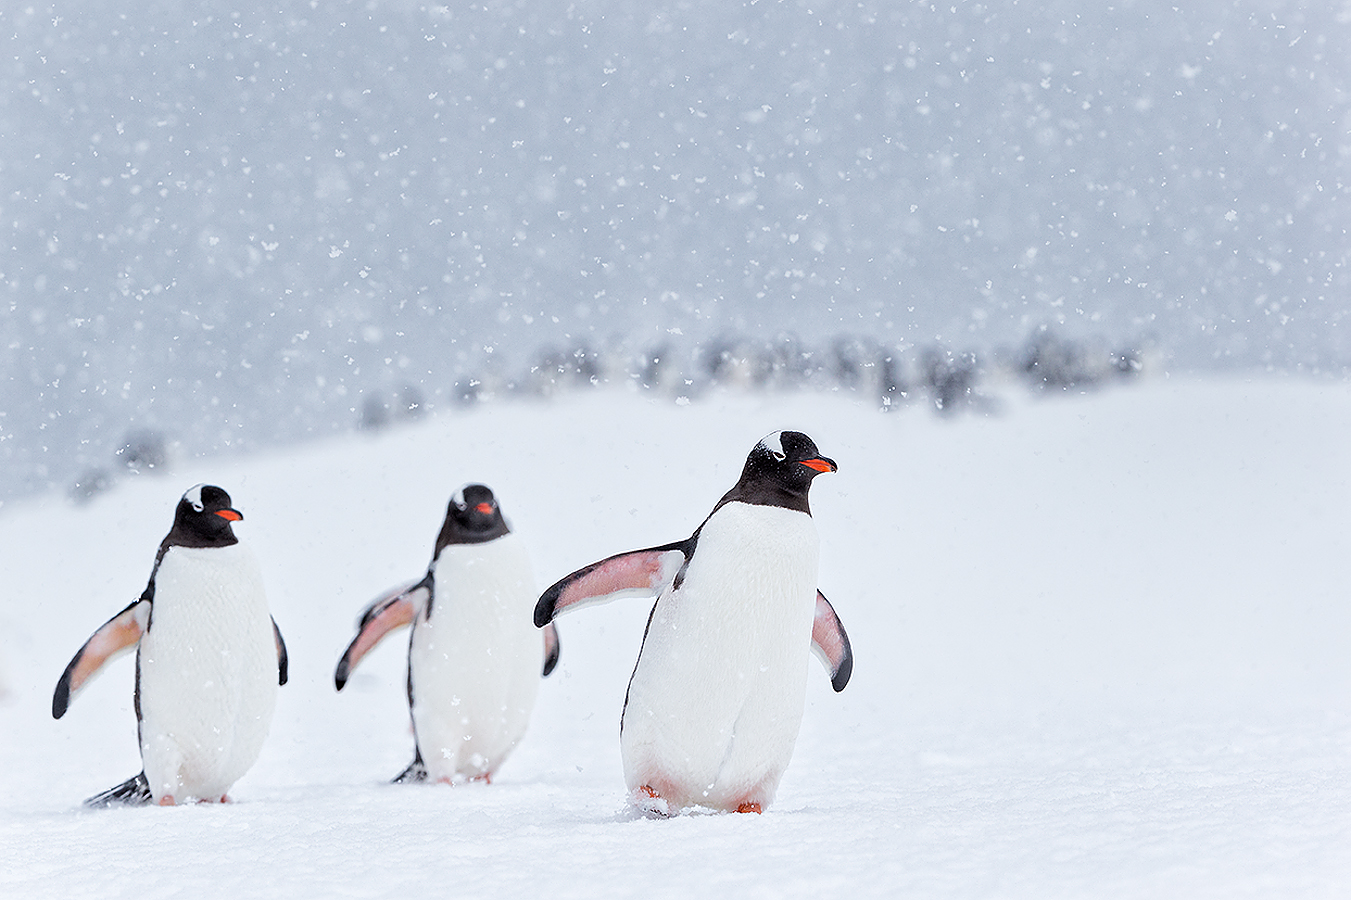
|
9th Place: Follow Us!/22 points.
|
Follow Us!
Congratulations to Clemens Van der Werf.
|
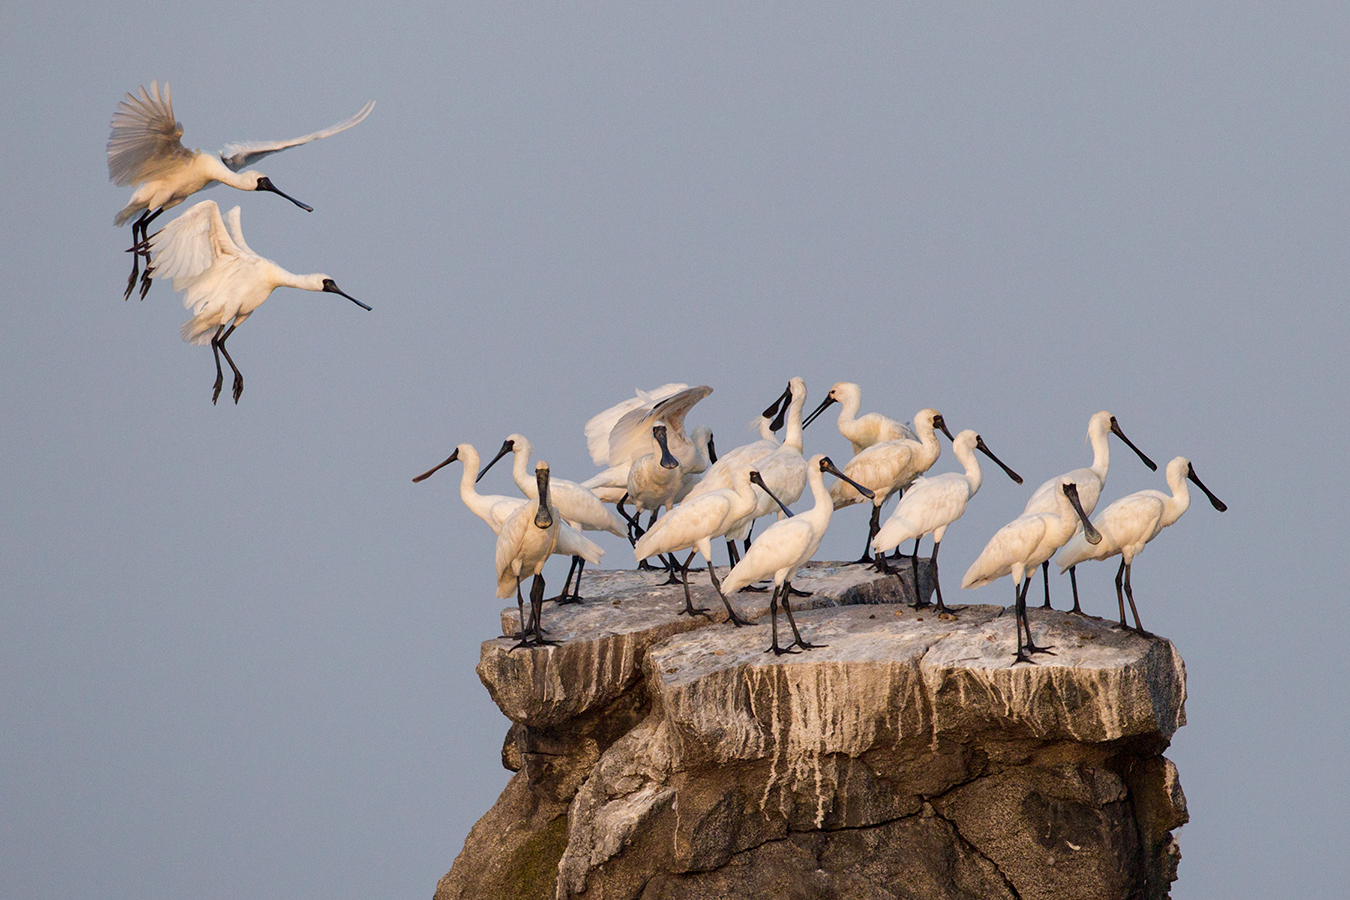
|
10th Place (tie): Black-faced Spoonbill Rock/20 points.
|
Black-faced Spoonbill Rock
Congratulations to Seungho Cho.
|
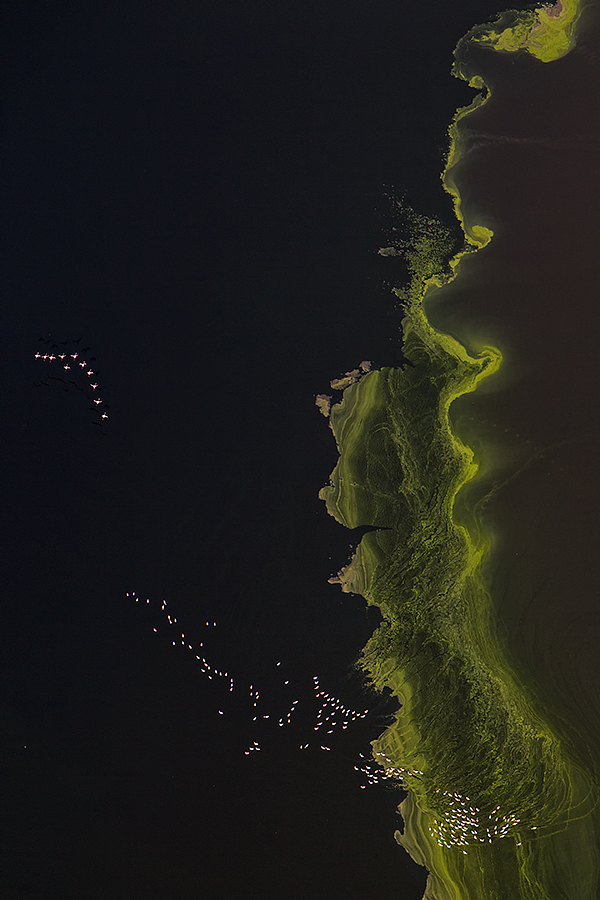
|
10th Place (tie): Flamingo Algae Slick/20 points.
|
Flamingo Algae Slick
Congratulations to Paul McKenzie.
|
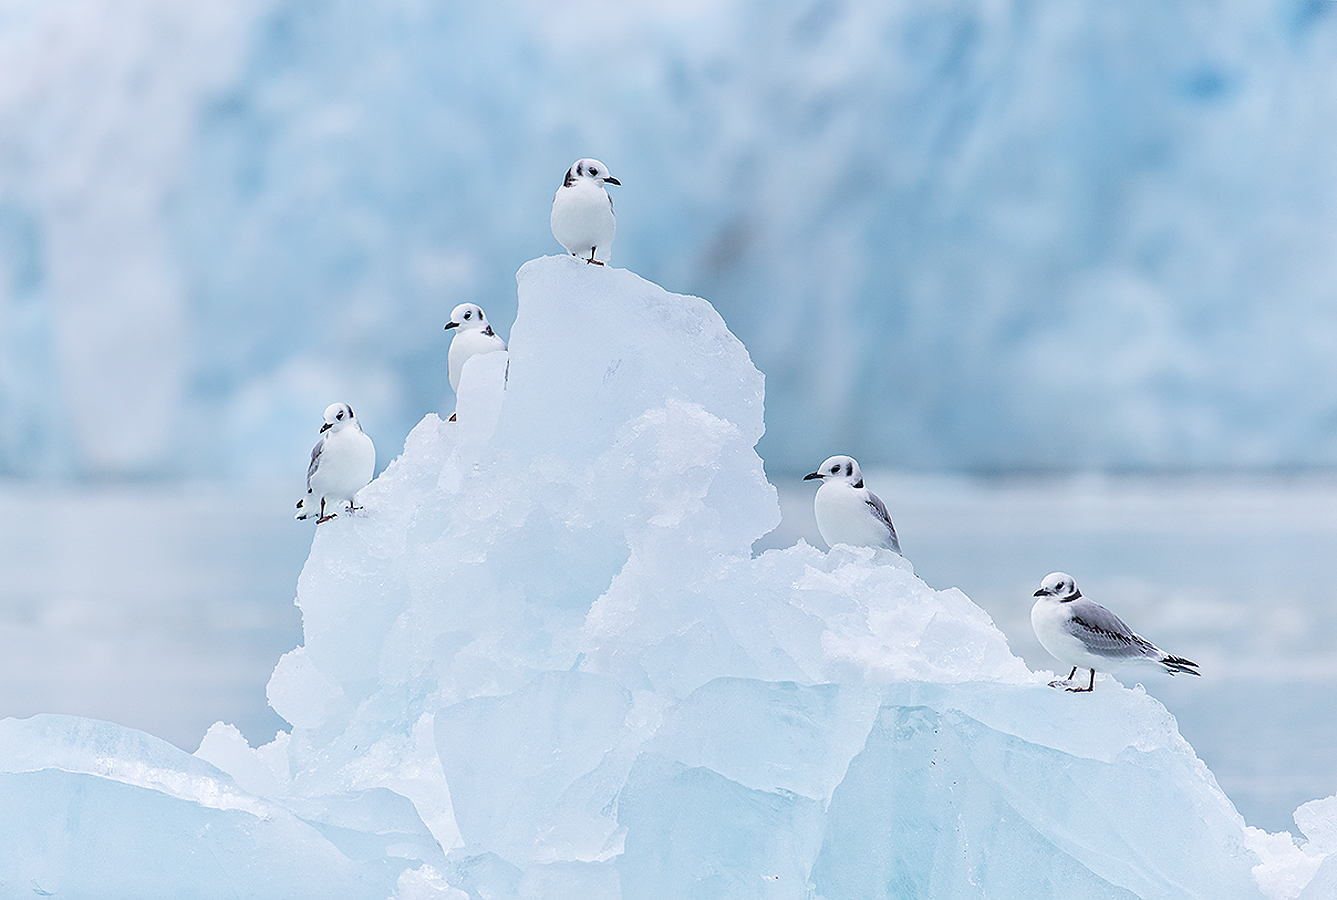
|
12th Place (tie): Kittiwake Berg/19 points.
|
Kittiwake Berg
Congratulations to Clemens Van der Werf.
|

|
12th Place (tie): Heavenly/19 points.
|
Heavenly
Congratulations to Eve Turek
Stuff
Getting even a single image to the final round of judging in any category is a huge accomplishment. All of the photographs in the finals of the Small in the Frame category are superb images; I would be proud to have made any one of them. 9 of the 13 images received at least 1 first place vote in the public ballot. Congrats again to all the winning and honored photographers.
Thanks to the readers who voted. And thanks again to our sponsors and to the panel of judges. Special thanks to Denise Ippolito and Peter Kes who helped me with the early rounds of judging. Please feel free to comment on the any of the images or to analyze and compare the judging; please remember that judging any contest or voting on the images is purely subjective. Coming next: Pleasing Blurs.
The Public Vote
1-Snow Goose Fire: 77 points.
2-Icicle Adelie: 66 points.
3-March of the Penguins: 61 points.
4-Flamingo Trails: 50 points.
5-Kittiwake Berg: 28 points.
6-Heavenly: 27 points.
7-(tie)/Follow Us: 20 points.
7-(tie)/Earth Shadow Gentoos: 20 points.
9-(tie)/Wall to Wall: 19 points.
9-(tie)/Landing Whooper Swans: 19 points.
11-Flamingo Algae Slick: 17 points.
12-Flamingo Abstract: 16 points.
13: Black Spoonbill Rock: 15 points.
|

|
|
I hope that you can join us on this great trip. The vertical puffin image was created by David Tipling. The rest–almost all from the UK, are mine :).
|
UK Puffins and Gannets IPT July 2-9, 2014. 5 full days of puffins and two half-days of gannet boat photography: $4,999 USD. Limit 10 + the 2 leaders.
Desperately needed: 1 female roommate.
Fly to Edinburgh (say “ED-in-BUR-row”), Scotland on a red eye flight on July 1st arriving on the early morning of July 2 or certainly before 10am. UK folks who plan on driving please contact me via e-mail immediately.
There are direct flights to Edinburgh from both Philadelphia and Toronto. If you learn of any others please advise via e-mail so that I may share with all the interested folks. Fly home mid-morning on July 9. UK locals and our many European friends are of course welcome.
With the needed 5 deposits in hand, this trip is a go; you can buy your flights now :).
What’s included:
5 full DAYS on the best UK puffin boat; trips to 2 different islands–all dependent on decent weather, i.e, no major storms. Seabirds including scads of Atlantic Puffin both in flight and perched, Razorbill, Great Cormorant, Shag, and others likely. The trip is times to maximize the opportunities for photographing the puffins bringing fish back to the nests. All boat fares and landing fees are included. The boat leaves at 9:30am. We have two hours on the first island. We are then picked up and head to the 2nd island for a 2+ hour session. The weather is typically cloudy bright.
One late-afternoon (2 July) and one early morning (probably 8 July) trip on a gannet photography boat where the birds are fed and dive very close to the boat. Both are dependent on good weather but we do have some flexibility. Boat fares and the cost of the fish are covered. Each will consist of a one hour outbound ride, two hours of diving Northern Gannet photography (with 6 boxes of fish) and the one hour return trip.
The tentative, weather-dependent itinerary:
July 2: airport pick-up no later than 10am UK time. Lunch on your dime. Drive to hotel. Afternoon gannet boat trip/time TBD.
July 3, 4, 5, 6, & 7: Full Day Puffin Boat trips as noted above.
July 8: early morning Gannet Boat trip. Afternoon: Small group Image review and Photoshop sessions. Pack for the trip home.
July 9: early morning departure for Edinburgh Airport (EDI).
The itinerary is subject to change to ensure the best possible photographic opportunities.
A super-telephoto lens is not required on this trip. The 300mm f/2.8s are ideal. I will be bringing one along with my 200-400mm with Internal Extender, my 70-200 f/2.8L IS II, and a shorter zoom lenses. Plus three 1.4X and two 2X TCs, a Gitzo 3532 LS Carbon Fiber tripod, and my Mongoose M3.6. I may go tripod-less on the puffin trips at times…. Or not…. All photography on the gannet boat will be hand held. It is likely that the 70-200s will be ideal for the gannets.
7 nights lodging in an older but excellent hotel just a few minutes from the puffin boat dock with about a 70 minute ride to the gannet boat. Double occupancy will be the rule though we might be able to offer a single supplement at an exorbitant price. See the hotel info here.
All breakfasts and dinner (at the hotel) from dinner on July 2 through dinner on July 8. And breakfast on our get-away day unless we need to leave earlier than they serve to make our flights home…
Airport pick-up until 10am on July 2–this should not be a problem as there are lots of red-eye flights from the US to Edinburgh.
All ground transportation. Airport return on the early morning of July 9. We may be getting up very early on July 9th.
Two great leaders; Denise Ippolito and yours truly will provide personalized and small group in-the-field instruction. As usual, the closer you stay to us and the more questions that you ask the more you will learn. We will of course point out the best situations. You will learn to see these great situations for yourself, to get the right exposure every time after making a single test exposure, to work in Manual mode, and to design pleasing images by mastering your camera’s AF system. You will learn the basics of photographing birds in flight and how the relationship between light direction and wind direction impacts the photography of both birds in flight and perched puffins. And tons more.
We will be conducting informal, small group image review and Photoshop sessions after dinner. All are invited to bring their laptops. Image critiques of your five best images will be done after the trip upon request.
Early morning castle photography right near the hotel is an option for the early risers. In the event of inclement weather or stormy seas there is the possibility of bird photography along the coast. Early evening bird photography along the coast is also optional.
Not included: all lunches–for the most part we will need to pack lunches for the puffin trips, or you may opt to skip lunch. Your round trip airfare from home to Scotland. Booze, wine, and any other beverages other than coffee and tea at breakfast.
A non-refundable deposit of $2,000 USD is required to hold your spot so please check on flights and your schedule before committing. The balance will be due on 15 May so you may wish to pay the whole thing at once. Overseas folks may e-mail for wire transfer info. Our $15 wire transfer fee will be added to your balance.
Trip insurance is highly recommended as your deposit (less a $200 cancellation fee) will not be refunded unless the trip fills completely. I, and my family, use Travel Insurance Services.
After letting us know via e-mail that you will be coming, please send your deposit check made out to “Arthur Morris” to us as follows:
Arthur Morris/BIRDS AS ART
PO Box 7245 (US mail) or 4041 Granada Drive (if by courier).
Indian Lake Estates, FL 33855
My friend David Tipling, with multiple BBC honored images and the author of dozens of photo illustrated books, helped with the planning and arrangements for this trip.
If you have any questions, please contact me via e-mail.
Used Nikon Super-Telephoto Lens for Sale
A Creative Adventure/BIRDS AS ART friend Kitto Kono sold her Nikon 500 yesterday to a Blog subscriber!
Nikon AF-S 400mm f/2.8G ED VR AF Lens
The first is a used Nikon AF-S NIKKOR 400mm f/2.8G ED VR AF lens for $5999.00. This lens sells new from B&H for $8999.00. The price includes UPS insured Ground shipping to the continental US. The lens comes with just about everything that came with the original purchase including the lens trunk, monopod collar, front lens cover, rear lens cap, slip on HK 33 Lens Hood, Slip-in Filter Holder, 52mm screw-in NC Filter, and LN – 1 Strap. The lens is in excellent condition with some minor blemishes and scratches on the exterior body and lens hood. Photos upon request. Potential buyers can contact Kitty via e-mail or by phone: 610-995-2339. Your check must clear before the lens is shipped.
The 400 f/2.8 is superb for large mammals, for birds at close range, and for work at bird feeders. Priced at $3,000 less than new this one should sell quickly.
Used Canon Gear for Sale
Denise Ippolito’s 100-400 and her 100 macro sold in one day. Peter Kes sold his 70-200 f/2.8: IS II and his 400 DO through BAA in just more than one week. In the past two months we have sold a Canon 800, a Canon 500 II, 3 400 DO lenses, a Nikon 500mm, and lots more. If you are interested in using our services, please e-mail.
Used Canon 100-400mm f/4.5-5.6L IS USM Lens for Sale/Price Reduced $100!
Multiple IPT veteran Bill Wingfield is offering a Canon 100-400mm f/4.5-5.6L IS USM lens in excellent condition for $1325! The glass is clean and the lens is in perfect working condition. The sale includes the lens hood, the fabric case, and insured shipping by UPS Ground to US addresses only. Personal checks only; your new lens will be shipped after your check clears.
For more than a decade I used the 100-400 to create hundreds of sharp, sale-able image. It is a very versatile lens.
You can reach Bill via e-mail or by phone at 843-729-6670.
Used Canon 800mm f/5.6L IS Lens for Sale
Multiple IPT veteran, the too-kind Jim Bicket, is offering a Canon EF 800mm f/5.6L IS USM lens in excellent condition for $8750. The lens is like new except for some wear on the bottom of the lens hood near the forward edge when the hood is reversed. The sales includes the LensCoat that has protected the lens since day 1, the leather hood, the original hard case and key, and insured shipping via UPS Ground to US addresses only. Personal checks only; your new lens will be shipped only after your check clears.
This great lens, my favorite for 3 years, sells new at B&H for $13,999.00. A month ago B&H was offering one in mint condition for a ridiculous $10,249.90; it sold overnight. Go figure. Jim’s lens will save you a ton of dough and you will have a great lens with lots of reach.
Interested folks can contact Jim via e-mail or try him at 501-915-9336.
This sale will be made through BAA. Please call Jim at 863-221-2372 (weekdays) or shoot me an if you have any questions.
Used EOS-5D Mark II for Sale/Price Reduced $100!
Doug Bolt’s 400 DO sold early last week. Doug is offering a used EOS-5D Mark II in very good to excellent condition for $1099! There is a shallow scratch on the body and a faint smudge on the top LCD. The sale includes a RRS L-plate, an off-brand vertical grip, and the original box and all the stuff that came in it. The seller will pay shipping to US addresses only. This one is a great body for flowers and landscapes. Mine saved me on a Southern Oceans cruise when I trashed two EOS-1D Mark IV bodies in a rainstorm; it was a great back-up camera body. The item will ship only when the check clears.
Please contact Doug for a link to photos of the camera and for additional info via e-mail or try him by phone at home: at 301-937-3112 or on his cell at 301-537-8073.
Used Canon EOS-7D for Sale
Doug Bolt loves his 5D Mark III so much that he is also offering a used EOS-7D camera body for $799. The sale includes a RRS camera body plate. The seller will pay shipping to US addresses only. This one is a great starter body. The item will ship only when the check clears.
Please contact Doug for additional info via e-mail or try him by phone at home: at 301-937-3112 or on his cell at 301-537-8073.
Used Canon EOS-7D for Sale/Price Reduced $100!
Janet Horton is offering a used Canon EOS-7D in excellent condition for $625!. The sale includes a RRS model B7D-L L plate, all items that were in the original box (including instruction manual) and the cost of insured shipping to US addresses only. Your check must clear before the item ships.
Please contact Janet via e-mail or try her at by phone at home: at 425-313-3060
Typos
In all blog posts and Bulletins, feel free to e-mail or to leave a comment regarding any typos, wrong words, misspellings, omissions, or grammatical errors. Just be right. 🙂
May 8th, 2014 IPT and I-T-F Updates
There are only 4 slots left on the UK Puffins and Gannets IPT and on the NOV 29-DEC Bosque IPT. The Fort DeSoto Short Notice, Nickerson Beach, and the Bosque Creative IPTs all have lots of room though the latter is filling nicely as Muriel McClellan and her daughter-in-law signed up recently. Scroll down for updated info & details on the St. Augustine In-the-Field days and the Fort DeSoto IPT. Click here for info on the others and for complete IPT details.
Used Canon and Nikon Gear for Sale
There are some great buys available on a variety of super-telephotos lenses as well as a few camera bodies. Scroll down for details. Kitty Kono’s Nikon 500 sold yesterday. Her 400 f/2.8 is still there for the taking at a great price.
|

|
|
Because there are so many amazing images the public voting in the Small-in-the-Frame Category of the BIRDS AS ART 2nd International Bird Photography Competition has been extended an additional day to give everyone an opportunity to vote. Click on the image to get a better idea of the great images in this category.
|
Small-in-the-Frame Voting Extended One Day
Join in the fun by voting on the Small-in-the-Frame Category of the BIRDS AS ART 2nd International Bird Photography Competition here. While the public vote has been very close to the results of the judge’s voting and the actual order of finish the opinions in this category so far have been all over the place. There are so many strong images that choosing your favorite five might just be impossible. Do take a peek. You have until early Friday morning to vote if you have not done so already.
The Streak Continues: 159
This post marks 159 consecutive days with a new educational blog post. With so many folks getting in the habit of using our B&H links and our Amazon logo-links why quit now? April was a record month! To show your appreciation for my efforts here, we do ask that you use our the B&H and Amazon affiliate links on the right side of the blog for all of your purchases. Please check the availability of all photographic accessories in the BIRDS AS ART Online Store, especially Gitzo tripods, Wimberley tripod heads, and the like. We sell only what I used, tested, and can depend on. We will not sell you junk. We know the tools that you need to make creating great images easy and fun. And we are always glad to answer your gear questions via e-mail.
You can find the following items in the store: Gitzo tripods, Mongoose M3.6 and Wimberley heads, plates, low feet, and accessories, flash brackets, , Delkin e-film Pro Compact Flash Cards, LensCoat products, and our unique line-up of educational materials including ABP I & II, Digital Basics, Site and Set-up e-Guides, Canon and Nikon Camera Users and AF e-Guides, and MP-4 Photoshop video tutorials among others.
I would of course appreciate your using our B&H affiliate links for all of your major gear, video, and electronic purchases. For the photographic stuff mentioned in the paragraph above we, meaning BAA, would of course greatly appreciate your business. Here is a huge thank you to the many who have been using our links on a regular basis and visiting the BAA Online store as well.
This post took 2 hours to put together. Enjoy!
The New Essence of the St. Augustine Alligator Farm
It has been years since I visited the St. Augustine Alligator Farm. As one would expect, a lot has changed. Over the years the management team–led by director John Brueggen–has removed extensive stands of non-native vegetation. To provide nesting habitat they have planted numerous Bald Cypress trees, Eldeberries, and Wax Myrtles. Overall the habitat has been thinned out; much of the vegetation adjacent to the boardwalk was non-native. Numbers of nesting Wood Storks have increased as this species has moved into several new and previously unoccupied areas of the Farm. Great Egrets are thriving as well with many dozens of successful nests with chicks of sizes various ranging from tiny to almost fledged. During our visit we witnessed but did not get to photograph the demise of several small Great Egret chicks. The runts of each litter are often attacked and driven into the water by their older siblings, Survival of the fittest for sure.
As before there are many breeding pairs of Snowy Egret and Tricolored Heron along with a smattering of Little Blue Herons. Cattle Egret numbers seem to be down. My impression is that the nests of the smaller species are a bit more difficult to photograph than they were 5-10 years ago. As with all rookery photography the good photographers can spot the few good situations but most folks simply do not understand that they need to work on sun angle on clear days and they have no clue when it comes to finding the best perspective. For clean shots of the smaller nesting species the edge this year goes to Gatorland. But as has always been the case, St. Augustine rules by a mile when it comes to good flight photography.
The biggest change at St. Augustine is that Roseate Spoonbill, surely one of if not the most desirable avian species in the state of Florida, is now an established breeder. There are dozens of nests with young of all sizes ranging from hatched yesterday to nearly fledged. There are several pairs still building nests. Photographing the nests with young is a nearly impossible task. There was one nest with four small chicks that offered great promise–low with a clean line of sight for one photographer. A pair of Snowy Egrets chose to set up a nest right in the only available photographic slot. So ixnay on that one.
Discouraged? No need. Competent photographer can take advantage of the pair that is building a nest on the left side of the boardwalk in early morning light. They offer great opportunities for creating extreme close-ups as they are totally oblivious to the visiting photographers. Denise and Catherine and I had a ball on Tuesday morning creating tight face portraits of a single sleeping Roseate. And there are many other more transient photo opps for this species available to the observant photographer. All in all, St. Augustine is now a Roseate Spoonbill photographic paradise.
Image Question
Why ISO 800 if the sun was out?
Used Nikon Super-Telephoto Lens for Sale
A Creative Adventure/BIRDS AS ART friend Kitto Kono sold her Nikon 500 yesterday to a Blog subscriber!
Nikon AF-S 400mm f/2.8G ED VR AF Lens
The first is a used Nikon AF-S NIKKOR 400mm f/2.8G ED VR AF lens for $5999.00. This lens sells new from B&H for $8999.00. The price includes UPS insured Ground shipping to the continental US. The lens comes with just about everything that came with the original purchase including the lens trunk, monopod collar, front lens cover, rear lens cap, slip on HK 33 Lens Hood, Slip-in Filter Holder, 52mm screw-in NC Filter, and LN – 1 Strap. The lens is in excellent condition with some minor blemishes and scratches on the exterior body and lens hood. Photos upon request. Potential buyers can contact Kitty via e-mail or by phone: 610-995-2339. Your check must clear before the lens is shipped.
The 400 f/2.8 is superb for large mammals, for birds at close range, and for work at bird feeders. Priced at $3,000 less than new this one should sell quickly.
Used Canon Gear for Sale
Denise Ippolito’s 100-400 and her 100 macro sold in one day. Peter Kes sold his 70-200 f/2.8: IS II and his 400 DO through BAA in just more than one week. In the past two months we have sold a Canon 800, a Canon 500 II, 3 400 DO lenses, a Nikon 500mm, and lots more. If you are interested in using our services, please e-mail.
Used Canon 100-400mm f/4.5-5.6L IS USM Lens for Sale/Price Reduced $100!
Multiple IPT veteran Bill Wingfield is offering a Canon 100-400mm f/4.5-5.6L IS USM lens in excellent condition for $1325! The glass is clean and the lens is in perfect working condition. The sale includes the lens hood, the fabric case, and insured shipping by UPS Ground to US addresses only. Personal checks only; your new lens will be shipped after your check clears.
For more than a decade I used the 100-400 to create hundreds of sharp, sale-able image. It is a very versatile lens.
You can reach Bill via e-mail or by phone at 843-729-6670.
Used Canon 800mm f/5.6L IS Lens for Sale
Multiple IPT veteran, the too-kind Jim Bicket, is offering a Canon EF 800mm f/5.6L IS USM lens in excellent condition for $8750. The lens is like new except for some wear on the bottom of the lens hood near the forward edge when the hood is reversed. The sales includes the LensCoat that has protected the lens since day 1, the leather hood, the original hard case and key, and insured shipping via UPS Ground to US addresses only. Personal checks only; your new lens will be shipped only after your check clears.
This great lens, my favorite for 3 years, sells new at B&H for $13,999.00. A month ago B&H was offering one in mint condition for a ridiculous $10,249.90; it sold overnight. Go figure. Jim’s lens will save you a ton of dough and you will have a great lens with lots of reach.
Interested folks can contact Jim via e-mail or try him at 501-915-9336.
This sale will be made through BAA. Please call Jim at 863-221-2372 (weekdays) or shoot me an if you have any questions.
Used EOS-5D Mark II for Sale/Price Reduced $100!
Doug Bolt’s 400 DO sold early last week. Doug is offering a used EOS-5D Mark II in very good to excellent condition for $1099! There is a shallow scratch on the body and a faint smudge on the top LCD. The sale includes a RRS L-plate, an off-brand vertical grip, and the original box and all the stuff that came in it. The seller will pay shipping to US addresses only. This one is a great body for flowers and landscapes. Mine saved me on a Southern Oceans cruise when I trashed two EOS-1D Mark IV bodies in a rainstorm; it was a great back-up camera body. The item will ship only when the check clears.
Please contact Doug for a link to photos of the camera and for additional info via e-mail or try him by phone at home: at 301-937-3112 or on his cell at 301-537-8073.
Used Canon EOS-7D for Sale
Doug Bolt loves his 5D Mark III so much that he is also offering a used EOS-7D camera body for $799. The sale includes a RRS camera body plate. The seller will pay shipping to US addresses only. This one is a great starter body. The item will ship only when the check clears.
Please contact Doug for additional info via e-mail or try him by phone at home: at 301-937-3112 or on his cell at 301-537-8073.
Used Canon EOS-7D for Sale/Price Reduced $100!
Janet Horton is offering a used Canon EOS-7D in excellent condition for $625!. The sale includes a RRS model B7D-L L plate, all items that were in the original box (including instruction manual) and the cost of insured shipping to US addresses only. Your check must clear before the item ships.
Please contact Janet via e-mail or try her at by phone at home: at 425-313-3060
|

|
|
Fort DeSoto in spring is rich with tame birds. With many in breeding plumage it is a photographer’s paradise. I hope that you can join me there in mid-May.
|
Short Notice Fort DeSoto IPT/In-the-Field Workshops: May 9, 10, & 11, 2014
IPT–3 FULL DAYs: $1099. In-the-Field Workshops: $399/day
Call the office, e-mail, or call my cell at 863-221-2372 for Late Registration Discount or Single Day info. Please leave a message if I do not answer.
Fort DeSoto in spring is so good that I needed to create two cards in order to give folks an idea of what is possible. Even then I have barely scratched the surface. If you are coming from out of town you will surely want to do all 3 days, the entire IPT. Local folks may wish to join me for one or more full days.
There will Lots of tame birds including breeding plumage Laughing Gull and Royal and Sandwich Terns courting and copulating. American Oystercatcher plus lots of sandpipers and plovers, some in breeding plumage. Red Knot in breeding plumage likely. Lots of wading birds including Great and Snowy Egrets, both color morphs of Reddish Egret, Great Blue, Tricolored and Little Blue Heron, and Yellow-crowned Night-Heron. Roseate Spoonbill and WOod Stork between possible and likely…. Lots of flight photography with the gulls and terns and with Brown Pelican.
You will learn how to approach free and wild birds without disturbing them, to understand and predict bird behavior, to identify many species of shorebirds, to spot the good situations, to choose the best perspective, to see and understand the light, to get the right exposure every time after making a single test exposure, and to design pleasing images by mastering your camera’s AF system. And you will learn learn how and why to work in Manual mode (even if you are scared of it).
At lunch we will review my images–folks learn a ton watching me edit–why keep this one and delete that one. If you opt to bring your laptop, we will take a look at five of your best images from the morning session. We will process a few of my images in Photoshop after converting them in DPP. That followed by Instructor Nap Time.
This is the IPT hotel: Comfort Inn St. Petersburg, FL. 2260 54th Ave N., St. Petersburg, FL 33714. tel: 1-727-362-0075. The best airport is Tampa (TPA).
Payment in full via credit card is due upon registering. Please call Jim or Jennifer at 863-692-0906 to register.
|
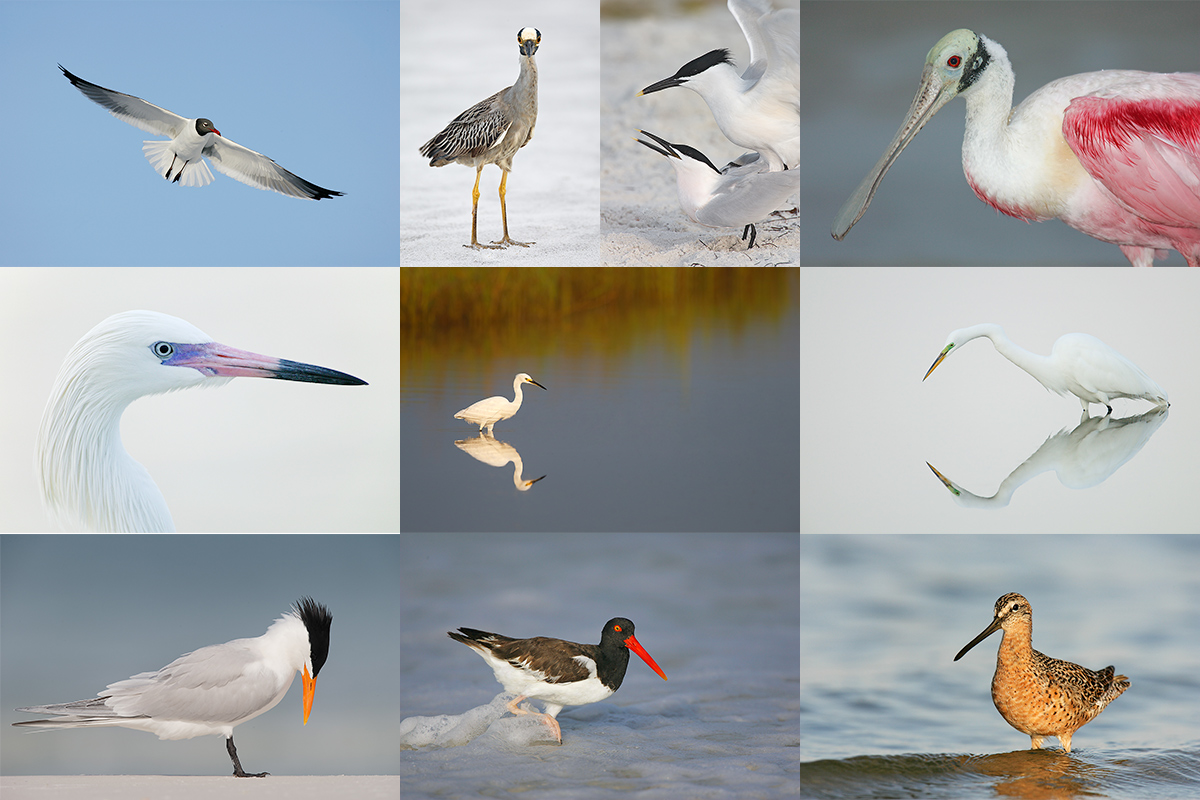
|
|
Fort DeSoto in spring is rich with tame birds. With many in breeding plumage it is a photographer’s paradise. I hope that you can join me there in mid-May.
|
Fort DeSoto Site Guide
Can’t make it in mid-May? Get yourself a copy of the Fort DeSoto Site Guide. Learn the best spots, where to be when in what season in what weather. Learn the best wind directions for the various locations. BAA Site Guides are the next best thing to being on an IPT. You can see all of them here.
Shorebirds/Beautiful Beachcombers
If the shorebirds in the ID quiz gave you pause, get yourself a copy of my Shorebirds/Beautiful Beachcombers. Includes ID tips, shorebird biology, migration, and tons more. All in my simple-to-read easy-to-read style.
Support the BAA Blog. Support the BAA Bulletins: Shop B&H here!
We want and need to keep providing you with the latest free information, photography and Photoshop lessons, and all manner of related information. Show your appreciation by making your purchases immediately after clicking on any of our B&H or Amazon Affiliate links in this blog post. Remember, B&H ain’t just photography!
….. …..
Typos
In all blog posts and Bulletins, feel free to e-mail or to leave a comment regarding any typos, wrong words, misspellings, omissions, or grammatical errors. Just be right. 🙂
May 7th, 2014 IPT and I-T-F Updates
There are only 4 slots left on the UK Puffins and Gannets IPT and on the NOV 29-DEC Bosque IPT. The Fort DeSoto Short Notice, Nickerson Beach, and the Bosque Creative IPTs all have lots of room though the latter is filling nicely as Muriel McClellan and her daughter-in-law signed up recently. Scroll down for updated info & details on the St. Augustine In-the-Field days and the Fort DeSoto IPT. Click here for info on the others and for complete IPT details.
Used Canon and Nikon Gear for Sale
There are some great buys available on a variety of super-telephotos lenses as well as a few camera bodies. Scroll down for details. Kitty Kono’s Nikon 500 sold yesterday. Her 400 f/2.8 is still there for the taking at a great price.
Small-in-the-Frame Voting Continues
Join in the fun by voting on the Small-in-the-Frame Category of the BIRDS AS ART 2nd International Bird Photography Competition here. While the public vote has been very close to the results of the judge’s voting and the actual order of finish the opinions in this category so far have been all over the place. There are so many strong images that choosing your favorite five might just be impossible. Do take a peek.
The Streak Continues: 158
Denise Ippolito and I spent another fine day on Tuesday–the weather has actually been much too fine–working with our single participant, Catherine Costolo of Atlanta. This post marks 158 consecutive days with a new educational blog post. With so many folks getting in the habit of using our B&H links and our Amazon logo-links why quit now? April was a record month! To show your appreciation for my efforts here, we do ask that you use our the B&H and Amazon affiliate links on the right side of the blog for all of your purchases. Please check the availability of all photographic accessories in the BIRDS AS ART Online Store, especially Gitzo tripods, Wimberley tripod heads, and the like. We sell only what I used, tested, and can depend on. We will not sell you junk. We know the tools that you need to make creating great images easy and fun. And we are always glad to answer your gear questions via e-mail.
You can find the following items in the store: Gitzo tripods, Mongoose M3.6 and Wimberley heads, plates, low feet, and accessories, flash brackets, , Delkin e-film Pro Compact Flash Cards, LensCoat products, and our unique line-up of educational materials including ABP I & II, Digital Basics, Site and Set-up e-Guides, Canon and Nikon Camera Users and AF e-Guides, and MP-4 Photoshop video tutorials among others.
I would of course appreciate your using our B&H affiliate links for all of your major gear, video, and electronic purchases. For the photographic stuff mentioned in the paragraph above we, meaning BAA, would of course greatly appreciate your business. Here is a huge thank you to the many who have been using our links on a regular basis and visiting the BAA Online store as well.
This post took 1 1/2 hours to put together. Enjoy!
|
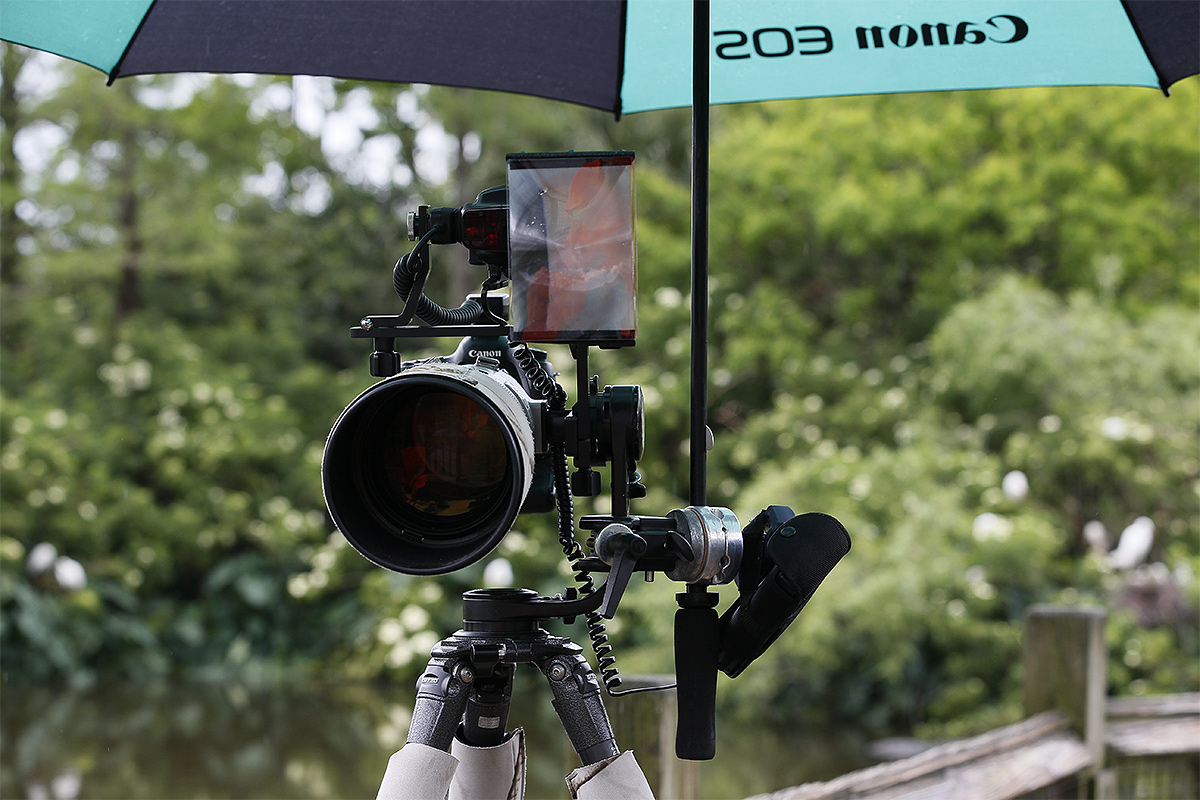
|
|
This image was created at Gatorland on the very rainy Saturday of May 3, 2014 with the Canon EF 70-200mm f/2.8L IS II USM lens (hand held at 100mm) and the Canon EOS-1D X. ISO 800. Evaluative metering +1/3 stop as framed: 1/320 sec. at f/7.1 in Manual mode. AWB.
Central Sensor/AI Servo-Surround/Rear Focus AF as framed was active at the moment of exposure. Click here to see the latest version of the Rear Focus Tutorial. Click on the image to see a larger version. .
|
Return of the Umbrella Clamp
This may sound strange, but photographing at one of the gator rookeries in a driving rainstorm can be huge fun. That from someone who does not like working with any of the sophisticated rain covers that are available today. Not to mention that a great part of the fun comes from using flash to light the drops of water on the birds and make them glisten. Years ago I came up with the perfect solution: the Umbrella Clamp. With my renewed interest in using Better Beamer fill flash on dreary days, I dug up my old Umbrella Clamp (let;s call it “UC” from now on) and tossed it in the back of my SUV.
The UC Rig clamps onto the upright arm of either the Mongoose (as above) or a Wimberley V-2 head via the Bogen Super Clamp. Then a long-shafted umbrella–the longer the shaft the better–is mounted via the round clamp, the Avenger Add-a-Head. Here I used the Wimberley F-1 Flash Bracket (re-configured) to mount the flash off to the side and low enough so that the flash was not blocked by the umbrella. While it is obvious that one should not use the rig during thunderstorms or in high winds, we ask you to exercise common sense when using the Umbrella Rig. By doing so you will assure that you will not be fried by lightning and that your 500mm IS lens and Mark II will not wind up flying up, up, and away like a kite! Equally obvious is the fact that you will want to set up and use your UC Rig only when working in relatively small areas rich in bird life.
If you have a question on the set-up please ask it by leaving a comment.
The Rewards of Singing in the Rain
On Sunday at the St. Augustine Alligator Farm several folks offered their condolences on my getting rained out the day before at Gatorland. Au contraire I said. Carl Shaw and I have a great day in the rain and drizzle. Carl worked often from one of the various shelters to stay out of the rain. He was envious of the Umbrella Clamp Rig and my big Canon umbrella that in combination allowed me to work even in heavy rain. Many Great Egrets lose their Kelly green lores late in the breeding season and in some birds, the color fades to a lovely reptilian green, a sort of cyan with a touch of blue. Here I love the streaks of rain and the sharpness of the image especially the bill.
Head Angle/Bill Angle Issues
As long time captain of the Head Angle Police (see my BPN post in the Educational Resources Forum entitled Head Angle Fine Points), I have been teaching folks for more than two decades that the best head angle features the bird’s head turned 2-3 degrees towards the photographer. I have recently learned something new and important: when working at point blank range creating tight head portraits with long focal lengths the best head angle is often 0 degrees with the bird’s head perfectly square to the imaging sensor. This goes for double when you wish to avoid stopping down and bringing up unwanted background detail. If the bird’s head in this image had been angled even ever-so-slightly towards me, the bill would have been increasing out of focus towards the tip of the bill. The the image below for concrete proof of this premise.
The Poor Head Angle
Note that in the unprocessed image above that with the usually preferred head angle the bird’s bill is completely out of focus by the time that you reach the tip of the bill. Why? Because I was working at point blank range where depth of field is measured in tiny fractions of an inch when working at 1200mm. In these instances, square to the imaging sensor is the way to go for best results.
Used Nikon Super-Telephoto Lens for Sale
A Creative Adventure/BIRDS AS ART friend Kitto Kono sold her Nikon 500 yesterday to a Blog subscriber!
Nikon AF-S NIKKOR 400mm f/2.8G ED VR AF Lens
The first is a used Nikon AF-S NIKKOR 400mm f/2.8G ED VR AF lens for $5999.00. This lens sells new from B&H for $8999.00. The price includes UPS insured Ground shipping to the continental US. The lens comes with just about everything that came with the original purchase including the lens trunk, monopod collar, front lens cover, rear lens cap, slip on HK 33 Lens Hood, Slip-in Filter Holder, 52mm screw-in NC Filter, and LN – 1 Strap. The lens is in excellent condition with some minor blemishes and scratches on the exterior body and lens hood. Photos upon request. Potential buyers can contact Kitty via e-mail or by phone: 610-995-2339. Your check must clear before the lens is shipped.
The 400 f/2.8 is superb for large mammals, for birds at close range, and for work at bird feeders. Priced at $3,000 less than new this one should sell quickly.
Used Canon Gear for Sale
Denise Ippolito’s 100-400 and her 100 macro sold in one day.
Used Canon 100-400mm f/4.5-5.6L IS USM Lens for Sale
Multiple IPT veteran Bill Wingfield is offering a Canon 100-400mm f/4.5-5.6L IS USM lens in excellent condition for $1425. The glass is clean and the lens is in perfect working condition. The sale includes the lens hood, the fabric case, and insured shipping by UPS Ground to US addresses only. Personal checks only; your new lens will be shipped after your check clears.
For more than a decade I used the 100-400 to create hundreds of sharp, sale-able image. It is a very versatile lens.
You can reach Bill via e-mail or by phone at 843-729-6670.
Used Canon 800mm f/5.6L IS Lens for Sale
Multiple IPT veteran, the too-kind Jim Bicket, is offering a Canon EF 800mm f/5.6L IS USM lens in excellent condition for $8750. The lens is like new except for some wear on the bottom of the lens hood near the forward edge when the hood is reversed. The sales includes the LensCoat that has protected the lens since day 1, the leather hood, the original hard case and key, and insured shipping via UPS Ground to US addresses only. Personal checks only; your new lens will be shipped only after your check clears.
This great lens, my favorite for 3 years, sells new at B&H for $13,999.00. A month ago B&H was offering one in mint condition for a ridiculous $10,249.90; it sold overnight. Go figure. Jim’s lens will save you a ton of dough and you will have a great lens with lots of reach.
Interested folks can contact Jim via e-mail or try him at 501-915-9336.
Used Canon 400mm f/4L IS DO Lens for Sale
Friend and BAA webmaster Peter Kes is offering is offering a Canon 400mm f/4 IS DO lens in excellent condition for $4699. The sale includes the lens trunk, the leather lens hood, a Forest Green LensCoat, and insured shipping by UPS Ground to US addresses only. Personal checks only; your new lens will be shipped after your check clears. I owned and used a 400 DO for years; at 4.28 pounds it is a great lens for folks wishing to gain extra reach without having to carry around excessively heavy gear…. I used it often with both TCs and made sharp images. It currently retails new for $6,469 at B&H.
This sale will be made through BAA. Please call Jim at 863-221-2372 (weekdays) or shoot me an if you have any questions.
Used EOS-5D Mark II for Sale/Price Reduced $100!
Doug Bolt’s 400 DO sold early last week. Doug is offering a used EOS-5D Mark II in very good to excellent condition for $1099! There is a shallow scratch on the body and a faint smudge on the top LCD. The sale includes a RRS L-plate, an off-brand vertical grip, and the original box and all the stuff that came in it. The seller will pay shipping to US addresses only. This one is a great body for flowers and landscapes. Mine saved me on a Southern Oceans cruise when I trashed two EOS-1D Mark IV bodies in a rainstorm; it was a great back-up camera body. The item will ship only when the check clears.
Please contact Doug for a link to photos of the camera and for additional info via e-mail or try him by phone at home: at 301-937-3112 or on his cell at 301-537-8073.
Used Canon EOS-7D for Sale
Doug Bolt loves his 5D Mark III so much that he is also offering a used EOS-7D camera body for $799. The sale includes a RRS camera body plate. The seller will pay shipping to US addresses only. This one is a great starter body. The item will ship only when the check clears.
Please contact Doug for additional info via e-mail or try him by phone at home: at 301-937-3112 or on his cell at 301-537-8073.
Used Canon EOS-7D for Sale
Janet Horton is offering a used Canon EOS-7D in excellent condition for $725. The sale includes a RRS model B7D-L L plate, all items that were in the original box (including instruction manual) and the cost of insured shipping to US addresses only. Your check must clear before the item ships.
Please contact Janet via e-mail or try her at by phone at home: at 425-313-3060
|

|
|
Fort DeSoto in spring is rich with tame birds. With many in breeding plumage it is a photographer’s paradise. I hope that you can join me there in mid-May.
|
Short Notice Fort DeSoto IPT/In-the-Field Workshops: May 9, 10, & 11, 2014
IPT–3 FULL DAYs: $1099. In-the-Field Workshops: $399/day
Call the office, e-mail, or my cell at 863-221-2372 for Late Registration Discount or Single Day info. Please leave a message if I do not answer.
Fort DeSoto in spring is so good that I needed to create two cards in order to give folks an idea of what is possible. Even then I have barely scratched the surface. If you are coming from out of town you will surely want to do all 3 days, the entire IPT. Local folks may wish to join me for one or more full days.
There will Lots of tame birds including breeding plumage Laughing Gull and Royal and Sandwich Terns courting and copulating. American Oystercatcher plus lots of sandpipers and plovers, some in breeding plumage. Red Knot in breeding plumage likely. Lots of wading birds including Great and Snowy Egrets, both color morphs of Reddish Egret, Great Blue, Tricolored and Little Blue Heron, and Yellow-crowned Night-Heron. Roseate Spoonbill and WOod Stork between possible and likely…. Lots of flight photography with the gulls and terns and with Brown Pelican.
You will learn how to approach free and wild birds without disturbing them, to understand and predict bird behavior, to identify many species of shorebirds, to spot the good situations, to choose the best perspective, to see and understand the light, to get the right exposure every time after making a single test exposure, and to design pleasing images by mastering your camera’s AF system. And you will learn learn how and why to work in Manual mode (even if you are scared of it).
At lunch we will review my images–folks learn a ton watching me edit–why keep this one and delete that one. If you opt to bring your laptop, we will take a look at five of your best images from the morning session. We will process a few of my images in Photoshop after converting them in DPP. That followed by Instructor Nap Time.
This is the IPT hotel: Comfort Inn St. Petersburg, FL. 2260 54th Ave N., St. Petersburg, FL 33714. tel: 1-727-362-0075. The best airport is Tampa (TPA).
Payment in full via credit card is due upon registering. Please call Jim or Jennifer at 863-692-0906 to register.
|

|
|
Fort DeSoto in spring is rich with tame birds. With many in breeding plumage it is a photographer’s paradise. I hope that you can join me there in mid-May.
|
Fort DeSoto Site Guide
Can’t make it in mid-May? Get yourself a copy of the Fort DeSoto Site Guide. Learn the best spots, where to be when in what season in what weather. Learn the best wind directions for the various locations. BAA Site Guides are the next best thing to being on an IPT. You can see all of them here.
Shorebirds/Beautiful Beachcombers
If the shorebirds in the ID quiz gave you pause, get yourself a copy of my Shorebirds/Beautiful Beachcombers. Includes ID tips, shorebird biology, migration, and tons more. All in my simple-to-read easy-to-read style.
Support the BAA Blog. Support the BAA Bulletins: Shop B&H here!
We want and need to keep providing you with the latest free information, photography and Photoshop lessons, and all manner of related information. Show your appreciation by making your purchases immediately after clicking on any of our B&H or Amazon Affiliate links in this blog post. Remember, B&H ain’t just photography!
….. …..
Typos
In all blog posts and Bulletins, feel free to e-mail or to leave a comment regarding any typos, wrong words, misspellings, omissions, or grammatical errors. Just be right. 🙂
May 6th, 2014 IPT and I-T-F Updates
There are only 4 slots left on the UK Puffins and Gannets IPT and on the NOV 29-DEC Bosque IPT. The Fort DeSoto Short Notice, Nickerson Beach, and the Bosque Creative IPTs all have lots of room though the latter is filling nicely as Muriel McClellan and her daughter-in-law signed up yesterday. Scroll down for updated info & details on the St. Augustine In-the-Field days and the Fort DeSoto IPT. Click here for info on the others and for complete IPT details.
Used Canon and Nikon Gear for Sale
There are some great buys available on a variety of super-telephotos lenses as well as a few camera bodies. Scroll down for details. Kitty Kono’s Nikon 500 sold yesterday. Her 400 f/2.8 is still there for the taking at a great price.
The Streak Continues: 157
Denise Ippolito and I spent a great day yesterday with our single participant, Catherine Costolo who drove down on Sunday from Atlanta, GA: chalk up another happy camper. With two leaders and just one client–it’s just Catherine–it is not too late to join us for some practically private instruction on an In-the-Field day on Wednesday. e-mail or better yet, call my cell as below if you are interested in 1 or 2 days of instruction. We visited the Alligator Farm yesterday afternoon in bright sun and as at Gatorland, most folks, including many with $15,000 or more of great gear clearly indicated by their actions that they have no clue as to how to create a good image in difficult lighting conditions.
This post marks 157 consecutive days with a new educational blog post. With so many folks getting in the habit of using our B&H links and our Amazon logo-links why quit now? April was a record month! To show your appreciation for my efforts here, we do ask that you use our the B&H and Amazon affiliate links on the right side of the blog for all of your purchases. Please check the availability of all photographic accessories in the BIRDS AS ART Online Store, especially Gitzo tripods, Wimberley tripod heads, and the like. We sell only what I used, tested, and can depend on. We will not sell you junk. We know the tools that you need to make creating great images easy and fun. And we are always glad to answer your gear questions via e-mail.
You can find the following items in the store: Gitzo tripods, Mongoose M3.6 and Wimberley heads, plates, low feet, and accessories, flash brackets, , Delkin e-film Pro Compact Flash Cards, LensCoat products, and our unique line-up of educational materials including ABP I & II, Digital Basics, Site and Set-up e-Guides, Canon and Nikon Camera Users and AF e-Guides, and MP-4 Photoshop video tutorials among others.
I would of course appreciate your using our B&H affiliate links for all of your major gear, video, and electronic purchases. For the photographic stuff mentioned in the paragraph above we, meaning BAA, would of course greatly appreciate your business. Here is a huge thank you to the many who have been using our links on a regular basis and visiting the BAA Online store as well.
This post took 1 1/2 hours to put together. Enjoy!
|

|
Snow Goose Fire
|
BIRDS AS ART 2nd International Bird Photography Competition
The judging of the BIRDS AS ART 2nd International Bird Photography Competition has been complete for about ten days. Thanks a stack to our panel of judges: Sandesh Kadur, Scott Elowitz, Lou Coetzer, Mary Ann McDonald, Michael Frye, Peter Kes, Denise Ippolito, and yours truly. You can learn more about the guest judges here.
From 5 to 18 images in the 8 categories were selected to be sent to the judges’ panel. Each judge voted on each image on a 0-5 scale. The votes were tallied and the results are now final. Two categories down, six to go.
Your Call
The images that were presented to the panel of judges in the Small in the Frame category are presented to you today here. This was one of the three strongest categories. Do understand that many very strong images were eliminated in the early rounds because of poor image processing, technical issues including over- or under-exposure, image sharpness, and the failure of folks to take advantage of our lenient digital guidelines that allow for removing distracting elements from an image.
After clicking on each image to view the larger size, we ask that each of you pick your five favorite images and vote them 5, 4, 3, 2, 1 with 5 being the strongest, 4 being your second favorite, and so on down to 1. You can click on each image to view a larger size. Additional comments are welcome as long as they appear below your selections that should look something like this:
Icicle Adelie: 5
Snow Goose Fire: 4
Follow Us: 3
Heavenly: 2
Wall to Wall: 1
The image composition in Icicle Adelie is superb, as are the icicles!
The selections above are of course arbitrary and should not at all influence your votes. Please read the directions carefully as comments that do not follow the format above exactly will be deleted without notice. The three winning images in this category along with the 5 runner up images and the names of the photographers will be announced here on Wednesday morning along with a tally of the public vote.
The Grand Prize winning image, the image that secured the highest total of judge’s votes, will be revealed when the results of the final category are announced.
|

|
Wall to Wall
|
Wall to Wall
|

|
Icicle Adelie
|
Icicle Adelie
|

|
Heavenly
|
Heavenly
|

|
Follow Us!
|
Follow Us!
|

|
Flamingo Algae Slick
|
Flamingo Algae Slick
|

|
Kittiwake Berg
|
Kittiwake Berg
|

|
Flamingo Trails
|
Flamingo Trails
|

|
Earth Shadow Gentoos
|
Earth Shadow Gentoos
|

|
Black-faced Spoonbill Rock
|
Black-faced Spoonbill Rock
|

|
Landing Whooper Swans
|
Landing Whooper Swans
|

|
March of the Penguins
|
March of the Penguins
|

|
Flamingo Abstract
|
Flamingo Abstract
Used Nikon Super-Telephoto Lens for Sale
A Creative Adventure/BIRDS AS ART friend Kitto Kono sold her Nikon 500 yesterday to a Blog subscriber!
Nikon AF-S NIKKOR 400mm f/2.8G ED VR AF Lens
The first is a used Nikon AF-S NIKKOR 400mm f/2.8G ED VR AF lens for $5999.00. This lens sells new from B&H for $8999.00. The price includes UPS insured Ground shipping to the continental US. The lens comes with just about everything that came with the original purchase including the lens trunk, monopod collar, front lens cover, rear lens cap, slip on HK 33 Lens Hood, Slip-in Filter Holder, 52mm screw-in NC Filter, and LN – 1 Strap. The lens is in excellent condition with some minor blemishes and scratches on the exterior body and lens hood. Photos upon request. Potential buyers can contact Kitty via e-mail or by phone: 610-995-2339. Your check must clear before the lens is shipped.
The 400 f/2.8 is superb for large mammals, for birds at close range, and for work at bird feeders. Priced at $3,000 less than new this one should sell quickly.
Used Canon Gear for Sale
Denise Ippolito’s 100-400 and her 100 macro sold in one day.
Used Canon 100-400mm f/4.5-5.6L IS USM Lens for Sale
Multiple IPT veteran Bill Wingfield is offering a Canon 100-400mm f/4.5-5.6L IS USM lens in excellent condition for $1425. The glass is clean and the lens is in perfect working condition. The sale includes the lens hood, the fabric case, and insured shipping by UPS Ground to US addresses only. Personal checks only; your new lens will be shipped after your check clears.
For more than a decade I used the 100-400 to create hundreds of sharp, sale-able image. It is a very versatile lens.
You can reach Bill via e-mail or by phone at 843-729-6670.
Used Canon 800mm f/5.6L IS Lens for Sale
Multiple IPT veteran, the too-kind Jim Bicket, is offering a Canon EF 800mm f/5.6L IS USM lens in excellent condition for $8750. The lens is like new except for some wear on the bottom of the lens hood near the forward edge when the hood is reversed. The sales includes the LensCoat that has protected the lens since day 1, the leather hood, the original hard case and key, and insured shipping via UPS Ground to US addresses only. Personal checks only; your new lens will be shipped only after your check clears.
This great lens, my favorite for 3 years, sells new at B&H for $13,999.00. A month ago B&H was offering one in mint condition for a ridiculous $10,249.90; it sold overnight. Go figure. Jim’s lens will save you a ton of dough and you will have a great lens with lots of reach.
Interested folks can contact Jim via e-mail or try him at 501-915-9336.
Used Canon 400mm f/4L IS DO Lens for Sale
Friend and BAA webmaster Peter Kes is offering is offering a Canon 400mm f/4 IS DO lens in excellent condition for $4699. The sale includes the lens trunk, the leather lens hood, a Forest Green LensCoat, and insured shipping by UPS Ground to US addresses only. Personal checks only; your new lens will be shipped after your check clears. I owned and used a 400 DO for years; at 4.28 pounds it is a great lens for folks wishing to gain extra reach without having to carry around excessively heavy gear…. I used it often with both TCs and made sharp images. It currently retails new for $6,469 at B&H.
This sale will be made through BAA. Please call Jim at 863-221-2372 (weekdays) or shoot me an if you have any questions.
Used EOS-5D Mark II for Sale/Price Reduced $100!
Doug Bolt’s 400 DO sold early last week. Doug is offering a used EOS-5D Mark II in very good to excellent condition for $1099! There is a shallow scratch on the body and a faint smudge on the top LCD. The sale includes a RRS L-plate, an off-brand vertical grip, and the original box and all the stuff that came in it. The seller will pay shipping to US addresses only. This one is a great body for flowers and landscapes. Mine saved me on a Southern Oceans cruise when I trashed two EOS-1D Mark IV bodies in a rainstorm; it was a great back-up camera body. The item will ship only when the check clears.
Please contact Doug for a link to photos of the camera and for additional info via e-mail or try him by phone at home: at 301-937-3112 or on his cell at 301-537-8073.
Used Canon EOS-7D for Sale
Doug Bolt loves his 5D Mark III so much that he is also offering a used EOS-7D camera body for $799. The sale includes a RRS camera body plate. The seller will pay shipping to US addresses only. This one is a great starter body. The item will ship only when the check clears.
Please contact Doug for additional info via e-mail or try him by phone at home: at 301-937-3112 or on his cell at 301-537-8073.
Used Canon EOS-7D for Sale
Janet Horton is offering a used Canon EOS-7D in excellent condition for $725. The sale includes a RRS model B7D-L L plate, all items that were in the original box (including instruction manual) and the cost of insured shipping to US addresses only. Your check must clear before the item ships.
Please contact Janet via e-mail or try her at by phone at home: at 425-313-3060
|
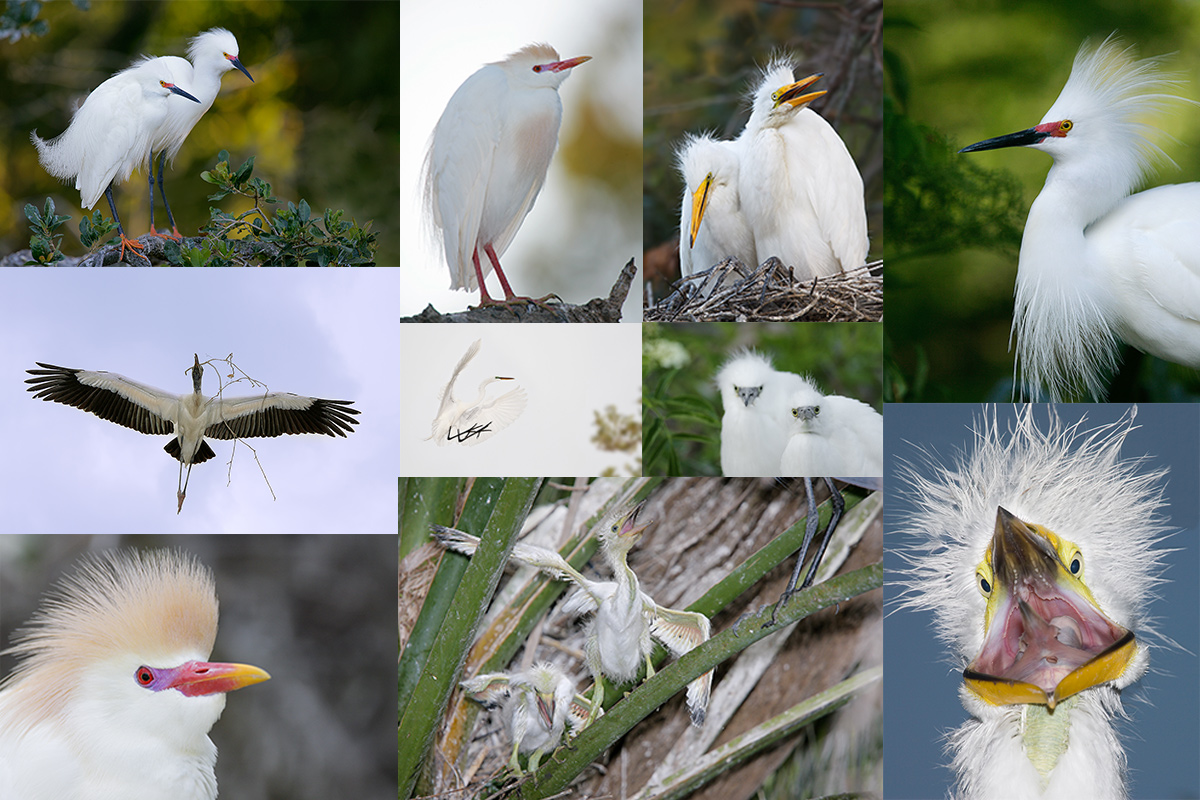
|
|
All of the images created at the St. Augustine Alligator Farm and copyright Arthur Morris/BIRDS AS ART
From top left clockwise to center: Snowy Egret pair in breeding plumage, breeding plumage Cattle Egret with fill flash, large Great Egret chicks in the nest, killer breeding plumage Snowy Egret displaying, flash-as-main light Great Egret chick happy to see mom, Little Blue Heron chicks, Cattle Egret breeding plumage head portrait, flash flight Wood Stork with nesting material, Great Egret landing at the nest, large Snowy Egret chicks.
Click on the image to enjoy a larger version.
|
St. Augustine Alligator Farm Short-Notice In-the-Field Workshops: Early entry/late stay. May 7, 2014.
Call my cell at 863-221-2372 for Late Registration Discount or Single Day info. Please leave a message if I do not pick up.
Breeding herons, egrets, and Wood Storks. Eggs and chicks in the nest. Some fledged young possible. Breeding behaviors including displaying and copulation. Flight and flash flight. Great Egret, Snowy Egret, Little Blue Heron, Cattle Egret, Tricolored Heron, Wood Stork. Early May rocks at the Farm as the weather is usually gorgeous and there should be lots of both small and large chicks in the nest. And you avoid the possibly oppressive heat of June and July.
Includes in-the-field instruction, early entry, late stay, $5/person late-stay gratuity, informal, small group Photoshop and image review sessions. Three lunches.
Not included: your lodging, your St. Augustine Alligator Farm photographer’s pass ($79.95 for the year); we will be more than glad to pre-order your pass for you. Please let us know when you register.
What you will learn:
How to see the good situations.
How to best avoid the clutter of a rookery by choosing the very best perspective.
How to properly evaluate the histogram and come up with the right exposure every time after making a single test exposure
How to see and understand the light.
How to to design pleasing images by mastering your camera’s AF system.
Why you must work in Manual mode 95% of the time when photographing at a rookery and how to do it.
How to evaluate and process your images.
Via intensive instruction how to use fill flash flash as main light, and Manual flash.
Flash flight techniques including the necessary use of high speed sync.
And tons more.
Please call Jim or Jen at 863-692-0906 to hold your spot with your non-refundable $299 credit card deposit and then put your check in the mail along with your signed registration form; you can find the form here.
Suitable airports: Jacksonville (JAX), Daytona Beach (DAB), Orlando MCO).
We look forward to seeing you in the nation’s oldest city for three days of fun and learning.
|

|
|
Fort DeSoto in spring is rich with tame birds. With many in breeding plumage it is a photographer’s paradise. I hope that you can join me there in mid-May.
|
Short Notice Fort DeSoto IPT/In-the-Field Workshops: May 9, 10, & 11, 2014
IPT–3 FULL DAYs: $1099. In-the-Field Workshops: $399/day
Call the office, e-mail, or my cell at 863-221-2372 for Late Registration Discount or Single Day info. Please leave a message if I do not answer.
Fort DeSoto in spring is so good that I needed to create two cards in order to give folks an idea of what is possible. Even then I have barely scratched the surface. If you are coming from out of town you will surely want to do all 3 days, the entire IPT. Local folks may wish to join me for one or more full days.
There will Lots of tame birds including breeding plumage Laughing Gull and Royal and Sandwich Terns courting and copulating. American Oystercatcher plus lots of sandpipers and plovers, some in breeding plumage. Red Knot in breeding plumage likely. Lots of wading birds including Great and Snowy Egrets, both color morphs of Reddish Egret, Great Blue, Tricolored and Little Blue Heron, and Yellow-crowned Night-Heron. Roseate Spoonbill and WOod Stork between possible and likely…. Lots of flight photography with the gulls and terns and with Brown Pelican.
You will learn how to approach free and wild birds without disturbing them, to understand and predict bird behavior, to identify many species of shorebirds, to spot the good situations, to choose the best perspective, to see and understand the light, to get the right exposure every time after making a single test exposure, and to design pleasing images by mastering your camera’s AF system. And you will learn learn how and why to work in Manual mode (even if you are scared of it).
At lunch we will review my images–folks learn a ton watching me edit–why keep this one and delete that one. If you opt to bring your laptop, we will take a look at five of your best images from the morning session. We will process a few of my images in Photoshop after converting them in DPP. That followed by Instructor Nap Time.
This is the IPT hotel: Comfort Inn St. Petersburg, FL. 2260 54th Ave N., St. Petersburg, FL 33714. tel: 1-727-362-0075. The best airport is Tampa (TPA).
Payment in full via credit card is due upon registering. Please call Jim or Jennifer at 863-692-0906 to register.
|

|
|
Fort DeSoto in spring is rich with tame birds. With many in breeding plumage it is a photographer’s paradise. I hope that you can join me there in mid-May.
|
Fort DeSoto Site Guide
Can’t make it in mid-May? Get yourself a copy of the Fort DeSoto Site Guide. Learn the best spots, where to be when in what season in what weather. Learn the best wind directions for the various locations. BAA Site Guides are the next best thing to being on an IPT. You can see all of them here.
Shorebirds/Beautiful Beachcombers
If the shorebirds in the ID quiz gave you pause, get yourself a copy of my Shorebirds/Beautiful Beachcombers. Includes ID tips, shorebird biology, migration, and tons more. All in my simple-to-read easy-to-read style.
Support the BAA Blog. Support the BAA Bulletins: Shop B&H here!
We want and need to keep providing you with the latest free information, photography and Photoshop lessons, and all manner of related information. Show your appreciation by making your purchases immediately after clicking on any of our B&H or Amazon Affiliate links in this blog post. Remember, B&H ain’t just photography!
….. …..
Typos
In all blog posts and Bulletins, feel free to e-mail or to leave a comment regarding any typos, wrong words, misspellings, omissions, or grammatical errors. Just be right. 🙂
|
|


