April 1st, 2012
|
|
|
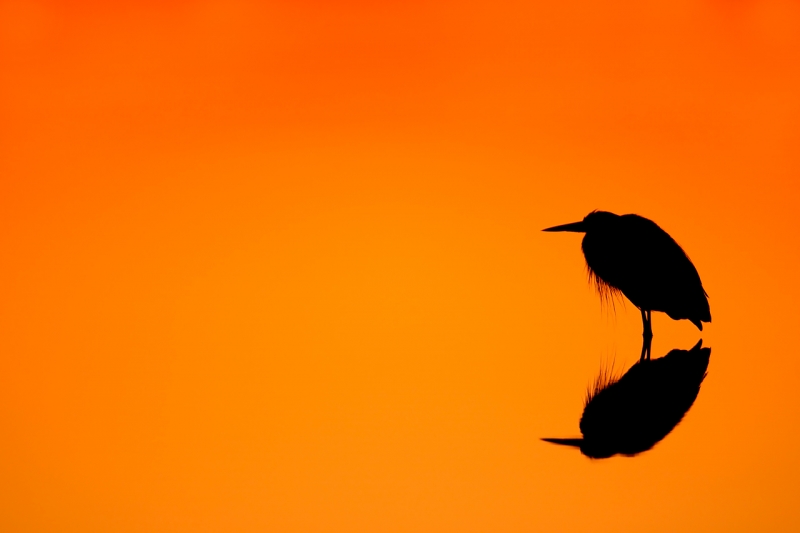
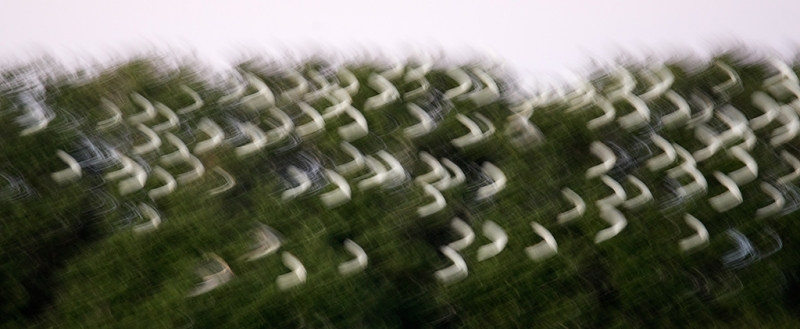
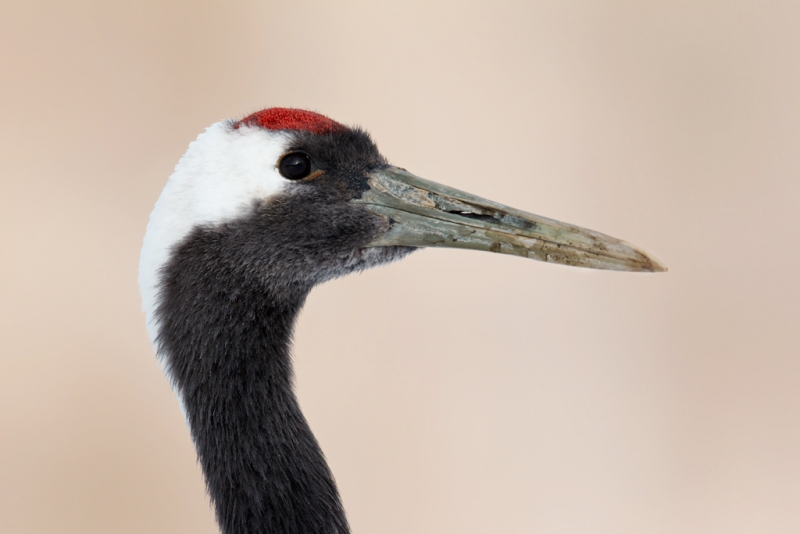
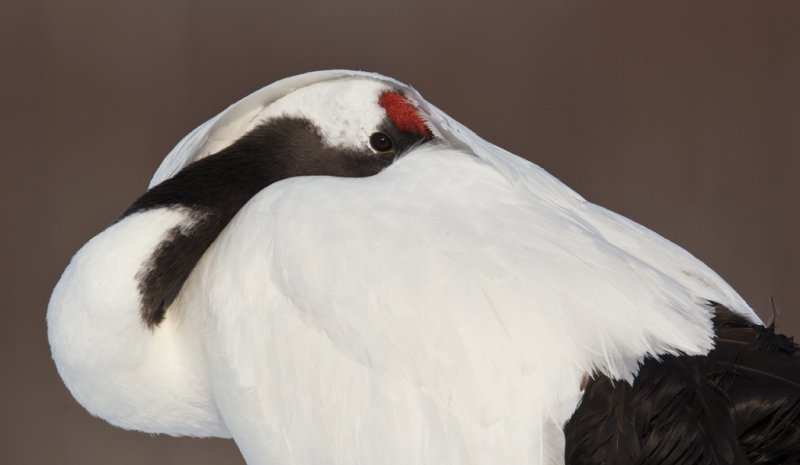
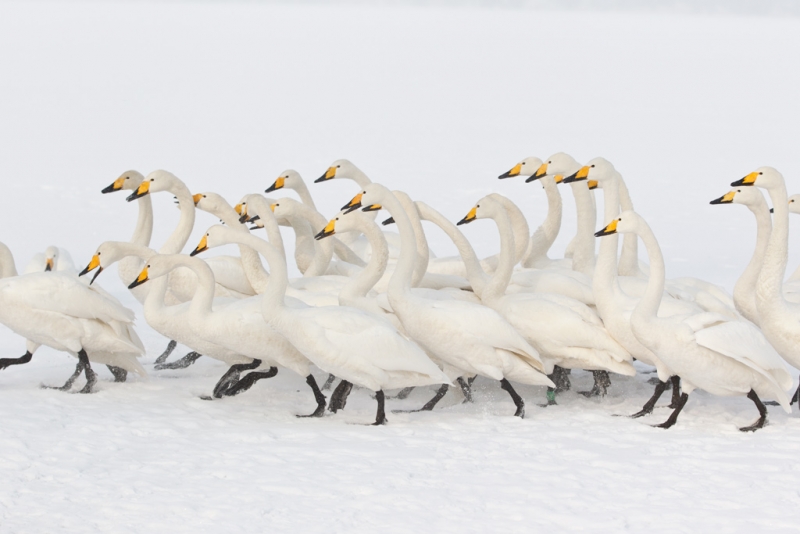
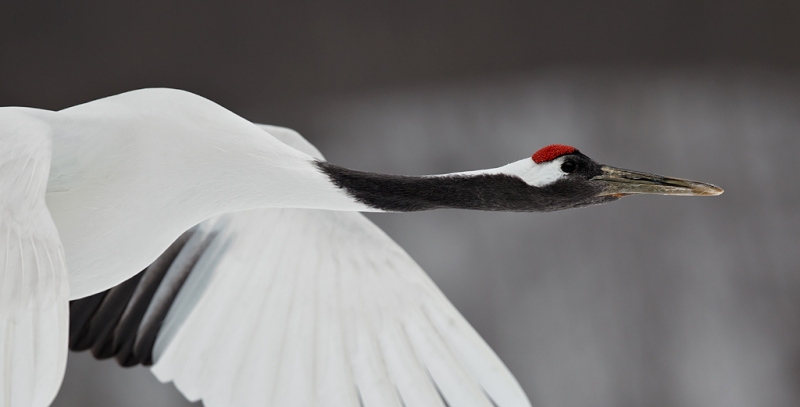
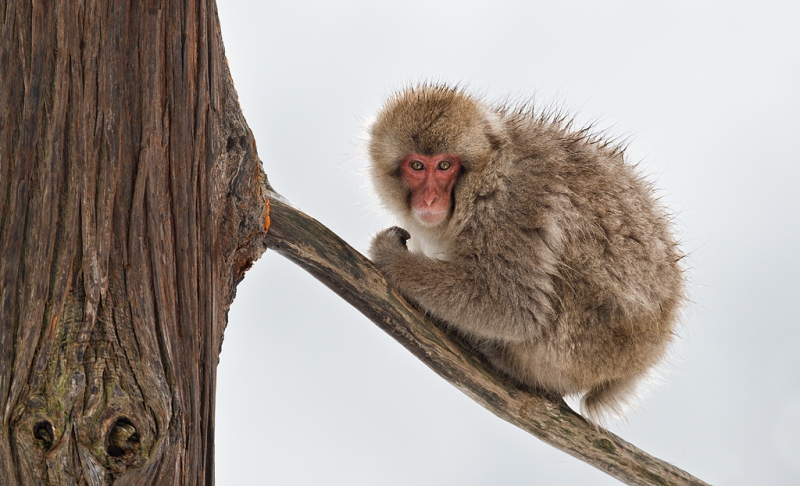
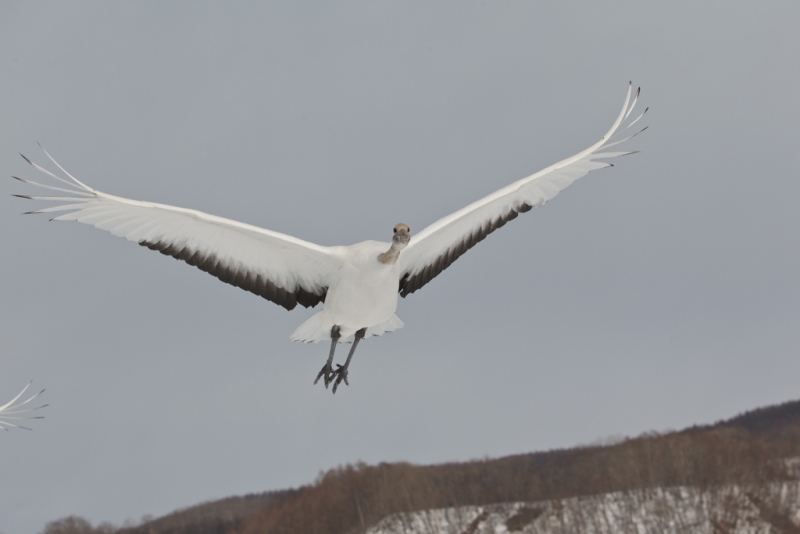
Image #1 was created with the tripod-mounted Canon 800mm f/5.6L IS lens and the Canon EOS-1D MIII (since replaced by the Canon EOS-1D Mark IV). ISO 400. Evaluative metering at +1 stop: 1/6 sec. at f/5.6 in Av Mode.
One Shot shutter button AF, turn off AF, and recompose. The old days for sure. Click on the image to enjoy a larger, more spectacular version.
|
Morro Bay Photo Expo
My two program yesterday at the Morro Bay Photo Expo were exceedingly well received. There were 208 folks at the morning seminar which included Choosing and Using Lenses for Nature Photography, Composition and Image Design, and Getting Close. About 60 folks attended the Photoshop for Nature Photographers program that afternoon. My stand-up schtick was very sharp in the morning and the folks responded quite well to pretty much every joke with several attendees actually rolling in the aisles laughing. “Liar!” The afternoon session was much more informal and folks were so into learning that I did not even consider taking the scheduled break.
If you are involved with a photography group or club that has an annual event that could attract 150 or so folks and would love a great keynote presenter please shoot me an and we can see if Canon would be willing to sponsor my appearance as they did so generously both for the F3C event in Naples last weekend and for this weekend’s gig as well. Aside from the humor folks will learn a ton :).
Oldies But Goodies #1
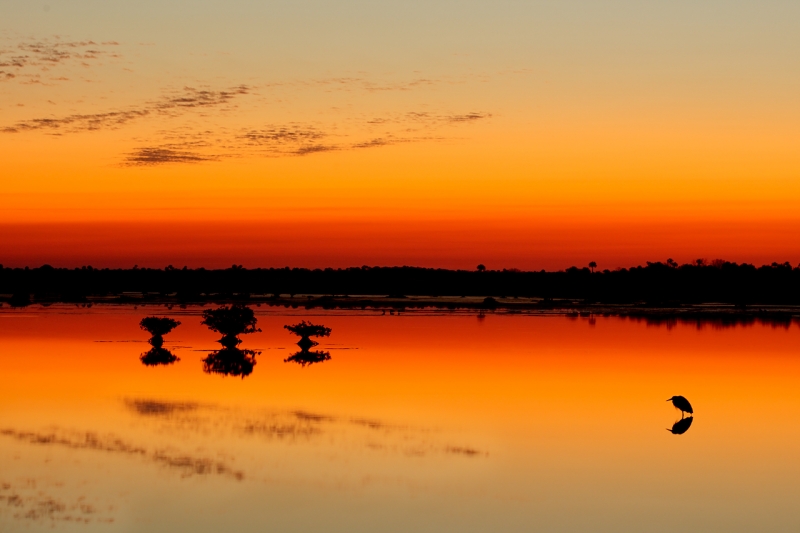
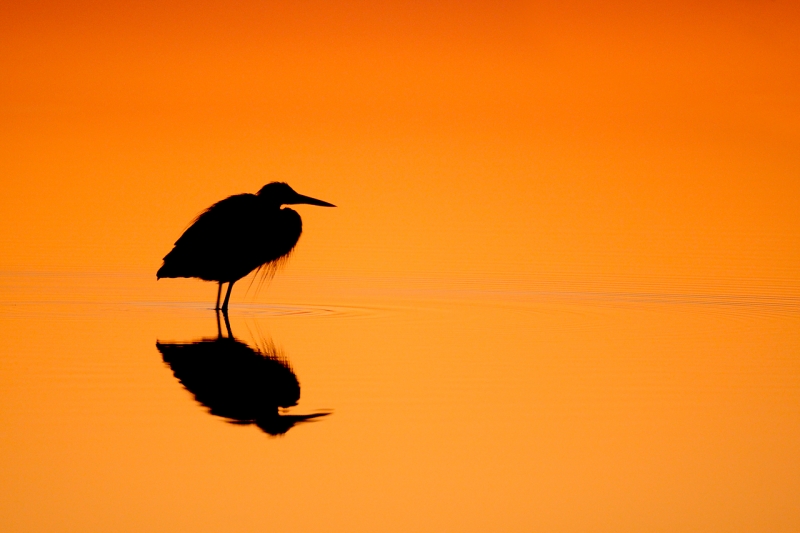
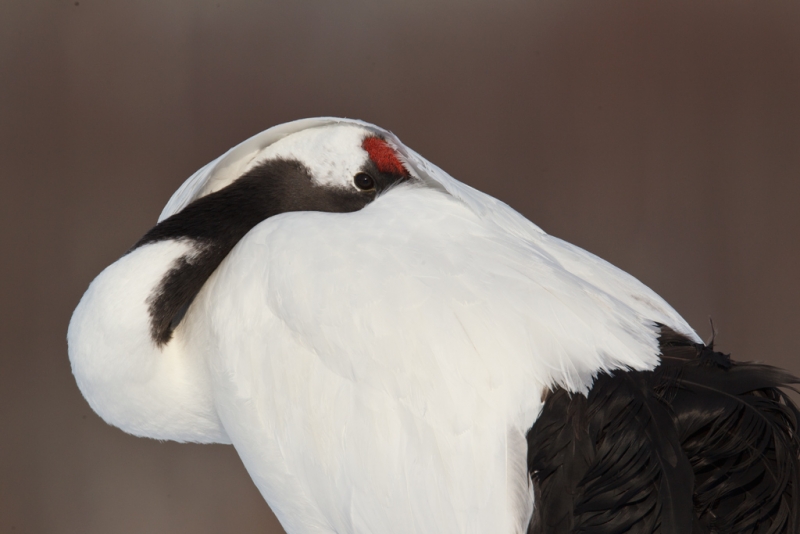
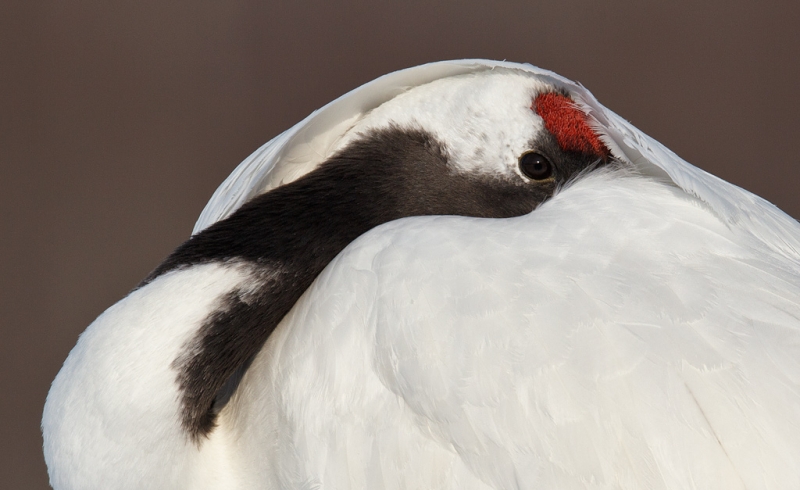
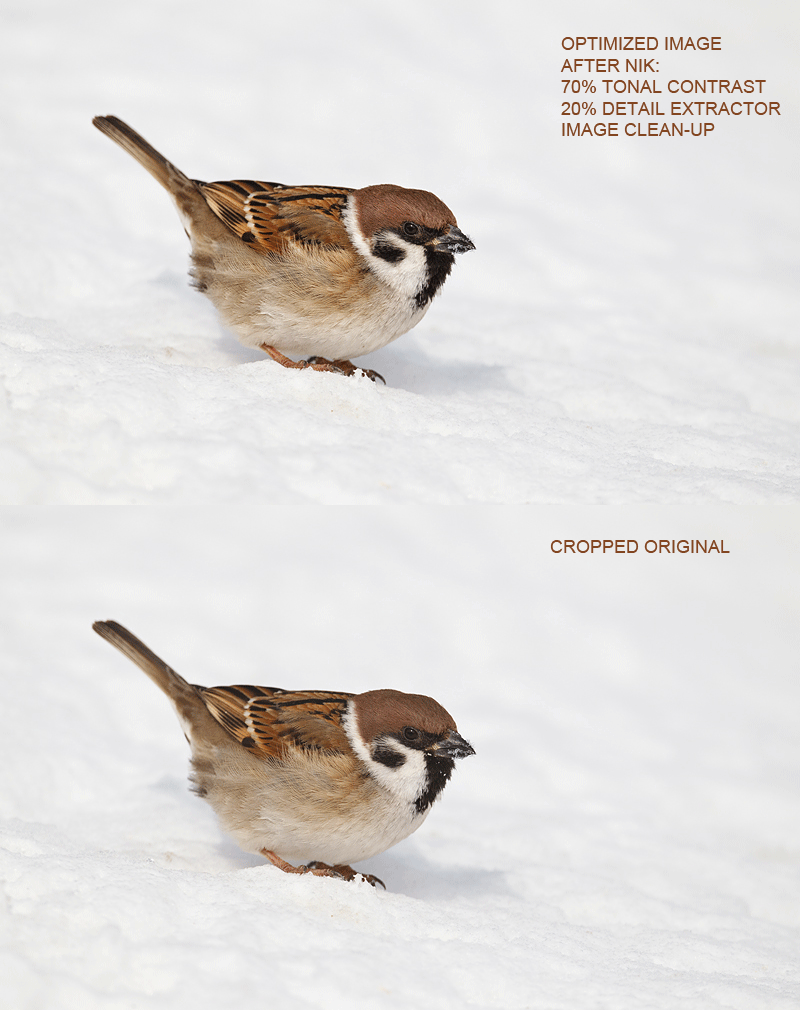
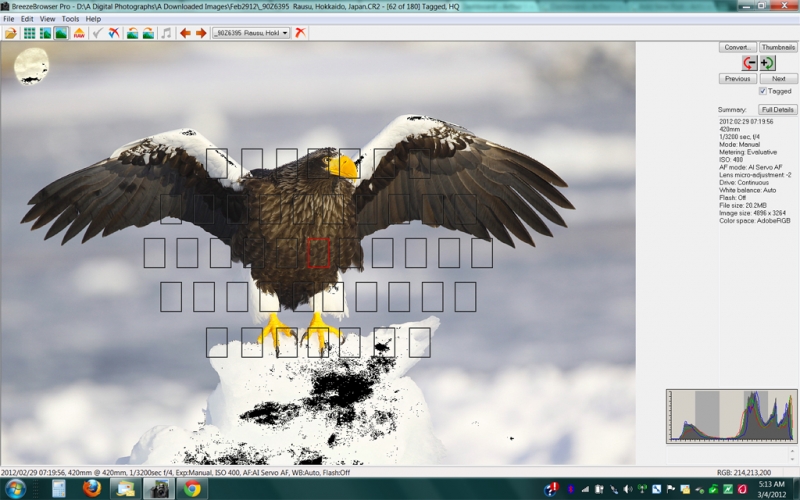
Here are two from January 25, 2009. Image #1 above was created at 6:46 am, image #2 below at 6:41 am, and image #3 at the bottom at 6:47 am. You can learn a ton by studying the exposure data for each image. Questions are welcome.
|
|
|
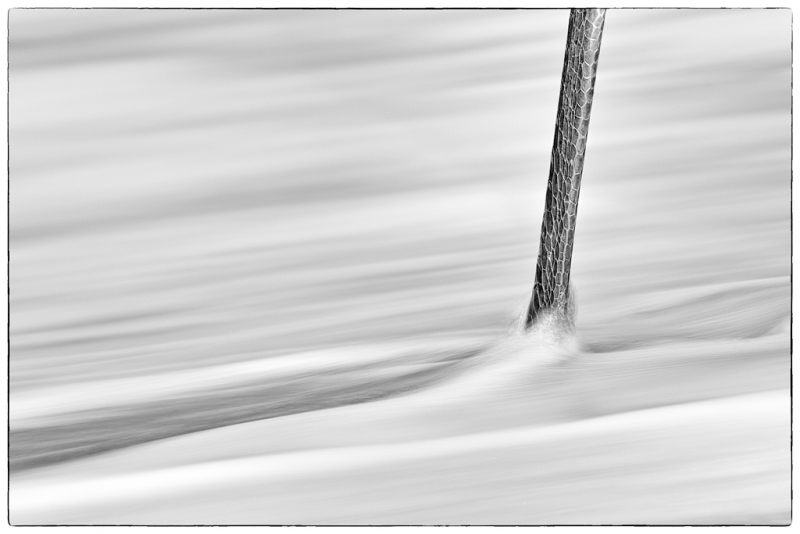
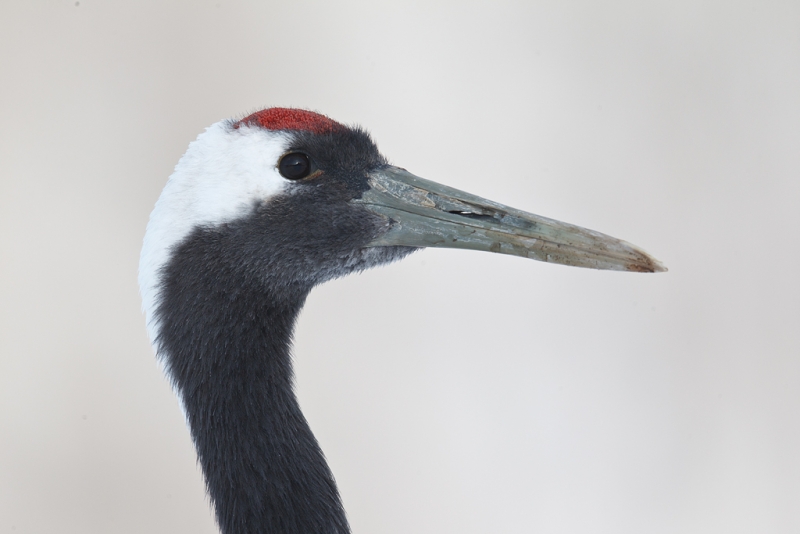
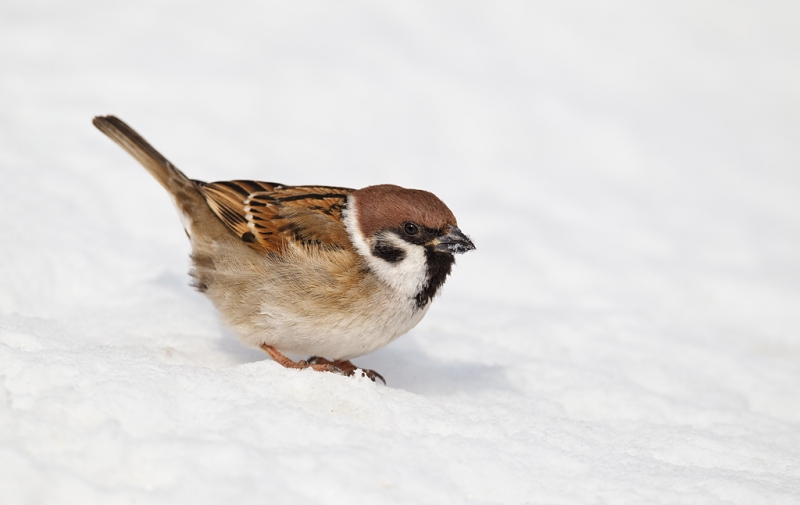
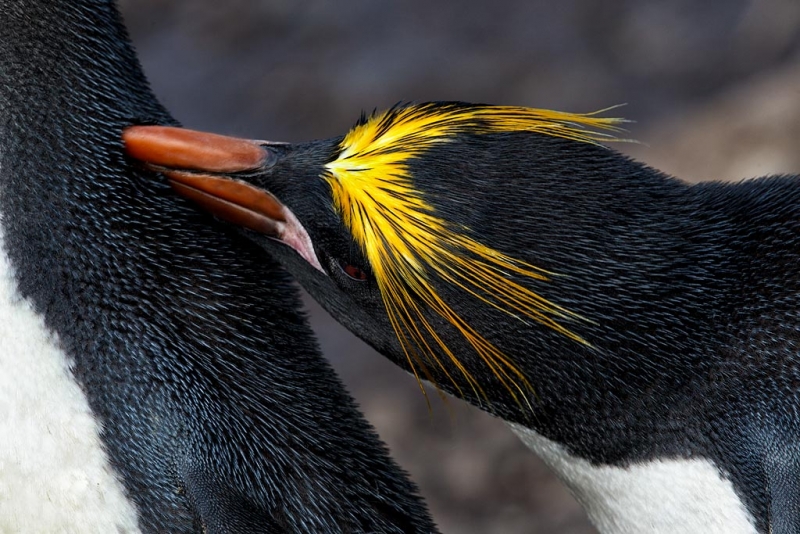
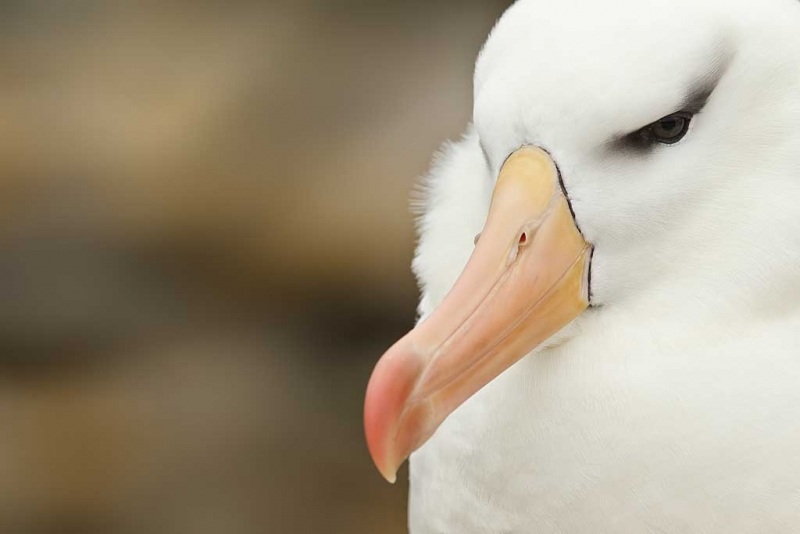
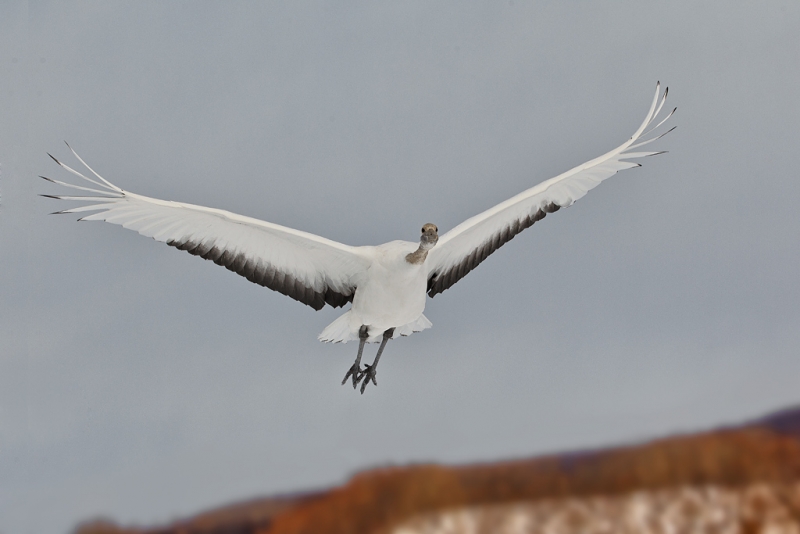
Image #2 was created with the tripod-mounted Canon 70-200mm f/2.8L IS II lens (at 120mm) and the Canon EOS-1D MIII (since replaced by the Canon EOS-1D Mark IV). ISO 200. Evaluative metering +1/3 stop: 1.3 seconds at f/6.3 in Av mode.
One Shot shutter button AF, turn off AF, and recompose. The old days for sure. Click on the image to enjoy a larger, more spectacular version.
|
Please take a moment and let us know which of the three images you like best, and why.
|
|
|
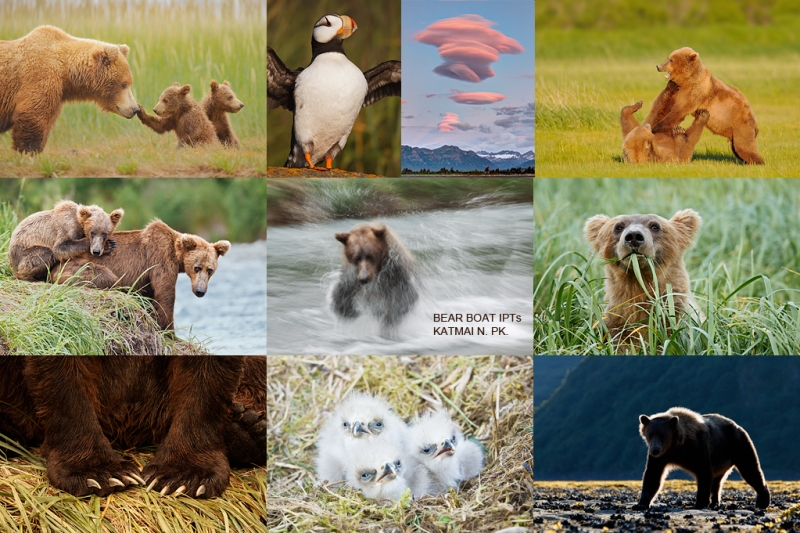
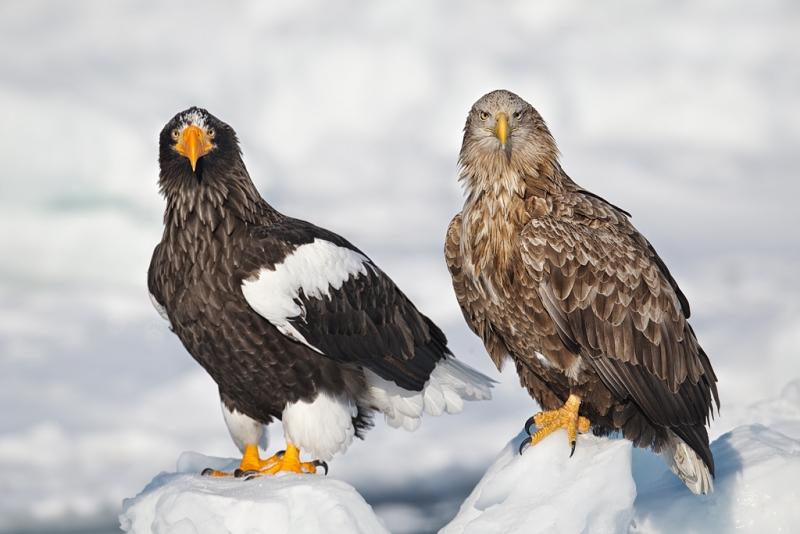
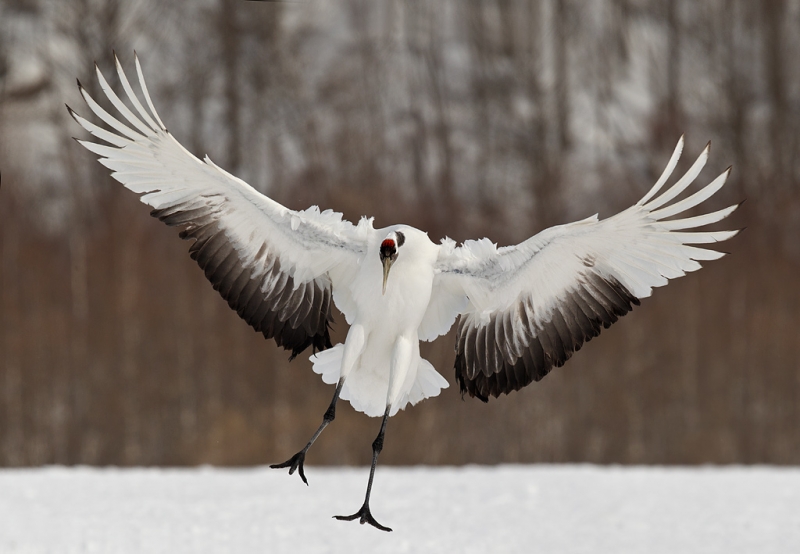
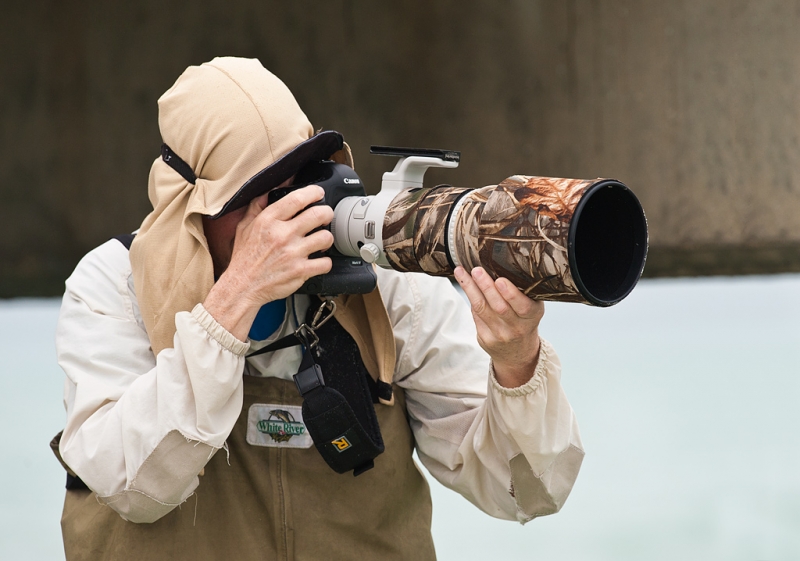
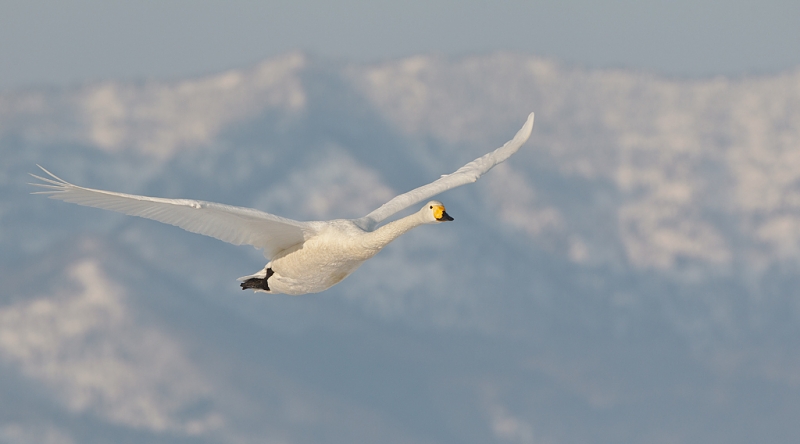
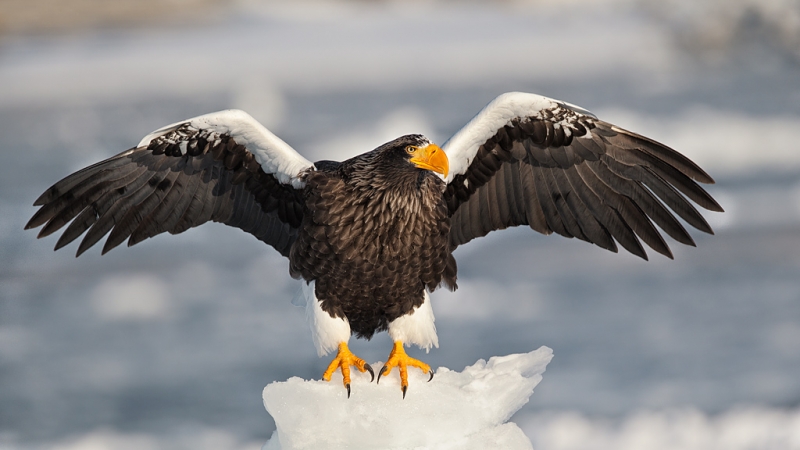
Image #1 was created with the tripod-mounted Canon 800mm f/5.6L IS lens and the Canon EOS-1D MIII (since replaced by the Canon EOS-1D Mark IV). ISO 1600. Evaluative metering at +1 stop: 1/30 sec. at f/5.6 in Av Mode.
One Shot shutter button AF, turn off AF, and recompose. The old days for sure. Click on the image to enjoy a larger, more spectacular version.
|
Earn Free Contest Entries and Support both the Bulletins and the Blog by making all your B & H purchases here.
More and more folks are earning multiple contest entries with their B & H purchases. See here for details on that. Eleven great categories, 34 winning and honored images, and prize pools valued in excess of $20,000. Click here to visit the competition home page.
Shopper’s Guide
Below is a list of gear that I used to create the image in this blog post. Thanks a stack to all who have used the Shopper’s Guide links to purchase their gear as a thank you for all the free information that we bring you on the Blog and in the Bulletins. Before you purchase anything be sure to check out the advice in our Shopper’s Guide.
Canon 800mm f/5.L IS lens. Right now this is my all time favorite super-telephoto lens.
Canon 70-200mm f/2.8L IS II lens. Man, I am loving this lens on my shoulder with the Canon EF 1.4X III TC. This new TC is designed to work best with the new Series II super-telephoto lenses.
Canon EOS-1D Mark IV professional digital camera body. My two Mark IVs are my workhorse digital camera bodies.
And from the BAA On-line Store:
LensCoats. I have a LensCoat on each of my big lenses to protect them from nicks and thus increase their re-sales value. All my big lens LensCoat stuff is in Hardwood Snow pattern.
LegCoat Tripod Leg Covers. I have four tripods active and each has a Hardwood Snow LegCoat on it to help prevent further damage to my tender shoulders 🙂 And you will love them in mega-cold weather….
Gitzo GT3530LS Tripod. This one will last you a lifetime.
Mongoose M3.6 Tripod Head. Right now this is the best tripod head around for use with lenses that weigh less than 9 pounds. For heavier lenses, check out the Wimberley V2 head.
CR-80 Replacement Foot for Canon 800. When using the 800 on a Mongoose as I do, replacing the lens foot with this accessory lets the lens sit like a dog whether pointed up or down and prevents wind-blown spinning of your lens on breezy days by centering the lens directly over the tripod.
Double Bubble Level. You will find one in my camera’s hot shoe whenever I am not using flash.
The Lens Align Mark II. I use the Lens Align Mark II pretty much religiously to micro-adjust all of my gear an average of once a month and always before a major trip. Enjoy our free comprehensive tutorial here.
Canon EOS-1D Mark IV User’s Guide. Learn to use your Mark IV the way that I use mine. Also available for the 7D and the Mark III here.
BreezeBrowser. I do not see how any digital photographer can exist without this program.
March 30th, 2012
Contest Deadline Extended until April 30, 2012
After careful consideration, and in view of the fact that so many of you have been struggling to meet the current deadline and get your images uploaded, and in view of the fact that Jim needed to leave early on March 30 for a doctor’s appointment, and in view of the fact that the word has been spreading like wildfire, and in view of the fact that some of you have not been able to redeem your free entries for your major B&H purchases as they have not yet showed up on the transactions report, we have decided to extend the deadline for entries until April 30, 2012. There will not be any additional extensions. We thank you for your understanding and for refraining from e-mailing your complaints or posting them here as comments :).
For those of you who have been in the dark you can learn more about the BIRDS AS ART 1st International Bird Photography Competition here or by visiting the main contest page here.
later and love, artie
March 30th, 2012 LAX Travel Adventures
When I checked in on-line on Thursday afternoon for my Friday flights to the west coast, I made sure to check the box for flight delay notification and entered my samandmayasgrandpa e-mail address. For most early morning flights I stay at the Orlando Courtyard Marriott the night before. You can leave your vehicle there for up to two weeks with no charge. So that is what I did yesterday. I got on line early this morning and voila, nothing from American Airlines. All good.
I finished re-packing and got on the 7am shuttle. With three checked bags I tipped the driver a five dollar bill. I was scheduled to fly first class to LA at 9am on American, continue on to Santa Barbara on a puddle jumper, also on AA, and then rent a car–I use and love National after having switched a year ago from Avis, and then drive to Los Osos. I would arrive just in time for the opening reception of the Morro Bay Photo Expo where I will be presenting all day Saturday and leading a Master Class/In-the-Field workshop on Sunday morning, all that thanks to the generosity of Canon USA/Explorers of Light. At curbside check-in at MCO (Orlando airport) I learned that the LA flight was delayed 2 1/2 hours. That would result in my missing my flight to Santa Barbara and missing the reception…. On to Plan B.
The porter brought my stuff inside–another five dollar tip thank you very much, and I explored several possibilities with the agent who was very helpful. The solution was for me to fly to LA on Delta’s 8:30am flight. Best news: they had a first class seat for me. That would get me into LA in more than enough time to make my flight to Santa Barbara, grab the car, and drive down to Los Osos for the reception. Now I needed to get my three checked bags over to Delta to check in. The agent grabbed a porter who was also very nice. And also very helpful as you will see in a minute. As check-in time on Delta was getting close–there is a 45 minute cutoff, the porter suggested that I rush ahead of him and said that he would catch up with all my bags, both checked and carry-ons. Not to worry, he did and I checked in on time.
The porter was nice enough to stay with me till the process was complete. I did not notice that Delta had checked my bags only to LAX. Had he not noticed, I would likely have continued on to Santa Barbara while my bags were going round and round on a carousel in LA. Ten bucks for him. I even had time to stop in the book store and grab yet another John Sandford airport novel in his Prey series. I’ve already started “Broken Prey.” The guy can wrtie! I am sitting up front on the Delta flight and for the first time ever, am online in the air. For only $12.95. Man, you gotta love being addicted…. This is the first time that I have ever posted anything from 35,000 feet!
Why the big tips? I have a theory and it has worked perfectly to date. Whenever I fly I tip the baggage folks and drivers generously to ensure good luck and safe flying. As I said, my system has a perfect record of getting me safely to my location. And if my flight crashes, what good would the extra five or ten bucks do me? I will let you know if it worked this time :).
|
|
|
For greater appreciation of the compostie image, click on the photo; then click on the larger version to close it.
|
Last Second Morro Bay IPT Miracles
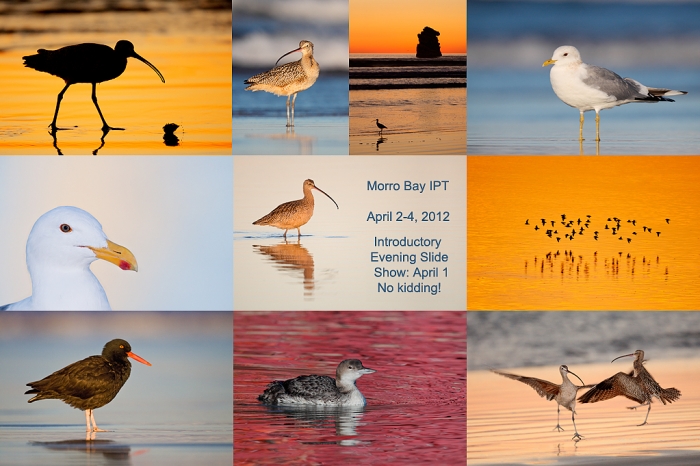
When I was sending BAA Bulletin #404 yesterday I updated the IPT page as I always do. I almost deleted the Morro Bay IPT from the top of the list–there were 9 of the 10 slots filled–but thought what the heck, so I left it. Along with my cell phone number. Last night in the motel I got a call from a Martin Lord. He will be joining the group in Morro Bay on Sunday night for the introductory slide program.
But wait, it gets even better. When I got on line this morning there was an e-mail from old friend and client Jean-Luc Valliant. He will also be joining the IPT. As it says on the web site, BAA always reserves the right to exceed the posted limit by one.
BAA Bulletin #404
BAA Bulletin #404 is on-line and can best be viewed here.
- MY THOUGHTS ON THE Canon EOS-5D Mark III
- THE CONTEST IS BOILING HOT!
- GEAR FOR SALE/PRICE REDUCED
- A VERY NICE e-MAIL
- B&H LINKS OF NOTE
- B&H CANON SPECIALS
- IPT UPDATES
Earn Free Contest Entries and Support both the Bulletins and the Blog by making all your B & H purchases here.
More and more folks are earning multiple contest entries with their B & H purchases. See here for details on that. Eleven great categories, 34 winning and honored images, and prize pools valued in excess of $20,000. Click here to visit the competition home page.
Shopper’s Guide
Thanks a stack to all who have used the Shopper’s Guide links to purchase their gear as a thank you for all the free information that we bring you on the Blog and in the Bulletins. Before you purchase anything be sure to check out the advice in our Shopper’s Guide.
March 28th, 2012
|
|
|
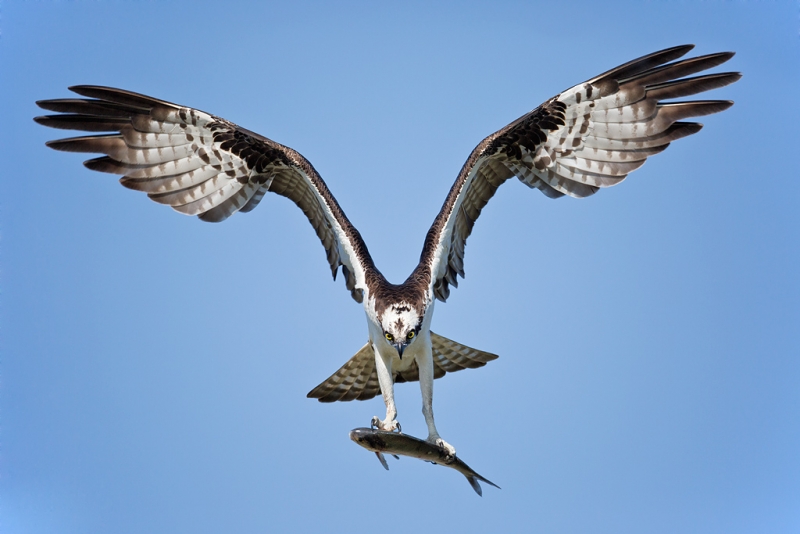
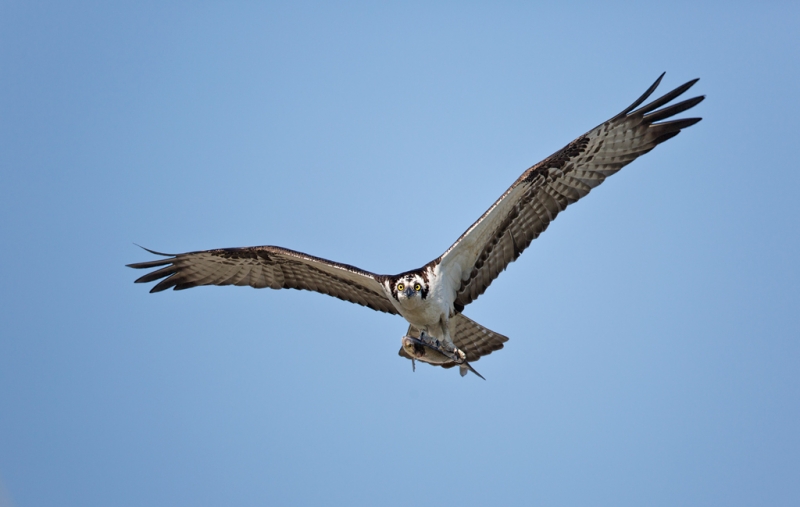
This image was created with the tripod-mounted Canon 800mm f/5.6L IS lens and the Canon EOS-5D Mark III. ISO 400. Evaluative metering at +1 stop off the blue sky: 1/2000 sec. at f/5.6 in Manual mode.
Central Sensor–Expand AF area/Rear Focus AF active at the moment of exposure. Click here if you missed the Rear Focus Tutorial.
Click on the image to enjoy a larger, more spectacular version.
|
The Canon EOS-5D Mark III: I’m In Love!
I left my office home a bit late at 8:15am today to head down to the lake five minutes from my home. With all my lenses and my new Canon EOS-5D Mark III. I photographed a few Sandhill Cranes and was especially impressed with the rear LCD screen; the images looked better than many laptop monitors I have seen. Exposure seemed very similar to my Mark IV bodies. Then I noticed an Osprey flying around with a fish so I grabbed the lens, jumped out of the car, and began making images. I kept that up for a few minutes until my arm gave out and then ran back to the car to grab the 3530 LS tripod with the Mongoose M3.6 on it. Miraculously the bird was still flying around. I created the image above just as he landed on the wire below his nest.
When I got home and viewed the series of flight images I realized that my 5D III AF predictions were true. Every image was sharp. Even when the bird flew behind a wire or the telephone pole. The files are luscious, incredibly detailed and sharp with natural color. Using this full frame camera with the 800 lens wide open at f/5.6 I needed to eliminate the vignetting. I did that for the image above in Photoshop. On the flight image below I used the Lens Correction tab in ACR.
BTW, thanks to Arash Harzeghi who pointed me here download for the Adobe Photoshop Camera Raw 6.7 Plug-In Release Candidate. I downloaded the Windows version, opened the ZIP file, and clicked on the install folder. In minutes I was able to convert my RAW files after hitting Control D in BreezeBrowser.
I must tell you, I have never been so excited about a new camera before.
I had headed out even without taking a look at the camera body manual. I had gone through all the Menus and I must say I was mega-confused…. As you can see that did not hurt my images though. As it turns out I was in Central Sensor Expand AF area. I plan on experimenting with all of the AF area selection modes. And I will of course be working hard on the BAA 5D Mark III User’s Guide. I have even figured out how to toggle between the various AF area selection modes. I could not do that this morning :). And it took me quite a while to figure out how to set up rear focus….
One strange thing that I noted while hand holding the 800. While tracking the Osprey in flight I experienced what I can only describe as IS shimmer; the viewfinder image seemed to shimmer slightly as I panned. I was of course was in AI Servo AF with IS Mode 2 set and IS on of course. The good news is that all of the images were sharp.
|
|
|
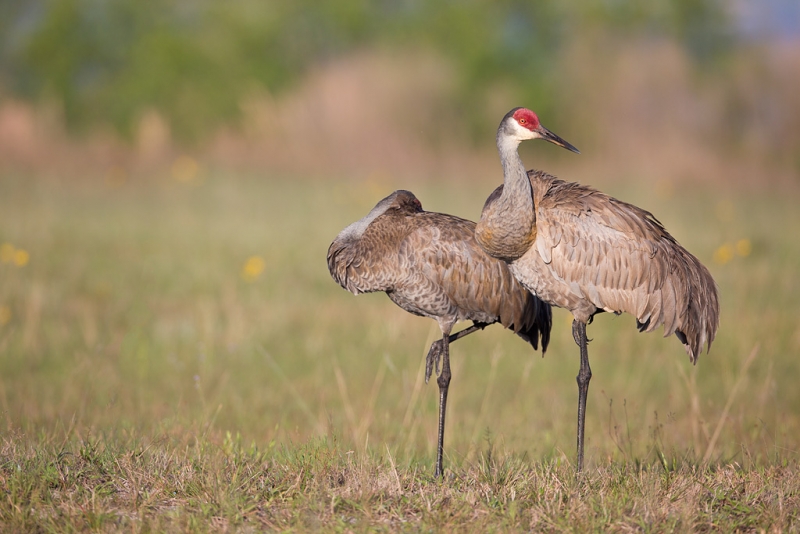
This image was created with the Canon 800mm f/5.6L IS lens and the Canon EOS-5D Mark III. ISO 400. Evaluative metering +1/3 stop: 1/640 sec. at f/8 in Manual mode. The lens was supported by a BLUBB on the car window.
Central Sensor–Expand AF area/Rear Focus AF on the right-hand bird’s eye and recompose. Click here if you missed the Rear Focus Tutorial. Click on the image to enjoy a larger version.
|
The image above was my first 5D Mark III keeper.
|
|
|
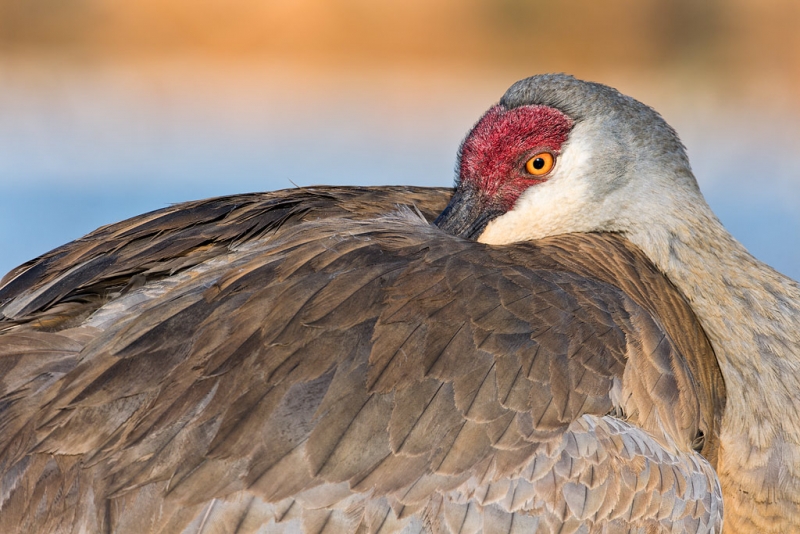
This image was also created with the Canon 800mm f/5.6L IS lens and the Canon EOS-5D Mark III. ISO 400. Evaluative metering +1/3 stop: 1/320 sec. at f/13 in Manual mode. As above, the lens was supported by a BLUBB on the car window.
Central Sensor–Expand AF area/Rear Focus AF on the right-hand bird’s eye and recompose. Click here if you missed the Rear Focus Tutorial. Click on the image to enjoy a larger version.
|
As I was working at point blank range note that I stopped down to ensure that all of the feathers on the side of the bird were rendered as sharp as possible. Depth-of-field is at a minimum when you are working near the minimum focusing distance of the lens.
|
|
|
This image was created with the hand held Canon 800mm f/5.6L IS lens and the Canon EOS-5D Mark III. ISO 400. Evaluative metering at +1 stop off the blue sky: 1/2000 sec. at f/5.6 in Manual mode.
Central Sensor–Expand AF area/Rear Focus AF active at the moment of exposure. Click here if you missed the Rear Focus Tutorial. Click on the image to enjoy a larger version.
|
I am not very skilled at hand holding big lenses but I was able to keep the bird in the frame for most of the flight images that I created.
B&H Links of Note
You can pre-order your Canon EOS-5D Mark III here. A second shipment is expected soon.
Even better, you can have a 5D Mark III shipped today if you package it with my favorite B-roll lens, the 24-105mm IS L zoom lens. I try never to leave home without it. The package represents a savings of $350. Here is the link for the 5D MIII/24-105mm kit.
Click here to learn more about the 24-105 and see the price of the lens alone….
The Contest Deadline…
The contest deadline–March 31, 2012 is fast approaching. Things are at a fever pitch here as as many as 30 folks have been signing up every day. Though several folks have purchased two or three entries the record is ten! We hope that your images make it in time for the judging.
BTW, if you pay without registering you will not here from us. Best to register first and then pay or send your B&H receipt. If you are late to the party click here for complete info on the BIRDS AS ART 1st International Bird Photography Competition.
Earn Free Contest Entries and Support both the Bulletins and the Blog by making all your B & H purchases here.
More and more folks are earning multiple contest entries with their B & H purchases. See here for details on that. Eleven great categories, 34 winning and honored images, and prize pools valued in excess of $20,000. Click here to visit the competition home page.
Shopper’s Guide
Below is a list of the gear used to create the images in today’s post. Thanks a stack to all who have used the Shopper’s Guide links to purchase their gear as a thank you for all the free information that we bring you on the Blog and in the Bulletins. Before you purchase anything be sure to check out the advice in our Shopper’s Guide.
Canon 800mm f/5.6L IS lens. Right now this is my all time favorite super-telephoto lens.
Canon EOS-5D Mark III. Man, I am in love with this camera body. Both the files and the AF system are superb. I cannot wait to get to Morro Bay.
And from the BAA On-line Store:
BLUBB. The BLUBB (Big Lens Ultimate BeanBag) is the world’s finest big lens beanbag. There are knock-offs for half the price but you will be wasting your money….
LensCoats. I have a LensCoat on each of my big lenses to protect them from nicks and thus increase their re-sales value. All my big lens LensCoat stuff is in Hardwood Snow pattern.
LegCoat Tripod Leg Covers. I have four tripods active and each has a Hardwood Snow LegCoat on it to help prevent further damage to my tender shoulders 🙂 And you will love them in mega-cold weather….
Gitzo GT3530LS Tripod. This one will last you a lifetime.
Mongoose M3.6 Tripod Head. Right now this is the best tripod head around for use with lenses that weigh less than 9 pounds. For heavier lenses, check out the Wimberley V2 head.
CR-80 Replacement Foot for Canon 800. When using the 800 on a Mongoose as I do, replacing the lens foot with this accessory lets the lens sit like a dog whether pointed up or down and prevents wind-blown spinning of your lens on breezy days by centering the lens directly over the tripod.
Double Bubble Level. You will find one in my camera’s hot shoe whenever I am not using flash.
The Lens Align Mark II. I use the Lens Align Mark II pretty much religiously to micro-adjust all of my gear an average of once a month and always before a major trip. Enjoy our free comprehensive tutorial here.
BreezeBrowser. I do not see how any digital photographer can exist without this program.
March 27th, 2012 Ask Tim Grey eNewsletter
I subscribe to the Ask Tim Grey eNewsletter on all BIRDS AS ART computers, office and laptop. Why? Tim has been the Photoshop guru for nature photographers for well more than a decade. His eNewsletters are filled with great info and tips. The last few have featured questions on what a RAW file is and is not, how color space affects RAW files (hint: it does not!), and how color space and color profiles affect your prints. I almost forgot; the e-newsletter includes links to Tim’s blog posts of interest and to upcoming teaching gigs. See below for my very favorite recent e-newsletter feature.
You can sign up to receive Tim’s missives on a regular basis by clicking here.
Note: Tim has been a guest co-leader on several BAA IPTs. He is a skilled instructor with a subtle sense of humor that always leaves me in stitches.
Ten Absolutely Free Photoshop 6 Video Tutorials!
This from Tim’s March 22 e-newsletter:
Tim’s Grey’s Top Ten Favorite New Features in Photoshop CS6 Beta
Adobe has announced the public availability of Photoshop CS6 Beta, which offers an advance look at some cool new features.
To help photographers gain a sense of what they can expect from the new update, I’ve put together (with the help of my friends at video2brain) a free (yes, free!) video training course highlighting my top ten favorite new features in Photoshop CS6 Beta. I won’t simply list out my top ten new features, but will show you how they can be put to use, so you’ll get a better idea of all Photoshop CS6 Beta has to offer.
You can read a bit of background on this free new video course in my latest blog post here.
And you can view the video course, called “Photoshop CS6 Beta: Tim Grey’s Top 10” through my video2brain online store here.
I hope you enjoy this free video course. And of course, you can bet that as soon as a full and final updated release of Photoshop comes out, I’ll be ready with new video training courses to help you make the most of your digital photos. Stay tuned! Thank you, Tim Grey
Tutorials
Below, in descending order, are Tim’s top ten CS-6 features. I have not looked at them all yet but I am sure that my #1 fave would be the Content-Aware Move Tool and my #2 (or possibly tied for #1) would be the Improved Patch Tool. Heck, Digital Basics folks and blog and Bulletin regulars know how much I love the old Patch Tool.
The length of each video follows the title. And here is the best news of all: not only does Tim describe the new features in each video but he teaches us how to use them. Thanks Tim!
#10: Paragraph and Character Styles (04:57)
#9: Panel Updates (01:42)
#8: Auto Brightness/Contrast (01:32)
#7: Auto Curves and Levels (01:40)
#6: Perspective Crop Tool (03:10)
#5: Sample Size for Magic Wand (03:18)
#4: Crop Tool Overhaul (03:45)
#3: Content-Aware Move Tool (04:04)
#2: Improved Patch Tool (02:52)
#1: Oil Paint Filter (03:59)
Again, you need to click here to access the free video tutorials. After you’ve viewed them all let us know which new feature would be your #1 CS-6 favorite. And why.
B & H Canon Specials
Click here to learn of the fantastic Canon lens & Speedlite Double Instant Rebates. The double rebates kick in only when an item is bundled with one of three selected Canon dSLR bodies including the EOS-7D and the EOS-5D MII a(the latter saved my butt in Antarctica!) Included are lots of my favorite lenses: the Canon EF 16-35mm f/2.8L II USM AF zoom lens (save $220), my beloved Canon EF 70-200mm f/2.8L IS II USM Telephoto zoom lens (save $400!), the EF 300mm f/4.0L IS USM AF lens–great for birds and butterflies with a 7D (save $180), the EF 180mm f/3.5L Macro USM AF lens–I sent mine to Morro Bay for the California poppies (save $180), and two old faves of mine, the EF 100-400mm f/4.5-5.6L IS zoom lens (save $220) and my old “toy lens”, the EF 400mm f/5.6L USM Autofocus Lens (save $180).
These offers expire at the end of the week and will not be extended so best to act now to take advantage of some great savings.
Upcoming B&H Passover Closing
Those wishing to earn contest entry credits with their B&H purchases–B&H is the principal contest sponsor–please note:
B&H will be closed Friday April 6th in observance of Passover and will reopen on Sunday April 15th at 10:00AM EST. Orders must be placed by 4:00PM EST on Thursday April 5th in order to ship before the Holiday. Orders placed after this time will ship when they reopen. We apologize for the inconvenience and appreciate your patronage.
Earn Free Contest Entries and Support both the Bulletins and the Blog by making all your B & H purchases here.
More and more folks are earning multiple contest entries with their B & H purchases. See here for details on that. Eleven great categories, 34 winning and honored images, and prize pools valued in excess of $20,000. Click here to visit the competition home page.
Shopper’s Guide
Thanks a stack to all who have used our Shopper’s Guide links to purchase their gear as a thank you for all the free information that we bring you on the Blog and in the Bulletins. Before you purchase anything be sure to check out the advice in our Shopper’s Guide.
March 25th, 2012
| [Not a valid template] |
|
This image was created with the Canon 800mm f/5.L IS lens, the 1.4X III TC, a 25mm Extension Tube, and the Canon EOS-1D Mark IV. ISO 400. Evaluative metering at +1/3 stop: 1/640 sec. at f/8 in Av mode.
Central sensor (by necessity) AI Servo/Rear Focus AF on the bird’s eye and recompose. Click here if you missed the Rear Focus Tutorial.
Note: by placing the teleconverter on the lens with the extension tube behind it you will get AF with this combo. If you put the extension tube in front of the TC you will be able to focus closer than if the TC were mounted in front of the tube (as above) but you will need to focus manually. These situations are discussed in detail in ABP II (916 pages on CD only).
|
F3C
I had a great time presenting at the F3C Conference in Naples, FL this weekend. On Friday I led a field trip (25 folks) to Tigertail Beach on Marco Island where I had done an episode of Canon Photo Safari many years ago. There were few birds but those who stayed with the group learned a ton as we went over the basics of digital exposure and histograms. Then we walked back to a Burrowing Owl nest that I had discovered the previous afternoon while scouting. The keynote address on Saturday night went quite well and I was thrilled to get a nice standing ovation :). And I finished off my work weekend with a Photoshop Image Clean-Up workshop on Sunday morning. I sold a ton of books and CDs all weekend long and a ton of Digital Basics after the Sunday workshop.
I’d be remiss without noting that on Friday evening the program was put on by a gentleman named Jimmy Keys (www.jimmykeys.com), A British Comedy Hall style entertainer. I was talked into going and boy, was I glad that I went. The guy has an amazing voice on his own–can you say Les Mis?, does killer impressions of many famous singers including two of my favorites, Billy Joel and Elton John. Heck, he sounds more like Elton John than Elton John does. Doubt me for a second? Go to the web site and click on the top video. Did I mention that Jimmy Keys is the funniest act I have ever seen? That he plays the piano like a skilled madman? The audience was howling for the entire 90 minutes. After the show I asked him how many times he had been on Letterman or Leno. He said never. I told him that he was more talented than any comedy act ever to appear on either program. If you have a corporate event or a big party, this guy travels. And he is a down-to-earth nice guy.
Lastly I had two amazing meals at two different Sushi Thai restaurants in Naples–Sushi Thai of Naples and Sushi Thai Too. The panang curry with pork was to die for. It was so good that I ordered it twice today. Once for lunch. And the second one will be my dinner tonight as soon as I finish this blog post and take a swim. I’m running late 🙂
Best of Both Worlds…
In the image above I loved the blowing grasses on the left side of the frame but not the bird looking out of the frame or the dark shadows caused by its deep-set eyes.
| [Not a valid template] |
|
Same gear, same techs.
|
In the image immediately above I loved the wide open eye and the bird looking to the left. But the lovely grasses has blown out of the frame. What to do?
| [Not a valid template] |
|
The optimized image, the final result.
|
I painted a Quick Mask of the left side of the opening image, put it on its own layer, and used the move tool to bring into the image just above. Then I added a Layer Mask and fine tuned the edges of the layer. NIK Color Efex Pro 4 Detail Extractor on the whitest parts of the neck and 50% Tonal Contrast applied to the whole image. Bill clean-up as usual but for the fact that I used some Content Aware Fill for the bill clean-up and was quite impressed.
I just love the result.
Learn the basics of Quick Masking and Layer Masking in Digital Basics along with my complete digital workflow. The next update coming no later than May will include basic NIK Color Efex Pro turorials.
Earn Free Contest Entries and Support both the Bulletins and the Blog by making all your B & H purchases here.
More and more folks are earning multiple contest entries with their B & H purchases. See here for details on that. Eleven great categories, 34 winning and honored images, and prize pools valued in excess of $20,000. Click here to visit the competition home page.
Shopper’s Guide
Below is a list of the gear used to create the images in today’s post. Thanks a stack to all who have used the Shopper’s Guide links to purchase their gear as a thank you for all the free information that we bring you on the Blog and in the Bulletins. Before you purchase anything be sure to check out the advice in our Shopper’s Guide.
Canon 800mm f/5.L IS lens. Right now this is my all time favorite super-telephoto lens.
Canon EF 1.4X III TC. This new TC is designed to work best with the new Series II super-telephoto lenses.
25mm Extension Tube. This vaulable accessory allows for closer focusing.
Canon EOS-1D Mark IV professional digital camera body. The very best professional digital camera body that I have ever used.
And from the BAA On-line Store:
LensCoats. I have a LensCoat on each of my big lenses to protect them from nicks and thus increase their re-sales value. All my big lens LensCoat stuff is in Hardwood Snow pattern.
LegCoat Tripod Leg Covers. I have four tripods active and each has a Hardwood Snow LegCoat on it to help prevent further damage to my tender shoulders 🙂 And you will love them in mega-cold weather….
Gitzo GT3530LS Tripod. This one will last you a lifetime.
Mongoose M3.6 Tripod Head. Right now this is the best tripod head around for use with lenses that weigh less than 9 pounds. For heavier lenses, check out the Wimberley V2 head.
CR-80 Replacement Foot for Canon 800. When using the 800 on a Mongoose as I do, replacing the lens foot with this accessory lets the lens sit like a dog whether pointed up or down and prevents wind-blown spinning of your lens on breezy days by centering the lens directly over the tripod.
Double Bubble Level. You will find one in my camera’s hot shoe whenever I am not using flash.
The Lens Align Mark II. I use the Lens Align Mark II pretty much religiously to micro-adjust all of my gear an average of once a month and always before a major trip. Enjoy our free comprehensive tutorial here.
Canon EOS-1D Mark IV User’s Guide. Learn to use your Mark IV the way that I use mine. Also available for the 7D and the Mark III here.
BreezeBrowser. I do not see how any digital photographer can exist without this program.
March 24th, 2012
|
|
|
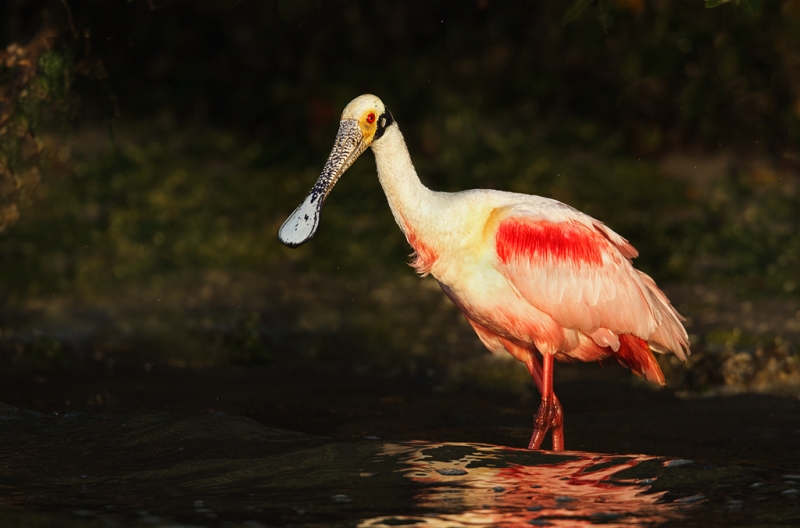
This image of a breeding plumage Roseate Spoonbill was created at 7:55 am with the with the tripod-mounted Canon 800mm f/5.6L IS lens and the Canon EOS-1D Mark IV. ISO 400. Evaluative metering -1/3 stops as framed: 1/800 sec. at f/5.6 in Manual mode.
Central Sensor/AI Servo Rear Focus on the bird’s lower breast active at the moment of exposure. Click here if you missed the Rear Focus Tutorial. Click on the image to enjoy a larger version.
This bird had sneaked out of the mangroves to my right; I would have missed the shot had James not alerted me. Thanks Froggie!
|
A Bad Morning on the Hooptie Deux is Still a Pretty Darned Good Morning
By the time that I got to the dock with the repair gear James was already there; he had jury-rigged a repair with a plastic bag and some zipper wax and limped back to the boat ramp. In short order the job was done. I loaded my gear and we were underway. It was a clear morning with a breeze from the southeast. The wind was from the perfect direction for flight photography but as the sun rose the breeze freshened to about 20 knots. Instead of landing on the flat in front of us as we had so carefully planned the spoonies and large numbers of White Ibises landed in the more sheltered cove to our left where we were unable to get our lenses on them. So we settled for a great morning of flight photography albeit without as many chances for Roesate Spoonbills as you would expect on a typical late March morning.
|
|
|
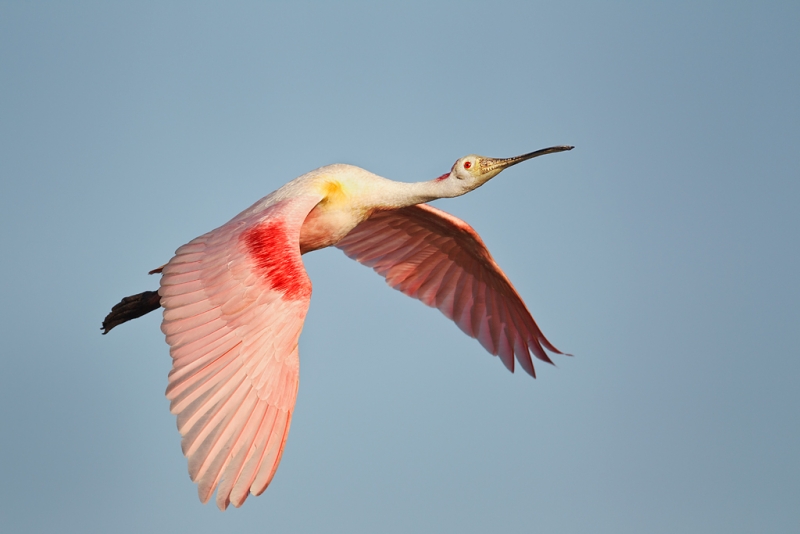
This tight-in-the-frame flight image of a Roseate Spoonbill was created at 8:35am with the with the tripod-mounted Canon 800mm f/5.6L IS lens and the Canon EOS-1D Mark IV. ISO 400. Evaluative metering +2 stops off the light blue sky: 1/2000 sec. at f/5.6 in Manual mode.
Central Sensor/AI Servo Rear Focus active at the moment of exposure. Click here if you missed the Rear Focus Tutorial. Click on the image to enjoy a larger version.
|
This image was a result of my taking a more aggressive approach to flight and action photography; in the past, I would have passed on this opportunity figuring that I would not be able to fit the whole bird in the frame. See here for details on that. I will share the original with you in the next blog post. I moved the bird back in the frame using APTATS II techniques and darkened the sky using Viveza with Control Points.
|
|
|
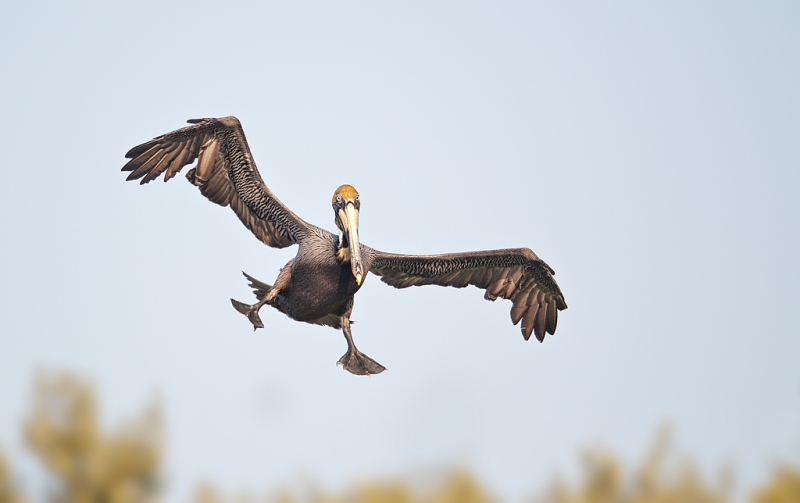
This breeding plumage Brown Pelican image was created at 8:44am with the tripod-mounted Canon 800mm f/5.6L IS lens and the Canon EOS-1D Mark IV. ISO 400. Evaluative metering +2 stops off the light blue sky: 1/1600 sec. at f/5.6 in Manual mode.
Central Sensor/AI Servo Rear Focus active at the moment of exposure. Click here if you missed the Rear Focus Tutorial. Click on the image to enjoy a larger version.
|
When the wind direction is right and the pelicans are coming in with their landing gear down, press and hold the shutter button to ensure a variety of poses. Detail Extractor and Tonal Contrast both at 50% with NIK Color Efex Pro on the bird only (selected with the Quick Selection Tool).
|
|
|
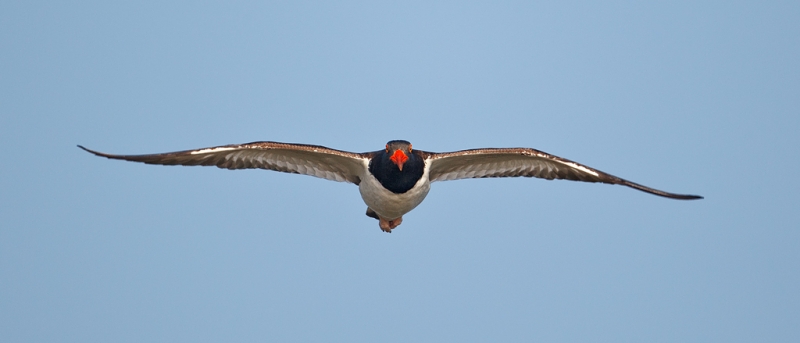
This incoming American Oystercatcher was photographed at 9:12am with the tripod-mounted Canon 800mm f/5.6L IS lens and the Canon EOS-1D Mark IV. ISO 400. Evaluative metering +1 2/3 stops off the light blue sky: 1/2000 sec. at f/5.6 in Manual mode.
Central Sensor/AI Servo Rear Focus active at the moment of exposure. Click here if you missed the Rear Focus Tutorial. Click on the image to enjoy a larger version.
|
This species almost always alerts you to their presence with their strident flight calls. As is usual this bird, one of a fly-by pair, announced itself long before flying into photographic range. Long lens flight photography tip: make sure that your distance range limit switch is set to far focus only so that the lens does not have to search all the way down to minimum focusing distance. This drastically reduces the time needed for initial focusing acquisition.
|
|
|
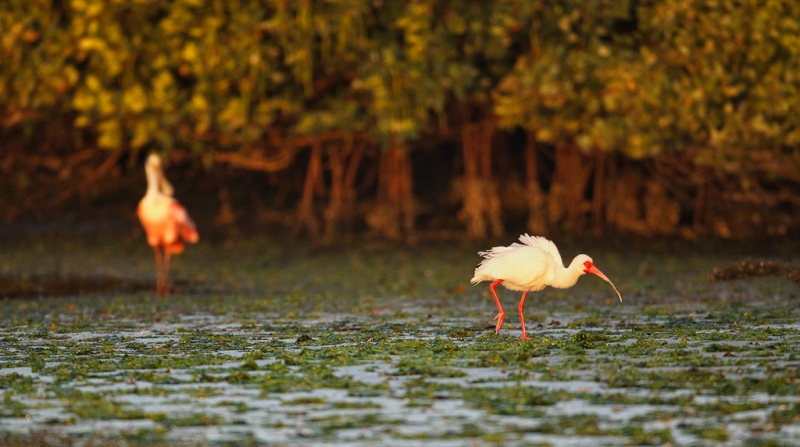
This small-in-the-frame/environmental image was created at 7:46am with the tripod-mounted Canon 800mm f/5.6L IS lens and the Canon EOS-1D Mark IV. ISO 1600. Evaluative metering +2 1/3 stops off the sky (-1 stop as framed): 1/640 sec. at f/5.6 in Manual mode.
Central Sensor/AI Servo Rear Focus on the White Ibis and recompose. Click here if you missed the Rear Focus Tutorial. Click on the image to enjoy a larger version.
|
I was set up for early morning flight photography when I noticed the ibis walking by the lone spoonbill. I rear focused on the ibis, swung the lens to the left, and when the compositional balance was pretty close to perfect fired off two frames. The Small-in-the-Frame/Environmental category is one of the weakest in the BIRDS AS ART 1st International Bird Photography Competition. The deadline is coming up soon; If you have some great small in the frame habitat images be sure to enter for a chance at some of the great prizes in the $22,000+ prize pool and lots of honor and glory as well :). For lots more info see “The Contest Heats Up.” Item 1 here.
|
|
|
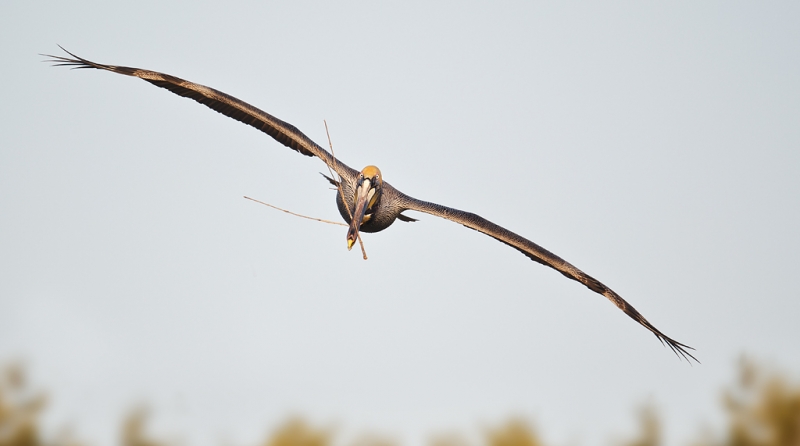
This image of a breeding plumage Brown Pelican carrying nesting material was created at 8:13am with the tripod-mounted Canon 800mm f/5.6L IS lens and the Canon EOS-1D Mark IV. ISO 400. Evaluative metering +2 2/3 stops off the very light blue sky: 1/800 sec. at f/5.6 in Manual mode.
Central Sensor/AI Servo Rear Focus active at the moment of exposure. Click here if you missed the Rear Focus Tutorial. Click on the image to enjoy a larger version.
|
About half the flying pelicans were carrying nesting material and with the south/southeast wind flight photography was superb. By studying the exposure data and the time that each image was made you can learn that as the morning wore on it was correct to add less and less light to the exposure reading off the sky.
Comments Welcome
Please feel free to leave a comment on all or any of the above. If you have a favorite, be sure to let us know why you like it.
James Shadle and the Hooptie Deux
I am always amazed when folks who visit Florida for the express purpose of photographing Roseate Spoonbill go home disappointed. To say that Ding Darling ain’t what it used to be is a vast understatement…. If you want to photograph lots of spoonbills all that you need to do is spend a few days with James Shadle on his photo-customized pontoon boat, the Hooptie Deux. Click here and scroll down for complete details and to see some of James’ incredible images from Alafia Banks.
James’ “In the Field Workshops” is the original Tampa Bay nature photography (by boat) workshop and tour leader. He has an exciting list of locations that will give you the opportunity to create incredible images of dramatic behavior and stunning plumages. He knows the bay better than anyone as he has been doing it longer than anyone and as the images show, he knows how to make great pictures and can teach you to do the same. James owns and operates a 20′ tri-toon boat (The Hooptie Deux) that has been customized specifically for photography workshops. It’s roomy, comfortable, and stable. The boat is equipped with a quiet and environmentally friendly E-Tec outboard motor. It also has a powerful, silent, electric trolling motor with wireless remote control. The boat can be configured with no top for on-board photography or with a bimini top to provide shelter from sun and rain. Refreshments are available at all times.
Call or e-mail in advance to inquire about dates and rates. You can get in touch with James for additional info or to schedule a Custom Workshop or Tour via e-mail, by cell phone at (813) 363-2854 or on his home phone (early evenings best) at (813-689-5307). If by cell phone it is best to call back rather than to leave a message.
If you plan on joining James make sure to read “Hooptie Deux Practicalities” by scrolling down here.
Earn Free Contest Entries and Support both the Bulletins and the Blog by making all your B & H purchases here.
More and more folks are earning multiple contest entries with their B & H purchases. See here for details on that. Eleven great categories, 34 winning and honored images, and prize pools valued in excess of $20,000. Click here to visit the competition home page.
Shopper’s Guide
Below is a list of gear that I used to create the image in this blog post. Thanks a stack to all who have used the Shopper’s Guide links to purchase their gear as a thank you for all the free information that we bring you on the Blog and in the Bulletins. Before you purchase anything be sure to check out the advice in our Shopper’s Guide.
Canon 800mm f/5.L IS lens. Right now this is my all time favorite super-telephoto lens.
Canon EF 1.4X III TC. This new TC is designed to work best with the new Series II super-telephoto lenses.
Canon EOS-1D Mark IV professional digital camera body. My two Mark IVs are my workhorse digital camera bodies.
And from the BAA On-line Store:
LensCoats. I have a LensCoat on each of my big lenses to protect them from nicks and thus increase their re-sales value. All my big lens LensCoat stuff is in Hardwood Snow pattern.
LegCoat Tripod Leg Covers. I have four tripods active and each has a Hardwood Snow LegCoat on it to help prevent further damage to my tender shoulders 🙂 And you will love them in mega-cold weather….
Gitzo GT3530LS Tripod. This one will last you a lifetime.
Mongoose M3.6 Tripod Head. Right now this is the best tripod head around for use with lenses that weigh less than 9 pounds. For heavier lenses, check out the Wimberley V2 head.
CR-80 Replacement Foot for Canon 800. When using the 800 on a Mongoose as I do, replacing the lens foot with this accessory lets the lens sit like a dog whether pointed up or down and prevents wind-blown spinning of your lens on breezy days by centering the lens directly over the tripod.
Double Bubble Level. You will find one in my camera’s hot shoe whenever I am not using flash.
The Lens Align Mark II. I use the Lens Align Mark II pretty much religiously to micro-adjust all of my gear an average of once a month and always before a major trip. Enjoy our free comprehensive tutorial here.
Canon EOS-1D Mark IV User’s Guide. Learn to use your Mark IV the way that I use mine. Also available for the 7D and the Mark III here.
BreezeBrowser. I do not see how any digital photographer can exist without this program.
March 22nd, 2012
|
|
|
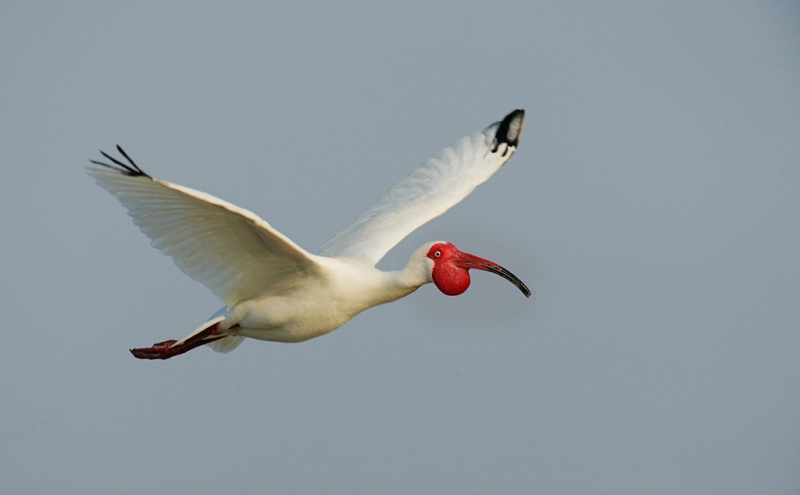
White Ibis in flight. Alafia Banks, on the Hooptie Deux. It is a composite made from 3 consecutive flight images. I took the best features of each 🙂 Probably with the Canon 600mm f/4L IS lens and the EOS-1Ds Mark II. On the tripod with a Mongoose.
|
I was headed west on State Road 60 headed for Gibsonton for an early morning with the spoonbills and White Ibises on the Hooptie Deux with my good friend and BPN founding partner James Shadle aka Froggie when my cell phone rang at about 5:45am of course. I had finally slept to the alarm which rang at 3:30 am. On Tuesday evening I had stayed up until 1am, wide awake after napping from 8:30 am till 1:30 pm; can you say Japanese jet lag? I was surprised to hear from James.
Anyway, back to the main story. “I took the boat for a test run and the fuel line sprang a leak. Go to Lowes just off I75 at Gibsonton Road and pick my up a 3/8” inch splice barb from plumbing. They open at 6am. Once you get to the dock have someone bring it out to me. I am stuck at the first marker bouy, #15. After that it will take me 5 minutes to make the repairs. I got to Lowes at 6:04 am. Perfect. Only they did not look open. They were not. They open at 7am. New hours. So not much to do but hook up the laptop to my car plane charger, get on line with my Droid, and share my exciting morning.
If all goes well we should be out to Alafia Banks just after sunrise. As I say often, you gotta love it. Well, it is 6:53 am and I am headed into Lowe’s; wish us luck!
|
|
|
White Ibis pre-dawn jiggle blur. Alafia Banks, on the Hooptie Deux. Probably with the Canon 70-200mm f/4L IS, the 1.4X III TC, and the EOS-1D Mark III. Hand held.
|
Which Image Do You Like Best?
Take a moment to let us know which of the two images you like best, and why.
BAA Bulletin #403
BAA Bulletin #403 is On-liine now and can be accessed here. See the exciting contest news!
March 20th, 2012
|
|
|
This image, a pleasing blur of the sharply rendered leg of a tame Great Blue Heron, was created at Blind Pass Beach on the SW FLA IPT by Clemens van der Werf with the tripod-mounted Canon 800mm f/5.6L IS lens and the Canon EOS-1D Mark IV. ISO 50. Evaluative metering +1 2/3 stops: 1/15 sec. at f22 in Manual mode.
Central Sensor/AI Servo Rear Focus on the bird’s leg and recompose. Click here if you missed the Rear Focus Tutorial. Click on the image to enjoy a larger, more spectacular version.
Image copyright 2012 and courtesy of Clemens van der Werf.
|
Teaching and Learning Creativity; A Great Example
As regular readers know, I am very proud of my friend and student Clemens van der Werf. Aside from being a super-nice guy Clemens is a mega-serious student of bird and nature photography. He has been on a zillion IPTs during the past two years. And he is headed back to Homer, AL today to join Robert O’Toole on another Bald Eagle trip, his second. Clemens’ work has been featured in several blog posts including Mystery Photographer and Skill Level Revealed, IPT Student Getting Too Good? Part I With Image Critiques, and IPT Student Getting Too Good? Part II With Image Critiques. The latter two posts feature 5 of Clemens’ best Bear Boat images with critiques on an additional 27. Studying good critiques is a great way to learn. If you are inspired to join me on the Bear Boat trip this July see item three below.
In Part I above I wrote, “The short story is that Clemens has been on virtually every IPT since attending the 2010 SW FLA IPT (now twice). He has been on the Homer IPT, the Bosque IPT (now twice), the San Diego IPT, the JBWR/Nickerson IPT, and most recently he attended the 2011 Bear Boat IPT. Prior to his first IPT he had photographed only sailboats, his dogs, and his daughter. His skills have improved steadily. The problem is that he is getting too good. His Coastal Brown Bear images from the recently concluded Photo-Cruise reflect continuing growth in all areas of his photography. His exposures are pretty much perfect, he has perfected his sharpness techniques, and he makes all the obvious images. But his biggest area of improvement has been in seeing and creating new and different images.
It was on the 2010 Bsoque IPT that Clemens was first exposed to blurs. The very talented Denise Ippolito was along. It was a slow morning. Just past the Chupadera Deck I stopped the group and got out with my Canon 70-200mm f/2.8L IS II lens, the 1.4X III TC, and the EOS-1D Mark IV. Everyone including Clemens looked at me like I was nuts. “There are no birds. Why are we stopping here?” My eye had been attracted to a tall stand of orange-red vegetation. I set a low ISO, picked a slow shutter speed in Tv Mode, added 1 1/3 stops of light, and began creating hand held vertical pan blurs. When I shared them on the back of the camera with the group–you gotta love the immediacy of digital capture–most folks joined in the fun. Denise also ledby example Before long most everyone was experimenting with pan blurs, zoom blurs, jiggle blurs, and flame blurs. Everyone including Clemens. And the look on his face made it clear that he was hooked on blurs.
That brings us to today’s image. Here once again the student has taken what he’s learned, applied it to a new situation, and created something very special. Clemens converted the image to black and white with NIK’s killer Silver Efex Pro plug-in. And he has entered it in the 2012 Veolia BBC Wildlife Photographer of the Year Competition in the Black and White category. Good luck Clemens! (It will not be long until Clemens garners his first BBC honors.)
If you’d like to learn to create pleasing blurs, check out A Guide to Pleasing Blurs by Denise Ippolito and yours truly. We cover dozens of different techniques that you can learn and use; Clemens’ image here is a moving water blur.
TIME IS RUNNING OUT!
The deadline (March 31, 2012) for the BIRDS AS ART 1st International Bird Photography Competition is fast approaching. Enter now and get your images uploaded for a chance a the $22,000 worth of great prizes. And lots of prestige.
Here are the contest categories:
- Bird Portraits (images that show the whole bird)
- Tight Portraits and Body Parts (head shots, feather detail, and more)
- Flight (dramatic images of birds in flight)
- Small in the frame/Environmental (images of a bird or flocks of birds in their natural habitat)
- Pleasing Blurs (pleasingly blurred images of a bird or a flock of birds; images in this category must be created in-camera.)
- Action (Photographs of a bird or birds in action)
- Behavior (Images that exhibit interesting avian behavior)
- Hand of Man (the composition must include man-made elements)
- Digital Creations (anything goes including the use of filters and effects as long as there is a bird or birds in the image)
- Youth (images submitted by young photographers born on or after March 31, 1994)
- Captive including zoos (photographs of captive, zoo, pet, or rehab birds)
SELECTED IPT INFO
|
|
|
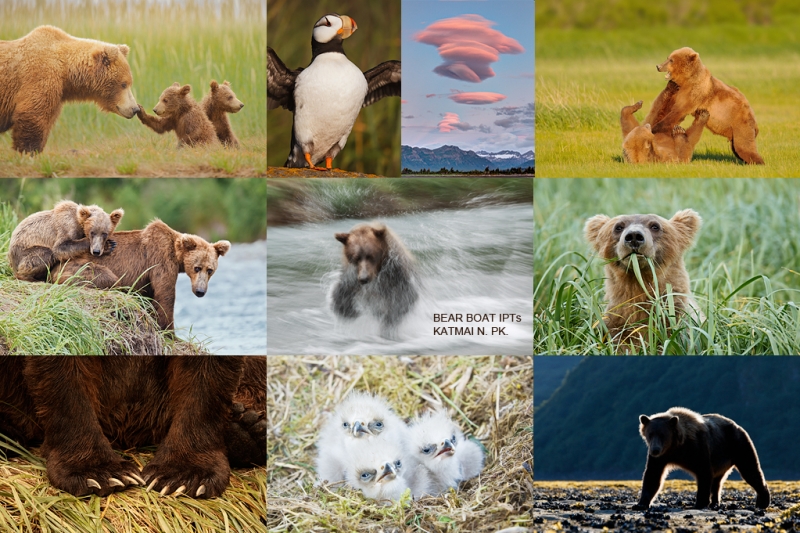
Join me this summer and live on a boat for six full and two half days of Coastal Brown (Grizzly) Bear photography. At close range. Live your dream. Great food too! Images copyright Arthur Morris & Robert O’Toole. If you are seriously interested please e-mail for itinerary and additional details.
|
KATMAI BEAR BOAT IPT: July 24-31, 2012 from Kodiak, AK: $6699. Limit 6/Openings 3. Coastal Brown Bears (Grizzlies) Galore!
Coastal Brown Bears at point blank range foraging & clamming with a good chance of copulations; cubs nursing and playing. Likely additional subjects include Horned and Tufted Puffins, nesting Bald Eagle and Black-legged Kittiwake, Steller’s Sea Lion, rafts of Sea Otters and more. Halibut fishing optional.
BOSQUE del APACHE 2012 IPT: “The Complete Bosque Experience.” NOV 21-27, 2012. 7-FULL DAYS: $3399. Introductory Slide program: 6:30 pm on 11/20. Limit: 12/Openings: 10/Openings 8.
Tens of thousand of Snow Geese, 10,000 Sandhill Cranes, ducks including point-blank American Wigeon and Wood Duck, amazing sunrises, sunsets, and blast-offs. Live, eat, and breathe photography with one of (if not the) world’s premier photographic educators at one of his very favorite locations on the planet. Top-notch Photoshop instruction. This will make 18 consecutive Novembers at Bosque for me. Nobody knows the place better than I do. Join us to learn to think like a pro, to recognize situations and to anticipate them based on the weather, especially the light and the wind direction. Every time we make a move we will let you know why. When you head home applying what you learned will prove to be invaluable.
Earn Free Contest Entries and Support both the Bulletins and the Blog by making all your B & H purchases here.
More and more folks are earning multiple contest entries with their B & H purchases. See here for details on that. Eleven great categories, 34 winning and honored images, and prize pools valued in excess of $20,000. Click here to visit the competition home page.
Shopper’s Guide
Below is a list of gear that I used to create the image in this blog post. Thanks a stack to all who have used the Shopper’s Guide links to purchase their gear as a thank you for all the free information that we bring you on the Blog and in the Bulletins. Before you purchase anything be sure to check out the advice in our Shopper’s Guide.
Canon 800mm f/5.L IS lens. Right now this is my all time favorite super-telephoto lens.
Canon EOS-1D Mark IV professional digital camera body. My two Mark IVs are my workhorse digital camera bodies.
And from the BAA On-line Store:
LensCoats. I have a LensCoat on each of my big lenses to protect them from nicks and thus increase their re-sales value. All my big lens LensCoat stuff is in Hardwood Snow pattern.
LegCoat Tripod Leg Covers. I have four tripods active and each has a Hardwood Snow LegCoat on it to help prevent further damage to my tender shoulders 🙂 And you will love them in mega-cold weather….
Gitzo GT3530LS Tripod. This one will last you a lifetime.
Mongoose M3.6 Tripod Head. Right now this is the best tripod head around for use with lenses that weigh less than 9 pounds. For heavier lenses, check out the Wimberley V2 head.
CR-80 Replacement Foot for Canon 800. When using the 800 on a Mongoose as I do, replacing the lens foot with this accessory lets the lens sit like a dog whether pointed up or down and prevents wind-blown spinning of your lens on breezy days by centering the lens directly over the tripod.
Double Bubble Level. You will find one in my camera’s hot shoe whenever I am not using flash.
The Lens Align Mark II. I use the Lens Align Mark II pretty much religiously to micro-adjust all of my gear an average of once a month and always before a major trip. Enjoy our free comprehensive tutorial here.
Canon EOS-1D Mark IV User’s Guide. Learn to use your Mark IV the way that I use mine. Also available for the 7D and the Mark III here.
BreezeBrowser. I do not see how any digital photographer can exist without this program.
March 18th, 2012
|
|
|
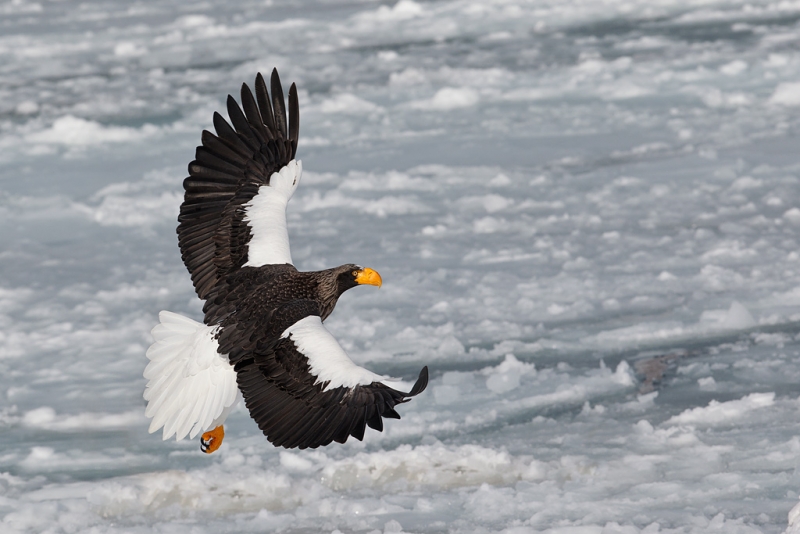
This Steller’s Sea Eagle in flight was photographed in Rausu, Hokkaido, Japan with the hand held Canon 300mm f/2.8 L IS II lens and the Canon EOS-1D Mark IV. ISO 400. Evaluative metering +2/3 stop off the ice: 1/2500 sec. at f/8 in Manual mode.
Central Sensor/AI Servo Rear Focus active at the moment of exposure. Expand AF points left and right as noted in the Mark IV User’s Guide. Click here if you missed the Rear Focus Tutorial. Click on the image for a larger version.
|
Bad Luck/Worse Luck
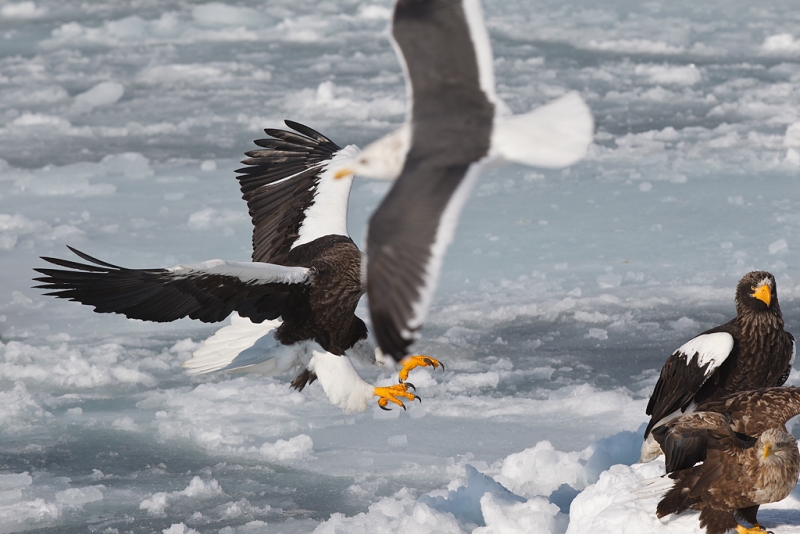
One of the big challenges on the sea eagle boat was isolating the subject. At times, it was impossible. My advice to the group was that when they did have other birds in the frame that they try to avoid merges. I did that with the bad luck image above. When I saw the image on the back of the camera I was pretty sure that I could do something with it. When I saw it on the computer I marveled at the sharpness and the beautiful dorsal view the wings; I knew that I had to do something to salvage it.
With the worse luck image below, I could not conceive of a way to try to save it.
|
|
|
Same bird, same gear, same exposure data. I thought that this was the same bird depicted in the first image but it is actually a different individual. The action must have been fast and furious as this image was created only 37/100ths of after the image above. With a bit of luck this one could have been spectacular.
|
Image Optimization
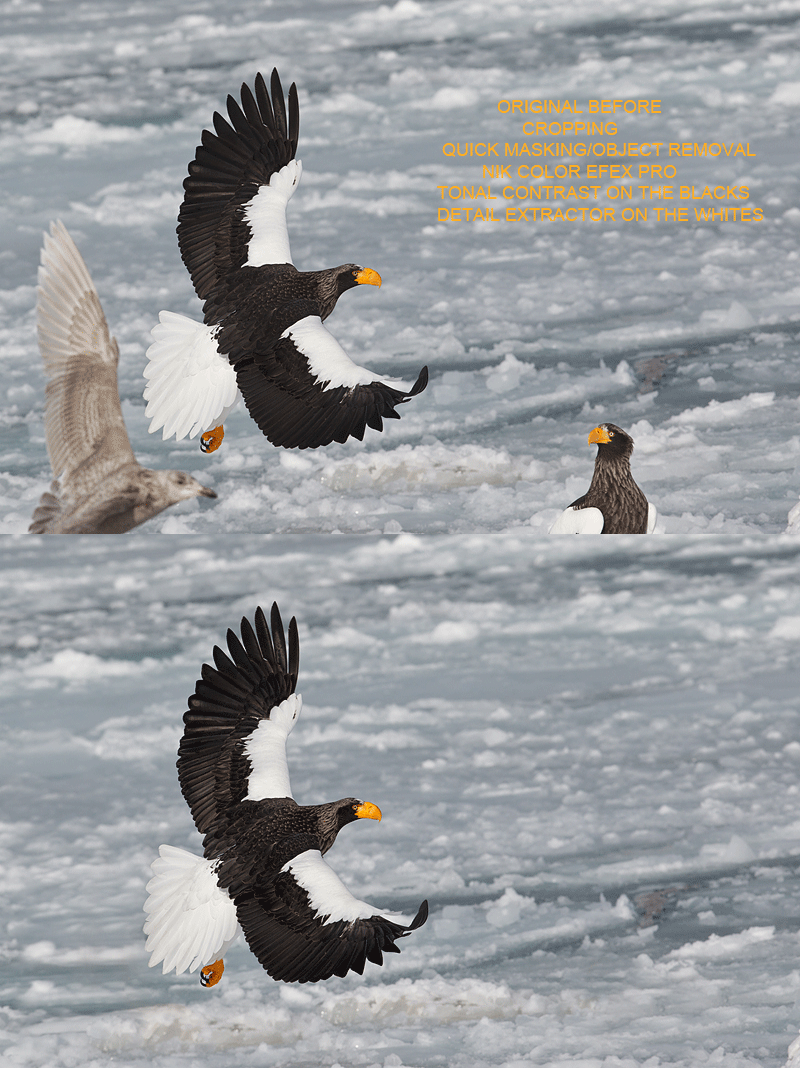
In the animated GIF below you can see the before and after images.
Bye Bye Birdies
There is lots to learn by studying the animated GIF above so be sure to let it cycle through at least a few times. I covered each of the two offending birds with two or three transformed Quick Masks. I have been working on a new trick where I paint a mask next to the object that needs to be covered, put it on its own Layer, hit Control T, and then drag one of the handles to stretch the layer over the object that needs to be covered. Here I moved the layer before stretching it. And I created at least one mask on each side of each of the two birds. Each mask was refined with a regular layer mask. After each new layer was merged I eliminated any obvious repeat patterns using the Patch Tool.
The basics of Quick Masking, Layer Masking and image clean-up are covered in detail in Digital Basics, an e-mailable PDF that includes my complete digital workflow and dozens of great Photoshop tips and tricks. Advanced Quick Masking Techniques are covered in Robert O’Toole’s APTATS II.
Hello Color Efex Pro
Now go back to the animated GIF and check out the BLACKs. Note the increased detail and contrast. That was done with a Tonal Contrast layer at 100% from NIK’s Color Efex Pro plug-in with the Midtones and Shadows sliders each moved about 15 points to the right. Note the increased detail and density in the WHITEs, especially on the leading edge of the wing. That was done with a 50% Detail Extractor layer, again with the NIK Color Efex Pro plug-in. With that filter on its own layer, I added a layer mask and erased 50% of the effect on the white areas of the upper wing as they had become somewhat greyed out. I left the full effect on the leading edge of the wing which was super-bright white in the original even with no RBG values above 235. A Color Efex Selection tutorial follows.
|
|
|
This is the optimized version. Though it seems like a lot of work the total time in Photoshop was less than 15 minutes. I just love the killer view of the upper wing, back, and tail surfaces. Click on the image to see a spectacular larger version.
|
Color Efex Selection Tutorial
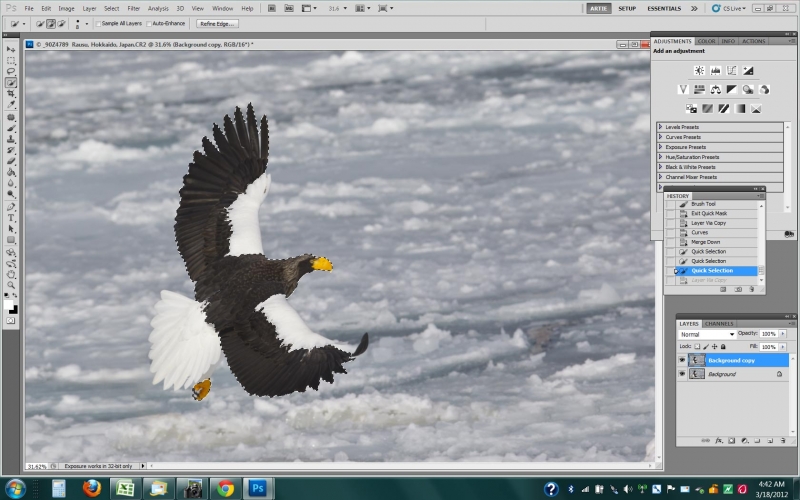
Lots of folks rave about the + and – Control Points in the various NIK plug-ins. Those of course include Color Efex Pro. I have been practicing using the control points and am getting better. For selections with less than sharp edges they do a beautiful job of masking. But for images like the one here today it makes much more sense to me to make your selections using the Quick Selection Tool. I click-drag a rather small + brush along the edges and then release the cursor. Most times with the strong black and white delineations that we see here I make a perfect selection on the first try. If not, you can work with a smaller – brush to refine the selection. In the screen below you can see that the marching ants have made a perfect selection of the blacks and the bird’s bill. (Being a screen capture the ants of course are not marching. But they are visible.)
|
|
|
When working with high contrast edges it is faster and easier to work with the Quick Selection Tool than with Control Points.
|
Any Questions?
Please feel free to leave any questions or comments below.
NIK
As regular readers know NIK’s Color Efex Pro 4 is now an integral part of my workflow. You can save 15% on all NIK products by clicking here and entering BAA in the Promo Code box at check-out. Then hit Apply to see your savings. You can download a trial copy that will work for 15 days and allow you to create full sized images.
Earn Free Contest Entries and Support both the Bulletins and the Blog by making all your B & H purchases here.
More and more folks are earning multiple contest entries with their B & H purchases. See here for details on that. Eleven great categories, 34 winning and honored images, and prize pools valued in excess of $20,000. Click here to visit the competition home page.
Shopper’s Guide
Below is a list of the gear used to create the image above. Thanks a stack to all who have used the Shopper’s Guide links to purchase their gear as a thank you for all the free information that we bring you on the Blog and in the Bulletins. Before you purchase anything be sure to check out the advice in our Shopper’s Guide.
Canon 300mm f/2.8 L IS II lens. The 300 f/2.8 L IS II alone is amazingly sharp even wide open.
Canon EOS-1D Mark IV professional digital camera body. My two Mark IVs are my workhorse digital camera bodies.
And from the BAA On-line Store:
LensCoats. I have a LensCoat on each of my big lenses to protect them from nicks and thus increase their re-sales value. All my big lens LensCoat stuff is in Hardwood Snow pattern.
The Lens Align Mark II. I use the Lens Align Mark II pretty much religiously to micro-adjust all of my gear an average of once a month and always before a major trip. Enjoy our free comprehensive tutorial here.
Canon EOS-1D Mark IV User’s Guide. Learn to use your Mark IV the way that I use mine. Also available for the 7D, the Mark III, and for Nikon dSLRs here.
BreezeBrowser. I do not see how any digital photographer can exist without this program.
March 17th, 2012 Oldie But Goodie
While searching online for information on the recent death of my old friend Bob Elliot Kutner the other day (scroll down here for info on that), I came across an old (2005) interview that I did for James Morrissey for The Nature, Wildlife and Pet Photography Forum and wanted to share an adapted and somewhat updated version here with you. You can find the original interview by James along with four images here.
Artist Showcase: Artie Morris by James Morrissey
About Artie Morris
JM: Can you tell me about yourself?
AM: I had a very nice childhood. I did not realize how messed up my childhood was until I was an adult 🙂 When I was a kid, I had a whole lot of fun.
I had no early photographic interests. My parents had no interest in nature. I lived in Brooklyn. When I was a young boy, my great aunt Alice and my great uncle Frank would go to Keyport, New Jersey where my great grandma Smith lived. By the time, I was 12 or 13 I would go by myself to Keyport with my Alice and Frank to a Great Grandma Smith’s home. I would collect butterflies, bugs, and box turtles. I used to cut the huge lawn. This was my first experience in nature. I would have told you that bird watching was for sissies when I was young.
JM: What brought you to photography then?
AM: I had two daughters by my first marriage and I wanted to take pictures of them… I purchased a Canon AE-1 and was doing snap shots of the kids and some scenics when I went on vacation. I shot perhaps 10 rolls of film during the first few years that I owned the camera. People had told me in the past, when I was in Junior HS, that I was artistically talented, but I had pretty much ignored it; whatever talent I had had lain dormant within me. In 1976, when I was in my early 30s, I started birding as a means of exercise as my knees were shot and my back was not in great shape.
I was inspired by a fellow named Bob Elliot Kutner from the South Shore Audubon Society in Long Island, NY. He was infectiously enthusiastic. He met a bunch of teachers from my school–including my late-wife Elaine Belsky-Morris and invited himself to our school and did an assembly program with his back-yard movies of Warblers. They were terrible, but he was so into it that it rubbed off. I wound up doing a few field trips with him, and that is how I got started.
JM: So your photographic education started well after you were a professional with the NYC Board of Education?
AM: Yes. I had the camera, but rarely used it. Early on I was influenced by two local guys – Tom Davis, who is dead, and an older Eastern European man named Tony Manzoni. They were both into photography. Tom was a recluse – 6′ 9”, 149 lbs. One time he took out his book of ‘baby pictures.’ They were juvenile shorebirds; he called them his “babies.” After I went to a slide show by Toni Manzoni, I said, “I can do that.” Then, I went out and purchased the Canon 400 f/4.5 FD lens.
Birding was something that developed in me over time after many seeds had been planted in my brain. The first seed was planted by Elliot Kutner, and the next by Tom Davis. I used to work at a pool club in Brooklyn and I would see Great Egrets and Snowy Egrets fishing. After seven years I was getting bored with just birding and took up photography as the next step.
My first marriage–to Dana–ended in 1985 after 18 years. We had two beautiful daughters – Jennifer and Alissa. Soon after my divorce, I married Elaine Belsky, a fellow teacher who had been my best friend for 15 years. I talked her into getting out of teaching in 1992. We got a sabbatical from the board of education, bought a small motor home, and drove twice around North America. Being married to Elaine was like being in heaven. After the sabbatical we returned home on June 30, 1993. If anyone had told me that she was going to find a lump in her left breast the next day and that she would be dead in 15 months, I would have fallen off my chair laughing. I would have said, “I am Artie Morris and this does not happen to me. I am blessed with complete happiness.” That is, however, exactly what happened. It was an horrific blow to me. Elaine died peacefully at home on November 20, 1994. I was a huge mess for seven years.
Ten days after Elaine died, I flew to Bosque Del Apache NWR in New Mexico and began the long, slow process of healing. It took me more than 7 years to get to the point where I could look back and think about how wonderful she was without crying. It was hard for a long time. Once I began doing The Work of Byron Katie I realized however that I had actively chosen to be a martyr. I was doing my best…. Doing the work brought me to peace over Elaine’s death.
A few years after Elaine’s passing I moved from Deltona, FL down to Indian Lake Estates. In about 1998 I hired my older daughter Jennifer as the Executive Director of BIRDS AS ART; her husband, Erik, works as a biologist at a nearby state park. They are the proud parents of my first two grandchildren.
JM: How do you feel that Elaine’s death affected your photography?
AM: Elaine had great confidence that I would succeed as a professional photographer. Many wives might say, “Oh my God, he is crazy. He gets up at 5 in the morning and stays out all day. He is nuts.” Elaine would say, “My Arthur. He gets up at 4 in the morning and he works so hard, and he stays out all day and photographs. He is going to be the best bird photographer in the world some day.” Her support meant the world to me. She was the first person to tell me, “You are good, you are handsome, you are loyal, you are loving, and you are smart.” I have done a lot of work since then and learned that I am all of those things and more.
JM: A lot of people never get to that point.
AM: I have done a lot of great self-help stuff. There is a great book entitled “Seeing Your Life Through New Eyes.” In addition, as I mentioned above, I have studied The Work of Byron Katie; her program, “Loving What Is” helped me find a great degree of peace.
JM: What drives you?
AM: Primarily, the fact that bird photography is fun. It is what I love to do. On another level, I have realized that my father influenced me positively in a convoluted way. He was a WWII veteran who had been severely injured on Okinawa; he lost his right arm and his left hung by a thread at one point. He spent 19 months in the hospital. He was bitter about his war injuries and we did not have a good relationship. He rarely had anything nice to say to me as I was growing up. I sometimes say somewhat jokingly that the nicest thing that he ever said to me was “Take out the damned garbage.” I didn’t realize how deeply this affected me until I was in my forties.
Why did I want to be the best teacher in the district? Why would I rather have died than lose a game of 3-man basketball? Why did I practice golf for 12 hours every day while playing on my college team? With everything that I have ever done, I have been driven to push myself to the max. In middle adulthood I realized that all along I had been trying to get people to say the nice things about me that my father never could or did. A few years before his death, I wrote him and thanked him for withholding praise, for being responsible for so much of my success. I thanked him for being a mean son of a bitch. My sister Arna read the letter to him and told me that he had a huge smile on his face. My Dad never quit. He worked in the same luggage store for more than 30 years and wound up as the manager. Many folks would have simply stayed home and collected their disability payments. I know that I got my determination from him. He was well respected in the industry. Stamps were his hobby. I can remember seeing him in the basement holding up the little squares of perforated paper and examining them with a magnifier. When I turned to photography and found myself sitting for hours on end editing slides with a loupe I chuckled at the similarities.
I am now at the point that I know I have an incredibly wonderful life. I don’t have the need for approval or the need for people to say nice things about me. When it happens though, it is certainly a nice part of the job.
Part of me is still driven to prove Elaine right. When I was in my 20s and 30s, I felt that I got ripped off in that I had no great talent. I would listen to Simon and Garfunkel singing some great song, or I would go to a show and watch talented people perform. I was envious. I wished that I had a talent. I started doing bird photography in 1983 and soon afterwards began doing slideshows. I would click up one of my images onto the screen, and people would ooh and ah. It was amazing; I was able to move people. I started adding humor to my shows. Since then, I have done more than 250 programs. When people marvel at my images or laugh at my jokes, it sure feels good.
JM: What kind of slideshows were these?
AM: As you know, I am a Canon contract photographer, an Explorer of Light. It is a wonderful program and they are quite generous to a large number of photographers worldwide. People call me up and say, “We would like you to speak at this or that festival or event.” I offer a variety of photography how-to and general interest programs. As long as we get 100 folks in the room Canon sponsors these speaking engagements. When people ask me how it all got started I trace it all back to the first slideshow I did in 1985 for the Queens County Bird Club. I got paid 10 dollars. Every bit of networking can be traced to that first show. It just grew.
At some point I began adding humor to my shows. One time, I spoke before 700 or 800 people in Cape May, NJ, Paul Kerlinger, the director of Cape May Bird Observatory, got up and said, “This is Artie Morris. It is hard to tell if he is one of the best bird photographers in the world or a standup comedian.” It helped that I had had a few whiskey sours before that program…. Now, I have spoken several times to audiences of between 400 and 700 people and have always found them to be enthralled with both the photographs and with the spiel. It was great to discover that I had had these gifts. And it was quite a thrill that to discover them rather late in life.
JM: I would imagine that you always had to be on stage when you were a teacher.
AM: To a degree teachers are on stage, but teaching was less satisfying and was much harder work, much harder than photography. The first 6 or 7 years I did not know what I was doing. For the 10 years after that I was a great teacher, but for the last 6 or 7 years I was burned out. Now I speak at a lot of birding and photography festivals. I get paid for these appearances and speaking has become an important part of my business. In addition to my honorarium, I have a sales table for the books, prints and photo accessories that we peddle. And I always get a plane ticket and a motel room for a few nights. Speaking engagements have become a great source of income for me, and I enjoy doing them immensely.
Tours are another facet of my business that I thoroughly enjoy. At a NANPA conference I once heard my friend John Shaw say, “If you think that you are going to make any decent money leading tours, forget it.” But he talks about it in terms of leading a tour for a big tour company and getting a free trip and $150-$200 a day. The trips are good ones and he gets to make lots of great images, but the money is simply not there. Not to worry, John Shaw is one of the world’s great nature photographers and he makes money in other ways.
Now, there is no question about it, if you go on one of those expensive tours they can take you to great places, places where I could not go because of the complex logistics involved. You are, however, paying those big tour companies for a large color catalog and a staff of 25 people. If you were going to Bosque with me you will learn a hell of a lot more from me than you would by joining a glitzy company tour. I put my heart and soul into my IPTs (Instructional Photo Tours). Ellen Anon, a very competent instructor and Photoshop expert, helped me out for years and now Robert O’Toole, a talented young photographer from LA helps me out on others. I have an amazing amount of repeat business. 50-60% of the folks that join us wind up coming back for more. If you are getting people back, it means that they are loving the experience and that you are doing things right.
I push myself because I love what I do. I am a people-person and I enjoy photographing with others. I would rather photograph with a group than by myself.
JM: This makes you very different from a lot of other nature photographers.
AM: Yes, I know. A lot of photographers need solitude. I don’t even like photographing by myself. I almost never do it.
Another thing about my chosen profession is that the schedule can be somewhat grueling. The way things worked out, I had been killing myself with Oreo cookies for 40 years (and doing a great job of it!) I met a doctor from San Diego who changed my life by getting me on a program of good nutrition, exercise, and a healthier lifestyle. I have been following this program for 15 years now; working with Dr. Cliff Oliver has enabled me to maintain a grueling pace.
Another big factor in my success has been my determination (thanks Dad!) It is the number one factor – even above self-promotion and the quality of my images. If you believe you can do it, then you can and will do it. Many people say “Oh, it is so hard to break into professional photography.” I say “Good. Fine. Keep on believing that.”
Another thing in the same vein: People read the original “The Art of Bird Photography,” and say, “Oh. I am going to find out how Art photographs birds.” People who like basket weaving might say, “Oh, look, here’s Millie Thompson’s book on the best basket weaving techniques.” Instead, folks need to look into the hearts and souls of those who have achieved great success. In every case they will find that those who have made it were driven to succeed and that they worked very hard to achieve that success.
JM: I know that when I learn more about the individual it does amazing things for me in terms of appreciating their work and their success.
AM: That makes sense to me. I forgot to mention that whenever I push the shutter button I do it to create something beautiful, something dramatic. The greatest compliment that you can get is when others are moved by your work. I never push the shutter button thinking, “This will be good for a two-page spread because they will have room for text.” I never shoot for the market. I make images to please myself. Looking at the overall picture, it makes me laugh: I am just a regular Jewish kid from Brooklyn. I don’t have any more talent than the next person. I just like to work hard and have been doing that for nearly three decades now.
JM: You have had such longevity. You are doing something right – I am not sure if you even know what it is.
AM: Oh, I know what it is. Busting my hump and working hard. That’s all it is. That, and loving what I do. Why do I love the birds so much? I don’t know for sure. They are free, they can fly, and they are colorful. There are so many species (identification is often a challenge) and lots of great behaviors to learn about and photograph. They migrate incredible distances, even the tiniest ones. Those are all the standard answers, but what matters to me is that they have gotten into my heart and into my soul. It is my passion to be out with them. I went out with a friend to DeSoto yesterday morning. I came home and processed the pictures. I said, “Oh My God. I made so many great pictures – and in only two hours. Photographing birds is a kick and I just love it.
I have been so, so blessed. I am going to Galapagos next week for the first time. I am starting to like the international trips. I lead most of them for others and don’t make a cent. I do get to go to great places, and I strive to make the trips educational for the participants. I am returning to the Galapagos next year and will visit Antarctica for the first time in 2007.
Added note: my trips to the Galapagos, to Antarctica, to Midway, the Wild Britain cruise that I did a few years back, my trips to Africa, to Norway, and most recently to Japan have all been among the great highlights of my life.
I’d be glad to answer any questions below.
March 15th, 2012
|
|
|
This Red-crowned Crane head portrait was created at the Akan Crane Center with the with the tripod-mounted Canon 800mm f/5.6L IS lens, the 1.4X III TC, and the Canon EOS-1D Mark IV. ISO 400. Evaluative metering +1 2/3 stops as framed: 1/320 sec. at f/9 in Manual mode.
Central Sensor/AI Servo Rear Focus on the bird’s bill and recompose. Click here if you missed the Rear Focus Tutorial. Click on the image to enjoy a larger, more spectacular version.
|
A Favorite Situation
This image was made moments after I created one of my very favorite images of the Japan trip, the sleeping Red-crowned Crane featured in the blog post here. In fact, this many very well be the same bird. A guy comes out on a snowmobile every ten to fifteen minutes or so to chase off the Whooper Swans that come in to eat the grain provided for the endangered cranes. Each time he shuffles the crane deck so to speak. In any case, at the time I made this image the subject was standing in the shade of the building that is the visitor center.
Subject in shade/background in sun is one of my very favorite nature photography situations. I look for it every time I am out. If you are lucky enough to encounter the opportunity, you will-as I did hear–want to add enough light to properly expose the shaded subject while at the same time avoid over-exposing the sunlit background. As I was in Manual mode at 1/800 sec. at f/11 for the sunlit bird I first dialed up to f/9 and then rolled adjusted the shutter speed till the analog scale showed +1 2/3 stops. I made one quick image, checked the background for blinkies–there were none, and then went for a better head angle.
One thing that we do on all IPTs is to make folks aware of the types of situations that I look for. And we let them know why one situation works while another does not. When I am in the field with a big lens I spend most of my time looking. Looking for good situations. I don’t waste my time photographing junk. When I find something good, however, I make lots of images in short order….
|
|
|
This is the original capture converted with the ACR defaults. I opened NIK Color Efex Pro 4 and ran Tonal Contrast at 70% only on the bird’s dark feathers and the bill. Then I brought up the background in Viveza where I am learning to use the Control Points effectively.
|
NIK 15% Discount
You can save 15% on all NIK products (including and especially Color Efex Pro 4) by clicking here and entering BAA in the Promo Code box at check-out. Then hit Apply to see your savings. You can download a trial copy that will work for 15 days and allow you to create full sized images.
NIK Creative Efex Collection
NIK recently announced the availability of a special limited production bundle of 3 of their most popular products, Color Efex Pro 4, Silver Efex Pro 2, and HDR Efex Pro. You can save more than $200 on the bundle which is available only through NIK affiliates. If you would like additional info, please e-mail with the words “Creative Efex Collection” in the Subject line. If you have been on the fence about purchasing the plug-ins mentioned above this is a great chance to save some significant bucks. I love both Color Efex Pro and Silver Efex and plan on learning to use Viveza soon.
|
|
|
Join me this summer and live on a boat for six full days of Coastal Brown (Grizzly) Bear photography. At close range. Live your dream. Great food too! Images copyright Arthur Morris & Robert O’Toole. If you are seriously interested please e-mail for itinerary and additional details.
|
SELECTED IPT INFO
KATMAI BEAR BOAT IPT: July 24-31, 2012 from Kodiak, AK: $6699. Limit 6/Openings 3. Coastal Brown Bears (Grizzlies) Galore!
Coastal Brown Bears at point blank range foraging & clamming with a good chance of copulations; cubs nursing and playing. Likely additional subjects include Horned and Tufted Puffins, nesting Bald Eagle and Black-legged Kittiwake, Steller’s Sea Lion, rafts of Sea Otters and more. Halibut fishing optional
MORRO BAY, CA IPT. APR 2-4, 2012. 3-FULL DAYS: $1499. Introductory Slide program: 7pm on 4/1. Limit: 10/Openings: 2.
Please call or e-mail for late registration discount information.
Click here to learn more about this IPT.
Earn Free Contest Entries and Support both the Bulletins and the Blog by making all your B & H purchases here.
More and more folks are earning multiple contest entries with their B & H purchases. See here for details on that. Eleven great categories, 34 winning and honored images, and prize pools valued in excess of $20,000. Click here to visit the competition home page.
Shopper’s Guide
Below is a list of gear that I used to create the image in this blog post. Thanks a stack to all who have used the Shopper’s Guide links to purchase their gear as a thank you for all the free information that we bring you on the Blog and in the Bulletins. Before you purchase anything be sure to check out the advice in our Shopper’s Guide.
Canon 800mm f/5.L IS lens. Right now this is my all time favorite super-telephoto lens.
Canon EF 1.4X III TC. This new TC is designed to work best with the new Series II super-telephoto lenses.
Canon EOS-1D Mark IV professional digital camera body. My two Mark IVs are my workhorse digital camera bodies.
And from the BAA On-line Store:
LensCoats. I have a LensCoat on each of my big lenses to protect them from nicks and thus increase their re-sales value. All my big lens LensCoat stuff is in Hardwood Snow pattern.
LegCoat Tripod Leg Covers. I have four tripods active and each has a Hardwood Snow LegCoat on it to help prevent further damage to my tender shoulders 🙂 And you will love them in mega-cold weather….
Gitzo GT3530LS Tripod. This one will last you a lifetime.
Mongoose M3.6 Tripod Head. Right now this is the best tripod head around for use with lenses that weigh less than 9 pounds. For heavier lenses, check out the Wimberley V2 head.
CR-80 Replacement Foot for Canon 800. When using the 800 on a Mongoose as I do, replacing the lens foot with this accessory lets the lens sit like a dog whether pointed up or down and prevents wind-blown spinning of your lens on breezy days by centering the lens directly over the tripod.
Double Bubble Level. You will find one in my camera’s hot shoe whenever I am not using flash.
The Lens Align Mark II. I use the Lens Align Mark II pretty much religiously to micro-adjust all of my gear an average of once a month and always before a major trip. Enjoy our free comprehensive tutorial here.
Canon EOS-1D Mark IV User’s Guide. Learn to use your Mark IV the way that I use mine. Also available for the 7D and the Mark III here.
BreezeBrowser. I do not see how any digital photographer can exist without this program.
March 14th, 2012
|
|
|
These two sea eagles–Steller’s on our left, White-tailed on our right–were photographed on the sea ice from the boat at Rausu, Hokkaido, Japan with the tripod-mounted Canon 800mm f/5.6L IS lens and the Canon EOS-1D Mark IV. ISO 400. Evaluative metering +1 1/3 stops off the snow: 1/2000 sec. at f/8 in Manual mode.
Central Sensor/AI Servo Rear Focus on an eye of the White-tailed Sea-Eagle and recompose. Click here if you missed the Rear Focus Tutorial. Click on the image to enjoy a larger, more spectacular version.
There are two important lessons that we can learn from this image:
- Even though I stopped down only one stop, from f.5.6 to f/8, there was sufficient depth-of-field to cover the Steller’s. Why? Because these are large birds that were a good distance from the camera. In this situation, at 36 meters, you have 14 1/2 inches of depth-of-field behind the point of focus. Contrast that with less than 1/2 inch of depth-of-field had the birds been at the minimum focus distance of 6 meters. Depth-of-field increases dramatically as subject to camera distance increases. You can learn a ton by visiting one of the many on line depth-of-field calculators. I use DOFMaster.
- With the larger Steller’s only a few inches behind the smaller white-tailed the birds look roughly the same size. In fact Steller’s averages about 20% larger and heavier than White-tailed with the females of both species being well larger than the males.
|
BOYS AND GIRLS AND CHILDREN OF ALL AGES
Many of you are trying to help us but are screwing up unintentionally. Please read on for the whole story….
In July 2010, less than two years ago, BIRDS AS ART became a B&H affiliate. We asked folks to consider making their lens, camera, and photographic accessory purchases through B&H using either our main link or specific links to various products. We suggested that doing so would be a great way to thank us for the free information that we have been providing on the blog and in Bulletins for many years. And to thanks me for the hundreds of gear-related, photo-related questions that I answer personally via e-mail every year. It is my firm belief that the topics, tutorials, and information in the blog and Bulletins–all dealing with nature photography, and all free–are unmatched anywhere. I quite literally put in at least twenty hours a week on the blog, and most Bulletins, in addition, takes 8-16 hours to create.
I will admit at times to feel overwhelmed by my desire to create new and exciting blog posts and Bulletin features on a near-daily basis, and to feeling crushed at times by the number of folks writing to request information or have their questions answered. Though I am sure that I miss an e-mail on occasion, such instances are very rare. We do ask that folks write only with new questions that have not been answered previously on the blog, in Bulletins, or in ABP, in ABP II, or in Digital Basics, and that they try a quick search before writing.
At times I have considered going to a pay as you ask system for those wishing e-mail answers, or a shareware payment for the blog and the Bulletins–pay something if you wish–all donations accepted. But I have always resisted, preferring instead to keep everything totally free.
Many folks have kindly used our B&H links. We thank them for the patronage and greatly appreciate the 3% that we receive from B&H. Our commissions have ranged from pennies on small accessories (21 cents on a AA battery case) to $416.97 on the purchase of a Canon 800mm f/5.6L IS lens for $13,899.00 less than a week ago–thanks you very much for that one! Wow, the price on that lens has gone way up. No matter the size of our commissions all BAA B&H purchases are greatly appreciated at this end. And you will simply not find better prices or more reliable service anywhere: order by 4pm for same day shipment and an easy 30-day return policy. In business since 1973 B&H is simply the world’s leading retailer of imaging products. As for those low prices, when I order an item through the Explorers of Light program I get it for 10% off low dealer price. The low dealer price is the B&H price. That should tell you something.
Now here is what we have discovered recently: many folks, wishing to earn free entries into the BAA 1st International Bird Photography Competition, are sending us B&H receipts and asking for their free contest entries. The only problem is that they have not begun their searches with our track-able BAA/B&H affiliate link. And they have not use one of the track-able specific product links that grave most every Bulletin and blog post. Folks send us the B&H receipt that they received via e-mail. Jim checks the transaction reports and is unable to match the purchase. Then he e-mails back letting folks know of their error. Then the folks write back and say, “Sorry–my bad.”
If you wish to thank us by making your B&H purchases via a BAA/B&H affiliate link, you can click here to ensure that your purchases are tracked to BAA.
Or you can use this link:
Or you can click on any one of the B&H logo links that are found all over the web site and the blog. They look like this:
If you have a specific product in mind, you can use one of the product specific links that can be found on the blog or in Bulletins both in our legendary educational captions or in the Shopper’s Guide features near or at the bottom of each blog post or Bulletin. Note: to check and make sure that you are using a valid BAA/B&H link hold your cursor over the link and check out the URL in the bottom left of your browser window. It should always end in 7226, our B&H affiliate code number. If you make a purchase from a link without the 7226 appendage, you are not making a BAA/B&H purchase. Not to worry: once you get to the B&H web site you will no longer see the 7226 code. The order is tracked to BAA invisibly.
Lastly you can e-mail me and let me know which product you will be buying. I will shoot you back the correct link asap.
Best of all, you still have two weeks to earn free entries into the contest with your major purchases. See here for payment options and here for complete details.
Much appreciated.
ps: If you purchase a new lens or camera body from B&H using a BAA/B&H link you can further help us out by ordering the additional stuff that you need from us at BIRDS AS ART. These items might include the right Gitzo Tripod for you, a Mongoose M3.6 or a Wimberley V2 head, LensCoats or LegCoats, camera plates or lens plates and replacement feet, flash brackets, flash cards, and lots more. Your BAA Online Store purchases are always appreciate.
Earn Free Contest Entries and Support both the Bulletins and the Blog by making all your B & H purchases here.
More and more folks are earning multiple contest entries with their B & H purchases. See here for details on that. Eleven great categories, 34 winning and honored images, and prize pools valued in excess of $20,000. Click here to visit the competition home page.
Shopper’s Guide
Below is a list of gear that I used to create the image in this blog post. Thanks a stack to all who have used the Shopper’s Guide links to purchase their gear as a thank you for all the free information that we bring you on the Blog and in the Bulletins. Before you purchase anything be sure to check out the advice in our Shopper’s Guide.
Canon 800mm f/5.L IS lens. Right now this is my all time favorite super-telephoto lens.
Canon EOS-1D Mark IV professional digital camera body. My two Mark IVs are my workhorse digital camera bodies.
And from the BAA On-line Store:
LensCoats. I have a LensCoat on each of my big lenses to protect them from nicks and thus increase their re-sales value. All my big lens LensCoat stuff is in Hardwood Snow pattern.
LegCoat Tripod Leg Covers. I have four tripods active and each has a Hardwood Snow LegCoat on it to help prevent further damage to my tender shoulders 🙂 And you will love them in mega-cold weather….
Gitzo GT3530LS Tripod. This one will last you a lifetime.
Mongoose M3.6 Tripod Head. Right now this is the best tripod head around for use with lenses that weigh less than 9 pounds. For heavier lenses, check out the Wimberley V2 head.
CR-80 Replacement Foot for Canon 800. When using the 800 on a Mongoose as I do, replacing the lens foot with this accessory lets the lens sit like a dog whether pointed up or down and prevents wind-blown spinning of your lens on breezy days by centering the lens directly over the tripod.
Double Bubble Level. You will find one in my camera’s hot shoe whenever I am not using flash.
The Lens Align Mark II. I use the Lens Align Mark II pretty much religiously to micro-adjust all of my gear an average of once a month and always before a major trip. Enjoy our free comprehensive tutorial here.
Canon EOS-1D Mark IV User’s Guide. Learn to use your Mark IV the way that I use mine. Also available for the 7D and the Mark III here.
BreezeBrowser. I do not see how any digital photographer can exist without this program.
March 13th, 2012
|
|
|
This sleeping Red-crowned Crane was photographed at the Akan Crane Center with the with the tripod-mounted Canon 800mm f/5.6L IS lens, the 1.4X III TC, and the Canon EOS-1D Mark IV. ISO 400. Evaluative metering +1 stop off the snow: 1/800 sec. at f/11 in Manual mode.
Central Sensor/AI Servo Rear Focus on the bird’s eye and recompose. Click here if you missed the Rear Focus Tutorial. Click on the image to enjoy a larger, more spectacular version.
This image, made in sweet, late afternoon sunlight, was one of the last that I created on my incredibly wonderful trip to Japan.
|
Blessed
I worked on this blog post at 37,000 feet en route from Tokyo to Dallas’s DFW. As I sat so comfortably in my lie-flat first class seat on American Airlines flight 176, I have been thinking at length about how blessed I have been and am. Yes, blessed to be able to be sitting up front for sure, but blessed in so many other more important ways. I have been thinking about how privileged I have been to have made two amazingly wonderful trips already this year, the Southern Oceans trip with the Cheesemans’ and the Japan trip with Robert O’Toole and a small IPT group. Thinking About the wonderful weather, birds, and animals that I have enjoyed so much. About my safe travels in good health. About all the great food, the fine meals on the Ortelius and the yakatori meals and the curry dishes here in Japan. About all the great photographic opportunities that I and the folks whom I have traveled with have experienced. And about my two wonderful daughters and their wonderful husbands, about my four super grandkids, and about my 89 year-old Mom whom is waiting anxiously for my call after I clear customs in Dallas. About my relationship with Canon and about all the great folks who have joined me over the years on IPTs, and about the many who have become dear friends. Blessed by my involvement with BPN including and especially with founding partner James Shadle and all the great members and participants there. Blessed by friendships past and present with so many great photography folks: Linda Robbins, Joanne Williams, Denise Ippolito, Ellen Anon, my web-man Peter Kes, Jim Neiger, Robert Amoruso, and Robert O’Toole among others. And doctor, doctor, Cliff Oliver; had I not met him on the Bosque IPT so many years ago I it is not likely that I would still be alive. And thinking about my pool. And getting in it :).
With apologies to the many that I have inadvertently omitted here I have to say that I have been one lucky guy.
Sayonara Japan. It’s been great.
My right-hand man Jim Litzenberg (another blessing) is picking me up at about 3pm in Orlando. My plan is to publish this from my car on the way home after getting online with my Droid. Lord, what amazingly wonderful times we live in. So if you see this blog post it means that I made it safely at least to MCO and should be home soon.
So much for plans. We got into Dallas early so I am publishing this early :). Enjoy. ps: Mom is doing fine. pps: Home safely at 5:05pm but beat :).
What A Way To Finish!
When I saw that the beautiful bird featured in the opening image here had decided to take a nap not too far from the walkway at Akan, I about jumped out of my lined dungarees. Whatever is draped over the bird’s head adds a ton to the beauty of the image. I think that it was the bird’s far wing; if anyone knows otherwise for sure please let me know. My very first instinct was to go for the traditional super-tight head and folded neck portrait (see image-last below) with the bird’s eye placed on or very close to the upper right rule of thirds spot. But my 2X III TC was already packed for the trip home, to save time…. So I went with what I had, a maximum effective focal length of (only) 800 X 1.4 X the 1.3 crop factor of my camera: 1456 mm, or just under 30X magnification. Poor boy. I lowered my tripod to ensure as evenly-toned a distant, out of focus woods background as possible.
Getting the right exposure was easy. With the soft, late afternoon light I took a meter reading off the sunlit snow and opened up one stop. Then I stopped down a bit to ensure sharp feather detail as I was relatively close to the minimum focusing distance of the lens, 6 meters and I made a series of images framed as you see in the original capture immediately below. I knew all the while that I would need to figure out the best possible crop while working with a somewhat awkward image design. Whatever I did, the bird’s eye would wind up somewhere near the middle of the frame. I experimented with various crops and finally decided on the one that you see above.
If you’d like to see what others thought of the image above, check out my BPN post: Last Japan Keeper.
|
|
|
This is the original full frame capture.
|
How’d You Like My Crop?
Now that you’ve seen the full frame original image (immediately above), feel free to leave a comment and let me know what you think of my original crop, the one in the lead image here.
|
|
|
This is the traditional “sleeping pelican, super-tight head and folded neck composition” that I had in mind until I realized that I did not have my 2X III TC with me. If I’d had the 2X with me I would have focused in Live View with Live Mode AF as described in detail in the Mark IV User’s Guide; accurate focus is attained via contrast on the imaging sensor. The TIFF file of this more tightly cropped version still has enough pixels for the image to run large in a magazine or for at least a sharp 8 X 12″ print.
|
Which Do You Like Best?
Please take a moment to let us know which you like best, the quasi-pano crop in the opening image or the tighter 3X2 crop (immediately above). And do let us know why. If you liked the middle image best–the full frame original capture–then you need to go back to image design school and study the principles outlined in the Advanced Composition and Image Design section of ABP II.
NIK 15% Discount
You can save 15% on all NIK products (including and especially Color Efex Pro 4) by clicking here and entering BAA in the Promo Code box at check-out. Then hit Apply to see your savings. You can download a trial copy that will work for 15 days and allow you to create full sized images.
NIK Creative Efex Collection
NIK recently announced the availability of a special limited production bundle of 3 of their most popular products, Color Efex Pro 4, Silver Efex Pro 2, and HDR Efex Pro. You can save more than $200 on the bundle which is available only through NIK affiliates. If you would like additional info, please e-mail with the words “Creative Efex Collection” in the Subject line. If you have been on the fence about purchasing the plug-ins mentioned above this is a great chance to save some significant bucks. I love both Color Efex Pro and Silver Efex and plan on learning to use Viveza soon.
Earn Free Contest Entries and Support both the Bulletins and the Blog by making all your B & H purchases here.
More and more folks are earning multiple contest entries with their B & H purchases. See here for details on that. Eleven great categories, 34 winning and honored images, and prize pools valued in excess of $20,000. Click here to visit the competition home page.
Shopper’s Guide
Below is a list of gear that I used to create the image in this blog post. Thanks a stack to all who have used the Shopper’s Guide links to purchase their gear as a thank you for all the free information that we bring you on the Blog and in the Bulletins. Before you purchase anything be sure to check out the advice in our Shopper’s Guide.
Canon 800mm f/5.L IS lens. Right now this is my all time favorite super-telephoto lens.
Canon EF 1.4X III TC. This new TC is designed to work best with the new Series II super-telephoto lenses.
Canon EOS-1D Mark IV professional digital camera body. My two Mark IVs are my workhorse digital camera bodies.
And from the BAA On-line Store:
LensCoats. I have a LensCoat on each of my big lenses to protect them from nicks and thus increase their re-sales value. All my big lens LensCoat stuff is in Hardwood Snow pattern.
LegCoat Tripod Leg Covers. I have four tripods active and each has a Hardwood Snow LegCoat on it to help prevent further damage to my tender shoulders 🙂 And you will love them in mega-cold weather….
Gitzo GT3530LS Tripod. This one will last you a lifetime.
Mongoose M3.6 Tripod Head. Right now this is the best tripod head around for use with lenses that weigh less than 9 pounds. For heavier lenses, check out the Wimberley V2 head.
CR-80 Replacement Foot for Canon 800. When using the 800 on a Mongoose as I do, replacing the lens foot with this accessory lets the lens sit like a dog whether pointed up or down and prevents wind-blown spinning of your lens on breezy days by centering the lens directly over the tripod.
Double Bubble Level. You will find one in my camera’s hot shoe whenever I am not using flash.
The Lens Align Mark II. I use the Lens Align Mark II pretty much religiously to micro-adjust all of my gear an average of once a month and always before a major trip. Enjoy our free comprehensive tutorial here.
Canon EOS-1D Mark IV User’s Guide. Learn to use your Mark IV the way that I use mine. Also available for the 7D and the Mark III here.
BreezeBrowser. I do not see how any digital photographer can exist without this program.
March 12th, 2012
Having Fun With a Fun Image or Creating a Photo Illustration?
The image above was created from the image below; it took me about 30 minutes in Photoshop. I covered most of the extraneous birds in the front of the frame with several fairly large Quick Masks. Additional clean-up work was done with a series of smaller Quick Masks. Several of the Quick Masks needed to be warped. Most of them had Layer Masks added so that I could fine tune the coverage. In addition I used the Patch Tool, the Spot Healing Brush, and the Clone Stamp Tool. The basics of quick masking and image clean-up are covered in detail in our Digital Basics File. Advanced Quick Masking is covered in detail in Robert O’Toole’s APTATS I.
What Do You Think?
In addition to removing the extra birds in front of the flock I made two other significant changes to the image. If you can spot them let us know by leaving a comment.
Was I having fun with a fun image or creating a photo illustration?
In your eyes is the optimized image a photograph?
If you had the skills would you have done what I did? Why or why not?
Remember: be nice. 🙂
My Comments on Your Comments.
Still catching up. I finally had some time tonight to comment on the comments at the St. Andrews Bay/Best Day Ever? post here. Stop by and learn which of the five images was my favorite.
BIRDS AS ART Bulletin #401 On-line
BIRDS AS ART Bulletin #401 is on-line now and can best be viewed in spectacular white on black format by clicking here.
Here are the features:
- THE ADVENTURE CONTINUES: HOMEWARD BOUND
- JAPAN IPT REPORT: PART III/THE WHOOPER SWANS
- THE BLOG IS THE BOMB
- SELECTED e-MAILS
- GEAR EVALUATION: THE CANON 300MM F/2.8L IS II LENS
- NIK Color Efex Pro
- IPT UPDATES
Support both the Bulletins and the Blog by making all your B & H purchases here.
Remember: you can earn free contest entries with your B & H purchases. Eleven great categories, 34 winning and honored images, and prize pools valued in excess of $20,000. Click here for details.
Shopper’s Guide
Below is a list of the gear used to create the images talked about in this blog post. Thanks a stack to all who have used the Shopper’s Guide links to purchase their gear as a thank you for all the free information that we bring you on the Blog and in the Bulletins. Before you purchase anything be sure to check out the advice in our Shopper’s Guide.
Canon 70-200mm f/2.8L IS II lens. Man, I am loving this lens on my shoulder with the 2XIII teleconverter. I also use it a lot–depending on the situation–with the 1.4X III TC.
Canon EF 1.4X III TC. This new TC is designed to work best with the new Series II super-telephoto lenses.
Canon EOS-1D Mark IV professional digital camera body. The very best professional digital camera body that I have ever used.
And from the BAA On-line Store:
And from the BAA On-line Store:
The Lens Align Mark II. I use the Lens Align Mark II pretty much religiously to micro-adjust all of my gear an average of once a month and always before a major trip. Enjoy our free comprehensive tutorial here.
Canon EOS-1D Mark IV User’s Guide. Learn to use your Mark IV the way that I use mine. Also available for the 7D and the Mark III here.
BreezeBrowser. I do not see how any digital photographer can exist without this program.
Delkin 32gb e-Film Pro Compact Flash Card. My Delkin cards are fast and dependable.
March 10th, 2012
|
|
|
This Eurasian Tree Sparrow was photographed at the Akan Crane Center, Hokkaido, Japan with the tripod-mounted Canon 800mm f/5.6L IS lens, the EF 25mm Extension Tube II (to allow for closer focusing), and the EOS-1D Mark IV. ISO 400. Evaluative metering +1 1/3 stops: 1/1600 sec. at f/8 in Manual mode.
Central Sensor (on the bird’s cheek) AI Servo Rear Focus AF active at the moment of exposure. Click here if you missed the Rear Focus Tutorial. A Double Bubble Level in the camera’s hot shoe ensured that the bird would be square to the world.
For a greater appreciation of the image, left-click on the photo.
|
One Songbird Image/So Many Lessons: Count Em!
Above is the optimized image of my best Eurasian Tree Sparrow from the Japan trip.
Your In-the-Field Mental Approach
Lots of times when folks see something perfect that they think would make a great image they pass it by thinking “I will photograph that later, or tomorrow.” Ninety-nine point nine per cent of the time that never happens. Every day when we entered the crane center these little guys were feeding on the snow. But on March 5th everything was perfect. The snow was fresh and the birds were unusually tame. The light was nice and the light angle was right on. So while the rest of the group entered the center in quest of the lager, spectacular, gorgeous Red-crowned Cranes I stayed behind to photograph the drab sparrows. Hey, I like birds.
When you see the photograph do not hesitate. Make it then or live to regret it.
In-the-Field Songbird Strategy
When creating static portraits of larger species like Steller’s Sea Eagle, Red-crowned Crane, and Snow Monkey, it is usually fairly easy to decide when the head angle is pretty much perfect and to push the shutter button when everything lines up precisely. See “Thee of a Kind” for a perfect example. Things are much more difficult with songbirds. They are small and fast and twitchy and rarely stay in the same spot for more than a second or two at most. If you wait for the perfect head angle it will be gone by the time you react and push the shutter button.
Here is the strategy that I employ when photographing songbirds: once the bird is parallel to the back of the camera or in a similar pleasing configuration (see Subject to Film Plane Orientation starting on page 177 of “The Art of Bird Photography II” ABP II: 916 pages on CD only) for complete details, I push and hold the shutter button even when the bird’s head is turned away and I don’t stop firing until the bird hops away or (very rarely) until I fill the buffer. That’s what I did here; I had no idea that I had captured the perfect pose with the perfect head angle until I got the images onto the laptop. I do not waste time chimping either for fear of what I might miss….
Taking a more aggressive approach when photographing songbirds works as well as it does when photographing birds in flight and in action. See here for more on that topic.
Image Optimization Tips
In the animated GIF above you can see the before and after images. Note that I cleaned up some of the snow off the darker areas of the bird’s chin but chose to leave the snow on the bill. Clean-up as usual was done with the Patch Tool and the Spot Healing Brush as detailed in Digital Basics an e-mailable PDF that includes my complete Digital Workflow and dozens of great Photoshop tips. The next free update will include NIK Color Efex Pro tutorials. Coming some time this spring.
Appreciate the crisper look of the bird’s feathers as a result of applying two NIK Color Efex Pro filters to the image.
Selection Tips
I am still learning to use the Control Points that everyone raves about. I hope to get some more lessons from Robert O’Toole and Paul Mckenzie over lunch today. In the meantime I have been using a tip from Denise Ippolito to make selections with images like this and then apply the filter(s) only to the selection (on its own layer). She taught me to use the Quick Selection Tool. Make the tool small and then click drag it along the interior edge of the area that you would like to select. In the image above it enabled me to select the all the dark areas of the bird’s plumage including the face, cap, crown, bib, back and wings. Then I hit Control J to place the selection on its own layer.
NIK Tips
Once I had the dark feathers on their own layer I opened NIK Color Efex Pro. When the plug in opens you will see the selected area in a box that is smaller than the complete image but that includes stuff other than the selection. As you apply one or more filters will affect everything inside the box. No to worry; when you click OK and the image opens in Photoshop you can toggle the NIK layer on and off. You will see that the filters have been applied only to the selection. And that is just what you want.
For this image I ran Tonal Contrast at 70%. To reduce the effect of a given filter click on the words “Control Points” near the bottom of the Control Panel (on the right). An Opacity slider will open just below. Then adjust the Opacity slide to taste. To note the effect of an individual filter click the check box to the left of the name of the filter at the top of the control panel on and off.
To stack or add a second filter click on “+ Add Filter” at the bottom of the Control Panel. For the tree sparrow image I added Detail Extractor at 20%. It is very easy to over-do Detail Extractor.
As you practice feel free to experiment by adjusting the opacity of various filters and clicking the effects on and off to compare. In time you will become more comfortable and more confident when using NIK Color Efex Pro 4. And your images will begin to look better and better. (Note: the directions above my not make sense if you are using a version earlier than CE Pro 4.)
NIK
As regular readers know NIK’s Color Efex Pro 4 is now an integral part of my workflow. You can save 15% on all NIK products by clicking here and entering BAA in the Promo Code box at check-out. Then hit Apply to see your savings. You can download a trial copy that will work for 15 days and allow you to create full sized images.
Shopper’s Guide
Below is a list of the gear used to create the images talked about in this blog post. Thanks a stack to all who have used the Shopper’s Guide links to purchase their gear as a thank you for all the free information that we bring you on the Blog and in the Bulletins. Before you purchase anything be sure to check out the advice in our Shopper’s Guide.
Shopper’s Guide
Below is a list of the gear used to create the image above. Thanks a stack to all who have used the Shopper’s Guide links to purchase their gear as a thank you for all the free information that we bring you on the Blog and in the Bulletins. Before you purchase anything be sure to check out the advice in our Shopper’s Guide.
Canon 800mm f/5.L IS lens. Right now this is my all time favorite super-telephoto lens.
EF 25mm Extension Tube II. Putting an extension tube between the camera body and a long lens allows you to focus closer than the lens’s minimum focusing distance: I always use one when I am photographing small songbirds.
Canon EOS-1D Mark IV professional digital camera body. My two Mark IVs are my workhorse digital camera bodies.
And from the BAA On-line Store:
LensCoats. I have a LensCoat on each of my big lenses to protect them from nicks and thus increase their re-sales value. All my big lens LensCoat stuff is in Hardwood Snow pattern.
LegCoat Tripod Leg Covers. I have four tripods active and each has a Hardwood Snow LegCoat on it to help prevent further damage to my tender shoulders 🙂
Gitzo GT3530LS Tripod. This one will last you a lifetime.
Mongoose M3.6 Tripod Head. Right now this is the best tripod head around for use with lenses that weigh less than 9 pounds. For heavier lenses, check out the Wimberley V2 head.
CR-80 Replacement Foot for Canon 800. When using the 800 on a Mongoose as I do, replacing the lens foot with this accessory lets the lens sit like a dog whether pointed up or down and prevents wind-blown spinning of your lens on breezy days by centering the lens directly over the tripod.
Double Bubble Level. You will find one in my camera’s hot shoe whenever I am not using flash.
The Lens Align Mark II. I use the Lens Align Mark II pretty much religiously to micro-adjust all of my gear an average of once a month and always before a major trip. Enjoy our free comprehensive tutorial here.
Canon EOS-1D Mark IV User’s Guide. Learn to use your Mark IV the way that I use mine. Also available for the 7D and the Mark III here.
BreezeBrowser. I do not see how any digital photographer can exist without this program.
March 7th, 2012
|
|
|
This incoming Red-crowned Crane was photographed at the Akan Crane Center with the hand held Canon 300mm f/2.8 L IS II lens, 1.4X III TC, and the Canon EOS-1D Mark IV. ISO 400. Evaluative metering +1 stop off the snow: 1/3200 sec. at f/7.1 in Manual mode.
Central Sensor/AI Servo Rear Focus active at the moment of exposure. Click here if you missed the Rear Focus Tutorial. Click on the image to enjoy a larger, more spectacular version.
To learn what others thought of this image check out “Inbound 747.”
|
Gear Evaluation: the Canon 300mm f/2.8L IS II
As regular readers know, I have–thanks to the kindness of the folks at Canon Professional Services (CPS)–especially Paul Ng, been field testing the same Canon 300mm f/2.8L IS II for more than two months. I first used it on my amazing Cheeseman’s Southern Oceans trip, then on the SW FLA IPT, and finally on the Japan IPT. It will be returned by Fed-X the afternoon that I get back to the office on March 13th. 🙂
I have long given the 300 f/2.8 lenses short shrift. In the original The Art of Bird Photography I wrote something to the effect that the 300 f/2.8s were favored by many of the world’s best raptor photographers but that I saw little need for one. In the all new follow-up, The Art of Bird Photography II (916 pages on CD only), I totally ignored these lenses but did include a few Homer eagle images made with one that I had borrowed from CPS. The images above and below show the incredible potential of the 300 f/2.8L IS lens/1.4X III TC as a flight photography combination.
|
|
|
This head shot of a point-blank fly-by Red-crowned Crane image was also created at the Akan Crane Center with the hand held Canon 300mm f/2.8 L IS II lens, 1.4X III TC, and the Canon EOS-1D Mark IV. ISO 400. Evaluative metering +1 2/3 stops off the snow: 1/2500 sec. at f/4 in Manual mode.
Central Sensor/AI Servo Rear Focus active at the moment of exposure. Click here if you missed the Rear Focus Tutorial. Click on the image to enjoy a larger, more spectacular version.
|
On my Antarctica trip the 300 IS II with the 2X III teleconverter served as my long lens (see the image immediately below) and I used it a lot with and without the 1.4X III TC both on landings and on Zodiac cruises. Carrying it on the long hikes was a pleasure when compared to the long lenses I am used to carrying…. I used the lens sparingly on the SW FLA IPT but my erstwhile assistant Tim Kaufman made a killer image of a Great Blue Heron in flight with a large southern whiting in its bill with it while toting the lens for me at Blind Pass Beach. You can see that spectacular image here.
|
|
|
This Macaroni Penguin preening its mate was photographed at Hercules Bay, South Georgia, with the tripod-mounted Canon 300mm f/2.8 L IS II lens, the 2X III teleconverter, and the Canon EOS-1D Mark IV. ISO 400. Evaluative metering -2/3 stop: 1/200 sec. at f/10 in Manual mode. This is one of my favorite images from the trip. The birds were so tame that I rarely if ever felt limited with my longest effective telephoto length of “only” 780mm (300mm X 2 X 1.3). An upper left-hand sensor was chosen manually: AI Servo Rear Focus active at the moment of exposure. Click here if you missed the Rear Focus Tutorial.
|
When I sent the image above to Christopher Robinson, editor of Outdoor Photographer, as part of a submission for an article on pros’ favorite Canon lenses, he commented via e-mail, “By the way…your Macaroni Penguin image, in particular, is incredible. I think it shows the sharpness of that lens better than anything I’ve seen. It’s an awesome lens and in your hands one can see why it’s so highly prized.” And that with the 2X III TC!
|
|
|
That’s me hand holding the Canon 300mm f/2.8L IS lens with the 1.4X TC and the EOS-1D Mark IV body alongside the fishing pier at the eastern end of Sanibel, FL. Photo copyright and courtesy of Peter Kes.
|
What’s To Like?
What can I say. The lens is incredibly sharp. Sharp wide open. Sharp edge to edge. Sharp with the 1.4X And yes, sharp with the 2X. When I do everything right–which is often with this lens in my hands–the images seem to leap off the computer screen. At A.B pounds, the lens is just light enough (5.19 pounds, 13% lighter than its predecessor) to hand hold for extended periods of time even though I have had some problems with my shoulders for the past few years. When Peter Kes made the image of me above we were photographing Red-breasted Mergansers swimming and diving. For more than two hours. I held the lens elevated for extended periods of time. When I got back to the motel and took off my sweatshirt I could barely lift my arms; I was very much in pain. It was sort of like what I did by swimming too many laps when my pool was finished…. By the next morning I was fine. On the sea eagle boat trips in Rausu I made sure to rest the lens on the gunnels when I was not actively photographing; having a nice neutral rest position when hand holding relatively heavy gear is always best.
With a maximum aperture of f/2.8, the lens is very fast. There were times on each trip that I was able to keep photographing in low light without going to crazy-high ISOs. Another benefit of all that speed is being able to work with either teleconverter and still have all AF points active. The lens is very versatile as it offers three focal lengths: 300mm, 420mm (with the 1.4X III TC), and 600mm (with the 2X III TC). I have not worked hand held with the 2X much but with enough shutter speed I am sure that competent folks would be able to create sharp action and flight images. For static work, however, it makes sense to be on a sturdy tripod like the Gitzo 3530 LS topped by a Mongoose M3.6, the latter was absolutely made for the 300 2.8 lenses.
|
|
|
This immature Whooper Swan head portrait was created at Lake Kussharo, Hokkaido, Japan with the hand held Canon 300mm f/2.8 L IS II lens, 1.4X III TC, and the Canon EOS-1D Mark IV. ISO 400. Evaluative metering +1/3 stop: 1/500 sec. at f/5 in Av mode.
Central Sensor/AI Servo Rear Focus active at the moment of exposure. Click here if you missed the Rear Focus Tutorial. Click on the image to enjoy a larger, more spectacular version.
When using shorter focal lengths than I normally do it is important for me to get low. That often means not being lazy, kneeling, sitting on the ground, and getting down, dirty, and prone. For this image I simply bent over a bit as the Whooper Swans are big birds.
|
Idiosyncracies
All four of the Series II telephoto lenses have three Image Stabilization modes: IS 1, IS 2, and IS 3. Here’s what Canon has to say about each:
- IS Mode 1: Corrects vibrations in all directions. It is mainly effective for shooting still subjects.
- IS 2 Mode: Corrects vertical camera shake during following shots (i.e., panning) in a horizontal direction, and corrects horizontal camera shake during following (i.e., panning) in a vertical direction. That means that if you hold the camera on end IS2 will realize what you are doing and stabilize in the correct manner.
- IS 3 Mode: Corrects vibration only during exposure. During panning shots, corrects vibration in only one direction same as IS mode 2. They continue: Since camera shake is stabilized only during exposure, following a subject is easier such as when shooting a fast and irregularly moving player during sports photography.
With previous generation super-telephoto lenses I have advised that folks set IS Mode 2 and leave it whether hand holding or working on a tripod and whether photographing stationary or moving subjects.
On our first day photographing the Snow Monkeys I learned that the Series II super-telephoto lenses are completely different animals. When I set IS 2 Mode and pressed the shutter button while working on a tripod the image jumped all over the place. I thought that the lens might be defective right out of the box…. So I tried IS Mode 3 and all was well with the world. Since then I have left the camera on IS Mode 3 all the time both on a tripod and hand holding and been perfectly happy. If I were photographing a static subject hand held I would try to remember to switch to IS Mode 1. And then to switch back to IS Mode 3.
|
|
|
This Snow Monkey image was created at Jigokudani Yaenkoen Nagano Prefecture, Japan with the tripod-mounted Canon 300mm f/2.8 L IS II lens, 1.4X III TC, and the Canon EOS-1D Mark IV. ISO 400. Evaluative metering +1 2/3 stops: 1/200 sec. at f/5 in Manual mode.
Central Sensor/AI Servo Rear Focus active at the moment of exposure. Click here if you missed the Rear Focus Tutorial. Click on the image to enjoy a larger version.
When I saw this monkey sitting in a tree I ran up the ramp to get in position taking Kevin Watson along with me. I quickly made about seven images once I got set up and only one had a good head angle. Then the monkey jumped onto the somewhat less natural railing…. It was at the monkey park that I first learned that when working off a tripod it is best to be in IS Mode 3 with the new Series III super-telephotos.
|
I have not yet had the opportunity to test the new 4-stop IS system at very slow shutter speeds but I will assume that it will perform as well as it does on the 800mm f/5.6 L IS. (Note: I strongly advise turning IS off when working on a tripod with exposure times of 1/2 second or longer.)
|
|
|
This Black-browed Albatross head portrait was created at New Island, the Falklands with the tripod-mounted Canon 300mm f/2.8 L IS II lens, 1.4X III TC, and the Canon EOS-1D Mark IV. ISO 400. Evaluative metering +1 stop: 1/250 sec. at f/8 in Manual mode.
Two upper-right Sensors/AI Servo Rear Focus active at the moment of exposure. Click here if you missed the Rear Focus Tutorial. Click on the image to enjoy a larger, more spectacular version.
I have found that when on a tripod IS Mode 3 is best at all times. Perhaps despite the official word…
|
The location of the AF/MF and the limit range switches is odd and takes some getting used to. On the 300 IS II these switches are located to the behind the tripod collar while on all other Canon lenses that I am familiar with they are located in front of the tripod collar. I still reach to the traditional spot when I want go from full focusing range to limited focusing range as is recommended for flight photography; initial AF acquisition is much faster when the lens does not have to search all the way back to the minimum focusing distance.
|
|
|
This Whooper Swan in flight against the distant mountain was photographed at Lake Kussharo, Hokkaido, Japan in early morning light with the hand held Canon 300mm f/2.8 L IS II lens and the Canon EOS-1D Mark IV. ISO 400. Evaluative metering +1/3 stop: 1/2500 sec. at f/5.6 in Manual mode.
Central Sensor/AI Servo Rear Focus active at the moment of exposure. Expand AF points left and right as noted in the Mark IV User’s Guide. Click here if you missed the Rear Focus Tutorial. Click on the image to enjoy a larger, more spectacular version.
Here I have stopped down two full stops from wide open and set IS Mode 3 for hand held flight photography.
|
A final thought from me: for folks with 1.6X crop factor bodies like the EOS-7D and the EOS-50D the 300 2.8 II would not be a bad workhorse lens for bird photography. They would enjoy effective focal lengths of 672 mm with a 1.4X and 960 mm with the 2X TC….
My Only Wish
In an ideal world the tripod collar would be removable making the lens just a bit easier to hand hold. At my age every ounce matters!
Wrong Again?
Though it happens rarely, I never mind admitting that I was wrong. Again. The 300 f/2.8L IS lens is a superb tool for bird photography; it is light enough for most folks to hand hold, it is fast, it is versatile, and it produces stunningly sharp images with incredible fine detail.
|
|
|
This Steller’s Sea Eagle was photographed in the pre-dawn light at Rausu, Hokkaido, Japan with the hand held Canon 300mm f/2.8 L IS II lens, 1.4X III TC, and the Canon EOS-1D Mark IV. ISO 500. Evaluative metering +1 stop: 1/500 sec. at f/4.5 in Tv mode with IS Safety Shift as detailed in the Mark IV User’s Guide.
Central Sensor/AI Servo Rear Focus active at the moment of exposure. Click here if you missed the Rear Focus Tutorial. Click on the image to enjoy a larger, more spectacular version.
I suggested to the group that they try my pre-dawn, 1/500 second/+1 in Tv Mode/Auto ISO trick. Here, it worked to perfection.
|
Canon’s Overview of the 300mm f/2.8L IS II Lens
A worthy successor to the popular Canon EF 300mm f/2.8 IS, the all-new Canon EF 300mm f/2.8 IS II USM super telephoto lens is lightweight, weighing approximately 13% less than its predecessor, yet offers faster operation, improved image stabilization and superior optics. Incorporating Fluorite elements for improved image quality and reduced chromatic aberration plus a number of advanced coatings to minimize ghosting, flaring, and with a newly developed Fluorine coating that keeps soiling, smears and fingerprints to a minimum, the EF 300mm f/2.8 IS II USM is ready to deliver spectacular images in an instant. With a third Image Stabilization mode (Mode 3) that activates IS only when the shutter button is fully pressed, and giving the equivalent effect of a shutter speed four stops faster, the EF 300mm f/2.8 IS II USM allows for easy panning and is ideally positioned for professional action photography. The EF 300mm f/2.8 IS II USM also features a new security slot for wire-type security locks.
You can find links to more info here.
Earn Free Contest Entries and Support both the Bulletins and the Blog by making all your B & H purchases here.
More and more folks are earning multiple contest entries with their B & H purchases. See here for details on that. Eleven great categories, 34 winning and honored images, and prize pools valued in excess of $20,000. Click here to visit the competition home page.
Shopper’s Guide
Below is a list of the gear used to create the image above. Thanks a stack to all who have used the Shopper’s Guide links to purchase their gear as a thank you for all the free information that we bring you on the Blog and in the Bulletins. Before you purchase anything be sure to check out the advice in our Shopper’s Guide.
Canon 300mm f/2.8 L IS II lens. The 300 f/2.8 L IS II with the 1.4X III TC is a killer flight combination.
1.4X III TC. The new Series III 1.4X was designed to work best with the new Series II super-telephoto lenses.
Canon EOS-1D Mark IV professional digital camera body. My two Mark IVs are my workhorse digital camera bodies.
And from the BAA On-line Store:
LensCoats. I have a LensCoat on each of my big lenses to protect them from nicks and thus increase their re-sales value. All my big lens LensCoat stuff is in Hardwood Snow pattern.
LegCoat Tripod Leg Covers. I have four tripods active and each has a Hardwood Snow LegCoat on it to help prevent further damage to my tender shoulders 🙂 And you will love them in mega-cold weather….
Gitzo GT3530LS Tripod. This one will last you a lifetime.
Mongoose M3.6 Tripod Head. Right now this is the best tripod head around for use with lenses that weigh less than 9 pounds. For heavier lenses, check out the Wimberley V2 head.
Double Bubble Level. You will find one in my camera’s hot shoe whenever I am not using flash.
The Lens Align Mark II. I use the Lens Align Mark II pretty much religiously to micro-adjust all of my gear an average of once a month and always before a major trip. Enjoy our free comprehensive tutorial here.
Canon EOS-1D Mark IV User’s Guide. Learn to use your Mark IV the way that I use mine. Also available for the 7D and the Mark III here.
BreezeBrowser. I do not see how any digital photographer can exist without this program.
March 7th, 2012
|
|
|
This image of a portion of the Black-browed Albatross colony on Steeple Jason Island in the Falklands was made on my Cheesemans’ Ecology Safari Southern Oceans trip this past January. It is an example of the superb image quality offered by the Canon EOS 5D Mark II. Click on the image to see a larger, even more spectacular version.
To learn more about the Cheesemans’ next Antarctica trip, click here.
|
The Canon EOS-5D Mark III
With the superb image quality of the EOS-5D MII folks can only be drooling over Canon’s recent announcement of the release of the much-anticipated EOS-5D Mark III on March 2, 2012. You can find complete details here. The new camera is expected to deliver superb image quality thanks to a new 22.3-megapixel full-frame Canon CMOS sensor and the high-performance DIGIC 5+ Imaging Processor. It incorporates a new 61-point High Density Reticular Autofocus (AF) System from Canon’s next professional digital camera body, the EOS-1DX that is scheduled to be released later in 2012. And with the 5D III’s six frames-per-second continuous shooting speed it will be great for photographing birds in flight and in action. And it goes without saying that the 5DIII will be a landscape photographer’s dream. Please see the press release for info on the new camera’s video capabilities.
I am most excited by the 5DIII’s light weight and by the new AF system. While I loved, loved, loved the image quality of my 5D II photos from the Antarctica trip–the 5DII pretty much saved that trip for me after my two Mark IV bodies went down for the most part due to operator induced rain damage, my biggest gripe was with the limited number of AF points available. This made hand held nature photography with intermediate telephoto zoom lenses difficult; can you say Snow Monkeys? It was often difficult to come up with a sensor on the subject’s eye. The 5D MIII will improve on that in spades with 61 AF points covering the largest area of any Canon camera ever.
|
|
|
This Whooper Swan coming in for a landing was photographed at the Akan Crane Center (where they are treated like pests and scared away by snowmobile and shotgun blasts). I used the tripod-mounted Canon 800mm f/5.6L IS lens and the Canon EOS 5D Mark II. ISO 400. Evaluative metering +1 2/3 stops off the snow: 1/1000 sec. at f/5.6 in Manual mode.
Central Sensor/Rear Focus/AI Servo AF active at the moment of exposure. Click here if you missed the Rear Focus Tutorial. For a greater appreciation of the image, left-click on the photo.
According to the internet experts the AF system of the 5D MII is not good enough or fast enough for flight photography. I disagree…. Every time that I have used it I have some up with some stellar stuff. If the AF system of the 5D MII is good enough to produce images like this one, imagine what the 5D MIII will be capable of.
|
I consider the Battery Grip BG-E11 (available end of April 2012) as a mandatory accessory for nature photographers; I just learned, however, that it is hugely overpriced…. It accepts either one or two LP-E6 lithium-ion battery packs (or a set of six AA-size batteries–the latter not recommended for environmental reasons). The new grip has a multicontroller and a multifunction (M.Fn) button together a with a full set of grip controls for easy operation when working in vertical format. You can pre-order yours here.
|
|
|
This running Red-Crowned Crane was chasing another at the Akan Crane Center, Hokkaido, Japan with the tripod-mounted Canon 800mm f/5.6L IS lens and the Canon EOS 5D Mark II. ISO 400. Evaluative metering +1 2/3 stops off the snow: 1/1000 sec. at f/5.6 in Manual mode.
Central Sensor/Rear Focus/AI Servo AF active at the moment of exposure. Click here if you missed the Rear Focus Tutorial. For a greater appreciation of the image, left-click on the photo.
According to the internet experts the AF system of the 5D MII is not good enough or fast enough for avian action photography, especially in low light. Again, I disagree…. If the AF system of the 5D MII is good enough to produce images like this one, imagine what the 5D MIII will be capable of.
|
B&H
Amazingly B&H is now accepting pre-orders for the EOS-5D Mark III and states that the camera should begin shipping within ten days. You can thank us for all of the free information and lessons in the blog and Bulletins and earn free BAA contest entries by using this link to order yours: Canon EOS-5D Mark III. Or you can package your new 5D MIII with my favorite B-roll lens, the 24-105mm IS L zoom lens by clicking here.
Speedlite 600EX-RT
In addition to the EOS 5D Mark III, Canon also announced its new flagship model flash, the Speedlite 600EX-RT. You can order yours with this B&H link now: Canon Speedlite 600EX-RT
Done Deal: My Canon EOS-5D Mark III
I have ordered my Canon EOS-5D Mark III body and can’t wait to get home and give it a test drive. I will be working hard on a 5D Mark III User’s Guide this spring.
|
|
|
I received my B&H receipt via e-mail while still in Japan. I get home on the 13th. I am looking forward to getting back in the pool and to working with my new camera.
|
Support both the Bulletins and the Blog by making all your B & H purchases here.
Remember: you can earn free contest entries with your B & H purchases. Eleven great categories, 34 winning and honored images, and prize pools valued in excess of $20,000. Click here for details.
Shopper’s Guide
Below is a list of the gear used to create the images in this blog post. Thanks a stack to all who have used the Shopper’s Guide links to purchase their gear as a thank you for all the free information that we bring you on the Blog and in the Bulletins. Before you purchase anything be sure to check out the advice in our Shopper’s Guide.
Canon EF 16-35mm f/2.8L II USM Autofocus Lens. This is Canon’s top of the line wide angle zoom lens.
Canon 800mm f/5.L IS lens. Right now this is my all time favorite super-telephoto lens.
Canon EOS 5D Mark II Digital Camera. Canon’s lightweight full frame body is perfect for serious landscape photography and worked out great for wildlife on my Southern Oceans voyage.
And from the BAA On-line Store:
LensCoats. I have a LensCoat on each of my big lenses to protect them from nicks and thus increase their re-sales value. All my big lens LensCoat stuff is in Hardwood Snow pattern.
LegCoat Tripod Leg Covers. I have four tripods active and each has a Hardwood Snow LegCoat on it to help prevent further damage to my tender shoulders 🙂 And you will love them in mega-cold weather….
Gitzo GT3530LS Tripod. This one will last you a lifetime.
Mongoose M3.6 Tripod Head. Right now this is the best tripod head around for use with lenses that weigh less than 9 pounds. For heavier lenses, check out the Wimberley V2 head.
Double Bubble Level. You will find one in my camera’s hot shoe whenever I am not using flash.
The Lens Align Mark II. I use the Lens Align Mark II pretty much religiously to micro-adjust all of my gear an average of once a month and always before a major trip. Enjoy our free comprehensive tutorial here.
Canon EOS-1D Mark IV User’s Guide. Learn to use your Mark IV the way that I use mine. Also available for the 7D and the Mark III here.
BreezeBrowser. I do not see how any digital photographer can exist without this program.
March 5th, 2012
|
|
|
This image of a young Red-crowned Crane was created at the Akan Crane Center, Hokkaido, Japan on March 4, 2012 with the Canon 70-200mm f/2.8L IS II lens, the 1.4X III TC (hand held at 98mm), and the Canon EOS-1D Mark IV. ISO 400. Evaluative metering +2/3 stop: 1/3200 sec. at f/8 in Manual mode.
Central Sensor/AI Servo Rear Focus active at the moment of exposure. Click here if you missed the Rear Focus Tutorial. Click on the image to enjoy a larger version.
|
Crane Park Clear Morning Lessons
Once we got to the two crane parks we had two lousy mornings. Why? It was clear as a bell with bright sun and blue skies. The Akan Crane Center where this image was created does not open till 8am. When we arrived we noted that the birds were 100% sidelit. Not my cup or tea at all. The next morning we got up way early in hope of photographing backlit cranes flying into the fields. It was -16 Celsius, about 3 degrees above zero Fahrenheit. We set up at the Tsurui Itoh Sanctuary only to learn that the birds do not fly in till mid morning…. As you will see in coming blog posts we killed on the sunny afternoons.
Today is March 6th. We woke up to three inches of fresh snow. It is still falling. We are excited and will be heading to Tsurui Itoh at 8:30am.
The young crane in the image above was photographed at 12:40pm in very bright overcast light on our first day at Akan.
The optimized image is below.
|
|
|
Red-crowned Crane in flight above ridge, Akan Crane Center, Hokkaido, Japan. This is the optimized version.
|
Many Lessons: How Would Your Optimize This Image?
Here’s what I did beginning in Photoshop CS-5:
I converted the image in ACR moving the Recovery Slider a bit to the right to ensure that I had know RGB values great than 230 and then set the black points by holding down the ALT key and moving it to the right until I noticed some speckling on the white field and backed off. All as detailed in Digital Basics.
Next I needed to move the bird away from the frame edge. I hit Control A, Control J placing the entire image on its own layer. Then I hit V for the Move Tool. I moved the bird (and the ridge below) to the right. Then I used a large Clone Stamp Tool to erase the faint edge where the two slightly different tonalities of sky met. This is the most basic of the many tutorials in Robert O’Toole’s APTATS II.
(This amazing CD covers the following topics in detail with numerous screen captures: Composition Correction: Increase Lead Room Without Cropping/Basic, Composition Correction: Increase Lead Room Without Cropping/Intermediate, Composition Correction: Increase Space Near a Frame Edge/Advanced, Super-Fast Element Removal: Basic, Super-Fast Element Removal Plus Composition Improvement, Gradient Background Blur, Mask Blending for Mega-Depth-of-Field, Selective Highlight Detail Enhancement, Selective Noise Reduction and Sharpening, Selective Sharpening with Finely Detailed Edges, and his killer Average Blur Color Balance Trick. Robert teaches you to create actions for most of the above techniques to speed up your workflow even more. This CD is only for serious Photoshop folks who wish to learn advanced techniques; some study will be required.)
Once I moved the bird to our left the primary tips on the layer below showed through. They were removed with multiple passes of a 60% hard Clone Stamp Tool followed by Patch Tool clean-up to restore detail in the repaired areas. The same techniques were used to remove the primaries of the second crane on the left frame-edge. Again, all as detailed in Digital Basics.
Once clean-up was complete I painted a Quick Mask of the ridge and ran a 35% Gaussian Blur to soften the details and then increased the saturation of the ridge only (Control U) and painted the effect from the sky after applying a regular Layer Mask. The basics of Quick Masking and Layer Masking are detailed in Digital Basics; the advanced Quick Masking techniques that I use on more than 50% of my images are covered in detail with screen captures in Robert’s APTATS I CD.
I increased Contrast globally in NIK’s Viveza and boosted Brightness as there as well. Then I used the Quick Selection Tool to select the black portions of the secondary feathers, the head, and the legs. I put the selection on its own layer and ran a 100% Tonal Contrast filter from NIK Color Efex Pro on that layer only. Then I selected the whites using Select/Color Range and applied at 20% round of Detail Extractor (again from NIK Color Efex Pro). The final touch was selectively sharpening the crane’s head and face with a Contrast Mask (Unsharp Mask at 15/65/0).
The entire image optimization process took less than ten minutes. It took a lot longer to write it in a clear, easy to understand style (almost 1 1/2 hours) than to do it!
Take a Moment
Take a moment to leave a comment and let us know what you think of the final image and let me know if you have any questions on the image optimization process.
NIK
As regular readers know NIK’s Color Efex Pro 4 is now an integral part of my workflow. You can save 15% on all NIK products by clicking here and entering BAA in the Promo Code box at check-out. Then hit Apply to see your savings. You can download a trial copy that will work for 15 days and allow you to create full sized images.
NIK Creative Efex Collection
NIK recently announced the availability of a special limited production bundle of 3 of their most popular products, Color Efex Pro 4, Silver Efex Pro 2, and HDR Efex Pro. You can save more than $200 on the bundle which is available only through NIK affiliates. If you would like additional info, please e-mail with the words “Creative Efex Collection” in the Subject line. If you have been on the fence about purchasing the plug-ins mentioned above this is a great chance to save some significant bucks.
Support both the Bulletins and the Blog by making all your B & H purchases here.
Remember: you can earn free contest entries with your B & H purchases. Eleven great categories, 34 winning and honored images, and prize pools valued in excess of $20,000. Click here for details.
Shopper’s Guide
Below is a list of the gear used to create the images talked about in this blog post. Thanks a stack to all who have used the Shopper’s Guide links to purchase their gear as a thank you for all the free information that we bring you on the Blog and in the Bulletins. Before you purchase anything be sure to check out the advice in our Shopper’s Guide.
Canon 70-200mm f/2.8L IS II lens. Man, I am loving this lens on my shoulder with the 2X III teleconverter. I also use it a lot–as I did for the image of the eagle with fish–with the 1.4X III TC.
Canon EOS-1D Mark IV professional digital camera body. My two Mark IVs are my workhorse digital camera bodies.
And from the BAA On-line Store:
The Lens Align Mark II. I use the Lens Align Mark II pretty much religiously to micro-adjust all of my gear an average of once a month and always before a major trip. Enjoy our free comprehensive tutorial here.
Canon EOS-1D Mark IV User’s Guide. Learn to use your Mark IV the way that I use mine. Also available for the 7D and the Mark III here.
BreezeBrowser. I do not see how any digital photographer can exist without this program.
March 3rd, 2012 Leap Day
Well, I have been around more than 65 years now and I never knew exactly what they called February 29; a Google search turned this up: February 29 is a date that usually occurs every four years, and is called leap day. This day is added to the calendar in leap years as a corrective measure, because the earth does not orbit around the sun in precisely 365 days. When I saw the usually, I pursued the matter further.
Wikipedia revealed this nugget: February 29, also known as a leap day in the Gregorian calendar, is a date that occurs in most years that are evenly divisible by 4, such as 2004, 2008, 2012 and 2016. Years that are evenly divisible by 100, but not by 400, do not contain a leap day; thus 1900 did not contain a leap day while 2000 did. Years containing a leap day are called leap years. The final answer for Alex Trebec: we skip Leap Day once every 400 years.
|
|
|
This Steller’s Sea Eagle image was created at 7:20am this past Leap Day at Rausu, Hokkaido, Japan with the hand held Canon 300mm f/2.8 L IS II lens, 1.4X III TC, and the Canon EOS-1D Mark IV. ISO 400. Evaluative metering +2/3 stop: 1/3200 sec. at f/4 in Manual mode.
Central Sensor/AI Servo Rear Focus active at the moment of exposure. Click here if you missed the Rear Focus Tutorial. Click on the image to enjoy a larger, more spectacular version.
|
The King of Hokkaido
Though making this image did not require the huge leap of faith that I wrote about in the last blog post, A More Aggressive Approach Pays Big Dividends, there is a good chance that I might not have pulled the trigger had my old mind set still been in place. I might have mentioned that I have missed a thousand great images over the decades waiting for the perfect image to become more perfect. That was not the case here: I saw the bird raise its wings, reacted quickly, and made a single image.
See what the folks at BPN had to say about this image and how they helped me improve an already fine image by clicking here. In addition, you can learn a ton by studying the BreezeBrowser Main View screen capture (and my comments) below. Lastly note that the image presented is full frame from side to side with a small crop from the bottom to eliminate the tops of the heads of the two birds along the lower frame edge.
|
|
|
Click on the image for a larger, easier-to-read version.
|
BreezeBrowser Main View Screen Capture
Note that as mentioned in previous blog posts I pushed the exposure to the right far enough to leave a few blinkies (the black areas) in the snow. As blinkies are only warnings of potential loss of detail those areas were easily saved by moving the exposure slider to the right while holding down the Alt key prior to converting the image in ACR (as described in detail in Digital Basics). Note also that the central AF sensor was on the bird’s breast which was approximately on the same plane as the bird’s eye. And note the crop from below that improved the composition. (See Advanced Composition and Image Design in The Art of Bird Photography II (ABP II: 916 pages on CD only).
Earn Free Contest Entries and Support both the Bulletins and the Blog by making all your B & H purchases here.
More and more folks are earning multiple contest entries with their B & H purchases. See here for details on that. Eleven great categories, 34 winning and honored images, and prize pools valued in excess of $20,000. Click here to visit the competition home page.
Shopper’s Guide
Below is a list of the gear used to create the image above. Thanks a stack to all who have used the Shopper’s Guide links to purchase their gear as a thank you for all the free information that we bring you on the Blog and in the Bulletins. Before you purchase anything be sure to check out the advice in our Shopper’s Guide.
Canon 300mm f/2.8 L IS II lens. The 300 f/2.8 L IS II with the 1.4X III TC is a killer flight combination.
1.4X III TC. The new Series III 1.4X was designed to work best with the new Series II super-telephoto lenses.
Canon EOS-1D Mark IV professional digital camera body. My two Mark IVs are my workhorse digital camera bodies.
And from the BAA On-line Store:
LensCoats. I have a LensCoat on each of my big lenses to protect them from nicks and thus increase their re-sales value. All my big lens LensCoat stuff is in Hardwood Snow pattern.
The Lens Align Mark II. I use the Lens Align Mark II pretty much religiously to micro-adjust all of my gear an average of once a month and always before a major trip. Enjoy our free comprehensive tutorial here.
Canon EOS-1D Mark IV User’s Guide. Learn to use your Mark IV the way that I use mine. Also available for the 7D and the Mark III here.
BreezeBrowser. I do not see how any digital photographer can exist without this program.
|
|

