January 29th, 2012
|
|
|
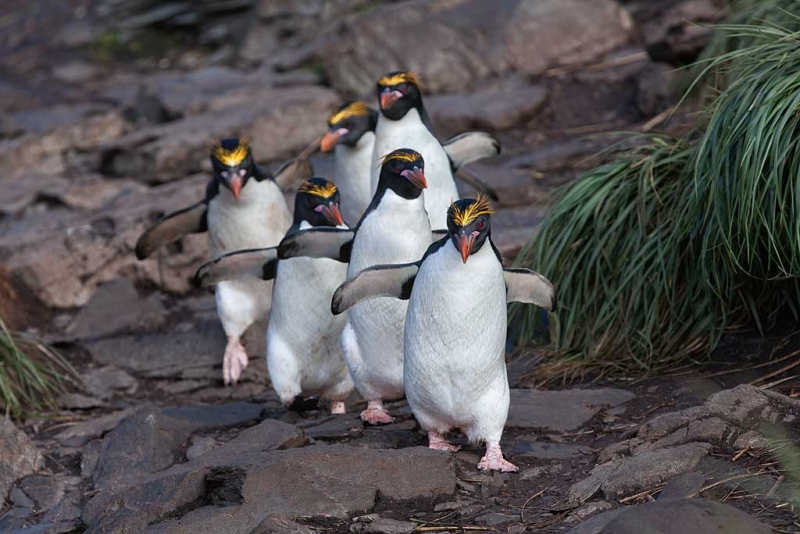
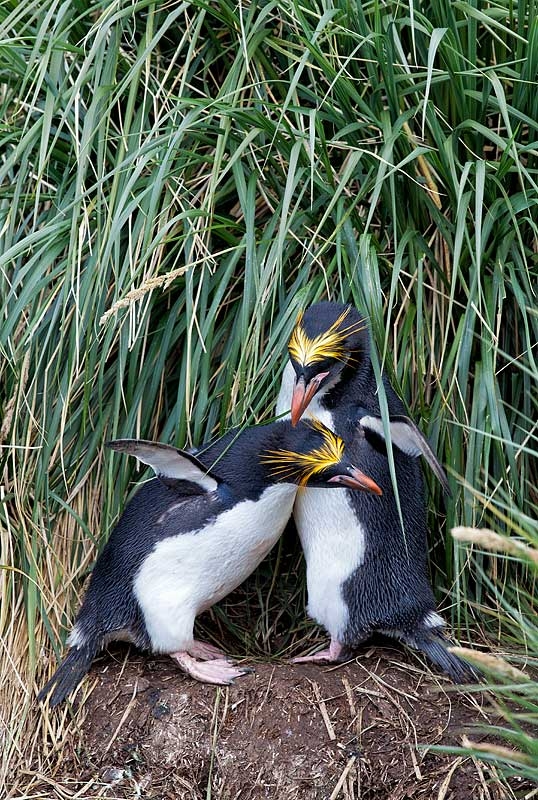
These Macaroni Penguins were photographed with the Canon 70-200mm f/2.8L IS II lens, the Canon 1.4X III TC, (handheld at 145mm) and the EOS-5D Mark II. ISO 400. Evaluative metering at zero: 1/800 sec. at f/7.1 in Manual mode.
Central Sensor Rear Focus AI Servo AF active at the moment of exposure. Click here if you missed the Rear Focus Tutorial. Note: the central AF sensor just caught the edge of the right wing of the penguin in the front and held focus accurately while tracking the subject. I was impressed.
|
EOS-5D Mark II Quick Evaluation
As described in BAA Bulletin #395, I was forced to depend on the Canon EOS-5D MII that I borrowed from CPS for my Southern Ocean trip far more than I planned on. (See the HOW TO RUIN TWO PROFESSIONAL DIGITAL CAMERA BODIES feature here.)
I quickly fell in love the the 5D MII. The files are beautiful. While it is hard to quantify a statement like that I do love the color. And it is the first full frame camera where I really love the small pixels. The amount of detail is phenomenal. As I am rarely a hold-the-hammerdown type of guy, the 3.9 frames per second advance is not usually a big handicap. I love to be able to use the Canon EF 8-15mm f/4L Fisheye USM Fisheye Ultra-Wide Zoom lens as either a circle lens or a full fish eye. And there are similar advantages when using this body with the Canon 16-35mm f/2.8L lens.
|
|
|
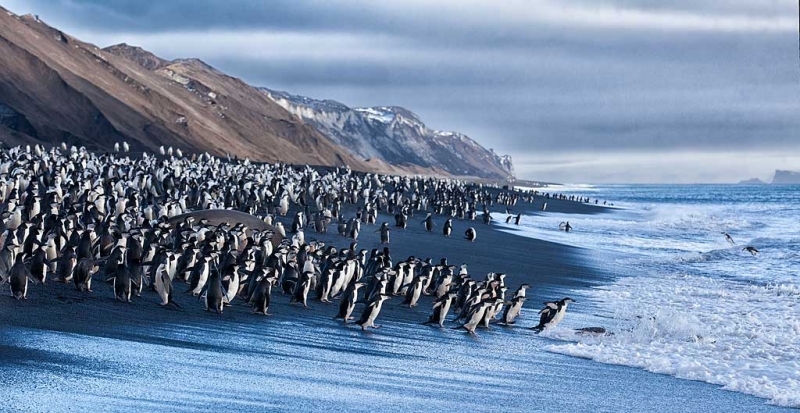
This image of Chinstrap Penguins headed for dinner and a swim was created at Bailey Head, Antarctica with the tripod-mounted Canon 70-200mm f/2.8L IS II lens, the Canon 1.4X III TC (at 165mm) and the EOS-5D Mark II. ISO 400. Evaluative metering -1/3 stop: 1/400 sec. at f/8 in Manual mode; confirmed by blinkies/histogram check.
Central Sensor Rear Focus AI Servo AF and recompose. Click here if you missed the Rear Focus Tutorial. I love the clean WHITEs and the incredible detail.
|
With 21.1 megapixels, a sharp 5D MII image can stand up to lots of cropping. Jeez; I almost forgot the camera’s super light weight. It did fabulously well on my shoulder with the Canon 70-200mm f/2.8L IS II lens. I had opportunities to use the 5D MII for flight but did get some great results; I used it from the ship and always used the full 9-point array in order to keep a sensor on the birds as the ship was rocking. Ergonomically, the camera felt very nice in my hands. And I made some great video footage easily on Bailey Head in Antarctica. If I can ever figure out how to edit it, I will post some here.
|
|
|
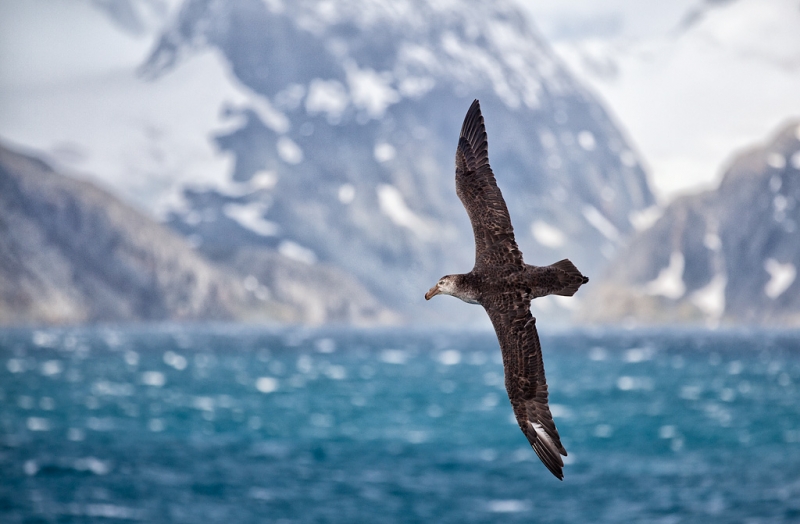
This Northern Giant Petrel image was created in Drygalski Fjiord, South Georgia, with the Canon 70-200mm f/2.8L IS II lens and the the Canon 1.4X III TC, (handheld at 280mm) and the EOS-5D Mark II. ISO 400. Evaluative metering +3 stops off the white sky: 1/1600 sec. at f/4 in Manual mode.
9-Point Rear Focus AI Servo AF active at the moment of exposure. Click here if you missed the Rear Focus Tutorial. Note: the full nine point AF array was ideal from the ship as it would have been difficult or impossible in the relatively rough seas to keep the central sensor on the bird.
I ran into double bad luck here with the misplaced primary feather on the lower wing and the bird’s head turned slightly away….
|
I am not at all a technical person. If you are and would like to read about the impressive stuff inside the camera, you can click here. After 28 1/2 years of photography including the last 11 doing digital I do know when I like a camera and when I don’t.
There were a few minor things that I did not like about the 5D MII. As with all Canon digital cameras, it is very difficult to see where the histogram ends when working outdoors. I have been begging for a thin white or yellow box around the histogram since I got the original EOS-1D in 2001. Or was that 2002? The 5D MII focuses only to f/5.6; that means that it will not autofocus when a 1.4X TC is added to an f/5.6 lens like my beloved 800mm f/5.6K IS. The 9-point array is hard to get used to for those coming from a MIV with AF sensors available almost everywhere; the good news is that the 9-Point array worked very nicely with walking, running, and flying subjects. When when I used the lens with a teleconverter and manually selected an AF sensor I noticed that all the AF sensors but the central sensor had some difficulty holding focus. My biggest gripe is with the Command Dial; it rotated inadvertently while I was carrying the lens on my shoulder with the Black Rapid RS-7 strap. I would put it in Manual mode but when I grabbed the rig to make a flight or action it would be set to Bulb or Program or something equally ridiculous. I considered putting a piece of tape on it. If you use one as your primary body this would be a non-issue.
I should be getting lots more experience with this great camera over the next few months as I ordered one on Friday….
|
|
|
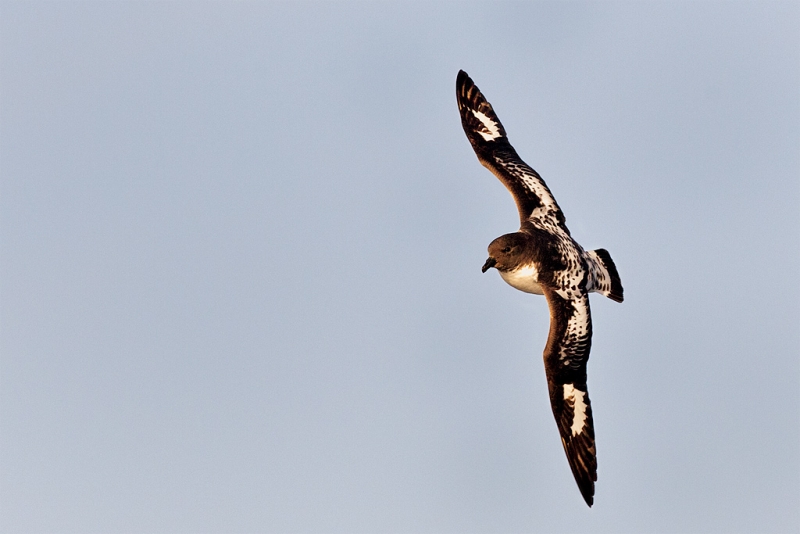
This image was created from the ship somewhere southwest of the South Orkney Islands with the hand held Canon 300mm f/2.8 L IS II lens, the Canon 1.4X III TC, and the EOS-5D Mark II. ISO 400. Evaluative metering + 1/3 stop off the blue sky was somewhat of an underexposure–the light was changing quickly: 1/2000 sec. at f/8.
9-Point Rear Focus AI Servo AF active at the moment of exposure. Click here if you missed the Rear Focus Tutorial.
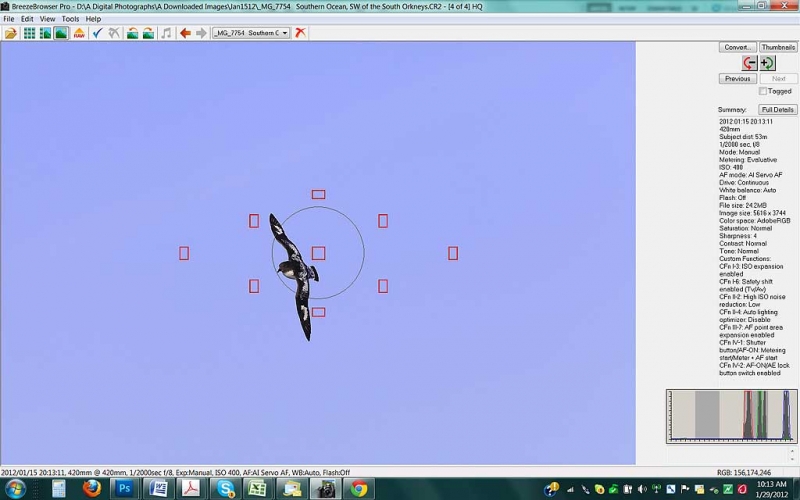
This is surely not the world’s greatest image of a Pintado (Cape) Petrel but it is presented here for a reason. The image above represents a huge crop from the original (see below). The size of the converted 5D MII RAW file here was 120.3 mbs. The size of the optimized TIFF was only 16.8 mbs. That means that the image above represents only 14% of the original capture; 86% of the pixels were cropped (or thrown) away.
|
Below is a screen capture of the BreezeBrowser Main View page for the image above.
|
|
|
There is lots to learn here if you study the fine print above. Do note the relatively small size of the subject in the original image. Click here to learn more about BreezeBrowser. I do not see how any digital photographer can exist without this program. Every single person who has watched me edit a 1,000_ image folder in ten minutes is amazed. All of my MAC friends even find away to run BreezeBrowser…. I know that I could not live without it.
|
Your Favorite?
Please leave a comment and let us know which of the first three images above is your favorite (and why).
Cheesemans’ Ecology Safaris
I traveled with Cheesemans’ Ecology Safaris; find out what I thought about them here. You can learn more about CES by clicking here. If you have any questions you can shoot them an e-mail or call them at 800.527.5330.
B&H Specials
Act now; these Instant Rebates expire February 4, 2012.
If you are interested in an amazing deal on a 7D, a 5D MII (both packaged with various lenses) or a $400 rebate on a Canon PIXMA Pro 9000 Mark II printer (with the purchase of a Canon EOS SLR), click here.
To learn about even more amazing Instant Rebates on Canon lenses and Speedlites click here or on the image below.
My Comments
With a bit more free time I had a chance to respond to comments posted to the December 28, 2011 blog post here: ISO 4000 at 1/6th of a second.
Support both the Bulletins and the Blog by making all your B & H purchases here.
Remember: you can earn free contest entries with your B & H purchases. Eleven great categories, 34 winning and honored images, and prize pools valued in excess of $20,000. Click here for details.
Shopper’s Guide
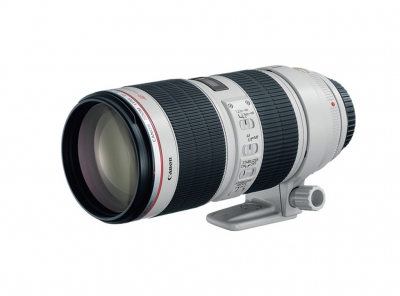
Canon 70-200mm f/2.8L IS II lens. Man, I am loving this lens on my shoulder with the 2X III teleconverter. I also use it a lot–as I did for the image of the eagle with fish–with the 1.4X III TC.
Canon 300mm f/2.8 L IS II lens. This lens proved to be ideal on a tripod for both birds and wildlife with both the 1.4X and 2X III TCs. All images were super-sharp and the lens was light enough for hand-holding both in the zodiacs and when doing flight photograph from the ship.
Canon EOS 5D Mark II Digital Camera. Canon’s lightweight full frame body is perfect for serious landscape photography.
And from the BAA On-line Store:
LensCoats. I have a LensCoat on each of my big lenses to protect them from nicks and thus increase their re-sales value. All my big lens LensCoat stuff is in Hardwood Snow pattern.
LegCoat Tripod Leg Covers. I have four tripods active and each has a Hardwood Snow LegCoat on it to help prevent further damage to my tender shoulders 🙂
Gitzo GT3530LS Tripod. This one will last you a lifetime.
Mongoose M3.6 Tripod Head. Right now this is the best tripod head around for use with lenses that weigh less than 9 pounds. For heavier lenses, check out the Wimberley V2 head.
Double Bubble Level. You will find one in my camera’s hot shoe whenever I am not using flash.
Be sure to check out our camera body User’s Guides here.
The Lens Align Mark II. I use the Lens Align Mark II pretty much religiously to micro-adjust all of my gear an average of once a month and always before a major trip. Enjoy our free comprehensive tutorial here.
Canon EOS-1D Mark IV User’s Guide. Learn to use your Mark IV the way that I use mine. Also available for the 7D and the Mark III here.
BreezeBrowser. I do not see how any digital photographer can exist without this program.
Black Rapid RS-7 Strap: I have been using this strap for a year; it allows me to grab my intermediate telephoto rig almost instantly for flight and action photography.
January 27th, 2012
St. Andrews Bay, South Georgia, Southern Ocean Voyage; Best Day Ever?
January 11, 2012 dawned dark and somewhat foreboding, but small patches of slightly brighter sky left me confident that my 17-year streak of photographic good-weather-Karma would continue. We would be visiting the world’s largest King Penguin colony at St. Andrews Bay where more than 320,000 pairs breed. The winds were light but the sky still dark and stormy as we exited the Zodiacs and unpacked our gear. When I was about halfway to the ridge that served as a vantage point above the vast plain of penguins it began to sprinkle. The sprinkle quickly turned to a heavy drizzle and in another minute it was de ja vu all over again as a heavy rain began to pelt down….
Three days before at the glorious and slightly smaller King Penguin colony at Salisbury Plain those who had stayed out all day had been drenched by a pouring rain that left my two EOS-1D MIV professional camera bodies completely dead. Hours inside a pillowcase with a hair dryer set on medium heat had revived them slightly. For the rest of the trip I was unable to see the large LCD on the back of each camera but otherwise they each functioned.
Within minutes and much to my relief, however, the rain at St. Andrews Bay quit.
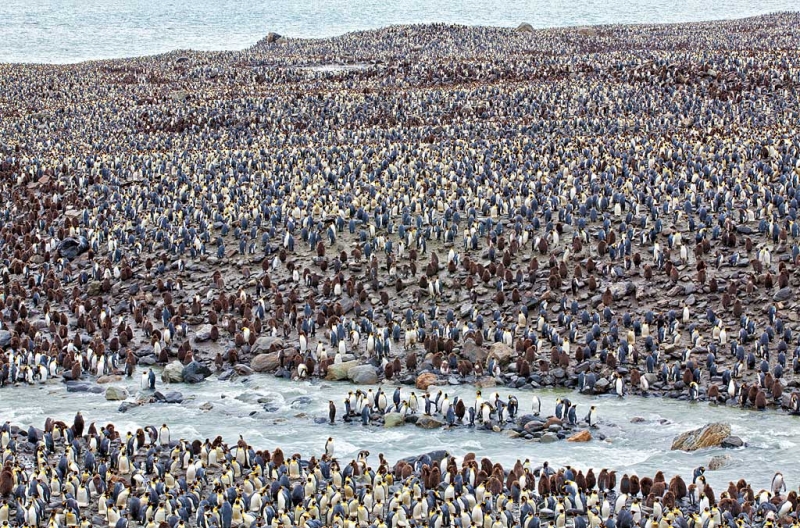
Soon I was set up on the ridge and making images in the muted light. A quick-flowing stream ran along the edge of an almost endless plain of King Penguins. Each adult stood protecting the single egg that rested atop its feet enveloped in a brood patch. Long lines of fluffy, brown oakum boys, last year’s young, zigzagged through the colony. Staff ornithologist Jim Danzenbaker explained that the young birds are relegated to the lower portions of the plain while the nesting adults chose the higher drier ground; thus, the lovely patterns.
|
|
|
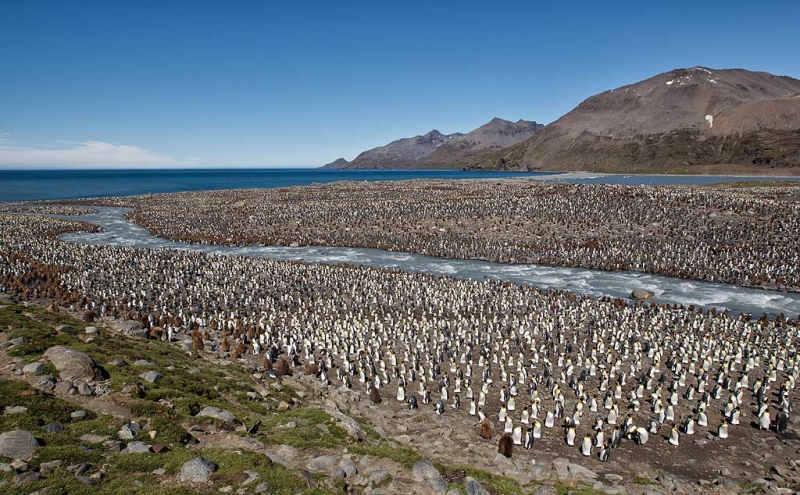
The King Penguin colony was photographed in the morning with the tripod-mounted Canon 70-200mm f/2.8L IS II lens (at 110mm) with the EOS-5D Mark II. ISO 400. Evaluative metering +1/3 stop: 1/20 sec. at f/32 in Av Mode. Rear Focus Central Sensor AF and recompose. Click here if you missed the Rear Focus Tutorial.
For a greater appreciation of this image, click on the photo. Then click on the enlarged version to close it. To see a really cool quasi-HDR grunge version of this image click here.
|
The upper reaches of the distant mountains in the background were covered by fog. Mesmerized by the beauty of the scene before me time flew by as I changed lenses and changed perspective often. Before I knew it, it was 11:00am and the sun peeked through here and there revealing the snow-covered peaks. But by the time that I switched to a wide angle lens they were once again shrouded in fog. A bit after noon the sun broke through with a vengeance and just like that it was too bright to photograph. I took a break, sat down on a rock, and enjoyed the lunch that I had scavenged at breakfast: ham and Swiss roll-ups with mayonnaise and a bit of low-sugar ketchup that I had brought from home. Stuffed into a zip-lock plastic bag it was quite the messy meal but it really hit the spot; you can could call it an astronaut style lunch.
I napped for a bit dreaming of how great conditions would be when the light got sweet later in the afternoon. When I awoke I noticed that the wind had come up a bit. Then it roared. The words “katabatic winds” were on everyone’s lips and at times it was difficult to stand. Whitecaps filled the bay around our anchored ship. We soon received word to head back to the landing site and await further instructions…. I packed up my gear and—a bit disappointed–headed back to the beached Zodiacs.
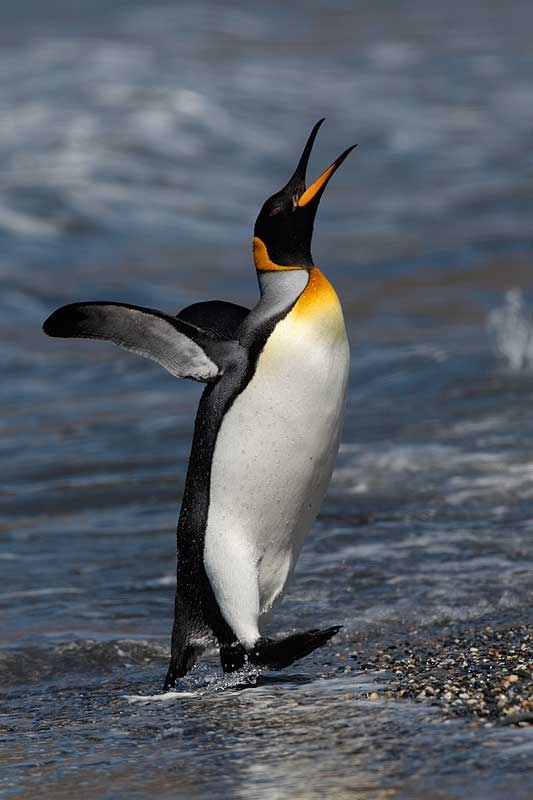
By the time I arrived the winds had pretty much abated but the ½ mile up and down hike turned out to be a blessing in disguise: I drank a ton of water and refilled the three bottles that I had drained in the morning. The light was getting nice and there were penguins entering the water, penguins feeding in the surf, and penguins so stuffed with lantern fish that they could not stand when leaving the water. Had it not been for the wind warning I would have missed some great chances as the wet King Penguins set against the deep blue water and breaking surf made a great combination.
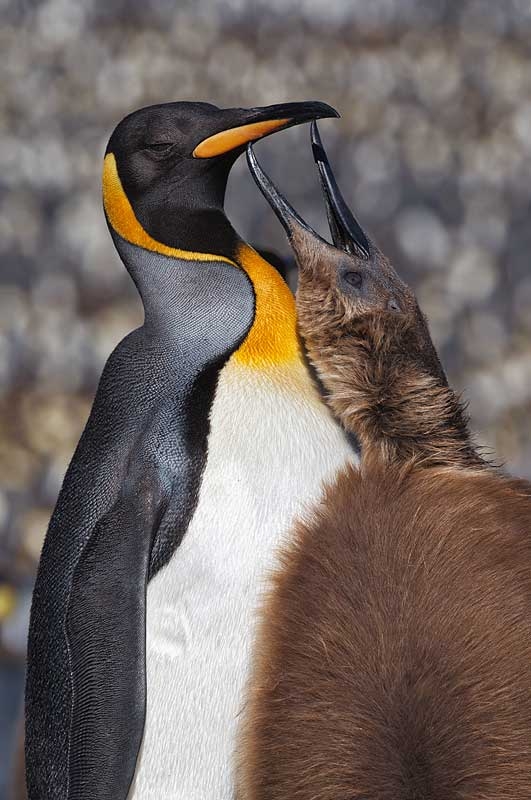
After an hour of the “surf” photography I hiked back up to the ridge and made hundreds of images of the sea of nesting penguins on the plain below–in the sweet light that I had dreamed of. On the way back to the landing several of us had great chances with adult kings feeding chicks in the sweetest light of the afternoon. In all respects the ten hours at St. Andrews Bay turned out to be one of the great days of my 28 years of bird photography.
Your Favorite?
Leave a comment and let us know which of the four images above is your favorite (and why).
Cheesemans’ Ecology Safaris
I traveled with Cheesemans’ Ecology Safaris; find out what I thought about them here. You can learn more about CES by clicking here. If you have any questions you can shoot them an e-mail or call them at 800.527.5330.
My Comments
With a bit of free time I had a chance to respond comments posted to the December 28, 2011 blog post here.
Support both the Bulletins and the Blog by making all your B & H purchases here.
Remember: you can earn free contest entries with your B & H purchases. Eleven great categories, 34 winning and honored images, and prize pools valued in excess of $20,000. Click here for details.
Shopper’s Guide
Below is a list of the gear used to create the image in today’s blog post. Thanks a stack to all who have used the Shopper’s Guide links to purchase their gear as a thank you for all the free information that we bring you on the Blog and in the Bulletins. Before you purchase anything be sure to check out the advice in our Shopper’s Guide.
Canon EF 16-35mm f/2.8L II USM Autofocus Lens. This is Canon’s top of the line wide angle zoom lens.
Canon 70-200mm f/2.8L IS II lens. Man, I am loving this lens on my shoulder with the 2X III teleconverter. I also use it a lot–as I did for the image of the eagle with fish–with the 1.4X III TC.
Canon 300mm f/2.8 L IS II lens. This lens proved to be ideal on a tripod for both birds and wildlife with both the 1.4X and 2X III TCs. All images were super-sharp and the lens was light enough for hand-holding both in the zodiacs and when doing flight photograph from the ship.
Canon EOS-1D Mark IV professional digital camera body. My two Mark IVs are my workhorse digital camera bodies.
Canon EOS 5D Mark II Digital Camera. Canon’s lightweight full frame body is perfect for serious landscape photography.
And from the BAA On-line Store:
LegCoat Tripod Leg Covers. I have four tripods active and each has a Hardwood Snow LegCoat on it to help prevent further damage to my tender shoulders :). And you will love them in mega-cold weather….
Gitzo GT3530LS Tripod. This one will last you a lifetime.
Giottos MH 1302-655 (Tiny) BallHead. I spin off my Mongoose M3.6 Tripod Head and mount the tiny ballhead whenever I need to use a short lens on the tripod. The camera goes in the clamp via the Wimberley P-5 camera body plate.
Double Bubble Level. You will find one in my camera’s hot shoe whenever I am not using flash.
January 26th, 2012
|
|
|
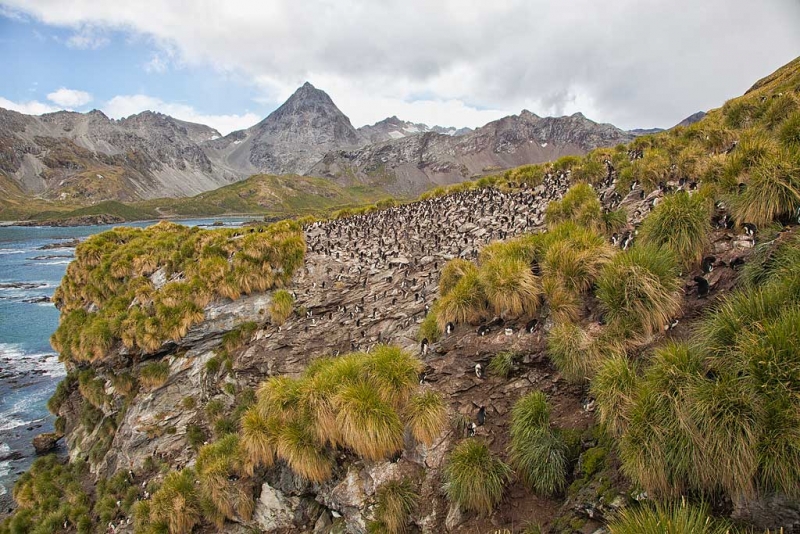
Above is the Macaroni Penguin colony on Cooper Bay, South Georgia. As I was making the climb up and down to the colony I was seriously questioning my own sanity…. The image was created with the Canon 24-105mm IS L lens (hand held at 24mm) and the EOS-5D Mark II. ISO 400. Evaluative metering -1 stop: 1/250 sec. at f/11. Learn the fate of my two EOS-1D Mark IV bodies in a future posting. I was, due to human error–mine of course, forced to go the the 5D MII and absolutely fell in love with the camera on the trip (somewhat out of necessity).
Thanks to bed bug photographer specialist Tom Myers for loaning me his 24-105; I had left the 16-35 at the landing in an effort to lighten the load for my most strenuous hike up the hill :).
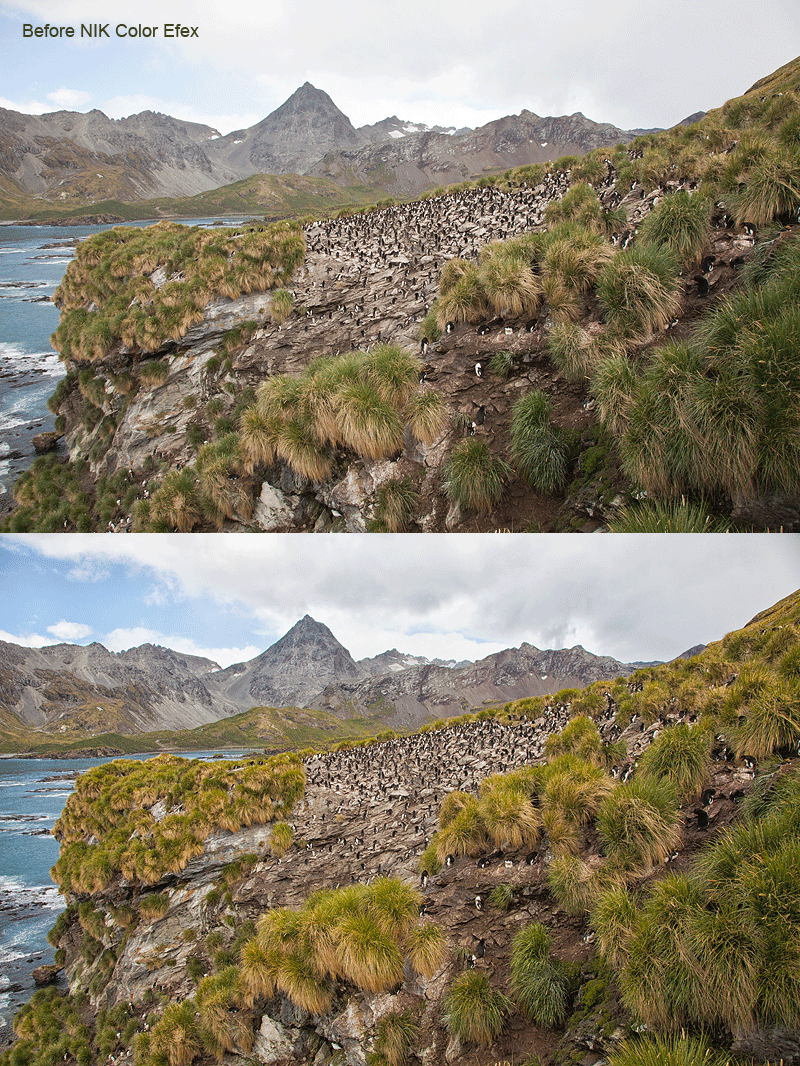
See the animated GIF below to learn how NIK Color Efex Pro 4 helped me get the most out of this image.
|
Home From the Southern Oceans Trip
After traveling to the ends of the earth–Ushuaia, Argentina–by commercial jet on December 28, 2011 I, along with about 100 shipmates, sailed 3,550 miles on the ice-strengthened vessel Ortelius on a tour of the Southern Ocean that visited the Falklands, South Georgia Island, and Antarctica. I debarked early on the morning of January 25 and flew 3 1/2 hours from Ushuaia to AEP, the domestic airport in Buenos Aires, Argentina. From there I took a 45-minute cab ride to EZE, the international airport. Then it was a red-eye flight to Miami, land at 5:45am, get through customs, and barely catch my flight to Orlando arriving at 7:45am. There I was picked up by my right-hand man, Jim Litzenberg and after a quick stop at Publix for some eggplant, Brussels Sprouts, and broccoli, I made it to my home office in Indian Lake Estates, FL just before 10:00 am on January 26th.
The trip was an amazing one. We enjoyed great weather nearly every day and avoided any major storms. We saw something in the neighborhood of one million penguins including breeding colonies of the following species: Magellenic, Rockhopper, King, Gentoo, Macaroni, Chinstrap, and Adelie. And–from the ship–we even got to see and photograph a single young Emperor Penguin on an iceberg. We visited the world’s largest Black-browed Albatross rookery on Steeple Jason in the Falklands, saw what seemed like a zillion baby fur seals on South Georgia, and got to photograph Humpback Whales and Orcas (Gerlach Strait Killer Whales) at close range from the ship.
I made some tough hikes and some long walks with my gear to get to some great places–at times through killer stands of tussock grass. I took great care by walking slowly at all times and making sure that I knew where I would place each foot and what would happen when I did. I made many treacherous (for me) downhill stretches on my butt. I got sufficient rest, never got seasick, and never caught so much as a cold. All in all I was blessed. I look forward to sharing lots of great images and lessons with you on both the blog and in future BAA Bulletins over the course of the next few months. It feels good to be home.
|
|
|
This courting pair of Macaroni Penguins was photographed at Cooper Bay, South Georgia with the tripod-mounted Canon 300mm f/2.8 L IS II lens and the EOS-5D Mark II. ISO 400. Evaluative metering at zero: 1/200 sec. at f/8. On this, my second Southern Oceans trip, Macaroni turned out to be my favorite penguin species in part because of their yellow-spaghetti hair-dos and in part because I had not created any good images of them on my 2007 trip.
There will be lots more on the Canon 300mm f/2.8 L IS II lens coming soon; it turned out to be the perfect long lens for me on this trip….
|
More NIK Color Efex Pro 4 Magic
On my Southern Ocean trip I used NIK Color Efex Pro 4 on just about every image that I processed. It continues to revolutionize my digital workflow. Note the effect of the Foliage Filter (80%) on the tussock grass and the effect of the Detail Extractor Filter 90%) on that bland sky. A round of Tonal Contrast (50%) out the finishing touches on the image below. (Give the animated GIF a few seconds to play so that you can view both the before and after versions.) I will be sharing some NIK Color Efex Pro workflow tips with you soon.
NIK 15% Discount
You can save 15% on all NIK products by clicking here and entering BAA in the Promo Code box at check-out. Then hit Apply to see your savings. You can download a trial copy that will work for 15 days and allow you to create full sized images.
NIK Creative Efex Collection
NIK recently announced the availability of a special limited production bundle of 3 of their most popular products, Color Efex Pro 4, Silver Efex Pro 2, and HDR Efex Pro. You can save more than $200 on the bundle which is available only through NIK affiliates. If you would like additional info, please e-mail with the words “Creative Efex Collection” in the Subject line. If you have been on the fence about purchasing the plug-ins mentioned above this is a great chance to save some significant bucks.
Cheesemans’ Ecology Safaris
I traveled with Cheesemans’ Ecology Safaris; find out what I thought about them here. You can learn more about CES by clicking here. If you have any questions you can shoot them an e-mail or call them at 800.527.5330.
Support both the Bulletins and the Blog by making all your B & H purchases here.
Remember: you can earn free contest entries with your B & H purchases. Eleven great categories, 34 winning and honored images, and prize pools valued in excess of $20,000. Click here for details.
Shopper’s Guide
Below is a list of the gear used to create the images talked about in his blog post. Thanks a stack to all who have used the Shopper’s Guide links to purchase their gear as a thank you for all the free information that we bring you on the Blog and in the Bulletins. Before you purchase anything be sure to check out the advice in our Shopper’s Guide.
Canon 24-105mm IS L lens. The 24-105 has been my go-to B-roll intermediate zoom lens since it was released about five years ago. Whenever I head into the field without putting mine in one of the big pockets of my X-trahand vest I regret it.
Canon 300mm f/2.8 L IS II lens. This lens proved to be ideal on a tripod for both birds and wildlife with both the 1.4X and 2X III TCs. All images were super-sharp and the lens was light enough for hand-holding both in the zodiacs and when doing flight photograph from the ship.
EOS-5D Mark II. Lightweight. An excellent AF system. Fast enough at 3.9 fps. Produces superb 21.1 megapixel files. What’s not to like? I really had my head stuck in the sand on this camera body. More to come.
And from the BAA On-line Store:
LensCoats. I have a LensCoat on each of my big lenses to protect them from nicks and thus increase their re-sales value. All my big lens LensCoat stuff is in Hardwood Snow pattern.
LegCoat Tripod Leg Covers. I have four tripods active and each has a Hardwood Snow LegCoat on it to help prevent further damage to my tender shoulders 🙂
Gitzo GT3530LS Tripod. This one will last you a lifetime.
Mongoose M3.6 Tripod Head. Right now this is the best tripod head around for use with lenses that weigh less than 9 pounds. For heavier lenses, check out the Wimberley V2 head.
CR-80 Replacement Foot for Canon 800. When using the 800 on a Mongoose as I do, replacing the lens foot with this accessory lets the lens sit like a dog whether pointed up or down and prevents wind-blown spinning of your lens on breezy days by centering the lens directly over the tripod.
Double Bubble Level. You will find one in my camera’s hot shoe whenever I am not using flash.
Be sure to check out our camera body User’s Guides here.
The Lens Align Mark II. I use the Lens Align Mark II pretty much religiously to micro-adjust all of my gear an average of once a month and always before a major trip. Enjoy our free comprehensive tutorial here.
Canon EOS-1D Mark IV User’s Guide. Learn to use your Mark IV the way that I use mine. Also available for the 7D and the Mark III here.
BreezeBrowser. I do not see how any digital photographer can exist without this program. All of my MAC friends in the know even find a way to run BreezeBrowser…. I could not live without it.
January 25th, 2012
Image Caption Contest
Write the funniest caption for the image above and win a $20 credit at the BIRDS AS ART On-Line Store. Judges: Jim Litzenburg, Jennifer Morris, and artie.
What’s Going On Here? Contest
Be the first to let us know what I was doing in the image above and win a $20 credit at the BIRDS AS ART On-Line Store. Judge: artie. Note: if you were on either boat in Homer you are NOT eligible for this contest. :). And no cheating will be permitted; you need to figure it out on your own (if that is possible…)
Results
The results of both contest will not be announced until January 30, 2012 as artie will not be returning from Antarctica until January 26, 2012.
Earn Free Contest Entries and Support both the Bulletins and the Blog by making all your B & H purchases here.
More and more folks are earning multiple contest entries with their B & H purchases. See here for details on that. Eleven great categories, 34 winning and honored images, and prize pools valued in excess of $20,000. Click here to visit the competition home page.
Shopper’s Guide
Below is a list of the gear used to create the image in today’s blog post. Thanks a stack to all who have used the Shopper’s Guide links to purchase their gear as a thank you for all the free information that we bring you on the Blog and in the Bulletins. Before you purchase anything be sure to check out the advice in our Shopper’s Guide.
Canon 100-400mm IS L zoom lens: A versatile all purpose zoom lens for all types of nature and general photography. Several excellent photographers including Dan Cadieux and Aidan Briggs use this lens as their workhorse bird photography telephoto lens.
Canon EOS-1D Mark IV professional digital camera body. My two Mark IVs are my workhorse digital camera bodies.
And from the BAA On-line Store:
The Lens Align Mark II. I use the Lens Align Mark II pretty much religiously to micro-adjust all of my gear an average of once a month and always before a major trip. Enjoy our free comprehensive tutorial here.
Canon EOS-1D Mark IV User’s Guide. Learn to use your Mark IV the way that I use mine. Also available for the 7D and the Mark III here.
January 24th, 2012
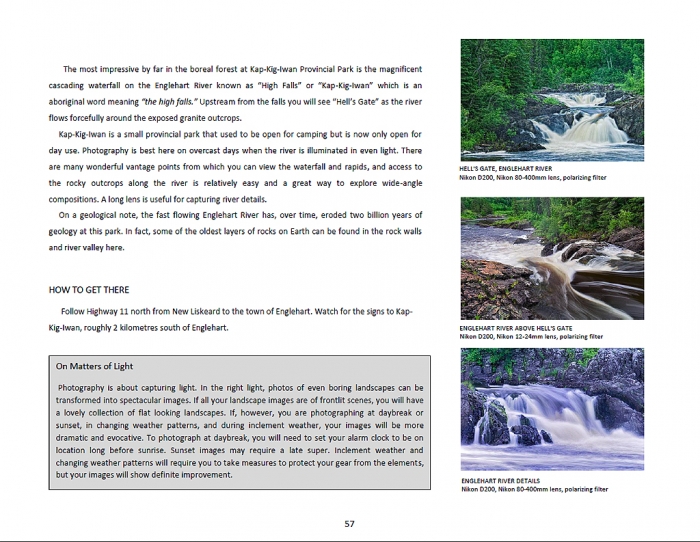
A Photographer’s Guide to the Ontario Landscape
BIRDS AS ART is proud to announce the publication of “A Photographer’s Guide to the Ontario Landscape,” a new e-book by Andrew McLachlan of Thornton, Ontario. Andrew’s guide is the latest in a long line of beautiful, inspiring, educational, how-to and where-to treatises brought to you by BAA Books. If you want to skip the spiel you can click here to order. 🙂 Or see more options below.
A Photographer’s Guide To The Ontario Landscape: $24; YouSendIt file downloads are sent via e-mail.
The vast and varied landscapes of Ontario, Canada’s second largest province, provide photographers with a great variety of outstanding destinations and opportunities. “A Photographer’s Guide To The Ontario Landscape” by Andrew McLachlan is an easy-to-read, easy-to-follow resource that will make it a snap for both local and visiting photographers to plan their outings and to maximize their time afield. Why spend days looking for the best spots when Andrew has already done the legwork?
From the remote Abitibi Canyon in the northeast to Point Pelee in the southwest, from the Ottawa Valley in the southeast to the Algoma Highlands north east of Sault Ste Marie, Andrew has-with skill and passion–photographed them all in every season. In addition he will guide you to the regions famous for fall colour including the Haliburton Highlands and Muskoka.
You will learn where and when to go to create dramatic landscapes. Andrew’s images will educate and inspire you. And his e-book contains dozens of excellent tips (each in its own sidebar) for folks who enjoy creating scenic landscape images. He covers all the bases including exposure and histograms, composition and image design, shutter speed, aperture, and depth-of-field, creative vision and perspective, matters of weather and light, and tips on all types of gear including lens choice, tripods, tripod heads, lens and camera body plates, & filters.
This e-book, the first-ever comprehensive guide to photographing Ontario’s landscapes, is a must for all who enjoy making great images of nature’s vistas.
The simplest and fastest way to order your copy of “A Photographer’s Guide to the Ontario Landscape” is through the BAA On-line Store by clicking here. Alternatively, you can order your copy by sending a check for $24 made out to “Arthur Morris” to us at BIRDS AS ART, PO Box 7245, Indian Lake Estates, FL 33855. Be sure to include your e-mail address (written legibly). If you prefer to use PayPal you can send $24 to us via e-mail; be sure to include the title of the book.
|
|
|
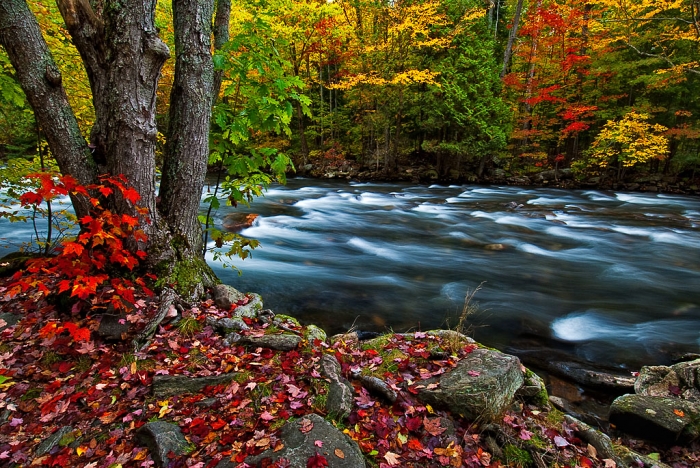
Haliburton Highlands, Fall colour at Kennisis River, Ontario. Nikon D200, Nikon 12-24mm lens, polarizing filter. Image copyright 2011: Andrew McLachlan.
|
artie is traveling 🙂
artie is traveling in the Southern Ocean (Falklands, South Georgia, & Antarctica) and will unable to respond to your questions and comments until after his return on 26 January 2012.
Earn Free Contest Entries and Support both the Bulletins and the Blog by making all your B & H purchases here.
More and more folks are earning multiple contest entries with their B & H purchases. See here for details on that. Eleven great categories, 34 winning and honored images, and prize pools valued in excess of $20,000. Click here to visit the competition home page.
Shopper’s Guide
Thanks a stack to all who have used the Shopper’s Guide links to purchase their gear as a thank you for all the free information that we bring you on the Blog and in the Bulletins. Before you purchase anything be sure to check out the advice in our Shopper’s Guide.
January 22nd, 2012
|
|
|
This three frame stitched panoramic image was assembled in Photoshop CS-5. The individual frames were created with the Canon 70-200mm f/2.8L IS II lens and the Canon EOS-1D Mark IV). ISO 200. Evaluative metering +2 stops: 8 seconds at f/11. “Mirror lock” via Live View with the 2-second self timer.
For a much greater appreciation of this image, click on the photo. Then click on the enlarged version to close it.
|
China Poot
I gotta thank Denise Ippolito again for helping me get started with Tonal Contrast in NIK’s Color Efex; she has been using it for years but as usual, I was simply too stubborn for too long…. Simply put, NIK’s Color Efex has changed my digital workflow drastically; in one or two simple steps it replaces twice that many steps in my traditional Photoshop workflow. And best of all, the images look better. As you can see above and below, the algorithms can do amazing things that pretty much eliminate the time-consuming (and usually impossible) chore of making a perfect selection.
To create the image above I ran both Tonal Contrast and Details Extractor at reduced opacity. The ability of Details Extractor to juice up cloudy day skies without having to create selections (that always leave a black or white halo between the mountains and the sky) is unparalleled. Do note that Details Extractor can be used to restore density and detail to bright WHITEs that are not technically over-exposed. See Image Optimization Magic Part II for details and an example.)
Here are a few tips on using Color Efex. When I first began and I ran first one filter, say Tonal Efex, and then tried to run another, say Details Extractor, I crashed Photoshop every time. I got Greg Benusa at NIK on the phone. He took over my laptop screen and explored the possible causes. My main problem was that in an effort to get Photoshop to run faster I had allocated 80% of the memory resources to Photoshop. Greg advised me to lower that to 60% and that solved the problem immediately. Need to check on your machine? Click on Edit/Preferences/Performance and then check the box that is titled “Memory Usage.” Move the slider until it shows 60% where it says “Let Photoshop Use:”
In the comments on Image Optimization Magic Part I, both Mark Hardymon and PhotoGizzard suggested that I try clicking on the Brush option (rather than OK) when applying the filter. This enables Color Efex to create a Hide-all Mask on the new layer once it opens in Photoshop. I experimented with that option but found it simpler to click OK and to create my own mask as needed. I did not like all the commands in the pop-up box; those included Paint and Apply. At times I need a Hide-all Layer Mask and at times I need a Regular Layer Mask…. Using the brush option creates only the former. Those same folks and Steve Gould suggested that I learn to use NIK’s Control Points and I plan on doing just that soon and to sharing what I learn with you here or on the blog.

Before and after Tonal Contast and Details Extractor from NIK’s Color Efex Pro 4.1. Can you believe the improvement in the sky?
|
NIK 15% Discount
You can save 15% on all NIK products by clicking here and entering BAA in the Promo Code box at check-out. Then hit Apply to see your savings. You can download a trial copy that will work for 15 days and allow you to create full sized images.
NIK Creative Efex Collection
NIK recently announced the availability of a special limited production bundle of 3 of their most popular products, Color Efex Pro 4, Silver Efex Pro 2, and HDR Efex Pro. You can save more than $200 on the bundle which is available only through NIK affiliates. If you would like additional info, please e-mail with the words “Creative Efex Collection” in the Subject line. If you have been on the fence about purchasing the plug-ins mentioned above this is a great chance to save some significant bucks.
artie is traveling 🙂
artie is traveling in the Southern Ocean (Falklands, South Georgia, & Antarctica) and will unable to respond to your questions and comments until after his return on 26 January 2012.
Earn Free Contest Entries and Support both the Bulletins and the Blog by making all of your B & H purchases here.
More and more folks are earning multiple contest entries with their B & H purchases. See here for details on that. Eleven great categories, 34 winning and honored images, and prize pools valued in excess of $20,000. Click here to visit the competition home page.
Shopper’s Guide
Below is a list of the gear used to create the images in today’s blog post. Thanks a stack to all who have used the Shopper’s Guide links to purchase their gear as a thank you for all the free information that we bring you on the Blog and in the Bulletins. Before you purchase anything be sure to check out the advice in our Shopper’s Guide.
Canon 70-200mm f/2.8L IS II lens. Man, I am loving this lens on my shoulder with the 2X III teleconverter. I also use it a lot–as I did for the image of the eagle with fish–with the 1.4X III TC.
Canon 800mm f/5.L IS lens. Right now this is my all time favorite super-telephoto lens.
Canon EOS-1D Mark IV professional digital camera body. My two Mark IVs are my workhorse digital camera bodies.
And from the BAA On-line Store:
LensCoats. I have a LensCoat on each of my big lenses to protect them from nicks and thus increase their re-sales value. All my big lens LensCoat stuff is in Hardwood Snow pattern.
LegCoat Tripod Leg Covers. I have four tripods active and each has a Hardwood Snow LegCoat on it to help prevent further damage to my tender shoulders 🙂
Gitzo GT3530LS Tripod. This one will last you a lifetime.
Mongoose M3.6 Tripod Head. Right now this is the best tripod head around for use with lenses that weigh less than 9 pounds. For heavier lenses, check out the Wimberley V2 head.
CR-80 Replacement Foot for Canon 800. When using the 800 on a Mongoose as I do, replacing the lens foot with this accessory lets the lens sit like a dog whether pointed up or down and prevents wind-blown spinning of your lens on breezy days by centering the lens directly over the tripod.
Double Bubble Level. You will find one in my camera’s hot shoe whenever I am not using flash.
Be sure to check out our camera body User’s Guides here.
The Lens Align Mark II. I use the Lens Align Mark II pretty much religiously to micro-adjust all of my gear an average of once a month and always before a major trip. Enjoy our free comprehensive tutorial here.
Canon EOS-1D Mark IV User’s Guide. Learn to use your Mark IV the way that I use mine. Also available for the 7D and the Mark III here.
January 20th, 2012
|
|
|
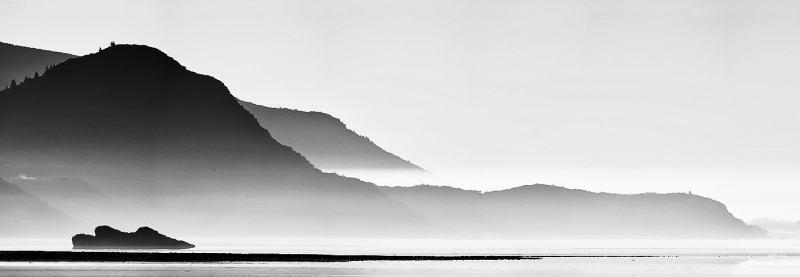
This panorama was created from seven vertical frames stitched together in Photoshop (File/Automate/Photomerge). The individual images were made with the tripod-mounted Canon 800mm f/5.6L IS lens and the EOS-1D Mark III (replaced now by the Canon EOS-1D Mark IV). ISO 400. Evaluative metering +2 stops: 1/800 sec. at 8.
As is my habit, I woke early. I was entranced by the eerie, foggy scene before me. Seen and created at 6:17am on June 10, 2009 from the deck of the bear boat anchored in Kukak Bay, Katmai National Park, AK.
For a greater appreciation of the image, click on the photo. Then click on the enlarged version to close it.
|
My Comments on: For Your Critique/Image #9
On September 30, 2011 I posted For Your Critique: Image #9. I entered this image in the Wild Places category of the 2011 BBC WPOTY Competition. (See “Images for Your Critiques} Revelations here.) This popular image garnered 16 comments; almost all were overwhelmingly positive. One person had to view the image several times to find something not to like–the dark strip of water lower left. For me that served as a nice compositional anchor. I remember darkening it for that purpose. I am sure that toning it down a bit would be fine. I liked this image a lot too and am very proud of it.
John Li was most enthusiastic. He wrote: Now there’s an image that made me sit bolt upright in my seat and go WOW. I mean, of course all the bird photos you post on this site are stellar, so maybe it just really caught my eye because it’s unique from your typical material … but I think it’s more. Something about the minimalism to it that confuses the mind as to whether it’s a photography or a painting, or digital graphic art. Simply astounding. Again, love the bird photos, but definitely this photo is one I’d purchase and print big.
Note to all: all BIRDS AS ART images are available as signed prints, either canvas or traditional. Click here to learn more.
For shame, it did not make the final round of judging. 🙂 Thanks to all who took the time to comment.
Thanks also to Bob Canepa who suggested the black & white interpretation below.
|
|
|
I do not do many landscapes and do even fewer black & whites. But when I do I love using NIK’s Silver Efex Pro. Here I clicked on about ten of the different pre-sets, like High Contrast Red best, and moved the Structure Slider to 40. I think that it looks pretty good. But it looks even better when you click on the image to see the larger version.
|
Which Do You Like Best?
Take a moment to leave a comment and let us know which version you like best, and why.
NIK 15% Discount
You can save 15% on all NIK products (including Silver Efex Pro) by clicking here and entering BAA in the Promo Code box at check-out. Then hit Apply to see your savings. You can download a trial copy that will work for 15 days and allow you to create full sized images.
NIK Creative Efex Collection
NIK recently announced the availability of a special limited production bundle of 3 of their most popular products, Color Efex Pro 4, Silver Efex Pro 2, and HDR Efex Pro. You can save more than $200 on the bundle which is available only through NIK affiliates. If you would like additional info, please e-mail with the words “Creative Efex Collection” in the Subject line. If you have been on the fence about purchasing the plug-ins mentioned above this is a great chance to save some significant bucks.
Earn Free Contest Entries and Support both the Bulletins and the Blog by making all your B & H purchases here.
More and more folks are earning multiple contest entries with their B & H purchases. See here for details on that. Eleven great categories, 34 winning and honored images, and prize pools valued in excess of $20,000. Click here to visit the competition home page.
artie is traveling 🙂
artie is traveling in the Southern Ocean (Falklands, South Georgia, & Antarctica) and will unable to respond to your questions and comments until after his return on 26 January 2012.
|
|
|
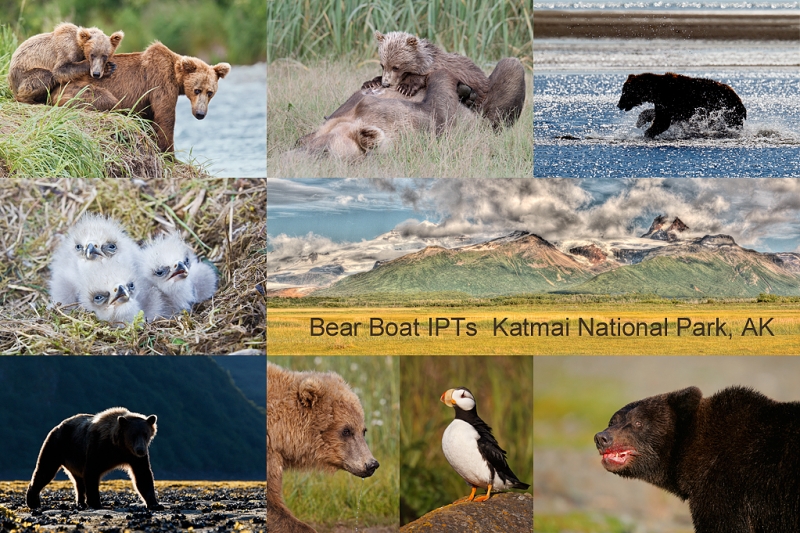
For a greater appreciation of this composite image, click on the photo. Then click on the enlarged version to close it.
|
KATMAI BEAR BOAT IPT: July 24-31, 2012 fr: Kodiak, AK: $6499. Limit 6/Openings 3.
Coastal Brown Bears at point blank range, cubs nursing and playing. Spectacular scenery. Likely: puffins, nesting Bald Eagle and kittiwakes, Steller’s Sea Lions, & rafts of Sea Otters.
Earn Free Contest Entries and Support both the Bulletins and the Blog by making all your B & H purchases here.
More and more folks are earning multiple contest entries with their B & H purchases. See here for details on that. Eleven great categories, 34 winning and honored images, and prize pools valued in excess of $20,000. Click here to visit the competition home page.
Shopper’s Guide
Below is a list of the gear used to create the image in today’s blog post. Thanks a stack to all who have used the Shopper’s Guide links to purchase their gear as a thank you for all the free information that we bring you on the Blog and in the Bulletins. Before you purchase anything be sure to check out the advice in our Shopper’s Guide.
Canon 800mm f/5.L IS lens. Right now this is my all time favorite super-telephoto lens.
Canon EOS-1D Mark IV professional digital camera body. My two Mark IVs are my workhorse digital camera bodies.
And from the BAA On-line Store:
LensCoats. I have a LensCoat on each of my big lenses to protect them from nicks and thus increase their re-sales value. All my big lens LensCoat stuff is in Hardwood Snow pattern.
LegCoat Tripod Leg Covers. I have four tripods active and each has a Hardwood Snow LegCoat on it to help prevent further damage to my tender shoulders 🙂
Gitzo GT3530LS Tripod. This one will last you a lifetime.
Mongoose M3.6 Tripod Head. Right now this is the best tripod head around for use with lenses that weigh less than 9 pounds. For heavier lenses, check out the Wimberley V2 head.
CR-80 Replacement Foot for Canon 800. When using the 800 on a Mongoose as I do, replacing the lens foot with this accessory lets the lens sit like a dog whether pointed up or down and prevents wind-blown spinning of your lens on breezy days by centering the lens directly over the tripod.
Double Bubble Level. You will find one in my camera’s hot shoe whenever I am not using flash.
Be sure to check out our camera body User’s Guides here.
The Lens Align Mark II. I use the Lens Align Mark II pretty much religiously to micro-adjust all of my gear an average of once a month and always before a major trip. Enjoy our free comprehensive tutorial here.
Canon EOS-1D Mark IV User’s Guide. Learn to use your Mark IV the way that I use mine. Also available for the 7D and the Mark III here.
January 19th, 2012
|
|
|
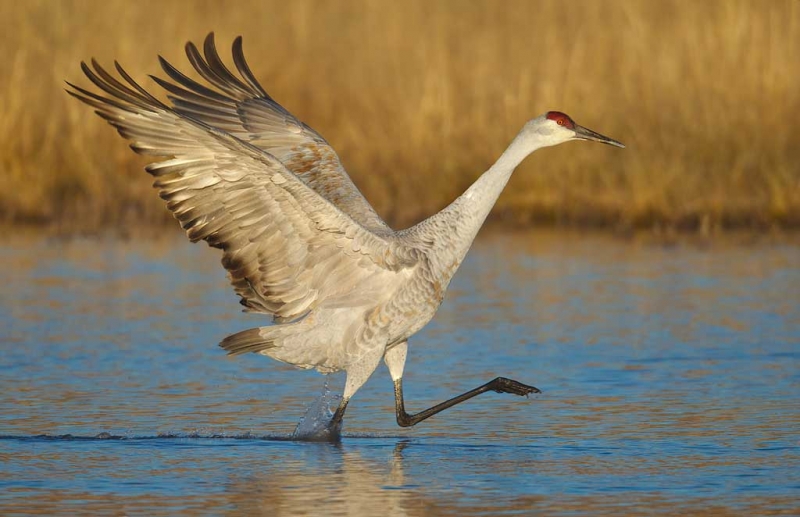
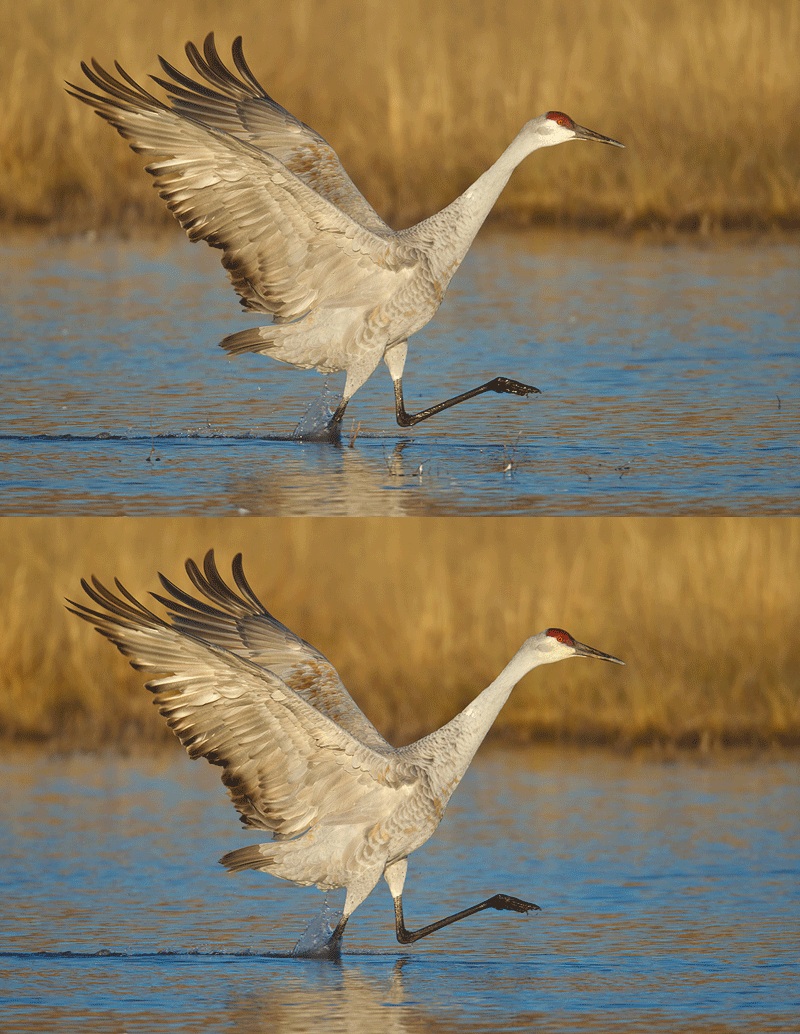
Sandhill Crane running display, Bosque del Apache NWR, San Antonion, NM. With the the tripod-mounted Canon 800mm f/5.6L IS lens, the 1.4X III TC, and the EOS-1D Mark IV. ISO 400. Evaluative metering +2/3 stop off the grasses: 1/1000 sec. at f/8 in Manual mode (early morning light at 7:22am).
Central Sensor (by necessity) Rear Focus/AI Servo AF active at the moment of exposure. Click here if you missed the Rear Focus Tutorial. Lens/TC/camera body Micro-adjustment: +4. For a greater appreciation of the image, click on the photo. Then click on the enlarged version to close it.
|
Was I Unlucky?
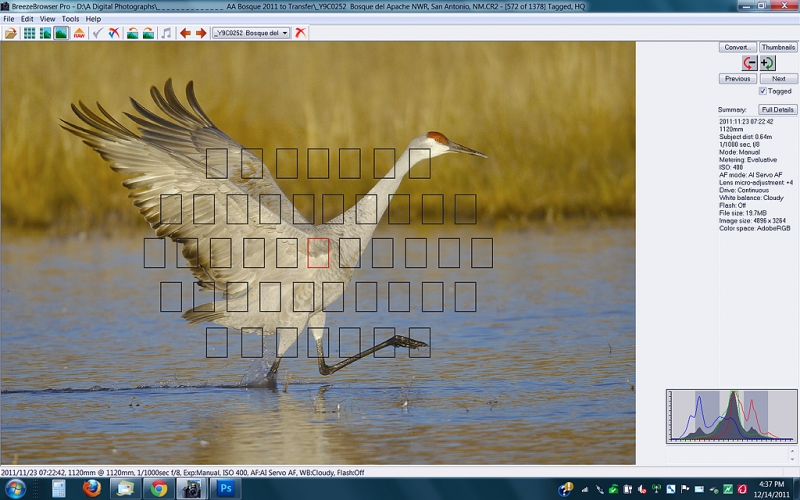
As you can see in the BreezeBrowser screen capture below I did everything perfectly. I had a perfect exposure–see the histogram. The framing was perfect; I had the central sensor on the base of the bird’s neck, right where I wanted it. The image is very sharp. In addition, I was lucky to be in the perfect position with the bird running towards me and winding up right down light angle. And amazingly there were no other birds in the background…. Was I unlucky at all? (Note: there was nothing that I could do about the far shoreline cutting the bird….)
Image Clean-up
You can see the image clean-up in the animated GIF above. Some of the clean-up was done with the Patch Tool and the Spot Healing Brush but most was done with a series of small Quick Masks that were used to cover the various bits of weed and grasses. All as described in detail in Digital Basics, an e-mailable PDF.
If you missed Digital Manipulation and Nature Photography Competitions you can find the post here.
artie is traveling 🙂
artie is traveling in the Southern Ocean (Falklands, South Georgia, & Antarctica) and will unable to respond to your questions and comments until after his return on 26 January 2012.
Shopper’s Guide
Below is a list of the gear used to create the images talked about in his blog post. Thanks a stack to all who have used the Shopper’s Guide links to purchase their gear as a thank you for all the free information that we bring you on the Blog and in the Bulletins. Before you purchase anything be sure to check out the advice in our Shopper’s Guide.
Canon 800mm f/5.L IS lens. Right now this is my all time favorite super-telephoto lens.
Canon 1.4X III Teleconverter. Designed to work best with the new Series II super-telephoto lenses.
Canon EOS-1D Mark IV professional digital camera body. My two Mark IVs are my workhorse digital camera bodies.
And from the BAA On-line Store:
LensCoats. I have a LensCoat on each of my big lenses to protect them from nicks and thus increase their re-sales value. All my big lens LensCoat stuff is in Hardwood Snow pattern.
LegCoat Tripod Leg Covers. I have four tripods active and each has a Hardwood Snow LegCoat on it to help prevent further damage to my tender shoulders 🙂
Gitzo GT3530LS Tripod. This one will last you a lifetime.
Mongoose M3.6 Tripod Head. Right now this is the best tripod head around for use with lenses that weigh less than 9 pounds. For heavier lenses, check out the Wimberley V2 head.
CR-80 Replacement Foot for Canon 800. When using the 800 on a Mongoose as I do, replacing the lens foot with this accessory lets the lens sit like a dog whether pointed up or down and prevents wind-blown spinning of your lens on breezy days by centering the lens directly over the tripod.
Double Bubble Level. You will find one in my camera’s hot shoe whenever I am not using flash.
Be sure to check out our camera body User’s Guides here.
The Lens Align Mark II. I use the Lens Align Mark II pretty much religiously to micro-adjust all of my gear an average of once a month and always before a major trip. Enjoy our free comprehensive tutorial here.
Canon EOS-1D Mark IV User’s Guide. Learn to use your Mark IV the way that I use mine. Also available for the 7D and the Mark III here.
BreezeBrowser. I do not see how any digital photographer can exist without this program. All of my MAC friends in the know even find away to run BreezeBrowser…. I could not live without it.
January 17th, 2012
|
|
|
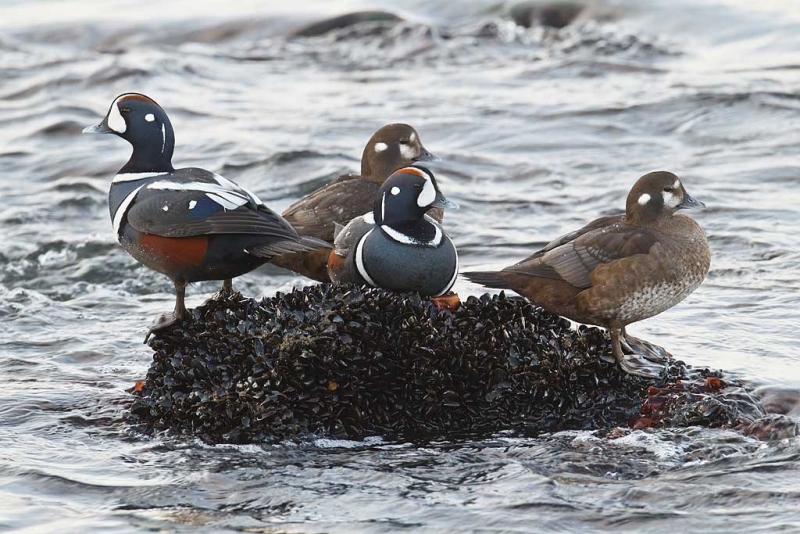
Harlequin Ducks, two pair on the rocks. Barnegat Jetty, Barnegat Light, NJ. DEC 12, 2011. With the the tripod-mounted Canon 800mm f/5.6L IS lens and the EOS-1D Mark IV. ISO 400. Evaluative metering +1 stop (was still well underexposed): 1/25 sec. at f/18 in Av mode. 1/25 sec. is not a typo.
Central Sensor Rear Focus/AI Servo AF and recompose. Click here if you missed the Rear Focus Tutorial. Lens/TC/camera body Micro-adjustment: +2. For a greater appreciation of the image, click on the photo. Then click on the enlarged version to close it.
|
Just Duckie: Two Depth-of-field Questions
In the two images here you see two very different approaches. For the image above, I moved way back–sun angle was irrelevant as the birds were in the shade. For the image below I got low and used a few other professional tricks to get close enough to the group for a head portrait; this species can be quite skittish.
I write and teach: work wide open unless you can verbalize a reason for stopping down.
For the group image above, why f/18? (Wide open would have been f/5.6.)
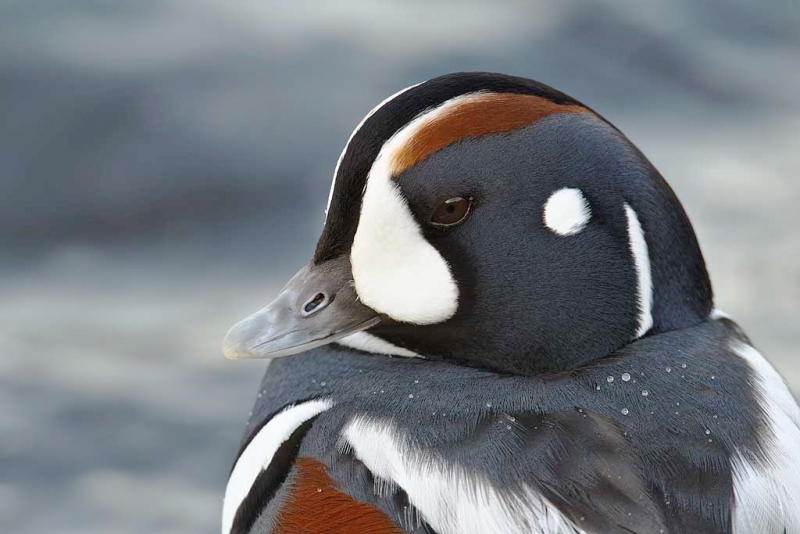
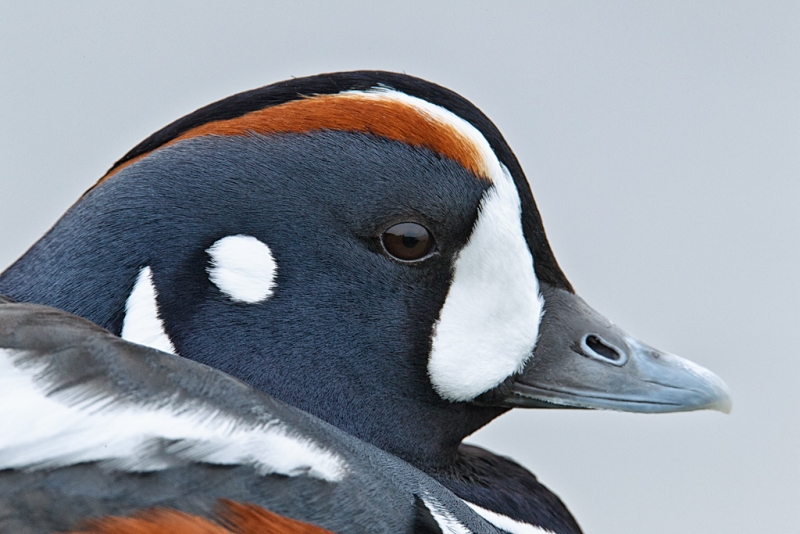
For the head portrait below, why f/11? (Wide open with the TC would have been f/8.)
|
|
|
Harlequin Duck, drake head portrait. Barnegat Jetty, Barnegat Light, NJ. DEC 12, 2011. With the the tripod-mounted Canon 800mm f/5.6L IS lens, the 1.4X III TC, and the EOS-1D Mark IV. ISO 500. Evaluative metering -1 stop: 1/60 sec. at f/11 in Manual mode.
Central Sensor (by necessity) Rear Focus/AI Servo AF active at the moment of exposure. Click here if you missed the Rear Focus Tutorial. Lens/TC/camera body Micro-adjustment: +4. For a greater appreciation of the image, click on the photo. Then click on the enlarged version to close it.
|
Just Duckie: Additional Lessons
In view of the fact that I have long believed that the best way to teach is to ask, I continue:
For the group image why did I hold the shutter button down?
For the head portrait, why did I hold the shutter button down? Why was I actively focusing at the moment of exposure?
Why did I need to add light for the group image but subtract light for the head portrait? (The subjects and the backgrounds are the same….)
Barnegat Jetty Site Guide
Whenever I visit the Barnegat Jetty (which is every time that I come to Long Island in the winter), I follow Denise Ippolito’s excellent suggestions as detailed in her Barnegat Jetty Site Guide. Yesterday I was following Denise Ippolito and she was on the one who spotted the harlequins. Folks visit from many states and whether you are a local or are flying driving to New Jersey just to visit this famed locale, you will learn a ton of valuable lessons. My tips on getting really close to the Harlequins are included in the guide. See more great images and learn about the guide here.
artie is traveling 🙂
artie is traveling in the Southern Ocean (Falklands, South Georgia, & Antarctica) and will unable to respond to your questions and comments until after his return on 26 January 2012.
Shopper’s Guide
Below is a list of the gear used to create the images talked about in his blog post. Thanks a stack to all who have used the Shopper’s Guide links to purchase their gear as a thank you for all the free information that we bring you on the Blog and in the Bulletins. Before you purchase anything be sure to check out the advice in our Shopper’s Guide.
Canon 800mm f/5.L IS lens. Right now this is my all time favorite super-telephoto lens.
Canon 1.4X III Teleconverter. Designed to work best with the new Series II super-telephoto lenses.
Canon EOS-1D Mark IV professional digital camera body. My two Mark IVs are my workhorse digital camera bodies.
And from the BAA On-line Store:
LensCoats. I have a LensCoat on each of my big lenses to protect them from nicks and thus increase their re-sales value. All my big lens LensCoat stuff is in Hardwood Snow pattern.
LegCoat Tripod Leg Covers. I have four tripods active and each has a Hardwood Snow LegCoat on it to help prevent further damage to my tender shoulders 🙂
Gitzo GT3530LS Tripod. This one will last you a lifetime.
Mongoose M3.6 Tripod Head. Right now this is the best tripod head around for use with lenses that weigh less than 9 pounds. For heavier lenses, check out the Wimberley V2 head.
CR-80 Replacement Foot for Canon 800. When using the 800 on a Mongoose as I do, replacing the lens foot with this accessory lets the lens sit like a dog whether pointed up or down and prevents wind-blown spinning of your lens on breezy days by centering the lens directly over the tripod.
Double Bubble Level. You will find one in my camera’s hot shoe whenever I am not using flash.
Be sure to check out our camera body User’s Guides here.
The Lens Align Mark II. I use the Lens Align Mark II pretty much religiously to micro-adjust all of my gear an average of once a month and always before a major trip. Enjoy our free comprehensive tutorial here.
Canon EOS-1D Mark IV User’s Guide. Learn to use your Mark IV the way that I use mine. Also available for the 7D and the Mark III here.
January 15th, 2012
Pushing the Shutter Speed Envelope
I have been amazed by the new 4-stop Image Stabilization on the Canon EF 800mm f/5.6L IS lens from the get-go. While spending two afternoons on the Barnegat Jetty recently with Denise Ippolito I decided to push the envelope and see what is actually possible with good sharpness techniques…. Here I was working with just about 30X magnification. I started making images at 1/60 sec. and then dropped down to 1/30 sec. With the duck just sitting there in lousy, lousy light I dropped that down to 1/15 sec. and finally made a half-dozen images at the ridiculously slow shutter speed of 1/8 sec. About half of all the images were sharp. The soft images were a result of either the bird moving during the exposure or having turned its head away just before I released the shutter.
Not sure why but I went back to my old-style sharpness techniques with my left hand pressing down on the base of the lens hood. After I focused and the bird held its position I held the shutter button down for 5-6 images at a time. (All with IS Mode 2.) From where I sit, this image is at least acceptably sharp. Do note that the near shoulder is totally out of focus due to lack of depth-of-field. Depth-of-field at 18 feet at f/14 with this set-up is about 1/10 of one inch. Or not much!
Do consider that there are many folks who feel that the Mongoose M3.6 does not offer enough support as good support as the Wimberley V2 with the 800 and a TC…. (Both are great heads for big glass. I prefer the lighter Mongoose while other prefer to stay away from side-mounting gimbal heads.
Why did I do it? I had nothing better to do and I am always looking to learn more about my gear. My only regret: I should have tried 1/4 second!
4-stop IS combined with amazing weight reduction are just two of the reasons that I am looking forward to the eventual release of the 500 and 600mm f/4L IS II super-telephoto lenses…. Learn more on these two lenses here.
Earn Free Contest Entries and Support both the Bulletins and the Blog by making all your B & H purchases here.
More and more folks are earning multiple contest entries with their B & H purchases. See here for details on that. Eleven great categories, 34 winning and honored images, and prize pools valued in excess of $20,000. Click here to visit the competition home page.
artie is traveling 🙂
artie is traveling in the Southern Ocean (Falklands, South Georgia, & Antarctica) and will unable to respond to your questions and comments until after his return on 26 January 2012.
Shopper’s Guide
Below is a list of the gear used to create the image in this blog post. Thanks a stack to all who have used the Shopper’s Guide links to purchase their gear as a thank you for all the free information that we bring you on the Blog and in the Bulletins. Before you purchase anything be sure to check out the advice in our Shopper’s Guide.
Canon 800mm f/5.L IS lens. Right now this is my all time favorite super-telephoto lens.
Canon 1.4X III Teleconverter. Designed to work best with the new Series II super-telephoto lenses.
25mm Extension Tube. An extension tube allows you to focus closer than the minimum focusing distance of your lens.
Canon EOS-1D Mark IV professional digital camera body. My two Mark IVs are my workhorse digital camera bodies.
And from the BAA On-line Store:
LensCoats. I have a LensCoat on each of my big lenses to protect them from nicks and thus increase their re-sales value. All my big lens LensCoat stuff is in Hardwood Snow pattern.
LegCoat Tripod Leg Covers. I have four tripods active and each has a Hardwood Snow LegCoat on it to help prevent further damage to my tender shoulders 🙂
Gitzo GT3530LS Tripod. This one will last you a lifetime.
Mongoose M3.6 Tripod Head. Right now this is the best tripod head around for use with lenses that weigh less than 9 pounds. For heavier lenses, check out the Wimberley V2 head.
CR-80 Replacement Foot for Canon 800. When using the 800 on a Mongoose as I do, replacing the lens foot with this accessory lets the lens sit like a dog whether pointed up or down and prevents wind-blown spinning of your lens on breezy days by centering the lens directly over the tripod.
Double Bubble Level. You will find one in my camera’s hot shoe whenever I am not using flash.
The Lens Align Mark II. I use the Lens Align Mark II pretty much religiously to micro-adjust all of my gear an average of once a month and always before a major trip. Enjoy our free comprehensive tutorial here.
Canon EOS-1D Mark IV User’s Guide. Learn to use your Mark IV the way that I use mine. Also available for the 7D and the Mark III here.
January 13th, 2012
My Comments on: For Your Critique/Image #8
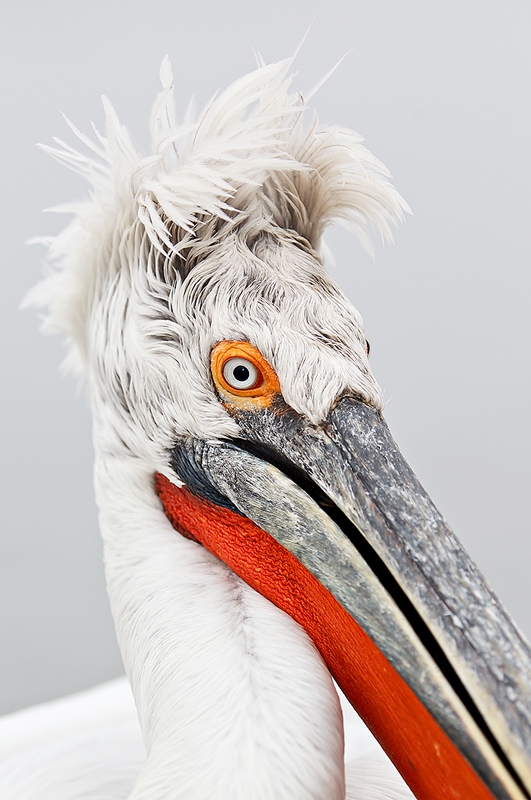
On September 25, 2011 I posted For Your Critique: Image #8. This Dalmatian Pelican image was entered in the Animal Portraits category of the 2011 WPOTY competition. I love the hairdo and the bird’s expression.The image caused more than a few folks to chuckle. Many folks liked the image and many had some suggestions. Many folks liked the tight crop while others–including my first and only photography teacher, Milton Heiberg, did not like it that the end of the bill was missing. I very much like tight crops on the face when you want to show important details, in this case the colorful eye and the snazzy hairdo. Some complained that the lower part of the bill was out-of-focus. It surely is, but I have been focusing on the eye and working at wide apertures for several decades so it is not likely that I will change soon as I have enjoyed a modicum of success employing that style.
Some folks like the white on white look, others suggested darkening the background.
The oft-asked question popped up again: why did you have the 1.4X TC on the 70-200 if you made the image at 145mm? Setting up with the 1.4X left me holding a 98-280mm lens which I thought would be best for the situation as some of the birds were more distant. And I do not worry at all about sharpness with the 1.4TC in place. Many folks commented that the image was very sharp. Steve Stadler wrote my favorite comment: “I Love it!! It really captures the personification of a grumpy old man who just woke up, and it looks like something Pixar would use as a character in one of their movies.”
This image did not make the final round of judging. Thanks to all who took the time to comment.
artie is traveling 🙂
artie is traveling in the Southern Ocean (Falklands, South Georgia, & Antarctica) and will unable to respond to your questions and comments until after his return on 26 January 2012.
Support both the Bulletins and the Blog by making all your B & H purchases here.
Remember: you can earn free contest entries with your B & H purchases. Eleven great categories, 34 winning and honored images, and prize pools valued in excess of $20,000. Click here for details.
Shopper’s Guide
Below is a list of the gear used to create the image in today’s blog post. Thanks a stack to all who have used the Shopper’s Guide links to purchase their gear as a thank you for all the free information that we bring you on the Blog and in the Bulletins. Before you purchase anything be sure to check out the advice in our Shopper’s Guide.
Canon 70-200mm f/2.8L IS II lens. Man, I am loving this lens on my shoulder with the 2X III teleconverter. I also use it a lot with the 1.4X III TC.
Canon 1.4X III Teleconverter. Designed to work best with the new Series II super-telephoto lenses.
Canon EOS-1D Mark IV professional digital camera body. My two Mark IVs are my workhorse digital camera bodies.
And from the BAA On-line Store:
The Lens Align Mark II. I use the Lens Align Mark II pretty much religiously to micro-adjust all of my gear an average of once a month and always before a major trip. Enjoy our free comprehensive tutorial here.
Canon EOS-1D Mark IV User’s Guide. Learn to use your Mark IV the way that I use mine. Also available for the 7D and the Mark III here.
January 11th, 2012
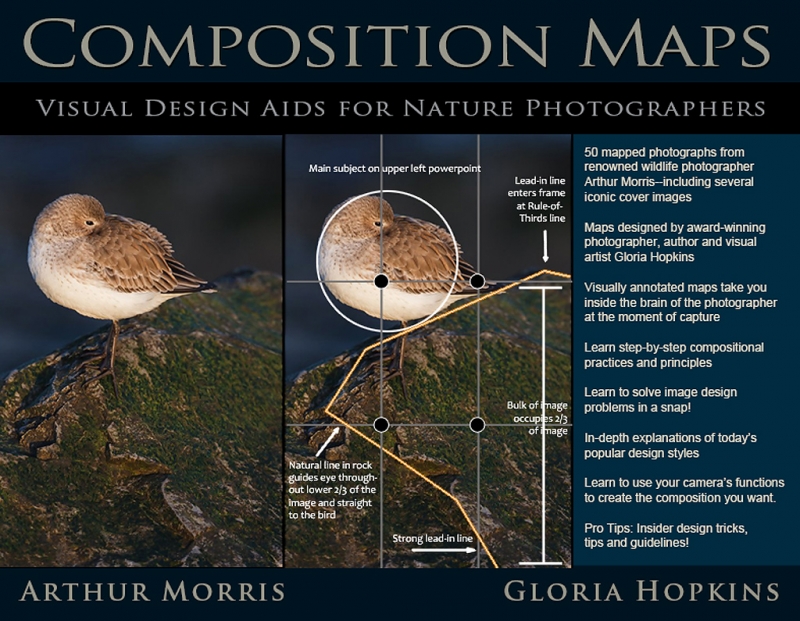
COMPOSITION MAPS: VISUAL DESIGN AIDS FOR NATURE PHOTOGRAPHERS
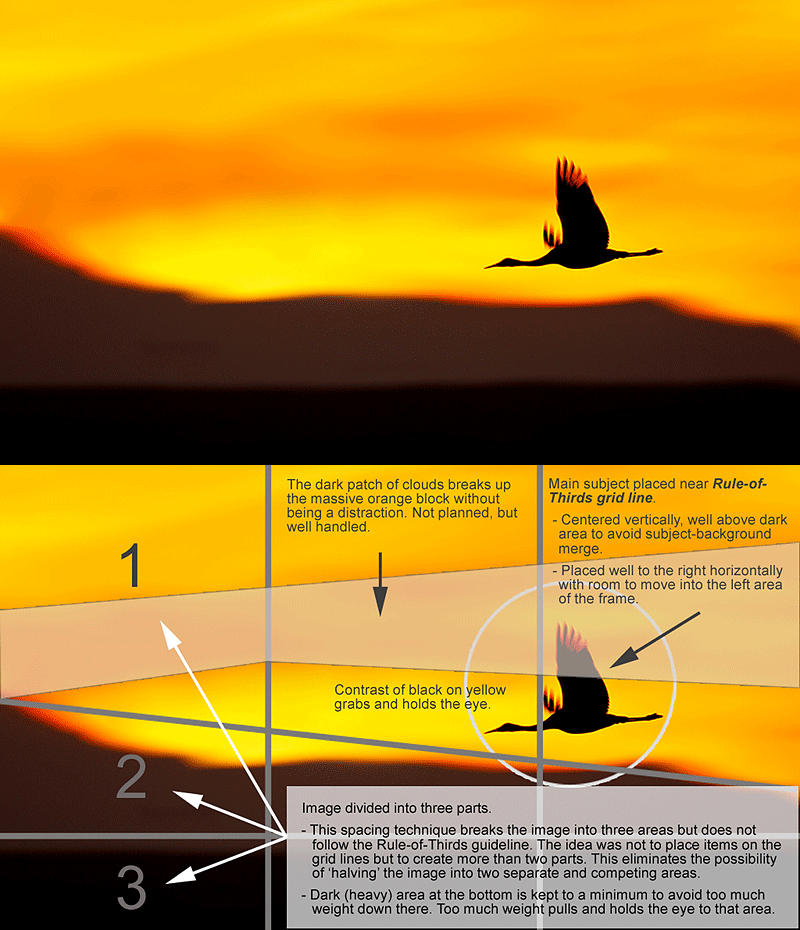
BIRDS AS ART Books is proud to announce the release of “Composition Maps: Visual Design Aids for Nature Photographers” a brand new e-book by Gloria Hopkins (with photographs by Arthur Morris). Several months ago we released Gloria’s first BAA e-book, Natural Design: Image Design for Nature Photographers. The book received positive reviews from many happy customers and everyone (including me) raved about her composition maps. I still have no clue as to how she knows exactly what is going on in my brain when I press the shutter button and optimize my images. But she does and shares that ingeniously in her latest offering, “Composition Maps.”
Click here to order your copy now.
The E-book features more than 80 BIRDS AS ART IMAGES and 61 composition maps–some of the maps deal with two or more images. In the e-book you simply click on the map and hold the cursor down: the image is revealed! Give the animated GIF below a few moments to play and you will get the idea.
The simplest and fastest way to order your copy of “Composition Maps: Visual Design Aids for Nature Photographers” is through the BAA On-line Store by clicking here. Or, you can order your copy by sending a check for $30 made out to “Arthur Morris” to us at BIRDS AS ART, PO Box 7245, Indian Lake Estates, FL 33855. Be sure to include your e-mail address (written legibly). If you prefer PayPal you can send $30 to us via e-mail; be sure to include the title of the book.
Click here to order your copy now.
artie is traveling 🙂
artie is traveling in the Southern Ocean (Falklands, South Georgia, & Antarctica) and will unable to respond to your questions and comments until after his return on 26 January 2012.
Earn Free Contest Entries and Support both the Bulletins and the Blog by making all your B & H purchases here.
More and more folks are earning multiple contest entries with their B & H purchases. See here for details on that. Eleven great categories, 34 winning and honored images, and prize pools valued in excess of $20,000. Click here to visit the competition home page.
Shopper’s Guide
Below is a list of the gear used to create the image in today’s blog post. Thanks a stack to all who have used the Shopper’s Guide links to purchase their gear as a thank you for all the free information that we bring you on the Blog and in the Bulletins. Before you purchase anything be sure to check out the advice in our Shopper’s Guide.
January 8th, 2012
|
|
|
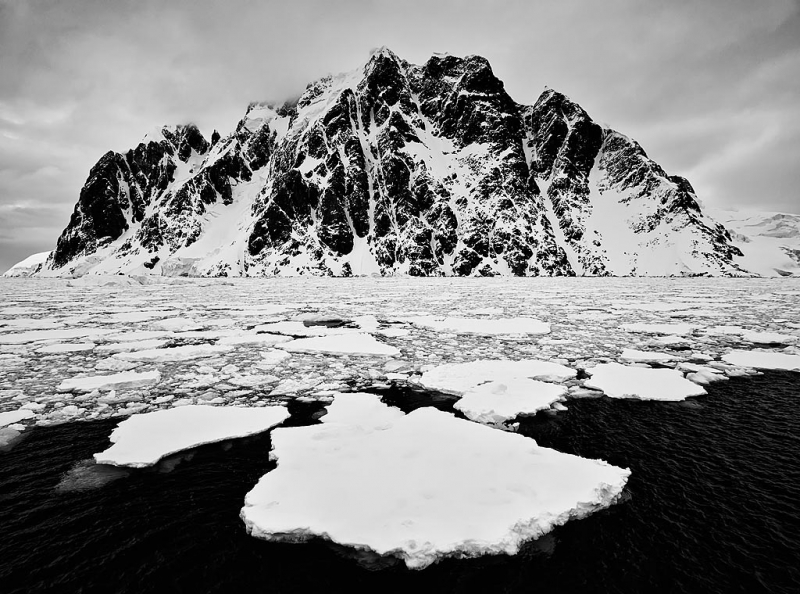
Wandel Peak, Booth Island, Lamaire Channel, Antarctica. Image courtesy of and copyright 2011: Paul Mckenzie
|
Antarctic Inspiration from Paul Mckenzie
On Thursday, December 22–just 6 days before I fly to Buenos Aires, Argentina and continue on to Ushuaia, I received the e-mail below with the following Subject Line:
Falkland Islands, South Georgia and Antarctica trip report.
Hi there, This is a much longer blog report than normal, but you’ll see why. Click here and enjoy! Best regards, Paul Mckenzie
Paul is a helluva nice guy and one of my favorite nature photographers. I have photographed with him twice on Midway and he will be joining Robert O’Toole and me for our (post-)Japan IPT songbird trip. I knew that I would leave out some great folks in the Inspirational Photography Websites post here. When I received Paul’s e-mail I realized that I had left him out of that post so I went back and added this:
Paul Mckenzie (website). Paul (along with wife Paveena) are aspiring professionals who travel extensively. Paul is equally skilled above and below the water. You will marvel at the images in his galleries and on his blog.
|
|
|
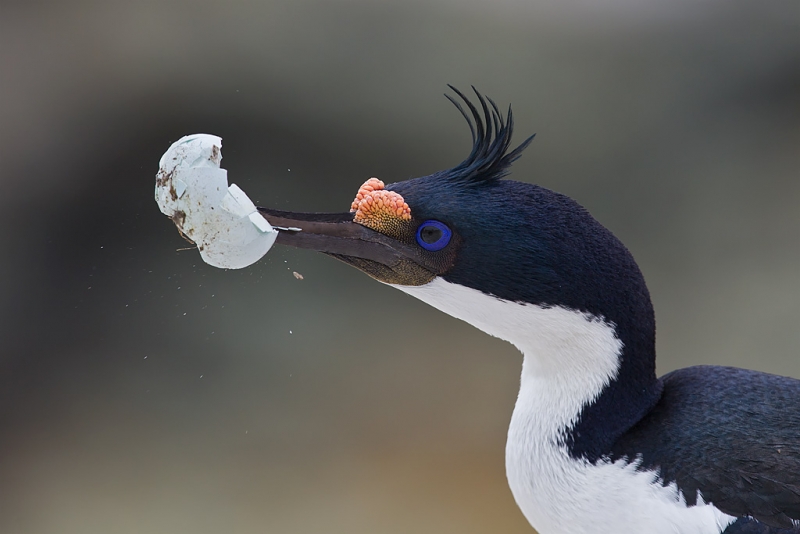
Imperial Shag breaking egg shell, New Island, Falkland Islands. Image courtesy of and copyright 2011: Paul Mckenzie
|
With my big trip coming up I spent a good half hour studying Paul’s images to get some inspiration.
|
|
|
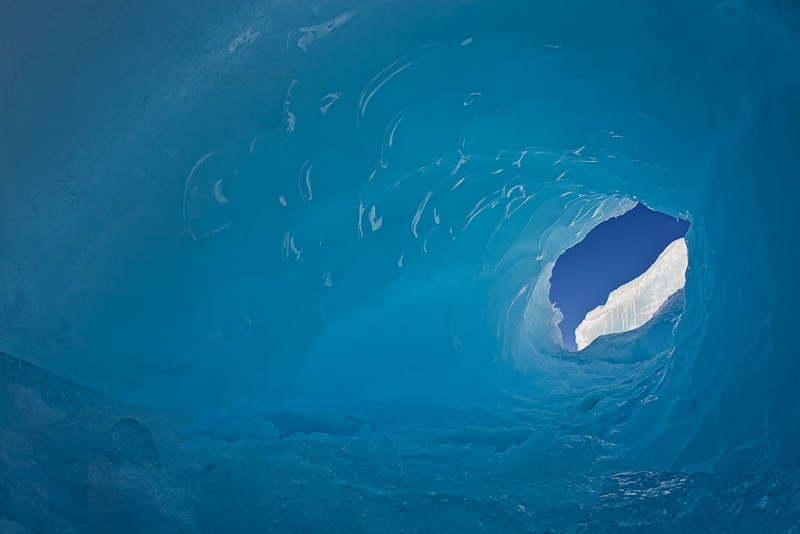
Blue Ice Hole, Antarctic Peninsula. Image courtesy of and copyright 2011: Paul Mckenzie
|
I asked Paul how the heck he made this image. I know that he is a very good underwater photographer but doubted that he had been in the water on his last trip. He wrote back:
The blue hole image was taken shooting blind. The entrance of the hole was small and right at the water’s edge. I lowered the camera (5D MK 2) with a 15mm fish-eye lens attached into the hole; it barely fit in. I could not even use Live View to see what the camera was seeing. I guessed at the composition and tilted the camera slightly upwards, fired off a few shots, checked the histogram, made some adjustments, and took some more. The sun was so bright that I really couldn’t see what I was getting on the back of the camera so was pretty pleased when I saw this on the computer monitor.
When I replied to thank him I asked if knew that the hole was there before he made the first image.
He sent back a one word e-mail:
No!
Note: creativity is–in part–about getting the right lens in place where there has never been a lens before….
|
|
|
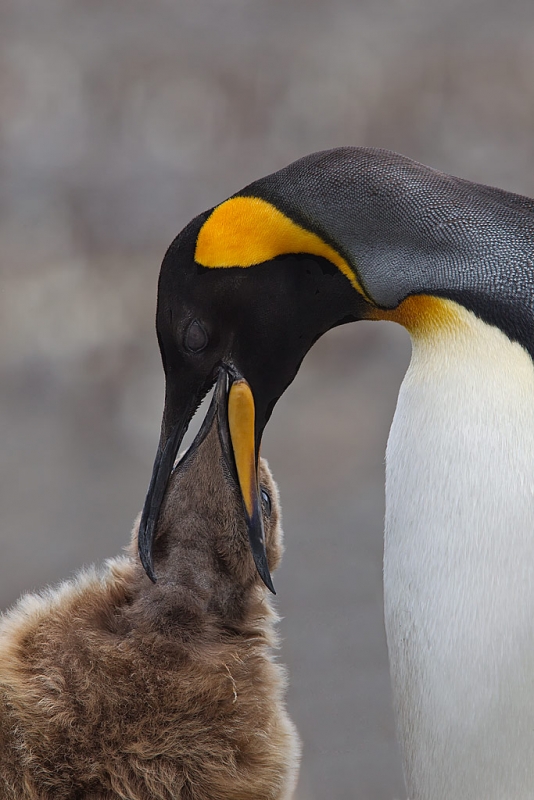
Adult King Penguin feeding chick, St. Andrews Bay, South Georgia. Image courtesy of and copyright 2011: Paul Mckenzie
|
Thanks!
Thanks Paul for permitting me to share your images here and for the inspiration. Reminder: you can see the entire blog post here.
artie is traveling 🙂
artie is traveling in the Southern Ocean (Falklands, South Georgia, & Antarctica) and will unable to respond to your questions and comments until after his return on 26 January 2012.
Earn Free Contest Entries and Support both the Bulletins and the Blog by making all your B & H purchases here.
More and more folks are earning multiple contest entries with their B & H purchases. See here for details on that. Eleven great categories, 34 winning and honored images, and prize pools valued in excess of $20,000. Click here to visit the competition home page.
Shopper’s Guide
Thanks a stack to all who have used the Shopper’s Guide links to purchase their gear as a thank you for all the free information that we bring you on the Blog and in the Bulletins. Before you purchase anything be sure to check out the advice in our Shopper’s Guide.
January 6th, 2012
|
|
|
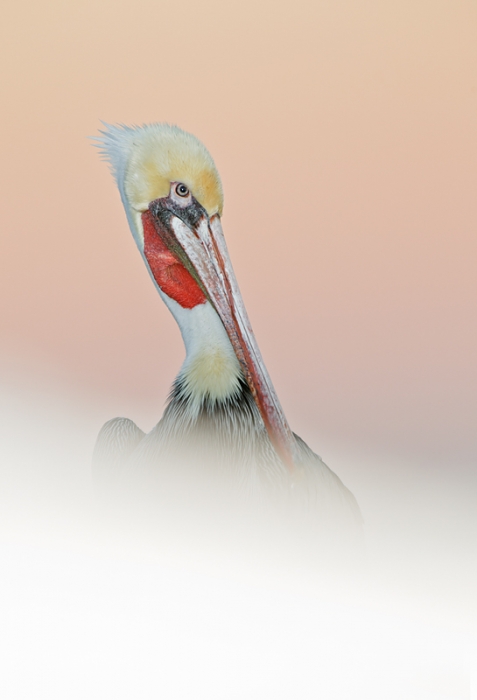
Brown Pelican in Peach Heaven, La Jolla, CA. This image was created was created with the Canon 70-200mm f/2.8L IS II lens, the 2X III teleconverter (hand held at 400mm) with the Canon EOS-1D Mark IV. ISO 500. Evaluative metering +2 1/3 stops: 1/60 sec. at f/6.3 in Tv Mode (to maintain a minimum shutter speed). I used the Canon 580 EX II Speedlight mounted on the camera and set at zero.
Central Sensor/Rear Focus/AI Servo AF and re-compose with my elbows braced on a rock. Click here if you missed the Rear Focus Tutorial.
|
My Comments on: For Your Critique/Image #6
On September 6, 2011 I posted For Your Critique: Image #6. It was entered in the 2011 WPOTY competition in the Animal Portraits category. I really love this image especially because of its fresh, new look. I used lots of flash to light up the rock in the foreground giving the bird the appearance of being somewhere ethereal. It takes some work to create new types of images especially when you return to the same location year after year. The BBC requested the RAW file for this image (and for six others that I submitted) as they were selected for the final round of judging. Alas…
Some folks loved the image. Some suggested that they would have liked seeing the end of the bill. I agree. And I did create a variety of compositions. But as I worked from a higher perspective so as to include the bill I lost some of the “in heaven” look. (See more below.) Others suggested a crop from the bottom. I was totally against that as it destroyed the compositional balance (2/3 top, 1/3 bottom with a nice diagonal thrown in). My favorite comment was from Lorraine who wrote, “I would have mistaken this for a painting in any other venue. It is amazing what a camera in the right hands can do! I love this.”
|
|
|
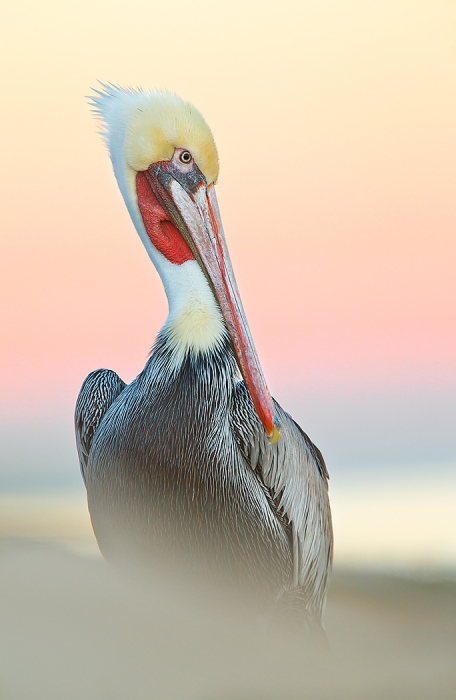
Brown Pelican in Peach Heaven, La Jolla, CA. This image was created was created with the Canon 70-200mm f/2.8L IS II lens, the 2X III teleconverter (hand held at 400mm) with the Canon EOS-1D Mark IV. ISO 500. Evaluative metering +2 1/3 stops: 1/60 sec. at f/6.3 in Tv Mode (to maintain a minimum shutter speed). No flash.
Central Sensor/Rear Focus/AI Servo AF and re-compose with my elbows braced on a rock. Click here if you missed the Rear Focus Tutorial.
Here I turned off the flash. I wish that I had not. 🙂 I did not have any images with the flash turned on that included the whole bill. (Note: the blue in the sky is the pre-dawn shadow of the earth.)
|
Which Image Do You Like Best?
Please take a moment to leave a comment and let us know which of the two images above you liked best, flash (above) or no flash (below). And do let us know why you made your choice.
Earn Free Contest Entries and Support both the Bulletins and the Blog by making all your B & H purchases here.
More and more folks are earning multiple contest entries with their B & H purchases. See here for details on that. Eleven great categories, 34 winning and honored images, and prize pools valued in excess of $20,000. Click here to visit the competition home page.
Shopper’s Guide
Below is a list of the gear used to create the image in today’s blog post. Thanks a stack to all who have used the Shopper’s Guide links to purchase their gear as a thank you for all the free information that we bring you on the Blog and in the Bulletins. Before you purchase anything be sure to check out the advice in our Shopper’s Guide.
Shopper’s Guide
Below is a list of the gear that I used to create the images above. Thanks a stack to all who have used the Shopper’s Guide links to purchase their gear as a thank you for all the free information that we bring you on the Blog and in the Bulletins. Before you purchase anything be sure to check out the advice in our recently revised Shopper’s Guide.
Canon 70-200mm f/2.8L IS II lens. Man, I am loving this lens on my shoulder with the 2X III teleconverter. I also use it a lot with the 1.4X III TC.
2X III teleconverter. This new TC is noticeably sharper than the 2X II TC.
Canon EOS-1D Mark IV professional digital camera body. My workhorse professional digital camera body. I own two.
Canon 580 EX II Speedlight. This is Canon’s most powerful, top of the line flash.
Canon CP-E4 Compact Battery Pack. Powers the flash. Allows more consecutive flashes and faster recharging times.
January 4th, 2012 Visit Arctic Norway with Jasper Doest–Exclusive to BAA Folks
Two Trips: Svalbard 2012/second trip (birds and landscapes) and Svalbard 2013/first trip (prime time for birds). Be sure to see the image collection below.
In June of 2011, I traveled to Svalbard with Patrick Sparkman and his wife Robin during prime time for birds. Jasper Doest was our guide. It was an astounding trip: we had two ponds full of courting Common Eiders, lots of breeding shorebirds including Purple Sandpiper and Red Phalarope (Grey Phalarope on the other side of the pond), Ivory Gull, nesting Pacific Loon, Barnacle Goose, Pink-footed Goose, Parastic Jeager, King Eider–a lucky find, Svalbard Ptarmigan, Svalbard Reindeer, and the impossibly cute little Dovekies among others. The Dovekies are relatively easy but for the climb. Plus gorgeous scenery including ice-scapes and ice macros and killer wildflowers. To see my images that were featured on the blog, click here, here, and here. To see my images featured in the Bulletin click here and here.
The absolute maximum group size is three. It is impossible visit Spitzbergen by yourself. Why? A guide with a rifle to protect against polar bears is a necessity. (We never saw or heard of a bear….) Jasper is already taking three BAA folks this coming June on the best dates for birds–the time frame for the drake Common Eiders is very narrow. The three folks inquired before I had time to make any announcements….. Jasper has agreed to put together a second trip this June, June 2012 as below, and another trip during the prime for birds dates in June 2013.
Svalbard – Arctic bird & landscape photography/Limit: 3. Date:June 21 – June 26, 2012. Price: €3300. Arrive Longyearbyen June 20, 2012, fly home, June 27, 2012. Join wildlife photographer Jasper Doest on an amazing wildlife adventure to Spitzbergen (Svalbard) in the high arctic.
Note: the trip above, the “second 2012 trip,” will most likely not feature large numbers of drake Common Eiders in the kennel ponds. On the other hand the female Common Eiders will be very cooperative and give you plenty of opportunities to make interesting compositions. Also you may get some images of nesting shorebirds and if you are very lucky, of shorebird chicks. Most of the rest of the subjects should be the same as they were for me on my trip: fantastic. Before you sign up for the second 2012 trip, do check out the info below on the first June 2013 trip….
Svalbard – Arctic bird photography/Limit 3/Openings 2. Date: June 15 – June 20, 2013. Price: €3300. Arrive Longyearbyen June 14, 2013, fly home, June 21, 2013. Join wildlife photographer Jasper Doest on an amazing wildlife adventure to Spitzbergen (Svalbard) in the high arctic.
To save yourself a spot on either trip please contact Jasper directly via e-mail and copy me as well here.
Svalbard is an archipelago in the Arctic, constituting the northernmost part of Norway. Located north of mainland Europe, it is about midway between mainland Norway and the North Pole. The group of islands range from 74° to 81° north latitude (and thus inside the Arctic Circle), and actually about twice as close to the North Pole as Barrow, AK.
Spitzbergen is the largest island with the administrative center being Longyearbyen. The archipelago is administered by the Governor of Svalbard. The archipelago features an Arctic climate, although with significantly higher temperatures than other areas at the same latitude. The flora takes advantage of the long period of midnight sun to compensate for the polar night. Svalbard is a breeding ground for many seabirds, and also features polar bears, reindeer and marine mammals. Seven national parks and twenty-three nature reserves cover two-thirds of the archipelago, protecting the largely untouched, yet fragile, nature. Sixty percent of the archipelago is glacier, and the islands feature many mountains and fjords.
During this time the archipelago turns into a bird paradise with approximately 30 species of birds breeding throughout the summer, including King Eider, Ivory Gull, Long-tailed duck, Parasitic Jaegers, Dovekies and the only endemic species, the Svalbard Ptarmigan. Svalbard is home to millions of Dovekies and we will be able to witness and photograph large flocks nesting and flying to and from their feeding grounds at sea as well as individual birds. As the arctic summer is really short, some birds will be on their nests. Parasitic Jaegers are to be found at several places on the tundra and they will allow us to photograph at VERY close distance. The Arctic Terns will be a little more challenging, as they tend to attack everything that moves. However, as soon as they find out that you have no bad intentions they will continue their normal behavior, allowing us to photograph them up close and personal. Every year Red-Throated Loons, Long-tailed Ducks and King Eiders are to be found in the area. And usually we will have some good opportunities with some of these amazing birds. The opportunities with most other birds, especially Common Eider –will be plentiful. And the aim of these trips is to make most of the opportunities offered with some of the arctic specialties and to nail those special images out of what might seem common. Besides birds, the tour will cover all aspects of nature photography including dramatic landscapes, the abundant arctic flora (which you will see develop throughout the week) and wildlife photography (including encounters with the native Svalbard Reindeer).
Although the Red-Throated Loons, Long-tailed Duck and both eiders will likely have moved farther out on the tundra or to the open sea during the second trip, the opportunities with most other birds will be plentiful. And we may find some shorebird nests with or without tiny chicks. Besides birds, both tours will cover all aspects of nature photography including dramatic landscapes, the abundant arctic flora (which will be at its best during the second trip) and wildlife photography (including encounters with the native Svalbard Reindeer). The cost of the trip includes a boat trip to an island where Barnacle Geese are common nesters.
As all of the birds and mammals rarely see humans, most of them will only give you a glance and then continue with their daily routines, allowing you to make most of the photo opportunities. Although overcast situations are most common, when the midnight sun comes through it will provide plenty of sweet warm light. Unlike many other tours to this destination, the main focus will not be the Polar bear. We will not tour around Svalbard on a sea-going vessel; we will focus on a rather small but diverse area on the main island of Spitzbergen. Over the years Jasper has spend over 6 months in this area and is very familiar with the animal species and photographic opportunities.
Accommodations
With modern comfort in historic surroundings Spitsbergen Hotel offers a unique Svalbard experience. Situated on the “Hill” it has great views of Longyearbyen, the Lars glacier and the Longyear glacier. The hotel was originally built as accommodation/dining area for employees at Store Norske Spitsbergen Kulkompani. It was also the company’s official representational building, and its interior and architecture made it Longyearbyen’s grandest construction. Great effort has been placed in preserving its special history and it is well worth a cultural stroll along the hotel corridors and public areas where you’ll find historic photographs, old maps and newspaper clippings.
Your Favorite?
The images below were created by two photographers: Jasper Doest and yours truly. Take a moment and let us know which two images below are your favorites and let us know why.
artie is traveling 🙂
artie is traveling in the Southern Ocean (Falklands, South Georgia, & Antarctica) and will be unable to respond to your questions and comments until after his return on 26 January 2012.
| [Not a valid template] |
|
Common Eider, drake head portrait. Image copyright 2011: Arthur Morris/BIRDS AS ART.
|
| [Not a valid template] |
|
Dovekie Flock Silhouette, Spitzbergen, Norway. Image courtesy of and copyright 2011: Jasper Doest.
|
| [Not a valid template] |
|
Red-throated Loon on nest, Spitzbergen, Norway. Image courtesy of and copyright 2011: Jasper Doest.
|
| [Not a valid template] |
|
Barnacle Goose on nest, Diabas, Norway. Image copyright 2011: Arthur Morris/BIRDS AS ART.
Both trips include a boat trip to an island with tame nesting Barnacle Geese.
|
| [Not a valid template] |
|
Common Eider hen on nest, Spitzbergen, Norway. Image courtesy of and copyright 2011: Jasper Doest.
|
| [Not a valid template] |
|
Dovekie with wings raised. Image copyright 2011: Arthur Morris/BIRDS AS ART.
|
| [Not a valid template] |
|
Parasitic Jaeger attacking Arctic Fox, Spitzbergen, Norway. Image courtesy of and copyright 2011: Jasper Doest.
Jasper did much better with the foxes in 2011 on the second trip than we did on the first.
|
| [Not a valid template] |
|
Dovekie in flight, Spitzbergen, Norway. Image courtesy of and copyright 2011: Jasper Doest.
Spitzbergen is the best place in the world to photograph the world’s smallest auk. It was my primary reason for making the trip.
|
| [Not a valid template] |
|
Geese on the ridge, Spitzbergen, Norway. Image courtesy of and copyright 2011: Jasper Doest.
|
| [Not a valid template] |
|
Dunlin, male singing on territory, Spitzbergen, Norway. Image courtesy of and copyright 2011: Jasper Doest.
|
| [Not a valid template] |
|
Shorebird chick, Spitzbergen, Norway. Image courtesy of and copyright 2011: Jasper Doest.
The second trip will offer the best chance for photographing shorebird chicks.
|
| [Not a valid template] |
|
Glacier, Spitzbergen, Norway. Image courtesy of and copyright 2011: Jasper Doest.
|
| [Not a valid template] |
|
Svalbard Reindeer, Spitzbergen, Norway. Image courtesy of and copyright 2011: Jasper Doest.
|
| [Not a valid template] |
|
Arctic Tern screaming, Spitzbergen, Norway. Image courtesy of and copyright 2011: Jasper Doest.
|
| [Not a valid template] |
|
Hillsides, Spitzbergen, Norway. Image courtesy of and copyright 2011: Jasper Doest.
|
| [Not a valid template] |
|
Barnacle Goose in flight, Diabas, Norway. Image copyright 2011: Arthur Morris/BIRDS AS ART.
Both trips include a boat trip to an island with tame nesting Barnacle Geese. Photographing this species was one of the highlights of the trip for me.
|
| [Not a valid template] |
|
King Eider, drake, Spitzbergen, Norway. Image courtesy of and copyright 2011: Jasper Doest.
|
| [Not a valid template] |
|
Ivory Gull, head portrait. Image copyright 2011: Arthur Morris/BIRDS AS ART.
|
| [Not a valid template] |
|
Common Eider, drake. Image copyright 2011: Arthur Morris/BIRDS AS ART.
|
| [Not a valid template] |
|
Parasitic Jaeger, copulating pair, Spitzbergen, Norway. Image courtesy of and copyright 2011: Jasper Doest.
|
| [Not a valid template] |
|
Arctic Tern calling, Spitzbergen, Norway. Image courtesy of and copyright 2011: Jasper Doest.
|
| [Not a valid template] |
|
Dovekie, flight silhouette, Spitzbergen, Norway. Image courtesy of and copyright 2011: Jasper Doest.
|
| [Not a valid template] |
|
Arctic wildflowers, Spitzbergen, Norway. Image copyright 2011: Arthur Morris.
|
| [Not a valid template] |
|
Derelict coal mine HDR, Spitzbergen, Norway. Image copyright 2011: Arthur Morris.
|
January 2nd, 2012
|
|
|
This image was created in Starr County, TX with the the tripod-mounted Canon 800mm f/5.6L IS lens, the 1.4X III TC, and the EOS-1D Mark IV. ISO 400. Evaluative metering +2/3 stop: 160 sec. at f/11 in Av Mode.
Lens/TC/Camera Body Micro-Adjustment: +10. For a greater appreciation of the image, click on the photo. Then click on the enlarged version to close it.
|
My Comments on: For Your Critique: Image #5
On August 8, 2011 I posted For Your Critique: Image #5. This image was entered in the WPOTY category: In Praise of Plants. Though this is not my all time favorite image, I do like it a lot. And I needed to fill a few more categories. (You can enter no more than 3 images in any one category for your single entry fee.) Many folks commented that the image was simply not sharp and even more folks commented on the need for more depth of field. All of those comments left me baffled as the image looks very sharp to me and at f/11–with a large flower pretty darned far from me, the d-o-f seems more than sufficient. Some folks loved the color, others saw it as too bland. I processed it so that the colors looked as they did that morning. I like the colors. Some criticized the image design while others praised it. I love the composition. It is my firm belief that in critiquing situations that there is what I call “the bandwagon effect.” When an early poster makes a comment many of those who follow tend to agree….
Martine Guay posted my favorite comment: Van Gogh. 🙂 Thanks to all who commented.
artie is out 🙂
artie is traveling in the Southern Ocean (Falklands, South Georgia, & Antarctica) and will unable to respond to your questions and comments until after his return on 26 January 2012.
Earn Free Contest Entries and Support both the Bulletins and the Blog by making all your B & H purchases here.
More and more folks are earning multiple contest entries with their B & H purchases. See here for details on that. Eleven great categories, 34 winning and honored images, and prize pools valued in excess of $20,000. Click here to visit the competition home page.
Shopper’s Guide
Below is a list of the gear used to create the image above. Thanks a stack to all who have used the Shopper’s Guide links to purchase their gear as a thank you for all the free information that we bring you on the Blog and in the Bulletins. Before you purchase anything be sure to check out the advice in our Shopper’s Guide.
Canon 800mm f/5.L IS lens. Right now this is my all time favorite super-telephoto lens.
Canon 1.4X III TC. This new TC is designed to work best with the new Series II super-telephoto lenses.
Canon EOS-1D Mark IV professional digital camera body. My two Mark IVs are my workhorse digital camera bodies.
And from the BAA On-line Store:
LensCoats. I have a LensCoat on each of my big lenses to protect them from nicks and thus increase their re-sales value. All my big lens LensCoat stuff is in Hardwood Snow pattern.
LegCoat Tripod Leg Covers. I have four tripods active and each has a Hardwood Snow LegCoat on it to help prevent further damage to my tender shoulders 🙂
Gitzo GT3530LS Tripod. This one will last you a lifetime.
Mongoose M3.6 Tripod Head. Right now this is the best tripod head around for use with lenses that weigh less than 9 pounds. For heavier lenses, check out the Wimberley V2 head.
CR-80 Replacement Foot for Canon 800. When using the 800 on a Mongoose as I do, replacing the lens foot with this accessory lets the lens sit like a dog whether pointed up or down and prevents wind-blown spinning of your lens on breezy days by centering the lens directly over the tripod.
Double Bubble Level. You will find one in my camera’s hot shoe whenever I am not using flash.
Be sure to check out our camera body User’s Guides here.
The Lens Align Mark II. I use the Lens Align Mark II pretty much religiously to micro-adjust all of my gear an average of once a month and always before a major trip. Enjoy our free comprehensive tutorial here.
December 31st, 2011
See Ya Later!
It is the last day of 2011. I am sitting on a tour bus with my photo gear and 1/3 of the group that will be boarding the Ortelius this afternoon for 26 days of touring the Southern Ocean. We will spend several days in the Falklands, six or seven days at South Georgia, and then head to the South Orkneys and the Antarctic Peninsula before heading north through the famed and feared Drake Passage. We will wind up back in Ushuaia, Argentina on the early morning of January 25th to catch our flights home later in the day. I am looking forward to a great adventure and to sharing my favorite images with you when I get home.
My plan is to post this from the hotel lobby after our whirlwind tour of Tierra del Fuego National Park. Old friends Rod and Marlene Planck are leading the trip today. Attending a seminar that Rod did in Philadelphia in 1990 or 1991 was a life-changing event for me as it served as motivation for me to leave teaching and pursue my current career. Seeing his great images in Birder’s World magazine had inspired me year’s before that.
My trip from Orlando to Ushuaia was a long one. I left my home at 12:30 on January 28th, flew to Miami at 3:35 pm, and continued on to Buenos Aires, Argentina arriving at about 7:30am the next day at the international airport, EZE. An hour cab ride brought me to AEP, the domestic airport for my 3:40pm flight to Ushuaia. I was in my room at the Albatros Hotel by 9pm. Fighting a cold, I rested for most of the day on the thirtieth. At about 4pm, finally succumbing to feeling a bit better, I grabbed my 300mm f/2.8L IS lens, both teleconverters, and my Gitzo my 3530 LS tripod with the Mongoose M3.6 on it and headed down to the causeway road alongside the harbor to try for some gulls. As luck would have it, someone had dumped a huge load of bread on the rocks that attracted a big assemblage of gulls including both Dolphin and Kelp Gulls of varying ages.
Surprisingly, the birds were somewhat skittish so I sat near the pile of bread and waited with some success for them to come to me. It was a good chance to work with the long lens that I will be using as big glass for the trip. I am used to working with extremely long effective focal lengths in the 1040 to 1456mm. With the 300 f/2.8L IS II and the 2X III TC my maximum effective focal length will be 780mm. Considering that the size of the bird in the frame is a function of the square of the focal length (rather than the focal length itself), I am sure at times that I will be wishing that I had my 800. But I am equally sure that I will make a few very good images. And by working wider rather than tighter I will have a better chance of creating images that depict interesting behavior.
Shopper’s Guide
Below is a list of the gear used to create the image above. Thanks a stack to all who have used the Shopper’s Guide links to purchase their gear as a thank you for all the free information that we bring you on the Blog and in the Bulletins. Before you purchase anything be sure to check out the advice in our Shopper’s Guide.
Canon 300mm f/2.8L IS II lens. The new version of the 300 f/2.8L IS lens is only a bit lighter than its predecessor but it is insanely sharp and features four-stop Image Stabilization. I will be using it with both Series III teleconvters.
2X III teleconverter. This new version of the 2X TC is noticeably sharper than the previous model, the EF 2X II.
Canon EOS-1D Mark IV professional digital camera body. My two Mark IVs are my workhorse digital camera bodies.
And from the BAA On-line Store:
LensCoats. I have a LensCoat on each of my big lenses to protect them from nicks and thus increase their re-sales value. All my big lens LensCoat stuff is in Hardwood Snow pattern.
LegCoat Tripod Leg Covers. I have four tripods active and each has a Hardwood Snow LegCoat on it to help prevent further damage to my tender shoulders 🙂
Gitzo GT3530LS Tripod. This one will last you a lifetime.
Mongoose M3.6 Tripod Head. Right now this is the best tripod head around for use with lenses that weigh less than 9 pounds. For heavier lenses, check out the Wimberley V2 head.
CR-80 Replacement Foot for Canon 800. When using the 800 on a Mongoose as I do, replacing the lens foot with this accessory lets the lens sit like a dog whether pointed up or down and prevents wind-blown spinning of your lens on breezy days by centering the lens directly over the tripod.
Double Bubble Level. You will find one in my camera’s hot shoe whenever I am not using flash.
Be sure to check out our camera body User’s Guides here.
The Lens Align Mark II. I use the Lens Align Mark II pretty much religiously to micro-adjust all of my gear an average of once a month and always before a major trip. Enjoy our free comprehensive tutorial here.
Canon EOS-1D Mark IV User’s Guide. Learn to use your Mark IV the way that I use mine. Also available for the 7D and the Mark III here.
December 30th, 2011
|
|
|
Predawn ducks in the mist, Bosque del Apache NWR, San Antonio, NM. NOV 30, 2011. With the the tripod-mounted Canon 800mm f/5.6L IS lens and the EOS-1D Mark IV. ISO 4000. Evaluative metering +1 1/3 stops: 1/6 sec. at f/5.6 in Tv mode.
Central Sensor Rear Focus/AI Servo AF and recompose. Click here if you missed the Rear Focus Tutorial. Lens/TC/camera body Micro-adjustment: +2. For a greater appreciation of the image, click on the photo. Then click on the enlarged version to close it.
|
ISO 4000 at 1/6th of a Second…
Folks often ask, “What is the highest ISO that you will use?” I always answer: “I have no set limit: I will use what I need to get the image. The image above was created at 6:20 am about 45 minutes before the sun would peek over the distant mountains to the east. I figured that at 1/6 sec. I had a chance of getting the ducks sharp enough so that the image would work. And at ISO 4000 the image would show a bit of a grainy look that would add some character the way that film grain did.
Does this image work for you? What do you like about it? Why don’t you like? What is the highest ISO that you normally use? Do you go higher on occasion? If yes, then why?
When I am presented with some fire in the mist, even just a bit as here, I will always go for the gusto whatever it takes…
artie is gone 🙂
artie is traveling in the Southern Ocean (Falklands, South Georgia, & Antarctica) and will unable to respond to your questions and comments until after his return on 26 January 2012.
|
|
|
The Canon 70-200mm f/2.8L IS II is my very favorite intermediate telephoto zoom lens. I use it often with both the 1.4 and 2X III teleconverters. It will be on my shoulder via the Black Rapid RS-7 Strap for pretty much all of my Southern Oceans trip.
|
B&H Killer Special
You can save $400 on one of my two favorite lenses from now through January 7, 2012 by clicking here. You can learn lots more about this great lens in dozens of blog posts especially here.. And you can save $400.00 off the regular price of $2374.00. It can be yours for only $1974.00 from now until 12/31/2011. (I learned today, 12/30/2011, that this deal will be good only through tomorrow and not through 7 January as I was originally told by my B&H contact. I apologize for any inconvenience.
Shopper’s Guide
Below is a list of the gear used to create the image above. Thanks a stack to all who have used the Shopper’s Guide links to purchase their gear as a thank you for all the free information that we bring you on the Blog and in the Bulletins. Before you purchase anything be sure to check out the advice in our Shopper’s Guide.
Canon 800mm f/5.L IS lens. Right now this is my all time favorite super-telephoto lens.
Canon EOS-1D Mark IV professional digital camera body. My two Mark IVs are my workhorse digital camera bodies.
And from the BAA On-line Store:
LensCoats. I have a LensCoat on each of my big lenses to protect them from nicks and thus increase their re-sales value. All my big lens LensCoat stuff is in Hardwood Snow pattern.
LegCoat Tripod Leg Covers. I have four tripods active and each has a Hardwood Snow LegCoat on it to help prevent further damage to my tender shoulders 🙂
Gitzo GT3530LS Tripod. This one will last you a lifetime.
Mongoose M3.6 Tripod Head. Right now this is the best tripod head around for use with lenses that weigh less than 9 pounds. For heavier lenses, check out the Wimberley V2 head.
CR-80 Replacement Foot for Canon 800. When using the 800 on a Mongoose as I do, replacing the lens foot with this accessory lets the lens sit like a dog whether pointed up or down and prevents wind-blown spinning of your lens on breezy days by centering the lens directly over the tripod.
Double Bubble Level. You will find one in my camera’s hot shoe whenever I am not using flash.
Be sure to check out our camera body User’s Guides here.
The Lens Align Mark II. I use the Lens Align Mark II pretty much religiously to micro-adjust all of my gear an average of once a month and always before a major trip. Enjoy our free comprehensive tutorial here.
Canon EOS-1D Mark IV User’s Guide. Learn to use your Mark IV the way that I use mine. Also available for the 7D and the Mark III here.
December 28th, 2011
|
|
|
This image was created with the with the tripod-mounted Canon 500mm f/4L IS lens and the EOS_1D Mark III (since replaced by the EOS-1D Mark IV). ISO 800. Evaluative metering at zero: 1/320 sec. at f/4 in Manual mode.
In the old days before I went to rear focus full time I probably used central sensor/One-Shot AF to focus on the fish’s eye but it is possible that I was in AI Servo and focused on the fish just beyond the claws and the eye of the fish…. Click here if you missed the Rear Focus Tutorial. Lens/TC/camera body Micro-adjustment: +4. For a greater appreciation of the image, click on the photo. Then click on the enlarged version to close it.
|
My Comments on “For Your Critique: Image #4”
On August 1, 2011 I posted For Your Critique: Image #4. It was entered in the WPOTY category: Behavior: Mammals. When this bear caught a salmon and walked right towards me I was a bit frazzled as it stopped to dine only 20 feet away. At first I was confused as to what type of image to create. I did not have an intermediate zoom lens on my shoulder. I knew that I needed to remove the 1.4X TC. That done I looked through the viewfinder, saw the eye of the fish between those big claws, and visualized the image that I wanted to create. I have always loved this image and thought that it might do well in a contest or two. It has not.
Several folks inferred that the subject matter was inappropriate mentioning the “poor salmon getting its guts ripped out.” Gore sells. Gore wins contests. Bears gotta eat…. As for me, I am always rooting for the predator. One poster mentioned that images like this had (pun intended) been done to death. Though I have seen lots of close-ups of bears eating fresh-caught salmon I have never seen one even remotely similar to this. Mary Stamper as she almost always does, saw things exactly as I did when she wrote: “I like the image as it is. To me, it is mostly about the eye between the claws. I like the way my eye first grabs the red flesh and then slides down the fish body to meet up with the eye between the claw. Then you realize that it’s a bear. That’s just about a perfect visual manipulation to me. A very engaging and arresting, not to mention startling, image.”
Earn Free Contest Entries and Support both the Bulletins and the Blog by making all your B & H purchases here.
More and more folks are earning multiple contest entries with their B & H purchases. See here for details on that. Eleven great categories, 34 winning and honored images, and prize pools valued in excess of $20,000. Click here to visit the competition home page.
Shopper’s Guide
Below is a list of the gear used to create the image in this blog post. Thanks a stack to all who have used the Shopper’s Guide links to purchase their gear as a thank you for all the free information that we bring you on the Blog and in the Bulletins. Before you purchase anything be sure to check out the advice in our Shopper’s Guide.
Support both the Bulletins and the Blog by making all your B & H purchases here.
Canon 500mm f/4L IS lens. 500mm is the most popular telephoto focal length with a wonderful blend of reach, ease of handling, and relatively light weight. I owned two of these at one time and loved them to death. This focal length will soon be replaced with a Series II model that will be smaller and lighter and feature 4-stop IS. I can’t wait 🙂 To learn more about the news lenses start here.
Canon EOS-1D Mark IV professional digital camera body. My two Mark IVs are my workhorse digital camera bodies.
And from the BAA On-line Store:
LensCoats. I have a LensCoat on each of my big lenses to protect them from nicks and thus increase their re-sales value. All my big lens LensCoat stuff is in Hardwood Snow pattern.
LegCoat Tripod Leg Covers. I have four tripods active and each has a Hardwood Snow LegCoat on it to help prevent further damage to my tender shoulders 🙂
Gitzo GT3530LS Tripod. This one will last you a lifetime.
Mongoose M3.6 Tripod Head. Right now this is the best tripod head around for use with lenses that weigh less than 9 pounds. For heavier lenses, check out the Wimberley V2 head.
CR-80 Replacement Foot for Canon 800. When using the 800 on a Mongoose as I do, replacing the lens foot with this accessory lets the lens sit like a dog whether pointed up or down and prevents wind-blown spinning of your lens on breezy days by centering the lens directly over the tripod.
Double Bubble Level. You will find one in my camera’s hot shoe whenever I am not using flash.
Be sure to check out our camera body User’s Guides here.
The Lens Align Mark II. I use the Lens Align Mark II pretty much religiously to micro-adjust all of my gear an average of once a month and always before a major trip. Enjoy our free comprehensive tutorial here.
December 27th, 2011
| [Not a valid template] |
|
This is the new Canon 300mm f/2.8L IS II Super-telephoto lens that I will be taking on my Falklands, South Georgia, Antarctica cruise.
|
The Best Laid Plans…
Last week I had BAA Account/Executive Director/daughter (not necessarily in that order) Jennifer send a check to Canon for my new 400mm f/2.8L IS lens. They were told that there was one on the way with my name on it. Several days later when the lens had not arrived I e-mailed and learned that the expected shipment had not materialized. So it was back to square one. Though time was very short I considered borrowing a 500mm f/4L IS lens–the old version–from Canon Professional Services but I went back to my list and decided to try to get the new 300mm f/2.8L IS lens…. It would prove to be very versatile and I am anxious to see how the Series II super-telephoto lenses work with the Series III teleconverters….
B&H did not have one in stock. That ruled out buying it from them. Since Canon Professional Services (CPS) did not have any 400 f/2.8L IS II lenses to loan I assumed that they did not have a 300 f/2.8L IS II either. So, when I was still at my Mom’s on Long Island, I went online to try to buy one. I found one in stock on Amazon (through a somewhat fishy third party), put it in my basket, entered my credit card info, and selected “expedited shipping.” Unexpectedly it said, “Delivery expected December 23-28, 2011…. So I cancelled my order.
The next morning on the way home from Orlando International Airport my cell phone rang. It was Paul from CPS asking if someone would be home the next day to receive the gear that I had loaned for my Antarctica trip, a Canon EOS_-D Mark II and a 16-35mm IS L II zoom lens. I said “Yes,” and continued with my tale of long lens woe. “Hold on,” he said, “I’ll be right back.” In a moment he returned saying, “I have a 300mm f/2.8L IS II lens here and will include it right now with the shipment that you will get tomorrow.”
That was a very nice holiday present. I spent this morning micro-adjusting the lens with both of my bodies with both the 1.4X III and the 2X III TCs. The results were amazingly consistent with my micro-adjustments ranging only from -3 to +2. (I have come up with a fast, new, easy way to micro-adjust without having to tether your camera to a laptop. I will be sharing the “Non-Tethered Micro-Adjusting Tutorial” with you at some point.) See here for Lens Align Mark II info and the original Micro-Adjusting Tutorial.
After I finished micro-adjusting I took a few hand held images with the new 300 f/2.8 II and the 2X III TC: tree trunks, some leaves, and a few tight details of of my home. Wow. Though I was working at relatively slow shutter speeds, averaging about 1/320 sec., the images were screamingly sharp. I can wait to get down there. Though offering a bit less magnification at the long end most of the birds and wildlife we will be working with are exceeding tame so I should be fine for the most part. I will get to try out both Series III TCs with a Series II super-telephoto lens, and I will be saving 3.3 pounds to boot. Not to mention saving more than $12,000! I leave for the airport tomorrow–12/28/2011–after lunch. Till then….
Earn Free Contest Entries and Support both the Bulletins and the Blog by making all your B & H purchases here.
More and more folks are earning multiple contest entries with their B & H purchases. See here for details on that. Eleven great categories, 34 winning and honored images, and prize pools valued in excess of $20,000. Click here to visit the competition home page.
Shopper’s Guide
Thanks a stack to all who have used the Shopper’s Guide links to purchase their gear as a thank you for all the free information that we bring you on the Blog and in the Bulletins. Before you purchase anything be sure to check out the advice in our Shopper’s Guide.
Canon 300mm f/2.8L IS II. The new 300 f/2.8 is only a bit lighter than the previous version but it features 4-stop IS and promises to work superbly well with both Series III TCs. And as I learned this morning it is–as expected–super-sharp. B&H should be getting a few in stock fairly soon; place your order now and your card will not be charged until the item is shipped. You will be seeing lots of images made with this lens when I get back (unless I drop it in the ocean….)
Canon 2X III teleconverter. Noticeably sharper than the 2X II TC this new extender is designed to work best with the new Series II super-telephoto lenses.
Canon 1.4X III Teleconverter. Designed to work best with the new Series II super-telephoto lenses.
|
|

