What’s Up?
The cold front has come and gone. The pool is down more than eight degrees. I have been working hard for several days preparing this blog post, more than a dozen hours in all.
Understand that I have no horse in this race, no ties to SONY or to Canon. Technically, I am Platinum Canon CPS and a Canon Explorer of Light Emeritus (both for life), but at this point neither of those benefit me in any way. As always, I have striven to be completely honest in my evaluation of the R5/RF 100-100 and in comparing it with the SONY 200-600/a9 ii rig. The first two images presented here today — Friday 3 December 2020 were created during my first session with the Canon gear; the Anhinga image was created two days later during my second outing with the Canon gear. All three of the images were converted in the latest version of Capture One Pro 20 which did a fine job. I had close to zero good flight chances in either session so this blog post will not go there.
Speaking of flight, I have run into many folks who use a system that involves using one or two or even three back buttons to activate different AF Methods when photographing flying birds because Face detection + Tracking/AI Servo AF sometimes has a hard time acquiring focus. They acquire focus with one AF method and then switch mid-stream to another method using one or more of the back buttons to focus on the bird (thankfully not at the same time of course) and then press the shutter button to create a series of images. Can you say cockamamie? Remember that I gave up back button focus many years ago after finally realizing that it is always easier to do one thing than it is to do two (or more!) See the excellent exchange of comments in the previous blog post here. That said I have picked up some great tips from the Comments that I will be trying out asap.
Two topics that will be addressed in the future are a comparison of the stabilization systems and the phenomenon known as rolling shutter (that may or may not affect images made when using Electronic Shutter).
I can keep the Canon loaner gear until the end of December though I am hoping to extend the loan till after I get back from San Diego in late January.
Understand that I have used my R5 only with the RF 100-500 lens and almost always with the RF 1.4X teleconverter.
I can say one thing for sure as a result of my playing with the R5 for two whole sessions: if you are married to Canon with a nice collection of EF lenses, you will surely want to purchase either an R5 or its less expensive little cousin, the 20 MP R6. Several folks I know who own Canon EOS-1DX III bodies have retired them and are using an R5 all the time. Weight alone is a fine reason for doing so. As far as I can tell, R5 performance on EF lenses via one of the three adapters is superb on all counts.
I am sure that I will have lots more to say about both systems in the coming month (at least) and equally sure that I will be using both systems. When I need f/4 I will be counting on my SONY 600 GM. And I am sure that I left out something important in this post. As always, feel free to ask questions or leave a comment or opinion below. Most R5 users will surely learn something by revisiting the last blog post here and reading the comments. (I suggest that several times in this blog post for good reasons.
At present, I would say that my chances of ever switching full time back to Canon are less than 1%. But there is a good chance that I will purchase an R5/RF 100-500/1.4X TC rig just for the fun of it (and so I can do a comprehensive User’s Guide) for all of my Canon friends. A single thought keeps visiting the back of my mind; how much fun would it be to head to San Diego or to the Southern Ocean or to any location with lots of tame birds with only a lightweight, do-almost-everything Canon kit?
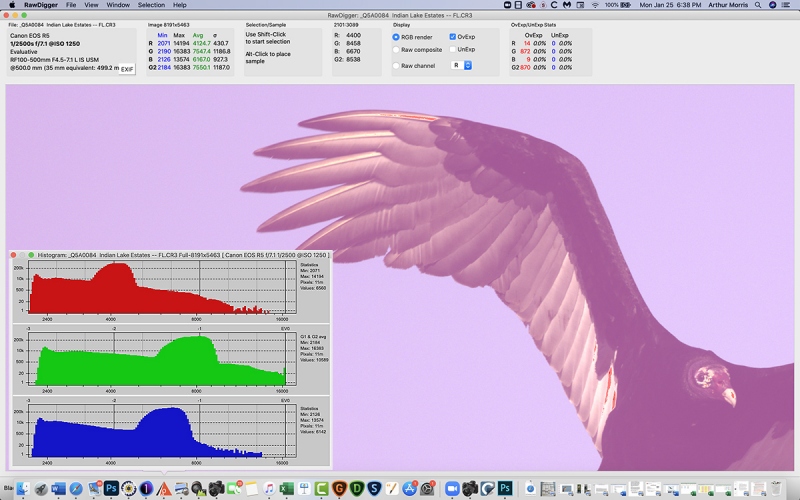
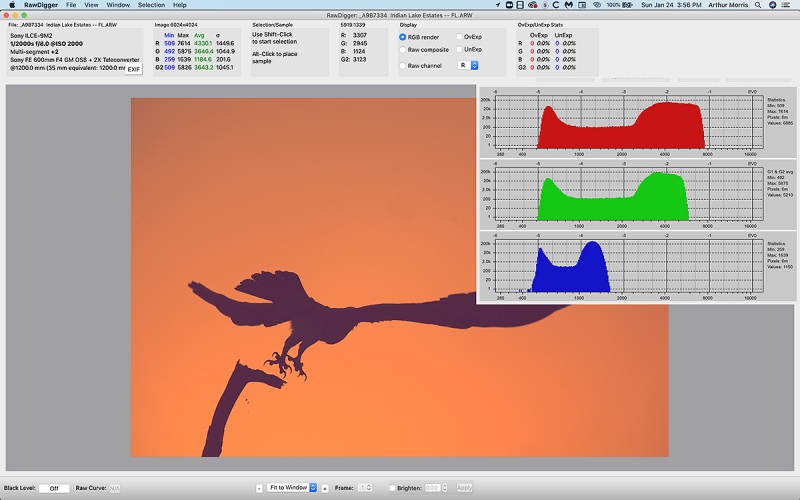
Confused by what I was seeing with my R5 images in RawDigger, I e-mailed Patrick and Iliah Borg with questions. On Wednesday night I spent more than an hour in a Zoom meeting with Patrick as he explained to me what he had learned from Iliah. We both learned a ton during this meeting. As a result, the publication date of the final RawDigger e-guide has once again been pushed back.
So why all the effort as far as the R5 is concerned? First off, I was intrigued by what I was hearing and wanted to see for myself. And I always like learning new stuff about bird photography. Second, lots of folks wanted to hear what I had to say about the R5/RF100-500 rig.
Most Importantly
As always, if what you read or learn here inspires or convinces you to purchase an R5 or 6, and/or the RF 100-500 lens, and/or the RF Extender 1.4X, please use my B&H affiliate links or get in touch with Steve Elkins at Bedford to save 3% on your new gear and get it a lot quicker …
Great R5/RF 100-500 News from Bedfords
I spoke to Steve Elkins at Bedford Camera on Thursday and was excited to learn that he will be getting his biggest-yet shipment of Canon R5 bodies and RF 100-500 lenses early next week. You can save 3% on your order by entering the BIRDSASART coupon code at checkout. Your discount will be applied to your pre-tax (if any is due) total. In addition, by using the code you will get free 2nd day air shipping via Fed Ex.
If you buy the Canon rig that I am testing you will save a very handsome $212.91. Using any of my affiliate links is the best way to thank me for the work that I do here on the blog.
Back in Stock
We now have eighteen of the hugely popular Levered-Clamp FlexShooter Pro tripod heads in stock. Click on the preceding link to learn more about this amazing head, the ballhead that thinks it’s a gimbal head and — thanks to the amazing counter-balanced spring mechanism — works great with any rig from the longest, heaviest super-telephoto lens to a camera-body-mounted wide angle. The latter is possible because of the bi-directional clamp; it is no longer necessary to travel with a gimbal head for long lens photography and a ballhead for scenic photography. And after just a moment’s adjustment, the double ball enables you to ensure that every image you take is on the level.
Please Remember
With income from IPTs approaching zero, please, if you enjoy and learn from the blog, remember to use one of my two affiliate programs when purchasing new gear. Doing so just might make it possible for me to avoid having to try to get a job as a Walmart greeter and will not cost you a single penny more. And if you use Bedfords and remember to enter the BIRDSASART code at checkout, you will save 3% on every order and enjoy free second-day air shipping. In these crazy times — I am out at least forty to sixty thousand dollars so far due to COVID 19 (with lots more to come) — remembering to use my B&H link or to shop at Bedfords will help me out a ton and be greatly appreciated. Overseas folks who cannot order from the US because of import fees, duties, and taxes can always help out by clicking here if they see fit.
Topaz Still on Sale!
Right now Topaz is offering price reductions on the Utility Bundle and the Creator Bundle. The former normally sells for $359.96. It is on sale now for $249.95. Click here, scroll all the way down to the sale, and enter the ARTHUR15 code at checkout to save an additional 15%! The Creator Bundle usually sells for #279.97 and is now on sale for $149.99. Using the ARTHUR15 code at checkout brings the price down to $127.49!
The BAA Used Gear Page
The Used Gear page continues to be red hot! It is BAA Used Gear Page is the place to sell your used photographic equipment. We will help you to get your gear sold quickly for 20 to 60% or more than what the big guys are offering … Doubt me? Check out the Recent Sales list for the past ten months at the bottom of the page.
BIRDS AS ART is registered in the U.S. Patent and Trademark Office
Great Topaz News!
Folks who use the BAA Topaz link to purchase Sharpen AI, DeNoise AI, or the Utility Bundle (or any other Topaz plugins) will receive a 15% discount by entering the ARTHUR15 code at checkout. To get the discount you must use my link and you must enter the discount code. Be sure to start with this link.
Topaz Stuff
As I said just a while back and have said often many times before, I should have listened sooner. If you, like me, are new to the Topaz party, please use this link to purchase. Right now I can wholeheartedly recommend both Topaz Sharpen AI and Topaz DeNoise AI. Though I have not yet worked with JPEGtoRAW AI or Gigapixel AI, I have installed both of these plug-ins and look forward to trying them on some I-Phone 11 images fairly soon. If you are thinking like me, consider the Utility Bundle that includes all four plug-ins mentioned above at a money-saving price.
Again, those who purchase Sharpen AI or DeNoise AI using my link, can e-mail to request a short Getting Started with Topaz e-Guide. I had a bit of trouble getting the two plug-ins installed and having them appear in the Photoshop Filter Menu. In addition, I will explain how to best learn about the two plug-ins by applying them on a Layer (in Photoshop). I amazed myself yesterday by completing this guide in the car on the way to and from Sebastian. Huge thanks to Anita for doing the driving. Please include a copy of your Topaz order when requesting the guide.
New and Better Bedfords Discount Policy!
You can now save 3% on all of your Bedfords photo gear purchases by entering the BIRDSASART coupon code at checkout. Your discount will be applied to your pre-tax total. In addition, by using the code you will get 2nd day air shipping via Fed Ex.
Grab a Nikon AF-S Teleconverter TC-14E III and save $14.99. Purchase a Canon EOS R5 and your discount will be $116.97. Purchase a Sony FE 600mm f/4 GM OSS lens and save a remarkable $389.94! Your Bedford’s purchase no longer needs to be greater than $1,000.00 for you to receive a discount. The more you spend, the more you save.
Money Saving Reminder
Many have learned that if you need a hot photo item that is out of stock at B&H and would enjoy free overnight shipping, your best bet is to click here, place an order with Bedfords, and enter the coupon code BIRDSASART at checkout. If an item is out of stock, contact Steve Elkins via e-mail or on his cell phone at (479) 381-2592 (Eastern time). Be sure to mention the BIRDSASART coupon code and use it for your online order. Steve has been great at getting folks the hot items that are out of stock at B&H and everywhere else. The wait lists at the big stores can be a year or longer for the hard to get items. Steve will surely get you your gear long before that. For the past year, he has been helping BAA Blog folks get their hands on items like the SONY a9 ii, the SONY 200-600 G OSS lens, the Canon EOS R5, the Canon RF 100-500mm lens, and the Nikon 500mm PF. Steve is personable, helpful, and eager to please.
Gear Questions and Advice
Too many folks attending BAA IPTs and dozens of photographers whom I see in the field and on BPN, are–out of ignorance–using the wrong gear especially when it comes to tripods and more especially, tripod heads… Please know that I am always glad to answer your gear questions via e-mail. Those questions might deal with systems, camera bodies, accessories, and/or lens choices and decisions.
|
This image was created on 27 November 2020 at Fort DeSoto Park. I used the handheld Canon RF 100-500mm f/4.5-7.1L IS USM lens with the Canon Extender RF 1.4x (at 700mm) and the highly touted 45MP Canon EOS R5 Mirrorless Digital camera body. ISO 800. Exposure determined by experience and luck and confirmed as near-perfect by RawDigger: 1/2000 sec. at f/10 (wide open!) in Manual mode. AWB at 7:51am on sunny morning.
Face detection + Tracking/AI Servo AF was active at the moment of exposure and performed well.
Click the image to see a larger version.
Image #1: Great Egret immature landing in early morning light
Your browser does not support iFrame.
|
Picking up the Canon Gear for the First Time
I loved the feel and fit of the R5 from the moment I picked it up. The feel of the body is more like rubber than plastic or metal. The camera felt great in my hand. The first time I held an a9 it felt like a toy. The a9ii with its slightly deeper chassis was somewhat of an improvement.
Advantage to Canon
Weight Comparison
When I picked up the Canon rig for the first time, I was amazed at how small and light it was. The R5/RF 100-500 rig with the tripod collar removed with one battery and a card tips the scale at 4 pounds, 12.8 oz. The SONY 200-600 with the lens foot removed with the a9 ii weighs 6 pounds, 8.1 ounces. With the R5’s poor battery performance (see more on that below), I’d recommend the purchase and use of the Canon BG-R10 Battery Grip with an extra Canon LP-E6NH Lithium-Ion Battery (7.2V, 2130mAh) to be mandatory (unless you are comfortable changing batteries in the field). Most serious folks will probably wish to add a second set of batteries as well. With the addition of the battery grip and a second battery, the Canon rig weighs in very close to 5 pounds, 11.2 ounces thus reducing the weight advantage to less than one pound.
Advantage: Canon
The R5 Story Begins
The Great Egret above was the second bird that I photographed with the R5. Working with a new system is always a challenge as your fingers struggle to find the right button or dial. Or with the zoom direction. You go clockwise with the SONY 200-600 to zoom to the longest focal length. With the Canon 100-500, you go counter-clockwise to get to 500mm. There is no advantage here to either system. That said, as this young Great Egret flew at me right down sun angle, I attempted to zoom out to keep the bird well in the frame but turned the zoom ring the wrong way.
Face detection + Tracking/AI Servo AF
The first bird I photographed with the Canon rig was a small-in-the-frame Little Blue Heron in very low light. I was stunned at first by the performance of the subject/eye detection technology of the R5. I placed the AF point on the eye and recomposed. The AF point stayed glued to the subject’s eye. Animal eye detection with the SONY bodies works well only some of the time but is very inconsistent.
Great Advantage: Canon
Note: the great advantage above goes to Canon only as far as Animal eye detection (with the SONY bodies) is concerned. Note that SONY’s Tracking Flexible Spot does quite well in similar situations though it does not perform as well as Face detection + Tracking with the R5. Furthermore, I recently tried a new SONY Focus Area that out-performs Tracking Flexible Spot. Patrick and I had incorrectly dismissed this Focus Area in The Sony Camera User’s e-Guide (and Videos). While we had not planned on updating the SONY e-guide, this is such an important discovery that we will be sending an update covering the use of this Focus Area on Friday. If you own the guide and do not receive your e-mail update by Saturday, please contact me via e-mail.
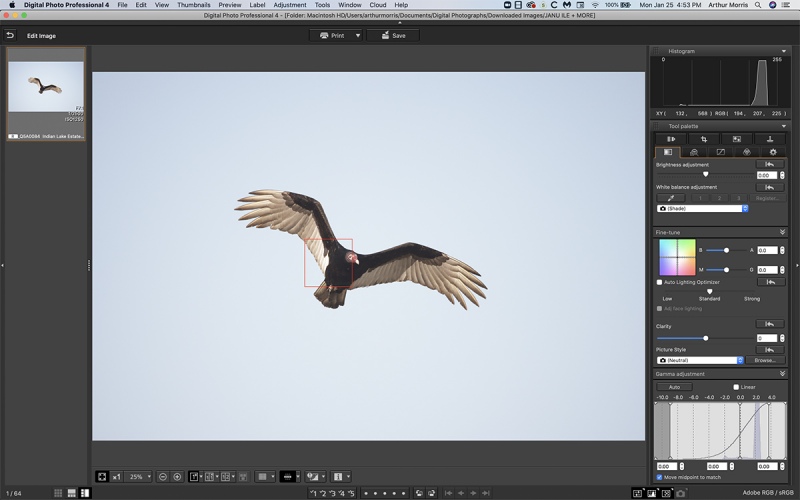
While I was stunned by the performance of the subject/eye detection technology of the R5, which placed the AF point on the face of the incoming Great Egret in each image even with the bird relatively large in the frame, I was — at first — less than thrilled with the sharpness. In retrospect, part of the problem there was that I was struggling using brand hew gear and was attempting to zoom wider while panning (not so) smoothly (the wrong way) with the incoming bird. See below to learn how Topaz Sharpen AI saved yet another image; it showed that the problem was motion blur and not inaccurate focus.
You can see the AF point on the LBH image and on one of the landing Great Egret images in the recent blog post here.
Getting the Right Exposure
While you can Enable Exposure Simulation on the R5 and view the histogram in the viewfinder, the R5 offers Zebras only with video. I did OK with the R5 exposures mainly because of my two decades of experience with digital and my vast knowledge of exposure. With SONY, I can teach you how to consistently make perfect or near-perfect exposures in two minutes with ISO on the rear dial. Or, you can learn this technique easily in The Sony Camera User’s e-Guide (and Videos). With the R5, you need to make and then evaluate a test exposure. This wastes valuable time and can easily cause you to miss the shot, especially with flight and action. As far as exposure is concerned, working with a camera body that does not offer Zebras is like being back in the Stone Age.
Huge Advantage: SONY
Dial & Button Set-up, Menu and Customization Options
Fortunately, I was — with Brian Sump’s help — able to re-configure the Canon buttons and dials so that control of ISO, Shutter Speed, and Aperture was fairly similar to what I have become used to with SONY. As far as the Menu and Customization Options, I feel that the SONY Menus are more intuitive than the R5 Menus and that SONY offers more options for customizing he various buttons and dials.
Advantage: SONY
Lens Speed
The RF 100-500 is f/7.1 at the long end while the SONY 200-600 is f/6.3 at the long end.
Small Advantage: SONY
Focal Length Ranges and Focal Lengths
On the surface, versatility, as determined by the focal length range of each lens alone, is just about even with each of these fine telephoto zooms offering a 400mm spread. (See more below Image #2 on what happens when you add a 1.4x teleconverter …) The focal length advantage (at 600mm) of the SONY 200-600 would seem to go clearly to Sony as compared to the Canon 100-500 at 500mm. There is, however, a fly in the ointment. The SONY lens exhibits considerable focus breathing — the length of the lens does not change when you zoom in or out. This is called internal focusing. When you are working with the SONY 2-6 at less than infinity, the focal length is well less than 600mm. Near the Minimum Focusing Distance (MFD), you are working somewhere in the vicinity of 540mm. As the 100-500 changes its physical length as you zoom, it exhibits less focus breathing than the SONY 200-600. Be sure to see the item on Focus Breathing in the blog post here.
That said, with the size of the bird in the frame being proportional to the square of the focal length, 29 (540 squared) is greater than 25 (5 squared). With distant subjects the math is even more striking with 36 (6 squared) being a lot greater than 25 (5 squared).
Advantage: SONY
Note that for ease of handling and when working on a tripod, I far prefer zoom lenses that focus internally (despite the problems related to focus breathing).
Minimum Focusing Distance
Continuing the close focus tradition of the Canon 100-400 II, the RF 100-500 at 500mm focuses down to 3.94 feet or 1.2 meters offering 0.33X maximum magnification. In comparison, the SONY 200-600 at about 540mm, focuses down to 7.87 feet of 2.4 meters with a maximum magnification of 0.2X. While the MFD of the SONY 200-600 is about half of the MFD of the SONY 600mm f/4 G lens, it pales in comparison to the MFD of the Canon RF 100-500. The latter will prove to be amazingly effective for mega-tight tame bird work, large flowers, butterflies, dragonflies, snakes, frogs, and the like.
Big Advantage: Canon
Note: according to the manufacturer’s specs, the Canon 100-400 II offers 0.31 X magnification at the long end while the SONY 100-400 GM offers 0.35X magnification at 400mm. The magnification is always greatest at the MFD.
|
Be sure to click on the image to better see the noise reduction on the water background.
Image #1A: Topaz DeNoise AI on Auto on the Great Egret immature landing in early morning light image at 100%
|
Topaz DeNoise AI on the Great Egret immature landing image
This screen capture dispels the myth that R5 images are pretty much noise free. As expected, you can see what I call “small pixel” noise in the before image on the left. Small pixel noise is a given with high megapixel cameras like the R5 (45 MP). Then note how beautifully Topaz DeNoise AI completely removed the noise from the blue water background. The unsharpness of the face, head, and eye are obvious at 100%. Topaz Sharpen AI to the rescue (as immediately below).
|
Be sure to click on the image to better see the increased sharpness on the face and the eye.
Image #1B: Topaz Sharpen AI on Auto on the on the Great Egret immature landing image at 100%
|
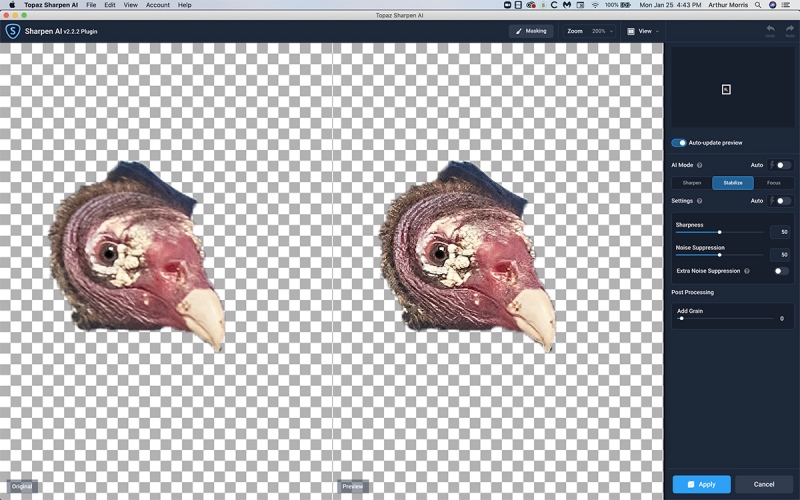
Topaz Sharpen AI on the Great Egret vertical image
Note that Topaz Sharpen AI on Auto has used the Stabilize mode; this indicates that the unsharpness about the head was primarily caused by motion blur. That said, I believe that the sharpest focus was slightly in front of the eye toward the bill tip. Note that in this case, I left the Noise Suppression slider at (the relatively low value of) 10, as it seemed to further reduce the background noise without doing anything funky to the image. Most of the time I will move that slider to zero when I have already run Topaz DeNoise AI on an image.
Again, Sharpen AI has taken a pretty poor, pretty much unusable image and transformed it into one that would look just fine when published or printed large.
|
This image was created on 27 November 2020 at Fort DeSoto Park. Again, I used the handheld Canon RF 100-500mm f/4.5-7.1L IS USM lens with the Canon Extender RF 1.4x (at 700mm) and the highly touted 45MP Canon EOS R5 Mirrorless Digital camera body. ISO 800. Exposure determined by experience and luck and confirmed as near-perfect by RawDigger: 1/1000 sec. at f/11 (stopped down 1/3 stop) in Manual mode. AWB at 8:19am on then mostly sunny morning.
Face detection + Tracking/AI Servo AF was active at the moment of exposure and performed perfectly.
Click the image to see a larger version.
Image #2: Two Dunlin resting. The front bird is in first winter plumage.
Your browser does not support iFrame.
|
Price Comparison
The Canon rig currently goes for $7,097.00. The SONY 2-6, a9 ii/FE TC 1.4X prices out right now at $7,044.00.
Advantage: let’s call this one a tie
|
Be sure to click on the image to better see the noise reduction on the out-of-focus Dunlin background.
Image #2A: Topaz DeNoise AI on Auto on the Two Dunlin resting image at 100%
|
Topaz DeNoise AI on the Two Dunlin resting image
Here again, this screen capture dispels the myth that R5 images are pretty much noise free. As expected, you can see what I call “small pixel” noise in the before image on our left. Small pixel noise is a given with high megapixel cameras like the R5 (45 MP). Then note how beautifully Topaz DeNoise AI completely removed the noise from the out-of-focus Dunlin background.
Note that the increased sharpness in the After image on our right, the crispy eye-skin, and the incredible fine feather detail as well. That brings us to File Size, Image Quality, Sharpness, and Fine Feather Detail (FFD) following Image #3.
|
This image was created on 29 November 2020 at Lakeland, FL. I used the handheld Canon RF 100-500mm f/4.5-7.1L IS USM lens with the Canon Extender RF 1.4x (at 599mm) and the highly touted 45MP Canon EOS R5 Mirrorless Digital camera body. ISO 2500. Exposure determined by experience and luck and confirmed as perfect by RawDigger: 1/1000 sec. at f/11 in Manual mode. AWB at 7:52am on sunny morning.
Large Zone AF: Horizontal/AI Servo AF was active at the moment of exposure and performed perfectly.
Click the image to see a larger version.
Image #3: Anhinga head portrait in early morning light
Your browser does not support iFrame.
|
The color, image quality, and fine feather details of sharp R5 images are superb. This is a small crop from three sides yet the amount of detail in the eye and the feathers is reminiscent of that in sharp a7r iv images. I was becoming somewhat frustrated with the inability of Face detection + Tracking to acquire and hold focus so I tried Large Zone AF: Horizontal and was very impressed: 28 AF points plastered the bird’s head, face, eye, and the base of the bill.
With the RF 100-500’s f/7.1 aperture at the long end you are at f/10 with the 1.4 TC. I have a habit of stopping down 1/3 stop most of the time. I must admit that working at ISO 2500 in bright sun was a bit strange. This image exhibited plenty of noise that was easily cleaned up in Topaz DeNoise AI. Welcome to the new world of digital photography.
File Size, Image Quality, Sharpness, and Fine Feather Detail (FFD)
File size for the R5 is 45 MP. File size for the a9 ii is 24.2MP
Image quality is very good to excellent with the a9 ii, superb with the R5 (as a result of the R5’s larger files size).
Accurately focused files from the a9 series bodies are sharper as they come out of the camera than R5 files because the R5 has an anti-aliasing filter in front of the sensor and the a9 ii does not. Many so-called internet experts have missed this important distinction. Traditional out-of-camera sharpening methods, or — better yet — the non-destructive sharpening provided by Topaz DeNoise AI, render R5 files as very sharp. A9 ii files often appear insanely sharp right out of camera.
FFD detail with properly sharpened R5 images is- as seen in the DeNoise screen capture above (Image #3A) –incredibly superb. a9 ii FFD is excellent.
Advantage: Canon
Canon’s advantage as far in the file size, image quality, sharpness, and FFD category is tempered by the following:
With a 2x application of Topaz Gigapixel AI, image quality and FFD with a9 ii images rivals that of R5 images.
File size for the SONY a7r iv is 61MP. The AF system is excellent but not as good as with either the a9 ii or the R5. I use my a7r iv often for static bird portraits, flowers, and the occasional spider. Image quality and FFD with sharp a7r iv images is astounding.
The Canon Extender RF 1.4x
So far, I have used the RF 1.4X teleconverter for almost every image that I have created with the R5/RF 100-500 combo. AF performance and image quality and sharpness have been superb with the TC in place. The same can be said of the Sony FE 1.4x Teleconverter with the a9ii/200-600 rig.
Advantage: tie
The Canon Extender RF 1.4x: Design and Size
When I was photographing the Dunlin at DeSoto, there were two birds sleeping about a foot apart; I thought that they might make a nice wide image. But a funny thing happened on the way to zooming out: the RF 100-500mm lens got stuck at the 300mm mark — 420mm with the 1.4X TC in place. At first, I thought that the lens was broken, but then I remembered hearing that with the TC in place the 100-500 would only zoom out to the 300mm setting because the front element of the TC prevented the lens from zooming out fully. So instead of having a 140-700mm zoom with the TC in place, you actually have a 420mm to 700mm zoom. This severely hampers the versatility of this combination. Coming in at 280 to 840mm, the SONY 200-600 with the TC is far more versatile.
The RF 1.4X TC is physically larger and heavier than the Sony FE 1.4X TC. At 7.9 ounces (almost a full half pound), it is 34% heavier than the Sony FE 1.4X TC (5.9 ounces).
Advantage: SONY
Both manufacturers are to be chided for their failure to place red indicators as needed on the camera bodies, lens mounts, and especially on the front and rear teleconverter caps. Having to struggle to mount or get the caps on a TC will often cause you to lose valuable seconds and miss a good shots. I mark all of my caps with an indelible silver Sharpie, but the marks wear off in time and I cannot do that with my Canon stuff as I do not own it … Yet?
Audio Clicks in Electronic Shutter
Both the a9 ii and the R5 are advertised at 20 fps when using the Electronic Shutter. The frame-rate of the R5 might or might not drop when the battery charge is less than 60%. (The literature indicates that the R5 frame-rate does drop when the battery charge is less than 60% and you are working with the Mechanical Shutter, but says nothing about working in Electronic Shutter with reduced battery power.
Two years ago, I had long been accustomed to hearing a sound when the shutter releases. When I first played with a SONY a9 series body, it killed me that the camera was silent when in Electronic Shutter. I could not tell when the camera fired. I learned quickly that there is a Menu Item that allows you to add a click sound when the shutter releases even when in Electronic Shutter. To do that, go to Camera 2 (Purple) and then to screen 11/11. You will see Audio Signals. I set mine to On: e-shutter only so that I hear the click each time that the shutter fires.
The R5 is 100% silent in in Electronic Shutter. A white frame flashes around the edge of the viewfinder with each shutter release. The a9 ii performs similarly except that the box is black and well inside the edge of the viewfinder. I do not like having to rely on this type of aid because doing so keeps you from concentrating on framing and image design …
The first time that I used the R5 I could not tell when the camera fired. As a result, I wound up creating 15 to 25 images each time I pressed the shutter button. I typically shoot in bursts of three. I checked around and learned that you cannot add an audio click when working in Electronic Shutter. For me, this is a big negative.
Advantage: SONY
Frame-Rate
Both the a9 ii and the R5 are advertised at 20 fps when using the Electronic Shutter. The frame-rate of the R5 might or might not drop when the battery charge is less than 60%. (The literature indicates that the R5 frame-rate does drop when the battery charge is less than 60% and you are working with the Mechanical Shutter, but says nothing about working in Electronic Shutter with reduced battery power.
To me, the frame rate of the R5 (in Electronic Shutter) seems much faster to me than the frame rate of the a9 ii. This might be due to one or more of the following:
1- The lack of an audio click.
2- A more sensitive shutter button.
3- My possible tendency to be lighter on the shutter button when I can hear the shutter firing.
I might try slowing down the R5 from High Speed Continuous Plus to High Speed Continuous; I need to do some research to see what that does to the frame rate.
Advantage: Canon
Battery Life
As noted above, battery life with the R5 seems poor. On my first day of working with the Canon gear the battery was dead by 9:00am despite that fact that it was not a great session. Battery life with all of the high-end SONY bodies is excellent. I do not use a battery grip (to save weight) and I have had to change a battery in the field only once. Anita North — who shoots a lot more aggressively than I do — always has an extra SONY battery or two with her in the field, and she changes them fairly often.
Big Advantage: SONY
Flash Cards
There is a ton online about the R5 buffer filling with slow-to-read and slow-to-write SONY and SanDisk flash cards. The R5 has slots for both CFexpress Type B and UHS II flash cards. I never thought that I would get used to the small size of the UHS cards, but I have. I was glad to learn that the R5 accepted the Prime SD UHS II cards that I have used with my SONY bodies from Day 1. Better yet, they are super-fast. Despite creating as many as 25 images with a single press of the shutter button, I never filled the R5 buffer. I use both 64 and 128 GB Delkin Power SD UHS II cards.
You can learn why I have been using Delkin cards for the past two decades in the blog post here.
Advantage: Delkin
SD UHS II
You can purchase the world’s best SD UHS II cards in the BAA Online Store by clicking here. These are perfect for all of my SONY bodies and more recently, for the Canon R5.
Typos
Feel free to e-mail or to leave a comment regarding any typos or errors. Just be right :). with love, artie