October 15th, 2025 If …
If you are subscribed and had previously been receiving blog post notifications via e-mail on a regular basis and they quit coming in the last month or so, please let me know via e-mail and cut and paste this into the subject line: Please Add to the Personalized Blog Notification List. It seems that some e-mail providers (likely including Gmail) recently began blocking the blog post notification e-mails being sent by the Word Press Newsletter plugin. The new, authenticated sending address was supposed to fix that problem, but it has not 🙂 Life goes on.
Don’t Just Shoot: Learn
If you wanna be like Red, and are interested in changing your life and becoming a better photographer by joining me on the Extended IPT at Sebastian Inlet for Ospreys and more (OCT 25 to NOV 24, 2025), in San Diego for Pacific-race Brown Pelicans and more (JAN 6 to FEB 2, 2026) as below, or for Roseate Spoonbills at Stick Marsh (March 2026), please e-mail for dates, rates, terms, and additional information. Or shoot me a text to 863-221-2372. Some offerings include options for shared AirBnB lodging and meals. Ground transportation during your stay is a possibility at times.
What’s Up?
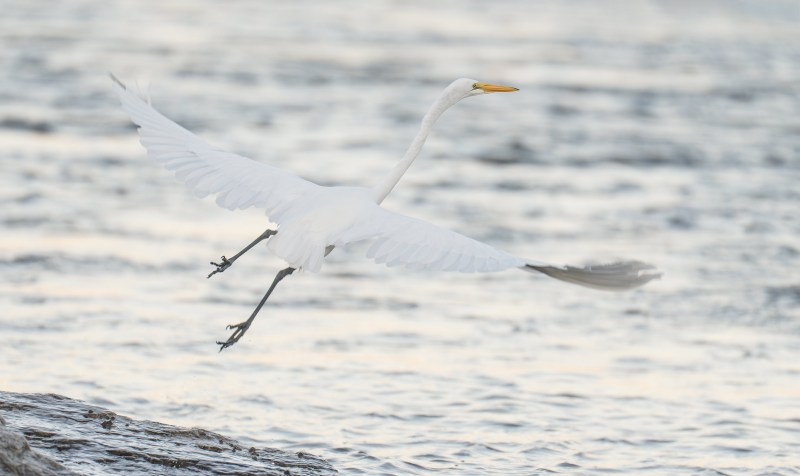
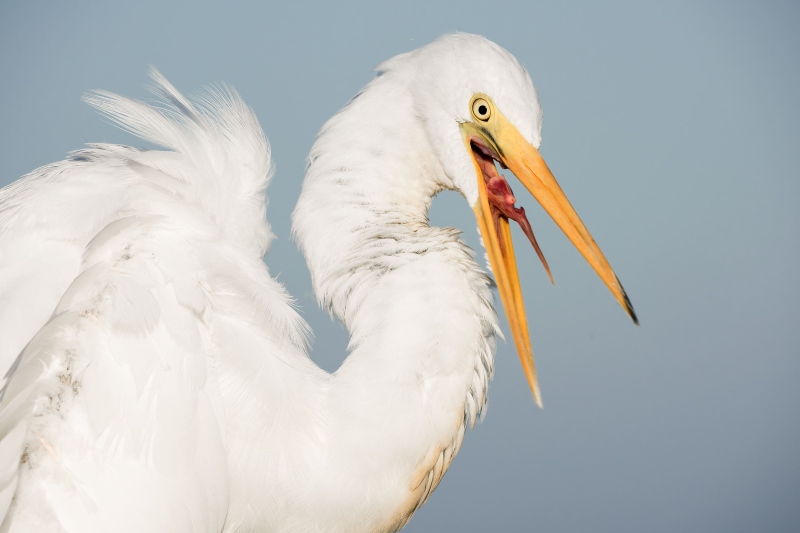
The photography on Tuesday morning was challenging (see today’s featured image below) but fabulously exciting. Early on, there were huge schools of finger mullet in the southeast corner of the inlet just east of the bridge abutments. Several Great and Snowy Egrets were chowing down on the bait and schools of fish were breaking on the surface almost continuously. But, it was way dark and some of the action was blocked by the jetty rocks.
Today is Wednesday 15 October and Eugen, Red, and I will be headed to the inlet by 6:30am. Whatever you opt to do, I hope that you too choose to have a great day.
If you would like to join in the fun and learn an absolute ton, I have room at the AirBnB for you on a Sebastian Extended IPT any time from 25 October through and including 23 November. For complete details you can get in touch via e-mail or try me on my cell at 863-221-2372. Please leave a message and shoot me a text if I do not pick up.
If an item — a Delkin flash card or reader, a Levered-clamp FlexShooter Pro, or a Wimberley lens plate or low foot — for example, that is available from B&H and/or Bedfords, is also available in the BAA Online Store, it would be great, and greatly appreciated, if you would opt to purchase from us. We will match or beat any price. Please remember also to use my B&H affiliate links or to earn 3% cash back at Bedford by using the BIRDSASART discount code at checkout for your major gear purchases. Doing either often earns you free guides and/or discounts. And always earns my great appreciation.
Gear Questions and Advice
Too many folks attending BAA IPTs and dozens of photographers whom I see in the field and on BirdPhotographer’s.Net, are — out of ignorance — using the wrong gear, especially when it comes to tripods and more especially, tripod heads. And the same is true in spades when ordering new camera bodies or lenses. My advice will often save you some serious money and may help you avoid making a seriously bad choice. Please know that I am always glad to answer your gear questions via e-mail. If you are desperate, you can try me on my cell at 863-221-2372. Please leave a message and shoot me a text if I do not pick up.
B&H Simplified
To ensure that I get credit for your B&H purchases, you can always click here. The tracking is invisible but using my affiliate links is greatly appreciated. And, with B&H, you can use your PayBoo card. You must use the website to order. You cannot get your free guides if you make a phone order. Once you have an item in your cart, you must complete the order within two hours. Huge thanks!
B&H
Many folks have written recently stating that they purchased a Sony a1 from B&H and would like their free membership in the Sony 1 Info and Updates Group, a $150.00 value. But when I check my affiliate account, their orders have not been there. When I let them know that they get credit for B&H purchases only if they use one of the many B&H affiliate links on the blog or begin their searches with this link, they are always disappointed. If in doubt, please contact me via e-mail and request a BH link. I am always glad to help and to guide you to the right gear.
Bedfords Simplified
Click here to start your search. Choose standard shipping, and when you get to the payment page, enter BIRDSASART in the discount code box and hit apply. You will be upgraded to free second day air Fed-Ex and receive 3% cash back on your credit card once your stuff ships. Using either my affiliate links is greatly appreciated and will often earn you free guides or discounts. To receive a free guide or free entry into a Sony Set-up and Info Notes e-Mail group, you need to shoot me your receipt via e-mail. The B&H receipts need to include the order number.
Bedfords Amazing BAA Discount Policy
Folks who have fallen in love with Bedfords can always use the BIRDSASART coupon code at checkout to enjoy a post-purchase, 3% off-statement credit (excluding taxes and shipping charges) on orders paid with a credit card. The 3% credit will be refunded to the card you used for your purchase when your product ships. Be sure, also, to check the box for free shipping to enjoy free Second Day Air Fed-Ex. This offer does not apply to purchases of Classes, Gift Cards, or prior purchases.
You can visit the Bedfords website here, shoot Steve Elkins an e-mail, or text him on his cell phone at (479) 381-2592.
Used Canon R & RF Gear Listings
Canon EOS R5 Mirrorless Camera Body with extras!
David Graebner is offering a Canon EOS R5 in near mint condition for $1999.00. The sale includes the battery grip, four Canon batteries, a Kirk L-bracket for Canon EOS R5MKII, R6MKII, R5 & R6 (a $155.00 value!), LCD protectors, the body cap, the wide strap, the original product box and all that came in it, and insured ground shipping via major courier to lower-48 US addresses only.
Please contact David via e-mail.
If you are looking to get into Canon mirrorless without having to sell your home, grab David’s R5 ASAP. The body sells new at B&H for $2999.00 and there is a comparable used one here for $2,578.95. This is the only Canon mirrorless body that I ever used and was quite impressed by the eye tracking. Purchase David’s camera and take 50% off the cost of the BAA EOS R5 Camera User’s Guide. artie
Canon RF 15-35mm f/2.8 L IS USM Lens
David Graebner is offering a Canon RF 15-35mm f/2.8 L IS USM in near mint condition for $1499.00. The sale includes the lens case, the lens hood, the front and rear lens caps, the original product box and all that came in it, and insured ground shipping via major courier to lower-48 US addresses only.
Covering a versatile wide-angle focal length range, the RF 15-35mm f/2.8 L IS USM from Canon is also characterized by its bright f/2.8 constant maximum aperture. This bright design enables working in available light conditions and also affords greater control over depth of field. The range of wide focal lengths suits working in a variety of situations, from landscape to documentary shooting, and this zoom is complemented by an advanced optical design that greatly reduces color fringing and distortion for high clarity and sharpness. An Air-Sphere coating has also been applied to reduce flare and ghosting for improved contrast and color fidelity when working in bright conditions. B&H
This lens sells new for $2,399.00 and there was a used copy here in lesser condition for $1,966.95; amazingly, it sold. Look no further if you have been searching for an ultra wide angle RF scenic lens. artie
Canon RF 24-70mm f/2.8 L IS USM Lens
David Graebner is offering a Canon RF 24-70mm f/2.8 L IS USM lens in near mint condition for $1999.00. The sale includes the lens case, the lens hood,the front and rear lens caps, the original product box and all that came in it, and insured ground shipping via major courier to lower-48 US addresses only.
Please contact David via e-mail.
The Canon RF 24-70mm f/2.8 L IS USM is Canon’s workhorse RF zoom lens, a versatile wide-angle to portrait-length lens characterized by its bright, advanced, and intuitive design. The constant f/2.8 maximum aperture suits working in difficult lighting conditions and also enables greater control over depth of field. The optical design incorporates a series of aspherical and Ultra-Low Dispersion elements, which greatly reduce a variety of aberrations throughout the zoom range in order to produce sharp and clear imagery. An Air Sphere Coating has also been applied to suppress flare and ghosting when working in strong lighting conditions. B&H
This lens sells new for $2,399.00 and there is a used copy here in lesser condition for $2,109.95. Look no further if you have been searching for a wide angle RF scenic lens. artie
Canon RF 70-200mm f/2.8 L IS USM Lens
David Graebner is offering a Canon RF 70-200mm f/2.8 L IS USM lens in near mint condition for $1999.00. The sale includes the lens case, the lens hood,the front and rear lens caps, the original product box and all that came in it, and insured ground shipping via major courier to lower-48 US addresses only.
Please contact David via e-mail.
This impressive L-Series lens offers a telephoto zoom focal length for getting closer to faraway subjects. Canon’s lightest and shortest 70-200mm f/2.8 lens ever, the RF 70-200mm f/2.8 L IS USM is engineered to make traveling more comfortable, offering a compact and portable design that’s easy to pack and carry wherever you go. B&H
This indispensable lens is another that I have owned with every system I’ve used. It sells new for $2,799.00 and there is a used copy here in similar condition for $2,109.95. artie
Canon RF 100mm f/2.8 L Macro IS USM Lens
David Graebner is offering a Canon RF 100mm f/2.8 L Macro IS USM lens in near mint condition for $799.00. The sale includes the lens case, the lens hood,the front and rear lens caps, the original product box and all that came in it, and insured ground shipping via major courier to lower-48 US addresses only.
Please contact David via e-mail.
Engineered specifically for full-frame EOS R-series cameras, the RF 100mm f/2.8 L Macro IS USM Lens from Canon combines a medium-telephoto field of view with a sleek design and close-focusing performance. Designed for close-up imagery, this autofocus lens is an ideal choice for portraits and macro subjects. Featuring a fixed 100mm focal length, a bright f/2.8 maximum aperture, fast, highly-precise autofocus, and a spherical aberration control ring, this lens elevates the look of portraits and macro shots and gives you the ability to create dreamlike and romantic images with a soft focus look. Its close focus design enables working with subject matter as close as 10.2″ away, and a Super Spectra coating minimizes ghosting and flare when working in strong lighting conditions. The lens also features optical image stabilization, along with Hybrid IS, to suppress up to five stops of camera shake for cleaner, steadier shooting, and imagemakers can expect to see stunning results that enhance their creative and artistic vision. B&H
This great macro lens sells new for $1249.00 and there is a used copy here in lesser condition for $1,023.95 artie
Canon RF 100-500mm f/4.5-7.1 L IS USM Lens with extra!
David Graebner is offering a Canon RF 100-500mm f/4.5-7.1 L IS USM lens in excellent plus condition for $1999.00. The sale includes the lens case, the lens hood,the front and rear lens caps, a Kirk Lens Support Bracket Canon (low foot) for the RF 100-500mm f/4.5-7.1 L IS USM lens (a $140.00 value), the original product box and all that came in it, and insured ground shipping via major courier to lower-48 US addresses only.
Please contact David via e-mail.
Covering a variety of telephoto focal lengths, the Canon RF 100-500mm f/4.5-7.1 L IS USM spans a short- to super-telephoto range within a sleek and portable form factor. The modest maximum aperture enables a relatively portable design that is well-suited to handheld, walkaround use and optical image stabilization also helps to steady photos and videos by up to five stops when working in difficult lighting conditions. This lens is also characterized by its advanced optical design, which includes a series of Super UD and UD elements to greatly reduce chromatic aberrations and color fringing throughout the zoom range for a degree of clarity and color accuracy. B&H
I used this RF lens exclusively when I was working on the BIRDS AS ART Canon EOS R5/R6 Camera User’s e-Guide. I made lots of fabulous images with it. It sells new for $2,899.00 and there is a used copy here in similar condition for $2,608.95. artie
|
|
|
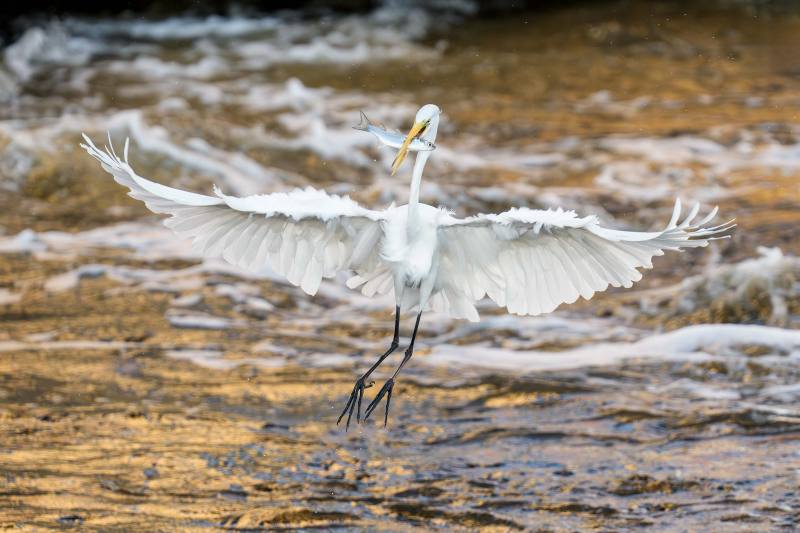
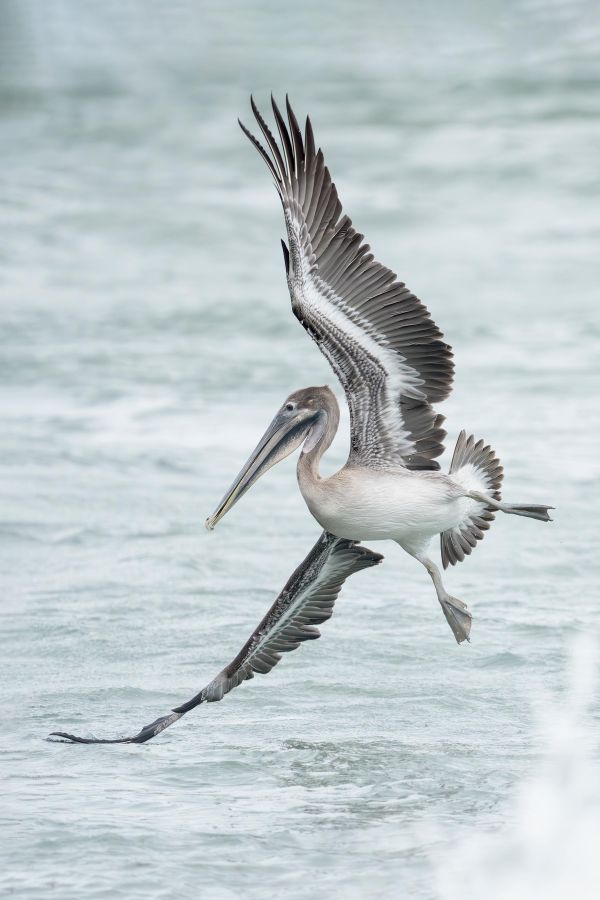
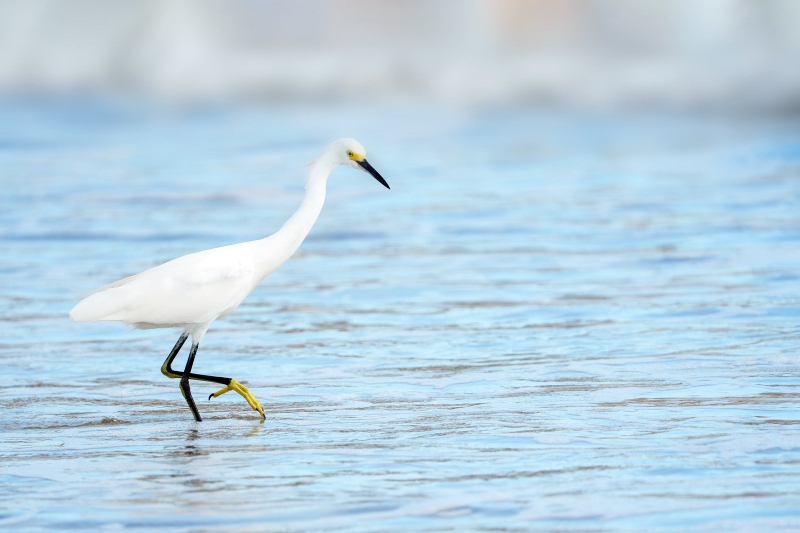
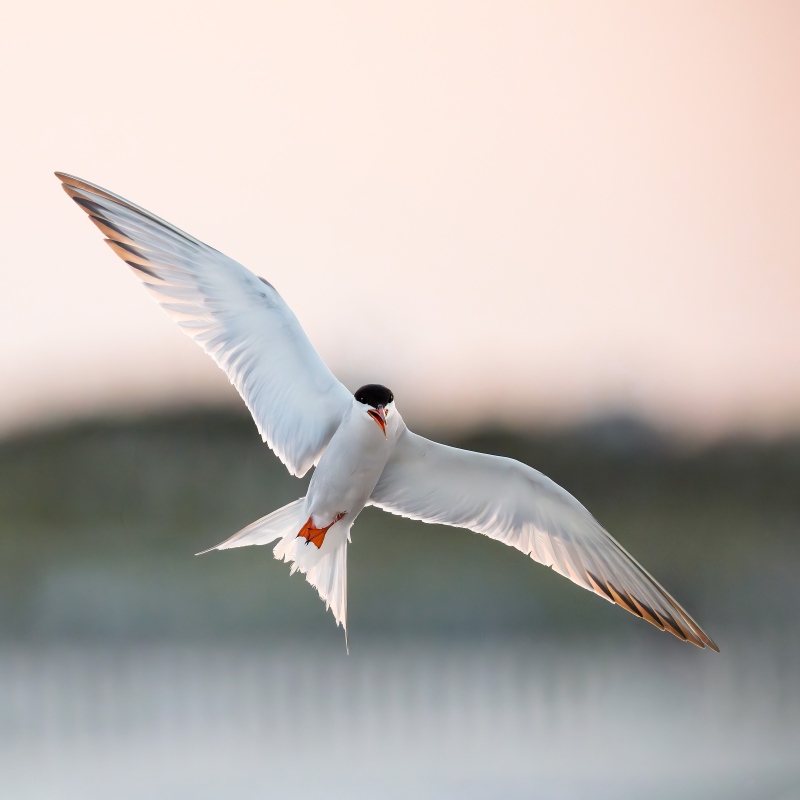
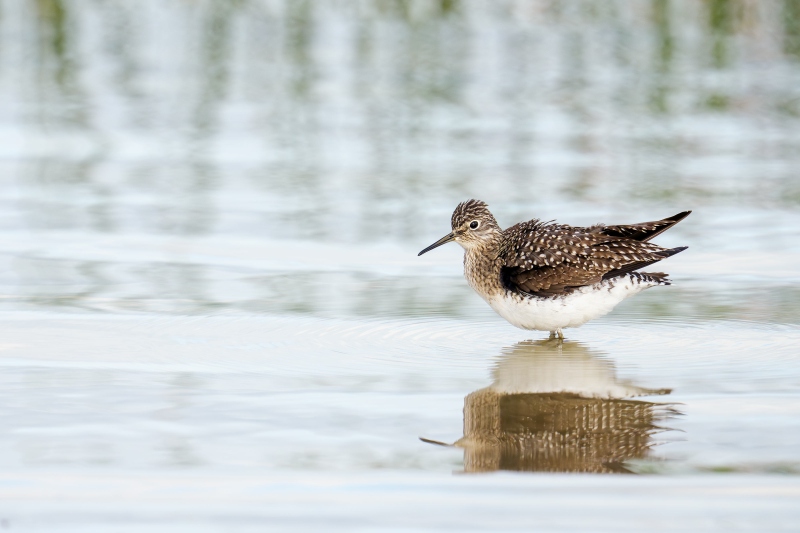
This image was created by yours truly on 14 October 2025 on a Sebastian Inlet Ospreys and More Extended IPT. I used the handheld Sony FE 70-200mm f/2.8 GM OSS II Lens with the Sony FE 2x Teleconverter (at 330mm) and The Latest Greatest Sony Flagship Body, the a1 II Mirrorless Camera. The exposure was determined by Zebras with ISO on the rear wheel — ISO 3200: 1/2000 second at f/5.6 (wide open) in Manual mode. AWB at 7:54:43am in the shade on a sunny morning.
Tracking: Zone/AF-C with Bird-Eye/Face Detection performed perfectly. Click on the image to enjoy the larger, inexplicably sharper high-res version.
Image #1: Great Egret landing with finger mullet
Image copyright 2025: Arthur Morris/BIRDS AS ART
|
Why So Challenging?
Most of the action occurred well before this image was created so we were using ISOs as high as 25,600 when trying for sharp. With the extreme low light conditions, all autofocus systems struggle as they need light and contrast to see. In addition, the a-1 ii’s Wide AF-C pattern would often grab the surface of the water. To combat that problem, I enabled Tracking: Wide. It has since been disabled.
The birds would spend ten minutes staring on a rock before taking flight without warning and stabbing for a fish. As a result, it was challenging to get on the subject and acquire focus.
Why the 70-200 with the 2X TC?
The main reason I was using the lightweight and versatile 70-200 II/2X TC/a-1 ii rig is that I wanted to be best able to help Red. When Eugen first arrived, I used the 200-600 for the first three days for the same reason.
The 140-400mm focal length range is ideal for close bird photography work especially for when shooting action. Note that to create today’s featured image zooming out to 330mm enable me to avoid clipping the egret’s wings. And, the very light weight of this rig makes it ideal for handholding, flight, and action. In addition, it is always good to work with a rig that is different from what you usually go with as it can help you to refine various skills.
This Just In
Added at 10:44am Eastern time on the day of publication
As detailed here previously, the 70-200mm f/2.8 II with either teleconverter makes the Sony 100-400 obsolete for many and all reasons.
|
|
|
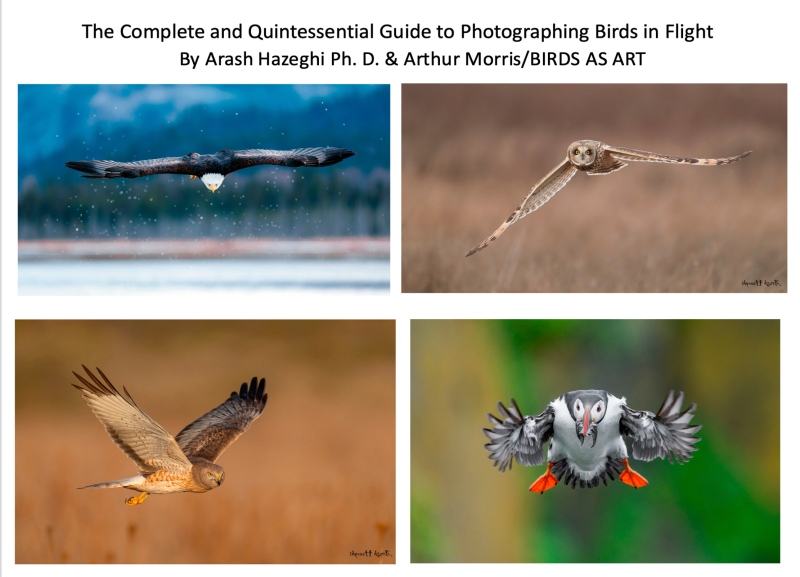
The title says it all. Purchase your copy here.
The Complete and Quintessential Guide to Photographing Birds in Flight
by Arash Hazeghi, Ph.D., and Arthur Morris/BIRDS AS ART
|
The Complete and Quintessential Guide to Photographing Birds in Flight: $99.00
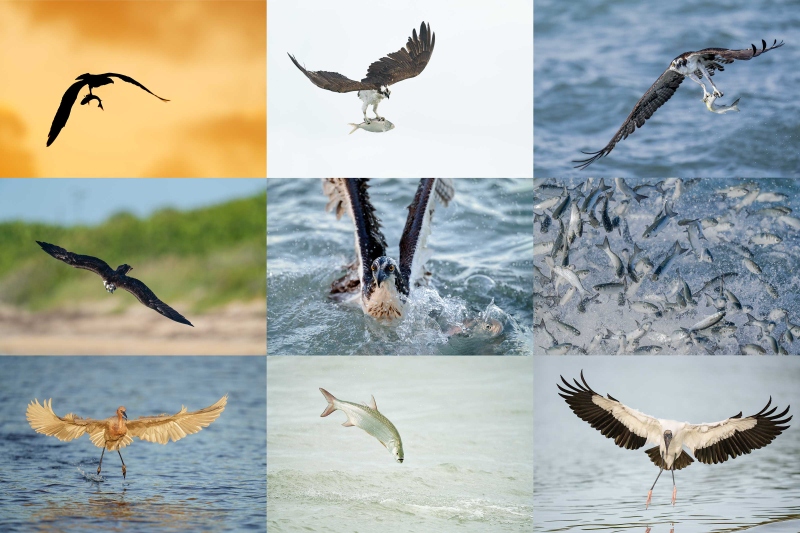
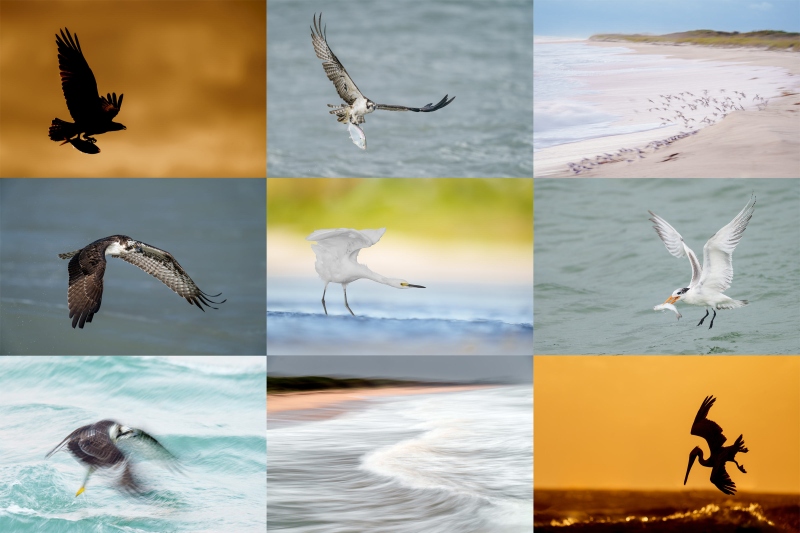
I had long dreamed of becoming a great flight photographer. When using dSLR gear, making sharp images was a huge problem. Most of the time, the camera bodies simply were not up to snuff. Things have changed dramatically with mirrorless technology. The high-end mirrorless camera bodies now feature science fiction-like autofocus systems and frame rates of 30, 40, and even 125 fps. Nowadays, getting the eye sharp is no longer a problem. The problem more often involves selecting the strongest image from a long series of sharp images.
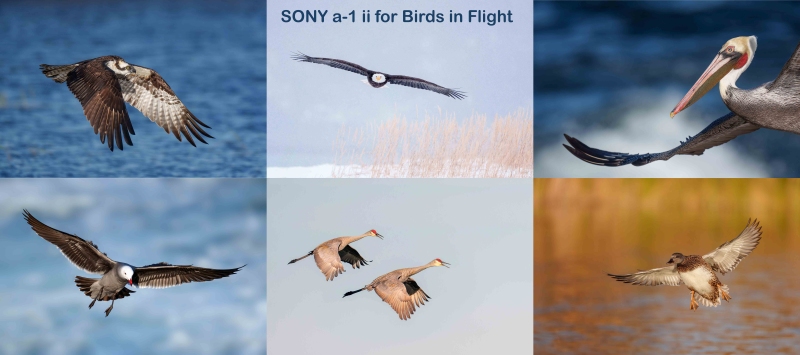
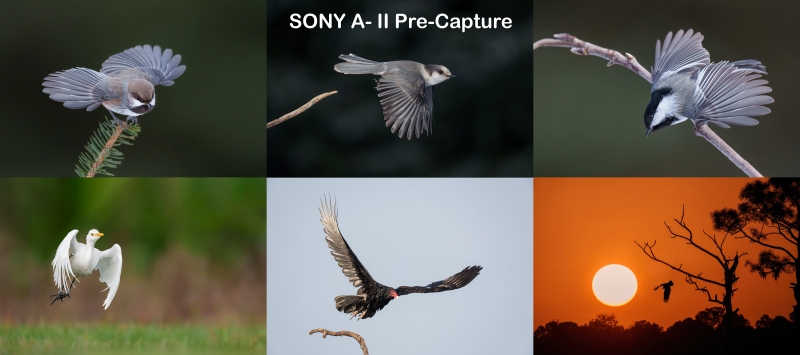
The truth, however, is that there is a lot more than owning a Canon EOS R1, a Nikon Z9, or a Sony a-1 ii to consistently creating great photographs of birds in flight. Some of the biggest factors to success include gear choice, shooting strategies, and understanding the importance of sky conditions and wind speed and direction. Once you have the techniques and technical aspects down pat and can routinely create sharp images, learning the importance of flight poses, wing positions, backgrounds, and subject placement and image design enable you to create and then select superb flight images. And you guessed it, each of those topics and tons more are covered in detail in The Complete and Quintessential Guide to Photographing Birds in Flight.
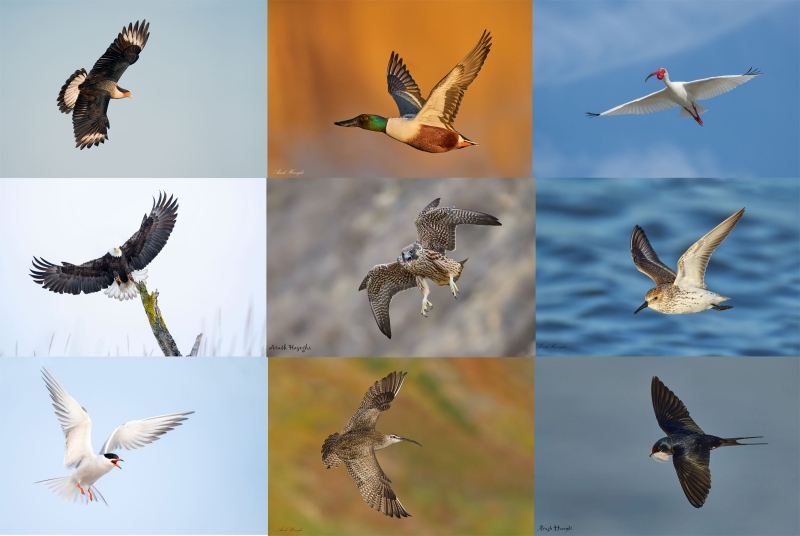
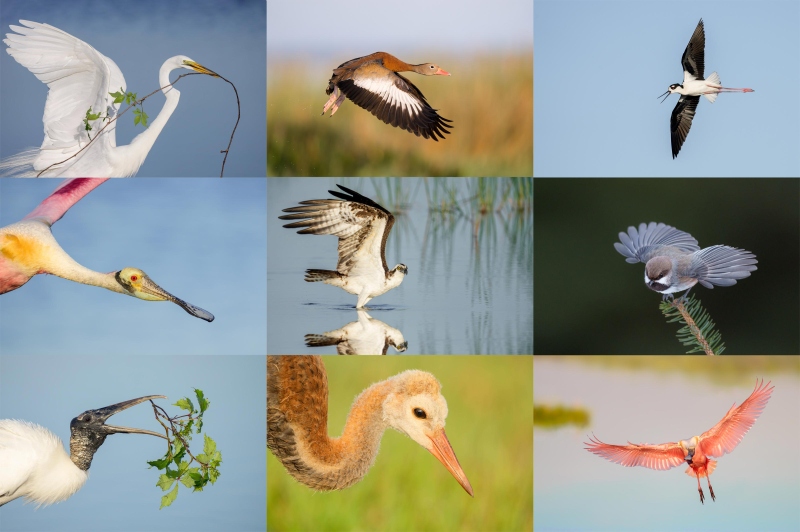
The guide consists of 267 pages and 21,013 words. There are 82 illustrative photos scattered throughout the text, two screen captures, and a 112-image gallery that includes examples created by Canon, Nikon, and mostly Sony gear. As seen above, each of the 194 inspirational photos is labeled with an educational caption.
You can purchase your copy here for $99.00.
Arash Hazeghi
Arash Hazeghi, Ph.D. is a principal electron device engineer. He received his Ph.D. degree in Electrical Engineering in 2011, from Stanford University, Stanford, California. His pioneering research on Carbon Nanotubes has been cited many times. In the past decade, Arash Hazeghi has been a major contributor to the research and the development of some of the most cutting-edge technologies introduced by Silicon Valley’s most reputable names including SanDisk, Intel and Apple.
More relevant here is that he is widely recognized as one of the world’s best birds in flight photographers. He specializes in raptors and the technical aspects of bird photography.
|
|
|
Flight photography is a skill that can be studied, practiced, and learned.
|
The Complete and Quintessential Guide to Photographing Birds in Flight
By Arash Hazeghi Ph.D., and Arthur Morris/BIRDS AS ART
What you will learn (about):
1- Weight and handholding super-telephoto lenses.
2- Weight and handholding intermediate telephoto and telephotos zoom lenses.
3- Choosing the right flight photography lens or lenses for you.
4- The importance of focal length for flight photography.
5- The importance of lens speed (the maximum aperture for flight photography.
6- Choosing between fixed focal lengths and zoom lenses for flight photography.
7- The importance of AF speed and performance for flight photography.
8- Handholding tips and techniques.
9- Shooting flight off a tripod with the Levered-clamp FlexShooter Pro.
10- Flight poses and wing positions.
11- Why artie changed his mind about the 400mm f/2.8 lenses for flight and more.
12- The advantages and disadvantages of using teleconverters for flight photography.
13- Why to stay away from off-brand lenses.
14- Understanding the importance of wind direction and speed for flight photography.
15- The relationship between sky conditions and wind direction and how it affects flight photography.
16- Creating flight silhouettes in wind-against-sun conditions.
17- The importance of being on sun angle for flight photography (and avoiding harsh shadows).
18- Tips on doing flight photography in cloudy, foggy, or overcast conditions.
19- About the direction of light in cloudy, foggy, or overcast conditions and how it affects flight photography.
20- How your understanding of bird behavior can dramatically improve your flight photography.
21- Tips on attracting birds for flight photography.
22- What to do when your camera’s AF system is temporarily blind.
23- The vital importance of pre-focusing.
24- How Direct Manual Focus can help you with flight photography.
25- The importance of shooting aggressively when doing flight photography.
26- Everything that you need to know with regards to rest positions for flight photography.
27- The importance of getting low when doing flight in many situations.
28- Getting the right exposure when doing flight photography.
29_ Why to use Manual mode 95% of the time for flight.
30- Tips on finding the bird in the frame, acquiring focus, and tracking the bird in flight.
31- How to set and best utilize your lens’s image stabilization feature (and why).
32- Setting the focus range limiter switch on your flight lens or lenses.
33- To choose the best shutter speed for photographing birds in flight.
34- The vital importance of pre-focusing. And yes, this is so important that it is on the list twice.
You can see four sample pages in the blog post here. And you can purchase your copy here.
Typos
With all blog posts, feel free to e-mail or to leave a comment regarding any typos or errors.
October 14th, 2025 What Do You Have to Say to Red?
After reading Red’s bird photography story and checking out five of his images, what do you have to say to this 80-year old beginner who never photographed a bird before Monday afternoon? Please be so kind as to leave a comment.
If …
If you are subscribed and had previously been receiving blog post notifications via e-mail on a regular basis and they quit coming in the last month or so, please let me know via e-mail and cut and paste this into the subject line: Please Add to the Personalized Blog Notification List. It seems that some e-mail providers (likely including Gmail) recently began blocking the blog post notification e-mails being sent by the Word Press Newsletter plugin. The new, authenticated sending address was supposed to fix that problem, but it has not 🙂 Life goes on.
Don’t Just Shoot: Learn
If you are interested in changing your life and becoming a better photographer by joining me on the Extended IPT at Sebastian Inlet for Ospreys and more (OCT 25 to NOV 24, 2025), in San Diego for Pacific-race Brown Pelicans and more (JAN 6 to FEB 2, 2026) as below, or for Roseate Spoonbills at Stick Marsh (March 2026), please e-mail for dates, rates, terms, and additional information. Or shoot me a text to 863-221-2372. Some offerings include options for shared AirBnB lodging and meals. Ground transportation during your stay is a possibility at times.
What’s Up?
Jim Litzenberg kindly picked up Alvin “Red” Stevens at the Melbourne airport on Sunday afternoon and dropped him off at the Vero Lake Estates AirBbN. After an early dinner of fresh seared tuna and a big salad, we headed to Sebastian Inlet.
Alvin (AKA Red), a retired dentist, is a very fit 80 years old. Three months ago he was looking for a new hobby that would exercise his brain cells. As he is returning to Antartica early next year he thought of bird photography. Before yesterday, he had never photographed birds before. IPT veteran and mutual friend Dr. Dick Curtain told Red that if anyone could get him on the right track with bird photography, it would be me. After some lengthy phone calls and lots of e-mails and with his Southern Ocean trip in mind, he followed my advice and purchased a Sony a-1 ii, the Sony FE 70-200mm f/2.8 GM OSS II lens, and both teleconverters. He used my B&H links (thank him very much) and had his gear sent to me in Indian Lake Estates so that I could set up his new camera.
I had Red practice the process by photographing mailboxes and cars around his home, and downloading his photos with Photo Mechanic. At times he was quite frustrated and was unsure that he could learn bird photography. Boy was he wrong. I was 100% positive that I could help him get started but did not expect that he would be a natural. Don’t get me wrong: he still has a long way to go to master the process, especially with regard to framing. He is doing fabulously well with shutter speeds, exposure, and creating sharp images.
Anyhoo, that afternoon we headed out each with the same rig in our hands so that we could be on the exact same page. Somewhat amazingly (but not for me), Red made each of today’s five featured images. Waking early on Monday, I optimized three of his best images. When I first showed them to him, he thought that they were my photos.
Unfortunately, Red brought wind against sun conditions with him; the forecast three mornings is for sunny with NW winds in the morning (bad) and northeast winds each afternoon (bad). We checked out the Ospreys in the inlet and I was pleased to see that Red was easily able to locate and track the birds with his 400mm rig. With the wind against sun, there were no good pictures to be made.
We headed to my favorite afternoon spot and found some birds in the shade. I woke early on Tuesday morning and optimized Red’s two best images from a difficult wind against sun Monday morning.
As you can see below, Red is a quick study, one who is capable of speedily learning the essentials of something to be done and readily absorbing new information.
We spent several hours on Monday afternoon reviewing and optimizing Eugen’s and Red’s images from our Monday morning session. Today is Tuesday 14 October 2025 and we will be headed out early to Sebastian for Red’s second and Eugen’s 17th morning instructional session. Whatever you opt to do, I hope that you too choose to have a great day.
If you would like to join in the fun and learn an absolute ton, I have room at the AirBnB for you on a Sebastian Extended IPT any time from 25 October through and including 23 November. For complete details you can get in touch via e-mail or try me on my cell at 863-221-2372. Please leave a message and shoot me a text if I do not pick up.
If an item — a Delkin flash card or reader, a Levered-clamp FlexShooter Pro, or a Wimberley lens plate or low foot — for example, that is available from B&H and/or Bedfords, is also available in the BAA Online Store, it would be great, and greatly appreciated, if you would opt to purchase from us. We will match or beat any price. Please remember also to use my B&H affiliate links or to earn 3% cash back at Bedford by using the BIRDSASART discount code at checkout for your major gear purchases. Doing either often earns you free guides and/or discounts. And always earns my great appreciation.
Gear Questions and Advice
Too many folks attending BAA IPTs and dozens of photographers whom I see in the field and on BirdPhotographer’s.Net, are — out of ignorance — using the wrong gear, especially when it comes to tripods and more especially, tripod heads. And the same is true in spades when ordering new camera bodies or lenses. My advice will often save you some serious money and may help you avoid making a seriously bad choice. Please know that I am always glad to answer your gear questions via e-mail. If you are desperate, you can try me on my cell at 863-221-2372. Please leave a message and shoot me a text if I do not pick up.
Don’t Just Shoot: Learn
If you are interested in changing your life and becoming a better photographer by joining me on the Extended IPT at Sebastian Inlet for Ospreys and more (OCT 25 to NOV 24, 2025), in San Diego for Pacific-race Brown Pelicans and more (JAN 6 to FEB 2, 2026), or for Roseate Spoonbills at Stick Marsh (March 2026), please e-mail for dates, rates, terms, and additional information. Or shoot me a text to 863-221-2372. Some offerings include options for shared AirBnB lodging and meals. Ground transportation during your stay is a possibility at times.
B&H Simplified
To ensure that I get credit for your B&H purchases, you can always click here. The tracking is invisible but using my affiliate links is greatly appreciated. And, with B&H, you can use your PayBoo card. You must use the website to order. You cannot get your free guides if you make a phone order. Once you have an item in your cart, you must complete the order within two hours. Huge thanks!
B&H
Many folks have written recently stating that they purchased a Sony a1 from B&H and would like their free membership in the Sony 1 Info and Updates Group, a $150.00 value. But when I check my affiliate account, their orders have not been there. When I let them know that they get credit for B&H purchases only if they use one of the many B&H affiliate links on the blog or begin their searches with this link, they are always disappointed. If in doubt, please contact me via e-mail and request a BH link. I am always glad to help and to guide you to the right gear.
Bedfords Simplified
Click here to start your search. Choose standard shipping, and when you get to the payment page, enter BIRDSASART in the discount code box and hit apply. You will be upgraded to free second day air Fed-Ex and receive 3% cash back on your credit card once your stuff ships. Using either my affiliate links is greatly appreciated and will often earn you free guides or discounts.
Bedfords Amazing BAA Discount Policy
Folks who have fallen in love with Bedfords can always use the BIRDSASART coupon code at checkout to enjoy a post-purchase, 3% off-statement credit (excluding taxes and shipping charges) on orders paid with a credit card. The 3% credit will be refunded to the card you used for your purchase when your product ships. Be sure, also, to check the box for free shipping to enjoy free Second Day Air Fed-Ex. This offer does not apply to purchases of Classes, Gift Cards, or prior purchases.
You can visit the Bedfords website here, shoot Steve Elkins an e-mail, or text him on his cell phone at (479) 381-2592.
|
|
|
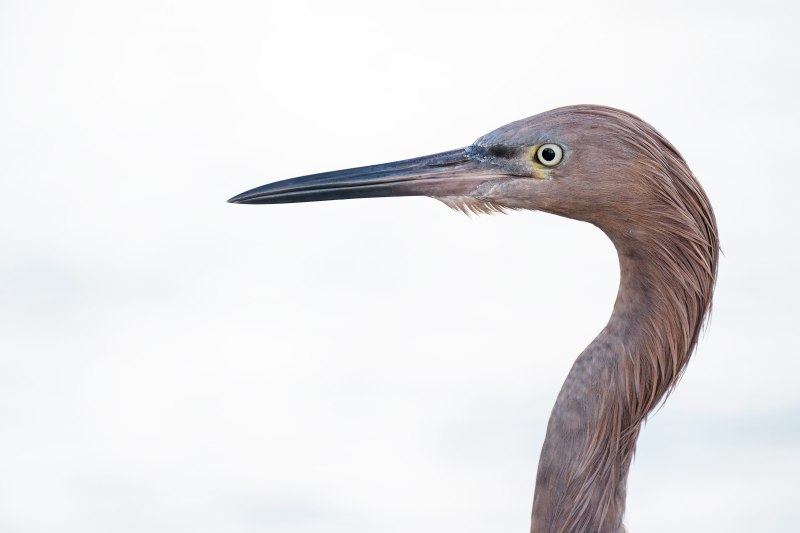
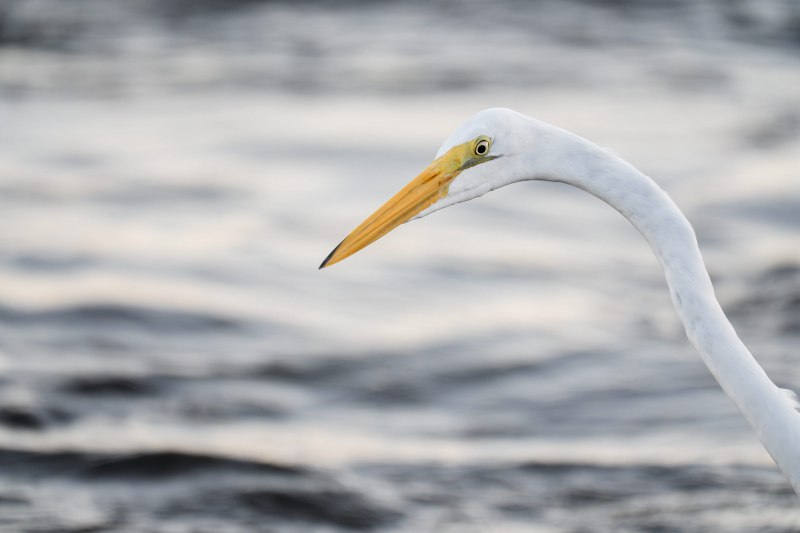
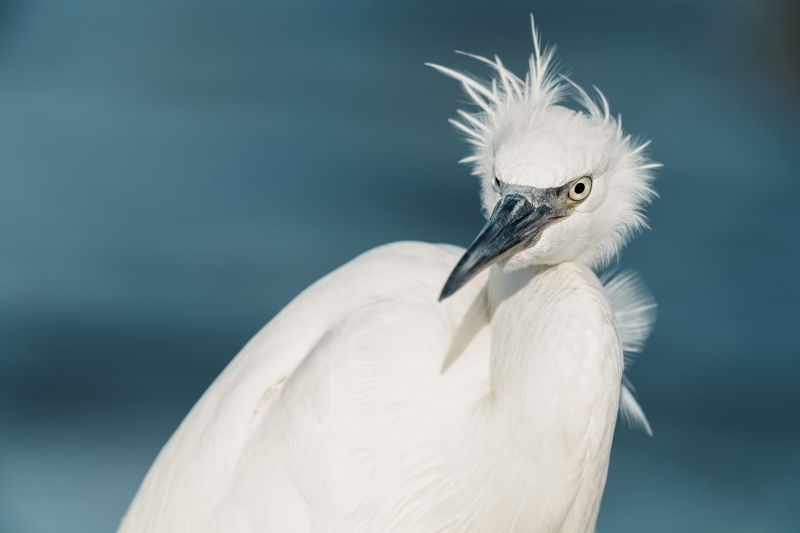
This image was created on 11 October 2025 by Alvin “Red” Stevens of Birmingham, AL. crouching as instructed, he used the handheld Sony FE 70-200mm f/2.8 GM OSS II Lens with the Sony FE 2x Teleconverter (at 394mm) and The Latest Greatest Sony Flagship Body, the a1 II Mirrorless Camera. The exposure was determined by Zebras with ISO on the rear wheel — ISO 800: 1/500 second at f/5.6 (wide open) in Manual mode. AWB at 6:25:34pm afternoon in the shade on a sunny afternoon.
Wide/AF-C with Bird-Eye/Face Detection performed perfectly. Click on the image to enjoy the larger, inexplicably sharper high-res version.
Image #1: Reddish Egret head portrait
Image courtesy of and copyright 2025: Red Stevens
Image optimization by Arthur Morris/BIRDS AS ART
|
Using Wide for Perfect Image Designs
Wide (non-tracking) AF is my go-to AF method with the Sony a-1 ii. Start with the bird’s eye in the center of the frame and recompose as needed. Having Red watch the back of my camera body, I showed him how the AF system tracked the eye as I perfectly re-positioned the bird in the frame. Then, he did the exact same thing.
|
|
|
This image was also created on 11 October 2025 by Alvin “Red” Stevens of Birmingham, AL. Standing at full height, he used the handheld Sony FE 70-200mm f/2.8 GM OSS II Lens with the Sony FE 2x Teleconverter (at 400mm) and The Latest Greatest Sony Flagship Body, the a1 II Mirrorless Camera. The exposure was determined by Zebras with ISO on the rear wheel — ISO 800: 1/800 second (!) at f/5.6 (wide open) in Manual mode. AWB at 6:42:14pm in the shade on a sunny afternoon.
Wide/AF-C with Bird-Eye/Face Detection performed perfectly. Click on the image to enjoy the larger, inexplicably sharper high-res version.
Image #2: Great Egret taking flight
Image courtesy of and copyright 2025: Red Stevens
Image optimization by Arthur Morris/BIRDS AS ART
|
Push the Button Now, Ask Questions Later
Red was making images of this young Great Egret working to place the bird on the left side of the frame. When it took flight, he panned with the bird and created several images despite the fact that his shutter speed was theoretically too slow for making a sharp flight image. But his accurate panning rate yielded a sharp image.
Is this the world’s greatest ever flight image? No, no by a long shot. But considering that it was Red’s first ever afternoon of bird photography it is quite amazing.
|
|
|
This image was also created on 11 October 2025 by Alvin “Red” Stevens of Birmingham, AL. Crouching a bit, he used the handheld Sony FE 70-200mm f/2.8 GM OSS II Lens with the Sony FE 2x Teleconverter (at 400mm) and The Latest Greatest Sony Flagship Body, the a1 II Mirrorless Camera. The exposure was determined by Zebras with ISO on the rear wheel — ISO 2000: 1/500 second at f/5.6 (wide open) in Manual mode. AWB at 6:51:06pm in the shade on a sunny afternoon.
Wide/AF-C with Bird-Eye/Face Detection performed perfectly. Click on the image to enjoy the larger, inexplicably sharper high-res version.
Image #3: Great Egret head portrait
Image courtesy of and copyright 2025: Red Stevens
Image optimization by Arthur Morris/BIRDS AS ART
|
Why Crouch?
With situations similar to this, crouching to get lower effectively moves the background farther from the subject and usually renders a more pleasing, less detailed background.
|
|
|
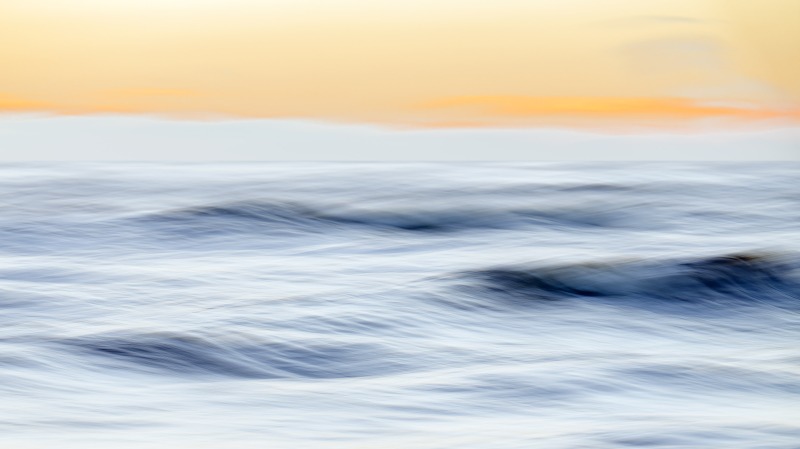
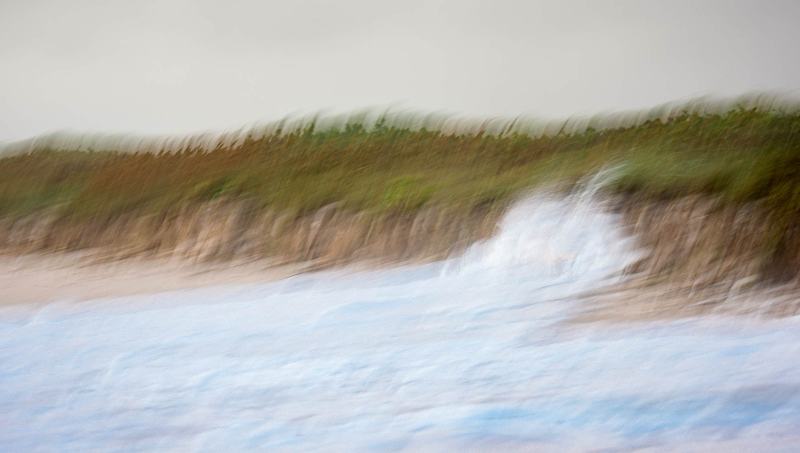
This image was created on 13 October 2025 by Alvin “Red” Stevens of Birmingham, AL. Standing near the base of the South Jetty, he used the handheld Sony FE 70-200mm f/2.8 GM OSS II lens with the with theSony FE 1.4x Teleconverter and The Latest Greatest Sony Flagship Body, the a1 II Mirrorless Camera. The exposure was determined by Zebras with Exposure Compensation (EC) on the thumb wheel. Multi Metering +2.3 stops. AUTO ISO set ISO 125: 1/8 second at f/5.6 (stopped down one stop) in Shutter Priority mode. AWB at 7:17:01am on a clear morning with one large cloud on the eastern horizon.
Wide/AF-C with Bird-Eye/Face Detection performed perfectly. Click on the image to enjoy the larger high-res version.
Image #4: Pre-sunny morning wave blur
Image courtesy of and copyright 2025: Alvin Stevens
Image optimization by Arthur Morris/BIRDS AS ART
|
Open to Learning New Techniques and Making Creative Blurs
On our first morning, Red was open to learning the Shutter Priority Mode technique that I use at the beach for creating pleasing blurs. He made lots of them, and created on quite sensual image. He learned during the image optimization that properly exposed raw files of overall light-toned scenes should look washed out and boring and that they can then be brought to life during the raw conversions.
|
|
|
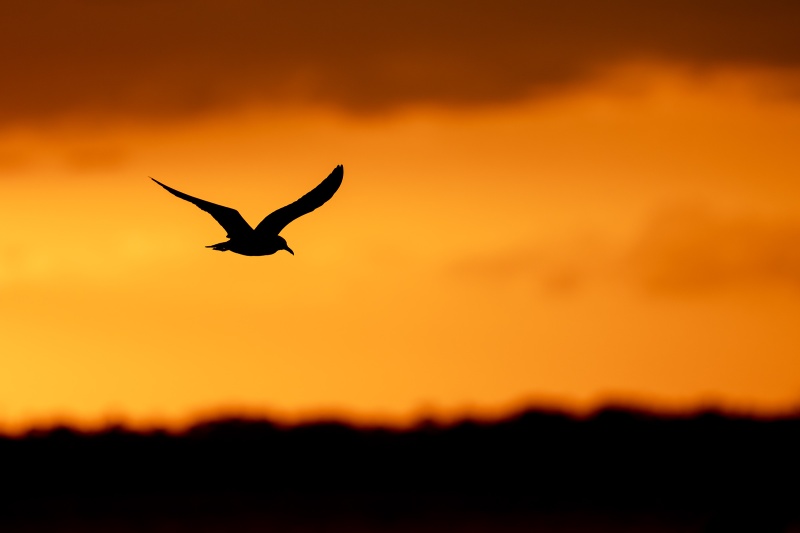
This image was created on 16 October 2025 by Alvin “Red” Stevens of Birmingham, AL on a Sebastian Inlet Ospreys and More Extended IPT. Standing at full height, he used the hand held Sony FE 300mm f/2.8 GM OSS Lens (Sony E) with the Sony FE 2x Teleconverter and the Latest Greatest Sony Flagship Body, the a1 II Mirrorless Camera. The exposure was determined by Zebras with Exposure Compensation (EC) on the thumb wheel. Multi Metering +1.0 stops. AUTO ISO set ISO 1250: 1/2500 second at f/5.6 (wide open) in Shutter Priority mode. RawDigger showed that the exposure was perfect: AWB at 6:45:10pm on a partly cloudy afternoon.
Tracking: Zone/AF-C with Bird Eye/Face Detection enabled performed perfectly.
Image #5: Laughing Gull — sunset silhouette
Image courtesy of and copyright 2025: Red Stevens
Image optimization by Arthur Morris/BIRDS AS ART
|
On Saving a Bit of ISO
Note that with this image Red properly dropped his shutter speed from 1/4000 sec. to 1/2500 sec. to save two clicks of ISO. It is proper to do the exact same thing when working in manual mode and creating sharp images. Red’s ability to create sharp images from day one of his bird photography career was remarkable.
I’ve long said that beginning and intermediate shooters with the latest greatest mirrorless gear, their cameras set up properly, and a modicum of good instruction can — on occasion, create action shots as good as those made by a pro with 42+ years of bird photography experience.
If …
If you had previously receiving blog post notifications via e-mail on a regular basis but they quit coming in the last month or so, please let me know via e-mail and cut and paste this into the subject line: Please Add to the Personalized Blog Notification List. It seems that some e-mail providers (likely including Gmail) recently began blocking the blog post notification e-mails being sent by the Word Press Newsletter plugin. The new, authenticated sending address was supposed to fix that problem, but it has not 🙂 Life goes on.
Don’t Just Shoot: Learn
If you are interested in changing your life and becoming a better photographer by joining me on the Extended IPT at Sebastian Inlet for Ospreys and more (OCT 25 to NOV 24, 2025), in San Diego for Pacific-race Brown Pelicans and more (JAN 6 to FEB 2, 2026) as below, or for Roseate Spoonbills at Stick Marsh (March 2026), please e-mail for dates, rates, terms, and additional information. Or shoot me a text to 863-221-2372. Some offerings include options for shared AirBnB lodging and meals. Ground transportation during your stay is a possibility at times.
October 11th, 2025 A Good Bird Photograph Must Show the Subject’s Eyes
Is the above true? Check out today’s six featured San Diego images and let us know what you think. Consider changing your life by joining me in San Diego this coming January. Details below.
If …
If you had previously receiving blog post notifications via e-mail on a regular basis but they quit coming in the last month or so, please let me know via e-mail and cut and paste this into the subject line: Please Add to the Personalized Blog Notification List. It seems that some e-mail providers (likely including Gmail) recently began blocking the blog post notification e-mails being sent by the Word Press Newsletter plugin. The new, authenticated sending address was supposed to fix that problem, but it has not 🙂 Life goes on.
Don’t Just Shoot: Learn
If you are interested in changing your life and becoming a better photographer by joining me on the Extended IPT at Sebastian Inlet for Ospreys and more (OCT 25 to NOV 24, 2025), in San Diego for Pacific-race Brown Pelicans and more (JAN 6 to FEB 2, 2026) as below, or for Roseate Spoonbills at Stick Marsh (March 2026), please e-mail for dates, rates, terms, and additional information. Or shoot me a text to 863-221-2372. Some offerings include options for shared AirBnB lodging and meals. Ground transportation during your stay is a possibility at times.
|
|
|
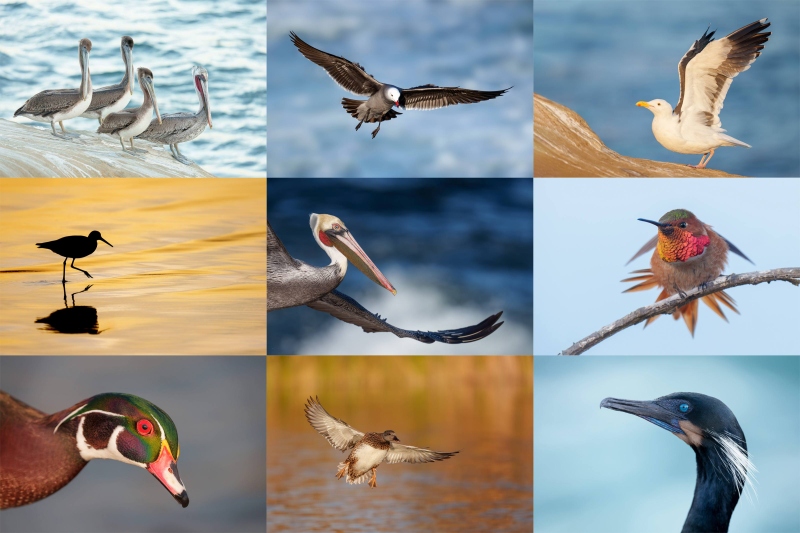
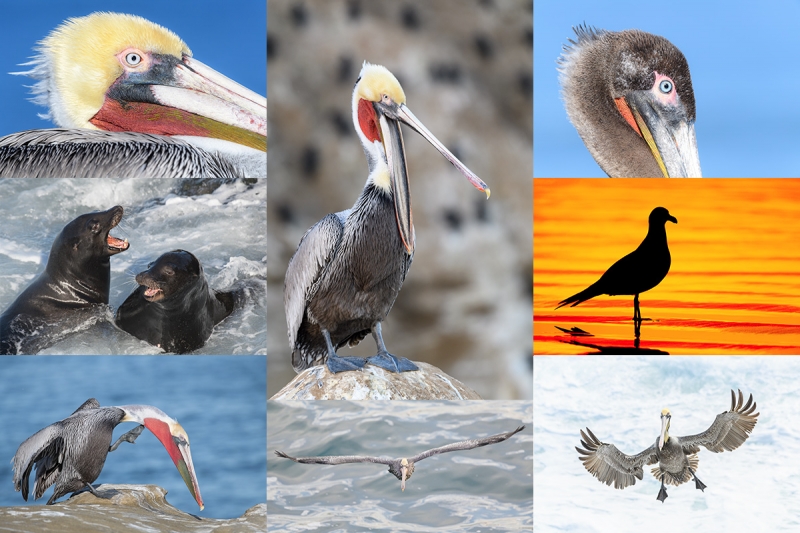
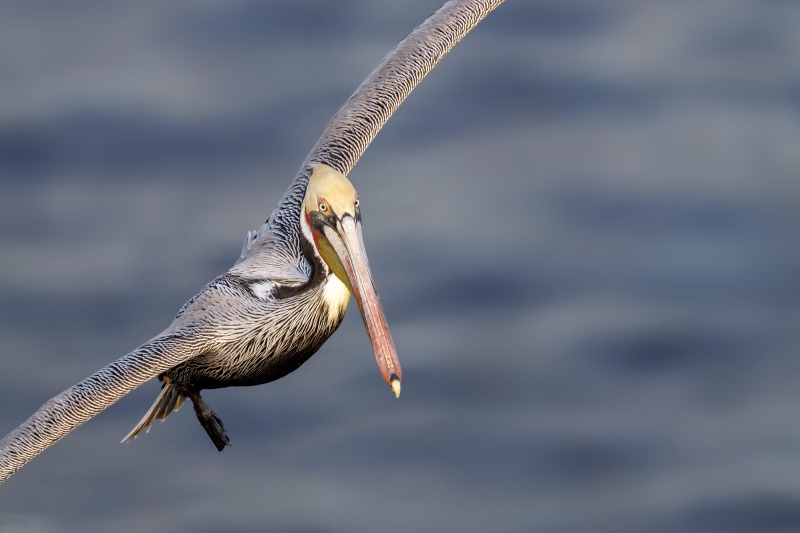
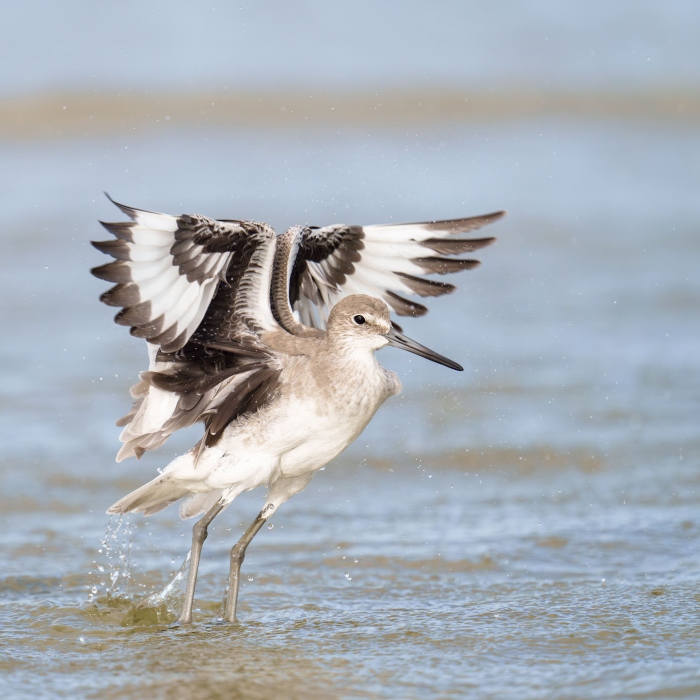
San Diego offers an incredible variety of attractive avian subjects, including and especially the Pacific race of Brown Pelican. Clockwise from top left back to center: juvenile and sub-adult Brown Pelicans; Heermann’s Gull; Western Gull; Allen’s Hummingbird; Brandt’s Cormorant; Gadwall hen; Wood Duck drake; Willet; Brown Pelican tight flight. Click on the composite to enjoy a larger version.
|
The 2026 San Diego Brown Pelicans (and more!) IPTs
San Diego IPT #1: 4 1/2 DAYS: THURS 8 JAN thru the morning session on MON 12 JAN 2026: $2599.00. Deposit: $699.00. Limit: 6 photographers.
San Diego IPT #2: 4 1/2 DAYS: FRI 16 JAN thru the morning session on TUES 20 JAN 2026: $2599.00. Limit: 6 photographers.
Morning BAA In-the-Field Instructional Sessions (ITFIS) followed by brunch and an Image Review & Photoshop session: $449.00/per session
Available dates: JAN 14 & 15, 2026. Please get in touch with questions or to register with an e-mail to samandmayasgrandpa@att.net and please shoot me a text to 863-221-2372.
AirBnB accommodations and ground transport with the leader are available for both IPTs and for In the Field Instructional Sessions on a first come, first served basis. Please e-mail for details and information on personalized pre- and post-IPT morning sessions.
Join me in San Diego to photograph the spectacular breeding plumage Brown Pelicans with their fire-engine red and olive green bill pouches; Brandt’s (nesting) and Double-crested Cormorants; breeding plumage Wood and Ring-necked Ducks; other duck species possible including Lesser Scaup, Redhead, Northern Shoveler and Surf Scoter; a variety of gulls including Western, California, and the gorgeous Heermann’s, all in full breeding plumage; shorebirds including Marbled Godwit, Willet, Sanderling and Black-bellied Plover; many others are possible including Least, Western, and Spotted Sandpiper, Whimbrel, Black and Ruddy Turnstone, Semipalmated Plover, and Surfbird; Harbor Seals and California Sea Lions (both depending on the current regulations and restrictions). And as you can see by studying the IPT cards, there are some nice bird-scape and landscape opportunities as well. Not to mention a ton of excellent flight photography opportunities and instruction.
Please note: where permitted and on occasion, ducks and gulls may be attracted (or re-located) with offerings of grains or healthy bread.
|
|
|
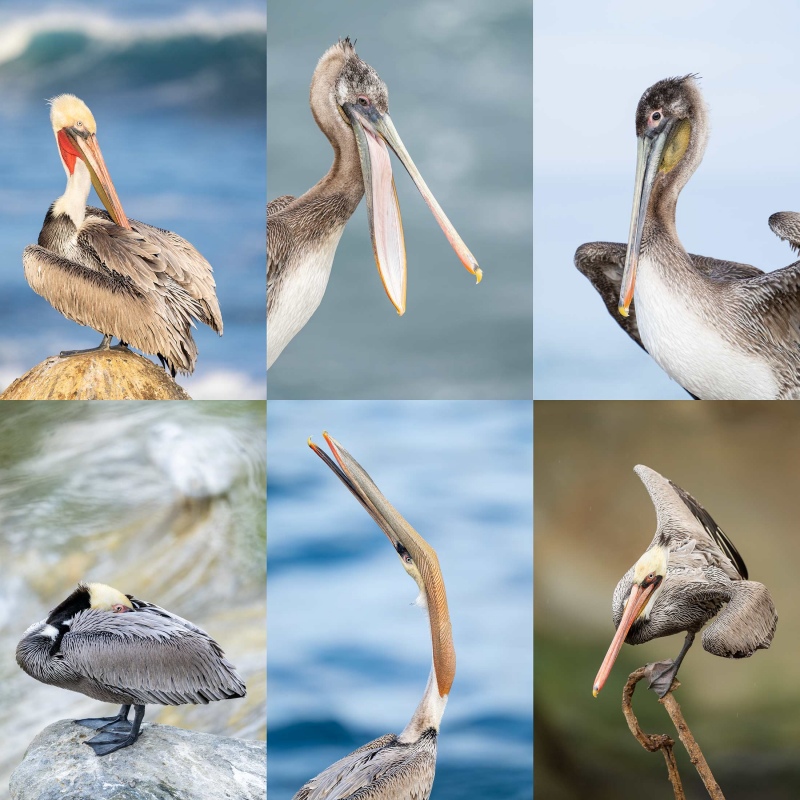
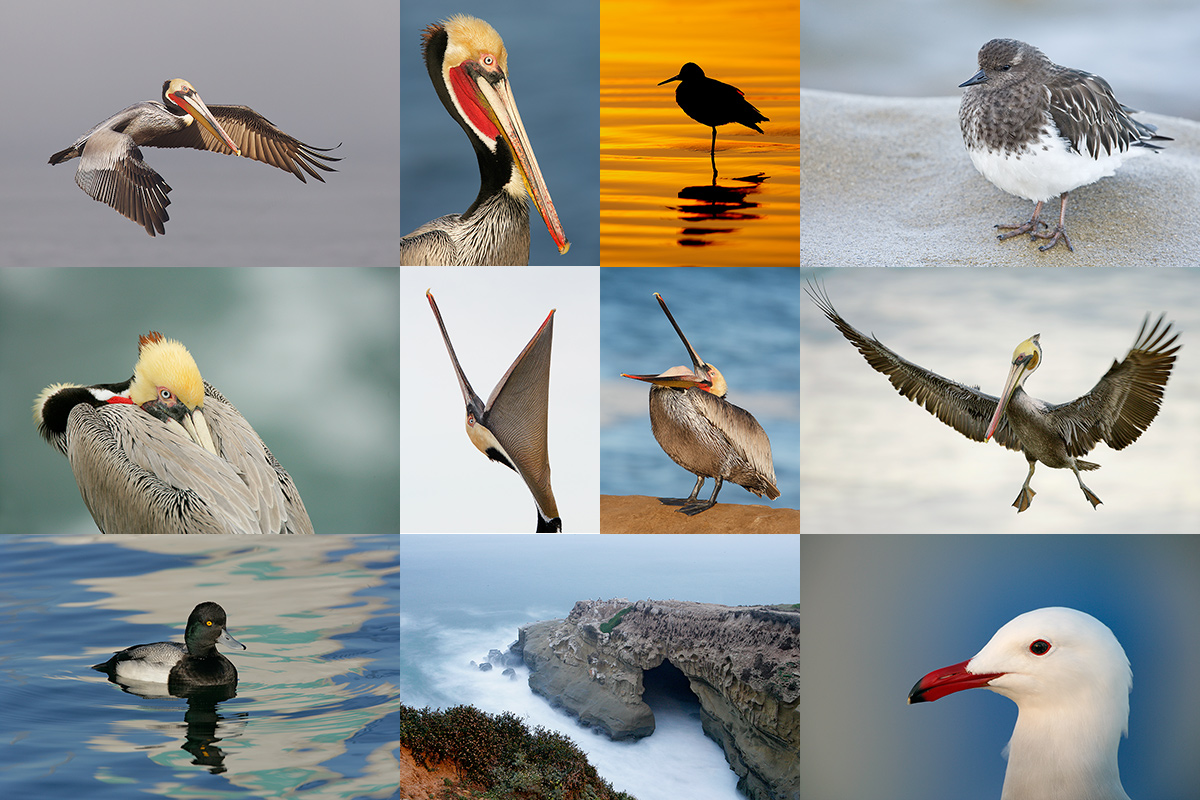
San Diego offers a wealth of very attractive natural history subjects, including and especially the Pacific race of California Brown Pelican. With annual visits spanning more than four decades, I have lots of photographic experience there … Click on the composite to enjoy a larger version.
|
Learning Exposure, Whether You Like It Or Not
Whether you like it or not, we will be beating the subject of exposure like a dead horse. In every new situation, you will hear my thoughts on exposure along with my thoughts on both Nikon and Canon histograms and SONY Zebras. Whether you like it or not, you will learn to work in manual mode so that you can get the right exposure every time (as long as a bird gives you ten seconds with the light constant). Or two seconds with SONY zebras … And you will learn what to do when the light is changing constantly. What you learn about exposure will be one of the great takeaways on every IPT.
|
|
|
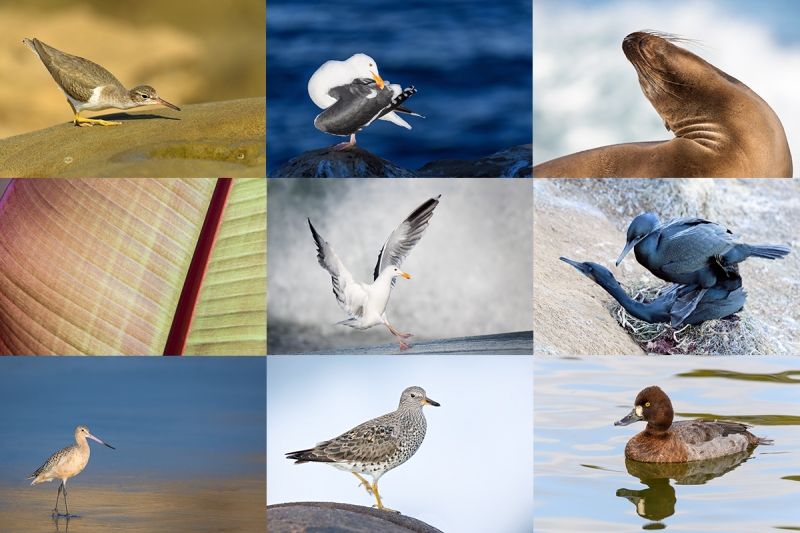
Though the pelicans will be the stars of the show on this IPT, there will be many other handsome and captivating subjects in wonderful settings. Click on the composite to enjoy a larger version.
|
It Ain’t Just Pelicans
With gorgeous subjects just sitting there waiting to have their pictures taken, photographing the pelicans on the cliffs is about as easy as nature photography gets. With the winds from the east almost every morning, there is usually some excellent flight photography, at times with 70-200mm lenses! And the pelicans are almost always doing something interesting: preening, scratching, bill pouch cleaning, or squabbling. And then there are those crazy head throws that are thought to be a form of intra-flock communication. You will be guided as to how to make the best of those opportunities. Depending on the weather, the local conditions, and the tides, there are a variety of other fabulous photo chances available in and around San Diego. Each IPT will include one or two duck sessions.
|

|
|
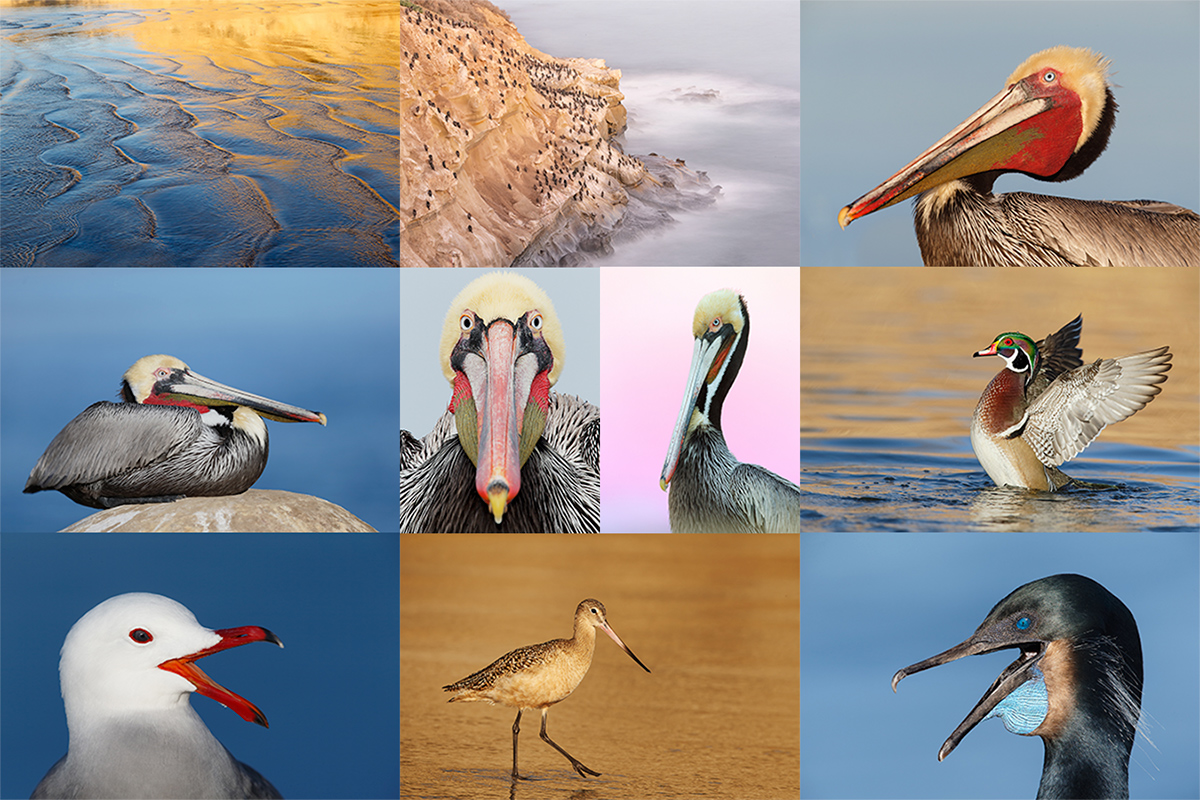
Did I mention that there are lots of great birds and natural history subjects in San Diego in winter? Click on the composite to enjoy a larger version.
|
The San Diego Details
These IPTs will include four or five 3-hour morning photo sessions, three or four 1 1/2-hour afternoon photo sessions, and three or four working brunches that will include image review and Photoshop sessions. On rare cloudy days, we may — at the leader’s discretion, stay out in the morning for a long session and skip that afternoon shoot. To ensure early starts, breakfasts will be your responsibility. And so that we can get some sleep, dinners will be on your own as well. In the extremely unlikely event that Goldfish Point is closed due to local ordinance (or whimsy) — that has never happened in the past fifty years, I will of course do my very best to maximize our photographic opportunities.
|
|
|
San Diego offers a wealth of very attractive natural history subjects, including and especially the Pacific race of California Brown Pelican. With annual visits spanning more than four decades, I have lots of photographic experience there. Click on the composite to enjoy a larger version.
|
Deposit Info
A $699 deposit is required to hold your slot for one of the 2024 San Diego IPT. You can send a check (made out to “BIRDS AS ART”) to us here: BIRDS AS ART, PO Box 7245, Indian Lake Estates, FL, 33855, or call Jim or Jennifer at the office with a credit card at 863-692-0906. Your balance, payable only by check, is due three months before the trip.
|

|
|
Variety is surely the spice of life in San Diego. Click on the composite to enjoy a larger version.
|
Getting Up Early and Staying Out Late
On all BIRDS AS ART IPTS including and especially the San Diego IPT, we get into the field early to take advantage of unique and often spectacular lighting conditions and we stay out late to maximize the chances of killer light and glorious sunset silhouette situations. We often arrive at the cliffs a full hour before anyone else shows up to check out the landscape and seascape opportunities.
What’s Up
Conditions were perfect at Sebastian Inlet on Friday morning with a strong southeast wind and cloudy bright skies. The Ospreys did not start catching fish until after 9:30am. Eugen and I had several really good chances and we both made them pay off.
Today is Saturday 11 October 2025. We will be heading to the park early as usual. The forecast is calling for light winds from the NW (not great) and cloudy skies (might make the less than ideal wind direction manageable). Whatever you opt to do, I hope that you too choose to have a great day.
If you would like to join in the fun and learn an absolute ton, I have room at the AirBnB for you on a Sebastian Extended IPT any time from 25 October through and including 23 November. For complete details you can scroll down here, get in touch via e-mail, or try me on my cell at 863-221-2372. Please leave a message and shoot me a text if I do not pick up.
Volume II of the Digital Basics IV Video Series was distirbuted yesterday afternoon to the many wholesome ordered the entire series; it explains in detail how to handle images where some bright colors like reds, oranges, and yellows, show as over-exposed as soon as you hold down the Alt or Option key and move the Whites slider to the right in Adobe Camera Raw. We should be sending it out to the many who ordered the complete series this afternoon. Next up in Volume III will be the amazing Super Resolution feature in Photoshop 2025 v26.20.0.
If an item — a Delkin flash card or reader, a Levered-clamp FlexShooter Pro, or a Wimberley lens plate or low foot — for example, that is available from B&H and/or Bedfords, is also available in the BAA Online Store, it would be great, and greatly appreciated, if you would opt to purchase from us. We will match or beat any price. Please remember also to use my B&H affiliate links or to earn 3% cash back at Bedford by using the BIRDSASART discount code at checkout for your major gear purchases. Doing either often earns you free guides and/or discounts. And always earns my great appreciation.
Gear Questions and Advice
Too many folks attending BAA IPTs and dozens of photographers whom I see in the field and on BirdPhotographer’s.Net, are — out of ignorance — using the wrong gear, especially when it comes to tripods and more especially, tripod heads. And the same is true in spades when ordering new camera bodies or lenses. My advice will often save you some serious money and may help you avoid making a seriously bad choice. Please know that I am always glad to answer your gear questions via e-mail. If you are desperate, you can try me on my cell at 863-221-2372. Please leave a message and shoot me a text if I do not pick up.
Don’t Just Shoot: Learn
If you are interested in changing your life and becoming a better photographer by joining me on the Extended IPT at Sebastian Inlet for Ospreys and more (OCT 25 to NOV 24, 2025), in San Diego for Pacific-race Brown Pelicans and more (JAN 6 to FEB 2, 2026), or for Roseate Spoonbills at Stick Marsh (March 2026), please e-mail for dates, rates, terms, and additional information. Or shoot me a text to 863-221-2372. Some offerings include options for shared AirBnB lodging and meals. Ground transportation during your stay is a possibility at times.
B&H Simplified
To ensure that I get credit for your B&H purchases, you can always click here. The tracking is invisible but using my affiliate links is greatly appreciated. And, with B&H, you can use your PayBoo card. You must use the website to order. You cannot get your free guides if you make a phone order. Once you have an item in your cart, you must complete the order within two hours. Huge thanks!
B&H
Many folks have written recently stating that they purchased a Sony a1 from B&H and would like their free membership in the Sony 1 Info and Updates Group, a $150.00 value. But when I check my affiliate account, their orders have not been there. When I let them know that they get credit for B&H purchases only if they use one of the many B&H affiliate links on the blog or begin their searches with this link, they are always disappointed. If in doubt, please contact me via e-mail and request a BH link. I am always glad to help and to guide you to the right gear.
Bedfords Simplified
Click here to start your search. Choose standard shipping, and when you get to the payment page, enter BIRDSASART in the discount code box and hit apply. You will be upgraded to free second day air Fed-Ex and receive 3% cash back on your credit card once your stuff ships. Using either my affiliate links is greatly appreciated and will often earn you free guides or discounts.
Bedfords Amazing BAA Discount Policy
Folks who have fallen in love with Bedfords can always use the BIRDSASART coupon code at checkout to enjoy a post-purchase, 3% off-statement credit (excluding taxes and shipping charges) on orders paid with a credit card. The 3% credit will be refunded to the card you used for your purchase when your product ships. Be sure, also, to check the box for free shipping to enjoy free Second Day Air Fed-Ex. This offer does not apply to purchases of Classes, Gift Cards, or prior purchases.
You can visit the Bedfords website here, shoot Steve Elkins an e-mail, or text him on his cell phone at (479) 381-2592.
|
|
|
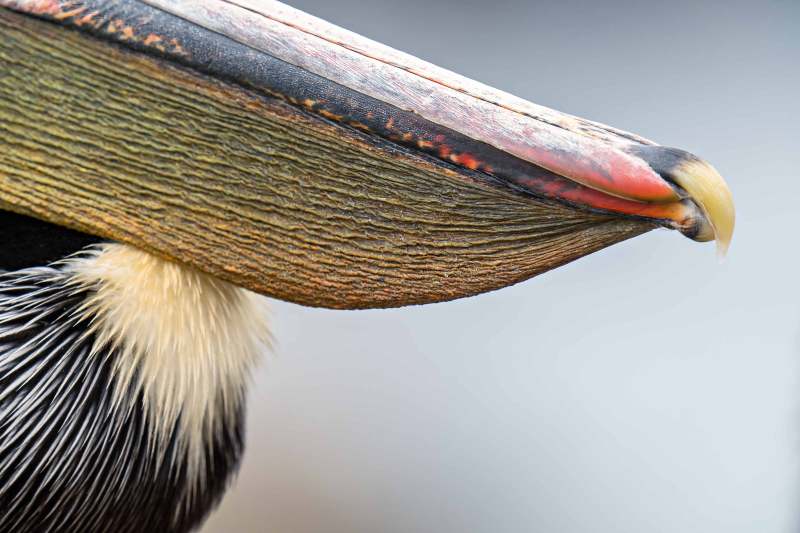
This image was created on 30 December 2022 on a San Diego/Brown Pelicans and more IPT. While seated, I used the knee-pod technique with the handheld Sony FE 400mm f/2.8 GM OSS lens with the Sony FE 2.0x Teleconverter, and The One, the Sony Alpha 1 Mirrorless Digital Camera). The exposure was determined by Zebras with ISO on the rear wheel: ISO 800: 1/320 sec. at f/8 (stopped down one stop for additional depth of field at point blank range) in Manual mode. When evaluated in RawDigger, the raw file exposure was determined to be about 1/6 stop short of perfect. AWB at 10:26:08am on a cloudy-bright morning.
Tracking: Zone AF-C with Bird Face/Eye detection enabled performed perfectly. Be sure to click on the image to enjoy a high-res version.
Image #1: Brown Pelican bill detail
|
La Jolla Pelican Tameness
In the early morning hours, La Jolla’s pelicans are very skittish. If you walk down to quickly, or peek over the edge of the cliff at the lower shelf, most or all of the pelicans may fly away. By 9:30am or so, the bird’s that remain on the cliffs can be ridiculously tame. If you are willing get low and get the seat of your pants dirty, there are days, especially cloudy ones, when it seems that you can just about reach out and touch them.
|
|
|
This image was created on 15 January 2022 on a San Diego/Brown Pelicans and more IPT. Standing at full height I used the Robus RC-5570 Vantage Series 3 Carbon Fiber Tripod/Levered-Clamp FlexShooter Pro-mounted -mounted Sony FE 600mm f/4 GM OSS lens, the Sony FE 2.0x Teleconverter, and The One, the Sony Alpha 1 Mirrorless Digital Camera). The exposure was determined via Zebra technology with ISO on the thumb dial. ISO 320. 1/8 sec. at f/25 (stopped down 2 1/3 stops for additional depth of filed) in Manual mode. When evaluated in RawDigger, the raw file brightness was determined to be perfect. AWB at 8:45:55am on a cloudy morning.
Five second self timer with the FlexShooteer Pro locked down.
Tracking: Spot S/AF-C with Bird-Eye/Face Detection performed perfectly. Click on the image to enjoy the high-res version. Be sure to click on the image to enjoy a high-res version.
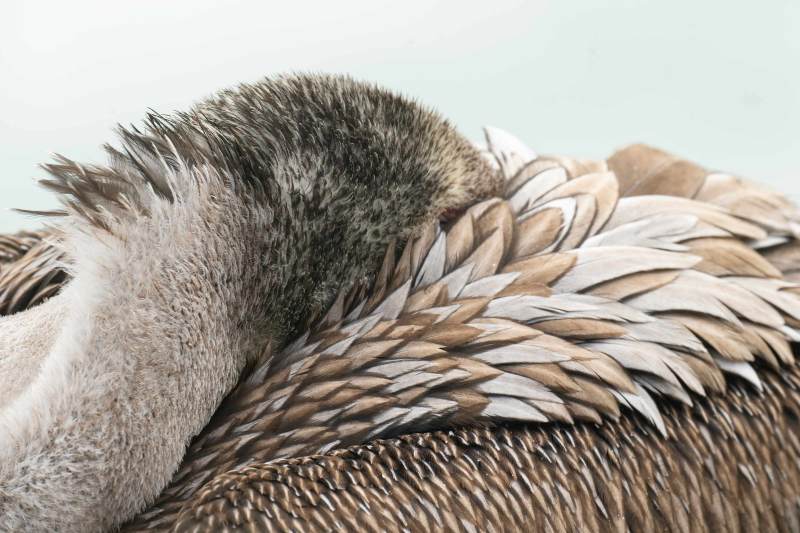
Image #2: Brown Pelican Pacific race adult breast feather detail
|
The Gold and White Diamond
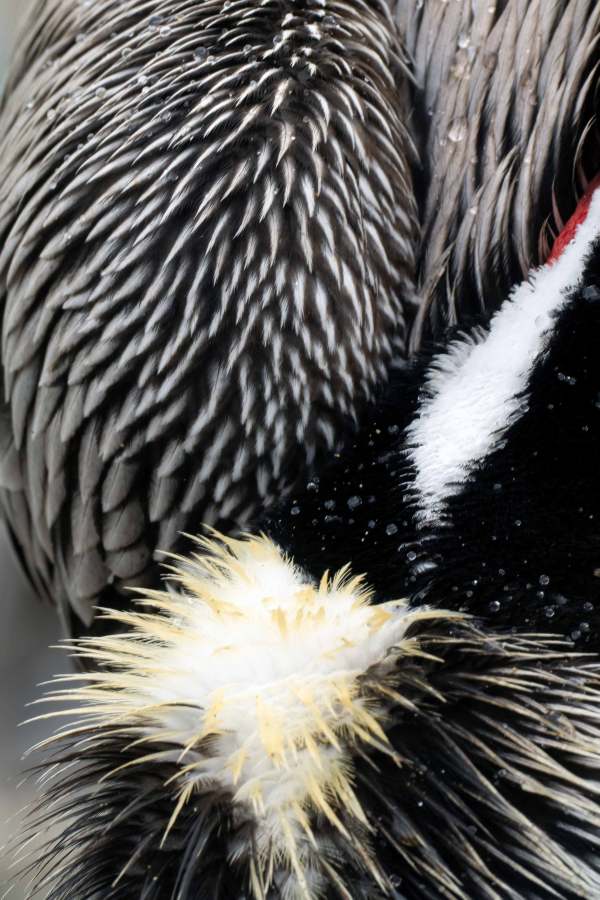
At the height of breeding plumage, the lower breast and belly feathers of the handsomest Pacific race pelicans are jet black. The upper breast is a mix of black and gray feathers. In the center, there is a diamond-shaped patch made up of splayed gold and white feathers.
|
|
|
This image was created on 15 January 2023 on a San Diego/Brown Pelicans and more IPT. Standing at full height on a sidewalk, I used the Robus RC-5570 Vantage Series 3 Carbon Fiber Tripod/Levered-Clamp FlexShooter Pro-mounted -mounted Sony FE 600mm f/4 GM OSS lens, the Sony FE 2.0x Teleconverter, and The One, the Sony Alpha 1 Mirrorless Digital Camera). The exposure was determined by Zebras with Exposure Compensation (EC) on the thumb wheel. Multi Metering +0.3 stops. AUTO ISO set ISO 400: 1/30 second at f/11 (stopped down one stop) in Shutter Priority mode. When evaluated in RawDigger, the exposure was determined to be perfect. AWB at 8:52:52am on a cloudy morning.
Five second self timer with the FlexShooteer Pro locked down.
Tracking: Spot S/AF-C with Bird-Eye/Face Detection performed perfectly. Click on the image to enjoy the high-res version. Be sure to click on the image to enjoy a high-res version.
Image #3: Brown Pelican Pacific race juvenile covert feather detail
|
Knowing Your Subjects and Understanding the Weather
On strong west winds accompanied by inclement weather, there is a readily accessible location in La Jolla where the birds rest and sleep just on the other side of a waist-high white fence. At times, the trick is to find a spot that offers a clear view of your desired through the vegetation.
|
|
|
This image was created on 24 January 2024 on a San Diego/Brown Pelicans and more IPT. Standing at full height on the cliffs at La Jolla, I used the Robus RC-5570 Vantage Series 3 Carbon Fiber Tripod/Levered-Clamp FlexShooter Pro-mounted -mounted Sony FE 600mm f/4 GM OSS lens, the Sony FE 2.0x Teleconverter, and The One, the Sony Alpha 1 Mirrorless Digital Camera). The exposure was determined by Zebras with ISO on the rear wheel: ISO 800: 1/320 sec. at f/8 (stopped down one stop for additional depth of field at point blank range) in Manual mode. When evaluated in RawDigger, the exposure was determined to be perfect. AWB at 8:52:52am on a cloudy morning.
Five second self timer with the FlexShooteer Pro locked down.
Tracking: Spot S/AF-C with Bird-Eye/Face Detection performed perfectly. Click on the image to enjoy the high-res version. Be sure to click on the image to enjoy a high-res version.
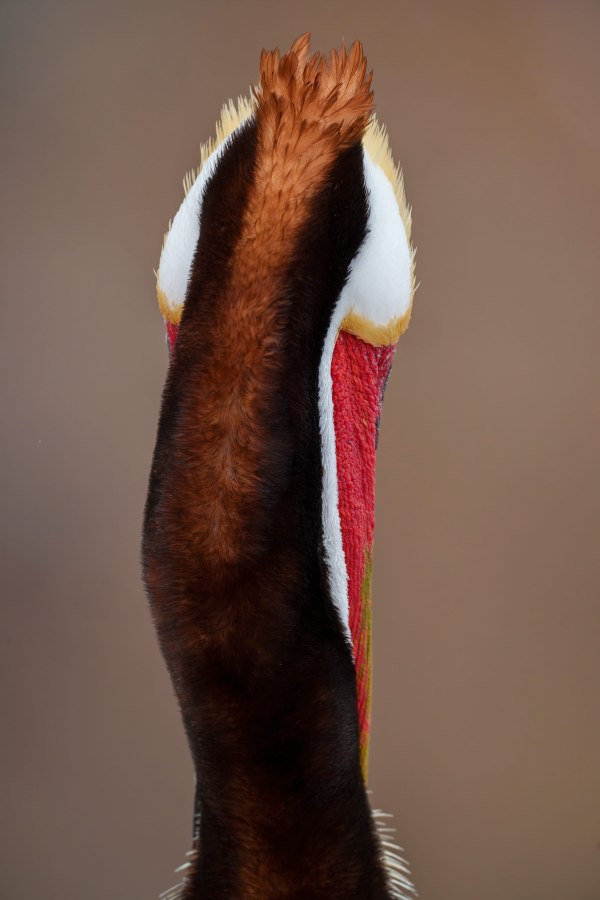
Image #4: Brown Pelican Pacific race adult in full breeding plumage — hind neck detail
|
Realize That the Rules Were Meant to be Broken
It is generally accepted that photographs of the back of a bird’s head are pretty much worthless. If Image #4 does not change your thinking, you may miss lots of wonderful opportunities that pop up right in front of your proverbial nose.
|
|
|
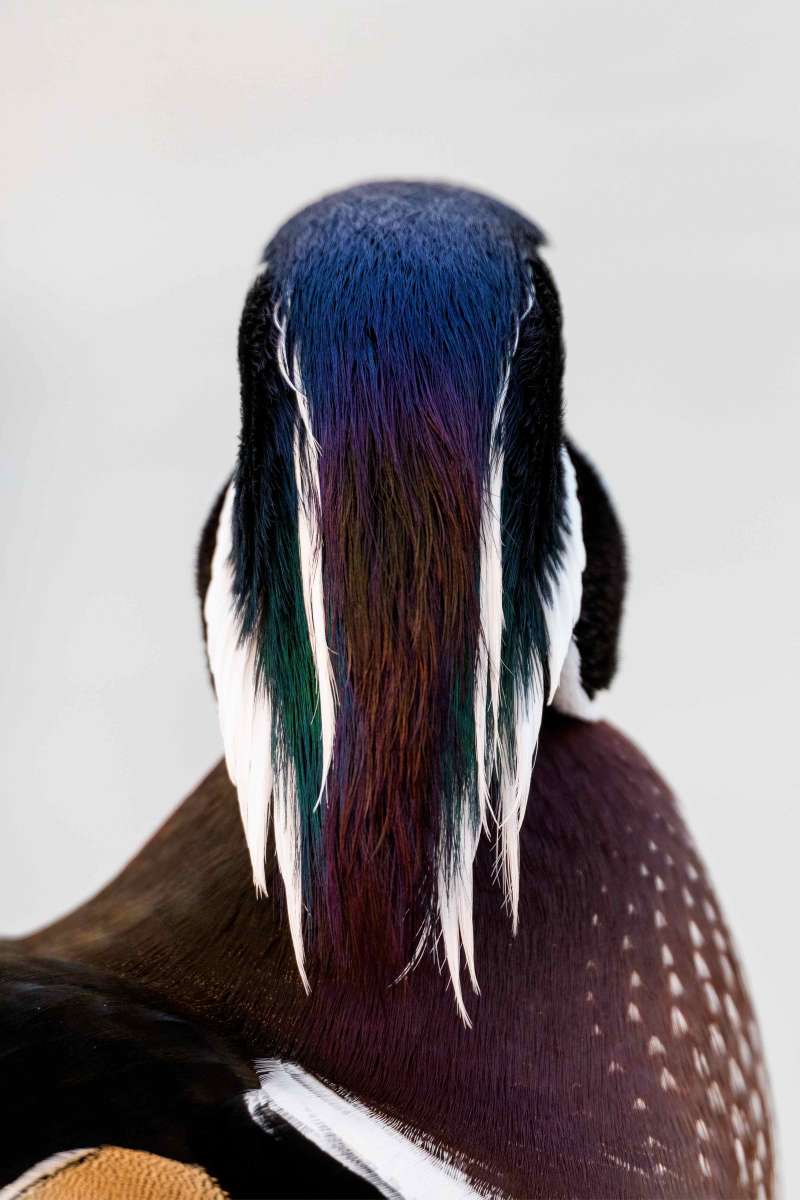
This image was created at Santee Lakes Park on 24 January 2024 on a San Diego IPT. Seated on a road, I used the hand held Sony FE 300mm f/2.8 GM OSS Lens (Sony E) with the Sony FE 2x Teleconverter and the with the Sony a-1 (now replaced by the Latest Greatest Sony Flagship Body, the a1 II Mirrorless Camera). ISO 2500. Exposure determined via Zebras with ISO on the Thumb Wheel; 1/1000 sec. at f/8 (stopped down two stops for additional depth of field) in Manual mode. RawDigger showed that the exposure was dead solid perfect: AWB at 10:19:09am on a cloudy bright morning.
Tracking: Spot S/AF-C with Bird Eye/Face Detection enabled performed perfectly.
Image #5: Wood Duck drake — back of head feather detail.
Image copyright 2025 Arthur Morris/BIRDS AS ART
|
More of the Same
Feeding the ducks at Santee is not only permitted by encouraged; the park sells small healthy bags of waterfowl food called scratch at the fee booth for $2.00 a crack. At times the paper bags split open and the ground around you is littered with bits of grains and seeds. The ducks will often gather around you at arm’s length. Good images are where you see them and they do not always follow the rules.
|
|
|
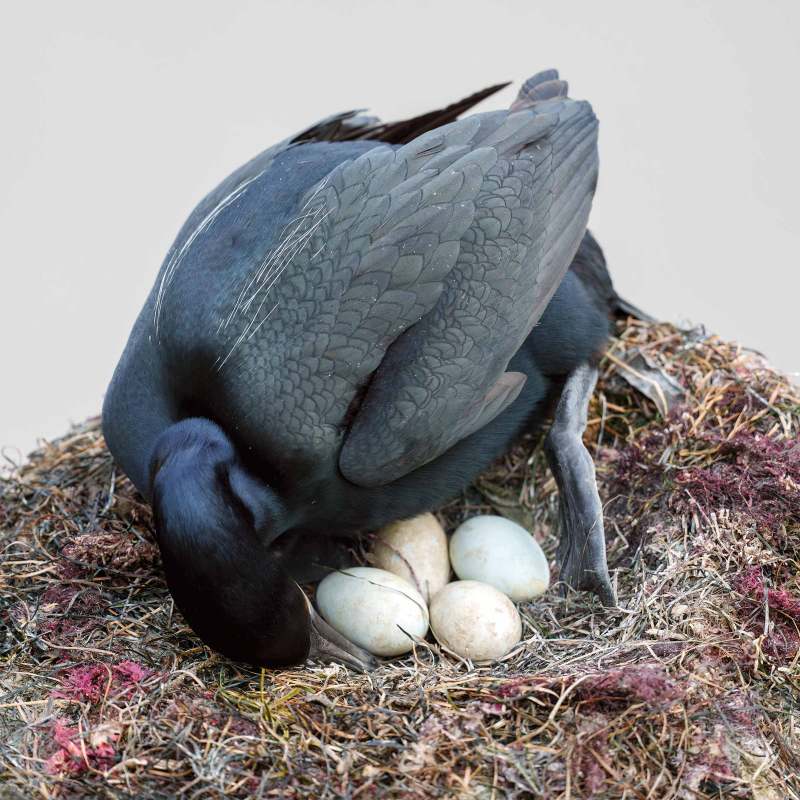
This image was created on 26 January on the 2025 San Diego IPT. Leaning on the railing above the breeding shelf, I used the hand held Sony FE 300mm f/2.8 GM OSS Lens (Sony E) with the Sony FE 1.4x Teleconverter and the Latest Greatest Sony Flagship Body, the a1 II Mirrorless Camera. ISO 1000. Exposure determined via Zebras with ISO on the Thumb Wheel; 1/400 sec. at f/4 (wide open) in Manual mode. RawDigger showed that the exposure was dead solid perfect: AWB at 8:32:54am in total shade on a partly sunny morning.
Tracking: Spot S/AF-C with Bird Eye/Face Detection enabled performed perfectly.
Image #6: Brandt’s Cormorant on nest with eggs
Image copyright 2025 Arthur Morris/BIRDS AS ART
|
Eggs-Zactly
Making good images of the Brandt’s Cormorants on the nesting shelf scant yards below the sidewalk a La Jolla that show the eggs is a big challenge. Here, we do not see the bird’s eyes because it is tending the eggs. Bird’s often roll the eggs around in the nest and turn them over to prevent the embryo from sticking to the shell, distribute heat evenly, and keep the embryo centered. Turning the eggs ensures that all parts of the egg receive nutrients and remain at the proper temperature.
Typos
With all blog posts, feel free to e-mail or to leave a comment regarding any typos or errors.
October 9th, 2025 Your Call
Which three of today’s nine featured flight images are your favorites? Please be so kind as to leave a comment and let us know why you made your choices.
If …
If you had previously receiving blog post notifications via e-mail on a regular basis but they quit coming in the last month or so, please let me know via e-mail and cut and paste this into the subject line: Please Add to the Personalized Blog Notification List. It seems that some e-mail providers (likely including Gmail) recently began blocking the blog post notification e-mails being sent by the Word Press Newsletter plugin. The new, authenticated sending address was supposed to fix that problem, but it has not 🙂 Life goes on.
What’s’ Up?
Mornings have continued to be great with diving Ospreys and fishing pelicans. Wednesday afternoon was typical of our pm sessions with challenging wind against sun conditions interspersed with rain squalls. We did enjoy some great subjects facing the wrong way, that means, looking at us! We did well with a young Great Blue Heron, Snowy and Reddish Egret, and several Wood Storks.
Today is Thursday 9 October. Conditions at Sebastian were very good but there was little going on. We did have one good chance on an Osprey with a fish on our way back to my SUV. Whatever you opt to do, I hope that you too choose to have a great day.
If you would like to join in the fun and learn an absolute ton, I have room at the AirBnB for you on a Sebastian Extended IPT any time from 25 October through and including 23 November. For complete details you can scroll down here, get in touch via e-mail, or try me on my cell at 863-221-2372. Please leave a message and shoot me a text if I do not pick up.
Volume II of the Digital Basics IV Video Series was distirbuted yesterday afternoon to the many wholesome ordered the entire series; it explains in detail how to handle images where some bright colors like reds, oranges, and yellows, show as over-exposed as soon as you hold down the Alt or Option key and move the Whites slider to the right in Adobe Camera Raw. We should be sending it out to the many who ordered the complete series this afternoon. Next up in Volume III will be the amazing Super Resolution feature in Photoshop 2025 v26.20.0.
If an item — a Delkin flash card or reader, a Levered-clamp FlexShooter Pro, or a Wimberley lens plate or low foot — for example, that is available from B&H and/or Bedfords, is also available in the BAA Online Store, it would be great, and greatly appreciated, if you would opt to purchase from us. We will match or beat any price. Please remember also to use my B&H affiliate links or to earn 3% cash back at Bedford by using the BIRDSASART discount code at checkout for your major gear purchases. Doing either often earns you free guides and/or discounts. And always earns my great appreciation.
Gear Questions and Advice
Too many folks attending BAA IPTs and dozens of photographers whom I see in the field and on BirdPhotographer’s.Net, are — out of ignorance — using the wrong gear, especially when it comes to tripods and more especially, tripod heads. And the same is true in spades when ordering new camera bodies or lenses. My advice will often save you some serious money and may help you avoid making a seriously bad choice. Please know that I am always glad to answer your gear questions via e-mail. If you are desperate, you can try me on my cell at 863-221-2372. Please leave a message and shoot me a text if I do not pick up.
Don’t Just Shoot: Learn
If you are interested in changing your life and becoming a better photographer by joining me on the Extended IPT at Sebastian Inlet for Ospreys and more (OCT 25 to NOV 24, 2025), in San Diego for Pacific-race Brown Pelicans and more (JAN 6 to FEB 2, 2026), or for Roseate Spoonbills at Stick Marsh (March 2026), please e-mail for dates, rates, terms, and additional information. Or shoot me a text to 863-221-2372. Some offerings include options for shared AirBnB lodging and meals. Ground transportation during your stay is a possibility at times.
|
|
|
The title says it all. Purchase your copy here.
The Complete and Quintessential Guide to Photographing Birds in Flight
by Arash Hazeghi, Ph.D., and Arthur Morris/BIRDS AS ART
|
The Complete and Quintessential Guide to Photographing Birds in Flight: $99.00
I had long dreamed of becoming a great flight photographer. When using dSLR gear, making sharp images was a huge problem. Most of the time, the camera bodies simply were not up to snuff. Things have changed dramatically with mirrorless technology. The high-end mirrorless camera bodies now feature science fiction-like autofocus systems and frame rates of 30, 40, and even 125 fps. Nowadays, getting the eye sharp is no longer a problem. The problem more often involves selecting the strongest image from a long series of sharp images.
The truth, however, is that there is a lot more than owning a Canon EOS R1, a Nikon Z9, or a Sony a-1 ii to consistently creating great photographs of birds in flight. Some of the biggest factors to success include gear choice, shooting strategies, and understanding the importance of sky conditions and wind speed and direction. Once you have the techniques and technical aspects down pat and can routinely create sharp images, learning the importance of flight poses, wing positions, backgrounds, and subject placement and image design enable you to create and then select superb flight images. And you guessed it, each of those topics and tons more are covered in detail in The Complete and Quintessential Guide to Photographing Birds in Flight.
The guide consists of 267 pages and 21,013 words. There are 82 illustrative photos scattered throughout the text, two screen captures, and a 112-image gallery that includes examples created by Canon, Nikon, and mostly Sony gear. As seen above, each of the 194 inspirational photos is labeled with an educational caption.
You can purchase your copy here for $99.00.
Arash Hazeghi
Arash Hazeghi, Ph.D. is a principal electron device engineer. He received his Ph.D. degree in Electrical Engineering in 2011, from Stanford University, Stanford, California. His pioneering research on Carbon Nanotubes has been cited many times. In the past decade, Arash Hazeghi has been a major contributor to the research and the development of some of the most cutting-edge technologies introduced by Silicon Valley’s most reputable names including SanDisk, Intel and Apple.
More relevant here is that he is widely recognized as one of the world’s best birds in flight photographers. He specializes in raptors and the technical aspects of bird photography.
|
|
|
Flight photography is a skill that can be studied, practiced, and learned.
|
The Complete and Quintessential Guide to Photographing Birds in Flight
By Arash Hazeghi Ph.D., and Arthur Morris/BIRDS AS ART
What you will learn (about):
1- Weight and handholding super-telephoto lenses.
2- Weight and handholding intermediate telephoto and telephotos zoom lenses.
3- Choosing the right flight photography lens or lenses for you.
4- The importance of focal length for flight photography.
5- The importance of lens speed (the maximum aperture for flight photography.
6- Choosing between fixed focal lengths and zoom lenses for flight photography.
7- The importance of AF speed and performance for flight photography.
8- Handholding tips and techniques.
9- Shooting flight off a tripod with the Levered-clamp FlexShooter Pro.
10- Flight poses and wing positions.
11- Why artie changed his mind about the 400mm f/2.8 lenses for flight and more.
12- The advantages and disadvantages of using teleconverters for flight photography.
13- Why to stay away from off-brand lenses.
14- Understanding the importance of wind direction and speed for flight photography.
15- The relationship between sky conditions and wind direction and how it affects flight photography.
16- Creating flight silhouettes in wind-against-sun conditions.
17- The importance of being on sun angle for flight photography (and avoiding harsh shadows).
18- Tips on doing flight photography in cloudy, foggy, or overcast conditions.
19- About the direction of light in cloudy, foggy, or overcast conditions and how it affects flight photography.
20- How your understanding of bird behavior can dramatically improve your flight photography.
21- Tips on attracting birds for flight photography.
22- What to do when your camera’s AF system is temporarily blind.
23- The vital importance of pre-focusing.
24- How Direct Manual Focus can help you with flight photography.
25- The importance of shooting aggressively when doing flight photography.
26- Everything that you need to know with regards to rest positions for flight photography.
27- The importance of getting low when doing flight in many situations.
28- Getting the right exposure when doing flight photography.
29_ Why to use Manual mode 95% of the time for flight.
30- Tips on finding the bird in the frame, acquiring focus, and tracking the bird in flight.
31- How to set and best utilize your lens’s image stabilization feature (and why).
32- Setting the focus range limiter switch on your flight lens or lenses.
33- To choose the best shutter speed for photographing birds in flight.
34- The vital importance of pre-focusing. And yes, this is so important that it is on the list twice.
You can see four sample pages in the blog post here. And you can purchase your copy here.
|
|
|
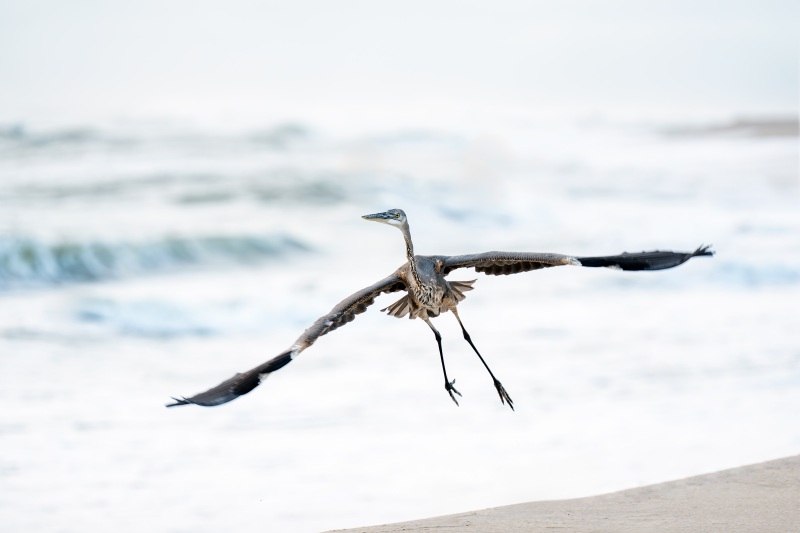
This image was created on 30 September 2025 on a Sebastian Inlet Ospreys and more Extended Instructional Photo-Tour (IPT). Standing at the base of the South Jetty, I used the handheld Sony FE 70-200mm f/2.8 GM OSS II Lens with theSony FE 1.4x Teleconverter (at 235mm) and The Latest Greatest Sony Flagship Body, the a1 II Mirrorless Camera. The exposure was determined by Zebras with Exposure Compensation (EC) on the thumb wheel. Multi Metering +2.0 stops. AUTO ISO set ISO 500: 1/500 second at f/4 (wide open) in Shutter Priority mode. RawDigger showed that the exposure was perfect. AWB at 7:45:35am on a cloudy morning.
Wide/AF-C with Bird-Eye/Face Detection performed perfectly. Click on the image to enjoy the larger, inexplicably sharper high-res version.
Image #1: Great Blue Heron juvenile taking flight over surf
Image copyright 2025: Arthur Morris/BIRDS AS ART
|
Getting Lucky on Shutter Speed with the Cloud-scape Rig
I call the 70-200mm f/2.8 II with the 1.4X TC the Cloud-scape Rig as it is ideal on partly cloudy mornings as the sun rises over the Atlantic Ocean. You often get some very nice sunrise color and dramatic cloudy formations either well before or just after sunrise. The 98-280mm focal lenght range is often the perfect tool. At times, I need to remove the TC to go wider for the clouds. I was working this young Great Blue Heron on the shoreline at 1/500 second. When it took flight I followed my own oft-given advice; when unexpected action occurs, press the shutter button. If you try to change any settings, you will likely come away with nothing. I was shocked and happy when I noted that half the images in the sequence were sharp on the bird’s eye at only 1/500 second.
|
|
|
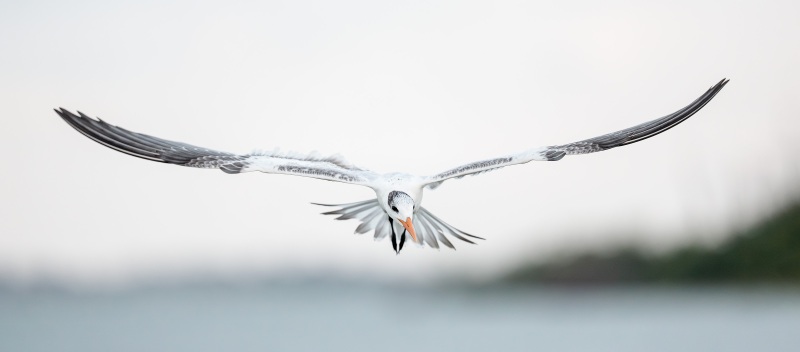
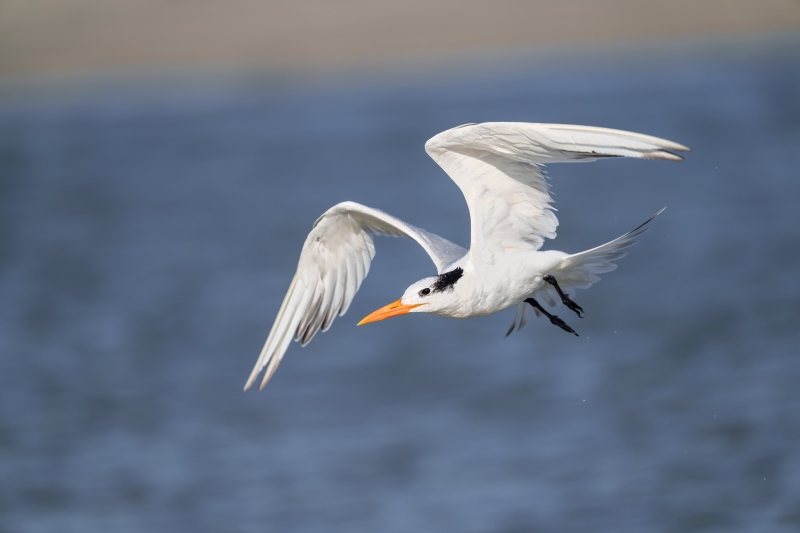
This image was also created on 2 October 2025 on a Sebastian Inlet Ospreys and more Extended Instructional Photo-Tour (IPT). Hanging out by the fishing pier, I used the hand held Sony FE 300mm f/2.8 GM OSS Lens (Sony E) and The Latest Greatest Sony Flagship Body, the a1 II Mirrorless Camera. Exposure was determined via Zebras with ISO on the Thumb Wheel. ISO 5000!: 1/1600 sec. at f/2.8 (wide open) in Manual mode. RawDigger showed that the exposure was perfect: AWB at 7:40:56am on a cloudy dark morning.
Tracking Zone/AF-C with Bird Eye/Face Detection enabled performed perfectly. Click on the image to enjoy the larger, inexplicably sharper high-res version.
Image #2: Royal Tern juvenile flying right at me
Image copyright 2025 Arthur Morris/BIRDS AS ART
|
Horses for Courses …
Lenses are nothing more than tools. Having the right tool for the job can make all the difference in the world. Though I was using a relatively low for flight shutter speed — 1/1600 second, I still needed a high ISO — 5000 to get a decent exposure (or raw file brightness to be technically correct). In mega low light flight situations, the 300m f/2.8 lenses can be deadly. The Sony GM version is the lightest of the lot by far at less than 3 1/4 lbs. It complements both the Sony 200-600 and the Sony 400-800 perfectly for low light bird photography. It does well with either the 1.4X or the 2X teleconverter.
840mm for Osprey Flight on a Tripod
There are lots of folks at Sebastian with 600mm f/4 lenses — Canon, Nikon, and Sony. Most folks handhold them, and I rarely see anyone using theirs with a 1.4X TC. I rarely go with the bare 600mm, and am always on a tripod. Here’s a tip for those using the Levered-Clamp FlexShooter Pro. After prolonged use, these heads do not pan as smoothly as they did when the come out of the box. Though the manufacturer recommends against it, spraying the inner black ball with WD-40 results in super-smooth panning. Try it, you will like it.
|
|
|
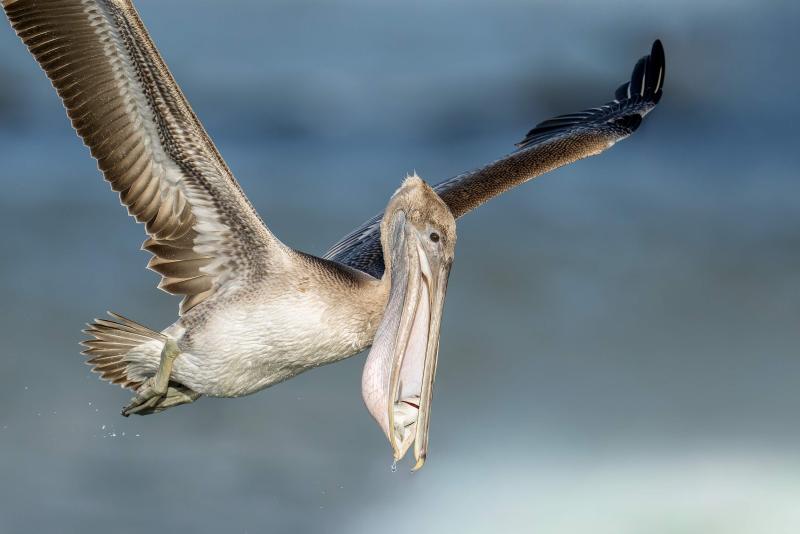
This image was also created on 3 October 2025 on a Sebastian Inlet Extended IPT. Standing at full height, I used the Robus RC-5570 Vantage Series 3 Carbon Fiber Tripod/Levered-Clamp FlexShooter Pro-mounted Sony FE 600mm f/4 GM OSS lens with the Sony FE 1.4x Teleconverter and the Latest Greatest Sony Flagship Body, the a1 II Mirrorless Camera. Exposure determined via Zebras with ISO on the Thumb Wheel. ISO 1250: 1/4000 sec. at f/5.6 (wide open) in Manual mode. RawDigger showed that the exposure was dead solid perfect. AWB at 8:24:05am on a sunny morning.
Tracking: Zone/AF-C with Bird Eye/Face Detection enabled performed perfectly. Click on the image to enjoy the larger, inexplicably sharper high-res version.
Image #4: Brown Pelican juvenile — tight flight with fish in bill pouch
Image copyright 2025 Arthur Morris/BIRDS AS ART
|
The New Super Resolution Feature
The new Super Resolution feature in Photoshop 2025 v26.10.0 (and in the latest version of Lightroom), or more correctly, in Adobe Camera Raw 17.5, can do wonders with large and huge crops. But only when the raw file is sharp. If your image suffers from unsharpness of motion blur, doubling the resolution only makes things worse. It is tricky to use this feature. Complete details on how to implement Super Resolution will be included in Volume III of the Digital Basics IV Video Series.
I doubled the resolution of this 50% cropped image and as you can see above after clicking on the image, the results are spectacular.
Dealing With Rapidly Changing Weather and Light
Yesterday morning (Wednesday) was typical. It began cloudy dark and then got brighter. Then it went from cloudy bright to full sun and then back to cloudy dark. Before Eugen and I headed home, it poured twice, each time for ten minutes as a squall passed by. With the strong east wind, I usually ride out the heavy rain simply by keeping my camera body in front of my face or chest to protect it. I keep an extra woolen watch cap in my pocket to place over the camera when it rains hard. When things get really bad, we seek shelter under the bridge; it is just a three minute walk. Five minutes later, the sun may be out again.
As far as getting the right exposure, Sony’s Zebra technology (set up properly), is a life-saver for both beginning photographers and 40+ year bird photography veterans. Don’t forget, when working in low light, white sky conditions, your camera’s metering system is just plain stupid. You need to add lots of light to avoid underexposing the subject.
The weather on 4 October was typical as noted above. Want proof? See the next frame.
Six Minutes Later!
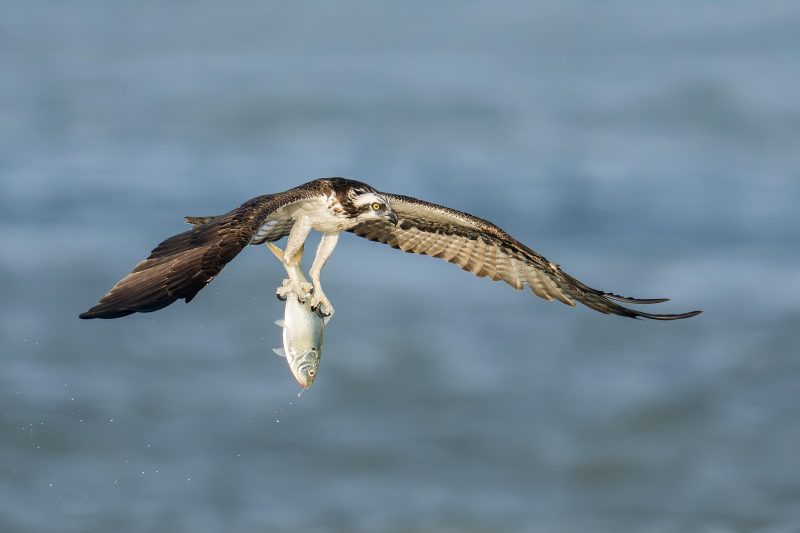
Six minutes after I created Image #5 at ISO 4000, the sun broke through. I lowered the ISO until I saw only faint Zebras on the brightest highlights, and created a very strong sequence of images as the Osprey lifted the fish out of the water. Though every image was razor sharp on the bird’s eye, I kept only eight of them, those with the strongest and most interesting wing positions and flight poses. You can see another image from the series (Image #2) in the blog post here.
The morning of Saturday 4 October was one of those fabulous photo sessions that you will remember for decades.
Super Resolution with a Vengeance
It’s no fun being a fish in Sebastian Inlet. Aside from the Ospreys attacking from above, large predatory fish attack from below. Those include Snook and Tarpon. On Tuesday past, there were sharks in the inlet, some right in front of us as we stood on the South Jetty. Anyhoo, I had fun with the huge crop that gave me an opportunity to work on the color and tonality of the mullet. Last year a fisherman hooked a shark on a pencil popper lure on the South Jetty, and, an hour later, landed a 5-foot Black-tipped Reef Shark about 1/4 mile up the beach.
|
|
|
This image was created on 7 October 2025 on a Sebastian Inlet Extended IPT. I used the hand held Sony FE 300mm f/2.8 GM OSS Lens (Sony E) with the Sony FE 1.4x Teleconverter and the Sony a-1 (now replaced by the Latest Greatest Sony Flagship Body, the a1 II Mirrorless Camera). Exposure determined via Zebras with ISO on the Thumb Wheel: ISO 3200. 1/2500 sec. at f/4 (wide open) in Manual mode. RawDigger showed that the exposure was perfect. AWB at 7:50:16am on a cloudy morning.
Tracking: Zone/AF-C with Bird Eye/Face Detection enabled performed perfectly. Click on the image to enjoy the larger, inexplicably sharper high-res version.
Image #8: Osprey juvenile in flight
Image copyright 2025 Arthur Morris/BIRDS AS ART
|
So, I Ran Back to My SUV
I noted lots of Ospreys hovering in the strong wind along the shoreline just south of the jetty. So, I ran back to the car and grabbed the 300 f/2.8 with the 1.4X TC. Before I even got back to the jetty I looked up and saw this handsome young Osprey directly overhead. I created about 40 images as it hung there, and kept only one, the one that had the bird looking right down at me. Once again, having the right tool at and in hand payed big dividends.
|
|
|
This image was created on 7 October 2025 on a Sebastian Inlet Extended IPT. Standing at full height I used the Robus RCM-439 4-Section Carbon Fiber Monopod, 65/Wimberley MonoGimbal Head-supported Sony FE 400-800mm f/6.3-8 G OSS lens (Sony E) (at 800mm) and The Latest Greatest Sony Flagship Body, the a1 II Mirrorless Camera. The exposure was determined by Zebras with ISO on the rear wheel: ISO 3200: 1/3200 sec. at f/8 (wide open) in Manual mode. RawDigger showed that the exposure was dead-solid perfect. AWB at 10:06:07am on a variably cloudy morning.
Wide/AF-C with Bird-Eye/Face Detection performed perfectly. Click on the image to enjoy the larger, inexplicably sharper high-res version.
Image #9: Brown Pelican juvenile turning to dive
Image copyright 2025: Arthur Morris/BIRDS AS ART
|
Mono-Podding
I love using the 400-800 on a monopod as detailed in the caption above. It really makes things easy when doing flight and action. The more I practice with it, the better I do.
Handholding Versus MonoPodding with the 400-800
With relatively heavy lenses, it is actually easier to handhold for flight photography than when working a static subject. Why? When doing flight, proper technique calls for raising the lens from the rest position, finding the subject, panning with it while acquiring focus, and squeezing off a sequence. Total time? Several seconds at most. When working a static subject like a Great Egret on a pier railing, however, you might wind up holding the lens up for five or ten or even more minute. Having the lens supported by a quality monopod reduces stress and strain especially on your left shoulder. A tripod would be even better but then you lose the stealth and mobility advantages that come with using a monopod.
You can learn a ton about using a monopod in the Robus MonoPodding With the Sony 400-800 G Lens blog post here..
Typos
With all blog posts, feel free to e-mail or to leave a comment regarding any typos or errors.
October 7th, 2025 Need Your Help
If you did not receive a post notification yesterday’s for Monday’s erroneously titled blog post (BIRDS AS ART Blog Back In Business and Better Than Ever!) but did receive a post notification via e-mail for this post, please click here and then hit Send. It should not take you more than three seconds. Thank you kindly.
Oops!
Early on Monday morning, I published a new post entitled BIRDS AS ART Blog Back In Business and Better Than Ever!. I was fairly sure that everything was A-OK with post notifications. I was wrong. It seems that we did not register and authenticate the new sending address with Bluehost. Then we needed to give the new address enough time for the MX record to populate. I am now hoping that everything will be working A-OK.
Right now, my plan — if all is finally well, is to publish some new blog posts and intersperse those with posts that folks likely missed. If you missed yesterday’s post, you can click here to access it.
As many of you know, the BIRDS AS ART Blog (www.BIRDSASART-Blog.com) has — for many years, been the very best place on the planet to learn to improve your bird photography (he said modestly) and has always been 100% free. If you know of a better place to learn, please leave a comment as I would love to visit.
Today is Tuesday 7 October 2025. Eugen Dolan and I enjoyed another wild and productive morning at Sebastian Inlet. The very brisk onshore wind continued with gusts of more 20 mph. Sky conditions ranged from cloudy dark to bright sun with everything in between. We ran back to my SUV for three rain squalls. Whatever you opt to do, I hope that you too choose to have a great day.
If you would like to join in the fun and learn an absolute ton, I have room at the AirBnB for you on a Sebastian Extended IPT any time from 25 October through and including 23 November. For complete details you can scroll down here, get in touch via e-mail, or try me on my cell at 863-221-2372. Please leave a message and shoot me a text if I do not pick up.
Volume II of the Digital Basics IV Video Series was distirbuted yesterday afternoon to the many wholesome ordered the entire series; it explains in detail how to handle images where some bright colors like reds, oranges, and yellows, show as over-exposed as soon as you hold down the Alt or Option key and move the Whites slider to the right in Adobe Camera Raw. We should be sending it out to the many who ordered the complete series this afternoon. Next up in Volume III will be the amazing Super Resolution feature in Photoshop 2025 v26.20.0.
If an item — a Delkin flash card or reader, a Levered-clamp FlexShooter Pro, or a Wimberley lens plate or low foot — for example, that is available from B&H and/or Bedfords, is also available in the BAA Online Store, it would be great, and greatly appreciated, if you would opt to purchase from us. We will match or beat any price. Please remember also to use my B&H affiliate links or to earn 3% cash back at Bedford by using the BIRDSASART discount code at checkout for your major gear purchases. Doing either often earns you free guides and/or discounts. And always earns my great appreciation.
Gear Questions and Advice
Too many folks attending BAA IPTs and dozens of photographers whom I see in the field and on BirdPhotographer’s.Net, are — out of ignorance — using the wrong gear, especially when it comes to tripods and more especially, tripod heads. And the same is true in spades when ordering new camera bodies or lenses. My advice will often save you some serious money and may help you avoid making a seriously bad choice. Please know that I am always glad to answer your gear questions via e-mail. If you are desperate, you can try me on my cell at 863-221-2372. Please leave a message and shoot me a text if I do not pick up.
Don’t Just Shoot: Learn
If you are interested in changing your life and becoming a better photographer by joining me on the Extended IPT at Sebastian Inlet for Ospreys and more (SEPT 25 to NOV 24, 2025), in San Diego for Pacific-race Brown Pelicans and more (JAN 6 to FEB 2, 2026), or for Roseate Spoonbills at Stick Marsh (March 2026), please e-mail for dates, rates, terms, and additional information. Or shoot me a text to 863-221-2372. Some offerings include options for shared AirBnB lodging and meals. Ground transportation during your stay is a possibility at times.
B&H Simplified
To ensure that I get credit for your B&H purchases, you can always click here. The tracking is invisible but using my affiliate links is greatly appreciated. And, with B&H, you can use your PayBoo card. You must use the website to order. You cannot get your free guides if you make a phone order. Once you have an item in your cart, you must complete the order within two hours. Huge thanks!
B&H
Many folks have written recently stating that they purchased a Sony a1 from B&H and would like their free membership in the Sony 1 Info and Updates Group, a $150.00 value. But when I check my affiliate account, their orders have not been there. When I let them know that they get credit for B&H purchases only if they use one of the many B&H affiliate links on the blog or begin their searches with this link, they are always disappointed. If in doubt, please contact me via e-mail and request a BH link. I am always glad to help and to guide you to the right gear.
Bedfords Simplified
Click here to start your search. Choose standard shipping, and when you get to the payment page, enter BIRDSASART in the discount code box and hit apply. You will be upgraded to free second day air Fed-Ex and receive 3% cash back on your credit card once your stuff ships. Using either my affiliate links is greatly appreciated and will often earn you free guides or discounts.
Bedfords Amazing BAA Discount Policy
Folks who have fallen in love with Bedfords can always use the BIRDSASART coupon code at checkout to enjoy a post-purchase, 3% off-statement credit (excluding taxes and shipping charges) on orders paid with a credit card. The 3% credit will be refunded to the card you used for your purchase when your product ships. Be sure, also, to check the box for free shipping to enjoy free Second Day Air Fed-Ex. This offer does not apply to purchases of Classes, Gift Cards, or prior purchases.
You can visit the Bedfords website here, shoot Steve Elkins an e-mail, or text him on his cell phone at (479) 381-2592.
|
|
|
This image was also created on 6 October 2025 on a Sebastian Inlet Ospreys and More Extended IPT. Standing at full height at the base of the South Jetty I used the handheld Sony FE 200-600mm f/5.6-6.3 G OSS lens (at 448mm) and The Latest Greatest Flagship Body, the Sony a1 II Mirrorless Camera. The exposure was determined by Zebras with Exposure Compensation (EC) on the thumb wheel. Multi Metering +1.7 stops. AUTO ISO set ISO 125: 1/8 second at f/6.3 (wide open) in Shutter Priority mode. RawDigger showed that the exposure could have been 2/3-stop brighter. AWB at 7:26:58am on a mostly stormy morning. (Amazingly, the sun did come out for a while at about 8:00am.)
Wide/AF-C with Bird-Eye/Face Detection performed perfectly. Click on the image to enjoy the larger, inexplicably sharper high-res version.
Image #1: Wave crashing onto dunes on stormy morning
Image copyright 2025: Arthur Morris/birds as Art
|
The Sea Was Angry That Day My Friend
The waves have been breaking over the South Jetty for a week now with the strong east winds. I am always the first photographer to arrive so that I can working on creating some nice pleasing blurs (in this case a seascape) and teach others to do the same. Today’s featured image was the result of excellent technique, a bit of creative vision, and a large dose of luck with the huge wave breaking right on the dunes just before I finished panning.
If Image #1 reminds you of the work of an Impressionist artist, please be so kind as to leave a comment and specify which one.
Where?
If you know where this line:
The Sea Was Angry That Day My Friend
is from, please leave a comment.
Viewing the Sebastian Composites below
Be sure to click on each composite to see a larger, inexplicably sharper high res version.
|
|
|
From upper left clockwise around to center: Osprey with fish at dawn; Osprey with menhaden; Osprey with Mullet; Mullet school under attack from below; Wood Stork landing; Tarpon jumping; Reddish Egret landing; Osprey turning to begin dive; Osprey with Yellow-tailed Menhaden.
Click on the composite to see a larger, inexplicably sharper high res version.
All images copyright 2025 Arthur Morris/BIRDS AS ART
|
Sebastian Inlet in Fall
Sebastian Inlet in the fall attracts schools of migrating saltwater fish that in turn attract dozens of Ospreys — we’ve counted 61 in the air at once, along with hordes of hungry birds including Brown Pelican, Royal Tern, and Laughing Gull. Other species of birds feed on smaller baitfish; those include Wood Stork, Reddish Egret, Snowy Egret, Great Egret, Great Blue heron, Little Blue Heron, and White Ibis. Sanderling and Ruddy Turnstone are easily photographed. American Avocet is an uncommon visitor. Rare gulls have included Lesser Black-backed Gull (all ages), Franklin’s Gull (first winter), and in 2024, a spectacular young Sabine’s Gull that remained for several weeks.
As this location provides world class action for at least two months each year, bird photographers travel to Florida’s East Coast from all over the planet. You are invited not only to join me but to learn a ton about bird photography. Remember that the more time you spend at great locations, the more chance you have to enjoy perfect weather conditions and opportunities that leave you in awe.
The shared AirBnB approach has proven to be tremendously popular and is hugely beneficial to learning.
|
|
|
From upper left clockwise around to center: Osprey with fish at dawn; Osprey with menhaden; Sanderling flock bird-scape blur; Royal Tern with large baitfish; Brown Pelican diving silhouette; 1-second breaking wave blur; Osprey with Yellow-tailed Menhaden blur; Osprey in flight/full downstroke; Snowy Egret/double overhead wingstretch.
Click on the composite to see a larger, inexplicably sharper high res version.
All images copyright 2025 Arthur Morris/BIRDS AS ART
|
2025 BIRDS AS ART Sebastian Inlet Ospreys and More In-the-Field Sessions
Available Dates: Friday 26 September (arrive on Thursday 25 September) thru the morning session on Mon 24 November 2025.
Limit: four photographers.
In 2024, I had an AirBnB in Vero Lake Estates for 26 nights. I had so much fun and enjoyed so many great opportunities that I am returning next fall for two full months; the AirBnB is just 22 minutes from the inlet.
Getting There
You can fly to Orlando International Airport (MCO) and rent a car or fly to Melbourne International Airport (MEL) and explore the possibility of airport pick-up and drop-off or a taxi or uber ride to and from the AirBnB. Rides with me are available for $15/day on a space available basis. Folks who ride with me do not need to purchase a park pass but will need to kick in $2.00/day when we are charged.
|
|
|
From upper left clockwise around to center: Osprey diving; Osprey with menhaden; Brown Pelican with Yellow-tailed Menhaden in bill pouch; Sabine’s Gull/juvenile top shot; Osprey landing on Cabbage Palm stump; Wood Stork sunrise silhouette; American Avocet running with wings raised; Osprey diving with talons outstretched; Peregrine with wings fully raised.
Click on the composite to see a larger, inexplicably sharper high res version.
All images copyright 2025 Arthur Morris/BIRDS AS ART
|
What You Will Learn
1- First and foremost you will learn to become a better flight photographer. Much better.
2- You will learn to shoot flight hand held and off the tripod.
3-You will learn the basics and fine points of digital exposure. Nikon and Canon folks will learn to get the right exposure every time after making a single test exposure, and SONY folks will learn to use Zebras so that they can be sure of making excellent exposures before pressing the shutter button.
4- You will learn to work in Manual exposure mode even if you fear it.
5- You will learn to evaluate wind and sky conditions and understand how they affect bird photography, especially (but not limited to) the photography of birds in flight.
6- You will learn to select the best shutter speeds for all types of bird photography, from flight and action to pleasing blurs.
7- You will learn how to approach free and wild birds without disturbing them.
8- You will learn to spot the good and the great situations.
9- You will learn to understand and predict bird behavior.
10- You will learn to design pleasing images by mastering your camera’s AF system.
11- You will learn to choose the best perspective.
12- You will learn to see and control your backgrounds.
13- You will learn to see and understand the light.
14- You will learn to see and create pleasing blurs in pre-dawn situations.
15- You will learn to be ready for the most likely event.
16- You will learn pro level tripod handling tips
17- During our image review sessions, you will learn the factors that separate insta-deletes, keepers, and family jewels. With general bird photography those include head angle, subject-to-sensor plane orientation, choice of perspective, the quality of the light, the quality of the background, image sharpness, and the image design. When evaluating photos of birds in flight, you must — in addition to the above, consider wing positions and flight poses.
18- You will improve your image optimization skills by leaps and bounds and will return home with a collection of image optimization videos.
The very best news is that you will be able to take everything you learn home with you so that you will be a better photographer wherever you are and whenever you photograph.
|
|
|
From upper left clockwise around to center: Osprey with Yellow-tailed Menhaden; Osprey overhead with bunker; Osprey with Yellow-tailed Menhaden; Osprey chase; Great Egret with pinfish; Osprey emerging with flounder; Great Egret taking flight; Osprey kiting; 1/8 second sunrise Atlantic Ocean blur.
Click on the composite to see a larger, inexplicably sharper high res version.
All images copyright 2025 Arthur Morris/BIRDS AS ART
|
Trip Costs and Booking Details
Change Your Life
Book any 3-6 Days: Lodging is $175/night. Instruction is $600/day. There is a morning session every day. Afternoon sessions average every other day. Image review and Photoshop sessions are usually daily.
Please note: Folks who sign up for an odd number of days of instruction will enjoy half + 1 afternoon sessions (more are possible if conditions are good) Those who sign up for an even number of days will enjoy at least 1/2 that number of afternoon shooting sessions (more are possible if conditions are good)
Book any 7-10 Days: Lodging is $160/night. Instruction is $575/day. There is a morning session every day. Afternoon sessions average every other day. Image review and Photoshop sessions are almost daily.
Book any 11-14 Days: Lodging is $150/night. Instruction is $550/day. There is a morning session every day. Afternoon sessions average every other day. Image review and Photoshop sessions are almost daily.
Book any three weeks: Lodging is $130/night. Instruction is $525/day. There is a morning session every day. Afternoon sessions average every other day. Image review and Photoshop sessions are almost daily.
Stay for one month (28 nights): Lodging is $120/night. Instruction is $500/day. There is a morning session every day. Afternoon sessions average every other day. Image review and Photoshop sessions are almost daily.
Stay two months (60 nights): Lodging is $100/night. Instruction is $475/day. There is a morning session every day. Afternoon sessions average every other day. Image review and Photoshop sessions are almost daily.
Brunch is on me. Dinners are provided for $20/day. I am an excellent chef and the food both healthy and of high quality.
Please note: your day of arrival is not a day of instruction.
Deposit Information
A non-refundable deposit by check is required to hold your spot. The amount will be 50% of the total for lodging, instruction, and meals. Please make the check out to:
BIRDS AS ART
And send it via US Mail to
BIRDS AS ART
PO Box 7245
Indian Lake Estates, FL 33855
Your balance, payable by check only as above, is due two months before your arrival date.
I hope to spend some quality time with you at Sebastian Inlet in the fall of 2025. If you have any questions, please get in touch via e-mail or via a text to 863-221-2372.
Typos
With all blog posts, feel free to e-mail or to leave a comment regarding any typos or errors.
October 6th, 2025 What’s Up?
Thanks to the great folks at Bluehost and webmaster Peter Kes, the BIRDS AS ART blog is now back in business. We believe that things will be better than ever as far as post notifications are concerned. My plan is to publish some new posts and intersperse those with posts that folks likely missed.
As many of you know, the BIRDS AS ART Blog (www.BIRDSASART-Blog.com) has — for many years, been the very best place on the planet to learn to improve your bird photography (he said modestly) and has always been 100% free. If you know of a better place to learn, please leave a comment as I would love to visit.
I have room at the AirBnB for you on a Sebastian Extended IPT any time from 25 October through and including 23 November. Scroll down to the bottom for details or get in touch via e-mail or try me on my cell at 863-221-2372. Please leave a message and shoot me a text if I do not pick up.
The Osprey fishing action has been heating up the past few days. The morning of Saturday 4 October was one of those fabulous photo sessions that you will remember for decades. Eugen Dolan is continuing to progress as he is working hard on mastering The Process detailed in the How Do You Learn to Make Great Action Shots? By Mastering the Basics and Learning to Create Perfect Images of Birds Doing Absolutely Nothing at All! blog post here. If you missed it, you will likely benefit by visiting, studying, and bookmarking it. That unless you have no desire to improve your bird photography.
Volume II of the Digital Basics IV Video Series has been completed; it explains in detail how to handle images where some bright colors like reds, oranges, and yellows, show as over-exposed as soon as you hold down the Alt of Option key and move the Whites slider to the right in Adobe Camera Raw. We should be sending it out to the many who ordered the complete series this afternoon. Next up in Volume III will be the amazing Super Resolution feature in Photoshop 2025 v26.20.0.
Today is Monday 6 October. The forecast is for partly cloudy with a brisk wind from the east, onshore at about 15mph. We will be heading to Sebastian Inlet State Park early as usual. Whatever you opt to do, I hope that you too choose to have a great day.
If an item — a Delkin flash card or reader, a Levered-clamp FlexShooter Pro, or a Wimberley lens plate or low foot — for example, that is available from B&H and/or Bedfords, is also available in the BAA Online Store, it would be great, and greatly appreciated, if you would opt to purchase from us. We will match or beat any price. Please remember also to use my B&H affiliate links or to earn 3% cash back at Bedford by using the BIRDSASART discount code at checkout for your major gear purchases. Doing either often earns you free guides and/or discounts. And always earns my great appreciation.
Gear Questions and Advice
Too many folks attending BAA IPTs and dozens of photographers whom I see in the field and on BirdPhotographer’s.Net, are — out of ignorance — using the wrong gear, especially when it comes to tripods and more especially, tripod heads. And the same is true in spades when ordering new camera bodies or lenses. My advice will often save you some serious money and may help you avoid making a seriously bad choice. Please know that I am always glad to answer your gear questions via e-mail. If you are desperate, you can try me on my cell at 863-221-2372. Please leave a message and shoot me a text if I do not pick up.
Don’t Just Shoot: Learn
If you are interested in changing your life and becoming a better photographer by joining me on the Extended IPT at Sebastian Inlet for Ospreys and more (SEPT 25 to NOV 24, 2025), in San Diego for Pacific-race Brown Pelicans and more (JAN 6 to FEB 2, 2026), or for Roseate Spoonbills at Stick Marsh (March 2026), please e-mail for dates, rates, terms, and additional information. Or shoot me a text to 863-221-2372. Some offerings include options for shared AirBnB lodging and meals. Ground transportation during your stay is a possibility at times.
B&H Simplified
To ensure that I get credit for your B&H purchases, you can always click here. The tracking is invisible but using my affiliate links is greatly appreciated. And, with B&H, you can use your PayBoo card. You must use the website to order. You cannot get your free guides if you make a phone order. Once you have an item in your cart, you must complete the order within two hours. Huge thanks!
B&H
Many folks have written recently stating that they purchased a Sony a1 from B&H and would like their free membership in the Sony 1 Info and Updates Group, a $150.00 value. But when I check my affiliate account, their orders have not been there. When I let them know that they get credit for B&H purchases only if they use one of the many B&H affiliate links on the blog or begin their searches with this link, they are always disappointed. If in doubt, please contact me via e-mail and request a BH link. I am always glad to help and to guide you to the right gear.
Bedfords Simplified
Click here to start your search. Choose standard shipping, and when you get to the payment page, enter BIRDSASART in the discount code box and hit apply. You will be upgraded to free second day air Fed-Ex and receive 3% cash back on your credit card once your stuff ships. Using either my affiliate links is greatly appreciated and will often earn you free guides or discounts.
Bedfords Amazing BAA Discount Policy
Folks who have fallen in love with Bedfords can always use the BIRDSASART coupon code at checkout to enjoy a post-purchase, 3% off-statement credit (excluding taxes and shipping charges) on orders paid with a credit card. The 3% credit will be refunded to the card you used for your purchase when your product ships. Be sure, also, to check the box for free shipping to enjoy free Second Day Air Fed-Ex. This offer does not apply to purchases of Classes, Gift Cards, or prior purchases.
You can visit the Bedfords website here, shoot Steve Elkins an e-mail, or text him on his cell phone at (479) 381-2592.
If …
If you were previously receiving blog post notifications via e-mail on a regular basis but they suddenly quit coming, please let me know via e-mail and cut and paste this into the subject line: Please Add to the Personalized Blog Notification List. Some e-mail providers (likely including Gmail) recently began blocking the post notifications being sent by the Word Press Newsletter program. It is possible that this problem has been solved.
|
|
|
This image was created on 28 September 2025 at Sebastian Inlet State Park by IPT veteran Eugen Dolan, visiting from Vancouver for 28 days. Standing at full height, he used the handheld Sony FE 200-600mm f/5.6-6.3 G OSS lens (at 600mm) and The Latest Greatest Flagship Body, the Sony a1 II Mirrorless Camera. The exposure was determined via Zebras with ISO on the Thumb Wheel. ISO 1250: 1/4000 sec. at f/6.3 (wide open) in Manual mode. RawDigger showed that the exposure was 2/3-stop from perfect. AWB at 3:45:42pm on a mostly cloudy afternoon.
Wide/AF-C with Bird-Eye/Face Detection performed perfectly. Click on the image to enjoy the larger, inexplicably sharper high-res version.
Image #1: Osprey juvenile in flight with late lunch
Image copyright 2025: Eugen Dolan
Image Optimization by Arthur Morris/birds as Art
|
Lucky on the Beach
On Sunday 28 September, Sebastian was closed due to Tropical Storm Warning. That afternoon, we walked the beach for two miles about one mile from the South Jetty. We had wind against sun but lucked out when it clouded over and a flock of White Ibises landed right in front of us for no reason at all. When the Osprey in Image #1 flew by in just the right spot, we each nailed it.
This image was processed using the amazing new Super Resolution feature in Photoshop 2025 v26.20.0. There is a nifty trick to clicking the Super Resolution box and doubling the resolution of a .TIF file after applying the fabulously improved Denoise feature, again in ACR 17.5/Photoshop 2025 v26.20.0. It will be detailed in Volume III of the Digital Basics IV Video Series.
Kudos to Eugen for creating a long, properly exposed series of images that yielded the lovely wing position above.
Lucky on Saturday
On Saturday morning past, the wind was from slightly south of east. For reasons unknown to me, most of the Ospreys that came up with a fish turned to their right and flew directly to northeast rather than turning left and away from the photographers on the South Jetty. It was a banner day.
Viewing the Sebastian Composites below
Be sure to click on each composite to see a larger, inexplicably sharper high res version.
|
|
|
From upper left clockwise around to center: Osprey with fish at dawn; Osprey with menhaden; Osprey with Mullet; Mullet school under attack from below; Wood Stork landing; Tarpon jumping; Reddish Egret landing; Osprey turning to begin dive; Osprey with Yellow-tailed Menhaden.
Click on the composite to see a larger, inexplicably sharper high res version.
All images copyright 2025 Arthur Morris/BIRDS AS ART
|
Sebastian Inlet in Fall
Sebastian Inlet in the fall attracts schools of migrating saltwater fish that in turn attract dozens of Ospreys — we’ve counted 61 in the air at once, along with hordes of hungry birds including Brown Pelican, Royal Tern, and Laughing Gull. Other species of birds feed on smaller baitfish; those include Wood Stork, Reddish Egret, Snowy Egret, Great Egret, Great Blue heron, Little Blue Heron, and White Ibis. Sanderling and Ruddy Turnstone are easily photographed. American Avocet is an uncommon visitor. Rare gulls have included Lesser Black-backed Gull (all ages), Franklin’s Gull (first winter), and in 2024, a spectacular young Sabine’s Gull that remained for several weeks.
As this location provides world class action for at least two months each year, bird photographers travel to Florida’s East Coast from all over the planet. You are invited not only to join me but to learn a ton about bird photography. Remember that the more time you spend at great locations, the more chance you have to enjoy perfect weather conditions and opportunities that leave you in awe.
The shared AirBnB approach has proven to be tremendously popular and is hugely beneficial to learning.
|
|
|
From upper left clockwise around to center: Osprey with fish at dawn; Osprey with menhaden; Sanderling flock bird-scape blur; Royal Tern with large baitfish; Brown Pelican diving silhouette; 1-second breaking wave blur; Osprey with Yellow-tailed Menhaden blur; Osprey in flight/full downstroke; Snowy Egret/double overhead wingstretch.
Click on the composite to see a larger, inexplicably sharper high res version.
All images copyright 2025 Arthur Morris/BIRDS AS ART
|
2025 BIRDS AS ART Sebastian Inlet Ospreys and More In-the-Field Sessions
Available Dates: Friday 26 September (arrive on Thursday 25 September) thru the morning session on Mon 24 November 2025.
Limit: four photographers.
In 2024, I had an AirBnB in Vero Lake Estates for 26 nights. I had so much fun and enjoyed so many great opportunities that I am returning next fall for two full months; the AirBnB is just 22 minutes from the inlet.
Getting There
You can fly to Orlando International Airport (MCO) and rent a car or fly to Melbourne International Airport (MEL) and explore the possibility of airport pick-up and drop-off or a taxi or uber ride to and from the AirBnB. Rides with me are available for $15/day on a space available basis. Folks who ride with me do not need to purchase a park pass but will need to kick in $2.00/day when we are charged.
|
|
|
From upper left clockwise around to center: Osprey diving; Osprey with menhaden; Brown Pelican with Yellow-tailed Menhaden in bill pouch; Sabine’s Gull/juvenile top shot; Osprey landing on Cabbage Palm stump; Wood Stork sunrise silhouette; American Avocet running with wings raised; Osprey diving with talons outstretched; Peregrine with wings fully raised.
Click on the composite to see a larger, inexplicably sharper high res version.
All images copyright 2025 Arthur Morris/BIRDS AS ART
|
What You Will Learn
1- First and foremost you will learn to become a better flight photographer. Much better.
2- You will learn to shoot flight hand held and off the tripod.
3-You will learn the basics and fine points of digital exposure. Nikon and Canon folks will learn to get the right exposure every time after making a single test exposure, and SONY folks will learn to use Zebras so that they can be sure of making excellent exposures before pressing the shutter button.
4- You will learn to work in Manual exposure mode even if you fear it.
5- You will learn to evaluate wind and sky conditions and understand how they affect bird photography, especially (but not limited to) the photography of birds in flight.
6- You will learn to select the best shutter speeds for all types of bird photography, from flight and action to pleasing blurs.
7- You will learn how to approach free and wild birds without disturbing them.
8- You will learn to spot the good and the great situations.
9- You will learn to understand and predict bird behavior.
10- You will learn to design pleasing images by mastering your camera’s AF system.
11- You will learn to choose the best perspective.
12- You will learn to see and control your backgrounds.
13- You will learn to see and understand the light.
14- You will learn to see and create pleasing blurs in pre-dawn situations.
15- You will learn to be ready for the most likely event.
16- You will learn pro level tripod handling tips
17- During our image review sessions, you will learn the factors that separate insta-deletes, keepers, and family jewels. With general bird photography those include head angle, subject-to-sensor plane orientation, choice of perspective, the quality of the light, the quality of the background, image sharpness, and the image design. When evaluating photos of birds in flight, you must — in addition to the above, consider wing positions and flight poses.
18- You will improve your image optimization skills by leaps and bounds and will return home with a collection of image optimization videos.
The very best news is that you will be able to take everything you learn home with you so that you will be a better photographer wherever you are and whenever you photograph.
|
|
|
From upper left clockwise around to center: Osprey with Yellow-tailed Menhaden; Osprey overhead with bunker; Osprey with Yellow-tailed Menhaden; Osprey chase; Great Egret with pinfish; Osprey emerging with flounder; Great Egret taking flight; Osprey kiting; 1/8 second sunrise Atlantic Ocean blur.
Click on the composite to see a larger, inexplicably sharper high res version.
All images copyright 2025 Arthur Morris/BIRDS AS ART
|
Trip Costs and Booking Details
Change Your Life
Book any 3-6 Days: Lodging is $175/night. Instruction is $600/day. There is a morning session every day. Afternoon sessions average every other day. Image review and Photoshop sessions are usually daily.
Please note: Folks who sign up for an odd number of days of instruction will enjoy half + 1 afternoon sessions (more are possible if conditions are good) Those who sign up for an even number of days will enjoy at least 1/2 that number of afternoon shooting sessions (more are possible if conditions are good)
Book any 7-10 Days: Lodging is $160/night. Instruction is $575/day. There is a morning session every day. Afternoon sessions average every other day. Image review and Photoshop sessions are almost daily.
Book any 11-14 Days: Lodging is $150/night. Instruction is $550/day. There is a morning session every day. Afternoon sessions average every other day. Image review and Photoshop sessions are almost daily.
Book any three weeks: Lodging is $130/night. Instruction is $525/day. There is a morning session every day. Afternoon sessions average every other day. Image review and Photoshop sessions are almost daily.
Stay for one month (28 nights): Lodging is $120/night. Instruction is $500/day. There is a morning session every day. Afternoon sessions average every other day. Image review and Photoshop sessions are almost daily.
Stay two months (60 nights): Lodging is $100/night. Instruction is $475/day. There is a morning session every day. Afternoon sessions average every other day. Image review and Photoshop sessions are almost daily.
Brunch is on me. Dinners are provided for $20/day. I am an excellent chef and the food both healthy and of high quality.
Please note: your day of arrival is not a day of instruction.
Deposit Information
A non-refundable deposit by check is required to hold your spot. The amount will be 50% of the total for lodging, instruction, and meals. Please make the check out to:
BIRDS AS ART
And send it via US Mail to
BIRDS AS ART
PO Box 7245
Indian Lake Estates, FL 33855
Your balance, payable by check only as above, is due two months before your arrival date.
I hope to spend some quality time with you at Sebastian Inlet in the fall of 2025. If you have any questions, please get in touch via e-mail or via a text to 863-221-2372.
Typos
With all blog posts, feel free to e-mail or to leave a comment regarding any typos or errors.
October 2nd, 2025 Technology Hell
As you may have figured by now, we are again experiencing technology hell here at the BIRDS AS ART blog, primarily involving post notifications. I am able to publish a blog post, but unable to let folks know about a new post. If you are reading this, you wound up here out of curiosity. Thanks for visiting. We should have things straightened out in a week or so at most. We hope.
Blog-master Peter Kes, now living in South Africa, and I working hard on a solution. As the blog may be down for a day or two in early October as we are moving to a new hosting company, you may want to copy and paste this page for study. After that, we will get back to tackling the post notification problems 🙂
Eugen Dolan is having a great time and learning beyond a ton despite the poor weather and many sessions with challenging wind-against-sun conditions. There are more Ospreys fishing and catching every day. Get in touch via e-mail if you would like to join me at Sebastian in November.
|
|
|
This image was created on 26 September 2025 at Sebastian Inlet State Park by IPT veteran Eugen Dolan, visiting from Vancouver for 28 days. Standing at full height, he used the handheld Sony FE 200-600mm f/5.6-6.3 G OSS lens (at 600mm) and The Latest Greatest Flagship Body, the Sony a1 II Mirrorless Camera. The exposure was determined via Zebras with ISO on the Thumb Wheel. ISO 1600: 1/1250 sec. at f/6.3 (wide open) in Manual mode. RawDigger showed that the exposure was dead-solid perfect. RawDigger showed that the exposure was perfect. AWB at 8:40:42am on a mostly sunny morning.
Wide/AF-C with Bird-Eye/Face Detection performed perfectly. Click on the image to enjoy the larger, inexplicably sharper high-res version.
Image #1: Snowy Egret
Image copyright 2025: Eugen Dolan
Image Optimization by Arthur Morris/birds as Art
|
Learning to Make Great Action Shots!
Most folks want to learn to create fabulous action shots depicting bird behaviors, birds interacting, and especially, dramatic photos of birds in flight. My response is aLways the same: the first step is to learn to create sharp, well exposed, pleasingly designed images of birds standing still doing nothing. Once you learn to do that consistently, the rest will follow.
As far as pleasingly designed, remember the Mike DeRosa rule: more room in front of the bird than behind, more room above the bird than below. After that it is simply a matter of mastering the process. With this simple yet elegant frame, Eugen has checked all the boxes. The raised foot is a bonus.
Again — and it bears repeating, many folks state that they want to create prize-winning images of birds in flight and in action. I urge them (and you) to first learn to create excellent static portraits by mastering the 16 points below. Only after you can do that consistently will you be ready to step up to the next level. One step at a time. Don’t be sloppy or careless. Press the shutter button only when you mean it! Exception: when shooting flight and action, shoot aggressively; do NOT wait for perfect.
The Basics That Many Folks Ignore but Everyone Needs to Master
Bookmark and Study This Page
1- Look for good situations. Learn to see the shot. Don’t just see the beauty of the bird, look for clean backgrounds: birds on small rises or ridges, or those perched on a clean branch or on an elevated rock. When working a group of birds, it is usually best to isolate by getting closer or adding a teleconverter. This skill is best improved by attending one of more Instructional Photo-Tours. And by getting down on the ground when photographing shorebirds!
2- See the background, not just the bird. Cluttered backgrounds, those with sticks and branches, those with unusually light or dark areas, those with crap and crud in the water, and/or those that are close to the bird should be avoided. Be sure to check the edges of the frame. And look for lots of distance from the subject to the background. As a general rule, the farther the background is from the subject, the softer, more de-focused, and more pleasing it will be. Note that as you get closer to the subject, the background will become softer.
3- Practice your stalking skills so that you can get learn to get reasonably close to a bird without scaring it off.
4- Strive to position yourself so that the plane of the bird’s body is parallel to the plane of the imaging sensor (or angled to some degree towards it and you). If the bird’s tail is closer to you than its head, you are shooting up the bird’s butt. Such photos are only very rarely successful. In any case, strive to stop down in those situations, and wait for the look back head angle.
5- Get down to the bird’s eye level — yes, that often means getting down on the ground. Doing so will often clean up otherwise distracting backgrounds. Similarly, shooting up at a bird atop a pole or a tree will usually not produce pleasing images.
6- On sunny days especially, consider the sun/light angle. In general, it is best to have the sun right behind you so that your shadow points to within ten or fifteen degrees (at most) of the subject. Remember that on cloudy days, the light still has a direction; you always want that light behind you. Paying attention to sun angle reduces or eliminates distracting shadows.
7- Understand that birds will generally fly into the wind, face into the wind when perched or on the ground, and take off into the wind. Thus, by understanding the relationship between sky conditions and wind direction, it is often possible to know in advance whether you should stay home of get out there. Furthermore, on cloudy days it almost always pays to keep the wind at your back.
8- Set a shutter speed that will allow you to create a sharp image. See the blog post and video here.
9- Select an AF mode or point that will yield the framing that you want, and ultimately, a pleasing composition. If you are using a zoom lens, zoom in or out as needed. For images of the whole bird, be sure to avoid clipping wingtips or feet. And remember, if an object is worth including in the frame, it is generally best to include the whole thing with at lease a small border around it.
10- Set a good exposure by adjusting the ISO.
11- Keep the lens as still as possible. With long lenses, using a tripod is often best. If not, try to improvise.
12- Be aware of the bird’s head angle. Depending on the situation, you will usually want the bird’s head turned one to three degrees toward you.
13- Depress the shutter button gently. Do not jab it.
14- Work to improve your post-processing skills.
15- When using a zoom lens for birds, get in the habit of keeping it zoomed in to the longest focal length. Then, you can always zoom out when needed.
16- In general, understand that when the sun is shining, the camera’s meter will yield a decent exposure, usually plus a small bit of light. But when it is cloudy or when you are working in the shade, you will need to add two or more stops of light when working with light-toned scenes and backgrounds.
As for using a tripod, there are many advantages of using a decent tripod topped by a Levered-clamp FlexShooter Pro:
1- Making sharper images at slower shutter speeds (and correspondingly lower ISOs).
2- Slowing you down thus allowing you time to check your exposures and your framing. That said, there are times when one or two seconds can make or break you. The more familiar you are with your gear, the better you will be able to succeed when time is of the essence.
3- The Levered-clamp FlexShooter Pro enables smooth, level panning when on a tripod, especially when doing flight photography on a tripod.
Best Advice
If you can afford an IPT and have some matching free time, sign up ASAP. Check out the possibilities here.
If you cannot afford an IPT and/or cannot take time off to attend one, consider these suggestions for improving:
1-Subscribe to the blog and read and study it here.
2-Purchase and study the information in the two-book bundle here. Study them. They will become your bird photography bible.
3- Purchase and study the BAA Current Workflow e-Guide (Digital Basics II) here, the Digital Basics III Video Series, and the Digital Basics IV Video Series.
4- Join BirdPhotographers.Net here and start posting your images in the Avian Forum.
5- Look at and study as many top notch bird photographs as possible. Ask yourself what it is that you like about each image, what it is that you do not like, and how the photo might have been improved either in the field or at the computer.
Typos
With all blog posts, feel free to e-mail or to leave a comment regarding any typos or errors.
September 28th, 2025 Post Notification Problems
Last spring we had a BIRDS AS ART blog nightmare — the post notification plug-in that had been working for two decades simply quit. Since then, the Word Press “Newsletter” plug-in had been working well for more than 15 months. Unbeknownst to me at first, post notifications were not sent for the last two blog posts (links below)..
We are aware of the current problem and despite our best efforts, we have been unable to set things straight with Newsletter. Webmaster Peter Kes and I are working hard to find a solution.
Halo Removed. Shooting Action Tips. Why a Monopod?
Digital Basics IV Video Series/Vol. I. ISOs 16,000 & 25,600!
If you happened upon today’s post (or perhaps received some sort of notification e-mail), you will likely want to check the two posts using the active links above.
It may take a few days to either patch things up with Newsletter or to get a new solution in place. Best advice: bookmark the blog post and visit every two or three days.
What’s Up?
Multiple IPT veteran and good friend Eugen Dolan arrived at the AirBnb in Vero Lake Estates on Friday afternoon. We have been out twice a day since then. There are schools of Mullet in and around the inlet but for the most part, the birds have not yet found the fish. I did see an Osprey dive and grab a fish on Saturday morning so we should enjoy some fishing action soon. There has been lots to photograph including Great Egret, Snowy Egret, juvenile Little Blue Heron, Reddish Egret, Great Blue Heron, Royal Tern, Sanderling, and Ruddy Turnstone. Not to mention some nice sunrises and cloud-scapes.
Today is Sunday 27 September and we will be heading to the Inlet at about 6:15am. The forecast is calling for a gentle breeze from the northeast and scattered thundershowers. Whatever you opt to do, I hope that you too choose to have a great day.
If an item — a Delkin flash card or reader, a Levered-clamp FlexShooter Pro, or a Wimberley lens plate or low foot — for example, that is available from B&H and/or Bedfords, is also available in the BAA Online Store, it would be great, and greatly appreciated, if you would opt to purchase from us. We will match or beat any price. Please remember also to use my B&H affiliate links or to earn 3% cash back at Bedford by using the BIRDSASART discount code at checkout for your major gear purchases. Doing either often earns you free guides and/or discounts. And always earns my great appreciation.
Gear Questions and Advice
Too many folks attending BAA IPTs and dozens of photographers whom I see in the field and on BirdPhotographer’s.Net, are — out of ignorance — using the wrong gear, especially when it comes to tripods and more especially, tripod heads. And the same is true in spades when ordering new camera bodies or lenses. My advice will often save you some serious money and may help you avoid making a seriously bad choice. Please know that I am always glad to answer your gear questions via e-mail. If you are desperate, you can try me on my cell at 863-221-2372. Please leave a message and shoot me a text if I do not pick up.
Don’t Just Shoot: Learn
If you are interested in changing your life and becoming a better photographer by joining me on the Extended IPT at Sebastian Inlet for Ospreys and more (SEPT 25 to NOV 24, 2025), in San Diego for Pacific-race Brown Pelicans and more (JAN 6 to FEB 2, 2026), or for Roseate Spoonbills at Stick Marsh (March 2026), please e-mail for dates, rates, terms, and additional information. Or shoot me a text to 863-221-2372. Some offerings include options for shared AirBnB lodging and meals. Ground transportation during your stay is a possibility at times.
|
|
|
Click on the screen capture to enlarge and check out the amazing noise reduction with this ISO 16000 image.
The Digital Basics IV Video Series/Volume I by Arthur Morris/Birds as Art
You can purchase Volume I by clicking here.
Or save $50.00 by purchasing the entire 5 volume series by clicking here.
|
Digital Basics IV Video Series/Volume I
Learn more in the blog post here.
Most importantly, DB IV/Volume I eliminates the confusion that resulted from the changes to AI Noise Reduction (under the Details tab) in the latest update (17.5) to Adobe Camera Raw (in both Photoshop 2025 Release 26.10.0 and the latest version of Lightroom). As you will see below and in the Volume I video, the new interface represents a significant improvement on the results obtained with the Enhance dialogue box in previous versions of ACR. And, as mentioned here recently, I have some fabulous new image optimization tips, techniques, and tricks to share with you. As the Digital Basics III Video Series proved to be so popular, I have decided to run it back in the form of the Digital Basics IV Video Series (Those who have complete faith in the information that I provide may wish to use the preceding link to save $50.00 by ordering the whole series on a pre-publication basis; you will receive Volume I as soon as you order. The rest will follow upon publication.
My new workflow includes the use of the masking feature in Adobe Camera Raw (thanks to Anita North), the use of the Point Color eye dropper to tame super-saturated colors during raw conversions (discovered in tandem with Anita), a fabulous new Remove Tool trick that makes my favorite Photoshop Tool even more powerful than before -— that one discovered by me. In addition, I have recently begun doing some Curves work during my ACR raw conversions.
My basic workflow remains much the same as is detailed in both DB II and in the DB III Video Series:
1- Setting the Color Temperature (when and if needed).
2- Setting the White and Black Points and adjusting the Highlights and Shadows sliders.
3- Setting the Clarity and Dehaze sliders.
4- Fine-tuning color using the Hue/Saturation/Luminance Targeted Adjustment Tool, a huge step up from the Color Mixer Tool.
5- My 2-step noise reduction technique (with most images).
Once I have the .TIF file in Photoshop, I still use my usual cadre of clean-up tools and techniques including the Remove Tool, the Clone Stamp (only rarely), Divide and Conquer, Quick Masking, Layer Masking, Gaussian Blurs, an expanded array of personalized keyboard shortcuts, and tons of other image optimization strategies and methods adapted from previous versions of Digital Basics. I also demonstrate the selective use of Topaz Sharpen AI utilizing the masking feature. And last but not least, I share my JPEG creation methodology.
Volume I of Digital Basics IV details the image optimizations of six images. Most everything above but for the use of the Point Color eye dropper to tame super-saturated colors during raw conversions is at least touched upon in Volume I. Most of it is covered in great detail.
Volume I of Digital Basics IV details the image optimizations of today’s six featured images. Most everything above but for the use of the Point Color eye dropper to tame super-saturated colors during raw conversions is at least touched upon in Volume I. Most of it is covered in detail.
You can purchase your copy of this all new 1 hour, two minute video for $49.00 here in the BAA Online Store. There will be five volumes in DB IV each featuring 5 or 6 complete image optimizations. If you purchase the first four volumes, you will receive the fifth volume for free.
Or, you can save $50.00 by purchasing all five volumes now for only $146.00 by clicking here. I hope to complete Volume II this week.
|
|
|
This image was created on 24 September down by the lake near my home at Indian Lake Estates. Seated in the driver’s seat of my SUV, I used the BLUBB-supported Sony FE 600mm f/4 GM OSS lens with the Sony FE 2x Teleconverter and The Latest Greatest Sony Flagship Body, the a1 II Mirrorless Camera. The exposure was determined using Zebra technology with ISO on the Thumb Wheel. ISO 1250: 1/1000 second at f/8 (wide open) in Manual mode. RawDigger showed that the exposure was dead solid perfect. AWB at 8:15:14am on a mostly sunny morning.
Tracking: Zone/AF-C with Bird-Eye/Face Detection performed perfectly. Click on the image to enjoy the high-res version.
Image #1: Great Blue Heron backlit head portrait
Image copyright 2025: Arthur Morris/BIRDS AS ART
|
Please Be Honest
Please be honest and let me know your thoughts on the image above. Do you find the large specular highlight balls to be distracting or do you think that they add to the image?
Stiched Pano
The up and down stitched pano was created from two frames. After creating the image of the GBH’s head, I turned off autofocus, pointed the lens up, and made an image of the specular highlights that overlapped After expanding canvas on the original image, combining the two was easy peasy.
An Exposure Note
The trick with rim-lit images like this is to push the exposure of the backlit white feathers as far to the right as possible to maximize the exposure of the shaded side of the subject. As always, Sony’s Zebra technology makes getting these exposures perfect child’s play (as long as your Zebra values are set up correctly (as detailed in the various BIRDS AS ART Camera User’s Guides). I dialed the ISO down until the Zebras disappeared and then increased it by two clicks.
Adobe Camera Raw (ACR) Masking
Huge thanks again to Anita North for teaching me to use the masking feature in Adobe Camera Raw. I use it often to brighten selected areas of an image. I used it twice on today’s featured image to increase the brightness of the shaded side of the heron. It is far, far superior than anything else I have ever tried. It will be featured in a future volume of the Digital Basics IV Video series.
|
|
|
This image was created on 24 September down by the lake near my home at Indian Lake Estates. Seated in the driver’s seat of my SUV, I used the BLUBB-supported Sony FE 600mm f/4 GM OSS lens with the Sony FE 2x Teleconverter and The Latest Greatest Sony Flagship Body, the a1 II Mirrorless Camera. The exposure was determined using Zebra technology with ISO on the Thumb Wheel. ISO 1250: 1/1000 second at f/8 (wide open) in Manual mode. RawDigger showed that the exposure was dead solid perfect. AWB at 8:15:14am on a mostly sunny morning.
Tracking: Zone/AF-C with Bird-Eye/Face Detection performed perfectly. Click on the image to enjoy the high-res version.
Image #2: Great Blue Heron backlit head portrait
Image copyright 2025: Arthur Morris/BIRDS AS ART
|
A Pano Version Without Specular Highlights
After I cropped the square version down to a pano, it took a bit of work to eliminate the sliver of specular highlights that remained at the top of the frame.
Typos
With all blog posts, feel free to e-mail or to leave a comment regarding any typos or errors.
September 25th, 2025 What’s Up?
Today is Thursday 25 September. I drive over to Vero Lake Estates this afternoon to begin a two month teaching residency at Sebastian Inlet State Park. Get in touch via e-mail if you would like to learn about joining me. Whatever you opt to do, I hope that you too choose to have a great day.
If an item — a Delkin flash card or reader, a Levered-clamp FlexShooter Pro, or a Wimberley lens plate or low foot — for example, that is available from B&H and/or Bedfords, is also available in the BAA Online Store, it would be great, and greatly appreciated, if you would opt to purchase from us. We will match or beat any price. Please remember also to use my B&H affiliate links or to earn 3% cash back at Bedford by using the BIRDSASART discount code at checkout for your major gear purchases. Doing either often earns you free guides and/or discounts. And always earns my great appreciation.
Gear Questions and Advice
Too many folks attending BAA IPTs and dozens of photographers whom I see in the field and on BirdPhotographer’s.Net, are — out of ignorance — using the wrong gear, especially when it comes to tripods and more especially, tripod heads. And the same is true in spades when ordering new camera bodies or lenses. My advice will often save you some serious money and may help you avoid making a seriously bad choice. Please know that I am always glad to answer your gear questions via e-mail. If you are desperate, you can try me on my cell at 863-221-2372. Please leave a message and shoot me a text if I do not pick up.
Don’t Just Shoot: Learn
If you are interested in changing your life and becoming a better photographer by joining me on the Extended IPT at Sebastian Inlet for Ospreys and more (SEPT 25 to NOV 24, 2025), in San Diego for Pacific-race Brown Pelicans and more (JAN 6 to FEB 2, 2026), or for Roseate Spoonbills at Stick Marsh (March 2026), please e-mail for dates, rates, terms, and additional information. Or shoot me a text to 863-221-2372. Some offerings include options for shared AirBnB lodging and meals. Ground transportation during your stay is a possibility at times.
|
|
|
Click on the screen capture to enlarge and check out the amazing noise reduction with this ISO 16000 image.
The Digital Basics IV Video Series/Volume I by Arthur Morris/Birds as Art
You can purchase Volume I by clicking here.
Or save $50.00 by purchasing the entire 5 volume series by clicking here.
|
Digital Basics IV Video Series/Volume I
Learn more in the blog post here.
Most importantly, DB IV/Volume I eliminates the confusion that resulted from the changes to AI Noise Reduction (under the Details tab) in the latest update (17.5) to Adobe Camera Raw (in both Photoshop 2025 Release 26.10.0 and the latest version of Lightroom). As you will see below and in the Volume I video, the new interface represents a significant improvement on the results obtained with the Enhance dialogue box in previous versions of ACR. And, as mentioned here recently, I have some fabulous new image optimization tips, techniques, and tricks to share with you. As the Digital Basics III Video Series proved to be so popular, I have decided to run it back in the form of the Digital Basics IV Video Series (Those who have complete faith in the information that I provide may wish to use the preceding link to save $50.00 by ordering the whole series on a pre-publication basis; you will receive Volume I as soon as you order. The rest will follow upon publication.
My new workflow includes the use of the masking feature in Adobe Camera Raw (thanks to Anita North), the use of the Point Color eye dropper to tame super-saturated colors during raw conversions (discovered in tandem with Anita), a fabulous new Remove Tool trick that makes my favorite Photoshop Tool even more powerful than before -— that one discovered by me. In addition, I have recently begun doing some Curves work during my ACR raw conversions.
My basic workflow remains much the same as is detailed in both DB II and in the DB III Video Series:
1- Setting the Color Temperature (when and if needed).
2- Setting the White and Black Points and adjusting the Highlights and Shadows sliders.
3- Setting the Clarity and Dehaze sliders.
4- Fine-tuning color using the Hue/Saturation/Luminance Targeted Adjustment Tool, a huge step up from the Color Mixer Tool.
5- My 2-step noise reduction technique (with most images).
Once I have the .TIF file in Photoshop, I still use my usual cadre of clean-up tools and techniques including the Remove Tool, the Clone Stamp (only rarely), Divide and Conquer, Quick Masking, Layer Masking, Gaussian Blurs, an expanded array of personalized keyboard shortcuts, and tons of other image optimization strategies and methods adapted from previous versions of Digital Basics. I also demonstrate the selective use of Topaz Sharpen AI utilizing the masking feature. And last but not least, I share my JPEG creation methodology.
Volume I of Digital Basics IV details the image optimizations of six images. Most everything above but for the use of the Point Color eye dropper to tame super-saturated colors during raw conversions is at least touched upon in Volume I. Most of it is covered in great detail.
Volume I of Digital Basics IV details the image optimizations of today’s six featured images. Most everything above but for the use of the Point Color eye dropper to tame super-saturated colors during raw conversions is at least touched upon in Volume I. Most of it is covered in detail.
You can purchase your copy of this all new 1 hour, two minute video for $49.00 here in the BAA Online Store. There will be five volumes in DB IV each featuring 5 or 6 complete image optimizations. If you purchase the first four volumes, you will receive the fifth volume for free.
Or, you can save $50.00 by purchasing all five volumes now for only $146.00 by clicking here. I hope to complete Volume II this week.
If …
If you were previously receiving blog post notifications via e-mail on a regular basis but they suddenly quit coming, please let me know via e-mail and cut and paste this into the subject line: Please Add to the Personalized Blog Notification List. Some e-mail providers (most likely and especially including Gmail) recently began blocking the post notifications being sent by the Word Press Newsletter program.
In the Last Blog Post
In the last blog post, my favorite was #3, the Sandhill Crane adult walking image for the amazingly clean ISO 25,600 ISO optimized version.
|
|
|
This image was created less than two minutes after Image #1 down by the lake near my home at Indian Lake Estates on 15 April 2025. Seated in the driver’s seat of my SUV, I used the BLUBB-supported Sony FE 600mm f/4 GM OSS lens with the Sony FE 2x Teleconverter and The Latest Greatest Sony Flagship Body, the a1 II Mirrorless Camera. The exposure was determined using Zebra technology with ISO on the Thumb Wheel. ISO 2500: 1/2000 second at f/8 (wide open) in Manual mode. RawDigger showed that the exposure was perfect. AWB at 8:32:42am on a cloudy morning.
Tracking: Zone/AF-C with Bird-Eye/Face Detection performed perfectly. Click on the image to enjoy the high-res version.
Image #1: Solitary Sandpiper jumping forward (with head replaced)
Image copyright 2025: Arthur Morris/BIRDS AS ART
|
The Head Replacement Halo
In the On Photographing a New Species Well blog post here, I posted the image above. I had replaced the head of the jumping bird with the head of the same bird from a static image. Two folks left a comment indicating that they did not like the light halo around the replaced head. Here is how I responded:
Thanks. I noted the halo. I am 99% sure that had I not revealed that the head and been replaced the head. nobody would have had “boo” to say about the halo, most likely passing it off as a matter of really good luck. That said, I may take another run at the .TIF file and attempt to eliminate the halo.
|
|
|
This image was created less than two minutes after Image #1 down by the lake near my home at Indian Lake Estates on 15 April 2025. Seated in the driver’s seat of my SUV, I used the BLUBB-supported Sony FE 600mm f/4 GM OSS lens with the Sony FE 2x Teleconverter and The Latest Greatest Sony Flagship Body, the a1 II Mirrorless Camera. The exposure was determined using Zebra technology with ISO on the Thumb Wheel. ISO 2500: 1/2000 second at f/8 (wide open) in Manual mode. RawDigger showed that the exposure was perfect. AWB at 8:32:42am on a cloudy morning.
Tracking: Zone/AF-C with Bird-Eye/Face Detection performed perfectly. Click on the image to enjoy the high-res version.
Image #2: Solitary Sandpiper jumping forward (with head replaced) — halo eliminated
Image copyright 2025: Arthur Morris/BIRDS AS ART
|
Eliminating the Halo
I an attempt to eliminate the halo, I painted a Quick Mask of the bill and the background, moved it into place, refined the placement, and then added a Regular Layer Mask to paint away the bill and a bit more. I am not sure which version I like better but am leaning toward the version with the halo as it seems to me to look more natural. And when I examine Image #2, the version without the halo, I find myself looking very closely at the background around the head. Whenever you make a significant repair, the tendency for most folks including me to view the area with great suspicion.
What do you think?
|
|
|
This image was created on 20 September on the pier down by the lake near my home at Indian Lake Estates, FL. Standing at full height I used the Robus RCM-439 4-Section Carbon Fiber Monopod, 65/Wimberley MonoGimbal Head-supported Sony FE 400-800mm f/6.3-8 G OSS lens (Sony E) (at 538mm) and The Latest Greatest Sony Flagship Body, the a1 II Mirrorless Camera. The exposure was determined by Zebras with ISO on the rear wheel: ISO 1250: 1/1600 sec. at f/11 (stopped down 1-stop for additional depth of field at point blank range) in Manual mode. RawDigger showed that the exposure was dead-solid perfect. AWB at 8:00:20am on a sunny morning.
Wide/AF-C with Bird-Eye/Face Detection performed perfectly. Click on the image to enjoy the larger, inexplicably sharper high-res version.
Image #3: Great Egret shaking head violently
Image copyright 2025: Arthur Morris/BIRDS AS ART
|
Photoshop Hank Panky?
Do you see any signs or evidence of significant Photoshop changes that have been made to Image #3? If yes, where and what?
Shooting Action Tips
As mentioned here dozens of times, when unexpected action occurs, press the shutter button and keep it pressed until the action stops. If you attempt to change the shutter speed or the ISO, you will likely wind up with nothing. In addition, do not stop shooting if you are framed too tightly and are worried about clipping something. Why? Because you just might get lucky.
Handholding Versus MonoPodding with the 400-800
With relatively heavy lenses, it is actually easier to handhold for flight photography than when working a static subject. Why? When doing flight, proper technique calls for raising the lens from the rest position, finding the subject, panning with it while acquiring focus, and squeezing off a sequence. Total time? Several seconds at most. When working a static subject like a Great Egret on a pier railing, however, you might wind up holding the lens up for five or ten or even more minute. Having the lens supported by a quality monopod reduces stress and strain especially on your left shoulder. A tripod would be even better but then you lose the stealth and mobility advantages that come with using a monopod.
You can learn a ton about using a monopod in the Robus MonoPodding With the Sony 400-800 G Lens blog post here..
Typos
With all blog posts, feel free to e-mail or to leave a comment regarding any typos or errors.
September 23rd, 2025 L’shana Tova
“L’shana tova” (לְשָׁנָה טוֹבָה) is a common Hebrew greeting that means “for a good year,” and it is used to wish someone a Happy New Year during Rosh Hashanah, the Jewish New Year holiday. Rosh Hashanah began last night and is comprised of two full days. Yom Kippur (one day) begins at sundown on Wednesday 21 October.
|
|
|
Click on the screen capture to enlarge and check out the amazing noise reduction with this ISO 16000 image.
The Digital Basics IV Video Series/Volume I by Arthur Morris/Birds as Art
You can purchase Volume I by clicking here.
Or save $50.00 by purchasing the entire 5 volumes series by clicking here.
|
Digital Basics IV Video Series/Volume I
Most importantly, DB IV/Volume I eliminates the confusion that resulted from the changes to AI Noise Reduction (under the Details tab) in the latest update (17.5) to Adobe Camera Raw (in both Photoshop 2025 Release 26.10.0 and the latest version of Lightroom). As you will see below and in the Volume I video, the new interface represents a significant improvement on the results obtained with the Enhance dialogue box in previous versions of ACR. And, as mentioned here recently, I have some fabulous new image optimization tips, techniques, and tricks to share with you. As the Digital Basics III Video Series proved to be so popular, I have decided to run it back in the form of the Digital Basics IV Video Series (Those who have complete faith in the information that I provide may wish to use the preceding link to save $50.00 by ordering the whole series on a pre-publication basis; you will receive Volume I as soon as you order. The rest will follow upon publication.
My new workflow includes the use of the masking feature in Adobe Camera Raw (thanks to Anita North), the use of the Point Color eye dropper to tame super-saturated colors during raw conversions (discovered in tandem with Anita), a fabulous new Remove Tool trick that makes my favorite Photoshop Tool even more powerful than before -— that one discovered by me. In addition, I have recently begun doing some Curves work during my ACR raw conversions.
My basic workflow remains much the same as is detailed in both DB II and in the DB III Video Series:
1- Setting the Color Temperature (when and if needed).
2- Setting the White and Black Points and adjusting the Highlights and Shadows sliders.
3- Setting the Clarity and Dehaze sliders.
4- Fine-tuning color using the Hue/Saturation/Luminance Targeted Adjustment Tool, a huge step up from the Color Mixer Tool.
5- My 2-step noise reduction technique (with most images).
Once I have the .TIF file in Photoshop, I still use my usual cadre of clean-up tools and techniques including the Remove Tool, the Clone Stamp (only rarely), Divide and Conquer, Quick Masking, Layer Masking, Gaussian Blurs, an expanded array of personalized keyboard shortcuts, and tons of other image optimization strategies and methods adapted from previous versions of Digital Basics. I also demonstrate the selective use of Topaz Sharpen AI utilizing the masking feature. And last but not least, I share my JPEG creation methodology.
Volume I of Digital Basics IV details the image optimizations of six images. Most everything above but for the use of the Point Color eye dropper to tame super-saturated colors during raw conversions is at least touched upon in Volume I. Most of it is covered in great detail.
Volume I of Digital Basics IV details the image optimizations of today’s six featured images. Most everything above but for the use of the Point Color eye dropper to tame super-saturated colors during raw conversions is at least touched upon in Volume I. Most of it is covered in detail.
You can purchase your copy of this all new 1 hour, two minute video for $49.00 here in the BAA Online Store. There will be five volumes in DB IV each featuring 5 or 6 complete image optimizations. If you purchase the first four volumes, you will receive the fifth volume for free.
Or, you can save $50.00 by purchasing all five volumes now for only $146.00 by clicking here. I hope to complete Volume II this week.
If …
If you were previously receiving blog post notifications via e-mail on a regular basis but they suddenly quit coming, please let me know via e-mail and cut and paste this into the subject line: Please Add to the Personalized Blog Notification List. Some e-mail providers (likely including Gmail) recently began blocking the post notifications being sent by the Word Press Newsletter program.
In the Last Blog Post
In the last blog post, only two folks picked a favorite, Image #4, both for the same reason: the bird’s elegant pose. My top pick was Image #3: Sandhill Crane colt head portrait, for its overall perfection.
If you are so inclined, feel free to pick a favorite from today’s six featured images and let us know why you made your choice.
What’s Up?
I’ve had several very good morning sessions here at ILE recently with lots of cooperative birds posing on the pier railings. Monday morning began slowly but I wound up working a pair of adult cranes preening on the beach south of a pier and yet another perched young Great Egret on The Perch II. I created 1245 yet-to-be-edited raw files and am of course, hoping for at least one good one.
Today is Tuesday 23 September and I will be headed down to the lake as soon as I hit publish. This blog post took a ridiculous 8+ hours to create, not including the time spent creating the images and the DB IV/VOL I video 🙂 Whatever you opt to do, I hope that you too choose to have a great day.
I am thinking about getting ready to head over to Sebastian on Thursday afternoon to begin my two-month residency at a very nice Vero Beach Estates AirBnB. Click here and scroll down a bit to learn about joining me.
If an item — a Delkin flash card or reader, a Levered-clamp FlexShooter Pro, or a Wimberley lens plate or low foot — for example, that is available from B&H and/or Bedfords, is also available in the BAA Online Store, it would be great, and greatly appreciated, if you would opt to purchase from us. We will match or beat any price. Please remember also to use my B&H affiliate links or to earn 3% cash back at Bedford by using the BIRDSASART discount code at checkout for your major gear purchases. Doing either often earns you free guides and/or discounts. And always earns my great appreciation.
Gear Questions and Advice
Too many folks attending BAA IPTs and dozens of photographers whom I see in the field and on BirdPhotographer’s.Net, are — out of ignorance — using the wrong gear, especially when it comes to tripods and more especially, tripod heads. And the same is true in spades when ordering new camera bodies or lenses. My advice will often save you some serious money and may help you avoid making a seriously bad choice. Please know that I am always glad to answer your gear questions via e-mail. If you are desperate, you can try me on my cell at 863-221-2372. Please leave a message and shoot me a text if I do not pick up.
Don’t Just Shoot: Learn
If you are interested in changing your life and becoming a better photographer by joining me on the Extended IPT at Sebastian Inlet for Ospreys and more (SEPT 25 to NOV 24, 2025), in San Diego for Pacific-race Brown Pelicans and more (JAN 6 to FEB 2, 2026), or for Roseate Spoonbills at Stick Marsh (March 2026), please e-mail for dates, rates, terms, and additional information. Or shoot me a text to 863-221-2372. Some offerings include options for shared AirBnB lodging and meals. Ground transportation during your stay is a possibility at times.
B&H Simplified
To ensure that I get credit for your B&H purchases, you can always click here. The tracking is invisible but using my affiliate links is greatly appreciated. And, with B&H, you can use your PayBoo card. You must use the website to order. You cannot get your free guides if you make a phone order. Once you have an item in your cart, you must complete the order within two hours. Huge thanks!
B&H
Many folks have written recently stating that they purchased a Sony a1 from B&H and would like their free membership in the Sony 1 Info and Updates Group, a $150.00 value. But when I check my affiliate account, their orders have not been there. When I let them know that they get credit for B&H purchases only if they use one of the many B&H affiliate links on the blog or begin their searches with this link, they are always disappointed. If in doubt, please contact me via e-mail and request a BH link. I am always glad to help and to guide you to the right gear.
Bedfords Simplified
Click here to start your search. Choose standard shipping, and when you get to the payment page, enter BIRDSASART in the discount code box and hit apply. You will be upgraded to free second day air Fed-Ex and receive 3% cash back on your credit card once your stuff ships. Using either my affiliate links is greatly appreciated and will often earn you free guides or discounts.
Bedfords Amazing BAA Discount Policy
Folks who have fallen in love with Bedfords can always use the BIRDSASART coupon code at checkout to enjoy a post-purchase, 3% off-statement credit (excluding taxes and shipping charges) on orders paid with a credit card. The 3% credit will be refunded to the card you used for your purchase when your product ships. Be sure, also, to check the box for free shipping to enjoy free Second Day Air Fed-Ex. This offer does not apply to purchases of Classes, Gift Cards, or prior purchases.
You can visit the Bedfords website here, shoot Steve Elkins an e-mail, or text him on his cell phone at (479) 381-2592.
|
|
|
This image was created on 19 September down by the lake near my home at Indian Lake Estates, FL. Standing at full height I used the handheld Sony FE 400-800mm f/6.3-8 G OSS lens (Sony E) (at 648mm) and The Latest Greatest Sony Flagship Body, the a1 II Mirrorless Camera. The exposure was determined by Zebras with ISO on the rear wheel: ISO 1250: 1/1600 sec. at f/9 (stopped down 1/3-stop) in Manual mode. RawDigger showed that the exposure was dead-solid perfect. AWB at 8:12:16am shortly after sunrise with some light clouds on the eastern horizon. <
Wide/AF-C with Bird-Eye/Face Detection performed perfectly. Click on the image to enjoy the larger, inexplicably sharper high-res version.
Image #1: Sandhill Crane adult head portrait
Image copyright 2025: Arthur Morris/BIRDS AS ART
|
The First Volume I Optimization
I chose a straightforward image to start the video to introduce my workflow with a mid-range ISO raw file. But for the new approach to using the Detail tab in ACR 17.5, most everything is similar to what I have been doing for the past two years.
|
|
|
This image was also created on 18 September 2025 down by the lake near my home at Indian Lake Estates, FL. Standing down on a slope that leads to a canal, I used the handheld Sony FE 200-600mm f/5.6-6.3 G OSS lens (at 600mm) and The Latest Greatest Flagship Body, the Sony a1 II Mirrorless Camera. The exposure was determined by Zebras with ISO on the rear wheel: ISO 1600: 1/500 sec. at f/9 (stopped down one stop) in Manual mode. RawDigger showed that the exposure was perfect. AWB at 8:40:42am on a mostly sunny morning.
Wide/AF-C with Bird-Eye/Face Detection performed perfectly. Click on the image to enjoy the larger, inexplicably sharper high-res version.
Image #2: Sandhill Crane colt head portrait
Image copyright 2025: Arthur Morris/birds as Art
|
The Second DB IV/Volume I Photo
My reasoning for choosing this image was much the same as for the first image. Having optimized this one previously, before I had learned to use the stuff until the Detail tab in the new ACR 17.5 properly, I wanted to compare the results. They were quite similar.
|
|
|
This image was also created on 24 March 2025 down by the lake near my home at Indian Lake Estates, FL. Working from the front seat of my SUV, I used the handheld Sony FE 200-600mm f/5.6-6.3 G OSS lens (at 419mm) and the a-1 (now replaced by The Latest Greatest Flagship Body, the Sony a1 II Mirrorless Camera). The exposure was determined by Zebras with ISO on the rear wheel: ISO 16000 (! — not a typo): 1/125 sec. at f/6.3 (wide open) in Manual mode. RawDigger showed that the exposure was 2/3 stop less than perfect. AWB at 7:14:25am on a totally cloudy morning.
Wide/AF-C with Bird-Eye/Face Detection performed perfectly.
Image #3: Sandhill Crane adult walking
Image copyright 2025: Arthur Morris/birds as Art
|
Getting Lucky on Shutter Speed
Photographing a walking crane, no matter how slowly, at 1/125 second with a super-telephoto zoom lens, requires some luck as far as getting a sharp image. Surely good technique helps to some degree but it is important to remember that image stabilization, no matter how good it is, will not correct for subject movement, AKA, motion blur.
ISO 16000!
After enlarging this image, it is hard to believe that it was created at such a high ISO. It looks clean, sharp, and detailed with no trace of noise, even in the vegetation at the top of the frame. Considering the high ISO and the fact that the raw file was under-exposed to begin with, the performance of my double noise reduction technique was beyond impressive. See below for before and after views of the noise.
Head of Subject Animated GIF
The noise levels in the original were oppressively huge at best, especially considering the overall light tones where noise is generally less prevalent. Note that the bill cleanup was using the Remove Tool after the creation of the video.
Background/Vegetation Animated GIF
Notice that the noise levels in the darker areas of an image are far greater than in light-toned areas. The swirly, wavy artifacts in the “after” version are due to the compression needed to create the proper sizing for the animated GIF. As you can see in the optimized version, they are not present in the optimized image above, Image #3.
|
|
The originals for Images #4 & #5
Image copyright 2025: Arthur Morris/BIRDS AS ART
|
The Originals for Images #4 & #5
I opted to show these originals so that you could see the cropping, leveling, and expanded canvas with #4 and the tight crop with #5.
|
|
|
This image was created on 7 August 2025 on a Nickerson Beach Extended IPT. Standing at full height I used the hand held Sony FE 300mm f/2.8 GM OSS Lens (Sony E) with the Sony FE 2x Teleconverter and the Latest Greatest Sony Flagship Body, the a1 II Mirrorless Camera. Exposure determined via Zebras with ISO on the Thumb Wheel. ISO 25600 (!): 1/5000 sec. at f/5.6 (wide open) in Manual mode. RawDigger showed that the exposure was fractionally short of perfect: AWB at 7:47:44pm a few minutes after the time of sunset.
Tracking: Zone/AF-C with Bird Eye/Face Detection enabled performed perfectly.
Image #4: Common Tern braking to land
Image copyright 2025 Arthur Morris/BIRDS AS ART
|
ISO 25600!
Large crops tend to make noise in an image more apparent. I do believe that the new noise reduction available in ACR 17.5 is an improvement as compared to the results in previous versions of Photoshop AI noise reduction. And, as is quite evident in the Volume I video, step two of my double noise reduction technique cleans up any remaining Luminance noise beautifully in images that require it. Such as Image #4. In spades! Also, with this image, we brightened and selectively sharpened the bird’s right eye (on our left), fiddled with the snow fence, and removed a bit of the dark area behind the bird’s head.
|
|
|
This image was created on 6 June 2025 from the pier at the lake near my home at Indian Lake Estates, FL. Standing at full height, I used the handheld Sony FE 400-800mm f/6.3-8 G OSS lens (Sony E) (at 400mm) and The Latest Greatest Sony Flagship Body, the a1 II Mirrorless Camera. The exposure was determined by Zebras with Exposure Compensation (EC) on the thumb wheel. Multi Metering +2.3 stops. AUTO ISO set ISO 6400: 1/4000 second at f/6.3 (wide open) in Shutter Priority mode. RawDigger showed that the exposure was dead-solid perfect. AWB at 8:27:15am on a cloudy morning. RawDigger showed that the exposure was dead solid perfect.
Wide/AF-C with Bird-Eye/Face Detection performed perfectly. Click on the image to enjoy the larger, inexplicably sharper high-res version.
Image #5: Boat-tailed Grackle male in flight
Image copyright 2025: Arthur Morris/BIRDS AS ART
|
Shutter Priority Mode and ISO 6400
As regular readers know, I will not hesitate to go to Shutter Priority mode with EC on the thumb wheel when I am not sure what might pop up audit is likely that I will be working with consistently toned backgrounds. One of the really huge advantages of working in Shutter Priority mode with slow, variable aperture lenses is that when you zoom out, you can often save a click or two of ISO. The latter as with this image. This tip, and many other valuable others, are explained in detail in the BIRDS AS ART SONY 400-800mm f/6.3-9 G Super-telephoto Zoom Lens Guide.
Notice that I wound up with a dead-solid perfect exposure at +2 1/3 stops. It is likely that few if any photographers have ever created an image at 2 2/3 stops. Why do I saw that? Because, in cloudy conditions, the whole world pretty much consistently under-exposes their raw files.
To learn more about choosing shutter speeds for bird photography, check out the YouTube Video Guide: Bird Photography Shutter Speeds blog post here. Be sure — of course, to watch the video and to bookmark it for future study.
|
|
|
This image was created on 6 August 2025 on a Nickerson Beach Extended IPT. Seated on damp sand I used the knee-pod technique with the handheld Sony FE 400-800mm f/6.3-8 G OSS lens (Sony E) (at 800mm) and The Latest Greatest Sony Flagship Body, the a1 II Mirrorless Camera. The exposure was determined by Zebras with Exposure Compensation (EC) on the thumb wheel. Multi Metering +2.0 stops. AUTO ISO set ISO 8000: 1/250 second at f/8 (wide open) in Shutter Priority mode. RawDigger showed that the exposure was fractionally short of perfect. AWB at 6:20:36am shortly after sunrise with some light clouds on the eastern horizon. <
Wide/AF-C with Bird-Eye/Face Detection performed perfectly. Click on the image to enjoy the larger, inexplicably sharper high-res version.
Image #6: Great Black-backed Gull juvenile playing with beach wrack
Image copyright 2025: Arthur Morris/BIRDS AS ART
|
ISO 8000 and Getting Lucky Again With a Relatively Slow Shutter Speed
Shutter Priority again went to an extremely high ISO despite that fact that I went with a dangerously slow shutter speed, 1/250 second. 1/250 is close to the bottom of the range when you are photographing a bird that is moving. Once again, my double noise reduction technique produced a clean, noise free photograph from a high ISO raw file.
In addition to increasing stability, note that getting down and using the knee-pod technique eases the strain of handholding a relatively heavy lens. And in nearly all cases, getting low provides a much more intimate perspective than standing at full height.
The BIRDS AS ART SONY 400-800mm f/6.3-9 G Super-telephoto Zoom Lens Guide
When I borrowed this lens from Sony, I assumed that at 5.45 pounds it was too heavy to handhold for long and that at f/8 at the long end (800mm,) it was too slow for most bird photography applications. In short, I did not want to like the lens. After a month of using it, I cannot live without it. After returning the loaner, I was miraculously able to get my own from Bedfords on 16 April 2025. In this guide I share everything that I have learned about using the 400-800. For best results, you need to know exactly what you are doing to get the most out of this zoom lens. It would be best, therefore, to consider and study the material in the guide so that you can begin making great images with your new lens.
You will learn how to deal with the relatively show apertures: f/6.3, f/7.1, and f/8 when working in Manual mode.
You will learn how to ensure that you are working at the widest aperture by working in Shutter Priority mode with AUTO ISO.
If you are able to hand hold the lens, you will learn proper hand holding techniques.
If you can’t, you will learn when, why, and how to employ other options. Those include:
1- The knee-pod, heel-pod, and toe-pod techniques
2- Using the lens on a monopod.
3- The best lens plate and low foot for your 4-8.
4- The best tripod and head for the 4-8 and how best to utilize them.
5- How to use the lens from your vehicle while supporting it on a BLUBB (or not and why not).
6- Detailed instructions on how to set and use the lens controls and buttons:
a- AF/MF
b- DMF Switch
c- Limit Range Switch
d- OSS (Optical Steady Shot) Switch
e- OSS Mode Switch
f- Focus Hold Buttons
The guide also includes a Hand Holding Shutter Speed Primer and an illustrative, educational, and inspiring 67-image gallery.
Free to folks who use one of my two affiliate links to purchase their Sony 400-800 G lens. Otherwise, please send a PayPal for $115.43 to birdsasart@verizon.net and include the words “400-800 Lens Guide” in your e-mail.
Typos
With all blog posts, feel free to e-mail or to leave a comment regarding any typos or errors.
September 20th, 2025 In the Last Blog Post
In the last blog post, two folks — as expected, did not like the light-toned halo in Image #3. Here is my response:
I noted the halo. I am 99% sure that had I not revealed that the head and been replaced the head, nobody would have had “boo” to say about the halo, passing it off as a matter of really good luck.
That said, I may take another run at the .TIF file and attempt to eliminate the halo.
Your Call?
Which of today’s four new featured images is your favorite? What do you like most about your first choice?
What’s Up?
The improving photography here at ILE continues and I have been getting out every morning. Today’s four new featured images were optimized in Photoshop 2025/26.10.0 Release with ACR 17.5, both recently updated. Yesterday I completed Volume I of the Digital Basics IV Video Series. It introduces the new ACR noise reduction methodology and details its use. The first volume will be introduced in the next blog post; DB IV/VOL I will be available for purchase in the BAA Online Store.
Today is Saturday 20 September 2025. The weather is perfect so I will be heading down to the lake as soon as I hit publish. Whatever you choose to do today, I hope that you too opt to have a wonderful blessed day.
If an item — a Delkin flash card or reader, a Levered-clamp FlexShooter Pro, or a Wimberley lens plate or low foot — for example, that is available from B&H and/or Bedfords, is also available in the BAA Online Store, it would be great, and greatly appreciated, if you would opt to purchase from us. We will match or beat any price. Please remember also to use my B&H affiliate links or to earn 3% cash back at Bedford by using the BIRDSASART discount code at checkout for your major gear purchases. Doing either often earns you free guides and/or discounts. And always earns my great appreciation.
Gear Questions and Advice
Too many folks attending BAA IPTs and dozens of photographers whom I see in the field and on BirdPhotographer’s.Net, are — out of ignorance — using the wrong gear, especially when it comes to tripods and more especially, tripod heads. And the same is true in spades when ordering new camera bodies or lenses. My advice will often save you some serious money and may help you avoid making a seriously bad choice. Please know that I am always glad to answer your gear questions via e-mail. If you are desperate, you can try me on my cell at 863-221-2372. Please leave a message and shoot me a text if I do not pick up.
Don’t Just Shoot: Learn
If you are interested in changing your life and becoming a better photographer by joining me on the Extended IPT at Sebastian Inlet for Ospreys and more (SEPT 25 to NOV 24, 2025), in San Diego for Pacific-race Brown Pelicans and more (JAN 6 to FEB 2, 2026), or for Roseate Spoonbills at Stick Marsh (March 2026), please e-mail for dates, rates, terms, and additional information. Or shoot me a text to 863-221-2372. Some offerings include options for shared AirBnB lodging and meals. Ground transportation during your stay is a possibility at times.
B&H Simplified
To ensure that I get credit for your B&H purchases, you can always click here. The tracking is invisible but using my affiliate links is greatly appreciated. And, with B&H, you can use your PayBoo card. You must use the website to order. You cannot get your free guides if you make a phone order. Once you have an item in your cart, you must complete the order within two hours. Huge thanks!
B&H
Many folks have written recently stating that they purchased a Sony a1-ii from B&H and would like their free membership in the Sony 1-ii Info and Updates Group, a roughly $225.00 value. But when I check my affiliate account, their orders have not been there. When I let them know that they get credit for B&H purchases only if they use one of the many B&H affiliate links on the blog or begin their searches with this link, they are always disappointed. If in doubt, please contact me via e-mail and request a BH link. I am always glad to help and to guide you to the right gear.
Bedfords Simplified
Click here to start your search. Choose standard shipping, and when you get to the payment page, enter BIRDSASART in the discount code box and hit apply. You will be upgraded to free second day air Fed-Ex and receive 3% cash back on your credit card once your stuff ships. Using either my affiliate links is greatly appreciated and will often earn you free guides or discounts.
Bedfords Amazing BAA Discount Policy
Folks who have fallen in love with Bedfords can always use the BIRDSASART coupon code at checkout to enjoy a post-purchase, 3% off-statement credit (excluding taxes and shipping charges) on orders paid with a credit card. The 3% credit will be refunded to the card you used for your purchase when your product ships. Be sure, also, to check the box for free shipping to enjoy free Second Day Air Fed-Ex. This offer does not apply to purchases of Classes, Gift Cards, or prior purchases.
You can visit the Bedfords website here, shoot Steve Elkins an e-mail, or text him on his cell phone at (479) 381-2592.
|
|
|
This image was created on 14 September 2025 down by the lake near my home at Indian Lake Estates, FL. Standing and squatting down a bit to move the background farther from the bird, I used the handheld Sony FE 400-800mm f/6.3-8 G OSS lens (Sony E) (at 800mm) and The Latest Greatest Sony Flagship Body, the a1 II Mirrorless Camera. The exposure was determined by Zebras with Exposure Compensation (EC) on the thumb wheel. The exposure was determined by Zebras with ISO on the rear wheel: ISO 3200: 1/800 sec. at f/8 (wide open) in Manual mode. RawDigger showed that the exposure was perfect. AWB at 7:59:59am on a mostly sunny morning. RawDigger showed that the exposure was dead solid perfect. AWB at 7:59:59am on a mostly sunny morning.
Wide/AF-C with Bird-Eye/Face Detection performed perfectly. Click on the image to enjoy the larger, inexplicably sharper high-res version.
Image #1: Sandhill Crane colt about six months old holding dried blade grass
Image copyright 2025: Arthur Morris/BIRDS AS ART
|
Subject in Shade, Background in Sun
Regular readers know that I am always on the lookout for subject in shade, background in sun situations because I always love the look of such images. They are not easy to find. With this one, the young crane was in the shade of a large tree; the shadow did not reach the background. The trick is to add enough light to properly expose the bird while avoiding over-exposing the background. A plus in these situation is that since the subject is in the shade, you can shoot off sun angle; that often helps in lining up with the sun drenched background.
|
|
|
This image was created on 18 September 2025 down by the lake near my home at Indian Lake Estates, FL. Standing down on a slope that leads to a canal, I used the handheld Sony FE 200-600mm f/5.6-6.3 G OSS lens (at 456mm) and The Latest Greatest Flagship Body, the Sony a1 II Mirrorless Camera. The exposure was determined by Zebras with ISO on the rear wheel: ISO 1600: 1/1000 sec. at f/6.3 (wide open) in Manual mode. RawDigger showed that the exposure was perfect. AWB at 8:30:39am on a mostly sunny morning.
Wide/AF-C with Bird-Eye/Face Detection performed perfectly. Click on the image to enjoy the larger, inexplicably sharper high-res version.
Image #2: Sandhill Crane colt about six months old with scavenged Glass Lizard
Image copyright 2025: Arthur Morris/birds as Art
|
The Glass Lizard Adventure
One of the adult cranes discovered the dead Glass Lizard in the grass and immediately began tearing off small bits from the rear end and feeding them to their surviving colt. This continued for about 40 minutes. Then, the colt began picking up the carcass and trying — without success, to swallow it head first. Photography was extremely difficult as one of the three birds in the family always seemed to be in the way. In addition, making a good feeding shot was very difficult for the usual reasons: poor subject to sensor plane orientation and/or terrible head angles. I had a ton of fun trying.
Thanks again to Matt Milnes for the herp ID.
|
|
|
This image was also created on 18 September 2025 down by the lake near my home at Indian Lake Estates, FL. Standing down on a slope that leads to a canal, I used the handheld Sony FE 200-600mm f/5.6-6.3 G OSS lens (at 600mm) and The Latest Greatest Flagship Body, the Sony a1 II Mirrorless Camera. The exposure was determined by Zebras with ISO on the rear wheel: ISO 1600: 1/500 sec. at f/9 (stopped down one stop) in Manual mode. RawDigger showed that the exposure was perfect. AWB at 8:40:42am on a mostly sunny morning.
Wide/AF-C with Bird-Eye/Face Detection performed perfectly. Click on the image to enjoy the larger, inexplicably sharper high-res version.
Image #3: Sandhill Crane colt head portrait
Image copyright 2025: Arthur Morris/birds as Art
|
Stopping Down!
Ninety-eight percent of my bird photographs are created at the wide open aperture. As preached here for years, the time to stop down for extra depth of field is when you are working near the minimum focusing distance (MFD) of the lens with a large-in-the frame subject. For whatever reason, the young crane quit feeding and posed while waiting for poppa to tear off another small chunk of lizard.
At risk of missing the perfect head portrait pose, I went three clicks clockwise with my right index finger to get to f/9 and then three clicks counterclockwise with my right thumb to reduce the shutter speed from 1/1000 sec. to 1/500 sec. That took less than two seconds and I was very glad that the bird had not moved.
|
|
|
This image was created on 19 September 2025 down by the lake near my home at Indian Lake Estates, FL. Seated on a concrete pad and working vertically off the tilted rear monitor, I used the toe-pod technique with the handheld Sony FE 400-800mm f/6.3-8 G OSS lens (Sony E) (at 427mm) and The Latest Greatest Sony Flagship Body, the a1 II Mirrorless Camera. The exposure was determined by Zebras with Exposure Compensation (EC) on the thumb wheel. The exposure was determined by Zebras with ISO on the rear wheel: ISO 1250: 1/1600 sec. at f/8 (wide open) in Manual mode. RawDigger showed that the exposure was perfect. AWB at 7:59:59am on a mostly sunny morning. RawDigger showed that the exposure was dead solid perfect. AWB at 8:22:41am on a sunny morning.
Wide/AF-C with Bird-Eye/Face Detection performed perfectly. Click on the image to enjoy the larger, inexplicably sharper high-res version.
Image #4: Sandhill Crane colt about six months old — elegant pose while preening
Image copyright 2025: Arthur Morris/BIRDS AS ART
|
Loving the Vertically Tilting Rear Monitor
When working on or near the ground with the original Sony a-1, I remember dozens of times when I was wishing that the a-1 had had a tilting rear screen. The articulating rear monitor on the a-1 ii is one of my very favorite features. The shadow at the bottom of the frame is from a small picnic shelter. Did I lighten that shadow too much? If yes, why?
200-600 versus the 400-800
In general, I will opt for the 200-600 in cloudy conditions and the 400-800 when the sun is shining. Both of these wonderful lenses are similar with their great versatility. Most folks can handhold them. Both offer fast, smooth zooming. And both feature internal focusing; the length of the lens does not change as you zoom in or out.
The 4-8 weighs 5.45 pounds. When you throw in the weight of the superb Wimberley AP-640 Low Foot, that makes the 4-8 at least a pound heavier than the 200-600 (4.65 pounds). Notes: I use a lens plate on the 200-600 on the very, very rare occasions that I use that lens on a tripod; I am not sure that I ever have. The foot, however, is removable so I basically never have it mounted. I wish that the foot of the 400-800 was removable but it is not. It does make a great carrying handle.
The minimum focusing distance of the 200-600 is a bit more than 7 feet at the long end while the MFD of its big brother is about 11 feet (again, at the long end).
One pound does not seem like a lot, but after my Friday morning session my left shoulder was letting me know that I should have been on the monopod.
|
|
|
This image was created down by the lake near my home at Indian Lake on 8 April 2025 on a BAA Baby Crane In-the-Field instructional session with Joe Norton. Working from well down on the slope that leads to the canal, I used the hand held Sony FE 300mm f/2.8 GM OSS Lens (Sony E) and The Latest Greatest Sony Flagship Body, the a1 II Mirrorless Camera. Exposure determined via Zebras with ISO on the Thumb Wheel. ISO 2500: 1/500 sec. at f/2.8 (wide open) in Manual mode. RawDigger showed that the exposure was dead solid perfect: AWB at 7:56:23am on a cloudy, overcast, sometimes drizzly morning.
Wide/AF-C with Bird Eye/Face Detection enabled performed perfectly.
Image #5: Sandhill Crane chick twins
Image copyright 2025 Arthur Morris/BIRDS AS ART
|
Hard to Believe
There is a more than 50% chance that one of the two crane chicks in Image #5 is the same individual pictured in Images #1-4. It is amazing how quickly the crane chicks grow.
The BIRDS AS ART SONY 400-800mm f/6.3-9 G Super-telephoto Zoom Lens Guide
When I borrowed this lens from Sony, I assumed that at 5.45 pounds it was too heavy to handhold for long and that at f/8 at the long end (800mm,) it was too slow for most bird photography applications. In short, I did not want to like the lens. After a month of using it, I cannot live without it. After returning the loaner, I was miraculously able to get my own from Bedfords on 16 April 2025. In this guide I share everything that I have learned about using the 400-800. For best results, you need to know exactly what you are doing to get the most out of this zoom lens. It would be best, therefore, to consider and study the material in the guide so that you can begin making great images with your new lens.
You will learn how to deal with the relatively show apertures: f/6.3, f/7.1, and f/8 when working in Manual mode.
You will learn how to ensure that you are working at the widest aperture by working in Shutter Priority mode with AUTO ISO.
If you are able to hand hold the lens, you will learn proper hand holding techniques.
If you can’t, you will learn when, why, and how to employ other options. Those include:
1- The knee-pod, heel-pod, and toe-pod techniques
2- Using the lens on a monopod.
3- The best lens plate and low foot for your 4-8.
4- The best tripod and head for the 4-8 and how best to utilize them.
5- How to use the lens from your vehicle while supporting it on a BLUBB (or not and why not).
6- Detailed instructions on how to set and use the lens controls and buttons:
a- AF/MF
b- DMF Switch
c- Limit Range Switch
d- OSS (Optical Steady Shot) Switch
e- OSS Mode Switch
f- Focus Hold Buttons
The guide also includes a Hand Holding Shutter Speed Primer and an illustrative, educational, and inspiring 67-image gallery.
Free to folks who use one of my two affiliate links to purchase their Sony 400-800 G lens. Otherwise, please send a PayPal for $115.43 to birdsasart@verizon.net and include the words “400-800 Lens Guide” in your e-mail.
The a-1 ii for General Bird Photography
I have found that eye-tracking for general bird photography with the a-1 ii is far, far better than with the original Sony a-1. It grabs the eye and tracks it faster and far more consistently and focus is rarely lost, even with backgrounds other than sky.
The a-1 ii for Birds in Flight
For birds in flight, the a-1 ii Mirrorless Camera body has no equal. As Arash Hazeghi says, “It is better than the a-1.” When I am late getting on a bird in flight, I have consistently been amazed at how often the AF system of the a-1 ii finds and tracks the bird’s eye.
Pre-Capture with the Sony a-1 ii
When it comes to Pre-Capture with the a-1 ii Mirrorless Camera body, Arash and I agree 100%. And with my slower reflexes, Pre-Capture is more important for me than it is for Arash. Understand that in each of the images in Composite #3, I did not push the shutter button until after the bird took flight!
Purchasing or Upgrading to a Sony a-1 ii
The Sony a-1 ii e-Mail Set-up and Info Guide
I now own and use two Sony a-1 ii bodies. Every day that I use them, the more I am amazed by speed and accuracy of the Bird Face-Eye tracking in AF-C and the overall performance of the camera.
Aside from the improved ergonomics as compared to the a-1, other nice features include the fact that the rear screen tilts both ways — the lack of a tilting rear screen on the original a-1 always ticked me off. Pre-capture has proven to be a huge plus almost exclusively for take-off flight images. In my opinion, the Speed Boost feature is a total waste for bird photography because you should always be utilizing the maximum frame rate. In addition, the resolution on the rear monitor has been improved dramatically. I must mention again that Bird Face-Eye tracking on the a-1 ii is vastly improved as compared to both the a-1 and the a9 iii and that the 51MP files are to die for.
So, the big question is, is the a-1 ii “worth” a gear upgrade. Remembering that I can never know whether or not something is worth it to you, I can say that I was not floored when first using my a-1 ii. The differences between the a-1 ii and the original a-1, seemed to be neither huge nor eye-opening. But over time, I have come to realize that I was 100% wrong. The huge difference between the new camera body and the a9 iii is, of course, the 51MP a-1 raw files (as compared to the 24MP files rendered by the a9 iii).
The price of a new a-1 is $5,898.00. The price of a new a-1 ii is $1,100.00 more: $6,998.00. As the a-1 ii is clearly far superior for bird photography to the original a-1, the choice for folks new to Sony or for those upgrading from lesser Sony camera bodies is an easy one. Prices for used a-1 bodies has not dropped drastically as I anticipated. At this point, a-1 folks who like showing flight and action and can afford an a-1 ii, are advised to purchase an a-1 ii. Please remember that life is short; we only get one ride on the merry-go-round.
If you do purchase an a-1 ii, be sure to use one of my two affiliate links so that you will receive my a-1 ii settings (in the form of a CAMSEa1ii.DAT file), the Buttons and Dials Guide, and an Info Sheet for free. Using my links will never cost you one penny and may actually save you some money. Folks who do not purchase their new a-i using my B&H link or from Bedfords here and entering the BIRDSASART discount code at checkout will be able to purchase the a-1 ii guide for $244.93. If you are at all confused and do not want to screw up your order, please get in touch via e-mail. If you would like to chat about upgrading, shoot me a text to 863-221-2372 and LMK a good time to call you.
Typos
With all blog posts, feel free to e-mail or to leave a comment regarding any typos or errors.
September 18th, 2025 Good Photoshop News
Huge thanks to longtime friend Tim Grey. Tim is one of the top educators in digital photography and imaging, offering clear guidance on complex subjects through his writing, speaking, and training. Tim explained that the Denoise AI feature had not been eliminated in ACR 17.5. They simply changed the implementation (but did not bother explaining anywhere to anyone). The new version is actually a bit of an improvement as compared to the old Enhance method. I will begin working on the first volume of the Digital Basics IV Video series this afternoon. The use of new Noise Reduction feature will be covered in detail. Volume I should be in the BAA Online Store no later than Monday.
Good a- II News
On Wednesday, I updated one of my two a-1 ii bodies to Firmware 3.00 as several folks who purchased their new camera body received theirs with the latest firmware installed. Now they are good to go and will easily be able to get all my setting on their a-1 ii bodies and receive both the Buttons and Dials guide and the INFO sheet so that they can head out and begin making great images from day one. Use one of my affiliate links to purchase your a-1 ii and get everything above free. Using one of my links never costs you one penny more and if you get in touch via e-mail, I may be able to save you some money.
What’s Up?
I have been finding some stuff to photograph here at ILE for the past few days. On Tuesday morning I had a young female Anhinga on The Perch II. The next morning there was a preening young Great Egret that was evicted by a young male Anhinga. And this morning, I worked the cranes for a bit. One family was scavenging what I thought might have been a mower-killed skink about eight inches long. I sent a bunch of screen grabs to my herp-friend, Matt Milnes. He wrote:
“It a Glass Lizard, Ophisaurus ventralis. They are one of several species of legless lizards that are native to the southeast. The common name comes from the fact that they readily drop their tail when handled. They have external ear holes and movable eyelids, like other lizards, whereas snakes lack external ear holes and have a clear fixed scale that covers their eyes.”
Today is Thursday 18 September 2025. Whatever you choose to do today, I hope that you too opt to have a wonderful blessed day.
If an item — a Delkin flash card or reader, a Levered-clamp FlexShooter Pro, or a Wimberley lens plate or low foot — for example, that is available from B&H and/or Bedfords, is also available in the BAA Online Store, it would be great, and greatly appreciated, if you would opt to purchase from us. We will match or beat any price. Please remember also to use my B&H affiliate links or to earn 3% cash back at Bedford by using the BIRDSASART discount code at checkout for your major gear purchases. Doing either often earns you free guides and/or discounts. And always earns my great appreciation.
Gear Questions and Advice
Too many folks attending BAA IPTs and dozens of photographers whom I see in the field and on BirdPhotographer’s.Net, are — out of ignorance — using the wrong gear, especially when it comes to tripods and more especially, tripod heads. And the same is true in spades when ordering new camera bodies or lenses. My advice will often save you some serious money and may help you avoid making a seriously bad choice. Please know that I am always glad to answer your gear questions via e-mail. If you are desperate, you can try me on my cell at 863-221-2372. Please leave a message and shoot me a text if I do not pick up.
Don’t Just Shoot: Learn
If you are interested in changing your life and becoming a better photographer by joining me on the Extended IPT at Sebastian Inlet for Ospreys and more (SEPT 25 to NOV 24, 2025), in San Diego for Pacific-race Brown Pelicans and more (JAN 6 to FEB 2, 2026), or for Roseate Spoonbills at Stick Marsh (March 2026), please e-mail for dates, rates, terms, and additional information. Or shoot me a text to 863-221-2372. Some offerings include options for shared AirBnB lodging and meals. Ground transportation during your stay is a possibility at times.
B&H Simplified
To ensure that I get credit for your B&H purchases, you can always click here. The tracking is invisible but using my affiliate links is greatly appreciated. And, with B&H, you can use your PayBoo card. You must use the website to order. You cannot get your free guides if you make a phone order. Once you have an item in your cart, you must complete the order within two hours. Huge thanks!
B&H
Many folks have written recently stating that they purchased a Sony a1-ii from B&H and would like their free membership in the Sony 1-ii Info and Updates Group, a roughly $225.00 value. But when I check my affiliate account, their orders have not been there. When I let them know that they get credit for B&H purchases only if they use one of the many B&H affiliate links on the blog or begin their searches with this link, they are always disappointed. If in doubt, please contact me via e-mail and request a BH link. I am always glad to help and to guide you to the right gear.
Bedfords Simplified
Click here to start your search. Choose standard shipping, and when you get to the payment page, enter BIRDSASART in the discount code box and hit apply. You will be upgraded to free second day air Fed-Ex and receive 3% cash back on your credit card once your stuff ships. Using either my affiliate links is greatly appreciated and will often earn you free guides or discounts.
Bedfords Amazing BAA Discount Policy
Folks who have fallen in love with Bedfords can always use the BIRDSASART coupon code at checkout to enjoy a post-purchase, 3% off-statement credit (excluding taxes and shipping charges) on orders paid with a credit card. The 3% credit will be refunded to the card you used for your purchase when your product ships. Be sure, also, to check the box for free shipping to enjoy free Second Day Air Fed-Ex. This offer does not apply to purchases of Classes, Gift Cards, or prior purchases.
You can visit the Bedfords website here, shoot Steve Elkins an e-mail, or text him on his cell phone at (479) 381-2592.
|
|
|
This image was created down by the lake near my home at Indian Lake Estates on 15 April 2025. Seated in the driver’s seat of my SUV, I used the BLUBB-supported Sony FE 600mm f/4 GM OSS lens with the Sony FE 2x Teleconverter and The Latest Greatest Sony Flagship Body, the a1 II Mirrorless Camera. The exposure was determined using Zebra technology with ISO on the Thumb Wheel. ISO 2500: 1/1600 second at f/8 (wide open) in Manual mode. RawDigger showed that the exposure was 1/2 stop too dark. AWB at 8:32:42am on a cloudy morning.
Tracking: Zone/AF-C with Bird-Eye/Face Detection performed perfectly. Click on the image to enjoy the high-res version.
Image #1: Solitary Sandpiper
Image copyright 2025: Arthur Morris/BIRDS AS ART
|
Photographing a New Species Well
Solitary Sandpiper, related to the yellowlegs, is a rare bird at Indian Lake Estates. I have seen it only once here in a quarter century. As its name implies to some degree, it is not seen in large numbers anywhere. I once saw three in the same spot on Staten Island early on a fine morning in May. Anyhoo, it is always a thrill to make a decent image of new species.
Solitary Sandpiper Species Account from Shorebirds; Beautiful Beachcombers
Tringa solitaria
True to its name, the Solitary Sandpiper is usually seen alone, It is extremely rare to see a group of more than three or four. Solitaries bob up and down as they search deliberately for aquatic insects and small crustaceans along the edges of shallow freshwater pools or along the shores of woodland ponds or streams. The presence of a fly-over Solitary Sandpiper is often revealed by its shrill “”peet weet” call.
This species is dark-brown above, lightly spotted white. It has greenish legs, a fairly short, straight bill, and a prominent, complete eye-ring. The throat, neck and breast are streaked dark brown. All plumages are similar, but in fresh juvenal plumage the spotting is brighter and more evident. Amazingly, this species nests in trees in the boreal forests of Canada and Alaska, frequently using the old nests of Rusty Blackbirds, robins, grackles, and waxwings. Solitary Sandpipers migrate south across a broad front, primarily east of the Rockies. A few winter in the southern United States, most in the Caribbean region and from Central America south to Argentina.
|
|
|
This image was created less than two minutes after Image #1 down by the lake near my home at Indian Lake Estates on 15 April 2025. Seated in the driver’s seat of my SUV, I used the BLUBB-supported Sony FE 600mm f/4 GM OSS lens with the Sony FE 2x Teleconverter and The Latest Greatest Sony Flagship Body, the a1 II Mirrorless Camera. The exposure was determined using Zebra technology with ISO on the Thumb Wheel. ISO 2500: 1/2000 second at f/8 (wide open) in Manual mode. RawDigger showed that the exposure was perfect. AWB at 8:32:42am on a cloudy morning.
Tracking: Zone/AF-C with Bird-Eye/Face Detection performed perfectly. Click on the image to enjoy the high-res version.
Image #2: Solitary Sandpiper jumping forward
Image copyright 2025: Arthur Morris/BIRDS AS ART
|
Getting An Action Shot of a New Species
Getting a decent action shot of a species that you have never photographed before is the icing on the cake. Before you scroll down, see if you can figure out what I don’t like about Image #2. Clue — with a breeze from the southeast the thing that bugged me was 100% bad luck.
Image Color Question
I optimized Image #1 this morning while Image #2 had been processed about 5 months ago. Do you like the warmer color tones in Image #1 or the slightly cooler look to Image #2?
|
|
|
This image was created less than two minutes after Image #1 down by the lake near my home at Indian Lake Estates on 15 April 2025. Seated in the driver’s seat of my SUV, I used the BLUBB-supported Sony FE 600mm f/4 GM OSS lens with the Sony FE 2x Teleconverter and The Latest Greatest Sony Flagship Body, the a1 II Mirrorless Camera. The exposure was determined using Zebra technology with ISO on the Thumb Wheel. ISO 2500: 1/2000 second at f/8 (wide open) in Manual mode. RawDigger showed that the exposure was perfect. AWB at 8:32:42am on a cloudy morning.
Tracking: Zone/AF-C with Bird-Eye/Face Detection performed perfectly. Click on the image to enjoy the high-res version.
Image #3: Solitary Sandpiper jumping forward (with head replaced)
Image copyright 2025: Arthur Morris/BIRDS AS ART
|
Photoshop Hanky Panky
Bad luck resulted in the bird’s head being turned slightly away in Image #2. So, I painted a Quick Mask of the same bird’s head on Image #1, moved it roughly into place on Image #2, refined the placement and warped the layer, and then added and refined the Regular Layer Mask that I had added. As the head was now held much higher, I needed to remove parts of the bill (and a bit more) that had not been covered by the Quick Mask. The last step was to select the formerly masked area with the Quick Selection Tool and reduce the saturation so that the replaced head matched the rest of the bird.
And no, I will not be entering Image #3 in any contests.
Shorebirds: Beautiful Beachcombers
Written for naturalists and birders, the text tells you everything you’ve always wanted to know about North America’s sandpipers, godwits, yellowlegs, phalaropes, plovers, avocets, stilts, and oystercatchers. Topics covered include identification and aging, shorebird behavior, their incredible migrations, feeding and diet, mating and breeding strategies, eggs, nests, and young, conservation efforts, and shorebirding tips. Also included are approximately 50 species accounts covering all of the regularly occurring North American shorebird species. With 70 of Arthur’s images and 26 more by some of the world’s best nature photographers, this book, at publication, contained the finest collection of shorebird photographs ever published in a single volume.
The a-1 ii for General Bird Photography
I have found that eye-tracking for general bird photography with the a-1 ii is far, far better than with the original Sony a-1. It grabs the eye and tracks it faster and far more consistently and focus is rarely lost, even with backgrounds other than sky.
The a-1 ii for Birds in Flight
For birds in flight, the a-1 ii Mirrorless Camera body has no equal. As Arash Hazeghi says, “It is better than the a-1.” When I am late getting on a bird in flight, I have consistently been amazed at how often the AF system of the a-1 ii finds and tracks the bird’s eye.
Pre-Capture with the Sony a-1 ii
When it comes to Pre-Capture with the a-1 ii Mirrorless Camera body, Arash and I agree 100%. And with my slower reflexes, Pre-Capture is more important for me than it is for Arash. Understand that in each of the images in Composite #3, I did not push the shutter button until after the bird took flight!
Purchasing or Upgrading to a Sony a-1 ii
The Sony a-1 ii e-Mail Set-up and Info Guide
I now own and use two Sony a-1 ii bodies. Every day that I use them, the more I am amazed by speed and accuracy of the Bird Face-Eye tracking in AF-C and the overall performance of the camera.
Aside from the improved ergonomics as compared to the a-1, other nice features include the fact that the rear screen tilts both ways — the lack of a tilting rear screen on the original a-1 always ticked me off. Pre-capture has proven to be a huge plus almost exclusively for take-off flight images. In my opinion, the Speed Boost feature is a total waste for bird photography because you should always be utilizing the maximum frame rate. In addition, the resolution on the rear monitor has been improved dramatically. I must mention again that Bird Face-Eye tracking on the a-1 ii is vastly improved as compared to both the a-1 and the a9 iii and that the 51MP files are to die for.
So, the big question is, is the a-1 ii “worth” a gear upgrade. Remembering that I can never know whether or not something is worth it to you, I can say that I was not floored when first using my a-1 ii. The differences between the a-1 ii and the original a-1, seemed to be neither huge nor eye-opening. But over time, I have come to realize that I was 100% wrong. The huge difference between the new camera body and the a9 iii is, of course, the 51MP a-1 raw files (as compared to the 24MP files rendered by the a9 iii).
The price of a new a-1 is $5,898.00. The price of a new a-1 ii is $1,100.00 more: $6,998.00. As the a-1 ii is clearly far superior for bird photography to the original a-1, the choice for folks new to Sony or for those upgrading from lesser Sony camera bodies is an easy one. Prices for used a-1 bodies has not dropped drastically as I anticipated. At this point, a-1 folks who like showing flight and action and can afford an a-1 ii, are advised to purchase an a-1 ii. Please remember that life is short; we only get one ride on the merry-go-round.
If you do purchase an a-1 ii, be sure to use one of my two affiliate links so that you will receive my a-1 ii settings (in the form of a CAMSEa1ii.DAT file), the Buttons and Dials Guide, and an Info Sheet for free. Using my links will never cost you one penny and may actually save you some money. Folks who do not purchase their new a-i using my B&H link or from Bedfords here and entering the BIRDSASART discount code at checkout will be able to purchase the a-1 ii guide for $244.93. If you are at all confused and do not want to screw up your order, please get in touch via e-mail. If you would like to chat about upgrading, shoot me a text to 863-221-2372 and LMK a good time to call you.
Typos
With all blog posts, feel free to e-mail or to leave a comment regarding any typos or errors.
September 16th, 2025 Goodbye Photoshop/ACR DeNoise AI
See my comments beneath the screen capture below for the bad news for folks who use Photoshop.
In the Last Blog Post
In the last blog post, the three folks who picked their best image went with #1, the Willet flapping after its bath. That was my least favorite. My top picks were the Caspian Tern breaking to land because they are not easy to photograph anywhere in Florida and the displaying Snowy Egret for the neat pose and the sweet tan sand background.
Your Call?
Which of today’s three featured images do you like best? Why?
Change Your Life
Join me in San Diego next January and learn to up your photographic game both in the field and at the computer. Scroll down for details.
|
|
Photo Mechanic screen capture: the originals for today’s featured images
Image courtesy of and copyright 2025: Vasili Chernishof
Image Optimization by Arthur Morris/BIRDS AS ART
|
Vasili’s Three Originals
Vasili Chernishoff is a relatively young doctor from near LA. For whatever reason, I have nick-named him “Vasili-Willy.” He and his wife are expecting their first child early next year so join me in sending love, strength, and energy to the family.
Compare the originals immediately above with the three optimized photos below. The last two raw files were processed in Adobe Photoshop 26.10.0 Release with Camera Raw 17.5 (both updated yesterday). If you have been using DeNoise AI under the ACR/Detail tab (in either Photoshop of Lightroom), you are in for a really big surprise; the fabulous DeNoise AI Enhance feature has been eliminated. Noise Reduction in ACR must now be done manually. I am working on exactly how to do that effectively. Don’t you just love it when a program is updated and one of the most valuable features is done away with? Not to mention that when I updated Photoshop to 26.10 I lost all of my Keyboard Shortcuts, Actions, and more. That is not how it is supposed to work. I did spend more than two mostly waste-of-time hours on the phone with several folks on the Adobe Help Line (1-800-833-6687). Part of that was after my promised 3:00pm ET callback came nearly four hours late. It ended when the senior advisor promised to call me right back, disconnected the call, but never did 🙂
|
|
|
This image was created on 21 January 2025 by student/friend/multiple IPT veteran Vasili Chernishof on a San Diego Extended IPT. Seated on a low stone wall, he used the handheld Canon RF 600mm f/4 L IS USM lens and the remarkable Canon EOS R1 Mirrorless Camera. ISO 250: 1/5000 sec at f/4 (wide open) in Manual mode. AWB at 9:14:01am on a sunny morning.
Image #1: Brown Pelican Pacific race breeding plumage adult
Image courtesy of and copyright 2025: Vasili Chernishof
Image Optimization by Arthur Morris/BIRDS AS ART
|
The Distended Bill Pouch
When I saw the distended bill pouch on Vasili’s resting pelican, I knew that I needed an aggressive crop and some fancy clean-up work to optimize the picture within the picture. Adding the 1.4X TC for this one would likely have helped quite a bit. Despite having “only” 24 MP, this Canon .CR3 files stood up beautifully to the large crop.
|
|
|
This image was created on 22 January 2025 by student/friend/multiple IPT veteran Vasili Chernishof on a San Diego Extended IPT. Seated on a sandstone cliff, he used the handheld Canon RF 600mm f/4 L IS USM lens, the Canon Extender RF 2x, and the remarkable Canon EOS R1 Mirrorless Camera. ISO 1600: 1/1000 sec at f/8 (wide open) in Manual mode. AWB at 9:16:45am on a sunny morning.
Image #2: Brown Pelican Pacific race juvenile with bill open
Image courtesy of and copyright 2025: Vasili Chernishof
Image Optimization by Arthur Morris/BIRDS AS ART
|
Tight
When working at 1200mm, you often wind up with the subject just a bit too large in the frame. Adding canvas above and right was easy using Content-Aware Crop. I am not sure what this young pelican was laughing about but it sure seems to be enjoying itself.
|
|
|
This image was created on 24 January 2025 by student/friend/multiple IPT veteran Vasili Chernishof on a San Diego Extended IPT. Standing on a sidewalk, he used the handheld Canon RF 600mm f/4 L IS USM lens, the Canon Extender RF 2x, and the remarkable Canon EOS R1 Mirrorless Camera. ISO 2000: 1/2000 sec at f/8 (wide open) in Manual mode. AWB at 9:16:45am on a sunny morning.
Image #3: Brown Pelican Pacific race adult — tight flight
Image courtesy of and copyright 2025: Vasili Chernishof
Image Optimization by Arthur Morris/BIRDS AS ART
|
EOS R1 1200mm Flight
While viewing Vasili’s EOS R1 1200mm flight images in San Diego last January, I was super-impressed with the camera’s eye-tracking AF. I’d have to say when matched up to Sony a-1 ii AF performance it was just as impressive. Of course, I love my 51 MP. When friend and experience Canon shooter Steffen Foerster tried an R1 at Nickerson this summer, he stated that the AF performance was “magnitudes better than the AF performance of the R5 II.” If you are using Canon and purchase an R1, please remember to use one of my affiliate links.
Under-exposed
This image was 2/3-stop too dark. After lightening it in ACR, I worked on the BLUEs with Color Mixer and then applied NR manually. My final step in Photoshop was a 50% layer o Image > Color Tone. Learn a ton in Digital Basics II and the DB III Video series.
|
|
|
San Diego offers an incredible variety of attractive avian subjects, including and especially the Pacific race of Brown Pelican. Clockwise from top left back to center: juvenile and sub-adult Brown Pelicans; Heermann’s Gull; Western Gull; Allen’s Hummingbird; Brandt’s Cormorant; Gadwall hen; Wood Duck drake; Willet; Brown Pelican tight flight. Click on the composite to enjoy a larger version.
|
The 2026 San Diego Brown Pelicans (and more!) IPTs
San Diego IPT #1: 4 1/2 DAYS: THURS 8 JAN thru the morning session on MON 12 JAN 2026: $2599.00. Deposit: $699.00. Limit: 6 photographers.
San Diego IPT #2: 4 1/2 DAYS: FRI 16 JAN thru the morning session on TUES 20 JAN 2026: $2599.00. Limit: 6 photographers.
Morning BAA In-the-Field Instructional Sessions (ITFIS) followed by brunch and an Image Review & Photoshop session: $449.00/per session
Available dates: JAN 14 & 15, 2026. Please get in touch with questions or to register with an e-mail to samandmayasgrandpa@att.net and please shoot me a text to 863-221-2372.
AirBnB accommodations and ground transport with the leader are available for both IPTs and for In the Field Instructional Sessions on a first come, first served basis. Please e-mail for details and information on personalized pre- and post-IPT morning sessions.
Join me in San Diego to photograph the spectacular breeding plumage Brown Pelicans with their fire-engine red and olive green bill pouches; Brandt’s (nesting) and Double-crested Cormorants; breeding plumage Wood and Ring-necked Ducks; other duck species possible including Lesser Scaup, Redhead, Northern Shoveler and Surf Scoter; a variety of gulls including Western, California, and the gorgeous Heermann’s, all in full breeding plumage; shorebirds including Marbled Godwit, Willet, Sanderling and Black-bellied Plover; many others are possible including Least, Western, and Spotted Sandpiper, Whimbrel, Black and Ruddy Turnstone, Semipalmated Plover, and Surfbird; Harbor Seals and California Sea Lions (both depending on the current regulations and restrictions). And as you can see by studying the IPT cards, there are some nice bird-scape and landscape opportunities as well. Not to mention a ton of excellent flight photography opportunities and instruction.
Please note: where permitted and on occasion, ducks and gulls may be attracted (or re-located) with offerings of grains or healthy bread.
|
|
|
San Diego offers a wealth of very attractive natural history subjects, including and especially the Pacific race of California Brown Pelican. With annual visits spanning more than four decades, I have lots of photographic experience there … Click on the composite to enjoy a larger version.
|
Learning Exposure, Whether You Like It Or Not
Whether you like it or not, we will be beating the subject of exposure like a dead horse. In every new situation, you will hear my thoughts on exposure along with my thoughts on both Nikon and Canon histograms and SONY Zebras. Whether you like it or not, you will learn to work in manual mode so that you can get the right exposure every time (as long as a bird gives you ten seconds with the light constant). Or two seconds with SONY zebras … And you will learn what to do when the light is changing constantly. What you learn about exposure will be one of the great takeaways on every IPT.
|
|
|
Though the pelicans will be the stars of the show on this IPT, there will be many other handsome and captivating subjects in wonderful settings. Click on the composite to enjoy a larger version.
|
It Ain’t Just Pelicans
With gorgeous subjects just sitting there waiting to have their pictures taken, photographing the pelicans on the cliffs is about as easy as nature photography gets. With the winds from the east almost every morning, there is usually some excellent flight photography, at times with 70-200mm lenses! And the pelicans are almost always doing something interesting: preening, scratching, bill pouch cleaning, or squabbling. And then there are those crazy head throws that are thought to be a form of intra-flock communication. You will be guided as to how to make the best of those opportunities. Depending on the weather, the local conditions, and the tides, there are a variety of other fabulous photo chances available in and around San Diego. Each IPT will include one or two duck sessions.
|

|
|
Did I mention that there are lots of great birds and natural history subjects in San Diego in winter? Click on the composite to enjoy a larger version.
|
The San Diego Details
These IPTs will include four or five 3-hour morning photo sessions, three or four 1 1/2-hour afternoon photo sessions, and three or four working brunches that will include image review and Photoshop sessions. On rare cloudy days, we may — at the leader’s discretion, stay out in the morning for a long session and skip that afternoon shoot. To ensure early starts, breakfasts will be your responsibility. And so that we can get some sleep, dinners will be on your own as well. In the extremely unlikely event that Goldfish Point is closed due to local ordinance (or whimsy) — that has never happened in the past fifty years, I will of course do my very best to maximize our photographic opportunities.
|
|
|
San Diego offers a wealth of very attractive natural history subjects, including and especially the Pacific race of California Brown Pelican. With annual visits spanning more than four decades, I have lots of photographic experience there. Click on the composite to enjoy a larger version.
|
Deposit Info
A $699 deposit is required to hold your slot for one of the 2026 San Diego IPTs. You can send a check (made out to “BIRDS AS ART”) to us here: BIRDS AS ART, PO Box 7245, Indian Lake Estates, FL, 33855, or call Jim or Jennifer at the office with a credit card at 863-692-0906. Your balance, payable only by check, is due three months before the trip.
|

|
|
Variety is surely the spice of life in San Diego. Click on the composite to enjoy a larger version.
|
Getting Up Early and Staying Out Late
On all BIRDS AS ART IPTS including and especially the San Diego IPT, we get into the field early to take advantage of unique and often spectacular lighting conditions and we stay out late to maximize the chances of killer light and glorious sunset silhouette situations. We often arrive at the cliffs a full hour before anyone else shows up to check out the landscape and seascape opportunities.
September 14th, 2025 Your Call?
Which of today’s five featured images do you think is the strongest? Why?
Sebastian Inlet Ospreys and More
Multiple IPT veteran Eugen Dolan is joining me for a month, arriving on 26 September. Beginning bird photographer Alvin Red Stevens is joining us for a week; he shows up on 12 October. And when he leaves, new friend Mishael Voisin will be with us for a week of photography and learning. Several other folks have sworn that they will be joining me at some point in November but right now it is wide open. Check out the opportunities immediately below and then change your life by joining me this fall. Feel free to e-mail me or to call or text — 863-221-2372 with any questions or concerns.
On Tuesday past I completed a third edit of the Sebastian OCT-NOV 2024 folder. It is always fun to discover some really good images that never caught your attention before. Below I share five more not-an-Osprey images that got me excited on my third trip through the folder of photos created during what was a great month at Sebastian in 2024. Do understand that in 2026 the top Sebastian location, the South Jetty, is scheduled to be closed for major reconstruction next season. That is why I am all in for 2025!
Topaz AI Stuff
Click here for more information. Additional info here on the blog soon.
What’s Up?
On Saturday morning, I worked several preening Sandhill Cranes from my SUV and then took my shirtless pier walk. I spent some time selecting images for my next big project– the Digital Basics IV Video Series. I have some fabulous new tips and techniques to share. Those include the use of the masking feature in Adobe Camera Raw (thanks to Anita North), the use of the Point Color eye dropper to tame super-saturated colors during raw conversions (discovered in tandem with Anita), a fabulous new Remove Tool trick that makes my favorite Photoshop Tool even more amazing — that one discovered by me 🙂 I have recently begun doing some Curves work during my ACR raw conversions and will share this new addition to my workflow in the new videos.
Today is Sunday 14 September 2025. I will be working on the above-mentioned Digital Basics IV Video Series in the morning and watching NFL games for the rest of the day. I so enjoy the close games and the competition. Whatever you opt to do, I hope that you too choose to have fun and have a great day.
If an item — a Delkin flash card or reader, a Levered-clamp FlexShooter Pro, or a Wimberley lens plate or low foot — for example, that is available from B&H and/or Bedfords, is also available in the BAA Online Store, it would be great, and greatly appreciated, if you would opt to purchase from us. We will match or beat any price. Please remember also to use my B&H affiliate links or to earn 3% cash back at Bedford by using the BIRDSASART discount code at checkout for your major gear purchases. Doing either often earns you free guides and/or discounts. And always earns my great appreciation.
|
|
|
From upper left clockwise around to center: Osprey with fish at dawn; Osprey with menhaden; Osprey with Mullet; Mullet school under attack from below; Wood Stork landing; Tarpon jumping; Reddish Egret landing; Osprey turning to begin dive; Osprey with Yellow-tailed Menhaden.
Click on the composite to see a larger, inexplicably sharper high res version.
All images copyright 2025 Arthur Morris/BIRDS AS ART
|
Sebastian Inlet in Fall
Sebastian Inlet in the fall attracts schools of migrating saltwater fish that in turn attract dozens of Ospreys — we’ve counted 61 in the air at once, along with hordes of hungry birds including Brown Pelican, Royal Tern, and Laughing Gull. Other species of birds feed on smaller baitfish; those include Wood Stork, Reddish Egret, Snowy Egret, Great Egret, Great Blue heron, Little Blue Heron, and White Ibis. Sanderling and Ruddy Turnstone are easily photographed. American Avocet is an uncommon visitor. Rare gulls have included Lesser Black-backed Gull (all ages), Franklin’s Gull (first winter), and in 2024, a spectacular young Sabine’s Gull that remained for several weeks.
As this location provides world class action for at least two months each year, bird photographers travel to Florida’s East Coast from all over the planet. You are invited not only to join me but to learn a ton about bird photography. Remember that the more time you spend at great locations, the more chance you have to enjoy perfect weather conditions and opportunities that leave you in awe.
The shared AirBnB approach has proven to be tremendously popular and is hugely beneficial to learning.
|
|
|
From upper left clockwise around to center: Osprey with fish at dawn; Osprey with menhaden; Sanderling flock bird-scape blur; Royal Tern with large baitfish; Brown Pelican diving silhouette; 1-second breaking wave blur; Osprey with Yellow-tailed Menhaden blur; Osprey in flight/full downstroke; Snowy Egret/double overhead wingstretch.
Click on the composite to see a larger, inexplicably sharper high res version.
All images copyright 2025 Arthur Morris/BIRDS AS ART
|
2025 BIRDS AS ART Sebastian Inlet Ospreys and More In-the-Field Sessions
Available Dates: Friday 26 September (arrive on Thursday 25 September) thru the morning session on Mon 24 November 2025.
Limit: four photographers.
In 2024, I had an AirBnB in Vero Lake Estates for 26 nights. I had so much fun and enjoyed so many great opportunities that I am returning next fall for two full months; the AirBnB is just 22 minutes from the inlet.
Getting There
You can fly to Orlando International Airport (MCO) and rent a car or fly to Melbourne International Airport (MEL) and explore the possibility of airport pick-up and drop-off or a taxi or uber ride to and from the AirBnB. Rides with me are available for $15/day on a space available basis. Folks who ride with me do not need to purchase a park pass but will need to kick in $2.00/day when we are charged.
|
|
|
From upper left clockwise around to center: Osprey diving; Osprey with menhaden; Brown Pelican with Yellow-tailed Menhaden in bill pouch; Sabine’s Gull/juvenile top shot; Osprey landing on Cabbage Palm stump; Wood Stork sunrise silhouette; American Avocet running with wings raised; Osprey diving with talons outstretched; Peregrine with wings fully raised.
Click on the composite to see a larger, inexplicably sharper high res version.
All images copyright 2025 Arthur Morris/BIRDS AS ART
|
What You Will Learn
1- First and foremost you will learn to become a better flight photographer. Much better.
2- You will learn to shoot flight hand held and off the tripod.
3-You will learn the basics and fine points of digital exposure. Nikon and Canon folks will learn to get the right exposure every time after making a single test exposure, and SONY folks will learn to use Zebras so that they can be sure of making excellent exposures before pressing the shutter button.
4- You will learn to work in Manual exposure mode even if you fear it.
5- You will learn to evaluate wind and sky conditions and understand how they affect bird photography, especially (but not limited to) the photography of birds in flight.
6- You will learn to select the best shutter speeds for all types of bird photography, from flight and action to pleasing blurs.
7- You will learn how to approach free and wild birds without disturbing them.
8- You will learn to spot the good and the great situations.
9- You will learn to understand and predict bird behavior.
10- You will learn to design pleasing images by mastering your camera’s AF system.
11- You will learn to choose the best perspective.
12- You will learn to see and control your backgrounds.
13- You will learn to see and understand the light.
14- You will learn to see and create pleasing blurs in pre-dawn situations.
15- You will learn to be ready for the most likely event.
16- You will learn pro level tripod handling tips
17- During our image review sessions, you will learn the factors that separate insta-deletes, keepers, and family jewels. With general bird photography those include head angle, subject-to-sensor plane orientation, choice of perspective, the quality of the light, the quality of the background, image sharpness, and the image design. When evaluating photos of birds in flight, you must — in addition to the above, consider wing positions and flight poses.
18- You will improve your image optimization skills by leaps and bounds and will return home with a collection of image optimization videos.
The very best news is that you will be able to take everything you learn home with you so that you will be a better photographer wherever you are and whenever you photograph.
|
|
|
From upper left clockwise around to center: Osprey with Yellow-tailed Menhaden; Osprey overhead with bunker; Osprey with Yellow-tailed Menhaden; Osprey chase; Great Egret with pinfish; Osprey emerging with flounder; Great Egret taking flight; Osprey kiting; 1/8 second sunrise Atlantic Ocean blur.
Click on the composite to see a larger, inexplicably sharper high res version.
All images copyright 2025 Arthur Morris/BIRDS AS ART
|
Trip Costs and Booking Details
Change Your Life
Book any 3-6 Days: Lodging is $175/night. Instruction is $600/day. There is a morning session every day. Afternoon sessions average every other day. Image review and Photoshop sessions are usually daily.
Please note: Folks who sign up for an odd number of days of instruction will enjoy half + 1 afternoon sessions (more are possible if conditions are good) Those who sign up for an even number of days will enjoy at least 1/2 that number of afternoon shooting sessions (more are possible if conditions are good)
Book any 7-10 Days: Lodging is $160/night. Instruction is $575/day. There is a morning session every day. Afternoon sessions average every other day. Image review and Photoshop sessions are almost daily.
Book any 11-14 Days: Lodging is $150/night. Instruction is $550/day. There is a morning session every day. Afternoon sessions average every other day. Image review and Photoshop sessions are almost daily.
Book any three weeks: Lodging is $130/night. Instruction is $525/day. There is a morning session every day. Afternoon sessions average every other day. Image review and Photoshop sessions are almost daily.
Stay for one month (28 nights): Lodging is $120/night. Instruction is $500/day. There is a morning session every day. Afternoon sessions average every other day. Image review and Photoshop sessions are almost daily.
Stay two months (60 nights): Lodging is $100/night. Instruction is $475/day. There is a morning session every day. Afternoon sessions average every other day. Image review and Photoshop sessions are almost daily.
Brunch is on me. Dinners are provided for $20/day. I am an excellent chef and the food both healthy and of high quality.
Please note: your day of arrival is not a day of instruction.
Deposit Information
Payment in full is due now. Please make the check out to:
BIRDS AS ART
And send it via US Mail to
BIRDS AS ART
PO Box 7245
Indian Lake Estates, FL 33855
I hope to spend some quality time with you at Sebastian Inlet in the fall of 2025 and to change your life. If you have any questions, please get in touch via e-mail or with a text to 863-221-2372.
Typos
With all blog posts, feel free to e-mail or to leave a comment regarding any typos or errors.
Gear Questions and Advice
Too many folks attending BAA IPTs and dozens of photographers whom I see in the field and on BirdPhotographer’s.Net, are — out of ignorance — using the wrong gear, especially when it comes to tripods and more especially, tripod heads. And the same is true in spades when ordering new camera bodies or lenses. My advice will often save you some serious money and may help you avoid making a seriously bad choice. Please know that I am always glad to answer your gear questions via e-mail. If you are desperate, you can try me on my cell at 863-221-2372. Please leave a message and shoot me a text if I do not pick up.
Don’t Just Shoot: Learn
If you are interested in changing your life and becoming a better photographer by joining me on the Extended IPT at Sebastian Inlet for Ospreys and more (SEPT 25 to NOV 24, 2025), in San Diego for Pacific-race Brown Pelicans and more (JAN 6 to FEB 2, 2026), or for Roseate Spoonbills at Stick Marsh (March 2026), please e-mail for dates, rates, terms, and additional information. Or shoot me a text to 863-221-2372. Some offerings include options for shared AirBnB lodging and meals. Ground transportation during your stay is a possibility at times.
Learn the Behavioral Signals
When you see a tern, a gull, or a shorebird (or a songbird for that matter) dipping its breast in the water it is taking a bath. Nine times out of ten it will jump up and flap its wings when it is done bathing. Move closer for the tight/splashing bathing shots, or, as I did here, stay back (or zoom out) to make some flapping-after-bath images. Note that the birds will almost always flap into the wind when they are done. At times, they may jump straight up and flap and then land in the same spot to resume bathing. At other times they will fly to shore and look for a good spot to preen.
|
|
|
This image was created on 10 November 2024 on a Sebastian Inlet Extended IPT. I used the hand held Sony FE 300mm f/2.8 GM OSS Lens (Sony E) with the Sony FE 1.4x Teleconverter and the Sony a-1 (now replaced by the Latest Greatest Sony Flagship Body, the a1 II Mirrorless Camera). Exposure determined via Zebras with ISO on the Thumb Wheel: ISO 640. 1/8000 sec. at f/4 (wide open) in Manual mode. RawDigger showed that the exposure was perfect. AWB at 8:25:06am on a mostly sunny morning.
Tracking: Zone/AF-C with Bird Eye/Face Detection enabled performed perfectly.
Image #2: Caspian Tern juvenile braking to land
Image copyright 2025 Arthur Morris/BIRDS AS ART
|
Favorite Handheld Sebastian Combos
Depending on the wind, the sky conditions, and the presence of baitfish, I will often grab the 300mm f/2.8 GM lens with the 1.4X TC in place (as with this one on the next three images). That puts me at 420mm at f/4 and gives me an eminently handhold-able flight lens. On sunny days, I’ll sometimes go with the 2X so that I have a lightweight eminently handhold-able 600mm f/5.6 rig in my hands.
Caspian Tern is “good” (i.e., uncommon) bird anywhere in Florida at any season. If you know of a good location anywhere in the northeast to photograph this species at an accessible breeding colony shoot me an invite. Years ago there was a decent breeding colony in Tampa Bay but Florida Audubon approved a dredging project that destroyed the nesting area. The Caspians never returned to breed.
|
|
|
This image was created on 10 November 2024 on a Sebastian Inlet Extended IPT. I used the hand held Sony FE 300mm f/2.8 GM OSS Lens (Sony E) with the Sony FE 1.4x Teleconverter and the Sony a-1 (now replaced by the Latest Greatest Sony Flagship Body, the a1 II Mirrorless Camera). Exposure determined via Zebras with ISO on the Thumb Wheel: ISO 320. 1/5000 sec. at f/4 (wide open) in Manual mode. RawDigger showed that the exposure was dead-solid perfect. AWB at 8:57:41am on a mostly sunny morning.
Tracking: Zone/AF-C with Bird Eye/Face Detection enabled performed perfectly.
Image #3: Royal Tern adult in flight
Image copyright 2025 Arthur Morris/BIRDS AS ART
|
Get the Head in the Clear
When picking your flight keepers and the bird is flying from one side of the frame to the other, look for images where the bird’s head does not merge either with a wing or with the breast. The fast frame rates and science-fiction-like autofocus systems of the high end mirrorless camera bodies should give you lots of images to choose from. But it always helps to know what you are looking for.
|
|
|
This image was created on 15 November 2024 on a Sebastian Inlet Extended IPT. I used the hand held Sony FE 300mm f/2.8 GM OSS Lens (Sony E) with the Sony FE 1.4x Teleconverter and the Sony a-1 (now replaced by the Latest Greatest Sony Flagship Body, the a1 II Mirrorless Camera). Exposure determined via Zebras with ISO on the Thumb Wheel: ISO 1600. 1/3200 sec. at f/4 (wide open) in Manual mode. RawDigger showed that the exposure was dead-solid perfect. AWB at 8:52:22am on a cloudy morning.
Tracking: Zone/AF-C with Bird Eye/Face Detection enabled performed perfectly.
Image #4: Snowy Egret displaying
Image copyright 2025 Arthur Morris/BIRDS AS ART
|
Sometimes There’s No Time To Sit
When photographing at the beach, getting on the ground to get lower is generally a great idea. I’ve recently come up with a new Artie-fact: when photographing at the beach, get down on the ground unless you have a clear reason for remaining standing. The most common acceptable reason would be to keep from introducing distracting elements in the distant background.
With Image #4, I was standing when the bird began to chase another SNEG so I had no choice but to make the image when the action happened. I think that the photo would have been a bit stronger had the subject raised its head (and its crest!) a bit more so that the bill did not merge with the far wing. Beach clean-up was minimal and some black crud was removed from the snowy’s chin with the Remove Tool.
|
|
|
This image was created on 15 November 2024 on a Sebastian Inlet Extended IPT. I used the hand held Sony FE 300mm f/2.8 GM OSS Lens (Sony E) with the Sony FE 1.4x Teleconverter and the Sony a-1 (now replaced by the Latest Greatest Sony Flagship Body, the a1 II Mirrorless Camera). Exposure determined via Zebras with ISO on the Thumb Wheel: ISO 2000. 1/2500 sec. at f/4 (wide open) in Manual mode. RawDigger showed that the exposure was perfect. AWB at 9:36:36am on a cloudy morning.
Tracking: Zone/AF-C with Bird Eye/Face Detection enabled performed perfectly.
Image #5: Brown Pelican in flight
Image copyright 2025 Arthur Morris/BIRDS AS ART
|
Cloudy Day/White Sky Flight Photography
I love cloudy days for flight photography because you do not have to deal with harsh underwing shadows. By exposing well to the right, you open up the underwings so that the maximum amount of detail is revealed. When I juiced up the color of the ocean by increasing AQUA in Color Mixer, there was a big CYAN cast on the pelican. So I nixed that and opened the image in Photoshop. Then, working on a new layer, I went back to ACR and juiced up the AQUA on the whole image. Then, I added a Regular Layer Mask and erased the color cast on the pelican. Voila.
|
|
|
The title says it all. Purchase your copy here.
The Complete and Quintessential Guide to Photographing Birds in Flight
by Arash Hazeghi, Ph.D., and Arthur Morris/BIRDS AS ART
|
The Complete and Quintessential Guide to Photographing Birds in Flight: $99.00
I had long dreamed of becoming a great flight photographer. When using dSLR gear, making sharp images was a huge problem. Most of the time, the camera bodies simply were not up to snuff. Things have changed dramatically with mirrorless technology. The high-end mirrorless camera bodies now feature science fiction-like autofocus systems and frame rates of 30, 40, and even 125 fps. Nowadays, getting the eye sharp is no longer a problem. The problem more often involves selecting the strongest image from a long series of sharp images.
The truth, however, is that there is a lot more than owning a Canon EOS R1, a Nikon Z9, or a Sony a-1 ii to consistently creating great photographs of birds in flight. Some of the biggest factors to success include gear choice, shooting strategies, and understanding the importance of sky conditions and wind speed and direction. Once you have the techniques and technical aspects down pat and can routinely create sharp images, learning the importance of flight poses, wing positions, backgrounds, and subject placement and image design enable you to create and then select superb flight images. And you guessed it, each of those topics and tons more are covered in detail in The Complete and Quintessential Guide to Photographing Birds in Flight.
The guide consists of 267 pages and 21,013 words. There are 82 illustrative photos scattered throughout the text, two screen captures, and a 112-image gallery that includes examples created by Canon, Nikon, and mostly Sony gear. As seen above, each of the 194 inspirational photos is labeled with an educational caption.
You can purchase your copy here for $99.00.
Arash Hazeghi
Arash Hazeghi, Ph.D. is a principal electron device engineer. He received his Ph.D. degree in Electrical Engineering in 2011, from Stanford University, Stanford, California. His pioneering research on Carbon Nanotubes has been cited many times. In the past decade, Arash Hazeghi has been a major contributor to the research and the development of some of the most cutting-edge technologies introduced by Silicon Valley’s most reputable names including SanDisk, Intel and Apple.
More relevant here is that he is widely recognized as one of the world’s best birds in flight photographers. He specializes in raptors and the technical aspects of bird photography.
|
|
|
Flight photography is a skill that can be studied, practiced, and learned.
|
The Complete and Quintessential Guide to Photographing Birds in Flight
By Arash Hazeghi Ph.D., and Arthur Morris/BIRDS AS ART
What you will learn (about):
1- Weight and handholding super-telephoto lenses.
2- Weight and handholding intermediate telephoto and telephotos zoom lenses.
3- Choosing the right flight photography lens or lenses for you.
4- The importance of focal length for flight photography.
5- The importance of lens speed (the maximum aperture for flight photography.
6- Choosing between fixed focal lengths and zoom lenses for flight photography.
7- The importance of AF speed and performance for flight photography.
8- Handholding tips and techniques.
9- Shooting flight off a tripod with the Levered-clamp FlexShooter Pro.
10- Flight poses and wing positions.
11- Why artie changed his mind about the 400mm f/2.8 lenses for flight and more.
12- The advantages and disadvantages of using teleconverters for flight photography.
13- Why to stay away from off-brand lenses.
14- Understanding the importance of wind direction and speed for flight photography.
15- The relationship between sky conditions and wind direction and how it affects flight photography.
16- Creating flight silhouettes in wind-against-sun conditions.
17- The importance of being on sun angle for flight photography (and avoiding harsh shadows).
18- Tips on doing flight photography in cloudy, foggy, or overcast conditions.
19- About the direction of light in cloudy, foggy, or overcast conditions and how it affects flight photography.
20- How your understanding of bird behavior can dramatically improve your flight photography.
21- Tips on attracting birds for flight photography.
22- What to do when your camera’s AF system is temporarily blind.
23- The vital importance of pre-focusing.
24- How Direct Manual Focus can help you with flight photography.
25- The importance of shooting aggressively when doing flight photography.
26- Everything that you need to know with regards to rest positions for flight photography.
27- The importance of getting low when doing flight in many situations.
28- Getting the right exposure when doing flight photography.
29_ Why to use Manual mode 95% of the time for flight.
30- Tips on finding the bird in the frame, acquiring focus, and tracking the bird in flight.
31- How to set and best utilize your lens’s image stabilization feature (and why).
32- Setting the focus range limiter switch on your flight lens or lenses.
33- To choose the best shutter speed for photographing birds in flight.
34- The vital importance of pre-focusing. And yes, this is so important that it is on the list twice.
You can see four sample pages in the blog post here. And you can purchase your copy here.
Typos
With all blog posts, feel free to e-mail or to leave a comment regarding any typos or errors.
September 12th, 2025 Sebastian Inlet Ospreys and More
Multiple IPT veteran Eugen Dolan is joining me for a month, arriving on 26 September. Beginning bird photographer Alvin Red Stevens is joining us for a week; he shows up on 12 October. And when he leaves, new friend Mishael Voisin will be with us for a week of photography and learning. Several folks have sworn that they will be joining me at some point but right now, November is wide open. Check out the opportunities below and then change your life by joining me this fall. Feel free to e-mail me or to call or text — 863-221-2372 with any questions or concerns.
On Tuesday I completed a third edit of the Sebastian OCT-NOV 2024 folder. It is always fun to discover some really good images that never caught your attention before. Below I share five images that got me excited on my third trip through what was a great month at Sebastian in 2024. Do understand that in 2026 the top Sebastian location, the South Jetty, is scheduled to be closed for major reconstruction next season. That is why I am all in for 2025!
What’s Up?
The lakeshore at ILE had been less than inspiring since I got back from Long Island. There are more than a few birds around, but nothing has really gotten me excited lately.
Today is Friday 12 September 2025. Whatever you opt to do, I hope that you too choose to have fun and enjoy the day.
As I have some fabulous new tips and techniques to share, I will soon begin work on the Digital Basics IV Video Series. Covered will be the use of the masking feature in Adobe Camera Raw (thanks to Anita North), the use of the Point Color eye dropper to tame super saturated colors during raw conversions (discovered in tandem with Anita), and a fabulous new Remove Tool trick that makes my favorite Photoshop Tool even more amazing — that one discovered by me 🙂
If an item — a Delkin flash card or reader, a Levered-clamp FlexShooter Pro, or a Wimberley lens plate or low foot — for example, that is available from B&H and/or Bedfords, is also available in the BAA Online Store, it would be great, and greatly appreciated, if you would opt to purchase from us. We will match or beat any price. Please remember also to use my B&H affiliate links or to earn 3% cash back at Bedford by using the BIRDSASART discount code at checkout for your major gear purchases. Doing either often earns you free guides and/or discounts. And always earns my great appreciation.
Gear Questions and Advice
Too many folks attending BAA IPTs and dozens of photographers whom I see in the field and on BirdPhotographer’s.Net, are — out of ignorance — using the wrong gear, especially when it comes to tripods and more especially, tripod heads. And the same is true in spades when ordering new camera bodies or lenses. My advice will often save you some serious money and may help you avoid making a seriously bad choice. Please know that I am always glad to answer your gear questions via e-mail. If you are desperate, you can try me on my cell at 863-221-2372. Please leave a message and shoot me a text if I do not pick up.
Don’t Just Shoot: Learn
If you are interested in changing your life and becoming a better photographer by joining me on the Extended IPT at Sebastian Inlet for Ospreys and more (SEPT 25 to NOV 24, 2025), in San Diego for Pacific-race Brown Pelicans and more (JAN 6 to FEB 2, 2026), or for Roseate Spoonbills at Stick Marsh (March 2026), please e-mail for dates, rates, terms, and additional information. Or shoot me a text to 863-221-2372. Some offerings include options for shared AirBnB lodging and meals. Ground transportation during your stay is a possibility at times.
|
|
|
Click on the screen capture to enlarge.
Photo Mechanic screen capture of today’s 5 featured raw files
Image copyright 2025 Arthur Morris/BIRDS AS ART
|
Today’s Image Optimizations
Optimizing the raw files that I create brings me just about as much joy and happiness as being out into the field creating the image. Properly exposed (to the right) raw files should not represent what you saw in nature. Other than the bill cleanup, Image #1, the white morph Reddish Egret, made in sunny conditions, looks quite a bit like the raw file. The raw file for the second image, the gently backlit Great Egret, looks washed out and lifeless and was not at all what I saw in the field. I used perhaps a dozen masks during the conversion in Adobe Camera Raw to bring this image to life. Creating and using ACR masking techniques will be covered in detail in the Digital Basics IV Video Series. Most folks looking at the raw file for the Tricolored Heron image would judge it as well over-exposed. RawDigger showed it to be perfect. A healthy crop from below and from the left the and the adjustments made by moving the sliders under the Light tab in ACR created the image that I had envisioned while standing in a foot of water. The raw files for Images #4 and 5 look totally flat, washed out, and boring. Each was brought to life simply be adjusting the sliders under the Light tab in ACR. And the pelicans on the rocks photo benefitted greatly from both some Color Mixer work and the Average Blur Color Balance trick.
You can of course see the five optimized images by scrolling down. I am most proud of the optimization of the gently backlit Great Egret raw file as getting the background, color, and tonality right was a challenge. We will be doing image review and Photoshop sessions pretty much every day at Sebastian.
Spiffy Hairdo
When this white morph reddish turned away from the wind, it blew the bird’s crest up in a somewhat comical fashion. I chose this head angle because it gave a great view of the blowing head feathers and a peek at both eyes.
Lots of Work
First off, the background here was very splotchy and there were several large round spots. I used multiple Radial Gradient masks during the raw conversion to tame the uneven background problems. The Remove Tool was used to eliminate the large round spots. A Select Subject mask was used to brighten the white subject.
Distant Backgrounds
The greater the distance from the subject to the background, the smoother and more defocused the background will be rendered. Learn to look for and see such situations by joining me in the field.
Bird-scapes with Long Lenses and Focal Lengths
Folks often think of intermediate telephoto lenses when creating bird-scapes. Long focal lengths, however, can often be quite effective with distant groups of birds. Again, the trick is to learn to see such situations. And again, the best way to do that is to sign up for an IPT.
Do you see a second species in this image? If yes, which one?
|
|
|
November 2024 on a Sebastian Inlet Extended IPT. Standing at full height, I used the handheld Sony FE 200-600mm f/5.6-6.3 G OSS lens (at 452mm) and Sony a-1 (now replaced by the Latest Greatest Flagship Body, the Sony a1 II Mirrorless Camera). The exposure was determined by Zebras with Exposure Compensation (EC) on the thumb wheel. Multi Metering +2.0 stops. AUTO ISO set ISO 2500: 1/500 second at f/8 (wide open) in Shutter Priority mode. RawDigger showed that the exposure was fractionally short of being perfect. AWB at 7:25:15 am on a cloudy morning.
Wide/AF-C with Bird-Eye/Face Detection performed perfectly. Click on the image to enjoy the larger, inexplicably sharper high-res version.
Image #5: Wood Stork foraging in surf
Image copyright 2025: Arthur Morris/birds as Art
|
Under-exposed at +2 Stops!
Though the raw file looks totally washed out, RawDigger showed this raw file could actually have used an additional 1/3 stop of light. Therefore, +2 1/3 stops would have been the ideal EC.
Simple Cloudy Day Exposure Tip for All Systems
On cloudy days with the subject and scene averaging to very light, it is almost best to begin by adding two stops to the exposure suggested by the camera. That can be done easily in both Manual and Shutter Priority modes. Remember that there is no Exposure Compensation when working in Manual mode; you determine the exposure level by viewing the analogue scale in the viewfinder.
|
|
Osprey with Yellowfin Menhaden
Image copyright 2025: Arthur Morris/BIRDS AS ART
|
Viewing the Sebastian Composites below
Be sure to click on each composite to see a larger, inexplicably sharper high res version.
|
|
|
From upper left clockwise around to center: Osprey with fish at dawn; Osprey with menhaden; Osprey with Mullet; Mullet school under attack from below; Wood Stork landing; Tarpon jumping; Reddish Egret landing; Osprey turning to begin dive; Osprey with Yellow-tailed Menhaden.
Click on the composite to see a larger, inexplicably sharper high res version.
All images copyright 2025 Arthur Morris/BIRDS AS ART
|
Sebastian Inlet in Fall
Sebastian Inlet in the fall attracts schools of migrating saltwater fish that in turn attract dozens of Ospreys — we’ve counted 61 in the air at once, along with hordes of hungry birds including Brown Pelican, Royal Tern, and Laughing Gull. Other species of birds feed on smaller baitfish; those include Wood Stork, Reddish Egret, Snowy Egret, Great Egret, Great Blue heron, Little Blue Heron, and White Ibis. Sanderling and Ruddy Turnstone are easily photographed. American Avocet is an uncommon visitor. Rare gulls have included Lesser Black-backed Gull (all ages), Franklin’s Gull (first winter), and in 2024, a spectacular young Sabine’s Gull that remained for several weeks.
As this location provides world class action for at least two months each year, bird photographers travel to Florida’s East Coast from all over the planet. You are invited not only to join me but to learn a ton about bird photography. Remember that the more time you spend at great locations, the more chance you have to enjoy perfect weather conditions and opportunities that leave you in awe.
The shared AirBnB approach has proven to be tremendously popular and is hugely beneficial to learning.
|
|
|
From upper left clockwise around to center: Osprey with fish at dawn; Osprey with menhaden; Sanderling flock bird-scape blur; Royal Tern with large baitfish; Brown Pelican diving silhouette; 1-second breaking wave blur; Osprey with Yellow-tailed Menhaden blur; Osprey in flight/full downstroke; Snowy Egret/double overhead wingstretch.
Click on the composite to see a larger, inexplicably sharper high res version.
All images copyright 2025 Arthur Morris/BIRDS AS ART
|
2025 BIRDS AS ART Sebastian Inlet Ospreys and More In-the-Field Sessions
Available Dates: Friday 26 September (arrive on Thursday 25 September) thru the morning session on Mon 24 November 2025.
Limit: four photographers.
In 2024, I had an AirBnB in Vero Lake Estates for 26 nights. I had so much fun and enjoyed so many great opportunities that I am returning next fall for two full months; the AirBnB is just 22 minutes from the inlet.
Getting There
You can fly to Orlando International Airport (MCO) and rent a car or fly to Melbourne International Airport (MEL) and explore the possibility of airport pick-up and drop-off or a taxi or uber ride to and from the AirBnB. Rides with me are available for $15/day on a space available basis. Folks who ride with me do not need to purchase a park pass but will need to kick in $2.00/day when we are charged.
|
|
|
From upper left clockwise around to center: Osprey diving; Osprey with menhaden; Brown Pelican with Yellow-tailed Menhaden in bill pouch; Sabine’s Gull/juvenile top shot; Osprey landing on Cabbage Palm stump; Wood Stork sunrise silhouette; American Avocet running with wings raised; Osprey diving with talons outstretched; Peregrine with wings fully raised.
Click on the composite to see a larger, inexplicably sharper high res version.
All images copyright 2025 Arthur Morris/BIRDS AS ART
|
What You Will Learn
1- First and foremost you will learn to become a better flight photographer. Much better.
2- You will learn to shoot flight hand held and off the tripod.
3-You will learn the basics and fine points of digital exposure. Nikon and Canon folks will learn to get the right exposure every time after making a single test exposure, and SONY folks will learn to use Zebras so that they can be sure of making excellent exposures before pressing the shutter button.
4- You will learn to work in Manual exposure mode even if you fear it.
5- You will learn to evaluate wind and sky conditions and understand how they affect bird photography, especially (but not limited to) the photography of birds in flight.
6- You will learn to select the best shutter speeds for all types of bird photography, from flight and action to pleasing blurs.
7- You will learn how to approach free and wild birds without disturbing them.
8- You will learn to spot the good and the great situations.
9- You will learn to understand and predict bird behavior.
10- You will learn to design pleasing images by mastering your camera’s AF system.
11- You will learn to choose the best perspective.
12- You will learn to see and control your backgrounds.
13- You will learn to see and understand the light.
14- You will learn to see and create pleasing blurs in pre-dawn situations.
15- You will learn to be ready for the most likely event.
16- You will learn pro level tripod handling tips
17- During our image review sessions, you will learn the factors that separate insta-deletes, keepers, and family jewels. With general bird photography those include head angle, subject-to-sensor plane orientation, choice of perspective, the quality of the light, the quality of the background, image sharpness, and the image design. When evaluating photos of birds in flight, you must — in addition to the above, consider wing positions and flight poses.
18- You will improve your image optimization skills by leaps and bounds and will return home with a collection of image optimization videos.
The very best news is that you will be able to take everything you learn home with you so that you will be a better photographer wherever you are and whenever you photograph.
|
|
|
From upper left clockwise around to center: Osprey with Yellow-tailed Menhaden; Osprey overhead with bunker; Osprey with Yellow-tailed Menhaden; Osprey chase; Great Egret with pinfish; Osprey emerging with flounder; Great Egret taking flight; Osprey kiting; 1/8 second sunrise Atlantic Ocean blur.
Click on the composite to see a larger, inexplicably sharper high res version.
All images copyright 2025 Arthur Morris/BIRDS AS ART
|
Trip Costs and Booking Details
Change Your Life
Book any 3-6 Days: Lodging is $175/night. Instruction is $600/day. There is a morning session every day. Afternoon sessions average every other day. Image review and Photoshop sessions are usually daily.
Please note: Folks who sign up for an odd number of days of instruction will enjoy half + 1 afternoon sessions (more are possible if conditions are good) Those who sign up for an even number of days will enjoy at least 1/2 that number of afternoon shooting sessions (more are possible if conditions are good)
Book any 7-10 Days: Lodging is $160/night. Instruction is $575/day. There is a morning session every day. Afternoon sessions average every other day. Image review and Photoshop sessions are almost daily.
Book any 11-14 Days: Lodging is $150/night. Instruction is $550/day. There is a morning session every day. Afternoon sessions average every other day. Image review and Photoshop sessions are almost daily.
Book any three weeks: Lodging is $130/night. Instruction is $525/day. There is a morning session every day. Afternoon sessions average every other day. Image review and Photoshop sessions are almost daily.
Stay for one month (28 nights): Lodging is $120/night. Instruction is $500/day. There is a morning session every day. Afternoon sessions average every other day. Image review and Photoshop sessions are almost daily.
Stay two months (60 nights): Lodging is $100/night. Instruction is $475/day. There is a morning session every day. Afternoon sessions average every other day. Image review and Photoshop sessions are almost daily.
Brunch is on me. Dinners are provided for $20/day. I am an excellent chef and the food both healthy and of high quality.
Please note: your day of arrival is not a day of instruction.
Deposit Information
Payment in full is due now. Please make the check out to:
BIRDS AS ART
And send it via US Mail to
BIRDS AS ART
PO Box 7245
Indian Lake Estates, FL 33855
I hope to spend some quality time with you at Sebastian Inlet in the fall of 2025 and to change your life. If you have any questions, please get in touch via e-mail or with a text to 863-221-2372.
Typos
With all blog posts, feel free to e-mail or to leave a comment regarding any typos or errors.
September 10th, 2025 Sebastian Inlet Ospreys and More
Multiple IPT veteran Eugen Dolan is joining me for a month, arriving on 26 September. Beginning bird photographer Alvin Red Stevens is joining us for a week; he shows up on 12 October. And when he leaves, new friend Mishael Voisin will be with us for a week of photography and learning. Several folks have sworn that they will be joining me at some point but right now, November is wide open. Check out the opportunities below and then change your life by joining me this fall. Feel free to e-mail me or to call or text — 863-221-2372 with any questions or concerns.
Yesterday I completed a third edit of the Sebastian OCT-NOV 2024 folder. It is always fun to discover some really good images that never caught your attention before. Below I share three Osprey images that got me excited on my third trip through what was a great month at Sebastian in 2024. Do understand that in 2026 the top Sebastian location, the South Jetty, is scheduled to be closed for major reconstruction next season. That is why I am all in for 2025!
In the Last Blog Post
In the last blog post, my very favorite image was #3, the Red Light District skimmer. The rest were tied for second place 🙂 Huge surprise: several folks (besides me) actually liked two of the three blurs. (I liked them all.)
What’s Up?
On Monday afternoon, the departure of the Auto Train from the Lorton, VA Station was delayed due to electrical problems. After an excellent flatiron steak dinner, some sleep, and a blessedly uneventful ride, we de-trained at Sanford, Florida at 10:50am on Tuesday morning, two hours late. I made it home by 1:30pm. It was good to sleep in my own bed that night.
Today is Wednesday 10 September 2025. I just got back from a short trip down to the lake to see what’s up and about. The usual suspects were present but I did not make a single photo from my SUV. I was not going to take a rig on my sun walk on the pier but when I spotted a Great Blue Heron on the railing, I grabbed the 300mm f/2.8 GM lens with the 1.4X TC and an a-1 ii. I got close to the GBH and wound up making some decent head and neck portraits. I have two appointments in town this afternoon and need to get some shopping done as well. Whatever you opt to do, I hope that you too choose to have fun and enjoy the day.
As I have some fabulous new tips and techniques to share, I will soon begin work on the Digital Basics IV Video Series. Covered will be the use of the masking feature in Adobe Camera Raw (thanks to Anita North), the use of the Point Color eye dropper to tame super saturated colors during raw conversions (discovered in tandem with Anita), and a fabulous new Remove Tool trick that makes my favorite Photoshop Tool even more amazing — that one discovered by me 🙂
If an item — a Delkin flash card or reader, a Levered-clamp FlexShooter Pro, or a Wimberley lens plate or low foot — for example, that is available from B&H and/or Bedfords, is also available in the BAA Online Store, it would be great, and greatly appreciated, if you would opt to purchase from us. We will match or beat any price. Please remember also to use my B&H affiliate links or to earn 3% cash back at Bedford by using the BIRDSASART discount code at checkout for your major gear purchases. Doing either often earns you free guides and/or discounts. And always earns my great appreciation.
Gear Questions and Advice
Too many folks attending BAA IPTs and dozens of photographers whom I see in the field and on BirdPhotographer’s.Net, are — out of ignorance — using the wrong gear, especially when it comes to tripods and more especially, tripod heads. And the same is true in spades when ordering new camera bodies or lenses. My advice will often save you some serious money and may help you avoid making a seriously bad choice. Please know that I am always glad to answer your gear questions via e-mail. If you are desperate, you can try me on my cell at 863-221-2372. Please leave a message and shoot me a text if I do not pick up.
Don’t Just Shoot: Learn
If you are interested in changing your life and becoming a better photographer by joining me on the Extended IPT at Sebastian Inlet for Ospreys and more (SEPT 25 to NOV 24, 2025), in San Diego for Pacific-race Brown Pelicans and more (JAN 6 to FEB 2, 2026), or for Roseate Spoonbills at Stick Marsh (March 2026), please e-mail for dates, rates, terms, and additional information. Or shoot me a text to 863-221-2372. Some offerings include options for shared AirBnB lodging and meals. Ground transportation during your stay is a possibility at times.
|
|
|
This image was created on 30 October 2024 on a Sebastian Inlet Extended IPT. Seated on a large rock next to the shore, I used the hand held Sony FE 300mm f/2.8 GM OSS Lens (Sony E) with the Sony FE 1.4x Teleconverter and the Sony a-1 (now replaced by the Latest Greatest Sony Flagship Body, the a1 II Mirrorless Camera). Exposure determined via Zebras with ISO on the Thumb Wheel: ISO 5000. 1/3200 sec. at f/4 (wide open) in Manual mode. RawDigger showed that the exposure was 1/3-stop too dark. AWB at 8:22:12am on a cloudy morning.
Tracking: Zone/AF-C with Bird Eye/Face Detection enabled performed perfectly.
Image #1: Osprey struggling with fish in its talons
Image copyright 2025 Arthur Morris/BIRDS AS ART
|
Wishing, Hoping, and Praying
When an Osprey dives and winds up floating on the surface of the water with its wings spread, you know that it has a fish in its talons, and is catching its breath and securing its grip on its quarry. As a photographer, you are talking to the bird quietly: please do not let this one go!. I am not sure if last year was typical, but it seemed that more than half the time my prayers were not answered; the fish hawk would take flight without a fish in its talons. Just like the bird in this image. Better luck this year!
A White Sky Exposure Tip for All Systems on Cloudy Days
When correctly doing flight photography on cloudy, white sky days, you should set your shutter speed and ISO so that you are reading at least +2 stops off the sky. It goes without saying that you should be using the wide open aperture. For best results, you will want a shutter speed of at least 1/3200 second. You must not be afraid using high ISO settings! There are times when working at plus two stops off the sky that when the raw file is examined in RawDigger, that the image will be under-exposed; +2 1/3 or + 2 2/3 stops would have been better.
A Sunny Day Exposure Tip for All Systems
Be aware that on sunny days your approach is completely different; you will be using much lower ISOs and need to be sure not to over-expose the shiny sides of the often silver fish. Join me at Sebastian to learn more about exposure than you ever imagined.
Yellowfin Menhaden
For several years I have mistakenly been using Yellow-tailed Menhaden when referring to the Osprey’s favorite November catch. I learned just this morning that the correct name for this fish species is Yellowfin Menhaden (Brevoortia smithi). In September, finger Mullet make up the bulk of the diet of Ospreys fishing the inlet.
Yellowfin Menhaden have silver bodies with greenish or bluish backs, golden yellow caudal (tail) fins, and a single black or purple spot behind the gill cover. This species is considered migratory, though its movements are less extensive than those of Atlantic Menhaden. Instead of long north/south coastal migrations, Yellowfin Menhaden typically move seasonally between inshore and offshore waters for feeding and spawning. In November, the adults make their way through the inlet to head offshore to spawn; peak spawning occurs from November through March. After hatching at sea, the larval fish are carried back into the estuaries by currents. The juveniles spend their first year growing in these estuarine nursery areas before joining the adult offshore migration in the fall.
Viewing the Sebastian Composites below
Be sure to click on each composite to see a larger, inexplicably sharper high res version.
|
|
|
From upper left clockwise around to center: Osprey with fish at dawn; Osprey with menhaden; Osprey with Mullet; Mullet school under attack from below; Wood Stork landing; Tarpon jumping; Reddish Egret landing; Osprey turning to begin dive; Osprey with Yellow-tailed Menhaden.
Click on the composite to see a larger, inexplicably sharper high res version.
All images copyright 2025 Arthur Morris/BIRDS AS ART
|
Sebastian Inlet in Fall
Sebastian Inlet in the fall attracts schools of migrating saltwater fish that in turn attract dozens of Ospreys — we’ve counted 61 in the air at once, along with hordes of hungry birds including Brown Pelican, Royal Tern, and Laughing Gull. Other species of birds feed on smaller baitfish; those include Wood Stork, Reddish Egret, Snowy Egret, Great Egret, Great Blue heron, Little Blue Heron, and White Ibis. Sanderling and Ruddy Turnstone are easily photographed. American Avocet is an uncommon visitor. Rare gulls have included Lesser Black-backed Gull (all ages), Franklin’s Gull (first winter), and in 2024, a spectacular young Sabine’s Gull that remained for several weeks.
As this location provides world class action for at least two months each year, bird photographers travel to Florida’s East Coast from all over the planet. You are invited not only to join me but to learn a ton about bird photography. Remember that the more time you spend at great locations, the more chance you have to enjoy perfect weather conditions and opportunities that leave you in awe.
The shared AirBnB approach has proven to be tremendously popular and is hugely beneficial to learning.
|
|
|
From upper left clockwise around to center: Osprey with fish at dawn; Osprey with menhaden; Sanderling flock bird-scape blur; Royal Tern with large baitfish; Brown Pelican diving silhouette; 1-second breaking wave blur; Osprey with Yellow-tailed Menhaden blur; Osprey in flight/full downstroke; Snowy Egret/double overhead wingstretch.
Click on the composite to see a larger, inexplicably sharper high res version.
All images copyright 2025 Arthur Morris/BIRDS AS ART
|
2025 BIRDS AS ART Sebastian Inlet Ospreys and More In-the-Field Sessions
Available Dates: Friday 26 September (arrive on Thursday 25 September) thru the morning session on Mon 24 November 2025.
Limit: four photographers.
In 2024, I had an AirBnB in Vero Lake Estates for 26 nights. I had so much fun and enjoyed so many great opportunities that I am returning next fall for two full months; the AirBnB is just 22 minutes from the inlet.
Getting There
You can fly to Orlando International Airport (MCO) and rent a car or fly to Melbourne International Airport (MEL) and explore the possibility of airport pick-up and drop-off or a taxi or uber ride to and from the AirBnB. Rides with me are available for $15/day on a space available basis. Folks who ride with me do not need to purchase a park pass but will need to kick in $2.00/day when we are charged.
|
|
|
From upper left clockwise around to center: Osprey diving; Osprey with menhaden; Brown Pelican with Yellow-tailed Menhaden in bill pouch; Sabine’s Gull/juvenile top shot; Osprey landing on Cabbage Palm stump; Wood Stork sunrise silhouette; American Avocet running with wings raised; Osprey diving with talons outstretched; Peregrine with wings fully raised.
Click on the composite to see a larger, inexplicably sharper high res version.
All images copyright 2025 Arthur Morris/BIRDS AS ART
|
What You Will Learn
1- First and foremost you will learn to become a better flight photographer. Much better.
2- You will learn to shoot flight hand held and off the tripod.
3-You will learn the basics and fine points of digital exposure. Nikon and Canon folks will learn to get the right exposure every time after making a single test exposure, and SONY folks will learn to use Zebras so that they can be sure of making excellent exposures before pressing the shutter button.
4- You will learn to work in Manual exposure mode even if you fear it.
5- You will learn to evaluate wind and sky conditions and understand how they affect bird photography, especially (but not limited to) the photography of birds in flight.
6- You will learn to select the best shutter speeds for all types of bird photography, from flight and action to pleasing blurs.
7- You will learn how to approach free and wild birds without disturbing them.
8- You will learn to spot the good and the great situations.
9- You will learn to understand and predict bird behavior.
10- You will learn to design pleasing images by mastering your camera’s AF system.
11- You will learn to choose the best perspective.
12- You will learn to see and control your backgrounds.
13- You will learn to see and understand the light.
14- You will learn to see and create pleasing blurs in pre-dawn situations.
15- You will learn to be ready for the most likely event.
16- You will learn pro level tripod handling tips
17- During our image review sessions, you will learn the factors that separate insta-deletes, keepers, and family jewels. With general bird photography those include head angle, subject-to-sensor plane orientation, choice of perspective, the quality of the light, the quality of the background, image sharpness, and the image design. When evaluating photos of birds in flight, you must — in addition to the above, consider wing positions and flight poses.
18- You will improve your image optimization skills by leaps and bounds and will return home with a collection of image optimization videos.
The very best news is that you will be able to take everything you learn home with you so that you will be a better photographer wherever you are and whenever you photograph.
|
|
|
From upper left clockwise around to center: Osprey with Yellow-tailed Menhaden; Osprey overhead with bunker; Osprey with Yellow-tailed Menhaden; Osprey chase; Great Egret with pinfish; Osprey emerging with flounder; Great Egret taking flight; Osprey kiting; 1/8 second sunrise Atlantic Ocean blur.
Click on the composite to see a larger, inexplicably sharper high res version.
All images copyright 2025 Arthur Morris/BIRDS AS ART
|
Trip Costs and Booking Details
Change Your Life
Book any 3-6 Days: Lodging is $175/night. Instruction is $600/day. There is a morning session every day. Afternoon sessions average every other day. Image review and Photoshop sessions are usually daily.
Please note: Folks who sign up for an odd number of days of instruction will enjoy half + 1 afternoon sessions (more are possible if conditions are good) Those who sign up for an even number of days will enjoy at least 1/2 that number of afternoon shooting sessions (more are possible if conditions are good)
Book any 7-10 Days: Lodging is $160/night. Instruction is $575/day. There is a morning session every day. Afternoon sessions average every other day. Image review and Photoshop sessions are almost daily.
Book any 11-14 Days: Lodging is $150/night. Instruction is $550/day. There is a morning session every day. Afternoon sessions average every other day. Image review and Photoshop sessions are almost daily.
Book any three weeks: Lodging is $130/night. Instruction is $525/day. There is a morning session every day. Afternoon sessions average every other day. Image review and Photoshop sessions are almost daily.
Stay for one month (28 nights): Lodging is $120/night. Instruction is $500/day. There is a morning session every day. Afternoon sessions average every other day. Image review and Photoshop sessions are almost daily.
Stay two months (60 nights): Lodging is $100/night. Instruction is $475/day. There is a morning session every day. Afternoon sessions average every other day. Image review and Photoshop sessions are almost daily.
Brunch is on me. Dinners are provided for $20/day. I am an excellent chef and the food both healthy and of high quality.
Please note: your day of arrival is not a day of instruction.
Deposit Information
Payment in full is due now. Please make the check out to:
BIRDS AS ART
And send it via US Mail to
BIRDS AS ART
PO Box 7245
Indian Lake Estates, FL 33855
I hope to spend some quality time with you at Sebastian Inlet in the fall of 2025 and to change your life. If you have any questions, please get in touch via e-mail or with a text to 863-221-2372.
Typos
With all blog posts, feel free to e-mail or to leave a comment regarding any typos or errors.
September 8th, 2025 Your Call?
Which of today’s five wind against sun images do you think is the strongest? Why do you like it?
What’s Up?
I drove to Ronkonkoma in Suffolk County on Saturday evening to have dinner with my younger daughter Alissa and her family. I ate much too much plov. Plov is a fragrant and hearty one-pot rice dish that originated in Central Asia and is considered the national dish of Uzbekistan. My son-in-law Ajiniyaz is an expert plov chef! It was great seeing my two grandsons. Sunday morning was a washout and I spent the afternoon watching NFL games on my laptop and packing my SUV.
My five week Nickerson visit was quite rewarding. Thanks to the three multiple IPT veterans who joined me and enjoyed their AirBnB learning experience (and my home cooking!) — Steve Shore, Vasili Chernishof, and Judy Stepanaskie. And thanks also to Carlotta Grenier who joined me for a great In-the-Field morning at the beach.
Today is Monday 8 September 2025. I left Long Island at 5:32am and arrived at the Lorton Virginia Auto Train Station at 12:20pm after several pitstops and a one hour nap. The train leaves at 4:00pm and is scheduled to arrive in Sanford, Fl at about 9:00am the next morning. From there it is about a two hour drive to my home at Indian Lake Estates.
I hope that you too opt to have a great day.
I will soon begin work on the Digital Basics IV Video Series and I have some fabulous new tips and techniques to share. Those include the use of the masking feature in Adobe Camera Raw (thanks to Anita North), using the Point Color eye dropper to tame super saturated colors during raw conversions (discovered in tandem with Anita), and a fabulous new Remove Tool trick that makes my favorite Photoshop Tool even more amazing — the last one discovered by me 🙂
On Tuesday past, I attended the evening session of the 2025 US Open Tennis Tournament and did not get into bed until 1:20am the next day. I set the alarm for 5:00am so that I could be at the beach well before sunrise in hopes of making a really good Red Light District image. Sometimes dreams come true. I tried a brand new technique — creating pleasing blurs in bright sun without an ND filter. Scroll down to see my five favorite images and learn a ton while you are at it.
If an item — a Delkin flash card or reader, a Levered-clamp FlexShooter Pro, or a Wimberley lens plate or low foot — for example, that is available from B&H and/or Bedfords, is also available in the BAA Online Store, it would be great, and greatly appreciated, if you would opt to purchase from us. We will match or beat any price. Please remember also to use my B&H affiliate links or to earn 3% cash back at Bedford by using the BIRDSASART discount code at checkout for your major gear purchases. Doing either often earns you free guides and/or discounts. And always earns my great appreciation.
Gear Questions and Advice
Too many folks attending BAA IPTs and dozens of photographers whom I see in the field and on BirdPhotographer’s.Net, are — out of ignorance — using the wrong gear, especially when it comes to tripods and more especially, tripod heads. And the same is true in spades when ordering new camera bodies or lenses. My advice will often save you some serious money and may help you avoid making a seriously bad choice. Please know that I am always glad to answer your gear questions via e-mail. If you are desperate, you can try me on my cell at 863-221-2372. Please leave a message and shoot me a text if I do not pick up.
Don’t Just Shoot: Learn
If you are interested in changing your life and becoming a better photographer by joining me on the Extended IPT at Sebastian Inlet for Ospreys and more (SEPT 25 to NOV 24, 2025), in San Diego for Pacific-race Brown Pelicans and more (JAN 6 to FEB 2, 2026), or for Roseate Spoonbills at Stick Marsh (March 2026), please e-mail for dates, rates, terms, and additional information. Or shoot me a text to 863-221-2372. Some offerings include options for shared AirBnB lodging and meals. Ground transportation during your stay is a possibility at times.
B&H Simplified
To ensure that I get credit for your B&H purchases, you can always click here. The tracking is invisible but using my affiliate links is greatly appreciated. And, with B&H, you can use your PayBoo card. You must use the website to order. You cannot get your free guides if you make a phone order. Once you have an item in your cart, you must complete the order within two hours. Huge thanks!
B&H
Many folks have written recently stating that they purchased a Sony a1-ii from B&H and would like their free membership in the Sony 1-ii Info and Updates Group, a roughly $225.00 value. But when I check my affiliate account, their orders have not been there. When I let them know that they get credit for B&H purchases only if they use one of the many B&H affiliate links on the blog or begin their searches with this link, they are always disappointed. If in doubt, please contact me via e-mail and request a BH link. I am always glad to help and to guide you to the right gear.
Bedfords Simplified
Click here to start your search. Choose standard shipping, and when you get to the payment page, enter BIRDSASART in the discount code box and hit apply. You will be upgraded to free second day air Fed-Ex and receive 3% cash back on your credit card once your stuff ships. Using either my affiliate links is greatly appreciated and will often earn you free guides or discounts.
Bedfords Amazing BAA Discount Policy
Folks who have fallen in love with Bedfords can always use the BIRDSASART coupon code at checkout to enjoy a post-purchase, 3% off-statement credit (excluding taxes and shipping charges) on orders paid with a credit card. The 3% credit will be refunded to the card you used for your purchase when your product ships. Be sure, also, to check the box for free shipping to enjoy free Second Day Air Fed-Ex. This offer does not apply to purchases of Classes, Gift Cards, or prior purchases.
You can visit the Bedfords website here, shoot Steve Elkins an e-mail, or text him on his cell phone at (479) 381-2592.
|
|
|
This image was created on 4 September 2025 on a wind-against-sun morning by yours truly at Nickerson Beach, Lido Beach, Long Island, NY. Seated on damp sand I used the knee-pod technique with the handheld (!) Sony FE 600mm f/4 GM OSS lens and The Latest Greatest Sony Flagship Body, the a1 II Mirrorless Camera. The exposure was determined by Zebras with Exposure Compensation (EC) on the thumb wheel. Multi Metering +2.3 stops. AUTO ISO set ISO 2000: 1/250 second at f/4 (wide open) in Shutter Priority mode. RawDigger showed that the exposure was dead solid perfect. AWB at 6:24:39am with a cloud on the eastern horizon.
Wide/AF-C with Bird-Eye/Face Detection performed perfectly. Click on the image to enjoy the larger, inexplicably sharper high-res version.
Image #1: Herring Gull 1st cycle with Sand Eel
Image copyright 2025: Arthur Morris/birds as Art
|
Opportunists
Most gull species are opportunistic feeders — they will eat just about anything they can get their bills on. It is rare to see one on the edge of the surf with a whole fish. It took an inordinately long time for this young Herring Gull to swallow the Sand Eel, likely dropped by a skimmer.
Going with the relatively slow shutter speed of 1/250 second was a big risk; if the gull was moving, the image would not have been sharp. My choice of shutter speed paid off when the gull paused momentarily. Using the knee-pod technique properly helps to keep the lens still and the Optical Stabilization System in both the camera and the lens helps with image sharpness as well. It is important to remember that image stabilization never helps with subject movement.
|
|
|
This image was also created on 4 September 2025 on a wind-against-sun morning by yours truly at Nickerson Beach, Lido Beach, Long Island, NY. Standing at full height, I used the Robus RC-5570 Vantage Series 3 Carbon Fiber Tripod/Levered-Clamp FlexShooter Pro-mounted Sony FE 600mm f/4 GM OSS lens and The Latest Greatest Sony Flagship Body, the a1 II Mirrorless Camera. The exposure was determined by Zebras with Exposure Compensation (EC) on the thumb wheel. Multi Metering +1.7 stops. AUTO ISO set ISO 160: 1/30 second at f/4 (wide open) in Shutter Priority mode. RawDigger showed that the exposure at least one stop too dark. AWB at 6:27:34am and getting brighter as the sun struggled to break through the cloud on the eastern horizon.
Wide/AF-C with Bird-Eye/Face Detection performed perfectly. Click on the image to enjoy the larger, inexplicably sharper high-res version.
Image #2: Black Skimmer juvenile flight blur
Image copyright 2025: Arthur Morris/birds as Art
|
Flight Photography on a Tripod
I am not sure why shooting flight blurs off a tripod is more difficult than creating sharp flight images with a big lens on a tripod, but it is. At least for me; I find it more difficult to pan with the bird and keep the subject properly framed when using a slow shutter speed. For the most part, I view shooting slow shutter speed blurs of single birds as practice for sharp flight photography.
Once in a while, however you get a perfectly framed image with the bird back in the frame and a halfway decent blurred effect.
|
|
|
This image was created on 13 August 2025 by yours truly on a wind-against-sun morning on a Nickerson Beach Extended IPT. Seated on damp sand I used the toe-pod technique with the handheld Sony FE 600mm f/4 GM OSS lens with the Sony FE 2x Teleconverter and The Latest Greatest Sony Flagship Body, the a1 II Mirrorless Camera. ISO 400: 1/3200 second at f/8 (wide open) in Shutter Priority mode. RawDigger showed that the exposure was perfect. AWB at 6:41:46am as the sun rose over the cloud on the eastern horizon.
Tracking: Zone/AF-C with Bird-Eye/Face Detection performed perfectly. Click on the image to enjoy the high-res version.
Image #3: Black Skimmer in the “Red Light District.”
Image copyright 2025: Arthur Morris/BIRDS AS ART
|
Red Light District Images
In the Pro Wind Against Sun Tip — Working the Red Light District blog post here, I reviewed the basic of creating red light images. One thing that I did not mention was that getting lower increases the intensity of the reds and yellows. When I saw this bird isolated atop the berm, I switched the 1.4X TC for the 2X TC and prayed that the bird would stay. It did. I started with the knee-pod technique and then followed my own advice by going to the toe-pod technique to get ever lower.
|
|
|
This image was also created on 4 September 2025 on a wind-against-sun morning by yours truly at Nickerson Beach, Lido Beach, Long Island, NY. Standing at full height, I used the Robus RC-5570 Vantage Series 3 Carbon Fiber Tripod/Levered-Clamp FlexShooter Pro-mounted Sony FE 600mm f/4 GM OSS lens and The Latest Greatest Sony Flagship Body, the a1 II Mirrorless Camera. The exposure was determined with Sony Zebra technology with ISO on the Thumb Dial. ISO 50: 1/15 sec. at f/20 (stopped down 4 2/3 stops) in Manual mode. RawDigger showed that the exposure at least one stop too dark. AWB at 7:22:54am on a then sunny morning.
Wide/AF-C with Bird-Eye/Face Detection performed perfectly. Click on the image to enjoy the larger, inexplicably sharper high-res version.
Image #4: Black Skimmer flock blur
Image copyright 2025: Arthur Morris/birds as Art
|
Sunny Day Blurs Without an ND Filter
When I shot Canon, I had several drop-in Neutral Density filters for my big lenses. With Sony, I had a 77mm ND filter for the front of my 200-600 but smashed it when I tripped at Torrey Pines.
I hate sharp blastoff images made on sunny days. The problem with going to a slow shutter speed in bright light is that even when you go to ISO 50, you will need a small aperture. Very small apertures like the f/20 that I used for Image #4 is that any and all sensor dust spots will be revealed.
As sensor dust has become less and less of a problem with each new mirrorless camera body, I decided to create some blastoff blurs on a wind against sun morning while using a slow shutter speed (1/30 second) and a small aperture (the latter to control the exposure). With this image, there was only a single small dust spot in the sky.
|
|
|
This image was also created on 4 September 2025 on a wind-against-sun morning by yours truly at Nickerson Beach, Lido Beach, Long Island, NY. Standing at full height, I used the Robus RC-5570 Vantage Series 3 Carbon Fiber Tripod/Levered-Clamp FlexShooter Pro-mounted Sony FE 600mm f/4 GM OSS lens and The Latest Greatest Sony Flagship Body, the a1 II Mirrorless Camera. The exposure was determined with Sony Zebra technology with ISO on the Thumb Dial. ISO 50: 1/30 sec. at f/18 (stopped down 4 1/3 stops) in Manual mode. RawDigger showed that the exposure at least one stop too dark. AWB at 8:02:33am on a then sunny morning.
Wide/AF-C with Bird-Eye/Face Detection performed perfectly. Click on the image to enjoy the larger, inexplicably sharper high-res version.
Image #5: Sanderling flock blur
Image copyright 2025: Arthur Morris/birds as Art
|
If It Ain’t Broke, Don’t Fix It. And Never Hesitate
When I saw a flock of Sanderlings flying by low over the ocean, I went to a faster shutter speed to make up with the whiter whites on the speedy shorebirds. I got on the flock quickly, acquired focus, ripped off about a dozen frames, kept four promising ones, eventually picked my favorite and deleted the others.
The a-1 ii for General Bird Photography
I have found that eye-tracking for general bird photography with the a-1 ii is far, far better than with the original Sony a-1. It grabs the eye and tracks it faster and far more consistently and focus is rarely lost, even with backgrounds other than sky.
The a-1 ii for Birds in Flight
For birds in flight, the a-1 ii Mirrorless Camera body has no equal. As Arash Hazeghi says, “It is better than the a-1.” When I am late getting on a bird in flight, I have consistently been amazed at how often the AF system of the a-1 ii finds and tracks the bird’s eye.
Pre-Capture with the Sony a-1 ii
When it comes to Pre-Capture with the a-1 ii Mirrorless Camera body, Arash and I agree 100%. And with my slower reflexes, Pre-Capture is more important for me than it is for Arash. Understand that in each of the images in Composite #3, I did not push the shutter button until after the bird took flight!
Purchasing or Upgrading to a Sony a-1 ii
The Sony a-1 ii e-Mail Set-up and Info Guide
I now own and use two Sony a-1 ii bodies. Every day that I use them, the more I am amazed by speed and accuracy of the Bird Face-Eye tracking in AF-C and the overall performance of the camera.
Aside from the improved ergonomics as compared to the a-1, other nice features include the fact that the rear screen tilts both ways — the lack of a tilting rear screen on the original a-1 always ticked me off. Pre-capture has proven to be a huge plus almost exclusively for take-off flight images. In my opinion, the Speed Boost feature is a total waste for bird photography because you should always be utilizing the maximum frame rate. In addition, the resolution on the rear monitor has been improved dramatically. I must mention again that Bird Face-Eye tracking on the a-1 ii is vastly improved as compared to both the a-1 and the a9 iii and that the 51MP files are to die for.
So, the big question is, is the a-1 ii “worth” a gear upgrade. Remembering that I can never know whether or not something is worth it to you, I can say that I was not floored when first using my a-1 ii. The differences between the a-1 ii and the original a-1, seemed to be neither huge nor eye-opening. But over time, I have come to realize that I was 100% wrong. The huge difference between the new camera body and the a9 iii is, of course, the 51MP a-1 raw files (as compared to the 24MP files rendered by the a9 iii).
The price of a new a-1 is $5,898.00. The price of a new a-1 ii is $1,100.00 more: $6,998.00. As the a-1 ii is clearly far superior for bird photography to the original a-1, the choice for folks new to Sony or for those upgrading from lesser Sony camera bodies is an easy one. Prices for used a-1 bodies has not dropped drastically as I anticipated. At this point, a-1 folks who like showing flight and action and can afford an a-1 ii, are advised to purchase an a-1 ii. Please remember that life is short; we only get one ride on the merry-go-round.
If you do purchase an a-1 ii, be sure to use one of my two affiliate links so that you will receive my a-1 ii settings (in the form of a CAMSEa1ii.DAT file), the Buttons and Dials Guide, and an Info Sheet for free. Using my links will never cost you one penny and may actually save you some money. Folks who do not purchase their new a-i using my B&H link or from Bedfords here and entering the BIRDSASART discount code at checkout will be able to purchase the a-1 ii guide for $244.93. If you are at all confused and do not want to screw up your order, please get in touch via e-mail. If you would like to chat about upgrading, shoot me a text to 863-221-2372 and LMK a good time to call you.
Typos
With all blog posts, feel free to e-mail or to leave a comment regarding any typos or errors.
September 6th, 2025 What’s Up?
Thursday and Friday afternoons on the beach at Nickerson were awe-inspiring with thousands of migrant Common Terns and many hundreds of Black Skimmers blasting off every three minutes into the 20+ mph wind that roared in off the Atlantic. It was a wild scene as the flocks flew off, swirled around, and then re-landed on the outer beach in ever-larger tight groups. You could actually feel the energy of the flocks growing until the next blastoff.
By Friday morning the remaining coastal flooding pool was down to two nearly connected large puddles. There were several photographers having fun in the mud with dozens of small shorebirds right in front of them in the smaller of the two puddles. Many of the mostly young birds were often too close to focus on. And there were lots of almost impossible to photograph squabbles. It was amazing to see the pond shrinking in size right before our eyes; the size of the pond diminishing by perhaps a foot every five minutes. By Friday afternoon that puddle had disappeared leaving medium sized puddle.
Today is Saturday 6 September 2025. Early in the morning, I headed to one of my soul places, the birthplace of my birding and photography career, the East Pond at Jamaica Bay Wildlife Refuge, Queens, NY. Working with the tripod-mounted 600mm f/4 lens alone and later on with the 1.4X TC in place, I enjoyed a very good morning with soft hazy light, not too many bugs, and beautiful green reflections in my favorite corner of the pond. I am pretty sure that I made some very good images of the expected and usual suspects: juvenile and adult Lesser Yellowlegs, a single young Greater Yellowlegs, a very sweet juvenile Semipalmated Plover, perhaps a half dozen worn juvenile Short-billed Dowitcher, a few Least Sandpipers, and several dozen Semipalmated Sandpipers including a very few worn, molting adults.
Whatever you opt to do today, I hope that you chose to have fun and be happy.
If an item — a Delkin flash card or reader, a Levered-clamp FlexShooter Pro, or a Wimberley lens plate or low foot — for example, that is available from B&H and/or Bedfords, is also available in the BAA Online Store, it would be great, and greatly appreciated, if you would opt to purchase from us. We will match or beat any price. Please remember also to use my B&H affiliate links or to earn 3% cash back at Bedford by using the BIRDSASART discount code at checkout for your major gear purchases. Doing either often earns you free guides and/or discounts. And always earns my great appreciation.
Gear Questions and Advice
Too many folks attending BAA IPTs and dozens of photographers whom I see in the field and on BirdPhotographer’s.Net, are — out of ignorance — using the wrong gear, especially when it comes to tripods and more especially, tripod heads. And the same is true in spades when ordering new camera bodies or lenses. My advice will often save you some serious money and may help you avoid making a seriously bad choice. Please know that I am always glad to answer your gear questions via e-mail. If you are desperate, you can try me on my cell at 863-221-2372. Please leave a message and shoot me a text if I do not pick up.
Don’t Just Shoot: Learn
If you are interested in changing your life and becoming a better photographer by joining me on the Extended IPT at Sebastian Inlet for Ospreys and more (SEPT 25 to NOV 24, 2025), in San Diego for Pacific-race Brown Pelicans and more (JAN 6 to FEB 2, 2026), or for Roseate Spoonbills at Stick Marsh (March 2026), please e-mail for dates, rates, terms, and additional information. Or shoot me a text to 863-221-2372. Some offerings include options for shared AirBnB lodging and meals. Ground transportation during your stay is a possibility at times.
B&H Simplified
To ensure that I get credit for your B&H purchases, you can always click here. The tracking is invisible but using my affiliate links is greatly appreciated. And, with B&H, you can use your PayBoo card. You must use the website to order. You cannot get your free guides if you make a phone order. Once you have an item in your cart, you must complete the order within two hours. Huge thanks!
B&H
Many folks have written recently stating that they purchased a Sony a1-ii from B&H and would like their free membership in the Sony 1-ii Info and Updates Group, a roughly $225.00 value. But when I check my affiliate account, their orders have not been there. When I let them know that they get credit for B&H purchases only if they use one of the many B&H affiliate links on the blog or begin their searches with this link, they are always disappointed. If in doubt, please contact me via e-mail and request a BH link. I am always glad to help and to guide you to the right gear.
Bedfords Simplified
Click here to start your search. Choose standard shipping, and when you get to the payment page, enter BIRDSASART in the discount code box and hit apply. You will be upgraded to free second day air Fed-Ex and receive 3% cash back on your credit card once your stuff ships. Using either my affiliate links is greatly appreciated and will often earn you free guides or discounts.
Bedfords Amazing BAA Discount Policy
Folks who have fallen in love with Bedfords can always use the BIRDSASART coupon code at checkout to enjoy a post-purchase, 3% off-statement credit (excluding taxes and shipping charges) on orders paid with a credit card. The 3% credit will be refunded to the card you used for your purchase when your product ships. Be sure, also, to check the box for free shipping to enjoy free Second Day Air Fed-Ex. This offer does not apply to purchases of Classes, Gift Cards, or prior purchases.
You can visit the Bedfords website here, shoot Steve Elkins an e-mail, or text him on his cell phone at (479) 381-2592.
|
|
|
This image was created on 3 September 2025 by yours truly at Nickerson Beach, Lido Beach, Long Island, NY. Standing at full height along the edge of the remaining coastal flooding pool, I used the Robus RC-5570 Vantage Series 3 Carbon Fiber Tripod/Levered-Clamp FlexShooter Pro-mounted Sony FE 600mm f/4 GM OSS lens with the Sony FE 1.4x Teleconverter and The Latest Greatest Sony Flagship Body, the a1 II Mirrorless Camera. The exposure was determined with Sony Zebra technology with ISO on the Thumb Dial. ISO 1250: 1/4000 sec. at f/5.6 (wide open) in Manual mode. RawDigger showed that the exposure was perfect. AWB at 9:27:55am on a cloudy morning.
Wide/AF-C with Bird-Eye/Face Detection performed perfectly. Click on the image to enjoy the larger, inexplicably sharper high-res version.
Photo Mechanic Screen Capture of birds in flight
Image copyright 2025: Arthur Morris/birds as Art
|
Insta-Delete?
In the last blog post, I asked if folks would delete this image instantly and if not, what their plan might be for the image optimization. Very few responded. Cliff Beitel suggested a possible version that involved a moderate crop. When my reply included this:ps: my solution might shock you. Or not, Cliff replied, Won’t be shocked if it focuses on that pretty dowitcher. You might say that he hit the nail right on the head. See my optimized version immediately below.
|
|
|
This image was created on 3 September 2025 by yours truly at Nickerson Beach, Lido Beach, Long Island, NY. Standing at full height along the edge of the remaining coastal flooding pool, I used the Robus RC-5570 Vantage Series 3 Carbon Fiber Tripod/Levered-Clamp FlexShooter Pro-mounted Sony FE 600mm f/4 GM OSS lens with the Sony FE 1.4x Teleconverter and The Latest Greatest Sony Flagship Body, the a1 II Mirrorless Camera. The exposure was determined with Sony Zebra technology with ISO on the Thumb Dial. ISO 1250: 1/4000 sec. at f/5.6 (wide open) in Manual mode. RawDigger showed that the exposure was perfect. AWB at 9:27:55am on a cloudy morning.
Wide/AF-C with Bird-Eye/Face Detection performed perfectly. Click on the image to enjoy the larger, inexplicably sharper high-res version.
Image #1: Dorsal view of juvenile Short-billed Dowitcher in flight
Image copyright 2025: Arthur Morris/birds as Art
|
The Aggressive Image Optimization
After converting the raw file, I first cleaned the playing field in the center of the frame, painted a generous quick mask of the dowitcher hard on the right frame edge, moved it to the center of the frame, adjusted the tonality of the layer to match the tonality of the background, and added and fine-tuned a Regular Layer Mask so that the new layer blended seamlessly with the layer below. A healthy crop yielded the final image immediately above.
Though the optimized .TIF file represents less than 17% of the original 51 million pixels, the resulting JPEG is fine for internet presentation. With the relatively huge crop, image quality has of course suffered a bit; I would not want to make a large print of this image.
|
|
|
This image was also created on 2 September 2025 by yours truly at Nickerson Beach, Lido Beach, Long Island, NY. Seated on damp sand near the edge of the surf, I used the handheld (!) Sony FE 600mm f/4 GM OSS lens with the Sony FE 1.4x Teleconverter and The Latest Greatest Sony Flagship Body, the a1 II Mirrorless Camera. The exposure was determined with Sony Zebra technology with ISO on the Thumb Dial. ISO 1250: 1/3200 sec. at f/5.6 (wide open) in Manual mode. RawDigger showed that the exposure was perfect. AWB at 7:07:21am on a mostly sunny morning.
Wide/AF-C with Bird-Eye/Face Detection performed perfectly. Click on the image to enjoy the larger, inexplicably sharper high-res version.
Image #2: Black-bellied Plover molting adult taking flight
Image copyright 2025: Arthur Morris/birds as Art
|
Operator Error
Thanks in part to the Pre-Capture feature of the a-1 ii (set to 0.3 seconds), I was able to create a nice take-off sequence of this large plover while handholding the 600mm f/4 at 840mm. Though the earlier frames in the series were tack sharp on the bird’s eye, I panned a bit too slowly to keep up with the bird in this frame; the eye was not quite tack sharp. In addition, the shutter speed was a bit too low; 1/4000 or even 1/5000 second would likely have produced a sharper eye. As I did love the pose, however, I selectively sharpened the eye first with Topaz Sharpen AI and then with a contrast mask, all as detailed in both Digital Basics II and the Digital Basics III Video Series.
|
|
|
This image was also created on 2 September 2025 by yours truly at Nickerson Beach, Lido Beach, Long Island, NY. Seated on damp sand near the edge of the surf, I used the handheld (!) Sony FE 600mm f/4 GM OSS lens with the Sony FE 1.4x Teleconverter and The Latest Greatest Sony Flagship Body, the a1 II Mirrorless Camera. The exposure was determined with Sony Zebra technology with ISO on the Thumb Dial. ISO 1250: 1/3200 sec. at f/5.6 (wide open) in Manual mode. RawDigger showed that the exposure was perfect. AWB at 7:10:30am on a mostly sunny morning.
Wide/AF-C with Bird-Eye/Face Detection performed perfectly. Click on the image to enjoy the larger, inexplicably sharper high-res version.
American Oystercatcher juvenile in flat flight
Image copyright 2025: Arthur Morris/birds as Art
|
Astounding a-1 ii AF Performance
About three minutes after the Black-bellied Plover flew to my right, my good fortune continued when a handsome young American Oystercatcher flew almost directly at me. As I was a bit late getting on the bird, I was astounded to see that the AF system tracked the AMOY’s eye perfectly in every frame. I kept four only four raw files because as the bird got closer and closer I began clipping wings.
I have had a million chances on oystercatchers in flight and this one is my favorite by a zillion miles; enlarge the image and check out the sharpness of the grains of sand on the bird’s bill.
I could never have even dreamed of creating sharp images of shorebirds in flight before I switched to Sony in 2019. And the a-1 ii makes almost everything possible.
|
|
The Viewer screen capture from IEDT (Imaging Edge Desktop) for the American Oystercatcher juvenile in flat flight image
Image copyright 2025: Arthur Morris/birds as Art
|
A Screen Capture is Worth a Thousand Words
The tiny green box on this raw file as seen in IEDT Viewer shows the active eye tracking AF point. Activate this feature by clicking on the Focus Frame Display icon (seen in orange on the task bar). It is two to the left of the Info icon (i) that is also highlighted in orange.
The a-1 ii for General Bird Photography
I have found that eye-tracking for general bird photography with the a-1 ii is far, far better than with the original Sony a-1. It grabs the eye and tracks it faster and far more consistently and focus is rarely lost, even with backgrounds other than sky.
The a-1 ii for Birds in Flight
For birds in flight, the a-1 ii Mirrorless Camera body has no equal. As Arash Hazeghi says, “It is better than the a-1.” When I am late getting on a bird in flight, I have consistently been amazed at how often the AF system of the a-1 ii finds and tracks the bird’s eye.
Pre-Capture with the Sony a-1 ii
When it comes to Pre-Capture with the a-1 ii Mirrorless Camera body, Arash and I agree 100%. And with my slower reflexes, Pre-Capture is more important for me than it is for Arash. Understand that in each of the images in Composite #3, I did not push the shutter button until after the bird took flight!
Purchasing or Upgrading to a Sony a-1 ii
The Sony a-1 ii e-Mail Set-up and Info Guide
I now own and use two Sony a-1 ii bodies. Every day that I use them, the more I am amazed by speed and accuracy of the Bird Face-Eye tracking in AF-C and the overall performance of the camera.
Aside from the improved ergonomics as compared to the a-1, other nice features include the fact that the rear screen tilts both ways — the lack of a tilting rear screen on the original a-1 always ticked me off. Pre-capture has proven to be a huge plus almost exclusively for take-off flight images. In my opinion, the Speed Boost feature is a total waste for bird photography because you should always be utilizing the maximum frame rate. In addition, the resolution on the rear monitor has been improved dramatically. I must mention again that Bird Face-Eye tracking on the a-1 ii is vastly improved as compared to both the a-1 and the a9 iii and that the 51MP files are to die for.
So, the big question is, is the a-1 ii “worth” a gear upgrade. Remembering that I can never know whether or not something is worth it to you, I can say that I was not floored when first using my a-1 ii. The differences between the a-1 ii and the original a-1, seemed to be neither huge nor eye-opening. But over time, I have come to realize that I was 100% wrong. The huge difference between the new camera body and the a9 iii is, of course, the 51MP a-1 raw files (as compared to the 24MP files rendered by the a9 iii).
The price of a new a-1 is $5,898.00. The price of a new a-1 ii is $1,100.00 more: $6,998.00. As the a-1 ii is clearly far superior for bird photography to the original a-1, the choice for folks new to Sony or for those upgrading from lesser Sony camera bodies is an easy one. Prices for used a-1 bodies has not dropped drastically as I anticipated. At this point, a-1 folks who like showing flight and action and can afford an a-1 ii, are advised to purchase an a-1 ii. Please remember that life is short; we only get one ride on the merry-go-round.
If you do purchase an a-1 ii, be sure to use one of my two affiliate links so that you will receive my a-1 ii settings (in the form of a CAMSEa1ii.DAT file), the Buttons and Dials Guide, and an Info Sheet for free. Using my links will never cost you one penny and may actually save you some money. Folks who do not purchase their new a-i using my B&H link or from Bedfords here and entering the BIRDSASART discount code at checkout will be able to purchase the a-1 ii guide for $244.93. If you are at all confused and do not want to screw up your order, please get in touch via e-mail. If you would like to chat about upgrading, shoot me a text to 863-221-2372 and LMK a good time to call you.
|
|
100% screen capture of the right wing from the .TIF file
|
PS in response to Ryan Sanderson’s Comment
Ryan,
Are you seeing the artifacts you talk about in your comment above? I am not seeing any artifacts.
Typos
With all blog posts, feel free to e-mail or to leave a comment regarding any typos or errors.
September 4th, 2025 What’s Up?
On Tuesday evening I attended the evening session of the 2025 US Open Tennis Tournament. I was supposed to see a Women’s quarterfinal match and a Men’s quarterfinal match in Arthur Ashe Stadium at the USTA Billie Jean King National Tennis Center in Flushing Meadows, Queens, NY. The Women’s match was a walkover as one of the participants was injured. The match between American Taylor Fritz and Serbian Novak Djokovic was moved up and began at 8:10pm, just before my usual bedtime. Fritz, 0-10 previously versus Djokovic, put up a great fight and extended the match to four sets by winning the third set. Fritz double faulted on Djokovic’s third match point, putting an end to the thrilling three-hour, 24-minute match that ended at 11:34pm. After exiting the tennis center along with many many thousands of others came the long walk back to my SUV in the Citi-Field lot and an hour drive back to Long Beach. I finally got to sleep at 1:30am. I woke on Wednesday at 4:50am ten minutes before the alarm I had set, got dressed, and headed to the beach. It was another great morning though probably not as good as the conditions warranrted — a slight NE breeze and sun — excellent for traditional front-lit bird photography. The pond was still with lovely reflections but the skimming skimmers were few. I have been concentrating more on shorebirds and gulls both at the diminishing pond and the shoreline and less on the skimmers and terns. Exhausted, I opted to stay in that afternoon.
Today is Thursday 4 September 2025 and I was at the beach at 5:45am. The forecast called for sunny skies and a SW wind (bad for traditional front-lit bird photography) and turned out to be accurate. In wind against-sun-conditions it is vitally important to arrive well before sunrise to try for pre-dawn blastoffs and possibly some Red Light District images. That said, several photographers arrived between 7:30 and 8:00am. Had they understood the relationship between sky conditions and wind direction they could have stayed home. There is one guy with a Nikon 600mm f/4 and a Z9 who shows up every day at eight regardless of the conditions. While chatting the other day he mentioned that for folks like him who had the latest greatest equipment making great bird images was easy. I gently begged to differ. In short, the guy has $20,000+ worth of gear no clue at all as to how to use it.
Whatever you opt to do today, I hope that you chose to have fun and be happy.
If an item — a Delkin flash card or reader, a Levered-clamp FlexShooter Pro, or a Wimberley lens plate or low foot — for example, that is available from B&H and/or Bedfords, is also available in the BAA Online Store, it would be great, and greatly appreciated, if you would opt to purchase from us. We will match or beat any price. Please remember also to use my B&H affiliate links or to earn 3% cash back at Bedford by using the BIRDSASART discount code at checkout for your major gear purchases. Doing either often earns you free guides and/or discounts. And always earns my great appreciation.
Gear Questions and Advice
Too many folks attending BAA IPTs and dozens of photographers whom I see in the field and on BirdPhotographer’s.Net, are — out of ignorance — using the wrong gear, especially when it comes to tripods and more especially, tripod heads. And the same is true in spades when ordering new camera bodies or lenses. My advice will often save you some serious money and may help you avoid making a seriously bad choice. Please know that I am always glad to answer your gear questions via e-mail. If you are desperate, you can try me on my cell at 863-221-2372. Please leave a message and shoot me a text if I do not pick up.
Don’t Just Shoot: Learn
If you are interested in changing your life and becoming a better photographer by joining me on the Extended IPT at Sebastian Inlet for Ospreys and more (SEPT 25 to NOV 24, 2025), in San Diego for Pacific-race Brown Pelicans and more (JAN 6 to FEB 2, 2026), or for Roseate Spoonbills at Stick Marsh (March 2026), please e-mail for dates, rates, terms, and additional information. Or shoot me a text to 863-221-2372. Some offerings include options for shared AirBnB lodging and meals. Ground transportation during your stay is a possibility at times.
B&H Simplified
To ensure that I get credit for your B&H purchases, you can always click here. The tracking is invisible but using my affiliate links is greatly appreciated. And, with B&H, you can use your PayBoo card. You must use the website to order. You cannot get your free guides if you make a phone order. Once you have an item in your cart, you must complete the order within two hours. Huge thanks!
B&H
Many folks have written recently stating that they purchased a Sony a1-ii from B&H and would like their free membership in the Sony 1-ii Info and Updates Group, a roughly $225.00 value. But when I check my affiliate account, their orders have not been there. When I let them know that they get credit for B&H purchases only if they use one of the many B&H affiliate links on the blog or begin their searches with this link, they are always disappointed. If in doubt, please contact me via e-mail and request a BH link. I am always glad to help and to guide you to the right gear.
Bedfords Simplified
Click here to start your search. Choose standard shipping, and when you get to the payment page, enter BIRDSASART in the discount code box and hit apply. You will be upgraded to free second day air Fed-Ex and receive 3% cash back on your credit card once your stuff ships. Using either my affiliate links is greatly appreciated and will often earn you free guides or discounts.
Bedfords Amazing BAA Discount Policy
Folks who have fallen in love with Bedfords can always use the BIRDSASART coupon code at checkout to enjoy a post-purchase, 3% off-statement credit (excluding taxes and shipping charges) on orders paid with a credit card. The 3% credit will be refunded to the card you used for your purchase when your product ships. Be sure, also, to check the box for free shipping to enjoy free Second Day Air Fed-Ex. This offer does not apply to purchases of Classes, Gift Cards, or prior purchases.
You can visit the Bedfords website here, shoot Steve Elkins an e-mail, or text him on his cell phone at (479) 381-2592.
|
|
|
This image was created on 3 September 2025 by yours truly at Nickerson Beach, Lido Beach, Long Island, NY. Standing at full height along the edge of the remaining coastal flooding pool, I used the Robus RC-5570 Vantage Series 3 Carbon Fiber Tripod/Levered-Clamp FlexShooter Pro-mounted Sony FE 600mm f/4 GM OSS lens with the Sony FE 1.4x Teleconverter and The Latest Greatest Sony Flagship Body, the a1 II Mirrorless Camera. The exposure was determined with Sony Zebra technology with ISO on the Thumb Dial. ISO 1250: 1/4000 sec. at f/5.6 (wide open) in Manual mode. RawDigger showed that the exposure was perfect. AWB at 9:27:55am on a cloudy morning.
Wide/AF-C with Bird-Eye/Face Detection performed perfectly. Click on the image to enjoy the larger, inexplicably sharper high-res version.
Photo Mechanic Screen Capture of birds in flight
Image copyright 2025: Arthur Morris/birds as Art
|
Would You Delete This Raw File Instantly?
There has been a Peregrine around for the past few days causing the small flocks of shorebirds to take flight in fear and the skimmer and tern flocks to blast off repeatedly. My advice when attempting to photograph flight shots of shorebird flocks is to acquire focus, attempt to frame the image, and press and hold the shutter button for as long as you have the flock in the frame. Even for the most aggressive shooters good images are extremely rare.
In today’s featured frame we have one dozen juvenile Semipalmated Sandpipers, two juvenile Short-billed Dowitchers, one Black Skimmer, one badly out of focus Ring-billed Gull, the far shoreline, and the base of the snow fence beyond the western edge of the pond. The green focus box as viewed in IEDT Viewer was re-created on the Photo Mechanic screen capture above
After enlarging the screen capture above, is there any reason at all to keep this frame? Is there a good picture in the picture? Or should it be deleted instantly? Remember that the raw file is 51 megapixels.
If you would keep this image, what would your plan be for the image optimization?
Nickerson Beach Shorebird Update
The past week has featured an adult Hudsonian Godwit, a few juvenile Lesser Yellowlegs– seven flew in yesterday to bathe but left too soon, a single Greater Yellowlegs, a single juvenile Red Knot, multiple worn, fading, molting adult Black Bellied Plovers, a handful of Semipalmated Plovers, seeveral Killdeer, both adult and young Ruddy Turnstones, a single young Piping Plover, a single juvenile Willet, a pair of Short-billed Dowitchers in fresh juvenile plumage, and of course, lots of peeps; there were about 3 dozen Semipalmated Sandpipers on the pond this morning along with the two usual worn molting adult White-rumped Sandpipers. And of course the young Baird’s Sandpiper featured in the last blog post. It is not totally surprising that I have not seen a single Western Sandpiper but I have been shocked not to have seen a single Least Sandpiper in the drying mud around the remaining pond. Commonplace have been large flocks of Sanderling and several hundred American Oystercatchers. Throw in the female American Avocet from two weeks ago and you have a halfway decent shorebird list.
This just in: on the way back to my place, I stopped to talk to some birders who told me about the Buff-breasted Sandpiper feeding in the grassy field that abuts the entrance/exit road. I had photographed one at Nickerson about a dozen years ago.
Shorebirds: Beautiful Beachcombers
Written for naturalists and birders, the text tells you everything you’ve always wanted to know about North America’s sandpipers, godwits, yellowlegs, phalaropes, plovers, avocets, stilts, and oystercatchers. Topics covered include identification and aging, shorebird behavior, their incredible migrations, feeding and diet, mating and breeding strategies, eggs, nests, and young, conservation efforts, and shorebirding tips. Also included are approximately 50 species accounts covering all of the regularly occurring North American shorebird species. With 70 of Arthur’s images and 26 more by some of the world’s best nature photographers, this book, at publication, contained the finest collection of shorebird photographs ever published in a single volume.
Typos
With all blog posts, feel free to e-mail or to leave a comment regarding any typos or errors.
September 2nd, 2025 Your Call?
Have you ever seen a better photograph of a single shorebird than today’s featured image? If yes, which photo by whom?
What’s Up?
On Labor Day at Nickerson Beach I enjoyed one my best morning sessions ever at one of my favorite locations on the planet. Everything that I did turned out to be right. The day dawned partly cloudy with a north wind that switched to northeast as the clouds first increased and then thinned out. After that, the sun played peekaboo but for the most part I was working in cloudy bright conditions. I started by opting to walk down the west side of the remaining coastal flooding pond in hopes of getting some Canada Geese (!) in bright pink reflections. To do that, I needed to walk through about a foot of water. I used the 600 alone on the Robus RC-5570 Vantage Series 3 Carbon Fiber Tripod topped by a Levered-Clamp FlexShooter Pro. My plan, however, succeeded almost perfectly. As the wind was slightly east of north, some of the geese were angled slightly away; some were right on the borderline.
In that same wind, the skimmers were skimming away from the photographers on the west shore who had been trying unsuccessfully to create some backlit blurs. So, I headed for the eastern shore and created some nice blurs of my own. I chose a spot with a small flock of skimmers right in front of me and thus, had the birds flying right at me. As the morning brightened somewhat, I switched to sharp early on and made some wonderful images of both young and adult skimmers skimming in cloudy bright conditions. Once the flock departed (for unknown reasons), I decided to follow my nose. I grabbed the 600, left the tripod standing on the edge of the pond, and headed to the ocean handholding my big lens. As mentioned here previously, I have gotten stronger from working so much with the 400-800 that I am now able to handhold the 600 f/4 fairly easily and without much trepidation.
There were lots of American Oystercatchers working the surf line so I sat and worked an unbanded adult with one unbanded juvenile. At 7:39:13am I noticed a pissed-off-about-something oystercatcher running right at me from down the beach. I began firing as the bird took flight and created a 96-frame sequence as the bird flew just to my right. I clipped many frames but came up with a few stunners. I will be creating and sharing a new YouTube Picking My Keepers video soon.
Anyhoo, I was set up to do flight on the incoming skimmers and terns carrying fish at ISO 2500/1/3200 second wide open at f/4 when I spotted an obviously juvenile shorebird a bit down the beach. At a glimpse, I thought that it might be a juvenile Sanderling. I made two distant frames so that I could ID the bird by magnifying the image. I was thrilled to see the long wings, warm brown tones, streaked upper breast, and neatly edged upperparts feathers of a juvenile Baird’s Sandpiper, regular but uncommon on the East coast during fall migration. It was likely the same individual that I had seen and photographed poorly the day before.
As the young shorebird is not as bright as a tern or a skimmer, I immediately and instinctively slowed the shutter speed down one click to 1/2500 second. The bird continued heading east so I picked a spot below the berm with a clean stretch of low tide beach in front of me and sat down. The bird kept coming. I began firing as the bird moved to my right and then cut sharply to its right to head towards the Atlantic. I had two frames in the sequence where the Baird’s had both feet off the ground as it ran. Image #1 below was the better of the two because the running pose was a bit more dramatic and the head angle a tad more pleasing.
As I sat on the beach the magic kept happening with the help of the now fully northeast wind. When a young skimmer coming in from the ocean flew directly at me, I made another 96-frame (!) sequence and clipped only a few wingtips when the bird got really close. The whole experience was exhilarating. When I had a moment to catch my breath, I checked out some of the Baird’s images on the back of the camera and when I saw the running sequence with the bird square to the back of the camera, my exhilaration grew. My hunch to head down to the ocean turned into a thrilling and totally unexpected 37 minutes of action during which I created 1736 photographs. My total for the morning was 5072 still yet-to-be-edited images.
On Monday evening I drove out to Bayshore to have dinner at Fatfish on the Water in Bayshore with my younger daughter Alissa, her husband Ajiniyaz, their son Idris, and my two granddaughters, Samantha and Maya. Sam and Maya — both living in Brooklyn, are the children of my older daughter Jennifer and my son-in-law Erik. Jen and Erik live in Florida and were not able to fly up for the family dinner.
Today is Tuesday September 2, 2025. Though conditions were perfect, the Monday magic was not with me at Nickerson this morning. My best images were some takeoff shots of a molting Black-bellied Plover and a killer fly-by juvie American Oystercatcher. And I shot lots of bathing gull photos as well. Whatever you opt to do today, I hope that you chose to have fun and be happy.
If an item — a Delkin flash card or reader, a Levered-clamp FlexShooter Pro, or a Wimberley lens plate or low foot — for example, that is available from B&H and/or Bedfords, is also available in the BAA Online Store, it would be great, and greatly appreciated, if you would opt to purchase from us. We will match or beat any price. Please remember also to use my B&H affiliate links or to earn 3% cash back at Bedford by using the BIRDSASART discount code at checkout for your major gear purchases. Doing either often earns you free guides and/or discounts. And always earns my great appreciation.
Gear Questions and Advice
Too many folks attending BAA IPTs and dozens of photographers whom I see in the field and on BirdPhotographer’s.Net, are — out of ignorance — using the wrong gear, especially when it comes to tripods and more especially, tripod heads. And the same is true in spades when ordering new camera bodies or lenses. My advice will often save you some serious money and may help you avoid making a seriously bad choice. Please know that I am always glad to answer your gear questions via e-mail. If you are desperate, you can try me on my cell at 863-221-2372. Please leave a message and shoot me a text if I do not pick up.
Don’t Just Shoot: Learn
If you are interested in changing your life and becoming a better photographer by joining me on the Extended IPT at Sebastian Inlet for Ospreys and more (SEPT 25 to NOV 24, 2025), in San Diego for Pacific-race Brown Pelicans and more (JAN 6 to FEB 2, 2026), or for Roseate Spoonbills at Stick Marsh (March 2026), please e-mail for dates, rates, terms, and additional information. Or shoot me a text to 863-221-2372. Some offerings include options for shared AirBnB lodging and meals. Ground transportation during your stay is a possibility at times.
|
|
|
This image was created on 1 September 2025 by yours truly at Nickerson Beach, Lido Beach, Long Island, NY. Seating on damp sand I used the handheld (!) Sony FE 600mm f/4 GM OSS lens and The Latest Greatest Sony Flagship Body, the a1 II Mirrorless Camera. The exposure was determined by experience as detailed below. ISO 2500: 1/2500 sec. at f/4 (wide open) in Manual mode. RawDigger showed that the exposure was perfect. AWB at 9:27:55am on a cloudy morning.
Wide/AF-C with Bird-Eye/Face Detection performed perfectly. Click on the image to enjoy the larger, inexplicably sharper high-res version.
Image #1: Baird’s Sandpiper in fresh juvenal plumage running on clean sand beach
Image copyright 2025: Arthur Morris/birds as Art
|
Baird’s Sandpiper
There are five North American peep species. Peeps are small sandpiper species of the Calidris genus. Baird’s and White-rumped Sanpdiper are the only two peep species with long wings that protrude well beyond the end of their tails. Why the long wings? As they winter primarily in Argentina, they make far longer migratory flights than their three cousins: least, semipalmated, and western. Least and Western Sandpipers winter primarily in the southern US while all the semis make it down to northern South America. No Semipalmated Sandpipers winter in the US.
I recall struggling to find a Baird’s Sandpiper at the East Pond in the late 1970s. And I remember fondly the day that the late Thomas H Davis knelt down in the mud at the East Pond to draw the shape and long wings of Baird’s for me.
Three small dark specks were removed from the almost pristine beach.
Some folks love warblers, some love Osprey, some love owls, and some love all raptors. Shorebirds have long been my first love and are still my favorites.
Shorebirds: Beautiful Beachcombers
Written for naturalists and birders, the text tells you everything you’ve always wanted to know about North America’s sandpipers, godwits, yellowlegs, phalaropes, plovers, avocets, stilts, and oystercatchers. Topics covered include identification and aging, shorebird behavior, their incredible migrations, feeding and diet, mating and breeding strategies, eggs, nests, and young, conservation efforts, and shorebirding tips. Also included are approximately 50 species accounts covering all of the regularly occurring North American shorebird species. With 70 of Arthur’s images and 26 more by some of the world’s best nature photographers, this book, at publication, contained the finest collection of shorebird photographs ever published in a single volume.
Typos
With all blog posts, feel free to e-mail or to leave a comment regarding any typos or errors.
|
|

