Re-published!
This post was originally published on Wednesday 27 December 2023. Then it mysteriously disappeared. Thanks to blog regular Dan Carr I was able to re-construct the photos and links and re-publish it on SAT 29 December 2023.
Your Call?
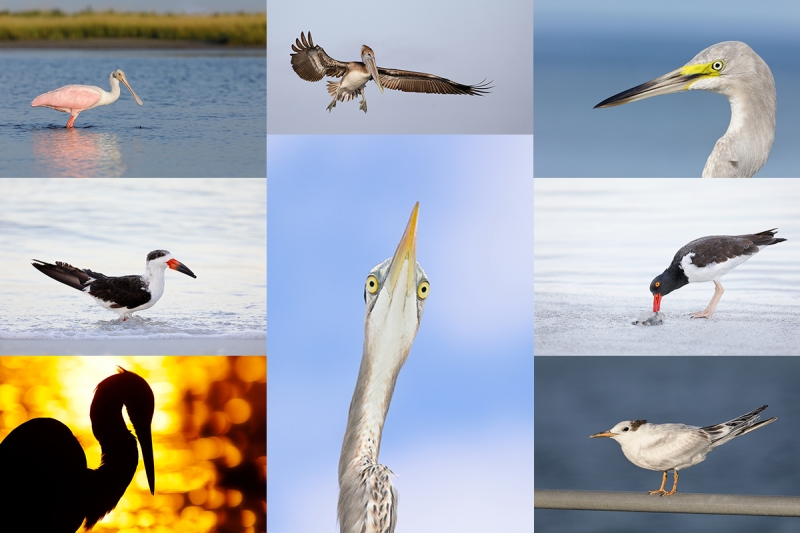
Which is the strongest of today’s three featured images? Why did you make your choice? I have a clear favorite that might surprise some folks. I will share my choice and why I made it in the next post.
Andrew. December 25, 2023 at 3:17am
So you pay $100 for “pro support” and you wait three months for a lens repair. Great success! I don’t know what’s wrong with Sony but their repair centers suck big time! I had my a7R IV sent for repair in NJ for broken front cover. They didn’t have parts in stock and had to order it from Japan. All took 4 weeks. I don’t understand how a repair center doesn’t have a stock of main parts and how ordering parts, even from Japan, takes weeks.
Arthur Morris/BIRDS AS ART. December 25, 2023 at 1:01pm
It would be nice if they had more parts in stock, but there are a lot of lenses and cameras, and thus, many, many thousands of parts. They do keep you abreast of the delays — that is better than waiting for months and not knowing anything They do pay the round trip shipping by FedEx. And, you can get a loaner quickly.
How’s this? I debated about approving a $650 charge to repair my 200-600 as it is a relatively inexpensive lens. Anyhoo, I gave them the go ahead. They needed so many parts that they sent me a brand new one with no additional charges! That ain’t shabby.
with love, artie
Save 15%!
If you’d like to try out a new lens, or if you need a lens for a specific trip or project (or for an IPT), LensRentals.com is the only way to go. To save 15%, simply click on the logo link above, arrange for your rental, and type in BIRDSASART15. If you type the gear you are looking for in the search box, it will pop right up. LensRentals.com offers affordable insurance. You can decline it, opt for LensCap: Damage Only, or select LensCap: Damage & Theft. Then hit PROCEED TO CHECKOUT. After you enter all of your info but before completing your order, be sure to scroll down to Promo Code box and enter the BIRDSASART15 code to save 15%.
I checked on renting a Sony FE 70-200mm f/2.8 GM OSS II lens for a week. The cost is only $122.00. LensCap: Damage Only coverage can be added for a very low $18.00. Going with LensCap: Damage & Theft would be $27.00. The shipping charge varies. They offer an interesting program called Lensrentals HD. By signing up for this shipping discount program ($99.00/year), you’ll get free Standard Shipping on all the orders you place.
Renting a Sony 600mm f/4 GM OSS lens for a week will cost you $536.00. The two coverage options come in at $76.00 or $114.00. Less your 15% discount when you enter the BIRDSASART15 code into the Promo Code box at checkout and enter the BIRDSASART15 codeine the Promo Code box at checkout to save 15%. .
Remember, to save the 15% on your rental you must start your search by clicking on the logo above, or on this link: LensRentals.com
The Gardiner Brothers
The other day I received a short pass-along-video from a friend via Message and shared it with many on my i-Phone. I loved it and so did everyone else. I tracked the brothers down and found their YouTube channel here. Surfing around there, I found this one. — The Galway Girl and two Galway Guys! — and loved it too. At 30 seconds, it is surely worth a click.
Galway Girl is an Ed Sheeran number sung beautifully above by Malinda. It is not a big stretch to imagine her as Sheeran’s sister.
The Gardiner Brothers are professional Irish dancers, social media personalities and influencers. Michael (born 1995) and Matthew (born 1999) are Irish-American dancers and choreographers, born in Denver and now living in Galway, Ireland. They are both cast members of Riverdance and have toured the world extensively since auditioning for the show in 2015. They are known for their rhythm, innovation, and syncopation and have both won the Irish dancing World Championship multiple times. (Wiki).
What’s Up?
With the winds shifting to the north and the west, I have not been heading down to the lake for a photo session recently. Yesterday, I edited another 2000 vulture/caracara/crane images and saved eight of 39 videos. I hope to process one or two of them soon and share them here with you.
It was Wednesday 27 December 2023 when this was first published. Then it disappeared. All was good as I had lots of work to do. There is still a ton of great stuff in today’s post so be sure to read the whole thing. It took me about three hours to prepare this post. Wherever you are and whatever you choose to do, I hope that you too have a great day.
Please remember to use the B&H and Amazon links that are found on most blog pages and to use the BIRDSASART discount code at checkout when purchasing your new gear from Bedfords to get 3% back on your credit card and enjoy free second-day air FedEx. Please, also, consider joining a BAA IPT. You will be amazed at how much you will learn!
You can find some great photo accessories (and necessities, like surf booties!) on Amazon by clicking on the Stuff tab on the orange/yellow menu bar above. On a related note, it would be extremely helpful if blog-folks who, like me, spend too much money on Amazon, would get in the habit of clicking on the Amazon logo link on the right side of each blog post when they shop online. As you might expect, doing so will not cost you a single penny, but would be appreciated tremendously by yours truly. And doing so works seamlessly with your Amazon Prime account.
If an item — a Delkin flash card, or a tripod head — for example, that is available from B&H and/or Bedfords, is also available in the BAA Online Store, it would be great, and greatly appreciated, if you would opt to purchase from us. We will match any price. Please remember also to use my B&H affiliate links or to earn 3% cash back at Bedfords by using the BIRDSASART discount code at checkout for your major gear purchases. Doing either often earns you free guides and/or discounts. And always earns my great appreciation.
Picking 25 Flight Keepers out of 348 Images
Lately, I have been enjoying some great action with both Black and Turkey Vultures at my road kill cafe set-ups, usually baited with fish heads and carcasses courtesy of Mike from Junior’s Fish Market in Lake Wales, FL. On a very dark Sunday morning past, I created 39 videos with the Peashooter Min-rig, the 70-200 II, the 1.4X TC, and the a-1. I am learning.
With the amazingly accurate AF systems of today’s fast frame-rate mirrorless camera bodies, you need to quickly determine which are the very best of so many sharp images. It is all about flight poses, wing positions, head angles, and more. Sit next to me as I pick my keepers from a great flight photography session. As always, Photo Mechanic makes picking your keepers super-fast and super-efficient.
The truth be told, while editing the video I went to the Trash and grabbed two images that I realized should have been kept. Then I edited the final 27 down to 13. So, 13 keepers out of 348 original captures — a 3.7% keeper rate.
|
|
|
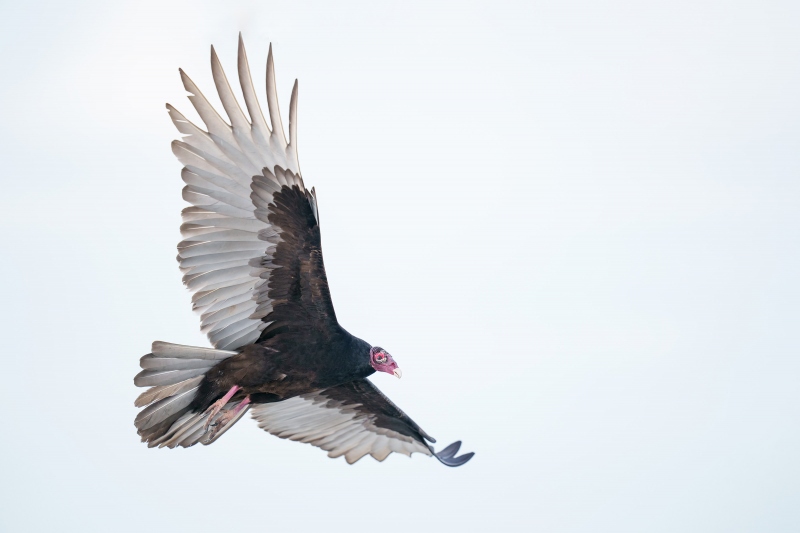
This image was created on 23 December 2023 down by the lake near my home at ILE. Seated on damp sand, I used the handheld Sony FE 400mm f/2.8 GM OSS lens and The One, the Sony Alpha 1 Mirrorless Digital Camera). The exposure was determined via Zebra technology with ISO on the Thumb Dial. ISO 1600. 1/4000 sec. at f/2.8. (wide open) in Manual mode. When evaluated in RawDigger, the raw file brightness was determined to be dead-solid perfect (ho hum). AWB at 8:46:14am on very cloudy morning. This image was created on 13 September 2022 down by the lake near my home at ILE. Standing at full height, I used the handheld Sony FE 400mm f/2.8 GM OSS lens and The One, the Sony Alpha 1 Mirrorless Digital Camera). The exposure was determined via Zebra technology with ISO on the Thumb Dial. ISO 500. 1/1000 sec. at f/7.1 (stopped down 2 2/3 stops) in Manual mode. When evaluated in RawDigger, the raw file brightness was determined to be dead-solid perfect (ho hum). AWB at 8:35:13am on hazy, sunny morning. Tracking: Zone/AF-C with Bird Face/Eye detection enabled performed to perfection. Be sure to click on the image to enjoy a high-res version. Image #1: Turkey Vulture soaring above lake |
New Remove Tool Miracle Discovery
If you watched the video, you will have noticed that I clipped the tips of the 2nd, 3rd, and 4th primary feathers at the top frame-edge. Once I got the image into Photoshop, I expanded canvas top and right using Content Aware Fill. As expected, that crudely repaired the clipped feathers. Very crudely. Rather than use the Clone Stamp Tool as I usually would, I tried the new Remove Tool to trim away the edges and shape the feathers. I was beyond astounded. I will include the details in a future Digital Basics III volume, most likely the next one, #4.
|
|
|
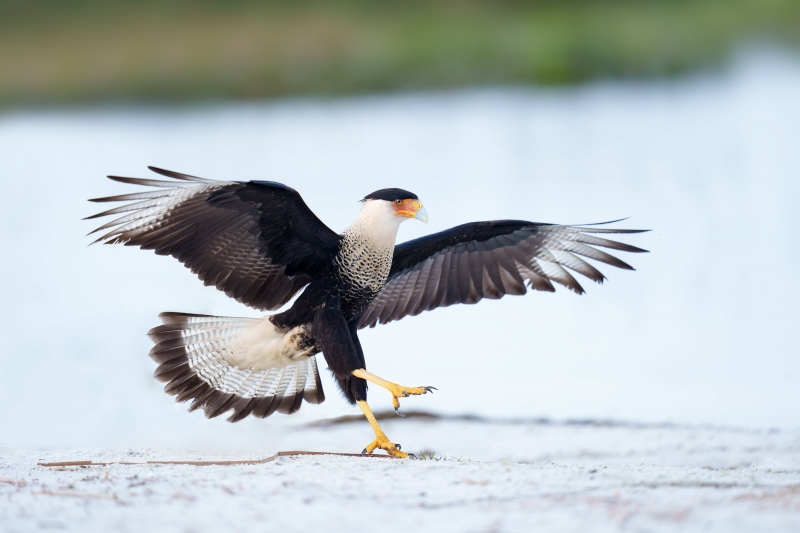
This image was created on 23 December 2023 down by the lake near my home at ILE. Seated on damp sand, I used the handheld Sony FE 400mm f/2.8 GM OSS lens and The One, the Sony Alpha 1 Mirrorless Digital Camera). The exposure was determined via Zebra technology with ISO on the Thumb Dial. ISO 1600. 1/4000 sec. at f/2.8. (wide open) in Manual mode. When evaluated in RawDigger, the raw file brightness was determined to be dead-solid perfect (ho hum). AWB at 8:46:14am on very cloudy morning. Tracking: Zone/AF-C with Bird Face/Eye detection enabled performed to perfection. Be sure to click on the image to enjoy a high-res version. Image #2: Crested Caracara landing on small beach |
Bad Luck and Trouble
“Hope for the best.’ ‘But plan for the worst.” Jack Reacher in Bad Luck And Trouble by Lee Child.
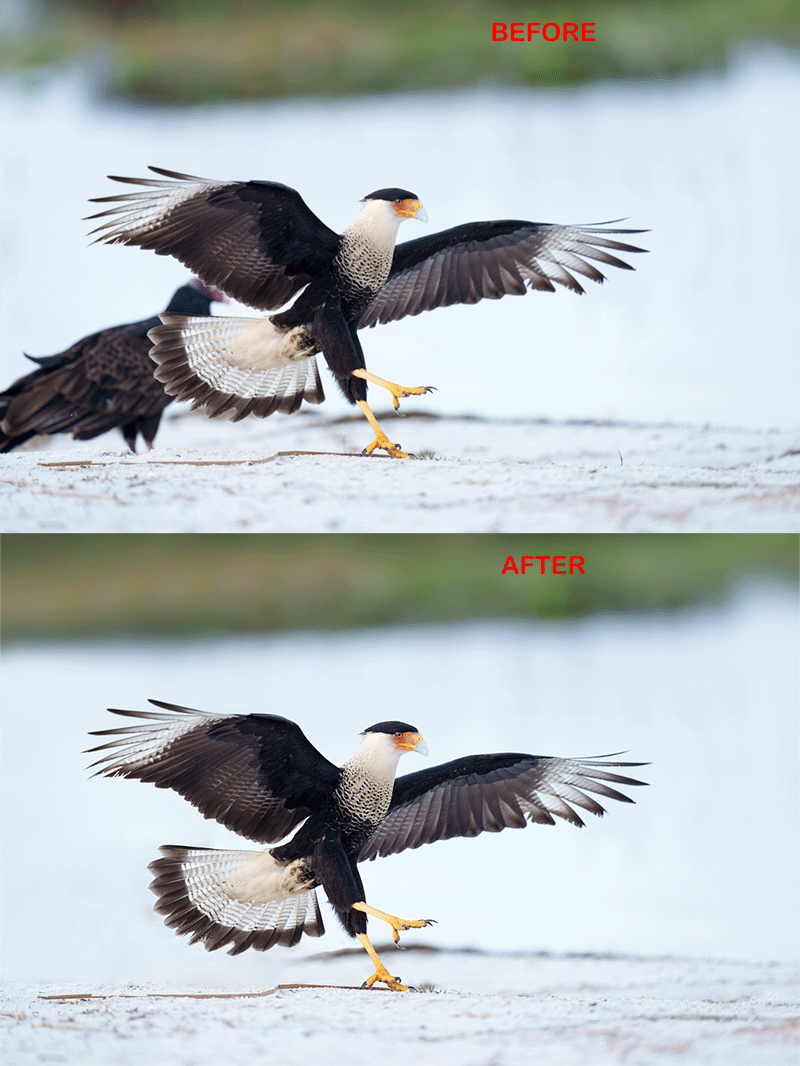
The plan was for me to get a clean shot at the caracara braking to land. But I was photo-bombed by a Turkey Vulture that merged with the tail and a bit more. The image optimization was far more difficult than I had imagined and took more than half an hour. Be sure to see the before and after animated GIF below Image #3.
|
|
|
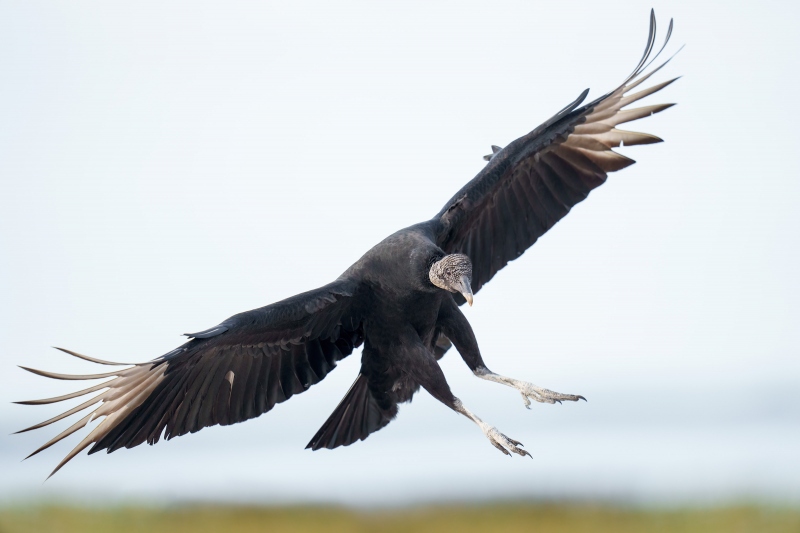
This image was also created on 23 December 2023 down by the lake near my home at ILE. Seated on damp sand, I used the handheld Sony FE 400mm f/2.8 GM OSS lens and The One, the Sony Alpha 1 Mirrorless Digital Camera). The exposure was determined via Zebra technology with ISO on the Thumb Dial. ISO 1600. 1/4000 sec. at f/2.8. (wide open) in Manual mode. When evaluated in RawDigger, the raw file brightness was determined to be dead-solid perfect (ho hum). AWB at 8:56:11am on very cloudy morning. Tracking: Zone/AF-C with Bird Face/Eye detection enabled performed to perfection. Be sure to click on the image to enjoy a high-res version. Image #3: Black Vulture braking to land |
Greedy but Successful!
As this is the full frame original, it is obvious that I was lucky to fit the whole bird in the frame at 400mm. Remember that you cannot win the lottery unless you buy a ticket. In flight photography terms, that means that even if the shot seems difficult or near impossible, it always pays to press and hold the shutter button.
|
|
Heck of a Lot of Work!
As noted above, the image optimization depicted above took more than 30 minutes. I used my usual cadre of clean-up tools and techniques including the Patch Tool, the Clone Stamp Tool, Divide and Conquer, and the new Remove Tool. All as detailed in DB II and in the DB III video series.
|
|
The Digital Basics III Video Series |
The Digital Basics III Video Series
I realized about a year ago that my digital workflow had changed significantly and was thinking about writing a Digital Basics III … More recently, I have learned and begun working with two great new Photoshop Tools, the Remove Tool and the Luminance Targeted Adjustment Tool. The former is like a smarter Spot Healing Brush Tool on steroids and the latter is a huge step up from the fabulous Color Mixer Tool. During that same time frame, I came up with a new and improved 2-step noise reduction technique. I still use Divide and Conquer, Quick Masks, Layer Masks, an expanded array of personalized keyboard shortcuts, and tons of other stuff from both versions of Digital Basics.
As soon as I realized that I did not want to take on another large writing project, I realized that by creating a series of videos I could much more easily share all the details of my current digital workflow and much more easily incorporate additional new tips, techniques, and tools as I went. And so, The Digital Basics III Video Series was born. You can check out Volume I/#1 here and Volume I/#2 here.
You might opt to purchase single videos or to subscribe to Volume I and save $26 by ordering the first five videos in one fell swoop. You can purchase the five videos in Volume I by clicking here. The videos will be most valuable for folks using the latest version of Photoshop (2024) or Lightroom along with Topaz DeNoise AI and Topaz Sharpen AI. Check out the amazing stuff in Volume I/#3 below.
Retroactive Discount Savings
If you have previously purchased a single video and learned a lot, you can upgrade to the complete DB III Volume I series and save $26.00 by calling Jim at 863-692-0906 weekdays, Monday through Friday at noon.
|
|
|
Click on the composite to view a larger version and be even more impressed. The Art & Science of Photographing Birds in Flight with the Sony α-1
|
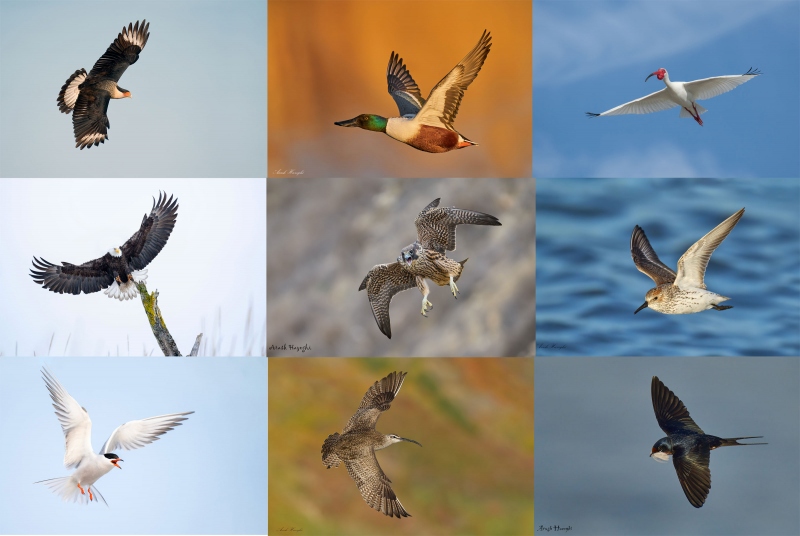
The Art & Science of Photographing Birds in Flight with the Sony α-1
by Arash Hazeghi and Arthur Morris
First of all, if you use Nikon or Canon (or Olympus or Fuji) gear, do not be put off by the title. While a portion of the guide deals with the Sony α-1, there is a ton of priceless information, tips, and techniques that can help you become a better flight photographer. No matter what system you are using. If you don not use an α-1, be sure to read down to the bottom to save a few bucks.
Arash Hazeghi and Arthur Morris have created the definitive and most comprehensive ever treatise on photographing birds in flight. With more than sixty years of experience photographing birds, they know what you need to know but have not figured out yet! You will be astounded by the depth of their knowledge and the tips they have to offer. More than six months in the making, the guide contains 229 pages, 24,321 words,97 exceptional and inspirational flight images — each with a legendary, enlightening BIRDS AS ART caption, and 22 screen captures. The guide contains a wealth of useful, practical, and for the most part — never-before-available information.
Purchase
Click here to purchase your copy in the BAA Online Store.
What Everyone Will Learn
We will teach you the basic concepts that you need to master to become a great flight photographer along with the techniques used by the world’s best flight photographers.
You will learn that most any telephoto lens can be perfect for flight photography in a given situation; focal lengths for the images in the book range from 200mm to 1200mm and everywhere in between.
We discuss the merits of various lenses in depth, including and especially comparing the 400mm f/2.8 lenses with the 600mm f/4s.
We guide you in getting your hands on the flight photography lens that will best meet your needs. We offer a variety of handholding and rest position tips and include tips on working with a big lens on a tripod when working with a flight lens that is otherwise too heavy for you.
Both authors offer their thoughts on getting the right exposure when photographing birds in flight. You will learn to get the right exposure on foggy days and even when photographing black birds in white sky conditions.
You will learn the tremendous importance of pre-focusing, of finding the bird in the viewfinder quickly, acquiring focus almost instantly (with tips on doing all three).
You will learn the role of image stabilization in flight photography and the best settings.
Both authors share their thoughts on using the focus range limiter switch. In the same vein, you will learn to use Direct Manual Focus to make your flight photography life easier.
All will learn about the best wing positions and the importance of the background with images of birds in flight. With lots of examples.
You will learn about the best shutter speeds (and the best aperture) to use when photographing flying birds.
You will learn to photograph flight while seated and the many advantages of doing so.
You will learn the best methods of controlling high ISO noise.
All will learn to properly and safely format their flash cards.
You will learn what to do when your AF system is temporarily blinded.
All will learn the huge effect that wind strength and direction has on flight photography and to evaluate the quality and direction of the light on both sunny and cloudy days.
You will learn why it is vitally important to shoot aggressively when photographing birds in flight.
You will learn to carefully observe and evaluate a variety of bird behaviors that may shine light on some excellent opportunities for photographing birds in flight. And about getting into the best position from which to photograph.
You will learn to be a much better flight photographer.
What Sony Folks Will Learn
Exactly how Artie uses Zebras to come up with perfect exposure after perfect exposure.
The fine points and recommended settings for Optical Steady Shot (OSS).
The concept of Auto-Focus (AF) tracking in the α-1.
Everything there is to know about the complex Sony autofocus system.
About all the AF patterns, how to quickly switch them, and about those favored by each author. And why.
The Tracking and Non-tracking AF patterns. When and why Arash uses Non-Tracking Zone. And why Artie uses only two AF patterns.
How to set and use Bird Face-Eye detection for flight photography.
How and why to assign various custom functions to the various programmable buttons on the α-1 body.
The perfect settings for the many, many Menu items that are vitally related to flight photography.
How and why the Sony α-1 uses both contrast and phase detection AF to determine focus (and the benefits thereof).
Which are the best memory cards for the Sony α-1.
To quickly access frequently used menu items.
Non-Sony α-1 Discount
Using the honor system, folks who do not use a Sony α-1 body are invited to click here to save $25.00 on the purchase price of the guide.
Typos
With all blog posts, feel free to e-mail or to leave a comment regarding any typos or errors.

