Stuff
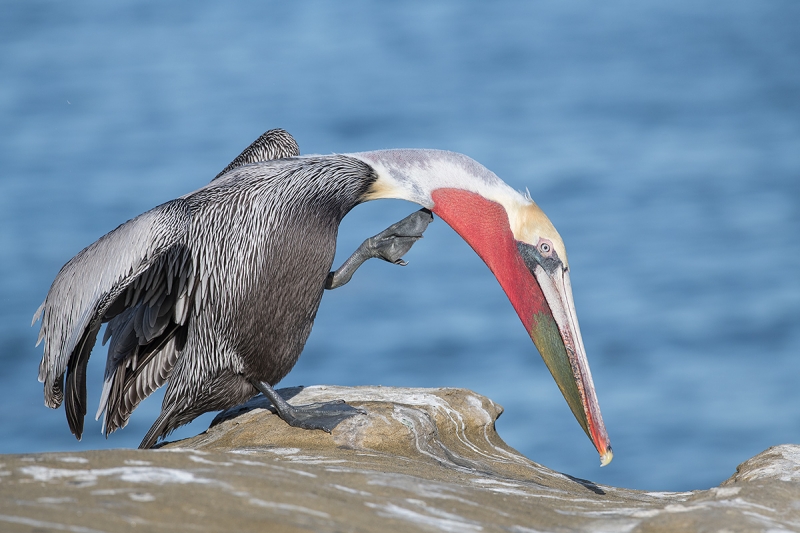
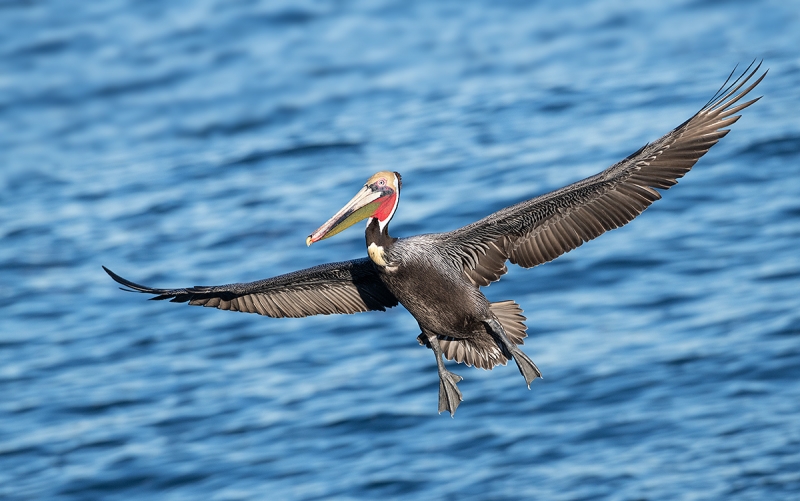
The morning began as the worst pelican day ever but with thin high clouds and patience we wound up doing quite well as some really handsome birds flew in to the lower shelf, right where I had put the group. When it clouded over completely we headed to the Harbor Seals but after a few minutes the sun came out and ruined things. The group outvoted me so we headed to Santee Lakes for the afternoon; I had wanted to do more pelicans and cormorants and Santee was terrible the last time I visited but lo and behold, we had a great afternoon capped off by five tame Wood Ducks, four drakes and a hen.
There are two openings on the spoonbill IPT. Click here for complete info. If anyone would like to join me shooting spoonbills for 1 1/2 days, February 19 (full day) and February 20 (morning session only), please get in touch via e-mail.
Nikon Part Help Needed
If you can find me one of these in stock anywhere: Nikon BL-5 Battery Chamber Cover for MB-D12 Battery Pack, please contact me via e-mail immediately. US suppliers only please. 🙂
The Streak
Today makes one hundred eighty-four days in a row with a new educational blog post! This one took about an hour to prepare. With all of my upcoming free time (or not …), the plan right now is to break the current record streak of 480 … Good health and good internet connections and my continuing insanity willing.
New Listing
BIRDS AS ART Record Low Price!
Canon EF 500mm f/4L IS USM Lens (the “old five”)
IPT veteran John Johnson is offering a Canon EF 500mm f/4L IS USM lens in excellent condition for the BIRDS AS ART record-low price of $3549.00. The lens was recently cleaned and checked by Canon. The sale includes the rear lens cap, the lens trunk, the tough front lens cover, a forest green camo LensCoat and Hoodie (softfrontlens cover), and insured ground shipping via major courier to US addresses only. Your item will not ship until your check clears unless other arrangements are made.
Please contact John via e-mail by phone at 1-216-533-6148 (Eastern time).
The 500mm f/4 lenses have been the world’s most popular telephoto lenses for birds, nature, wildlife, and sports for many decades. I owned and used and loved my “old five” for many years. If you don’t have the cash for the 500 II and can handle the additional 1 1/2 pounds, then this is your best super-telephoto option. Most everyone can produce sharp images with this lens and a 1.4X TC. Folks with good to excellent sharpness techniques can do the same with a 2X TC. With the new 500 II selling for $8,999 you can save a neat $5299.00 by grabbing John’s lens now! artie


Booking.Com
Booking.Com came through for me twice again recently with both the DeSoto Fall IPT and next July’s UK Puffins, Gannets, and Bempton Pre-trip room reservations. And all the rates were great. If you’d like to give Booking.Com a shot, click here and you will earn a $25 reward. Thanks to the many who have already tried and used this great service.
Gear Questions and Advice
Too many folks attending BAA IPTs and dozens of folks whom I see in the field, and on BPN, are–out of ignorance–using the wrong gear especially when it comes to tripods and more especially, tripod heads… Please know that I am always glad to answer your gear questions via e-mail. Those questions might deal with systems, camera bodies, accessories, and/or lens choices and decisions.
|
|
|
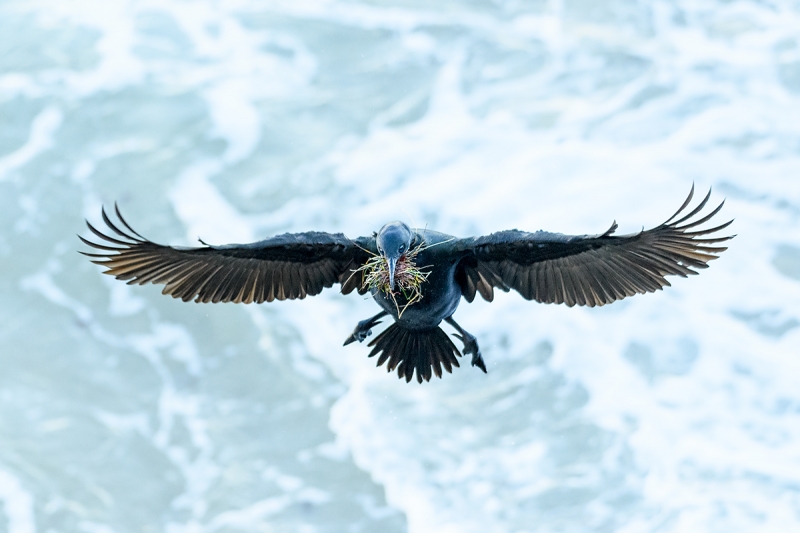
This image was created on January 29 at La Jolla, CA with the hand held Nikon AF-S NIKKOR 200-500mm f/5.6E ED VR lens (at 240mm) and the blazingly fast professional digital camera body, the Nikon D5 DSLR camera body with dual XQD slots). ISO 3200: 1/1600 sec. at f/5.6 in Manual mode. AWB at 9:03am in the shade of the nesting cliff.
Center Group (grp)/Shutter Button AF. Click on the image to enjoy a larger version.
Brandt’ Cormorant, incoming with nesting material
|
A Single Image That Explains Why I Switched from Canon to Nikon; No More Sharp on the Feet!
I tried for this image with Canon gear many 100s of times. I experimented with various AF custom Case settings. No matter what I did, the best I could do was to get images that were sharp on the incoming bird’s feet. With the birds flying right at you at about 40mph, Canon AF could simply not keep up. I never had a single sharp on the eye result. Patrick had one or two sharp with his Canon gear. With the 200-500 and either the 5D or the D-850, most of the images are sharp on the eye barring operator error.
How I Did It
I came up with this technique in short order. I hold the 200-500 lens with the zoom set at 250mm, instructing my brain on which direction to turn the barrel to zoom out to 200mm. I scan the ocean for incoming birds, especially those carrying nesting material. Now here is the totally amazing part. I acquire focus on the distant bird with the lens at 250mm. With Canon this would simply be pipe dreaming. With my Nikon stuff, the system acquires focus quickly even though the bird is tiny in the frame. And it locks focus and holds on like a starving bulldog on a bone. On sunny days the birds are in the sun when I first acquire focus. I stay at 250mm and track them as they get larger and larger in the frame. When they hit the shade I begin to fire and if they are coming right at me I zoom out at some point.
|
|
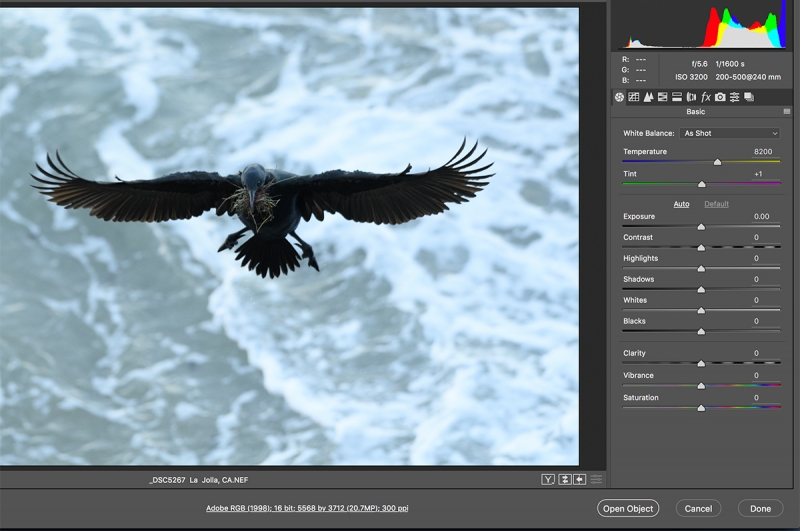
An ACR screen capture w/ all values at my default settings for the D-5
|
The Exposure and the Ramifications
Patrick and I have pretty much pre-determined the exposure for the incoming cormorants in the shade: 1/1600 sec. at f/5.6 for the dark birds will be a bit under for the birds. But, as you can see in the ACR histogram in the screen capture below, these values will not toast the breaking waves. Both the RAW conversion and the image optimization takes care of the too-dark dark tones.
|
|
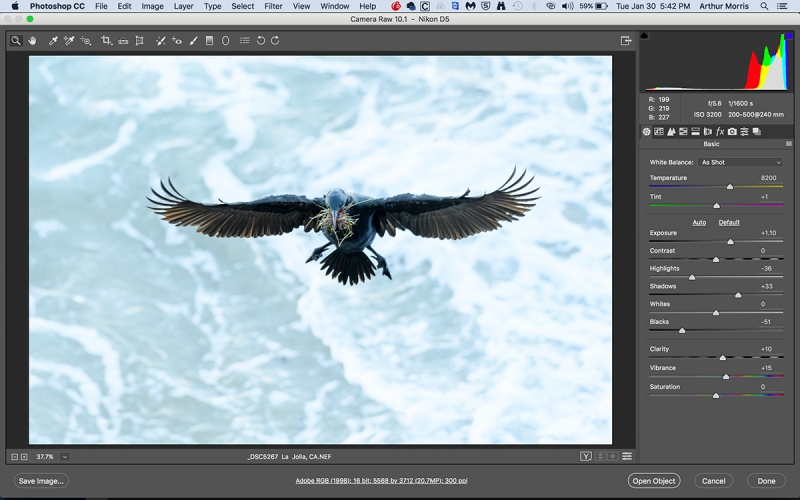
An ACR screen capture w/ all values at my default settings for the D-5
|
The RAW Conversion in ACR
First I increased the Exposure by more than a stop. Then I set the WHITE and BLACK points in ACR and then as I always do backed off a bit on each. Next was -36 on the Highlights to bring some detail into the breaking waves and +33 and the Shadow slider to open up the dark underwings. Plus 10 with Clarity and +15 on Vibrance finished things off.
The Image Optimization
Next was a crop. But the underwings were still too dark without much detail. I selected the bird and applied my 40/40 Nik Color Efex Pro recipe to that Layer. That really brought the image to life. Last was a quick and dirty layer of NeatImage noise reduction with Y set to about 50%.
|
|
|
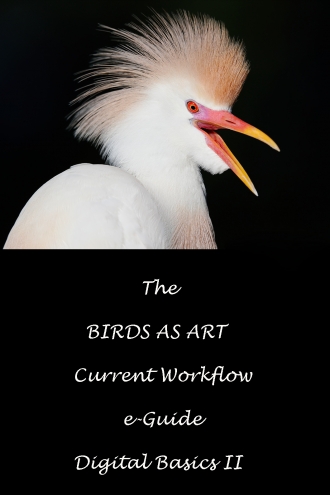
The BIRDS AS ART Current Workflow e-Guide (Digital Basics II) will teach you an efficient Mac or PC/Photo Mechanic/Photoshop workflow that will make it easy for you to make your images better in Photoshop (rather than worse). That true whether you convert your images in DPP 4 or ACR. See the blog post here to learn lots more and to read a free excerpt.
You can order your copy from the BAA Online Store here, by sending a Paypal for $40 here, or by calling Jim or Jennifer weekdays at 863-692-0906 with your credit card in hand.
|
The BIRDS AS ART Current Workflow e-Guide (Digital Basics II)
Your guessed it, everything mentioned above including making ACR conversions (and tons more) is covered in detail in the BIRDS AS ART Current Workflow e-Guide (Digital Basics II), an instructional PDF that is sent via e-mail. Learn more and check out the free excerpt in the blog post here. While the new e-Guide reflects my Macbook Pro/Photo Mechanic/DPP 4/Photoshop workflow, folks using a PC and/or BreezeBrowser will also benefit greatly by studying the material on DB II. Do note that you will find the RGB Curves Adjustment Color Balancing tutorial only in the new e-guide. Note: folks working on a PC and/or those who do not want to miss anything Photoshop may wish to purchase the original Digital Basics along with DB II while saving $15 by clicking here to buy the DB Bundle.
The two most recent and many of the older MP4 Photoshop Tutorial videos releases go hand and hand with the information in DB II):
- The Wingtip Repairs MP4 Video here.
- The MP4 Crow Cleanup Video here.
Folks who learn well by following along rather than by reading can check out the complete collection of MP 4 Photoshop Tutorial Videos by clicking here.
You can learn how and why I and other discerning Canon shooters convert nearly all of their Canon digital RAW files in DPP 4 using Canon Digital Photo Professional in the DPP 4 RAW conversion Guide here. And you can learn advanced Quick Masking and advanced Layer Masking techniques in APTATS I & II. You can save $15 by purchasing the pair. Folks can learn sophisticated sharpening and (NeatImage) Noise Reduction techniques in the The Professional Post Processing Guide by Arash Hazeghi and yours truly.
Help Support the Blog
Please help support my (stupendous) efforts here on the blog by remembering to click on the logo link above each time that you shop Amazon. That would be greatly appreciated. There is no problem using your Prime account; just click on the link and log into your Prime account. With love, artie
If In Doubt …
If in doubt about using the BAA B&H affiliate link correctly, you can always start your search by clicking here. Please note that the tracking is invisible. Web orders only. Please, however, remember to shoot me your receipt via e-mail.


Please Remember to use my Affiliate Links and to Visit the New BAA Online Store 🙂
To show your appreciation for my continuing efforts here, we ask, as always, that you get in the habit of using my B&H affiliate links on the right side of the blog for all of your photo and electronics purchases. Please check the availability of all photographic accessories in the New BIRDS AS ART Online Store, especially the Mongoose M3.6 tripod head, Wimberley lens plates, Delkin flash cards and accessories, and LensCoat stuff.
As always, we sell only what I have used, have tested, and can depend on. We will not sell you junk. We know what you need to make creating great images easy and fun. And please remember that I am always glad to answer your gear questions via e-mail.
I would of course appreciate your using our B&H affiliate links for all of your major gear, video, and electronic purchases. For the photographic stuff mentioned in the paragraph above, and for everything else in the new store, we, meaning BAA, would of course greatly appreciate your business. Here is a huge thank you to the many who have been using our links on a regular basis and those who will be visiting the New BIRDS AS ART Online Store as well.
Facebook
Be sure to like and follow BAA on Facebook by clicking on the logo link upper right. Tanks a stack.
Typos
In all blog posts and Bulletins, feel free to e-mail or to leave a comment regarding any typos or errors. Just be right :).


