December 5th, 2020 What’s Up?
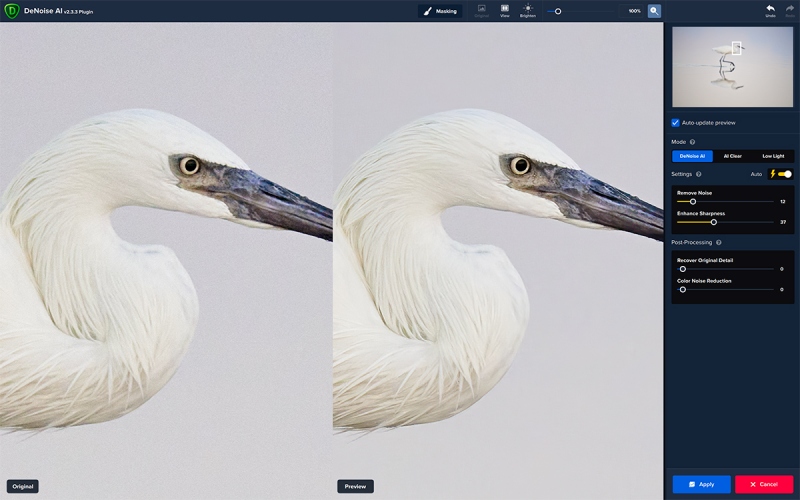
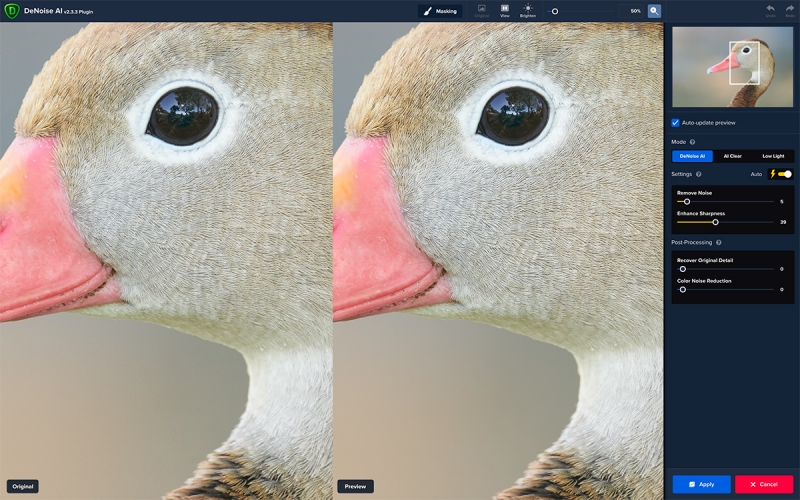
I woke early today — Saturday 5 December 2020 — and checked the weather forecast for Indian Lake Estates: cloudy with NW winds. So I worked in bed till almost 8am helping out BPN-friend Paul Burdett with a White-faced Heron image. You can see this interesting post here.. I got out of bed and pulled back the blinds to see a bright sun, clear skies, and zero wind … I dressed quickly, drove down to the lake with only the Canon gear in the car, and enjoyed lots of good chances on the usual subjects: the Mother’s Day crane family and a slew of Black Vultures.
The more that I work with the Canon gear the more I learn, the more fun I have, and the more impressed I become. Several folks who have left comments on the last two blog posts have been amazingly helpful. If you own or are considering getting an R5 (or an R6), it would behoove you to go back and read the great exchange of ideas in the Comments sections.
Most Importantly
As always, if what you read or learn here inspires or convinces you to purchase an R5 or 6, and/or the RF 100-500 lens, and/or the RF Extender 1.4X, please use my B&H affiliate links or get in touch with Steve Elkins at Bedford to save 3% on your new gear and get it a lot quicker …
Great R5/RF 100-500 News from Bedfords
I spoke to Steve Elkins at Bedford Camera on Thursday and was excited to learn that he will be getting his biggest-yet shipment of Canon R5 bodies and RF 100-500 lenses early next week. You can save 3% on your order by entering the BIRDSASART coupon code at checkout. Your discount will be applied to your pre-tax (if any is due) total. In addition, by using the code you will get free 2nd day air shipping via Fed Ex.
If you buy the Canon rig that I am testing you will save a very handsome $212.91. As most of you know and too many of you forget, using either of my affiliate partners is the best way to thank me for the work that I do here on the blog.
Back in Stock
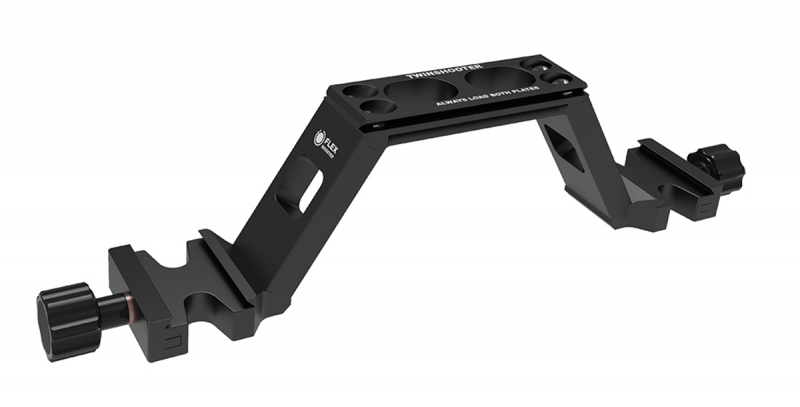
We now have eighteen of the hugely popular Levered-Clamp FlexShooter Pro tripod heads in stock. Click on the preceding link to learn more about this amazing head, the ballhead that thinks it’s a gimbal head and — thanks to the amazing counter-balanced spring mechanism — works great with any rig from the longest, heaviest super-telephoto lens to a camera-body-mounted wide angle. The latter is possible because of the bi-directional clamp; it is no longer necessary to travel with a gimbal head for long lens photography and a ballhead for scenic photography. And after just a moment’s adjustment, the double ball enables you to ensure that every image you take is on the level.
Please Remember
With income from IPTs approaching zero, please, if you enjoy and learn from the blog, remember to use one of my two affiliate programs when purchasing new gear. Doing so just might make it possible for me to avoid having to try to get a job as a Walmart greeter and will not cost you a single penny more. And if you use Bedfords and remember to enter the BIRDSASART code at checkout, you will save 3% on every order and enjoy free second-day air shipping. In these crazy times — I am out at least forty to sixty thousand dollars so far due to COVID 19 (with lots more to come) — remembering to use my B&H link or to shop at Bedfords will help me out a ton and be greatly appreciated. Overseas folks who cannot order from the US because of import fees, duties, and taxes can always help out by clicking here if they see fit.
Topaz Still on Sale!
Right now Topaz is offering price reductions on the Utility Bundle and the Creator Bundle. The former normally sells for $359.96. It is on sale now for $249.95. Click here, scroll all the way down to the sale, and enter the ARTHUR15 code at checkout to save an additional 15%! The Creator Bundle usually sells for $279.97 and is now on sale for $149.99. Using the ARTHUR15 code at checkout brings the price down to $127.49!
The BAA Used Gear Page
The Used Gear page continues to be red hot! It is BAA Used Gear Page is the place to sell your used photographic equipment. We will help you to get your gear sold quickly for 20 to 60% or more than what the big guys are offering … Doubt me? Check out the Recent Sales list for the past ten months at the bottom of the page.
BIRDS AS ART is registered in the U.S. Patent and Trademark Office
Great Topaz News!
Folks who use the BAA Topaz link to purchase Sharpen AI, DeNoise AI, or the Utility Bundle (or any other Topaz plugins) will receive a 15% discount by entering the ARTHUR15 code at checkout. To get the discount you must use my link and you must enter the discount code. Be sure to start with this link.
Topaz Stuff
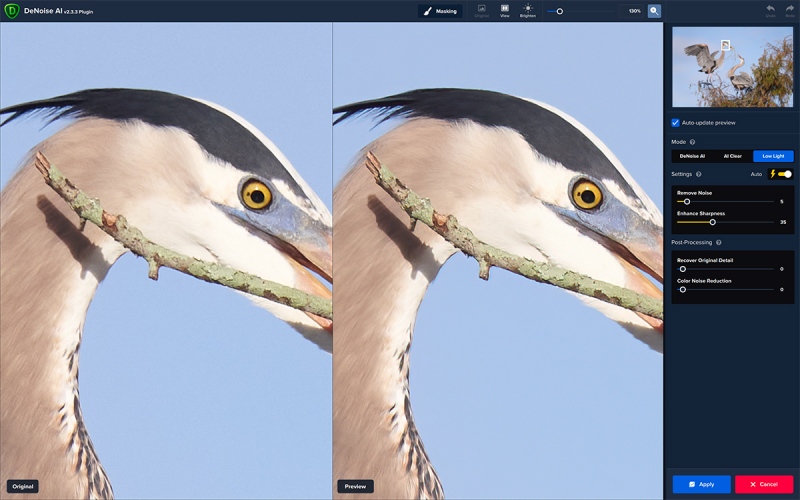
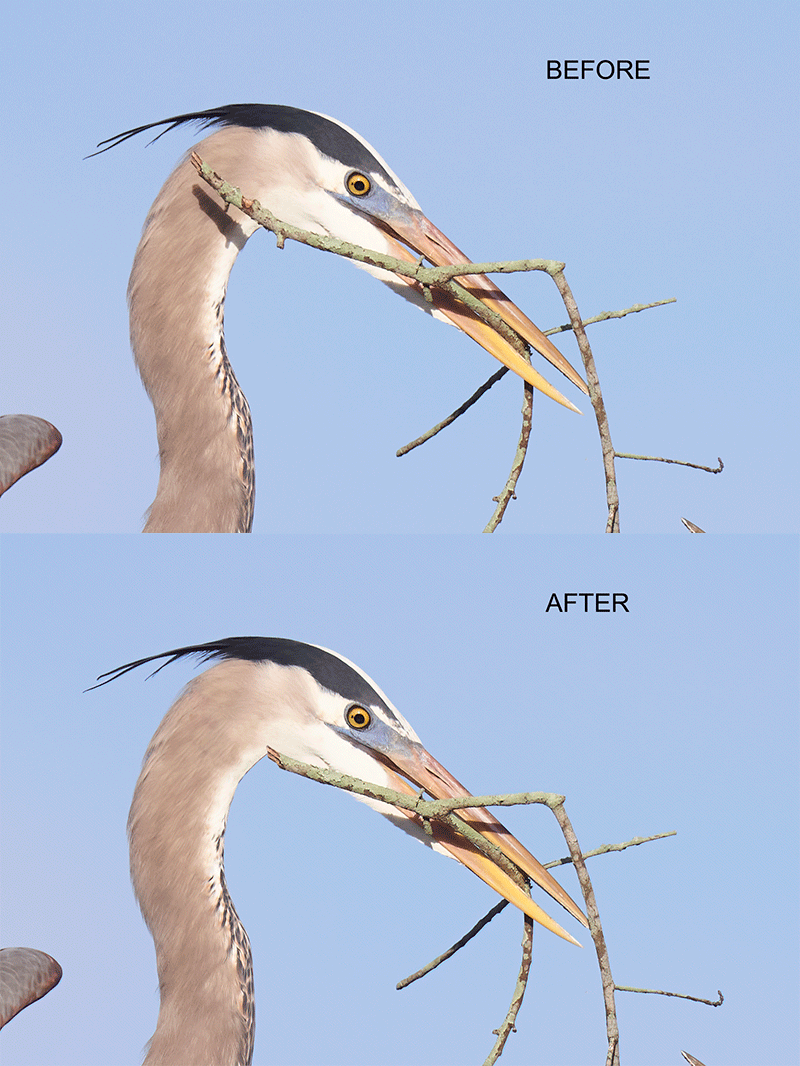
As I said just a while back and have said often many times before, I should have listened sooner. If you, like me, are new to the Topaz party, please use this link to purchase. Right now I can wholeheartedly recommend both Topaz Sharpen AI and Topaz DeNoise AI. Though I have not yet worked with JPEGtoRAW AI or Gigapixel AI, I have installed both of these plug-ins and look forward to trying them on some I-Phone 11 images fairly soon. If you are thinking like me, consider the Utility Bundle that includes all four plug-ins mentioned above at a money-saving price.
Again, those who purchase Sharpen AI or DeNoise AI using my link, can e-mail to request a short Getting Started with Topaz e-Guide. I had a bit of trouble getting the two plug-ins installed and having them appear in the Photoshop Filter Menu. In addition, I will explain how to best learn about the two plug-ins by applying them on a Layer (in Photoshop). I amazed myself yesterday by completing this guide in the car on the way to and from Sebastian. Huge thanks to Anita for doing the driving. Please include a copy of your Topaz order when requesting the guide.
New and Better Bedfords Discount Policy!
You can now save 3% on all of your Bedfords photo gear purchases by entering the BIRDSASART coupon code at checkout. Your discount will be applied to your pre-tax total. In addition, by using the code you will get 2nd day air shipping via Fed Ex.
Grab a Nikon AF-S Teleconverter TC-14E III and save $14.99. Purchase a Canon EOS R5 and your discount will be $116.97. Purchase a Sony FE 600mm f/4 GM OSS lens and save a remarkable $389.94! Your Bedford’s purchase no longer needs to be greater than $1,000.00 for you to receive a discount. The more you spend, the more you save.
Money Saving Reminder
Many have learned that if you need a hot photo item that is out of stock at B&H and would enjoy free overnight shipping, your best bet is to click here, place an order with Bedfords, and enter the coupon code BIRDSASART at checkout. If an item is out of stock, contact Steve Elkins via e-mail or on his cell phone at (479) 381-2592 (Eastern time). Be sure to mention the BIRDSASART coupon code and use it for your online order. Steve has been great at getting folks the hot items that are out of stock at B&H and everywhere else. The wait lists at the big stores can be a year or longer for the hard to get items. Steve will surely get you your gear long before that. For the past year, he has been helping BAA Blog folks get their hands on items like the SONY a9 ii, the SONY 200-600 G OSS lens, the Canon EOS R5, the Canon RF 100-500mm lens, and the Nikon 500mm PF. Steve is personable, helpful, and eager to please.


Gear Questions and Advice
Too many folks attending BAA IPTs and dozens of photographers whom I see in the field and on BPN, are–out of ignorance–using the wrong gear especially when it comes to tripods and more especially, tripod heads… Please know that I am always glad to answer your gear questions via e-mail. Those questions might deal with systems, camera bodies, accessories, and/or lens choices and decisions.
An Exercise in Thinking Part I
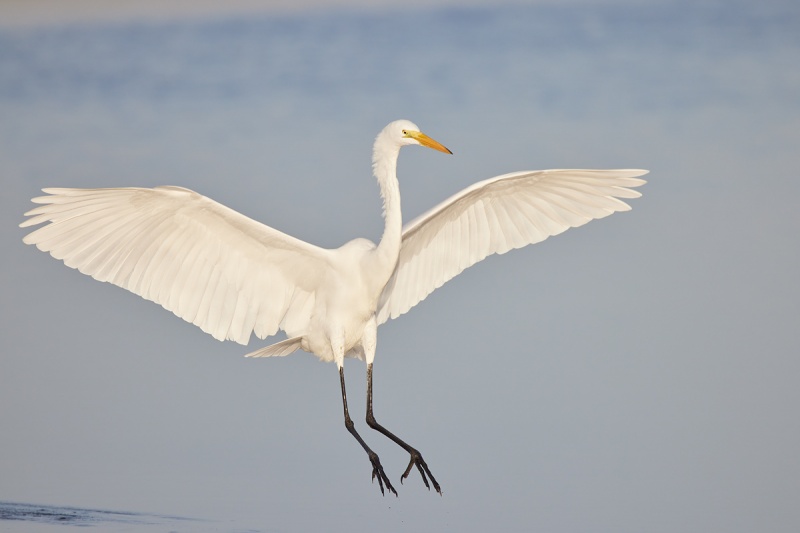
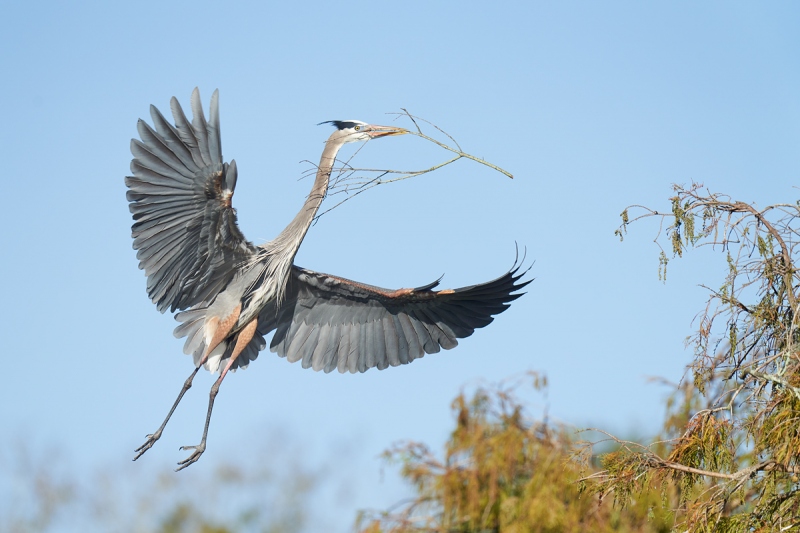
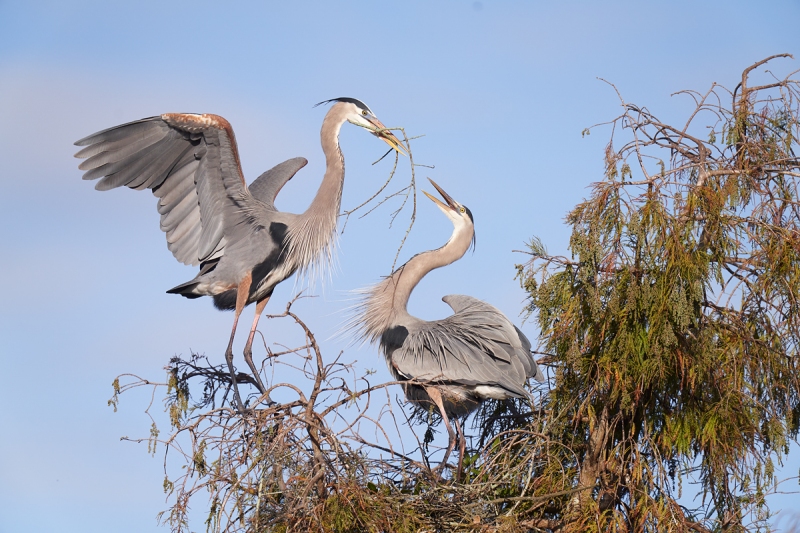
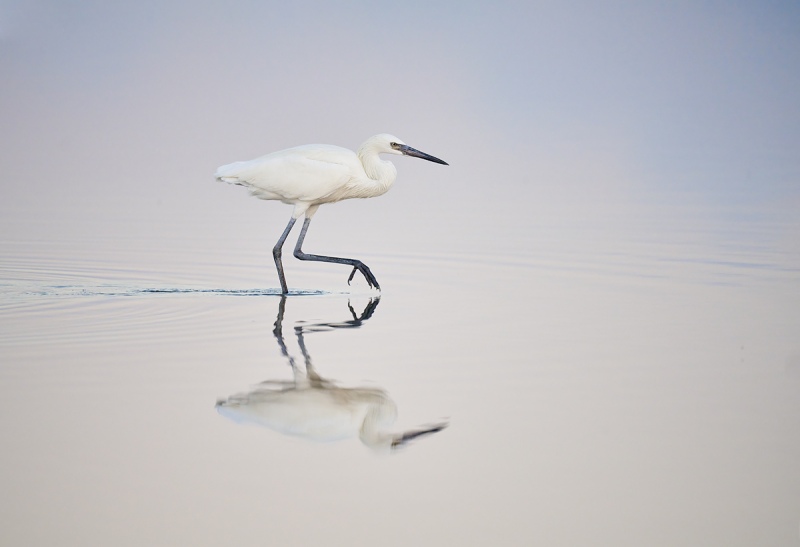
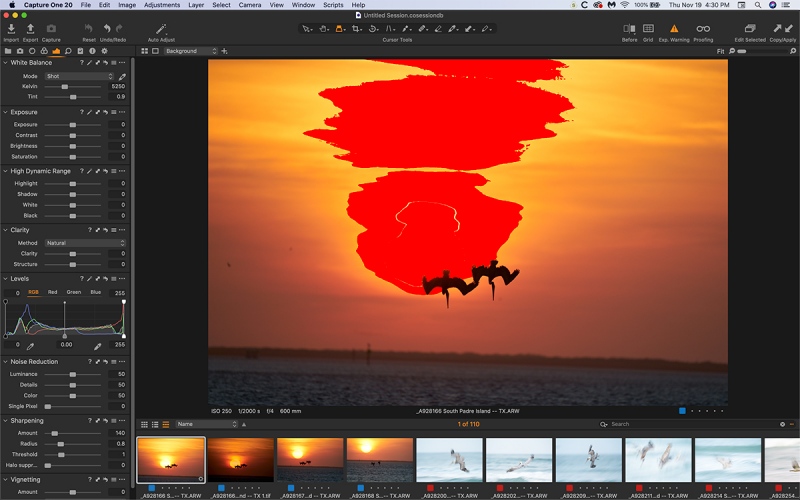
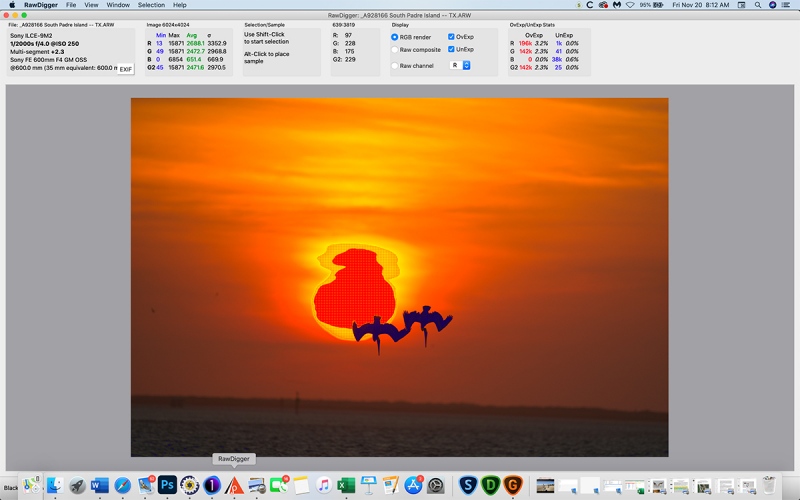
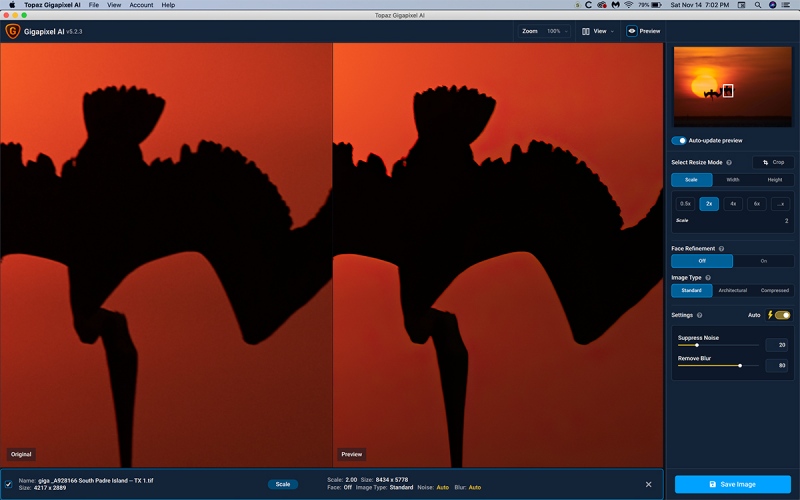
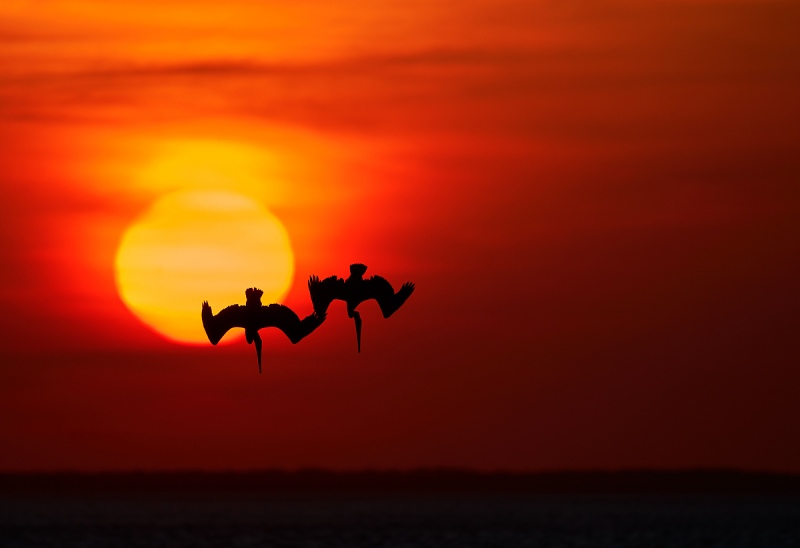
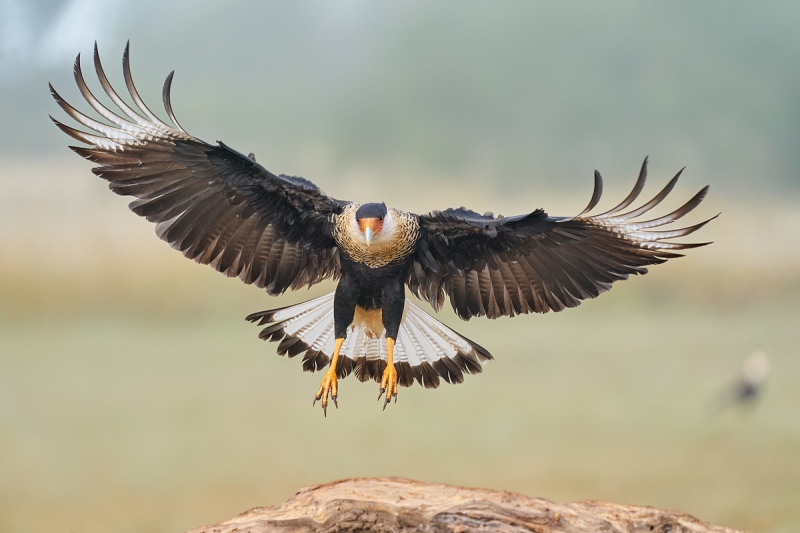
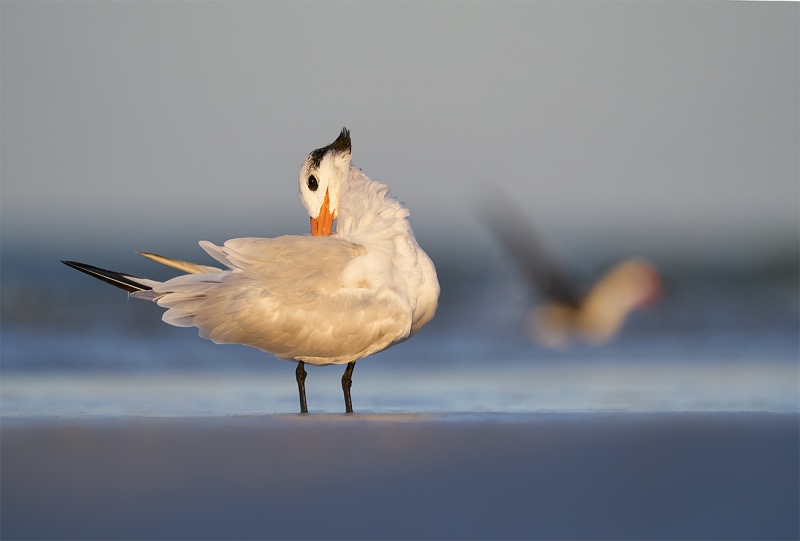
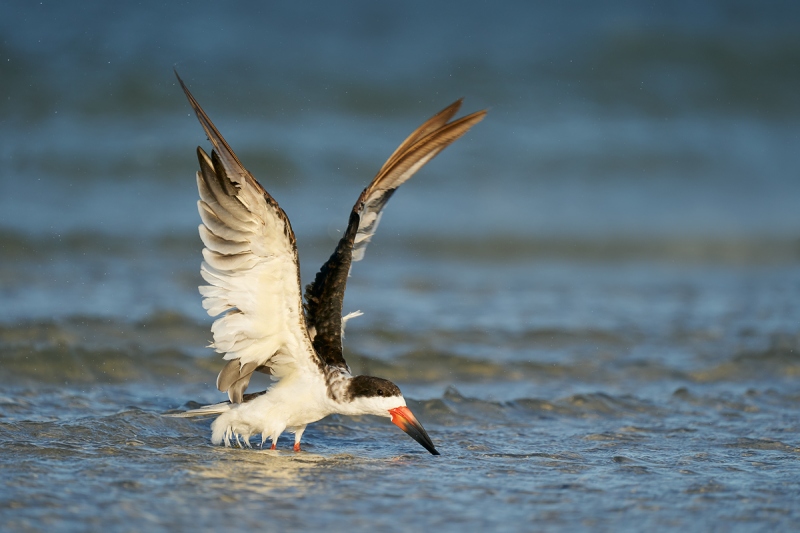
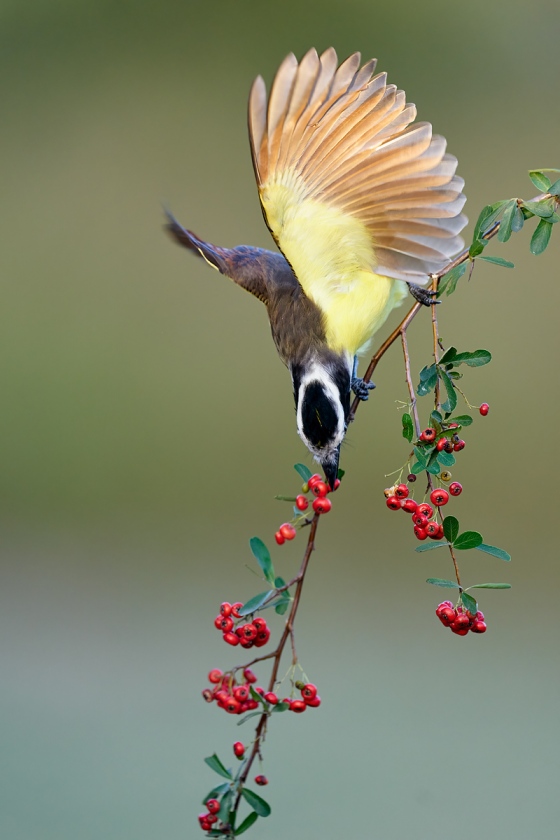
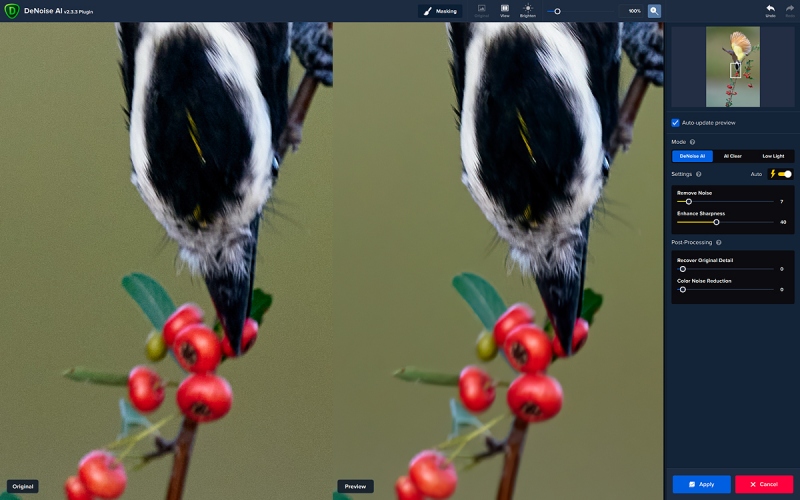
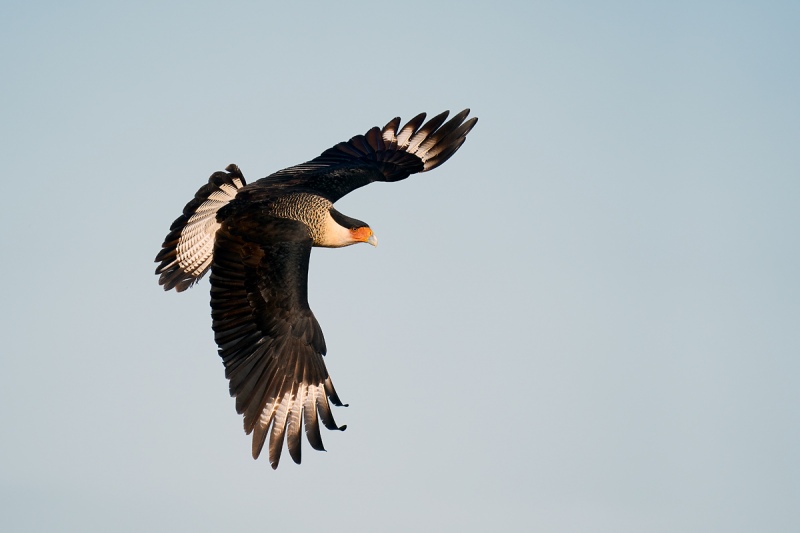
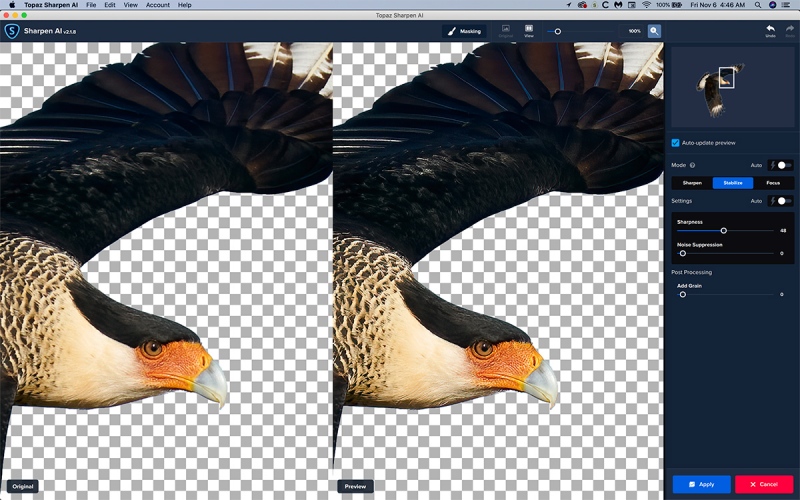
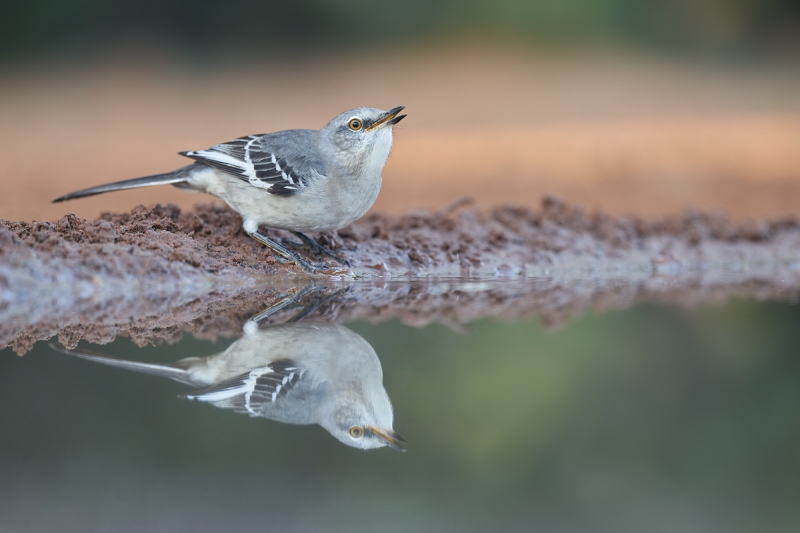
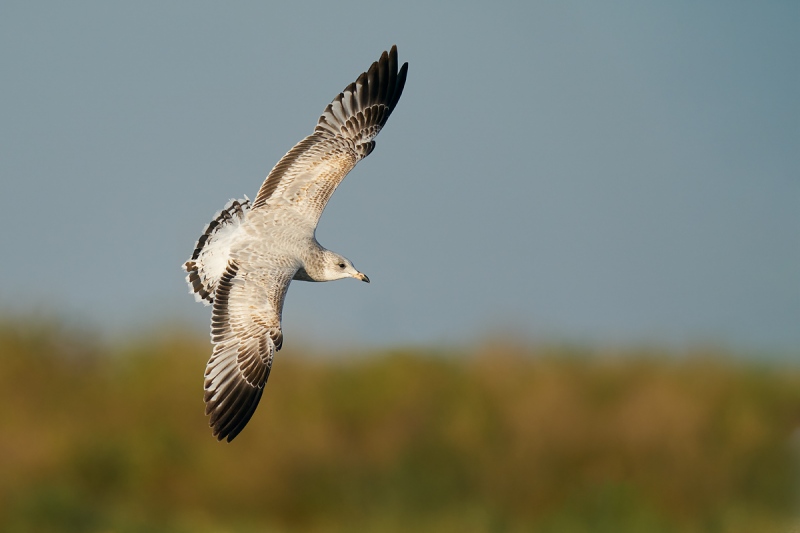
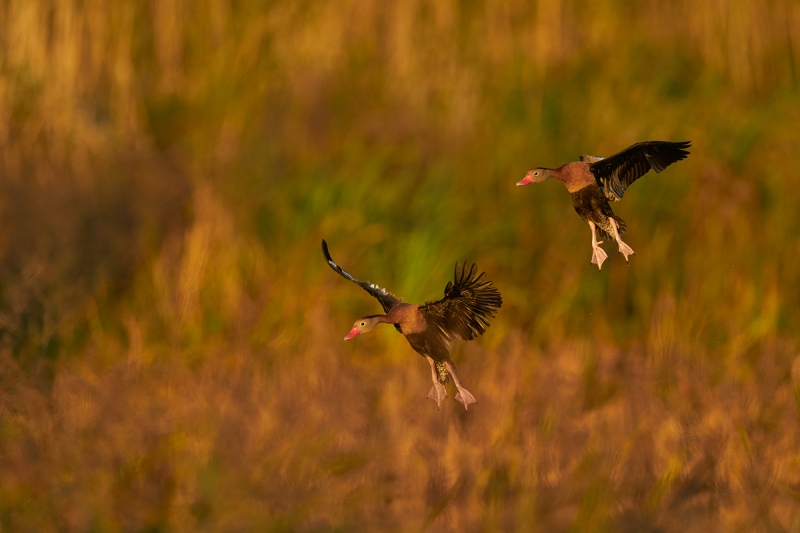
Please feel free to share your thoughts on this image. Can you guess the ISO? What direction was the slight breeze from? Do you see anything funky in the processing? Any and all comments are welcome.
|
|
|
This image was created on 4 December 2020 at Indian Lake Estates, FL. I used the handheld Canon RF 100-500mm f/4.5-7.1L IS USM lens (at 500mm) and the highly touted 45MP Canon EOS R5 Mirrorless Digital camera body. ISO ???. Exposure determined using the in-camera histogram: 1/1000 sec. at f/7.1 (wide open!) in Manual mode. AWB at 7:53am on cloudy very dark morning.
Face detection + Tracking/AI Servo AF was active at the moment of exposure and performed well.
Click the image to see a larger version.
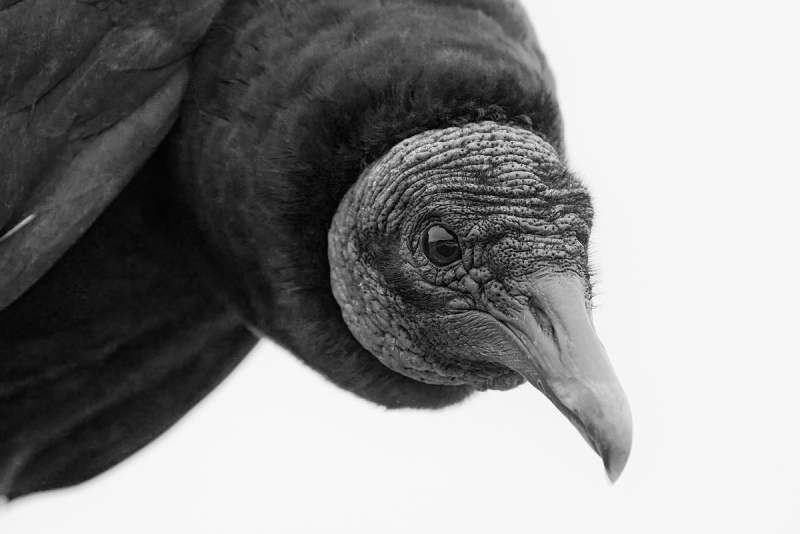
Image #2: Black Vulture in B&W
|
An Exercise in Thinking Part II
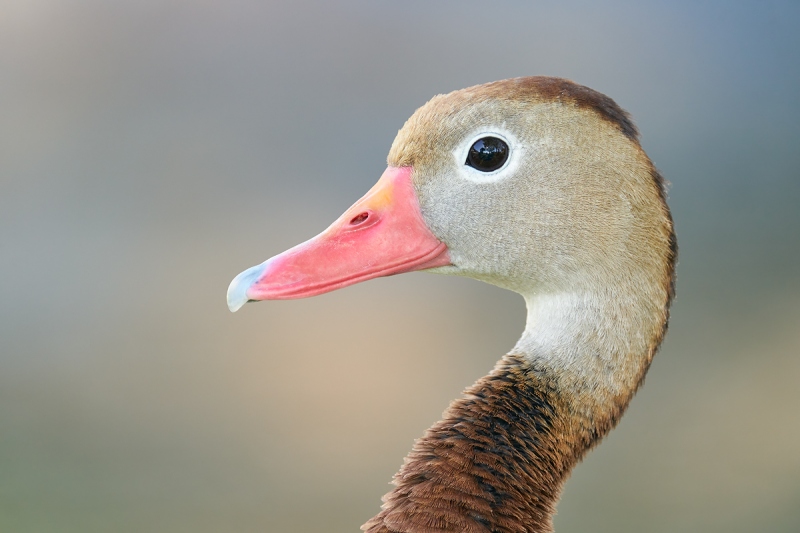
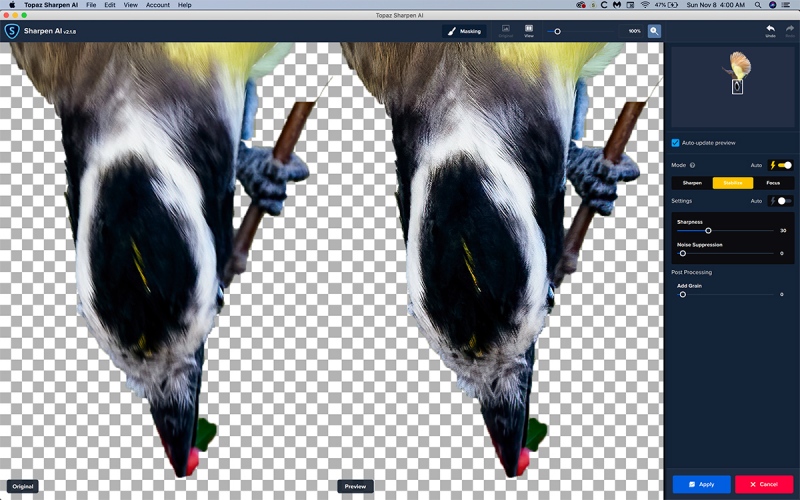
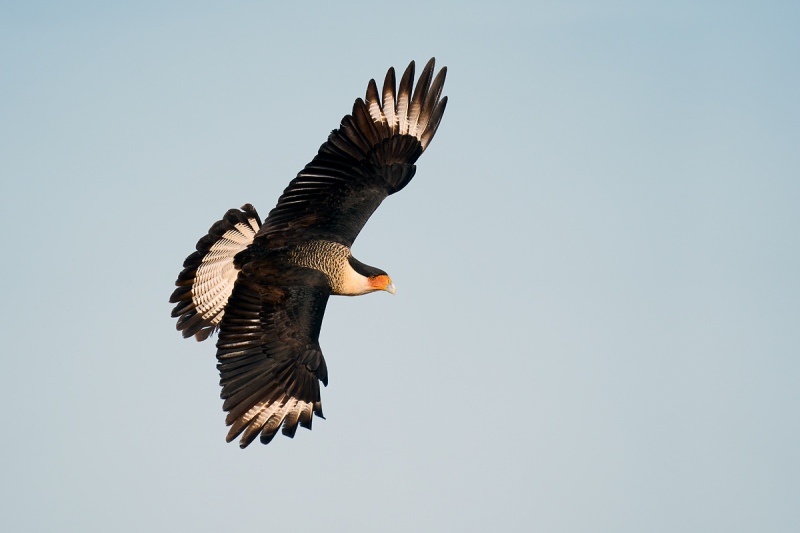
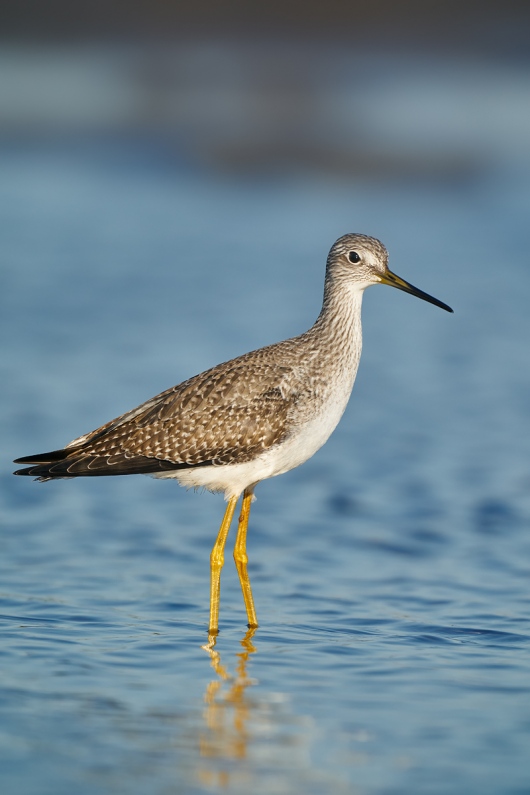
Please feel free to share your thoughts on this image. Can you guess the ISO? How would you rate the sharpness of this image? How did I get so close to this bird? Can you detect any Photoshop trickery in Image #2? Any and all comments are welcome.
Typos
Feel free to e-mail or to leave a comment regarding any typos or errors. Just be right :). with love, artie
December 4th, 2020 What’s Up?
The cold front has come and gone. The pool is down more than eight degrees. I have been working hard for several days preparing this blog post, more than a dozen hours in all.
Understand that I have no horse in this race, no ties to SONY or to Canon. Technically, I am Platinum Canon CPS and a Canon Explorer of Light Emeritus (both for life), but at this point neither of those benefit me in any way. As always, I have striven to be completely honest in my evaluation of the R5/RF 100-100 and in comparing it with the SONY 200-600/a9 ii rig. The first two images presented here today — Friday 3 December 2020 were created during my first session with the Canon gear; the Anhinga image was created two days later during my second outing with the Canon gear. All three of the images were converted in the latest version of Capture One Pro 20 which did a fine job. I had close to zero good flight chances in either session so this blog post will not go there.
Speaking of flight, I have run into many folks who use a system that involves using one or two or even three back buttons to activate different AF Methods when photographing flying birds because Face detection + Tracking/AI Servo AF sometimes has a hard time acquiring focus. They acquire focus with one AF method and then switch mid-stream to another method using one or more of the back buttons to focus on the bird (thankfully not at the same time of course) and then press the shutter button to create a series of images. Can you say cockamamie? Remember that I gave up back button focus many years ago after finally realizing that it is always easier to do one thing than it is to do two (or more!) See the excellent exchange of comments in the previous blog post here. That said I have picked up some great tips from the Comments that I will be trying out asap.
Two topics that will be addressed in the future are a comparison of the stabilization systems and the phenomenon known as rolling shutter (that may or may not affect images made when using Electronic Shutter).
I can keep the Canon loaner gear until the end of December though I am hoping to extend the loan till after I get back from San Diego in late January.
Understand that I have used my R5 only with the RF 100-500 lens and almost always with the RF 1.4X teleconverter.
I can say one thing for sure as a result of my playing with the R5 for two whole sessions: if you are married to Canon with a nice collection of EF lenses, you will surely want to purchase either an R5 or its less expensive little cousin, the 20 MP R6. Several folks I know who own Canon EOS-1DX III bodies have retired them and are using an R5 all the time. Weight alone is a fine reason for doing so. As far as I can tell, R5 performance on EF lenses via one of the three adapters is superb on all counts.
I am sure that I will have lots more to say about both systems in the coming month (at least) and equally sure that I will be using both systems. When I need f/4 I will be counting on my SONY 600 GM. And I am sure that I left out something important in this post. As always, feel free to ask questions or leave a comment or opinion below. Most R5 users will surely learn something by revisiting the last blog post here and reading the comments. (I suggest that several times in this blog post for good reasons.
At present, I would say that my chances of ever switching full time back to Canon are less than 1%. But there is a good chance that I will purchase an R5/RF 100-500/1.4X TC rig just for the fun of it (and so I can do a comprehensive User’s Guide) for all of my Canon friends. A single thought keeps visiting the back of my mind; how much fun would it be to head to San Diego or to the Southern Ocean or to any location with lots of tame birds with only a lightweight, do-almost-everything Canon kit?
Confused by what I was seeing with my R5 images in RawDigger, I e-mailed Patrick and Iliah Borg with questions. On Wednesday night I spent more than an hour in a Zoom meeting with Patrick as he explained to me what he had learned from Iliah. We both learned a ton during this meeting. As a result, the publication date of the final RawDigger e-guide has once again been pushed back.
So why all the effort as far as the R5 is concerned? First off, I was intrigued by what I was hearing and wanted to see for myself. And I always like learning new stuff about bird photography. Second, lots of folks wanted to hear what I had to say about the R5/RF100-500 rig.
Most Importantly
As always, if what you read or learn here inspires or convinces you to purchase an R5 or 6, and/or the RF 100-500 lens, and/or the RF Extender 1.4X, please use my B&H affiliate links or get in touch with Steve Elkins at Bedford to save 3% on your new gear and get it a lot quicker …
Great R5/RF 100-500 News from Bedfords
I spoke to Steve Elkins at Bedford Camera on Thursday and was excited to learn that he will be getting his biggest-yet shipment of Canon R5 bodies and RF 100-500 lenses early next week. You can save 3% on your order by entering the BIRDSASART coupon code at checkout. Your discount will be applied to your pre-tax (if any is due) total. In addition, by using the code you will get free 2nd day air shipping via Fed Ex.
If you buy the Canon rig that I am testing you will save a very handsome $212.91. Using any of my affiliate links is the best way to thank me for the work that I do here on the blog.
Back in Stock
We now have eighteen of the hugely popular Levered-Clamp FlexShooter Pro tripod heads in stock. Click on the preceding link to learn more about this amazing head, the ballhead that thinks it’s a gimbal head and — thanks to the amazing counter-balanced spring mechanism — works great with any rig from the longest, heaviest super-telephoto lens to a camera-body-mounted wide angle. The latter is possible because of the bi-directional clamp; it is no longer necessary to travel with a gimbal head for long lens photography and a ballhead for scenic photography. And after just a moment’s adjustment, the double ball enables you to ensure that every image you take is on the level.
Please Remember
With income from IPTs approaching zero, please, if you enjoy and learn from the blog, remember to use one of my two affiliate programs when purchasing new gear. Doing so just might make it possible for me to avoid having to try to get a job as a Walmart greeter and will not cost you a single penny more. And if you use Bedfords and remember to enter the BIRDSASART code at checkout, you will save 3% on every order and enjoy free second-day air shipping. In these crazy times — I am out at least forty to sixty thousand dollars so far due to COVID 19 (with lots more to come) — remembering to use my B&H link or to shop at Bedfords will help me out a ton and be greatly appreciated. Overseas folks who cannot order from the US because of import fees, duties, and taxes can always help out by clicking here if they see fit.
Topaz Still on Sale!
Right now Topaz is offering price reductions on the Utility Bundle and the Creator Bundle. The former normally sells for $359.96. It is on sale now for $249.95. Click here, scroll all the way down to the sale, and enter the ARTHUR15 code at checkout to save an additional 15%! The Creator Bundle usually sells for #279.97 and is now on sale for $149.99. Using the ARTHUR15 code at checkout brings the price down to $127.49!
The BAA Used Gear Page
The Used Gear page continues to be red hot! It is BAA Used Gear Page is the place to sell your used photographic equipment. We will help you to get your gear sold quickly for 20 to 60% or more than what the big guys are offering … Doubt me? Check out the Recent Sales list for the past ten months at the bottom of the page.
BIRDS AS ART is registered in the U.S. Patent and Trademark Office
Great Topaz News!
Folks who use the BAA Topaz link to purchase Sharpen AI, DeNoise AI, or the Utility Bundle (or any other Topaz plugins) will receive a 15% discount by entering the ARTHUR15 code at checkout. To get the discount you must use my link and you must enter the discount code. Be sure to start with this link.
Topaz Stuff
As I said just a while back and have said often many times before, I should have listened sooner. If you, like me, are new to the Topaz party, please use this link to purchase. Right now I can wholeheartedly recommend both Topaz Sharpen AI and Topaz DeNoise AI. Though I have not yet worked with JPEGtoRAW AI or Gigapixel AI, I have installed both of these plug-ins and look forward to trying them on some I-Phone 11 images fairly soon. If you are thinking like me, consider the Utility Bundle that includes all four plug-ins mentioned above at a money-saving price.
Again, those who purchase Sharpen AI or DeNoise AI using my link, can e-mail to request a short Getting Started with Topaz e-Guide. I had a bit of trouble getting the two plug-ins installed and having them appear in the Photoshop Filter Menu. In addition, I will explain how to best learn about the two plug-ins by applying them on a Layer (in Photoshop). I amazed myself yesterday by completing this guide in the car on the way to and from Sebastian. Huge thanks to Anita for doing the driving. Please include a copy of your Topaz order when requesting the guide.
New and Better Bedfords Discount Policy!
You can now save 3% on all of your Bedfords photo gear purchases by entering the BIRDSASART coupon code at checkout. Your discount will be applied to your pre-tax total. In addition, by using the code you will get 2nd day air shipping via Fed Ex.
Grab a Nikon AF-S Teleconverter TC-14E III and save $14.99. Purchase a Canon EOS R5 and your discount will be $116.97. Purchase a Sony FE 600mm f/4 GM OSS lens and save a remarkable $389.94! Your Bedford’s purchase no longer needs to be greater than $1,000.00 for you to receive a discount. The more you spend, the more you save.
Money Saving Reminder
Many have learned that if you need a hot photo item that is out of stock at B&H and would enjoy free overnight shipping, your best bet is to click here, place an order with Bedfords, and enter the coupon code BIRDSASART at checkout. If an item is out of stock, contact Steve Elkins via e-mail or on his cell phone at (479) 381-2592 (Eastern time). Be sure to mention the BIRDSASART coupon code and use it for your online order. Steve has been great at getting folks the hot items that are out of stock at B&H and everywhere else. The wait lists at the big stores can be a year or longer for the hard to get items. Steve will surely get you your gear long before that. For the past year, he has been helping BAA Blog folks get their hands on items like the SONY a9 ii, the SONY 200-600 G OSS lens, the Canon EOS R5, the Canon RF 100-500mm lens, and the Nikon 500mm PF. Steve is personable, helpful, and eager to please.


Gear Questions and Advice
Too many folks attending BAA IPTs and dozens of photographers whom I see in the field and on BPN, are–out of ignorance–using the wrong gear especially when it comes to tripods and more especially, tripod heads… Please know that I am always glad to answer your gear questions via e-mail. Those questions might deal with systems, camera bodies, accessories, and/or lens choices and decisions.
|
|
|
This image was created on 27 November 2020 at Fort DeSoto Park. I used the handheld Canon RF 100-500mm f/4.5-7.1L IS USM lens with the Canon Extender RF 1.4x (at 700mm) and the highly touted 45MP Canon EOS R5 Mirrorless Digital camera body. ISO 800. Exposure determined by experience and luck and confirmed as near-perfect by RawDigger: 1/2000 sec. at f/10 (wide open!) in Manual mode. AWB at 7:51am on sunny morning.
Face detection + Tracking/AI Servo AF was active at the moment of exposure and performed well.
Click the image to see a larger version.
Image #1: Great Egret immature landing in early morning light
|
Picking up the Canon Gear for the First Time
I loved the feel and fit of the R5 from the moment I picked it up. The feel of the body is more like rubber than plastic or metal. The camera felt great in my hand. The first time I held an a9 it felt like a toy. The a9ii with its slightly deeper chassis was somewhat of an improvement.
Advantage to Canon
Weight Comparison
When I picked up the Canon rig for the first time, I was amazed at how small and light it was. The R5/RF 100-500 rig with the tripod collar removed with one battery and a card tips the scale at 4 pounds, 12.8 oz. The SONY 200-600 with the lens foot removed with the a9 ii weighs 6 pounds, 8.1 ounces. With the R5’s poor battery performance (see more on that below), I’d recommend the purchase and use of the Canon BG-R10 Battery Grip with an extra Canon LP-E6NH Lithium-Ion Battery (7.2V, 2130mAh) to be mandatory (unless you are comfortable changing batteries in the field). Most serious folks will probably wish to add a second set of batteries as well. With the addition of the battery grip and a second battery, the Canon rig weighs in very close to 5 pounds, 11.2 ounces thus reducing the weight advantage to less than one pound.
Advantage: Canon
The R5 Story Begins
The Great Egret above was the second bird that I photographed with the R5. Working with a new system is always a challenge as your fingers struggle to find the right button or dial. Or with the zoom direction. You go clockwise with the SONY 200-600 to zoom to the longest focal length. With the Canon 100-500, you go counter-clockwise to get to 500mm. There is no advantage here to either system. That said, as this young Great Egret flew at me right down sun angle, I attempted to zoom out to keep the bird well in the frame but turned the zoom ring the wrong way.
Face detection + Tracking/AI Servo AF
The first bird I photographed with the Canon rig was a small-in-the-frame Little Blue Heron in very low light. I was stunned at first by the performance of the subject/eye detection technology of the R5. I placed the AF point on the eye and recomposed. The AF point stayed glued to the subject’s eye. Animal eye detection with the SONY bodies works well only some of the time but is very inconsistent.
Great Advantage: Canon
Note: the great advantage above goes to Canon only as far as Animal eye detection (with the SONY bodies) is concerned. Note that SONY’s Tracking Flexible Spot does quite well in similar situations though it does not perform as well as Face detection + Tracking with the R5. Furthermore, I recently tried a new SONY Focus Area that out-performs Tracking Flexible Spot. Patrick and I had incorrectly dismissed this Focus Area in The Sony Camera User’s e-Guide (and Videos). While we had not planned on updating the SONY e-guide, this is such an important discovery that we will be sending an update covering the use of this Focus Area on Friday. If you own the guide and do not receive your e-mail update by Saturday, please contact me via e-mail.
While I was stunned by the performance of the subject/eye detection technology of the R5, which placed the AF point on the face of the incoming Great Egret in each image even with the bird relatively large in the frame, I was — at first — less than thrilled with the sharpness. In retrospect, part of the problem there was that I was struggling using brand hew gear and was attempting to zoom wider while panning (not so) smoothly (the wrong way) with the incoming bird. See below to learn how Topaz Sharpen AI saved yet another image; it showed that the problem was motion blur and not inaccurate focus.
You can see the AF point on the LBH image and on one of the landing Great Egret images in the recent blog post here.
Getting the Right Exposure
While you can Enable Exposure Simulation on the R5 and view the histogram in the viewfinder, the R5 offers Zebras only with video. I did OK with the R5 exposures mainly because of my two decades of experience with digital and my vast knowledge of exposure. With SONY, I can teach you how to consistently make perfect or near-perfect exposures in two minutes with ISO on the rear dial. Or, you can learn this technique easily in The Sony Camera User’s e-Guide (and Videos). With the R5, you need to make and then evaluate a test exposure. This wastes valuable time and can easily cause you to miss the shot, especially with flight and action. As far as exposure is concerned, working with a camera body that does not offer Zebras is like being back in the Stone Age.
Huge Advantage: SONY
Dial & Button Set-up, Menu and Customization Options
Fortunately, I was — with Brian Sump’s help — able to re-configure the Canon buttons and dials so that control of ISO, Shutter Speed, and Aperture was fairly similar to what I have become used to with SONY. As far as the Menu and Customization Options, I feel that the SONY Menus are more intuitive than the R5 Menus and that SONY offers more options for customizing he various buttons and dials.
Advantage: SONY
Lens Speed
The RF 100-500 is f/7.1 at the long end while the SONY 200-600 is f/6.3 at the long end.
Small Advantage: SONY
Focal Length Ranges and Focal Lengths
On the surface, versatility, as determined by the focal length range of each lens alone, is just about even with each of these fine telephoto zooms offering a 400mm spread. (See more below Image #2 on what happens when you add a 1.4x teleconverter …) The focal length advantage (at 600mm) of the SONY 200-600 would seem to go clearly to Sony as compared to the Canon 100-500 at 500mm. There is, however, a fly in the ointment. The SONY lens exhibits considerable focus breathing — the length of the lens does not change when you zoom in or out. This is called internal focusing. When you are working with the SONY 2-6 at less than infinity, the focal length is well less than 600mm. Near the Minimum Focusing Distance (MFD), you are working somewhere in the vicinity of 540mm. As the 100-500 changes its physical length as you zoom, it exhibits less focus breathing than the SONY 200-600. Be sure to see the item on Focus Breathing in the blog post here.
That said, with the size of the bird in the frame being proportional to the square of the focal length, 29 (540 squared) is greater than 25 (5 squared). With distant subjects the math is even more striking with 36 (6 squared) being a lot greater than 25 (5 squared).
Advantage: SONY
Note that for ease of handling and when working on a tripod, I far prefer zoom lenses that focus internally (despite the problems related to focus breathing).
Minimum Focusing Distance
Continuing the close focus tradition of the Canon 100-400 II, the RF 100-500 at 500mm focuses down to 3.94 feet or 1.2 meters offering 0.33X maximum magnification. In comparison, the SONY 200-600 at about 540mm, focuses down to 7.87 feet of 2.4 meters with a maximum magnification of 0.2X. While the MFD of the SONY 200-600 is about half of the MFD of the SONY 600mm f/4 G lens, it pales in comparison to the MFD of the Canon RF 100-500. The latter will prove to be amazingly effective for mega-tight tame bird work, large flowers, butterflies, dragonflies, snakes, frogs, and the like.
Big Advantage: Canon
Note: according to the manufacturer’s specs, the Canon 100-400 II offers 0.31 X magnification at the long end while the SONY 100-400 GM offers 0.35X magnification at 400mm. The magnification is always greatest at the MFD.
|
|
|
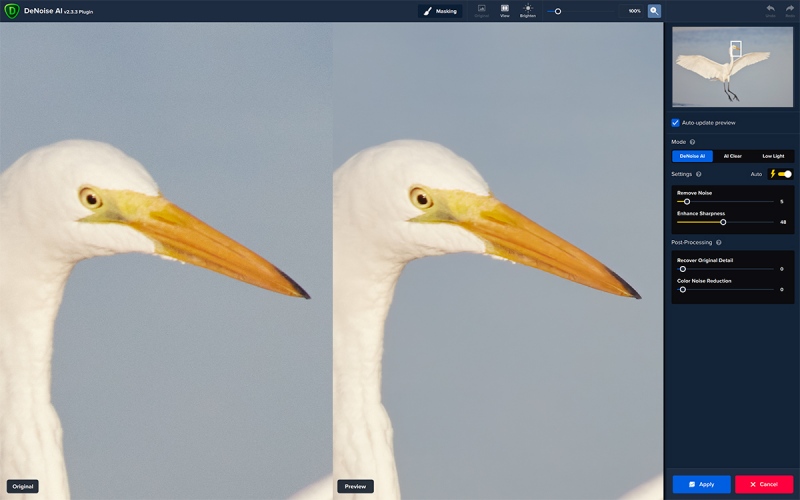
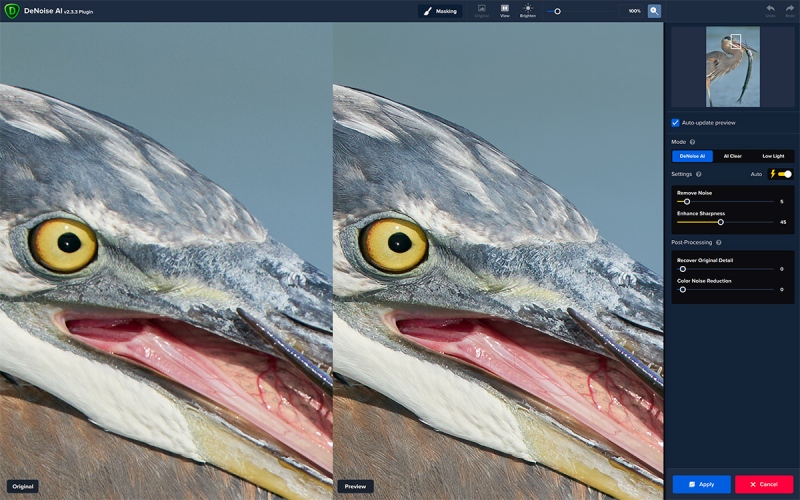
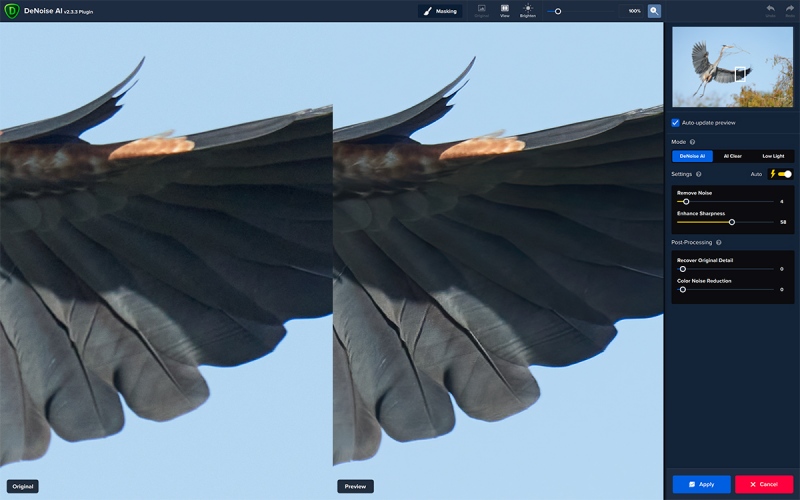
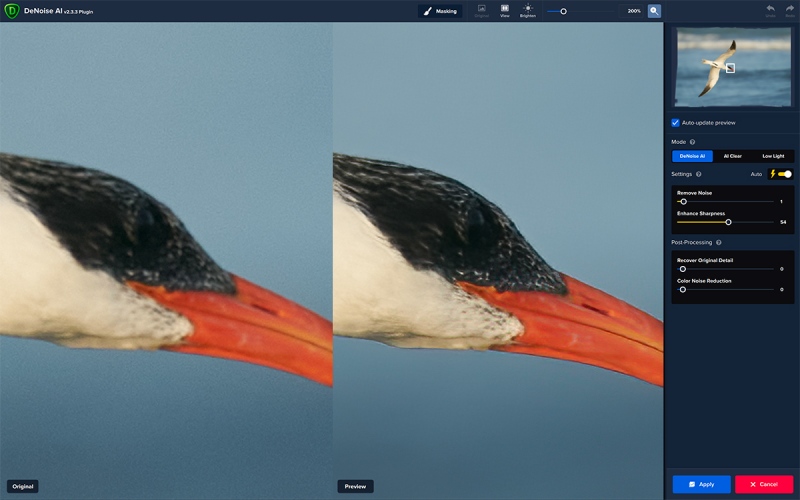
Be sure to click on the image to better see the noise reduction on the water background.
Image #1A: Topaz DeNoise AI on Auto on the Great Egret immature landing in early morning light image at 100%
|
Topaz DeNoise AI on the Great Egret immature landing image
This screen capture dispels the myth that R5 images are pretty much noise free. As expected, you can see what I call “small pixel” noise in the before image on the left. Small pixel noise is a given with high megapixel cameras like the R5 (45 MP). Then note how beautifully Topaz DeNoise AI completely removed the noise from the blue water background. The unsharpness of the face, head, and eye are obvious at 100%. Topaz Sharpen AI to the rescue (as immediately below).
|
|
|
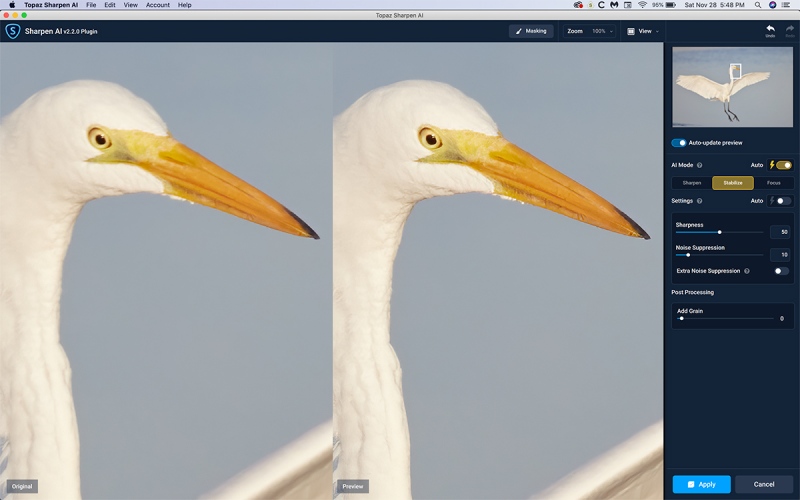
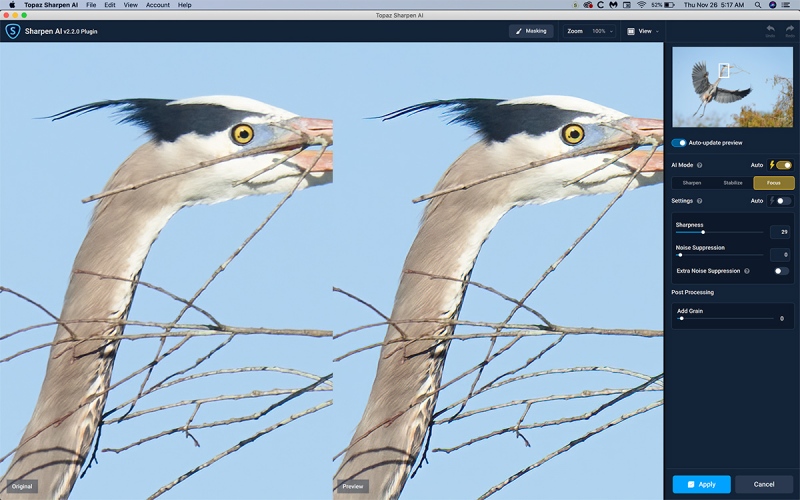
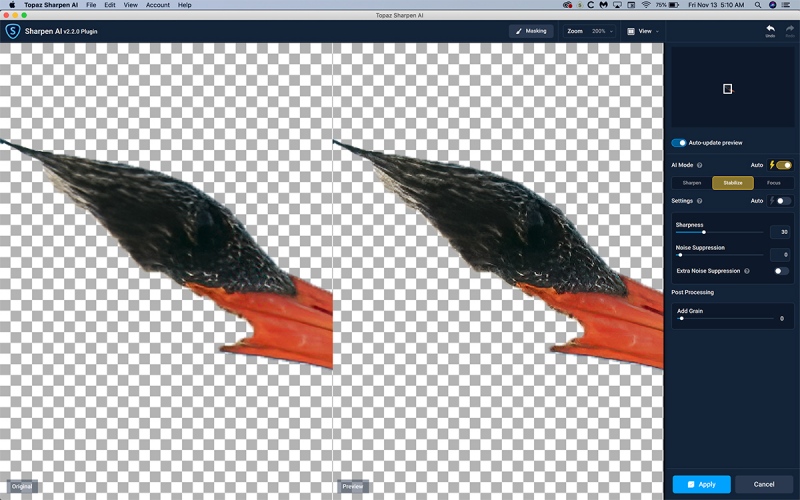
Be sure to click on the image to better see the increased sharpness on the face and the eye.
Image #1B: Topaz Sharpen AI on Auto on the on the Great Egret immature landing image at 100%
|
Topaz Sharpen AI on the Great Egret vertical image
Note that Topaz Sharpen AI on Auto has used the Stabilize mode; this indicates that the unsharpness about the head was primarily caused by motion blur. That said, I believe that the sharpest focus was slightly in front of the eye toward the bill tip. Note that in this case, I left the Noise Suppression slider at (the relatively low value of) 10, as it seemed to further reduce the background noise without doing anything funky to the image. Most of the time I will move that slider to zero when I have already run Topaz DeNoise AI on an image.
Again, Sharpen AI has taken a pretty poor, pretty much unusable image and transformed it into one that would look just fine when published or printed large.
|
|
|
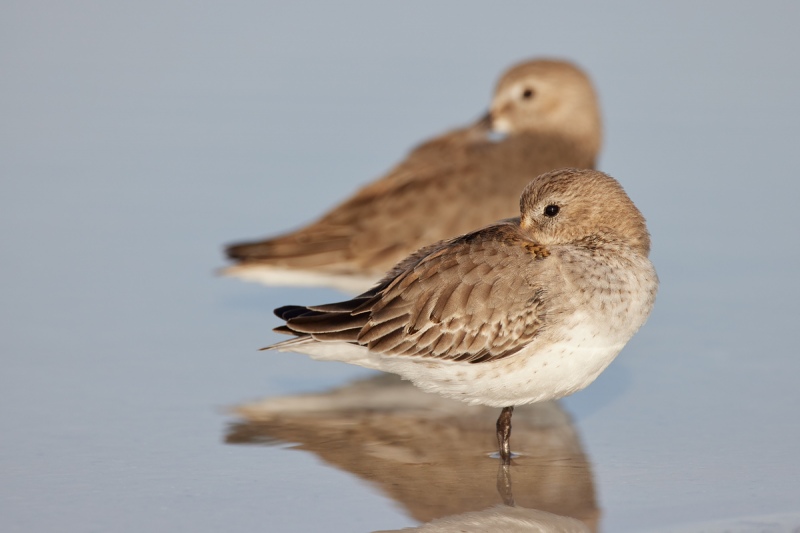
This image was created on 27 November 2020 at Fort DeSoto Park. Again, I used the handheld Canon RF 100-500mm f/4.5-7.1L IS USM lens with the Canon Extender RF 1.4x (at 700mm) and the highly touted 45MP Canon EOS R5 Mirrorless Digital camera body. ISO 800. Exposure determined by experience and luck and confirmed as near-perfect by RawDigger: 1/1000 sec. at f/11 (stopped down 1/3 stop) in Manual mode. AWB at 8:19am on then mostly sunny morning.
Face detection + Tracking/AI Servo AF was active at the moment of exposure and performed perfectly.
Click the image to see a larger version.
Image #2: Two Dunlin resting. The front bird is in first winter plumage.
|
Price Comparison
The Canon rig currently goes for $7,097.00. The SONY 2-6, a9 ii/FE TC 1.4X prices out right now at $7,044.00.
Advantage: let’s call this one a tie
|
|
|
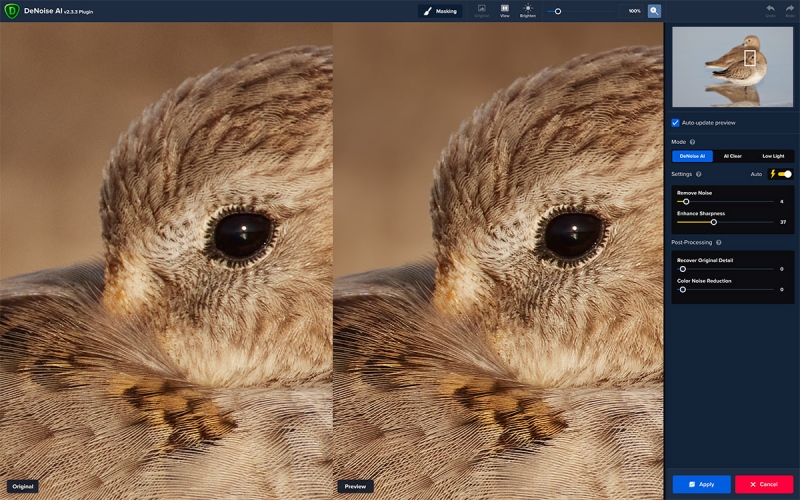
Be sure to click on the image to better see the noise reduction on the out-of-focus Dunlin background.
Image #2A: Topaz DeNoise AI on Auto on the Two Dunlin resting image at 100%
|
Topaz DeNoise AI on the Two Dunlin resting image
Here again, this screen capture dispels the myth that R5 images are pretty much noise free. As expected, you can see what I call “small pixel” noise in the before image on our left. Small pixel noise is a given with high megapixel cameras like the R5 (45 MP). Then note how beautifully Topaz DeNoise AI completely removed the noise from the out-of-focus Dunlin background.
Note that the increased sharpness in the After image on our right, the crispy eye-skin, and the incredible fine feather detail as well. That brings us to File Size, Image Quality, Sharpness, and Fine Feather Detail (FFD) following Image #3.
|
|
|
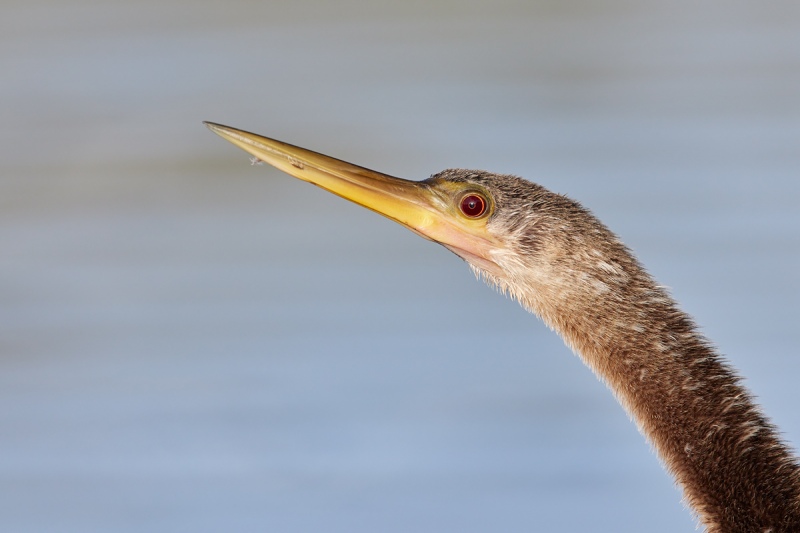
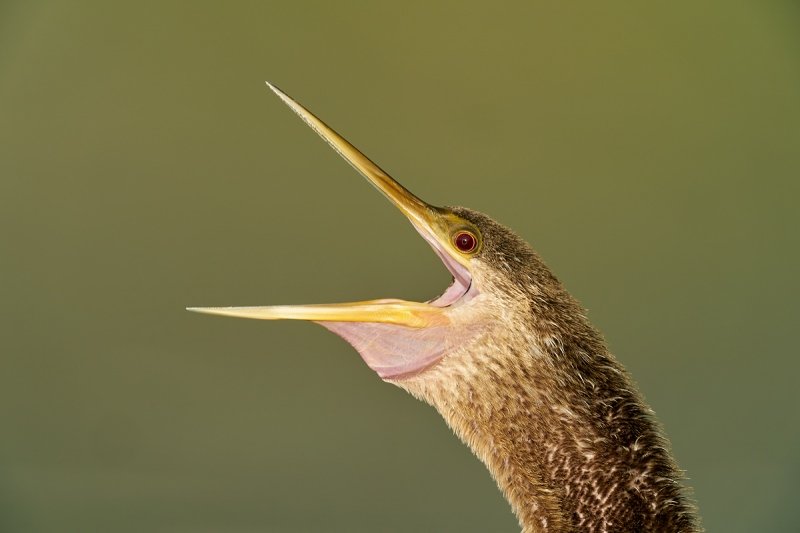
This image was created on 29 November 2020 at Lakeland, FL. I used the handheld Canon RF 100-500mm f/4.5-7.1L IS USM lens with the Canon Extender RF 1.4x (at 599mm) and the highly touted 45MP Canon EOS R5 Mirrorless Digital camera body. ISO 2500. Exposure determined by experience and luck and confirmed as perfect by RawDigger: 1/1000 sec. at f/11 in Manual mode. AWB at 7:52am on sunny morning.
Large Zone AF: Horizontal/AI Servo AF was active at the moment of exposure and performed perfectly.
Click the image to see a larger version.
Image #3: Anhinga head portrait in early morning light
|
The color, image quality, and fine feather details of sharp R5 images are superb. This is a small crop from three sides yet the amount of detail in the eye and the feathers is reminiscent of that in sharp a7r iv images. I was becoming somewhat frustrated with the inability of Face detection + Tracking to acquire and hold focus so I tried Large Zone AF: Horizontal and was very impressed: 28 AF points plastered the bird’s head, face, eye, and the base of the bill.
With the RF 100-500’s f/7.1 aperture at the long end you are at f/10 with the 1.4 TC. I have a habit of stopping down 1/3 stop most of the time. I must admit that working at ISO 2500 in bright sun was a bit strange. This image exhibited plenty of noise that was easily cleaned up in Topaz DeNoise AI. Welcome to the new world of digital photography.
File Size, Image Quality, Sharpness, and Fine Feather Detail (FFD)
File size for the R5 is 45 MP. File size for the a9 ii is 24.2MP
Image quality is very good to excellent with the a9 ii, superb with the R5 (as a result of the R5’s larger files size).
Accurately focused files from the a9 series bodies are sharper as they come out of the camera than R5 files because the R5 has an anti-aliasing filter in front of the sensor and the a9 ii does not. Many so-called internet experts have missed this important distinction. Traditional out-of-camera sharpening methods, or — better yet — the non-destructive sharpening provided by Topaz DeNoise AI, render R5 files as very sharp. A9 ii files often appear insanely sharp right out of camera.
FFD detail with properly sharpened R5 images is- as seen in the DeNoise screen capture above (Image #3A) –incredibly superb. a9 ii FFD is excellent.
Advantage: Canon
Canon’s advantage as far in the file size, image quality, sharpness, and FFD category is tempered by the following:
With a 2x application of Topaz Gigapixel AI, image quality and FFD with a9 ii images rivals that of R5 images.
File size for the SONY a7r iv is 61MP. The AF system is excellent but not as good as with either the a9 ii or the R5. I use my a7r iv often for static bird portraits, flowers, and the occasional spider. Image quality and FFD with sharp a7r iv images is astounding.
The Canon Extender RF 1.4x
So far, I have used the RF 1.4X teleconverter for almost every image that I have created with the R5/RF 100-500 combo. AF performance and image quality and sharpness have been superb with the TC in place. The same can be said of the Sony FE 1.4x Teleconverter with the a9ii/200-600 rig.
Advantage: tie
The Canon Extender RF 1.4x: Design and Size
When I was photographing the Dunlin at DeSoto, there were two birds sleeping about a foot apart; I thought that they might make a nice wide image. But a funny thing happened on the way to zooming out: the RF 100-500mm lens got stuck at the 300mm mark — 420mm with the 1.4X TC in place. At first, I thought that the lens was broken, but then I remembered hearing that with the TC in place the 100-500 would only zoom out to the 300mm setting because the front element of the TC prevented the lens from zooming out fully. So instead of having a 140-700mm zoom with the TC in place, you actually have a 420mm to 700mm zoom. This severely hampers the versatility of this combination. Coming in at 280 to 840mm, the SONY 200-600 with the TC is far more versatile.
The RF 1.4X TC is physically larger and heavier than the Sony FE 1.4X TC. At 7.9 ounces (almost a full half pound), it is 34% heavier than the Sony FE 1.4X TC (5.9 ounces).
Advantage: SONY
Both manufacturers are to be chided for their failure to place red indicators as needed on the camera bodies, lens mounts, and especially on the front and rear teleconverter caps. Having to struggle to mount or get the caps on a TC will often cause you to lose valuable seconds and miss a good shots. I mark all of my caps with an indelible silver Sharpie, but the marks wear off in time and I cannot do that with my Canon stuff as I do not own it … Yet?
Audio Clicks in Electronic Shutter
Both the a9 ii and the R5 are advertised at 20 fps when using the Electronic Shutter. The frame-rate of the R5 might or might not drop when the battery charge is less than 60%. (The literature indicates that the R5 frame-rate does drop when the battery charge is less than 60% and you are working with the Mechanical Shutter, but says nothing about working in Electronic Shutter with reduced battery power.
Two years ago, I had long been accustomed to hearing a sound when the shutter releases. When I first played with a SONY a9 series body, it killed me that the camera was silent when in Electronic Shutter. I could not tell when the camera fired. I learned quickly that there is a Menu Item that allows you to add a click sound when the shutter releases even when in Electronic Shutter. To do that, go to Camera 2 (Purple) and then to screen 11/11. You will see Audio Signals. I set mine to On: e-shutter only so that I hear the click each time that the shutter fires.
The R5 is 100% silent in in Electronic Shutter. A white frame flashes around the edge of the viewfinder with each shutter release. The a9 ii performs similarly except that the box is black and well inside the edge of the viewfinder. I do not like having to rely on this type of aid because doing so keeps you from concentrating on framing and image design …
The first time that I used the R5 I could not tell when the camera fired. As a result, I wound up creating 15 to 25 images each time I pressed the shutter button. I typically shoot in bursts of three. I checked around and learned that you cannot add an audio click when working in Electronic Shutter. For me, this is a big negative.
Advantage: SONY
Frame-Rate
Both the a9 ii and the R5 are advertised at 20 fps when using the Electronic Shutter. The frame-rate of the R5 might or might not drop when the battery charge is less than 60%. (The literature indicates that the R5 frame-rate does drop when the battery charge is less than 60% and you are working with the Mechanical Shutter, but says nothing about working in Electronic Shutter with reduced battery power.
To me, the frame rate of the R5 (in Electronic Shutter) seems much faster to me than the frame rate of the a9 ii. This might be due to one or more of the following:
1- The lack of an audio click.
2- A more sensitive shutter button.
3- My possible tendency to be lighter on the shutter button when I can hear the shutter firing.
I might try slowing down the R5 from High Speed Continuous Plus to High Speed Continuous; I need to do some research to see what that does to the frame rate.
Advantage: Canon
Battery Life
As noted above, battery life with the R5 seems poor. On my first day of working with the Canon gear the battery was dead by 9:00am despite that fact that it was not a great session. Battery life with all of the high-end SONY bodies is excellent. I do not use a battery grip (to save weight) and I have had to change a battery in the field only once. Anita North — who shoots a lot more aggressively than I do — always has an extra SONY battery or two with her in the field, and she changes them fairly often.
Big Advantage: SONY
Flash Cards
There is a ton online about the R5 buffer filling with slow-to-read and slow-to-write SONY and SanDisk flash cards. The R5 has slots for both CFexpress Type B and UHS II flash cards. I never thought that I would get used to the small size of the UHS cards, but I have. I was glad to learn that the R5 accepted the Prime SD UHS II cards that I have used with my SONY bodies from Day 1. Better yet, they are super-fast. Despite creating as many as 25 images with a single press of the shutter button, I never filled the R5 buffer. I use both 64 and 128 GB Delkin Power SD UHS II cards.
You can learn why I have been using Delkin cards for the past two decades in the blog post here.
Advantage: Delkin
SD UHS II
You can purchase the world’s best SD UHS II cards in the BAA Online Store by clicking here. These are perfect for all of my SONY bodies and more recently, for the Canon R5.
Typos
Feel free to e-mail or to leave a comment regarding any typos or errors. Just be right :). with love, artie
December 2nd, 2020 What’s Up?
With help from several blog regulars, especially Ryan Sanderson and Joe Subolefsky, I continue to learn more about my Canon loaner gear, the Canon RF 100-500mm f/4.5-7.1L IS USM lens with the Canon Extender RF 1.4x, and the highly touted 45MP Canon EOS R5 Mirrorless Digital camera body. I had planned on publishing the big comparative blog post on the Canon gear above with the SONY 200-600/a9 ii/1.4X TC, but with the stuff I learned yesterday I need to do additional work on that post. I decided to share some of what I have learned with you here in a blog post that will set the stage for some of the information to be presented in the next blog post.
Below, I evaluate the performance of the R5’s Face detection + Tracking/AI Servo AF by way of ten images created on my first outing with the Canon loaner gear. Be sure to read down to my somewhat surprising conclusions. Questions and comments are welcome as always. And appreciated.
I dropped Anita North off at the Orlando Airport yesterday before noon for her flight back to Toronto. She hopes to make it to San Diego in January. All in all we had a great time and enjoyed some really good photography.
Most Important
As always, if what you read or learn here inspires or convinces you to purchase an R5 or 6, and/or the RF 100-500 lens, please use my B&H affiliate links or get in touch with Steve Elkins at Bedford to save 3% on your new gear and get it a lot quicker …
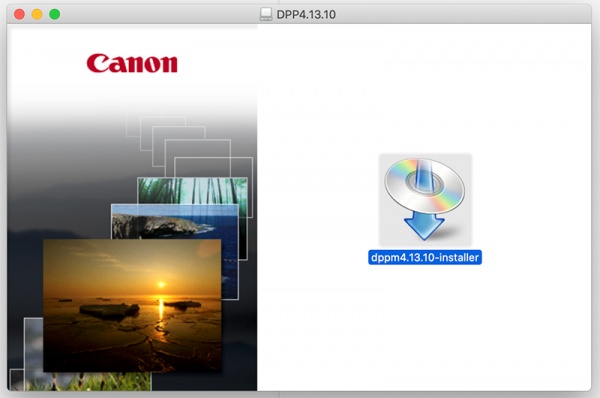
DPP4 (Digital Photo Professional 4.13.10 for macOS) Installation Successful! (for the most part …)
Huge thanks to the many who offered suggestions, especially Joel Eade and Patricia Hyde. None of their suggestions worked, but I tried them all and all were appreciated. And then I received an e-mail from (the very accomplished) British Professor, Sir Alan Fersht,https://en.wikipedia.org/wiki/Alan_Fersht FRS FMedSci/Gonville and Caius College, Cambridge, UK. He wrote:
The Canon Installer doesn’t work on some Macs because it doesn’t let the computer check for malware. The way to do it is to install it on another Mac which is compatible, and then copy the app onto a drive and transfer to your MacBook Pro.
Alternatively, I can upload you my copy to wetransfer.com and you can download it.
Alan
While he was following up on the latter, I tried the former. I downloaded the installer for the Catalina version of DPP4 to my old MacBook Pro (Mojave). That went off without a hitch. Fortunately, there was a copy of an older version of DPP4 on the old laptop. Once I successfully installed DPP4 (Version 4.13.10 for macOS) I tried to AirDrop the entire Canon Utilities folder to my new laptop, but the old laptop could not see my new laptop. So I AirDropped the folder to Anita’s MacBook Pro and she AirDropped it to my new machine.
Problem solved? Not quite yet, but I had hope. Anita successfully guided me through the installation, security settings, and permissions maze, and in short order I had the latest version of DPP 4 up and running on my current MacBook Pro. Hooray. Being able to Show Focus Points had me feeling like the proverbial kid in the candy store. See the R5 Face Detection + Tracking AF feature below to see what I learned. Huge thanks to both Alan and Anita.
I just learned that the installation was not 100% successful as a compatible version of the EOS Lens Registration Tool did not install. None-the-less, I am thrilled to be able to see the RF focus points and AF data.
Please Remember
With income from IPTs approaching zero, please, if you enjoy and learn from the blog, remember to use one of my two affiliate programs when purchasing new gear. Doing so just might make it possible for me to avoid having to try to get a job as a Walmart greeter and will not cost you a single penny more. And if you use Bedfords and remember to enter the BIRDSASART code at checkout, you will save 3% on every order and enjoy free second-day air shipping. In these crazy times — I am out at least forty to sixty thousand dollars so far due to COVID 19 (with lots more to come) — remembering to use my B&H link or to shop at Bedfords will help me out a ton and be greatly appreciated. Overseas folks who cannot order from the US because of import fees, duties, and taxes can always help out by clicking here if they see fit.
Back in Stock
We now have eighteen of the hugely popular Levered-Clamp FlexShooter Pro tripod heads in stock. Click on the preceding link to learn more about this amazing head, the ballhead that thinks its a gimbal head and — thanks to the amazing county-balanced spring mechanism — works great with any rig from the longest, heaviest super-telephoto lens to a camera-body-mounted wide angle. The latter is possible because of the bi-directional clamp; it is no longer necessary to travel with a gimbal head for long lens photography and a ballhead for scenic photography. And after just a moment’s adjustment, the double ball enables you to ensure that every image you take is on the level.
Topaz Still on Sale!
Right now Topaz is offering price reductions on the Utility Bundle and the Creator Bundle. The former normally sells for $359.96. It is on sale now for $249.95. Click here, scroll all the way down to the sale, and enter the ARTHUR15 code at checkout to save an additional 15%! The Creator Bundle usually sells for #279.97 and is now on sale for $149.99. Using the ARTHUR15 code at checkout brings the price down to $127.49!
The BAA Used Gear Page
The Used Gear page continues to be red hot! It is BAA Used Gear Page is the place to sell your used photographic equipment. We will help you to get your gear sold quickly for 20 to 60% or more than what the big guys are offering … Doubt me? Check out the Recent Sales list for the past ten months at the bottom of the page.
BIRDS AS ART is registered in the U.S. Patent and Trademark Office
Great Topaz News!
Folks who use the BAA Topaz link to purchase Sharpen AI, DeNoise AI, or the Utility Bundle (or any other Topaz plugins) will receive a 15% discount by entering the ARTHUR15 code at checkout. To get the discount you must use my link and you must enter the discount code. Be sure to start with this link.
Topaz Stuff
As I said just a while back and have said often many times before, I should have listened sooner. If you, like me, are new to the Topaz party, please use this link to purchase. Right now I can wholeheartedly recommend both Topaz Sharpen AI and Topaz DeNoise AI. Though I have not yet worked with JPEGtoRAW AI or Gigapixel AI, I have installed both of these plug-ins and look forward to trying them on some I-Phone 11 images fairly soon. If you are thinking like me, consider the Utility Bundle that includes all four plug-ins mentioned above at a money-saving price.
Again, those who purchase Sharpen AI or DeNoise AI using my link, can e-mail to request a short Getting Started with Topaz e-Guide. I had a bit of trouble getting the two plug-ins installed and having them appear in the Photoshop Filter Menu. In addition, I will explain how to best learn about the two plug-ins by applying them on a Layer (in Photoshop). I amazed myself yesterday by completing this guide in the car on the way to and from Sebastian. Huge thanks to Anita for doing the driving. Please include a copy of your Topaz order when requesting the guide.
New and Better Bedfords Discount Policy!
You can now save 3% on all of your Bedfords photo gear purchases by entering the BIRDSASART coupon code at checkout. Your discount will be applied to your pre-tax total. In addition, by using the code you will get 2nd day air shipping via Fed Ex.
Grab a Nikon AF-S Teleconverter TC-14E III and save $14.99. Purchase a Canon EOS R5 and your discount will be $116.97. Purchase a Sony FE 600mm f/4 GM OSS lens and save a remarkable $389.94! Your Bedford’s purchase no longer needs to be greater than $1,000.00 for you to receive a discount. The more you spend, the more you save.
|
|
|
124 sold to rave reviews.
The SONY e-Guide by Patrick Sparkman and Arthur Morris
|
The Sony Camera User’s e-Guide (and Videos)
Click here to purchase the guide with one Camera Set-up Video. Be sure to e-mail us by clicking here to specify your camera body so that we can send you a link for the correct video.
Click here to purchase the guide with two Camera Set-up Videos. Be sure to e-mail us by clicking here to specify your two camera bodies so that we can send you links for the correct videos.
Click here to learn more about the SONY e-Guide.
Money Saving Reminder
Many have learned that if you need a hot photo item that is out of stock at B&H and would enjoy free overnight shipping, your best bet is to click here, place an order with Bedfords, and enter the coupon code BIRDSASART at checkout. If an item is out of stock, contact Steve Elkins via e-mail or on his cell phone at (479) 381-2592 (Eastern time). Be sure to mention the BIRDSASART coupon code and use it for your online order. Steve has been great at getting folks the hot items that are out of stock at B&H and everywhere else. The wait lists at the big stores can be a year or longer for the hard to get items. Steve will surely get you your gear long before that. For the past year, he has been helping BAA Blog folks get their hands on items like the SONY a9 ii, the SONY 200-600 G OSS lens, the Canon EOS R5, the Canon RF 100-500mm lens, and the Nikon 500mm PF. Steve is personable, helpful, and eager to please.


Gear Questions and Advice
Too many folks attending BAA IPTs and dozens of photographers whom I see in the field and on BPN, are–out of ignorance–using the wrong gear especially when it comes to tripods and more especially, tripod heads… Please know that I am always glad to answer your gear questions via e-mail. Those questions might deal with systems, camera bodies, accessories, and/or lens choices and decisions.
Puns for the Educated
Thanks to many multiple IPT veteran and dear friend John Dupps for sharing this internet pass-along with me via e-mail. The only one that I’d heard before is the one about the vulture and its carry-on. If you know any others or wish to share your favorite from the list below, please feel free to leave a comment. My favorites are 3, 19, and 25. And 11. And 16. Heck, they are all funny and very clever.
1. The fattest knight at King Arthur’s round table was Sir Cumference. He acquired his size from too much pi.
2. I thought I saw an eye doctor on an Alaskan island, but it turned out to be an optical Aleutian.
3. She was only a whiskey maker, but he loved her still.
4. A rubber band pistol was confiscated from algebra class, because it was a weapon of math disruption.
5. No matter how much you push the envelope, it’ll still be stationery.
6. A dog gave birth to puppies near the road and was cited for littering.
7. A grenade thrown into a kitchen in France would result in Linoleum Blownapart.
8. Two silk worms had a race. They ended up in a tie.
9. A hole has been found in the nudist camp wall. The police are looking into it.
10. Time flies like an arrow. Fruit flies like a banana.
11. Atheism is a non-prophet organization.
12. Two hats were hanging on a hat rack in the hallway. One hat said to the other: ‘You stay here; I’ll go on a head.’
13. I wondered why the baseball kept getting bigger. Then it hit me.
14. A sign on the lawn at a drug rehab center said: ‘Keep off the Grass.’
15. The midget fortune-teller who escaped from prison was a small medium at large.
16. The soldier who survived mustard gas and pepper spray is now a seasoned veteran.
17. A backward poet writes inverse.
18. In a democracy it’s your vote that counts. In feudalism it’s your count that votes.
19. When cannibals ate a missionary, they got a taste of religion.
20. If you jumped off the bridge in Paris, you’d be in Seine .
21. A vulture boards an airplane, carrying two dead raccoons. The stewardess looks at him and says, ‘I’m sorry, sir, only one carrion allowed per passenger.’
22. Two fish swim into a concrete wall. One turns to the other and says ‘Dam!’
23. Two Eskimos sitting in a kayak were chilly, so they lit a fire in the craft. Unsurprisingly it sank, proving once again that you can’t have your kayak and heat it too.
24. Two hydrogen atoms meet. One says, ‘I’ve lost my electron.’ The other says ‘Are you sure?’ The first replies, ‘Yes, I’m positive.
25. Did you hear about the Buddhist who refused Novocain during a root canal? His goal: transcend dental medication.
26. There was the person who sent ten puns to friends, with the hope that at least one of the puns would make them laugh. No pun in ten did.
My Misunderstanding of Focus Breathing
What is Focus Breathing?
From the PhotographyLife.com article here.
Focus breathing is a term that describes the change in focal length that occurs as a result of adjusting the focusing distance of a lens. It is a common issue that occurs on many photographic lenses. As focus is adjusted from close focus to infinity, focus breathing causes noticeable changes in both angle of view and magnification.
These changes are often clearly visible to the photographer during the process of focusing, with different lenses exhibiting varying levels of focal length changes. Focus breathing issues can occur on both prime and zoom lenses.
I e-mailed this to Patrick Sparkman:
The quote below is from the article here.
“(It is) normal is for the composition to change size in the frame (sometimes significantly) as focus is pulled from one extent to the other. This is referred to as focus breathing, a change in focal length resulting from a change in focus distance. Focus breathing negatively impacts photographers intending to use focus stacking techniques, videographers pulling focus, and anyone very-critically framing while adjusting focus. This Canon RF 100-500 shows a moderate amount of focus breathing.”
That totally screws up what I thought was my correct understanding of focus breathing; I though that lenses that change the physical length when zooming did NOT suffer from focus breathing …
Patrick replied:
All lenses have focus breathing to some extent, and zooms generally have more of it. It all depends on what the designers prioritized. Like most things, designing a lens is full of compromises, especially with zoom lenses. Allowing the lens to change length while focusing might help focus breathing, but brings other compromises like mechanical complexity and cost as well the potential for lens elements to move out of alignment while moving. So to say a lens that changes length does not have focus breathing is incorrect. The designer might have made that decision for many reasons and the lens might still have focus breathing.
The Truth About R5 (and R6) Face Detection + Tracking AF (as I see It after my first session)
For as long as anyone has been photographing birds with the Canon R5 and R6, I have been hearing great things about Face Detection + Tracking AF. “It works perfectly every time. It is totally amazing. It never fails; ever!” I thought to myself, All of that would be great if it were true. Finding out how true these statements are is one of the many reasons that I wanted to get to field test an R5, and the main reason I wanted to get DPP4 up and running.
|
|
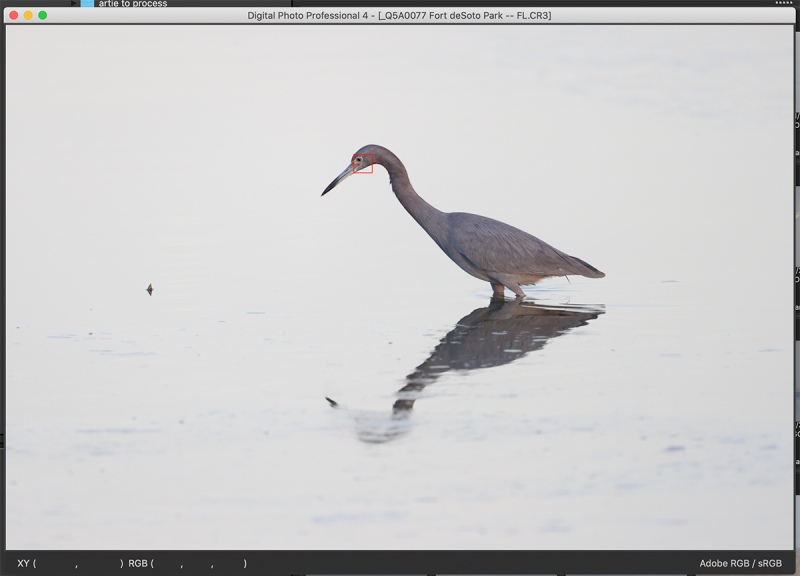
|
Face detection + Tracking/AI Servo AF was active at the moment of exposure.
Click on the image to see a larger version.
Image #1: Little Blue Heron in pre-dawn light
|
The First Bird …
This is the first bird that I photographed with the R5. Light and contrast were low. When the AF point grabbed the relatively-small-in-the-frame subject’s eye and held onto it, I was very impressed. Could everything I had heard have been true?
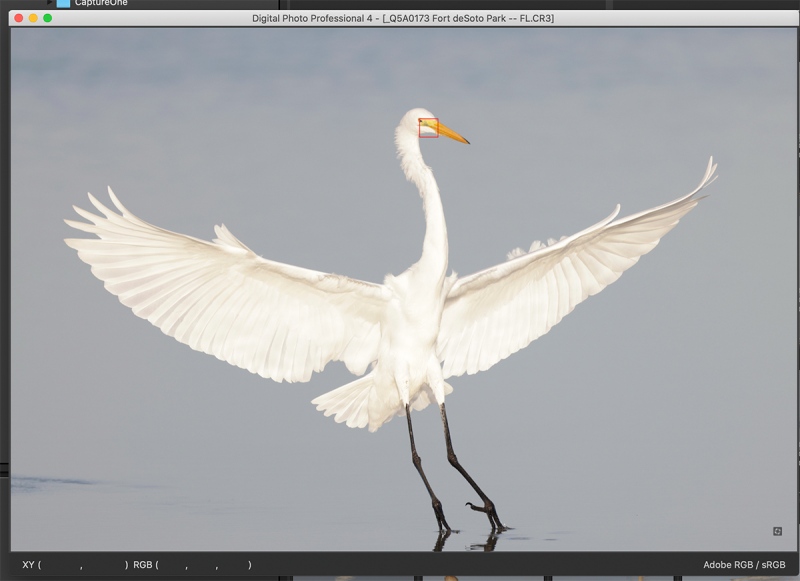
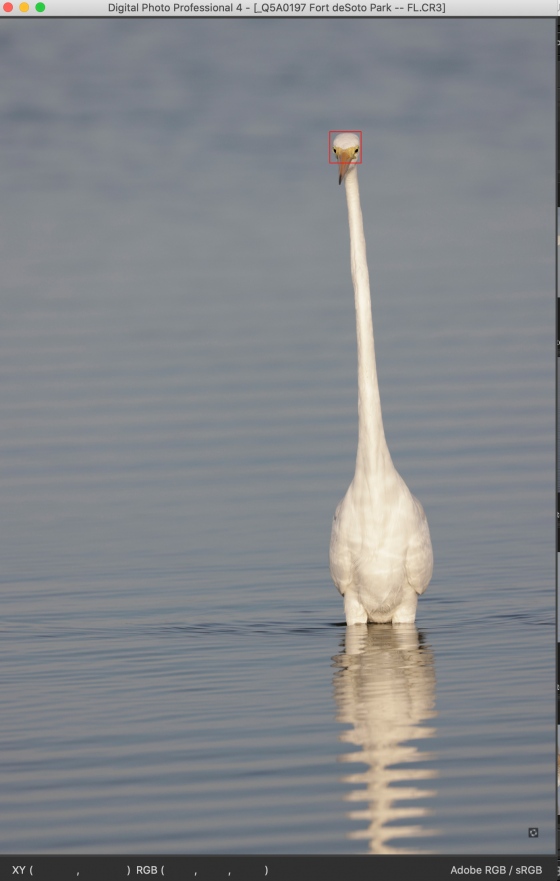
Note that in each of today’s images that the red box signifies the AF point or area that was active at the moment of exposure.
|
|
|
Face detection + Tracking/AI Servo AF was active at the moment of exposure.
Click on the image to see a larger version.
Image #2: Great Egret landing
|
The Second Bird
This is the 2nd bird that I photographed with the Canon loaner gear. Image #2 is one of a four keepers from a seven-frame sequence. All of the images suffered from motion blur. Three of the images had the wings clipped. Learn more about this situation in the next blog post. When I saw that the AF point was on the bird’s face or eye in all six frames, I could barely believe it …
|
|
|
Face detection + Tracking/AI Servo AF was active at the moment of exposure.
Click on the image to see a larger version.
Image #3: Great Egret vertical
|
The Same Bird
The bird in Image #3 is the same bird as the bird in Image #2. If you were not impressed by the first two examples, this one should floor you.
|
|
|
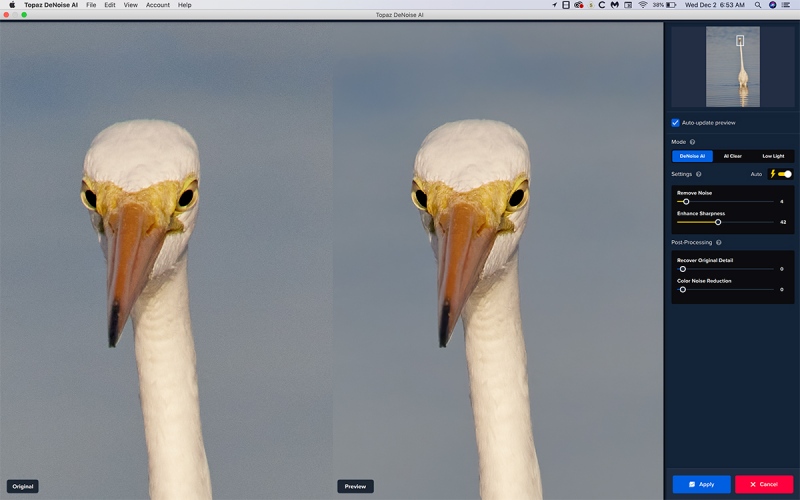
Be sure to click on the image to better see the noise reduction on the water background.
Image #3A: Topaz DeNoise AI on Auto on the Great Egret vertical at 100%
|
Topaz DeNoise AI on the Great Egret vertical image
I included this here in part to dispel the myth that R5 images are close to being noise free. As expected, you can see what I call “small pixel” noise in the before image on the left. Small pixel noise is a given with high megapixel cameras like the R5 (45 MP). Then note how beautifully Topaz DeNoise AI completely removed the noise from the blue water background and sharpened the image non-destructively as well.
Note also in the 100% view that Face detection + Tracking/AI Servo AF performed absolutely perfectly in a somewhat difficult situation. This image shows face detection at its best.
|
|
|
Face detection + Tracking/AI Servo AF was active at the moment of exposure.
Click on the image to see a larger version.
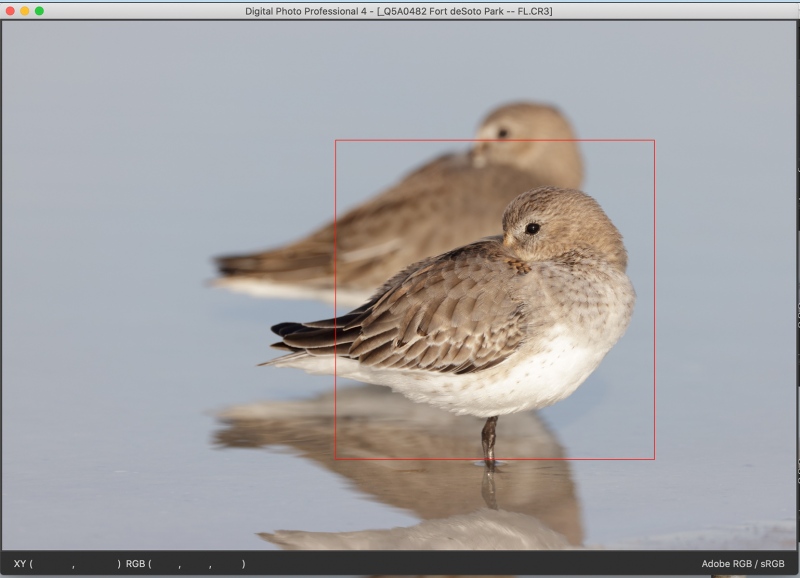
Image #4: Two Dunlin resting
|
The First Chink in the Armor?
Here is was using Face detection + Tracking/AI Servo AF but the system inexplicably could not pick up the birds eye. The AF system reverted to a large box. The image is very sharp on the eye. Do understand that for this AF mode to perform perfectly, the operator needs to keep the AF point right on the eye while recomposing. At times with the R5, the AF point slips off the eye and reverts to one of several larger squares or rectangles.
|
|
|
Face detection + Tracking/AI Servo AF was active at the moment of exposure.
Click on the image to see a larger version.
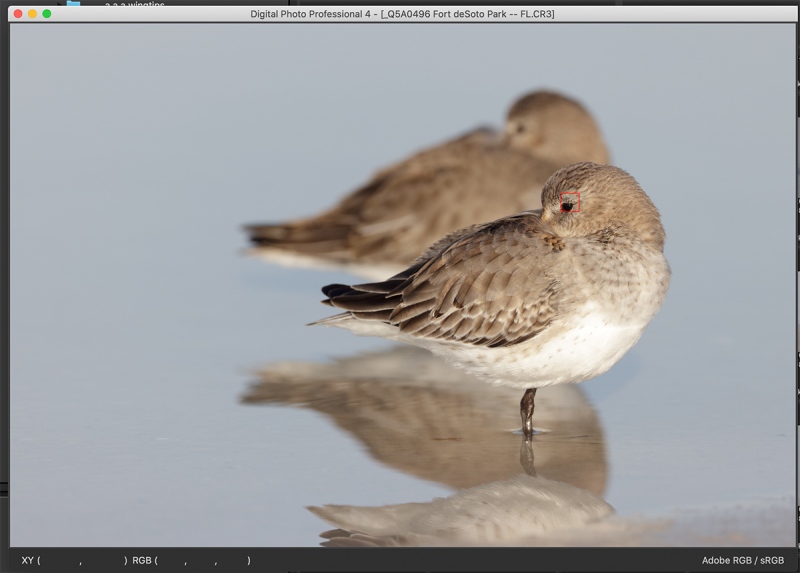
Image #5: Two Dunlin resting
|
Nineteen Seconds Later …
Nineteen seconds later, with the same two resting birds, the same photographer, and the same AF settings, Face detection + Tracking/AI Servo AF performed perfectly. Note: the bird’s face in Image #4 was more square to the sensor than the bird’s face in Image #5. This should have made it easier for the AF system to “see” the eye. But it did not.
|
|
|
1-point/AI Servo AF was active at the moment of exposure.
Click on the image to see a larger version.
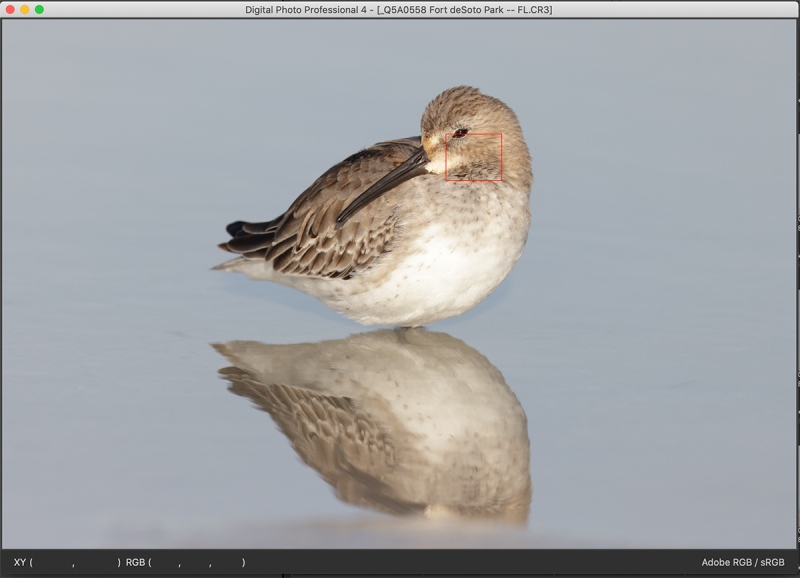
Image #6: Dunlin resting
|
Frustrated with Face detection + Tracking/AI Servo AF
At one point, while I was working with the tame dunlin, I became somewhat frustrated with the inability of Face detection + Tracking/AI Servo AF to see and track the bird’s eye so I switched to 1-point AF. I was easily able to move the AF point but in this case should have moved it farther to the right …
|
|
|
Face detection + Tracking/AI Servo AF was active at the moment of exposure.
Click on the image to see a larger version.
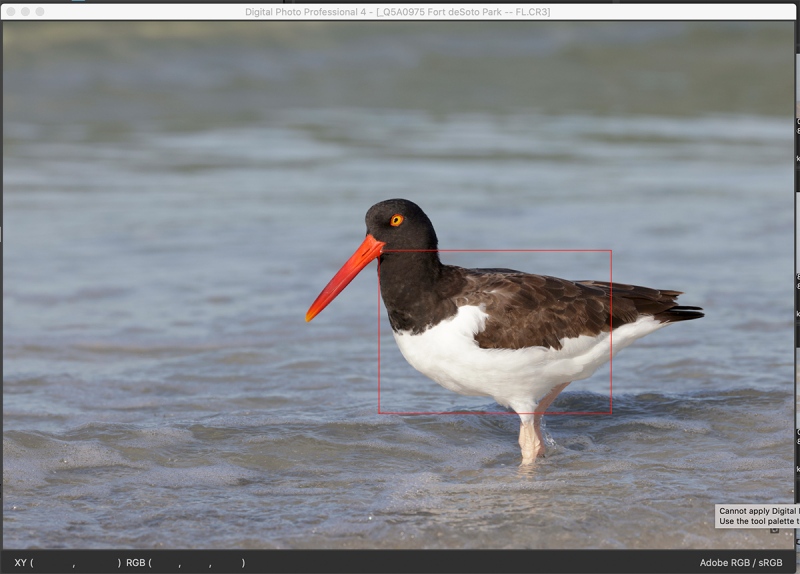
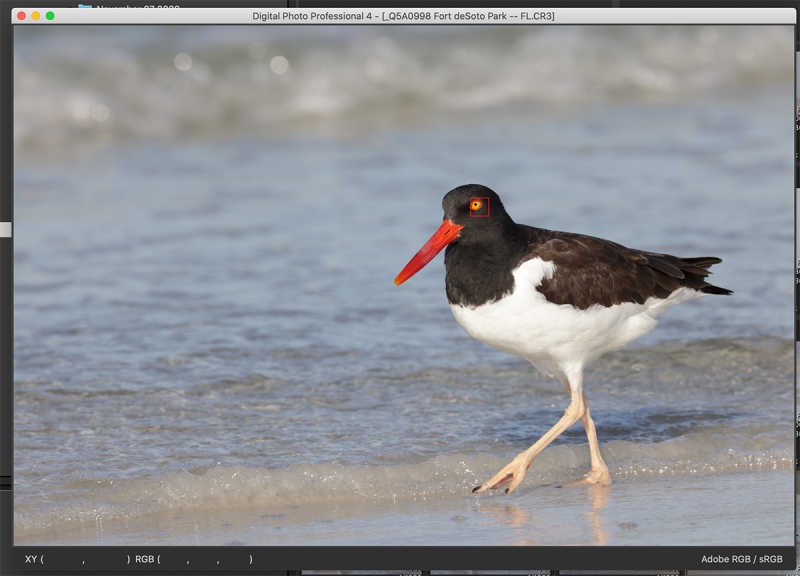
Image #7: American Oystercatcher standing in surf
|
Another Failure
Here, with the eye plainly visible, the system again failed to track the eye properly. As expected, the focus on the eye is a bit off because the fold of the wing is closer to the sensor than the bird’s eye. It is highly likely that Topaz Sharpen AI could save this one.
|
|
|
Face detection + Tracking/AI Servo AF was active at the moment of exposure.
Click on the image to see a larger version.
Image #8: American Oystercatcher striding in surf
|
Back to Perfection
Six seconds later, with the bird now in motion, the AF system properly tracked the eye and rendered it perfectly sharp with the nice crispy eye skin that I love.
|
|
|
Face detection + Tracking/AI Servo AF was active at the moment of exposure.
Click on the image to see a larger version.
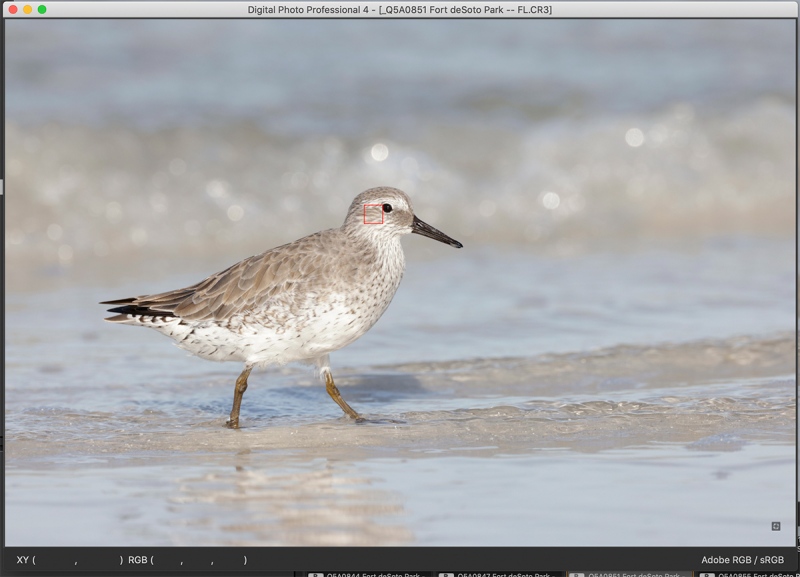
Image #9: Red Knot in surf
|
More of the Same
With this image, the system failed to recognize and track the subject’s eye, despite the fact that it was in plain sight. IAC, the bird’s eye is perfectly sharp because the knot’s face was on the same plane as its eye. In the next frame, the AF system tracked perfectly with a tiny box right on the subject’s eye just as in Images #5 and 7.
|
|
|
Face detection + Tracking/AI Servo AF was active at the moment of exposure.
Click on the image to see a larger version.
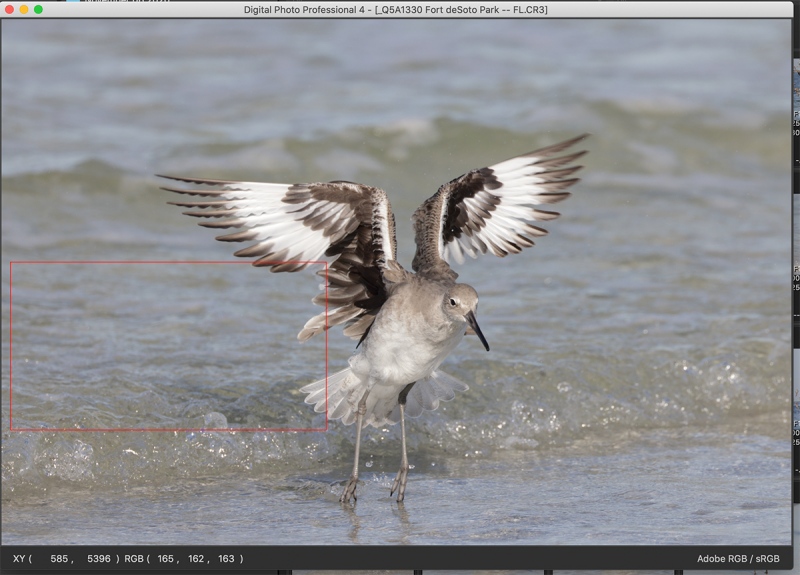
Image #10: Willet landing
|
Total Failure
Here, Face detection + Tracking/AI Servo AF failed completely; sharpest focus is on the leading edge of the inner portion of the bird’s right wing. I am pretty sure that the a9 ii in Center Zone AF-C would have nailed this one.
R5 (and R6) Face Detection + Tracking AF; the Somewhat Surprising (?) Conclusions
First off, realize that the images in this blog post were all created in a single (not very good) session at Fort DeSoto. That session was my first with the R5/RF 100-500/RF 1.4X Extender. I would fully expect that with more time in the field with this rig (an with possibly a few tweaks in the settings) that I will do better with Face detection + Tracking/AI Servo AF. In addition, I had very few opportunities to photograph birds in flight.
That said, I can state with confidence, that Face Detection + Tracking AF with the R5 is the best eye-tracking system I have ever run across. When it worked — which it did much but not all of the time — it performed superbly. Is it as perfect as enthusiastic folks have been saying? Absolutely not. But after decades of not having a camera that could consistently focus on birds in flight, I can understand their excitement.
SONY Face/Eye Priority by as compared to Face Detection + Tracking AF with the R5 is simply not very good. Here is what Patrick and I had to say about it in the Sony Camera User’s e-Guide:
When using any Tracking AF Area, we recommend that you set Face/Eye AF Set > Face/Eye Priority in AF to Off and that Subject Detection is set to Human. With a7 series bodies, if you have Subject Detection set to Animal Eye you will not be able to choose or use any Tracking Flexible Spot even if Face/Eye AF Set > Face/Eye Priority in AF is set to Off. With the a9 series bodies, if you have Face/Eye AF Set > Face/Eye Priority in AF set to On and Subject Detection set to Animal, Flexible Tracking Spot AF will often become quite erratic.
Right now I plan to continue to field test the Canon gear and am excited about doing so. I would think that at this point, the chances of my switching back to Canon completely are still less than 1%. But the chances of my purchasing a Canon RF 100-500mm f/4.5-7.1L IS USM lens/Canon Extender RF 1.4x/Canon EOS R5 Mirrorless Digital camera body outfit have risen to about 51%. If I do buy this Canon rig, I will definitely be doing an R5/R6 guide.
If you are interested in an R5, an R6, and RF lens, or the EOS R adapters (that are needed to link your EOS R series bodies to your EF lenses), you will want to check out the Canon Comeback Fueled By Mirrorless Bodies & Lenses. The skinny on everything that you wanted to know about Canon Mirrorless but were afraid to ask … blog post (and especially the Comments) here.
If you’ve read this far, be sure to stay tuned for the big blog post comparing the Canon gear above to the SONY 200-600G/a9ii rig. It is coming soon.
Shame on SONY
Shame on SONY for not enabling users to show focus points or even determine the AF Area Mode after the fact. This has been and continues to be a glaring problem that prevents folks from learning the SONY AF system. I have written them several times over the past year but my pleas to rectify this situation have fallen on deaf ears.
Typos
In all blog posts and Bulletins, feel free to e-mail or to leave a comment regarding any typos or errors. Just be right :).
November 30th, 2020 What’s Up?
Not much. It is cloudy here today at ILE and a big cold front will be arriving tonight. I am publishing this just before noon and will be doing my swim right after I hit Publish. I have been doing my slow half-mile (44 lengths) every day since I got back.
I will be sharing a ton with you here very soon by way of a comparison of the R5/100-500 with the SONY 200-600/a9 ii.
Topaz Cyber Monday Sale till midnight tonight!
Click on the logo link above or here to save 68% on the complete Topaz Suite (or the items you need to complete your Suite). The regular price for the Complete Suite is $939.92. On sale till midnight tonight for only $299.99. Enter the ARTHUR15 code at checkout to save an additional 15%!
Topaz Still on Sale!
Right now Topaz is offering price reductions on the Utility Bundle and the Creator Bundle. The former normally sells for $359.96. It is on sale now for $249.95. Click here, scroll all the way down to the sale, and enter the ARTHUR15 code at checkout to save an additional 15%! The Creator Bundle usually sells for $279.97 and is now on sale for $149.99. Using the ARTHUR15 code at checkout brings the price down to $127.49!
Great Topaz News!
Folks who use the BAA Topaz link to purchase Sharpen AI, DeNoise AI, or the Utility Bundle (or any other Topaz plugins) will receive a 15% discount by entering the ARTHUR15 code at checkout. To get the discount you must use my link and you must enter the discount code. Be sure to start with this link.
Topaz Stuff
As I said just a while back and have said often many times before, I should have listened sooner. If you, like me, are new to the Topaz party, please use this link to purchase. Right now I can wholeheartedly recommend both Topaz Sharpen AI and Topaz DeNoise AI. Though I have not yet worked with JPEGtoRAW AI or Gigapixel AI, I have installed both of these plug-ins and look forward to trying them on some I-Phone 11 images fairly soon. If you are thinking like me, consider the Utility Bundle that includes all four plug-ins mentioned above at a money-saving price.
Again, those who purchase Sharpen AI or DeNoise AI using my link, can e-mail to request a short Getting Started with Topaz e-Guide. I had a bit of trouble getting the two plug-ins installed and having them appear in the Photoshop Filter Menu. In addition, I will explain how to best learn about the two plug-ins by applying them on a Layer (in Photoshop). I amazed myself yesterday by completing this guide in the car on the way to and from Sebastian. Huge thanks to Anita for doing the driving. Please include a copy of your Topaz order when requesting the guide.
|
|
|
This image was created on 27 November 2020 at Fort DeSoto. I used the handheld Sony FE 200-600mm f/5.6-6.3 G OSS lens (at 600mm) and the blazingly fast AF King, the Sony Alpha a9 II Mirrorless Digital camera body. ISO 500. Exposure determined by Zebras with ISO on the rear wheel: 1/2000 sec. at f/8 in Manual mode. AWB at 9:54am on a sunny morning.
Upper Center Zone AF-C was active at the moment of exposure and performed superbly.
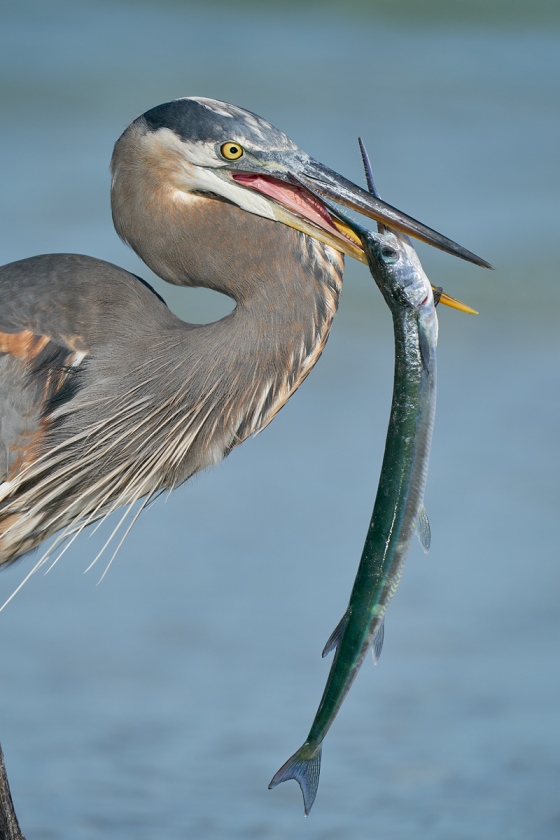
Image #1: Great Blue Heron with large needlefish
|
A Generous Fisherman
A generous fisherman donated his catch — a very large needlefish — to the ecosystem. A typically cooperative Great Blue Heron did the rest. This occurred right after my R5 battery died; my SONY gear performed perfectly to the tune of 45 keepers each carefully framed with the SONY 2-6.
|
|
|
Be sure to click on the image to better see the noise reduction and especially the increase in sharpness.
Image #1A: Topaz DeNoise AI on Auto on the Great Blue Heron with large needlefish image at 100%
|
Topaz DeNoise AI on the Great Blue Heron Great Blue Heron with large needlefish image
This is yet another example of Topaz DeNoise AI improving an image that came out of the camera pretty-much-perfect. Topaz AI on Auto. The converted TIF here was close to being noise-free (thanks to the work I have done with RawDigger) and it was sharp. DeNoise AI completely removed the noise from the sky background and sharpened the image non-destructively as well.
November 29th, 2020 What’s Up?
On Friday morning, our only session at DeSoto, I worked exclusively with my loaner Canon rig, the R5 and the RF 100-500 almost always with the RF 1.4X teleconverter.
On Saturday and Sunday morning Anita North and I decided to head back to Lakeland. The American White Pelicans that typically loaf on the bulkheads along the lakeshore have been roosting the base of a large, lighted ornamental X-mas tree in the middle of the lake. I was glad to learn that tree will be taken down after the holidays … On Saturday morning I went with the SONY 600 and the a9 ii, while on Sunday I again worked exclusively with my Canon gear: the R5, the RF 100-500, and usually the RF 1.4X teleconverter.
The more I use the Canon gear the more I learn. I will be sharing a ton with you here very soon by way of a comparison of the R5/100-500 with the SONY 200-600/a9 ii.
Though things were a bit on the slow side both mornings, we each made some really good images. Today’s featured images are all from our Saturday session.
BTW, I have not yet solved the DPP4 installation problem … Huge thanks to all those who tried to help.
Please Remember
With income from IPTs approaching zero, please, if you enjoy and learn from the blog, remember to use one of my two affiliate programs when purchasing new gear. Doing so just might make it possible for me to avoid having to try to get a job as a Walmart greeter and will not cost you a single penny more. And if you use Bedfords and remember to enter the BIRDSASART code at checkout, you will save 3% on every order and enjoy free second-day air shipping. In these crazy times — I am out at least forty to sixty thousand dollars so far due to COVID 19 (with lots more to come) — remembering to use my B&H link or to shop at Bedfords will help me out a ton and be greatly appreciated. Overseas folks who cannot order from the US because of import fees, duties, and taxes can always help out by clicking here if they see fit.
Back in Stock
We now have eighteen of the hugely popular Levered-Clamp FlexShooter Pro tripod heads in stock. Click on the preceding link to learn more about this amazing head, the ballhead that thinks its a gimbal head and — thanks to the amazing county-balanced spring mechanism — works great with any rig from the longest, heaviest super-telephoto lens to a camera-body-mounted wide angle. The latter is possible because of the bi-directional clamp; it is no longer necessary to travel with a gimbal head for long lens photography and a ballhead for scenic photography. And after just a moment’s adjustment, the double ball enables you to ensure that every image you take is on the level.
Wanted to Buy
If you have a used SONY 200-600 G lens that you would like to sell, please contact me via e-mail.
Topaz Still on Sale!
Right now Topaz is offering price reductions on the Utility Bundle and the Creator Bundle. The former normally sells for $359.96. It is on sale now for $249.95. Click here, scroll all the way down to the sale, and enter the ARTHUR15 code at checkout to save an additional 15%! The Creator Bundle usually sells for #279.97 and is now on sale for $149.99. Using the ARTHUR15 code at checkout brings the price down to $127.49!
The BAA Used Gear Page
The Used Gear page continues to be red hot! It is BAA Used Gear Page is the place to sell your used photographic equipment. We will help you to get your gear sold quickly for 20 to 60% or more than what the big guys are offering … Doubt me? Check out the Recent Sales list for the past ten months at the bottom of the page.
BIRDS AS ART is registered in the U.S. Patent and Trademark Office
Great Topaz News!
Folks who use the BAA Topaz link to purchase Sharpen AI, DeNoise AI, or the Utility Bundle (or any other Topaz plugins) will receive a 15% discount by entering the ARTHUR15 code at checkout. To get the discount you must use my link and you must enter the discount code. Be sure to start with this link.
Topaz Stuff
As I said just a while back and have said often many times before, I should have listened sooner. If you, like me, are new to the Topaz party, please use this link to purchase. Right now I can wholeheartedly recommend both Topaz Sharpen AI and Topaz DeNoise AI. Though I have not yet worked with JPEGtoRAW AI or Gigapixel AI, I have installed both of these plug-ins and look forward to trying them on some I-Phone 11 images fairly soon. If you are thinking like me, consider the Utility Bundle that includes all four plug-ins mentioned above at a money-saving price.
Again, those who purchase Sharpen AI or DeNoise AI using my link, can e-mail to request a short Getting Started with Topaz e-Guide. I had a bit of trouble getting the two plug-ins installed and having them appear in the Photoshop Filter Menu. In addition, I will explain how to best learn about the two plug-ins by applying them on a Layer (in Photoshop). I amazed myself yesterday by completing this guide in the car on the way to and from Sebastian. Huge thanks to Anita for doing the driving. Please include a copy of your Topaz order when requesting the guide.
New and Better Bedfords Discount Policy!
You can now save 3% on all of your Bedfords photo gear purchases by entering the BIRDSASART coupon code at checkout. Your discount will be applied to your pre-tax total. In addition, by using the code you will get 2nd day air shipping via Fed Ex.
Grab a Nikon AF-S Teleconverter TC-14E III and save $14.99. Purchase a Canon EOS R5 and your discount will be $116.97. Purchase a Sony FE 600mm f/4 GM OSS lens and save a remarkable $389.94! Your Bedford’s purchase no longer needs to be greater than $1,000.00 for you to receive a discount. The more you spend, the more you save.
|
|
|
124 sold to rave reviews.
The SONY e-Guide by Patrick Sparkman and Arthur Morris
|
The Sony Camera User’s e-Guide (and Videos)
Click here to purchase the guide with one Camera Set-up Video. Be sure to e-mail us by clicking here to specify your camera body so that we can send you a link for the correct video.
Click here to purchase the guide with two Camera Set-up Videos. Be sure to e-mail us by clicking here to specify your two camera bodies so that we can send you links for the correct videos.
Click here to learn more about the SONY e-Guide.
Money Saving Reminder
Many have learned that if you need a hot photo item that is out of stock at B&H and would enjoy free overnight shipping, your best bet is to click here, place an order with Bedfords, and enter the coupon code BIRDSASART at checkout. If an item is out of stock, contact Steve Elkins via e-mail or on his cell phone at (479) 381-2592 (Eastern time). Be sure to mention the BIRDSASART coupon code and use it for your online order. Steve has been great at getting folks the hot items that are out of stock at B&H and everywhere else. The wait lists at the big stores can be a year or longer for the hard to get items. Steve will surely get you your gear long before that. For the past year, he has been helping BAA Blog folks get their hands on items like the SONY a9 ii, the SONY 200-600 G OSS lens, the Canon EOS R5, the Canon RF 100-500mm lens, and the Nikon 500mm PF. Steve is personable, helpful, and eager to please.


Gear Questions and Advice
Too many folks attending BAA IPTs and dozens of photographers whom I see in the field and on BPN, are–out of ignorance–using the wrong gear especially when it comes to tripods and more especially, tripod heads… Please know that I am always glad to answer your gear questions via e-mail. Those questions might deal with systems, camera bodies, accessories, and/or lens choices and decisions.
|
|
|
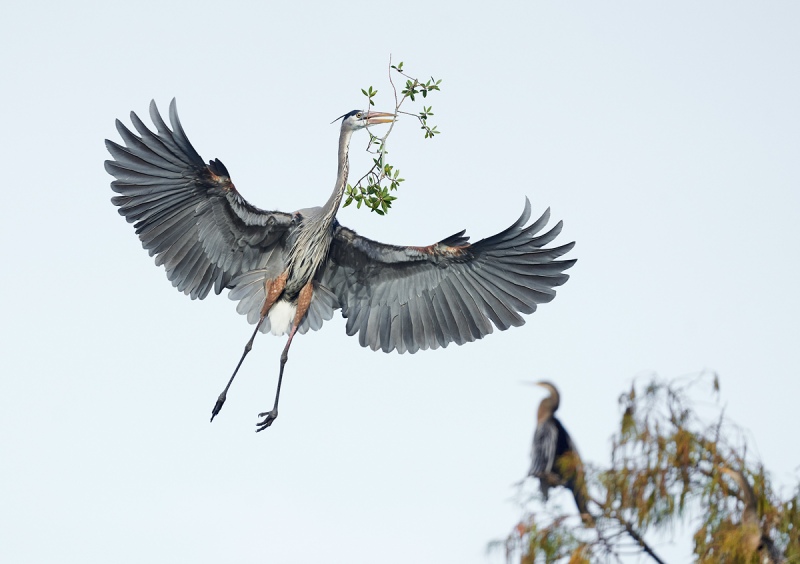
This image was created by Anita North on 28 November 2020. She used the Sony FE 600mm f/4 GM OSS lens and the 61-MP Sony Alpha a7R IV Mirrorless Digital Camera Body. ISO 640. Exposure determined by Zebras with ISO on the rear dial: 1/2500 sec. at f/4 in Manual mode. AWB at 9:03am in partly sunny morning.
Center Zone AF-C was active at the moment of exposure and performed to perfection.
Image courtesy of and copyright 2020: Anita North
Image #1: Great Blue Heron landing at nest with sprig
|
Patience Pays Off
On Saturday morning, the heron nest was not very active. The male was having a tough time breaking off twigs for the nest. Anita stuck with it while I wandered east along the shoreline in search of other subjects. I absolutely love the soft light, the evenly lit underwings, the flight pose, and the daintiness of this image. And the whimsy. Not to mention that the Anhinga in the Cypress tree is a nice extra.
|
|
|
This image was created on 28 November 2020. I used the handheld Sony FE 600mm f/4 GM OSS lens, Sony FE 1.4x teleconverter, and the blazingly fast AF King, the Sony Alpha a9 II Mirrorless Digital Camera Body. ISO 640. Exposure determined by Zebras with ISO on the rear dial: 1/500 sec. at f/7.1 in Manual mode. AWB at 8:40am on a mostly sunny morning.
Tracking Expand Flexible Spot AF-C was active at the moment of exposure and performed to perfection.
Click the image to see a larger version.
Image #2: Anhinga — immature calling
|
Carrying a Big Lens
As you may have learned in the How to Carry a Long Lens On a Tripod. Or Not? video here, the best way to see your shoulders healthy is to take your big lens off the tripod, carry the lens in one hand, and the tripod in the other.
When I got bored too quickly at the Great Blue Heron nest, that is just what I did. When I came across this sunning Anhinga, I wanted to get low so instead of messing with the tripod I simply sat down on the ground and used the knee-pod technique with the back off my left forearm resting on and supported by my left knee. I see that as handholding while cheating a bit.
|
|
|
This image was also created on 28 November 2020. Again, I used the handheld Sony FE 600mm f/4 GM OSS lens, Sony FE 1.4x teleconverter, and the blazingly fast AF King, the Sony Alpha a9 II Mirrorless Digital Camera Body. ISO 2000. Exposure determined by Zebras with ISO on the rear dial: 1/4000 sec. at f/5.6 in Manual mode. AWB at 8:52am on a mostly sunny morning.
Center Zone AC was active at the moment of exposure and performed to perfection.
Click the image to see a larger version.
Image #3: American White Pelican in flight over Lakeland
|
Handholding at 840mm
A moment after the Anghina slid into the water to go fishing, a few of the big white pelicans began flying around so I simply grabbed the 600, set the exposure, and made a few images. It is a lot harder for me to keep a flying bird in the center of the frame when handholding the 600 as compared to handholding the much lighter 200-600. This bird was fairly well-framed in the raw file. I like the position and the clouds set against the blue sky. I am only able to handhold the big lens for a limited amount of time. If there is lots of flight action I need to get the lens onto the tripod.
The Location of the Nest Tree
As you can see by looking at today’s featured images, the GBH nest in Lakeland is pretty sweet. I kept 52 images from our single morning session and Anita also did quite well.
If you own a copy of the BAA Middle of Florida Photographic Site Guide and would like to know the exact location of the nest featured in today’s blog post, shoot me e-mail with the words GBH Nest Info in the Subject Line. Please be able to include some form of proof of purchase.
If you do not own a copy of the guide and would like to know the exact location of the nest in Lakeland, please send a PayPal for $20 to birdsasart@verizon.net and with the words GBH Nest Info somewhere in the PayPal.
|
|
The BAA Middle of Florida Photographic Site Guide
You can purchase your copy here in the BAA Online Store.
|
The BAA Middle of Florida Photographic Site Guide
126 pages, 87 photographs by Joe Przybyla and Arthur Morris.
The PDF for this e-Guide is an electronic download sent via e-mail.
Purchase your copy here in the BAA Online Store.
I had thought about doing a guide to some of the great but little-known photo hotspots around central Florida for about a decade, but those plans never came to fruition. I met Joe online in the Avian Forum at BirdPhotographer’s.Net about two years ago. Joe’s photography has improved tremendously over the past few years; he credits the BAA blog, my books and PDFs, and his participation on BPN. The one thing that I learned right from the get-go about Joe is that he is a hard and tenacious worker, always striving to improve his skills and to grow his knowledge base. As he knew of more than a few good spots in central Florida, I broached the idea of us doing a photographic site guide that covered many of the little-known photographic hotspots from Brandon to Lakeland to Joe Overstreet Road to Indian Lake Estates (my Florida home for the past 20 years or so). After more than many, many dozens of hours of effort, The BIRDS AS ART Middle of Florida Photographic Site Guide is now a reality. Thanks to Joe’s wife Dottie for her review of our writing. We all learned once again that writing is a process, a back and forth process. All thanks to the white pelicans of Lakeland. Here are the locations that are detailed in this e-Guide:
- Indian Lake Estates: Sandhills Cranes with chicks and colts, lots of vultures, and Ospreys up the kazoo!
- Gatorland, Kissimmee: Learn to make great images of wading birds in a cluttered rookery.
- The Brandon Rookery: Great for nesting Wood Storks, Great Egrets, and more.
- Circle Bar B Reserve, Lakeland: Here you will find a great variety of avian subjects in a great variety of habitats.
- Lake Morton, Lakeland: There are lots of silly tame birds here including and especially American White Pelican during the colder months.
- Lake Mirror, Lakeland: Tame Anhingas, Limpkins, and a zillion White Ibises at times.
- West Lake Parker, Lakeland: Here you will have a chance for two difficult birds, Snail Kite, and Purple Gallinule.
- Joe Overstreet Road, Kenansville: Crested Caracara, meadowlarks, Loggerhead Shrike, and much more on the fenceposts and barbed wire.
Each location includes a map, a detailed description of the best spots, best season, light and time of day instructions, the expected species, and an educational and inspirational gallery that is designed to open your eyes as to the possibilities.
You can purchase a copy here in the BAA Online Store.
Typos
In all blog posts and Bulletins, feel free to e-mail or to leave a comment regarding any typos or errors. Just be right :).
November 28th, 2020 Very Brief Initial R5/RF100-500/1.4X TC Thoughts
I used the loaner Canon gear to create 1408 images at DeSoto on Friday morning. DeSoto was good but not great, though we had an amazing finish to the morning after the R5 battery died (too soon for me). As we were having trouble getting an AirBNB for the night, we decided to head home and do the Great Blue Heron nest in Lakeland this morning, Saturday 28 NOV 2020.
In short, the R5/RF100-500/1.4X TC combo — I used the 100-500 almost exclusively with the 1.4X TC after the sun rose above some clouds — seemed on the surface to be a quite remarkable rig. After looking at the images on the back of the camera yesterday, I was thinking that the chance of my ever owning the loaner gear had risen from well less than 5% to about 34%. But after reviewing the (magnified) images in Photo Mechanic early this morning, my gut feeling is that the chance of my ever owning the Canon loaner gear has dropped to about 15%. I will share more of my thoughts — I have lots of them — as soon as I am able to get DPP4 (Digital Photo Professional 4.13.10 for macOS) installed and running on my MacBook Pro … See my request for help with that below.
|
|
This is where I get stuck …
|
Help Needed Installing DPP4 (Digital Photo Professional 4.13.10 for macOS)
I am running Catalina 10.15.7 on my MacBook Pro. I believe that that is several updates behind. I successfully dowloaded the dppm4.13.10-installer.dmg file several times, first from the Canon Europe site and then from the Canon USA site. When I click on the downward-pointing arrow as instructed, a small box with a blue line that says Extracting Files pops up. As I understand it — thanks to help from blog regular Joe Sobelefsky — a new window with installation instructions should appear automatically. I have gotten to this point a dozen times and nothing happens. I have checked my Applications folder to see if I could find a Canon folder — no success there.
I am not sure if something in my security settings is preventing the installation process from beginning, or if perhaps I need to update Catalina. If you have any suggestions, you can either leave a comment below or contact me via e-mail.
In a phone conversation with Brian Sump yesterday he stated clearly that the R5/.CR3 raw conversions in DPP4 are (but for the ability to lift the shadows) far superior to the conversions in Adobe Camera Raw. I will not be able to share any R5 images with you here on the blog (along with my extensive comments) until I get DPP4 up and running.
I just installed the latest update of RawDigger without a problem … The good news is that RawDigger Version 1.4.2 Release Build 691 (x64) does fine with R5 files.
November 27th, 2020 Thanksgiving at ILE
Kudos to Anita for preparing a sumptuous feast that was enjoyed by my daughter Jennifer, her husband Erik, my right-hand man Jim Litzenburg, me, Anita, and Olivia — Jen’s wonderful rescue dog. Olivia has an amazingly sweet disposition and thrills at chasing the Cuban Anoles around inside the pool cage. We dined on the pool deck while socially distancing. I, for one, ate far too much but I had a good excuse: Anita paid homage to my late-Mom, Hazel Louise Morris, by basting the turkey in apple juice and adding celery and apples to the home-made stuffing … Erik prepared a fabulous pumpkin/pecan pie that was quickly devoured.
What’s Up?
Today is Friday 27 November 2020. Anita North and I pulled out of my driveway at 4:29am to head over to Fort DeSoto. Our plan is to photograph this morning, this afternoon, and Saturday morning, and then head home. I will be trying out my loaner Canon R5 with the Canon RF 100-500 lens. I will have the RF 1.4X teleconverter in my fanny pack. Time will tell. Huge thanks to BPN-friend Brian Sump who spent more than an hour on the phone with me on Thanksgiving Day helping me to set up the R5 and going through all the menus. It will be a challenge for sure as I am so comfortable with my SONY gear. Thanks also to blog regular Joe Subolefsky who offered some tips via e-mail and has been answering some questions for me as well.
My plan is to give the loaner Canon gear a good road test between now and X-mas when I need to ship it back to B&H (unless I wish to purchase it). Some folks are hoping that after testing the R5 that I will switch back to Canon. At this point — before I have even photographed a single bird with the Canon gear — I am sure that the chances of that happening are well less than 1% and that the chance of me purchasing an R5/100-500/1.4X TC rig to use on occasion would be well less than 5%. Time will tell.
If you know the answers to these questions, please leave a comment below:
Does Capture One 20 Pro Build 13.1.1.24 (61bb 403) recognize and convert R5 raw files?
Does Adobe Photoshop 21.2.0 Release recognize and convert R5 raw files?
Does the latest version of Canon Digital Photo Professional (DPP 4) recognize and convert R5 raw files?
Answering my own question here: Digital Photo Professional 4.13.10 for macOS recognizes and converts R5 raw files
I was glad to learn recently of the sale of James Paula’s Sony Alpha a7 III Mirrorless Digital camera body in excellent plus condition for $1098.00 and the sale of Used Gear page veteran and SONY-e-Guide reviewer Craig Elson’s Sony Alpha a9 Mirrorless Digital camera body in near-mint condition for $2300.00 (was $2498.00).
Please Remember
This blog post took well more than five hours to assemble …
With income from IPTs approaching zero, please, if you enjoy and learn from the blog, remember to use one of my two affiliate programs when purchasing new gear. Doing so just might make it possible for me to avoid having to try to get a job as a Walmart greeter and will not cost you a single penny more. And if you use Bedfords and remember to enter the BIRDSASART code at checkout, you will save 3% on every order and enjoy free second-day air shipping. In these crazy times — I am out at least forty to sixty thousand dollars so far due to COVID 19 (with lots more to come) — remembering to use my B&H link or to shop at Bedfords will help me out a ton and be greatly appreciated. Overseas folks who cannot order from the US because of import fees, duties, and taxes can always help out by clicking here if they see fit.
Back in Stock
We now have eighteen of the hugely popular Levered-Clamp FlexShooter Pro tripod heads in stock. Click on the preceding link to learn more about this amazing head, the ballhead that thinks its a gimbal head and — thanks to the amazing county-balanced spring mechanism — works great with any rig from the longest, heaviest super-telephoto lens to a camera-body-mounted wide angle. The latter is possible because of the bi-directional clamp; it is no longer necessary to travel with a gimbal head for long lens photography and a ballhead for scenic photography. And after just a moment’s adjustment, the double ball enables you to ensure that every image you take is on the level.
Wanted to Buy
If you have a used SONY 200-600 G lens that you would like to sell, please contact me via e-mail.
Topaz Still on Sale!
Right now Topaz is offering price reductions on the Utility Bundle and the Creator Bundle. The former normally sells for $359.96. It is on sale now for $249.95. Click here, scroll all the way down to the sale, and enter the ARTHUR15 code at checkout to save an additional 15%! The Creator Bundle usually sells for #279.97 and is now on sale for $149.99. Using the ARTHUR15 code at checkout brings the price down to $127.49!
The BAA Used Gear Page
The Used Gear page continues to be red hot! It is BAA Used Gear Page is the place to sell your used photographic equipment. We will help you to get your gear sold quickly for 20 to 60% or more than what the big guys are offering … Doubt me? Check out the Recent Sales list for the past ten months at the bottom of the page.
BIRDS AS ART is registered in the U.S. Patent and Trademark Office
Great Topaz News!
Folks who use the BAA Topaz link to purchase Sharpen AI, DeNoise AI, or the Utility Bundle (or any other Topaz plugins) will receive a 15% discount by entering the ARTHUR15 code at checkout. To get the discount you must use my link and you must enter the discount code. Be sure to start with this link.
Topaz Stuff
As I said just a while back and have said often many times before, I should have listened sooner. If you, like me, are new to the Topaz party, please use this link to purchase. Right now I can wholeheartedly recommend both Topaz Sharpen AI and Topaz DeNoise AI. Though I have not yet worked with JPEGtoRAW AI or Gigapixel AI, I have installed both of these plug-ins and look forward to trying them on some I-Phone 11 images fairly soon. If you are thinking like me, consider the Utility Bundle that includes all four plug-ins mentioned above at a money-saving price.
Again, those who purchase Sharpen AI or DeNoise AI using my link, can e-mail to request a short Getting Started with Topaz e-Guide. I had a bit of trouble getting the two plug-ins installed and having them appear in the Photoshop Filter Menu. In addition, I will explain how to best learn about the two plug-ins by applying them on a Layer (in Photoshop). I amazed myself yesterday by completing this guide in the car on the way to and from Sebastian. Huge thanks to Anita for doing the driving. Please include a copy of your Topaz order when requesting the guide.
New and Better Bedfords Discount Policy!
You can now save 3% on all of your Bedfords photo gear purchases by entering the BIRDSASART coupon code at checkout. Your discount will be applied to your pre-tax total. In addition, by using the code you will get 2nd day air shipping via Fed Ex.
Grab a Nikon AF-S Teleconverter TC-14E III and save $14.99. Purchase a Canon EOS R5 and your discount will be $116.97. Purchase a Sony FE 600mm f/4 GM OSS lens and save a remarkable $389.94! Your Bedford’s purchase no longer needs to be greater than $1,000.00 for you to receive a discount. The more you spend, the more you save.
|
|
|
123 sold to rave reviews.
The SONY e-Guide by Patrick Sparkman and Arthur Morris
|
The Sony Camera User’s e-Guide (and Videos)
Click here to purchase the guide with one Camera Set-up Video. Be sure to e-mail us by clicking here to specify your camera body so that we can send you a link for the correct video.
Click here to purchase the guide with two Camera Set-up Videos. Be sure to e-mail us by clicking here to specify your two camera bodies so that we can send you links for the correct videos.
Click here to learn more about the SONY e-Guide.
Money Saving Reminder
Many have learned that if you need a hot photo item that is out of stock at B&H and would enjoy free overnight shipping, your best bet is to click here, place an order with Bedfords, and enter the coupon code BIRDSASART at checkout. If an item is out of stock, contact Steve Elkins via e-mail or on his cell phone at (479) 381-2592 (Eastern time). Be sure to mention the BIRDSASART coupon code and use it for your online order. Steve has been great at getting folks the hot items that are out of stock at B&H and everywhere else. The wait lists at the big stores can be a year or longer for the hard to get items. Steve will surely get you your gear long before that. For the past year, he has been helping BAA Blog folks get their hands on items like the SONY a9 ii, the SONY 200-600 G OSS lens, the Canon EOS R5, the Canon RF 100-500mm lens, and the Nikon 500mm PF. Steve is personable, helpful, and eager to please.


Gear Questions and Advice
Too many folks attending BAA IPTs and dozens of photographers whom I see in the field and on BPN, are–out of ignorance–using the wrong gear especially when it comes to tripods and more especially, tripod heads… Please know that I am always glad to answer your gear questions via e-mail. Those questions might deal with systems, camera bodies, accessories, and/or lens choices and decisions.
SONY a7r iv for Flight and Action at 840mm
Multiple IPT veteran Mukesh Patel told me last spring that a7r iv AF was improved greatly with the then-recent firmware update. Based on the results of yesterday’s sustained flight and action session, I would have to agree. I was amazed that but for two or three frames out of several hundred that the SONY AF system — always in Center Zone AF-C, was able to see through the branches and get the flying bird’s eye razor sharp. Though I have gotten a few decent flight images with the SONY 200-600 G lens, a7r iv AF accuracy with that lens falls far short of the AF accuracy attained with that lens and the a9 ii.
|
|
|
Click on the image to better see the noise reduction.
Image #1A: Topaz DeNoise AI on the Male Great Blue Heron bringing stick for the nest to mate image at 100%
|
Topaz DeNoise AI on the Great Blue Heron bringing stick image
As part of my now-regular workflow, I ran Topaz DeNoise AI on Auto on the whole image. Though I have — on occasion– recently begun changing the values on one or both sliders after starting with Auto, the AI (Artificial Intelligence) settings recommended by Auto were — spot-on for this ISO 800 image. Since I properly exposed for the white feathers on the heron’s crown and face, the shaded under-primaries were quite under-exposed. This made them considerably noisy for an ISO 800 image (as expected). DeNoise did a fabulous job of eliminating the noise in this area while providing a bit of extra sharpness.
|
|
|
Click on the image to better see the sharpening.
Image #1B: Topaz Sharpen AI on the Male Great Blue Heron bringing stick for the nest to mate image at 100%
|
Topaz Sharpen AI on the Male Great Blue Heron bringing stick to mate image
Here, I started with Topaz Sharpen AI on Auto. But at 100% the image looked over-sharpened so I reduced the Sharpness slider value by approximately half from 57 to 29. In addition, I moved the Noise Suppression slider to zero as I had already run DeNoise AI. I was a thrilled to note that even though I ran Sharpen AI on the whole image, the plug-in knew to sharpen only the subject. Note also that Sharpen AI chose Focus. This showed that the shutter speed was fast enough to prevent any noticeable motion blur. Artificial intelligence indeed!
The Original “The Art of Bird Photography”
This image is somewhat reminiscent of the image that has long-graced the cover of the original “The Art of Bird Photography.”
For those who do not know much about the original “The Art of Bird Photography,” it was first published in hard cover in 1998 and quickly became the classic how-to book on the subject. That printing was followed by two soft cover printings. With 30,000 copies sold in less than a decade, it was a big surprise when Amphoto dropped the title. The very great strength of the book is the chapter on Exposure which offers complete coverage of exposure theory and its practical applications. I have received countless e-mails and letters over the years reading something like this: “I have been photographing for more than a decade, have attended many seminars, and read every book out there but not until I read and studied the chapter on exposure in ABP did I really understand both the basics and the complexities. Now, I can not only come up with the right exposure in almost every situation, but understand what I am doing and why. Thank you, thank you, thank you!” In addition, all of the basics are covered in detail in ABP: composition and image design, how to choose lenses, camera bodies, & film, how to see and utilize natural light, how to make sharp images, how to get close to free and wild birds, how to use flash as both main light and as fill, and how to edit and market your work. There is no digital content in the original “The Art of Bird Photography.”
What I am most proud of is the fact that 4 out of 5 — or perhaps 9 out of ten — of the top bird photographers in the world, were influenced to some degree by the original “The Art of Bird Photography.” Every time I learn of another avian photographer in that group, it is humbling.
The Location of the Nest Tree
As you can see by looking at today’s featured images, the GBH nest in Lakeland is pretty sweet. I kept 52 images from our single morning session and Anita also did quite well.
If you own a copy of the BAA Middle of Florida Photographic Site Guide and would like to know the exact location of the nest featured in today’s blog post, shoot me e-mail with the words GBH Nest Info in the Subject Line. Please be able to include some form of proof of purchase.
If you do not own a copy of the guide and would like to know the exact location of the nest in Lakeland, please send a PayPal for $20 to birdsasart@verizon.net and with the words GBH Nest Info somewhere in the PayPal.
The BAA Middle of Florida Photographic Site Guide
126 pages, 87 photographs by Joe Przybyla and Arthur Morris.
The PDF for this e-Guide is an electronic download sent via e-mail.
Purchase your copy here in the BAA Online Store.
I had thought about doing a guide to some of the great but little-known photo hotspots around central Florida for about a decade, but those plans never came to fruition. I met Joe online in the Avian Forum at BirdPhotographer’s.Net about two years ago. Joe’s photography has improved tremendously over the past few years; he credits the BAA blog, my books and PDFs, and his participation on BPN. The one thing that I learned right from the get-go about Joe is that he is a hard and tenacious worker, always striving to improve his skills and to grow his knowledge base. As he knew of more than a few good spots in central Florida, I broached the idea of us doing a photographic site guide that covered many of the little-known photographic hotspots from Brandon to Lakeland to Joe Overstreet Road to Indian Lake Estates (my Florida home for the past 20 years or so). After more than many, many dozens of hours of effort, The BIRDS AS ART Middle of Florida Photographic Site Guide is now a reality. Thanks to Joe’s wife Dottie for her review of our writing. We all learned once again that writing is a process, a back and forth process. All thanks to the white pelicans of Lakeland. Here are the locations that are detailed in this e-Guide:
- Indian Lake Estates: Sandhills Cranes with chicks and colts, lots of vultures, and Ospreys up the kazoo!
- Gatorland, Kissimmee: Learn to make great images of wading birds in a cluttered rookery.
- The Brandon Rookery: Great for nesting Wood Storks, Great Egrets, and more.
- Circle Bar B Reserve, Lakeland: Here you will find a great variety of avian subjects in a great variety of habitats.
- Lake Morton, Lakeland: There are lots of silly tame birds here including and especially American White Pelican during the colder months.
- Lake Mirror, Lakeland: Tame Anhingas, Limpkins, and a zillion White Ibises at times.
- West Lake Parker, Lakeland: Here you will have a chance for two difficult birds, Snail Kite, and Purple Gallinule.
- Joe Overstreet Road, Kenansville: Crested Caracara, meadowlarks, Loggerhead Shrike, and much more on the fenceposts and barbed wire.
Each location includes a map, a detailed description of the best spots, best season, light and time of day instructions, the expected species, and an educational and inspirational gallery that is designed to open your eyes as to the possibilities.
You can purchase a copy here in the BAA Online Store.
|
|
|
Click on the image to better see the noise reduction.
Image #2A: Topaz DeNoise AI on the Male Great Blue Heron giving stick for nest to mate at 100%
|
Topaz DeNoise AI on the Great Blue Heron giving stick image
As part of my now-regular workflow, I ran Topaz DeNoise AI on Auto on the whole image. Though I have — on occasion– recently begun changing the values on one or both sliders after starting with Auto, the AI (Artificial Intelligence) settings recommended by Auto were — spot-on for this ISO 800 image. Since I properly exposed for the white feathers on the heron’s crown and face, the shaded under-primaries were quite under-exposed. This made them considerably noisy for an ISO 800 image (as expected). DeNoise did a fabulous job of eliminating the noise in this area while providing a bit of extra sharpness.
The Stick and the Shadow on the Bird’s Face …
I hate the stick and its shadow covering most of the bird’s face so I decided to give the bird a shorter stick … I used the Magnetic Lasso Tool to select the broken end of the stick and put it on its own layer. Then I moved that layer to the middle of the image, clicked off the eyeball for that layer, and activated the layer below. Then I used Divide and Conquer with the Clone Stamp Tool and then used the Patch Tool, Content-Aware Fill, and several small Quick Masks refined, re-shaped, and warped with the addition of a Regular Layer mask and the Transform command. Once the face was cleaned up I clicked on the eyeball for the end of the stick layer, moved it into place with the Move Tool (V), and refined that layer as noted above. Voila!
You can learn the advanced Quick Masking and advanced Layer Masking techniques that I used for the above repair in APTATS I & II. You can save $15 by purchasing the pair.
|
|
The BIRDS AS ART Current Workflow e-Guide (Digital Basics II).
You can order your copy from the BAA Online Store here, by sending a PayPal for $40 here, or by calling Jim or Jennifer weekdays at 863-692-0906 with your credit card in hand. Be sure to specify Digital Basics II.
|
The BIRDS AS ART Current Workflow e-Guide (Digital Basics II)
The techniques mentioned above and tons more (with the exception of Capture One RAW Conversions) — along with all of my personalized Keyboard Shortcuts — are covered in detail in the BIRDS AS ART Current Workflow e-Guide (Digital Basics II), an instructional PDF that is sent via e-mail. Learn more and check out the free excerpt in the blog post here. While the new e-Guide reflects my MacBook Pro/Photo Mechanic/DPP 4/Photoshop workflow, folks using a PC and/or BreezeBrowser will also benefit greatly by studying the material on DB II. Note: folks working on a PC and/or those who do not want to miss anything Photoshop may wish to purchase the original Digital Basics along with DB II while saving $15 by clicking here to buy the DB Bundle.
Folks who learn well by following along rather than by reading can check out the complete collection of MP 4 Photoshop Tutorial Videos by clicking here. Note: all of the videos are now priced at an amazingly low $5.00 each.
You can learn how and why I converted all of my Canon digital RAW files in DPP 4 in the DPP 4 RAW Conversion Guide here. More recently, I became proficient at converting my Nikon RAW (NEF) files in Adobe Camera Raw. About two years ago I began converting my Nikon and Sony RAW files in Capture One Pro 12 and continue to do so today.
To purchase Capture One, please use this link. Then you can learn more about Capture One in the Capture One Pro 12 Simplified MP4 Video here. The next step would be to get a copy of Arash Hazeghi’s “The Nikon Photographers’ Guide to Phase One Capture One Pro e-Guide” in the blog post here.
You can learn advanced Quick Masking and advanced Layer Masking techniques in APTATS I & II. You can save $15 by purchasing the pair. Folks can learn sophisticated sharpening and (NeatImage) Noise Reduction techniques in The Professional Post Processing Guide by Arash Hazeghi and edited by yours truly. Please use this link to purchase NeatImage.
To introduce folks to our MP.4 videos and the basics involved in applying more NeatImage noise reduction to the background and less on the subject, I’d be glad to send you a free copy of the Free Noise Reduction Basics MP.4 Video. Simply click to shoot me an e-mail to get your free copy.
Typos
In all blog posts and Bulletins, feel free to e-mail or to leave a comment regarding any typos or errors. Just be right :).
November 26th, 2020 What’s Up?
Anita North and I drove over to Lakeland early on Wednesday morning to photograph the American White Pelicans. They were there in force, but we quickly spotted a Great Blue Heron nest atop a Cyprus tree and concentrated on the activity there as the male was very active. He brought a stick to the nest about every five minutes for more than an hour before slowing down a bit. It was great fun and Anita really enjoyed watching the pair build their nest as that was a first for her. Be sure not to miss all the lessons in tomorrow’s blog post that will feature two images from this wonderful morning of photography along with Topaz DeNoise and Sharpen AI tips and a neat animated GIF.
Yesterday, I received my loaner Canon R5 and a Canon RF 100-500 lens from B&H. I will be playing with it extensively between now and X-mas (when I have to return it) …
|
|
Wild Turkey tom, Indian Lake Estates, FL
|
Have a Great Thanksgiving!
Today is Thursday 26 November 2020. We will be heading down to the lake early to photograph some of the many vultures down by the lakefront. Anita is preparing a huge traditional feast. Jim will of course be joining us as will daughter Jennifer and her husband Erik. We will enjoy our meal on the pool deck while socially distancing. Personally, I have a ton to be thankful for and make sure to count my blessings every day. Whatever you do today, I hope that you enjoy it to the max.
I firmly believe that happiness is a choice, and though COVID has forced me to change many plans, I am still having fun every day and opting to choose happiness over despair. If you would like to join me, check out The Work of Byron Katie. with love, artie
|
|
The BAA Middle of Florida Photographic Site Guide
You can purchase your copy here in the BAA Online Store.
|
The BAA Middle of Florida Photographic Site Guide
126 pages, 87 photographs by Joe Przybyla and Arthur Morris.
The PDF for this e-Guide is an electronic download sent via e-mail.
Purchase your copy here in the BAA Online Store.
I had thought about doing a guide to some of the great but little-known photo hotspots around central Florida for about a decade, but those plans never came to fruition. I met Joe online in the Avian Forum at BirdPhotographer’s.Net about two years ago. Joe’s photography has improved tremendously over the past few years; he credits the BAA blog, my books and PDFs, and his participation on BPN. The one thing that I learned right from the get-go about Joe is that he is a hard and tenacious worker, always striving to improve his skills and to grow his knowledge base. As he knew of more than a few good spots in central Florida, I broached the idea of us doing a photographic site guide that covered many of the little-known photographic hotspots from Brandon to Lakeland to Joe Overstreet Road to Indian Lake Estates (my Florida home for the past 20 years or so). After more than many, many dozens of hours of effort, The BIRDS AS ART Middle of Florida Photographic Site Guide is now a reality. Thanks to Joe’s wife Dottie for her review of our writing. We all learned once again that writing is a process, a back and forth process. All thanks to the white pelicans of Lakeland. Here are the locations that are detailed in this e-Guide:
- Indian Lake Estates: Sandhills Cranes with chicks and colts, lots of vultures, and Ospreys up the kazoo!
- Gatorland, Kissimmee: Learn to make great images of wading birds in a cluttered rookery.
- The Brandon Rookery: Great for nesting Wood Storks, Great Egrets, and more.
- Circle Bar B Reserve, Lakeland: Here you will find a great variety of avian subjects in a great variety of habitats.
- Lake Morton, Lakeland: There are lots of silly tame birds here including and especially American White Pelican during the colder months.
- Lake Mirror, Lakeland: Tame Anhingas, Limpkins, and a zillion White Ibises at times.
- West Lake Parker, Lakeland: Here you will have a chance for two difficult birds, Snail Kite, and Purple Gallinule.
- Joe Overstreet Road, Kenansville: Crested Caracara, meadowlarks, Loggerhead Shrike, and much more on the fenceposts and barbed wire.
Each location includes a map, a detailed description of the best spots, best season, light and time of day instructions, the expected species, and an educational and inspirational gallery that is designed to open your eyes as to the possibilities.
You can purchase a copy here in the BAA Online Store.
November 24th, 2020 What’s Up?
After resting up for two days from the rigors of the recently concluded road trip (to Denver and back), Anita North and I opted to rest on our first two mornings back at ILE. The fact that both Sunday and Monday dawned cloudy-dark just might have had something to do with that 🙂
This morning — Tuesday 24 November 2020 — featured clear skies and a north wind. We headed down to the lake early and photographed the Mother’s Day Sandhill Crane family and some of the more than 200 Black and Turkey Vultures along the lakefront and in the South Field. The surviving crane colt is almost exactly 6 1/2 months old.
I HATE Topaz
Via e-mail from Patrick Sparkman
Hey Artie,
I am glad that you and Anita made it back to Florida safely. Robin and I are staying safely at home for the holidays here.
I hate Topaz! DeNoise, and especially Sharpen. I am now going to need to re-process every image I have ever made!
I went back to my images from St Paul Island, AK (one of five islands in the Pribilofs, 240 miles north of the Aleutians) and played around with Topaz Sharpen AI. It did an amazing job, especially with flight shots; it really is a game changer. It makes A9 images look so good. I have always enjoyed using the a9 series bodies more than the a7r series bodies. And now the image quality of the a9 files can be enhanced even more both with Sharpen AI and with Gigapixel AI! What a great time to be a wildlife photographer.
Best Regards,
Patrick
he Topaz Question I Had Been Expecting
An e-mail conversation with multiple IPT veteran David Hollander
AM: Hey David, It is good to hear from you.
re:
DH: Topaz DeNoise includes both noise reduction and sharpening. You have consistently recommended that you never sharpen a master file, and instead sharpen as a last step, after an image has been sized for a specific use. Do you recommend using the sharpening function in the Topaz DeNoise? Why not use the sharpening only in a separate final layer, with Topaz Sharpen?
AM: Good question; I had been wondering when someone would ask it.
Somehow, the sharpening function in DeNoise is non-destructive; it does not produce and sharpening halos. It is sort of like the previously out-of-camera sharpening methods that we used before, only it is a a lot cleaner and lot more effective.
Though I do not make many prints, I am sure that you will still need to sharpen your master files for printing in the same manner as before. That can be done with in Photoshop of using Topaz Sharpen AI. As I rarely make any prints, I am not qualified to know which will produce better results. As always no knowledge, no comment.
I ran this by Patrick; he agrees.
With love to you both,
artie
A Gigapixel AI Question from Yogesh Puarnik (and My Response) in the Comments Section on the Tandem Brown Pelican Sunset Dive Image: Gigapixel AI to the Stunning Rescue. Do You Have a SONY Callus? blog post here.
Yogesh Puranik/November 23, 2020 at 1:09pm
As always excellent stuff Arthur sir. Thank you for sharing the details. So what exactly Topaz GigaPixel AI do?, i did not get it exactly.
I have to meet you in person once in a lifetime, not sure when. I am in other part of world, India. Do visit sir.
Arthur Morris/BIRDS AS ART/November 24, 2020 at 10:32am
Hi Yogesh, Thanks for your comment. Where do you live? Where are you from?
There have been many ways to up-res image files. You can do it in Photoshop by going Image> Image Size, increasing the dimensions by over-typing, making sure that the Resample box is checked, selecting Bicubic Smoother (enlargement) from the Resample drop-down menu, and then hitting OK. There have been other plug-ins designed to do the same thing. But none of them can do what Gigapixel AI does. Gigapixel not only increases the file size but it improves image quality, increases the level of fine detail, sharpens the image, and reduces noise. In short, it is amazing and unparalleled.
As I will be 75 in June (should I survive the Pandamnit as I am planning on doing), it is not likely that I will get to visit you wonderful country in this lifetime. You are however, invited to come here for an IPT and possibly some additional shooting time together.
with love, artie
Wanted to Buy
If you have a used SONY 200-600 G lens that you would like to sell, please contact me via e-mail.
Topaz Still on Sale!
Right now Topaz is offering price reductions on the Utility Bundle and the Creator Bundle. The former normally sells for $359.96. It is on sale now for $249.95. Click here, scroll all the way down to the sale, and enter the ARTHUR15 code at checkout to save an additional 15%! The Creator Bundle usually sells for #279.97 and is now on sale for $149.99. Using the ARTHUR15 code at checkout brings the price down to $127.49!
Please Remember
With income from IPTs approaching zero, please, if you enjoy and learn from the blog, remember to use one of my two affiliate programs when purchasing new gear. Doing so just might make it possible for me to avoid having to try to get a job as a Walmart greeter and will not cost you a single penny more. And if you use Bedfords and remember to enter the BIRDSASART code at checkout, you will save 3% on every order and enjoy free second-day air shipping. In these crazy times — I am out at least forty to sixty thousand dollars so far due to COVID 19 (with lots more to come) — remembering to use my B&H link or to shop at Bedfords will help me out a ton and be greatly appreciated. Overseas folks who cannot order from the US because of import fees, duties, and taxes can always help out by clicking here if they see fit.
The BAA Used Gear Page
The Used Gear page continues to be red hot! It is BAA Used Gear Page is the place to sell your used photographic equipment. We will help you to get your gear sold quickly for 20 to 60% or more than what the big guys are offering … Doubt me? Check out the Recent Sales list for the past ten months at the bottom of the page.
BIRDS AS ART is registered in the U.S. Patent and Trademark Office
Great Topaz News!
Folks who use the BAA Topaz link to purchase Sharpen AI, DeNoise AI, or the Utility Bundle (or any other Topaz plugins) will receive a 15% discount by entering the ARTHUR15 code at checkout. To get the discount you must use my link and you must enter the discount code. Be sure to start with this link.
Topaz Stuff
As I said just a while back and have said often many times before, I should have listened sooner. If you, like me, are new to the Topaz party, please use this link to purchase. Right now I can wholeheartedly recommend both Topaz Sharpen AI and Topaz DeNoise AI. Though I have not yet worked with JPEGtoRAW AI or Gigapixel AI, I have installed both of these plug-ins and look forward to trying them on some I-Phone 11 images fairly soon. If you are thinking like me, consider the Utility Bundle that includes all four plug-ins mentioned above at a money-saving price.
Again, those who purchase Sharpen AI or DeNoise AI using my link, can e-mail to request a short Getting Started with Topaz e-Guide. I had a bit of trouble getting the two plug-ins installed and having them appear in the Photoshop Filter Menu. In addition, I will explain how to best learn about the two plug-ins by applying them on a Layer (in Photoshop). I amazed myself yesterday by completing this guide in the car on the way to and from Sebastian. Huge thanks to Anita for doing the driving. Please include a copy of your Topaz order when requesting the guide.
New and Better Bedfords Discount Policy!
You can now save 3% on all of your Bedfords photo gear purchases by entering the BIRDSASART coupon code at checkout. Your discount will be applied to your pre-tax total. In addition, by using the code you will get 2nd day air shipping via Fed Ex.
Grab a Nikon AF-S Teleconverter TC-14E III and save $14.99. Purchase a Canon EOS R5 and your discount will be $116.97. Purchase a Sony FE 600mm f/4 GM OSS lens and save a remarkable $389.94! Your Bedford’s purchase no longer needs to be greater than $1,000.00 for you to receive a discount. The more you spend, the more you save.
|
|
|
123 sold to rave reviews.
The SONY e-Guide by Patrick Sparkman and Arthur Morris
|
The Sony Camera User’s e-Guide (and Videos)
Click here to purchase the guide with one Camera Set-up Video. Be sure to e-mail us by clicking here to specify your camera body so that we can send you a link for the correct video.
Click here to purchase the guide with two Camera Set-up Videos. Be sure to e-mail us by clicking here to specify your two camera bodies so that we can send you links for the correct videos.
Click here to learn more about the SONY e-Guide.
Money Saving Reminder
Many have learned that if you need a hot photo item that is out of stock at B&H and would enjoy free overnight shipping, your best bet is to click here, place an order with Bedfords, and enter the coupon code BIRDSASART at checkout. If an item is out of stock, contact Steve Elkins via e-mail or on his cell phone at (479) 381-2592 (Eastern time). Be sure to mention the BIRDSASART coupon code and use it for your online order. Steve has been great at getting folks the hot items that are out of stock at B&H and everywhere else. The wait lists at the big stores can be a year or longer for the hard to get items. Steve will surely get you your gear long before that. For the past year, he has been helping BAA Blog folks get their hands on items like the SONY a9 ii, the SONY 200-600 G OSS lens, the Canon EOS R5, the Canon RF 100-500mm lens, and the Nikon 500mm PF. Steve is personable, helpful, and eager to please.


Gear Questions and Advice
Too many folks attending BAA IPTs and dozens of photographers whom I see in the field and on BPN, are–out of ignorance–using the wrong gear especially when it comes to tripods and more especially, tripod heads… Please know that I am always glad to answer your gear questions via e-mail. Those questions might deal with systems, camera bodies, accessories, and/or lens choices and decisions.
|
|
|
This image was created on 12 NOV 2020 in the bay behind the convention center on South Padre Island, TX. I used the Induro GIT 304/Levered-Clamp FlexShooter-mounted Sony FE 600mm f/4 GM OSS lens and the 61-MP Monster, the Sony Alpha a7R IV Mirrorless Digital Camera Body. ISO 5000. Exposure determined by Zebras with ISO on the rear dial: 1/1600 sec. at f/4 in Manual mode. AWB at 6:45am on a slightly foggy morning.
Upper Center Zone AF-C was active at the moment of exposure and performed to perfection.
Click the image to see a larger version.
Image #2: White morph Reddish Egret striding
|
The New Normal
With Topaz DeNoise AI, you will be to work at high (3200 to at least 8000) ISOs with impunity, run DeNoise (always beginning with Auto), and produce sharp, clean images with virtually no visible noise.
RawDigger
RawDigger showed this image to be more than 2/3rds stop too dark. Before Topaz DeNoise AI underexposing an ISO 5000 image would have been the kiss of death. In the (almost-finished) RawDigger e-Guide, you will learn when and why it is OK to underexpose certain images but not others.
SONY AF Tip
When you wish to include a bird’s whole reflection, it is best to select one of the upper Zones. For today’s featured image, I went with Upper Center Zone so that I could include more of the wake than I would have by putting the bird well back in the frame. Choosing Upper Right Zone would have put the bird farther right in the frame and included more of the wake. But I would have lost the darker BLUE tones in the upper right corner …
|
|
|
Click on the image to better see the noise reduction and the increased sharpness.
Image #1A: Topaz DeNoise on the white morph Reddish Egret striding image at 100%
|
Topaz DeNoise on the white morph Reddish Egret Image
As part of my now-regular workflow, I ran Topaz DeNoise AI on Auto on the whole image. Though I have — on occasion– recently begun changing the values on one or both sliders after starting with Auto, the AI (Artificial Intelligence) settings recommended by Auto were — spot-on for this ISO 5000 image. Be sure to click on the image to enlarge it and note the complete elimination of noise in the background as well as the increased sharpness and the complete lack of any sharpening halos. To me it is pretty amazing that DeNoise can take a somewhat under-exposed image and transform it into an image that is so much cleaner and sharper.
Typos
In all blog posts and Bulletins, feel free to e-mail or to leave a comment regarding any typos or errors. Just be right :).
November 22nd, 2020 What’s Up?
On Friday, we left Lakewood, CO at 3:21am Mountain time, drove for 18 hours and 45 minutes, and checked into a Hampton Inn in Nashville, TN at 11:06pm Central time. We were in a single lane (construction zone) on I-24 about an hour outside of Nashville when traffic stopped suddenly. After a few minutes, I got out of the car and could not see anything but taillights ahead. Seemingly forever. Oops. We might have been there for several hours but after about 20 minutes we were up and running and in a flash the construction zone ended and we were tooling along at 82mph (seven over the speed limit). That was a very insane 1,165 miles.
We left Nashville at 6:15am Central time and was in my driveway at Indian Lake Estates, FL at 8:30 Eastern time. Chalk up another 12 hours and 45 minutes in the car and an additional 747 miles. Unexpectedly for a Saturday, traffic on I-75 around Atlanta was hell. We hit traffic again on I-75 near Ocala, FL.
Anita North did the great bulk of the driving both on the whole trip and on our long journey home. I managed about seven and a half hours on Friday and about another five on Saturday. The totals: 1912 miles and 31 hours (less pit stops and fast food drive-throughs). I got a good night’s sleep in my own bed and will be getting back into the pool this morning. Home sweet home.
As far as COVID, we always practiced social distancing, never ate in a restaurant, and wore masks on our brief shopping tips. Staying in AirBNBs enabled us to prepare our own meals. We did spend a wonderful afternoon and a morning photographing and getting to know BPN-friend Brian Sump (while social distancing). I can now say (and have video proof) that I completed a pass to someone who caught passes from Drew Brees (the latter on a professional level). Details soon.
I was glad to learn today that Used gear page veteran and SONY-e-Guide reviewer Craig Elson recently sold his Sony Alpha a9 Mirrorless Digital camera body in near-mint condition for $2300.00 (was $2498.00).
Wanted to Buy
If you have a used SONY 200-600 G lens that you would like to sell, please contact me via e-mail.
Topaz Still on Sale!
Right now Topaz is offering price reductions on the Utility Bundle and the Creator Bundle. The former normally sells for $359.96. It is on sale now for $249.95. Click here, scroll all the way down to the sale, and enter the ARTHUR15 code at checkout to save an additional 15%! The Creator Bundle usually sells for #279.97 and is now on sale for $149.99. Using the ARTHUR15 code at checkout brings the price down to $127.49!
Please Remember
With income from IPTs approaching zero, please, if you enjoy and learn from the blog, remember to use one of my two affiliate programs when purchasing new gear. Doing so just might make it possible for me to avoid having to try to get a job as a Walmart greeter and will not cost you a single penny more. And if you use Bedfords and remember to enter the BIRDSASART code at checkout, you will save 3% on every order and enjoy free second-day air shipping. In these crazy times — I am out at least forty to sixty thousand dollars so far due to COVID 19 (with lots more to come) — remembering to use my B&H link or to shop at Bedfords will help me out a ton and be greatly appreciated. Overseas folks who cannot order from the US because of import fees, duties, and taxes can always help out by clicking here if they see fit.
The BAA Used Gear Page
The Used Gear page continues to be red hot! It is BAA Used Gear Page is the place to sell your used photographic equipment. We will help you to get your gear sold quickly for 20 to 60% or more than what the big guys are offering … Doubt me? Check out the Recent Sales list for the past ten months at the bottom of the page.
BIRDS AS ART is registered in the U.S. Patent and Trademark Office
Great Topaz News!
Folks who use the BAA Topaz link to purchase Sharpen AI, DeNoise AI, or the Utility Bundle (or any other Topaz plugins) will receive a 15% discount by entering the ARTHUR15 code at checkout. To get the discount you must use my link and you must enter the discount code. Be sure to start with this link.
Topaz Stuff
As I said just a while back and have said often many times before, I should have listened sooner. If you, like me, are new to the Topaz party, please use this link to purchase. Right now I can wholeheartedly recommend both Topaz Sharpen AI and Topaz DeNoise AI. Though I have not yet worked with JPEGtoRAW AI or Gigapixel AI, I have installed both of these plug-ins and look forward to trying them on some I-Phone 11 images fairly soon. If you are thinking like me, consider the Utility Bundle that includes all four plug-ins mentioned above at a money-saving price.
Again, those who purchase Sharpen AI or DeNoise AI using my link, can e-mail to request a short Getting Started with Topaz e-Guide. I had a bit of trouble getting the two plug-ins installed and having them appear in the Photoshop Filter Menu. In addition, I will explain how to best learn about the two plug-ins by applying them on a Layer (in Photoshop). I amazed myself yesterday by completing this guide in the car on the way to and from Sebastian. Huge thanks to Anita for doing the driving. Please include a copy of your Topaz order when requesting the guide.
New and Better Bedfords Discount Policy!
You can now save 3% on all of your Bedfords photo gear purchases by entering the BIRDSASART coupon code at checkout. Your discount will be applied to your pre-tax total. In addition, by using the code you will get 2nd day air shipping via Fed Ex.
Grab a Nikon AF-S Teleconverter TC-14E III and save $14.99. Purchase a Canon EOS R5 and your discount will be $116.97. Purchase a Sony FE 600mm f/4 GM OSS lens and save a remarkable $389.94! Your Bedford’s purchase no longer needs to be greater than $1,000.00 for you to receive a discount. The more you spend, the more you save.
|
|
|
122 sold to rave reviews.
The SONY e-Guide by Patrick Sparkman and Arthur Morris
|
The Sony Camera User’s e-Guide (and Videos)
Click here to purchase the guide with one Camera Set-up Video. Be sure to e-mail us by clicking here to specify your camera body so that we can send you a link for the correct video.
Click here to purchase the guide with two Camera Set-up Videos. Be sure to e-mail us by clicking here to specify your two camera bodies so that we can send you links for the correct videos.
Click here to learn more about the SONY e-Guide.
Money Saving Reminder
Many have learned that if you need a hot photo item that is out of stock at B&H and would enjoy free overnight shipping, your best bet is to click here, place an order with Bedfords, and enter the coupon code BIRDSASART at checkout. If an item is out of stock, contact Steve Elkins via e-mail or on his cell phone at (479) 381-2592 (Eastern time). Be sure to mention the BIRDSASART coupon code and use it for your online order. Steve has been great at getting folks the hot items that are out of stock at B&H and everywhere else. The wait lists at the big stores can be a year or longer for the hard to get items. Steve will surely get you your gear long before that. For the past year, he has been helping BAA Blog folks get their hands on items like the SONY a9 ii, the SONY 200-600 G OSS lens, the Canon EOS R5, the Canon RF 100-500mm lens, and the Nikon 500mm PF. Steve is personable, helpful, and eager to please.


Gear Questions and Advice
Too many folks attending BAA IPTs and dozens of photographers whom I see in the field and on BPN, are–out of ignorance–using the wrong gear especially when it comes to tripods and more especially, tripod heads… Please know that I am always glad to answer your gear questions via e-mail. Those questions might deal with systems, camera bodies, accessories, and/or lens choices and decisions.
New Listings
Nikkor 500mm AF-S F4 ED VR Lens
William Dummitt is offering a Nikkor 500mm AF-S f/4 G ED VR lens in excellent plus condition for an incredibly low $2999.00. The sale includes the rear lens cap, the lens trunk, the original front lens cover, and insured ground shipping via UPS to lower-48 US addresses only. Your item will not ship until your check clears unless other arrangements are made.
Please contact William via e-mail or by phone at 1-314-918-0720 (Eastern time).
The 500mm f/4 super telephoto lenses have been the world’s most popular for birds, nature, wildlife, and sports for many decades. This Nikon version is super-sharp with and without the TC-14E III (the 1.4X teleconverter). It is relatively small and can be hand held by some folks. It is much easier travel with, focuses closer than, and costs a lot less than the current Nikon 600 VR. The current version of the Nikon 500 VR sells new for $10,296.95 … It might be best to grab William’s lens asap. I loved my Canon 500 II. artie
Sigma 500mm f/4.5 APO EX HSM lens for Nikon mount
William Dummitt is offering a Sigma 500mm f/4.5 APO EX HSM lens for Nikon mount in excellent condition for a very low $899.00. (Artie’s suggested price). The sale includes the rear lens cap, the original soft case and padding, the vinyl lens cover, and insured ground shipping via UPS to lower-48 US addresses only. Your item will not ship until your check clears unless other arrangements are made.
Please contact William via e-mail or by phone at 1-314-918-0720 (Eastern time).
I have seen amazingly sharp images made with this lens both on IPTs and on BPN. artie
Nikon AF-S NIKKOR 24-120mm f/4G ED VR Lens
William Dummitt is offering a Nikon AF-S NIKKOR 24-120mm f/4G ED VR lens in excellent condition for a very low $498.00. The sale includes the front and rear lens caps, a Tiffen UV/Haze filter, and insured ground shipping via UPS to lower-48 US addresses only.Your item will not ship until your check clears unless other arrangements are made.
Please contact William Dummitt via e-mail at wdummitt@yahoo.com or by phone at 1-314-918-0720 (Eastern Time)
Canon EF 100mm f/2.8 Macro USM Lens
William Dummitt is offering a Canon EF 100mm f/2.8 Macro USM lens in excellent condition for only $249.00. The sale includes the front and rear lens caps and insured ground shipping via major courier to lower-48 US addresses only. Your item will not ship until your check clears unless other arrangements are made.
Please contact William via e-mail or by phone at 1-314-918-0720 (Eastern time).
This, the original non-IS version of this hugely popular very sharp macro lens, was Denise Ippolito’s favorite for many years. It is great for flowers and bugs large and small. The tripod collar for this lens requires a separate purchase. This lens, still in production, sells new at B&H for $599.00 (though it is currently on back-order). The IS L version II sells for $1299.00. artie
The Situation (and More)
After one of our many excellent mornings photographing in the bay behind the Convention Center on South Padre Island, Anita and I decided to swing by the South Padre Island Birding and Nature Center to check things out. We learned that there is fairly substantial entrance fee ($7.00 for seniors). They open at 8am and close at 5pm. With sunrise in November at about 6:30am and sunset at about 6:15pm, the hours are not meant to attract nature photographers (expect perhaps on cloudy days …) But adjacent to the parking lot was a very small pond surrounded by about a dozen or more whistling ducks. We grabbed our 200-600s and went to work.
We moved slowly into position, got on the ground very slowly, and butt-wiggled closer. I added the 1.4X TC in an effort to create some head portraits. The in-and-out sun and the backgrounds were somewhat problematic. As I have been doing more and more lately, I went with Tracking: Expand Flexible Spot. It has pretty much replaced Tracking Flexible Spot (M) as my go-to AF Area for static subjects. Both of these AF Areas are similar in that they require extensive practice so that you can attain the precise image design that you are looking to create.
We both used the dependable knee-pod technique with my left forearm well out on the lens barrel and squarely resting on the back of my left knee. I was pretty confident that I could create sharp images at 1/200 second. If you take a close look at the DeNoise screen capture below I am pretty sure that you will agree that I was right. The degree of fine feather detail on the duck’s face is astounding considering that the 200-600 G lens ($1998.00) is supposedly inferior to the 600 GM lens ($12998.00). When folks ask Patrick and me whether we see any differences in image quality with the two lenses, we simply answer “No.” While chuckling at bit.
The SONY 200-600 + 1.4X TC at 840mm (or not?)
aka Focus Breathing
Focusing to or near infinity with the 200-600 will yield a true 600mm focal length with approximately 12X magnification. But when focusing on nearby subjects, a phenomenon known as focus breathing comes into play. The actual focal length will be considerably less than that indicated on the zoom ring. When you are working close to the Minimum Focusing Distance (MFD) you will be at about 540mm when fully zoomed to the long end. At close range with the 1.4X TC in place you will be somewhere around 750mm (rather than the assumed 840mm). Note that the MFD of the 200-600 (7.87 feet) kills the MFD of its far more expensive big brother, the 600mm f/4 GM lens (14.8 feet). So for close work with relatively tame birds you are far better off with the 200-600 than the 600 GM. As long as your sharpness techniques allow you to go with relatively low shutter speeds when needed. Note also the effectiveness of the SONY OSS (Optical Stabilization System) at a focal length three and a half times greater than the reciprocal of the shutter speed — 750 to 200.
Do understand that focus breathing exists with all zoom lenses that focus internally, that is, lenses where the physical length of the lens does not change as you zoom in or out. Those include both the Canon 100-400 II and the Canon RF 100-500mm lenses.
|
|
Image #1A: Topaz DeNoise on the Black-bellied Whistling Duck head portrait image at 50%
|
Topaz DeNoise on the Black-bellied Whistling Duck image
As part of my now-regular workflow, I ran Topaz DeNoise AI on Auto on the whole image. Be sure to click on the image to enlarge it and note the complete elimination of noise in the background as well as the increased sharpness and the complete lack of any sharpening halos. To me it is pretty amazing that DeNoise can take a pretty much perfect image and make it considerably better.
Take a peek back at Image #1 and note the extensive clean-up of the dirt near the base of the bird’s bill … I used my usual cadre of clean-up tools and techniques– the Patch Tool, The Clone Stamp Tool, Content-Aware Fill, and several small Quick Masks refined with both the Transform command and Regular Layer Masks. All plus tons more as detailed in Digital Basics II.
|
|
|
San Diego offers a wealth of very attractive natural history subjects, including and especially the Pacific race of California Brown Pelican. With annual visits spanning more than four decades, I have lots of photographic experience there … Click on the composite to enjoy a larger version.
|
San Diego 2021 COVID-conscious Brown Pelican IPT
January 12 thru the morning session on January 16, 2021. Four full and one-half day: $2299.00. Deposit: $599.00. Limit: 8 photographers/Openings: 6.
Introductory Meet and Greet at 7:00pm on the evening before the IPT begins; MON JAN 11, 2021.
Join me in San Diego to photograph the spectacular breeding plumage Brown Pelicans with their fire-engine red and olive green bill pouches; Brandt’s (nesting with eggs and possibly chicks) and Double-crested Cormorants; breeding plumage Wood and Ring-necked Duck; other duck species possible including Lesser Scaup, Redhead, and Surf Scoter; a variety of gulls including Western, California, and the gorgeous Heermann’s, all in full breeding plumage; shorebirds including Marbled Godwit, Willet, Sanderling and Black-bellied Plover; many others are possible including Least, Western, and Spotted Sandpiper, Whimbrel, Black and Ruddy Turnstone, Semipalmated Plover, and Surfbird; Harbor Seals (depending on the current regulations) and California Sea Lions; and Bird of Paradise flowers. And as you can see by studying the IPT cards, there are some nice bird-scape and landscape opportunities as well. Not to mention a ton of excellent flight photography opportunities and instruction.
Please note: where permitted and on occasion, ducks and gulls may be attracted (or re-located) with offerings of grains or healthy bread.
Learning Exposure, Whether You Like It Or Not
Whether you like it or not, we will be beating the subject of exposure like a dead horse. In every new situation, you will hear my thoughts on the exposure situation along with my thoughts on both Nikon and Canon histograms and the subject of blinkies. Whether you like it or not, you will learn to work in manual mode and to get the right exposure every time as long as a bird gives you ten seconds with the light constant. And you will learn what to do when the light is changing constantly. What you learn about exposure will be one of the great takeaways on every IPT.
|
|
|
Though the pelicans will be the stars of the show on this IPT, there will be many other handsome and captivating subjects in wonderful settings. Click on the composite to enjoy a larger version.
|
It Ain’t Just Pelicans
With gorgeous subjects just sitting there waiting to have their pictures taken, photographing the pelicans on the cliffs is about as easy as nature photography gets. With the winds from the east almost every morning there is usually some excellent flight photography as well. And the pelicans are almost always doing something interesting: preening, scratching, bill pouch cleaning, or squabbling. And then there are those crazy head throws that are thought to be a form of intra-flock communication. You will be guided as to how to make the best of all of those opportunities. And depending on the weather and local conditions and tides, there are a variety of fabulous photo chances available in and around San Diego.
|

|
|
Did I mention that there are lots of great birds and natural history subjects in San Diego in winter? Click on the composite to enjoy a larger version.
|
The San Diego Details
This IPT will include five 3 1/2 hour morning photo sessions, four 2 1/2 hour afternoon photo sessions, four lunches, and after-brunch image review and Photoshop sessions. To ensure early starts, breakfasts will be your responsibility. And so that we can get some sleep, dinners will be on your own as well.
A $599 deposit is required to hold your slot for this IPT. You can send a check (made out to “BIRDS AS ART) to us here: BIRDS AS ART, PO Box 7245, Indian Lake Estates, FL, 3385, or call Jim or Jennifer at the office with a credit card at 863-692-0906. Your balance, payable only by check, is due immediately after you sign up. Please print, complete, and sign the form that is linked to here and shoot it to us along with your deposit check. If you register by phone, please print, complete and sign the form as noted above and either mail it to us or e-mail the scan. If you have any questions, please feel free to contact me via e-mail. If you cancel due to COVID 19 concerns, all of your payments will be refunded.
Travel Insurance
Travel insurance for both big international trips and US-based IPTs is highly recommended as we never know what life has in store for us. I strongly recommend that you purchase quality travel insurance. Travel Insurance Services offers a variety of plans and options. Included with the Elite Option or available as an upgrade to the Basic & Plus Options you can also purchase Cancel for Any Reason Coverage that expands the list of reasons for your canceling to include things such as sudden work or family obligation and even a simple change of mind. My family and I use and depend on the great policies offered by TIS whenever we travel. You can learn more here: Travel Insurance Services. Do note that many plans require that you purchase your travel insurance within 14 days of our cashing your deposit check or running your credit card. Whenever purchasing travel insurance, be sure to read the fine print carefully even when dealing with reputable firms like TSI.
|

|
|
Variety is surely the spice of life in San Diego. Click on the composite to enjoy a larger version.
|
Getting Up Early and Staying Out Late
On all BIRDS AS ART IPTS including and especially the San Diego IPT, we get into the field early to take advantage of unique and often spectacular lighting conditions and we stay out late to maximize the chances of killer light and glorious sunset silhouette situations. We often arrive at the cliffs a full hour before anyone else shows up to check out the landscape and seascape opportunities.
Typos
In all blog posts and Bulletins, feel free to e-mail or to leave a comment regarding any typos or errors. Just be right :).
November 20th, 2020 What’s Up?
We pulled out of the driveway at 3:21am Mountain Time. The sun rose at 6:33am. About thirty minutes after we crossed into Kansas, we lost an hour as we entered the Central time one. Yes, Dorothy — there are two time zones in Kansas! I posted this at 12:14pm somewhere in Kansas. We are hoping to get a huge driving day under our belts and make it a bit past St. Louis, MO … We hope to be back to ILE late on Sunday afternoon. The straight line drive (no pitstops or lodging) is 1907 miles.
I was glad to learn your yesterday that the sale of James Paula’s Sony Alpha a7 III Mirrorless Digital camera body in excellent plus condition for $1098.00 is pending.
I was glad also to learn yesterday that Carolyn Johnson signed up for the San Diego IPT.
Wanted to Buy
If you have a used SONY 200-600 G lens that you would like to sell, please contact me via e-mail.
Topaz Still on Sale!
Right now Topaz is offering price reductions on the Utility Bundle and the Creator Bundle. The former normally sells for $359.96. It is on sale now for $249.95. Click here, scroll all the way down to the sale, and enter the ARTHUR15 code at checkout to save an additional 15%! The Creator Bundle usually sells for #279.97 and is now on sale for $149.99. Using the ARTHUR15 code at checkout brings the price down to $127.49!
Please Remember
With income from IPTs approaching zero, please, if you enjoy and learn from the blog, remember to use one of my two affiliate programs when purchasing new gear. Doing so just might make it possible for me to avoid having to try to get a job as a Walmart greeter and will not cost you a single penny more. And if you use Bedfords and remember to enter the BIRDSASART code at checkout, you will save 3% on every order and enjoy free second-day air shipping. In these crazy times — I am out at least forty to sixty thousand dollars so far due to COVID 19 (with lots more to come) — remembering to use my B&H link or to shop at Bedfords will help me out a ton and be greatly appreciated. Overseas folks who cannot order from the US because of import fees, duties, and taxes can always help out by clicking here if they see fit.
The BAA Used Gear Page
The Used Gear page continues to be red hot! It is BAA Used Gear Page is the place to sell your used photographic equipment. We will help you to get your gear sold quickly for 20 to 60% or more than what the big guys are offering … Doubt me? Check out the Recent Sales list for the past ten months at the bottom of the page.
BIRDS AS ART is registered in the U.S. Patent and Trademark Office
Great Topaz News!
Folks who use the BAA Topaz link to purchase Sharpen AI, DeNoise AI, or the Utility Bundle (or any other Topaz plugins) will receive a 15% discount by entering the ARTHUR15 code at checkout. To get the discount you must use my link and you must enter the discount code. Be sure to start with this link.
Topaz Stuff
As I said just a while back and have said often many times before, I should have listened sooner. If you, like me, are new to the Topaz party, please use this link to purchase. Right now I can wholeheartedly recommend both Topaz Sharpen AI and Topaz DeNoise AI. Though I have not yet worked with JPEGtoRAW AI or Gigapixel AI, I have installed both of these plug-ins and look forward to trying them on some I-Phone 11 images fairly soon. If you are thinking like me, consider the Utility Bundle that includes all four plug-ins mentioned above at a money-saving price.
Again, those who purchase Sharpen AI or DeNoise AI using my link, can e-mail to request a short Getting Started with Topaz e-Guide. I had a bit of trouble getting the two plug-ins installed and having them appear in the Photoshop Filter Menu. In addition, I will explain how to best learn about the two plug-ins by applying them on a Layer (in Photoshop). I amazed myself yesterday by completing this guide in the car on the way to and from Sebastian. Huge thanks to Anita for doing the driving. Please include a copy of your Topaz order when requesting the guide.
New and Better Bedfords Discount Policy!
You can now save 3% on all of your Bedfords photo gear purchases by entering the BIRDSASART coupon code at checkout. Your discount will be applied to your pre-tax total. In addition, by using the code you will get 2nd day air shipping via Fed Ex.
Grab a Nikon AF-S Teleconverter TC-14E III and save $14.99. Purchase a Canon EOS R5 and your discount will be $116.97. Purchase a Sony FE 600mm f/4 GM OSS lens and save a remarkable $389.94! Your Bedford’s purchase no longer needs to be greater than $1,000.00 for you to receive a discount. The more you spend, the more you save.
|
|
|
122 sold to rave reviews.
The SONY e-Guide by Patrick Sparkman and Arthur Morris
|
The Sony Camera User’s e-Guide (and Videos)
Click here to purchase the guide with one Camera Set-up Video. Be sure to e-mail us by clicking here to specify your camera body so that we can send you a link for the correct video.
Click here to purchase the guide with two Camera Set-up Videos. Be sure to e-mail us by clicking here to specify your two camera bodies so that we can send you links for the correct videos.
Click here to learn more about the SONY e-Guide.
Money Saving Reminder
Many have learned that if you need a hot photo item that is out of stock at B&H and would enjoy free overnight shipping, your best bet is to click here, place an order with Bedfords, and enter the coupon code BIRDSASART at checkout. If an item is out of stock, contact Steve Elkins via e-mail or on his cell phone at (479) 381-2592 (Eastern time). Be sure to mention the BIRDSASART coupon code and use it for your online order. Steve has been great at getting folks the hot items that are out of stock at B&H and everywhere else. The wait lists at the big stores can be a year or longer for the hard to get items. Steve will surely get you your gear long before that. For the past year, he has been helping BAA Blog folks get their hands on items like the SONY a9 ii, the SONY 200-600 G OSS lens, the Canon EOS R5, the Canon RF 100-500mm lens, and the Nikon 500mm PF. Steve is personable, helpful, and eager to please.


Gear Questions and Advice
Too many folks attending BAA IPTs and dozens of photographers whom I see in the field and on BPN, are–out of ignorance–using the wrong gear especially when it comes to tripods and more especially, tripod heads… Please know that I am always glad to answer your gear questions via e-mail. Those questions might deal with systems, camera bodies, accessories, and/or lens choices and decisions.
|
|
This is the Capture One screen capture for today’s featured image: Brown Pelican tandem diving in front of setting sun
|
An Impossible Exposure
At the moment of capture, the dynamic range of the scene far exceeded the dynamic range of the a9 ii sensor. And it far exceeded the dynamic range of any digital camera that I know of. And it far exceeded the dynamic range of any film that I know of. In the Photo Mechanic screen capture above you can see that the sun and a good portion of the bright sky above it show as grossly over-exposed. With the Exposure Warning activated, however, nothing showed as under-exposed.
|
|
This is the RawDigger screen capture for today’s featured image: Brown Pelican tandem diving in front of setting sun
|
Yes, An Impossible Exposure
RawDigger assessed the situation much more accurately. It showed the ball of the sun and just a small portion of the bright sky right above it to be overexposed (via the red warnings). And it correctly showed (via the blue warnings) that the two pelicans were under-exposed. Both of those as expected. It is simply not possible to maintain detail in a setting sun that is not fully muted by clouds while revealing detail in the veery darkest tones — in this case, the two diving pelicans.
In the RawDigger e-Guide (almost finished), you will learn how to interpret the Max values to ensure that your raw files are mega-exposed to the right. You will also learn how to interpret the OvExp/UnExp stats. And in addition, you will learn why it was possible to salvage what is obviously a grossly over-exposed image with 196,000 over-exposed red pixels and 142,00 over-exposed green pixels…
|
|
Topaz Gigapixel AI to the Rescue
|
Gigapixel AI to the Rescue
I was excited when I saw this image on the back of the camera and was thrilled to have an image with the two birds in the sky above the water. I knew instantly the it would require a fairly large crop. Immediately I thought that the cropped image would be a good candidate for Topaz Gigapixel AI. The results on Auto, as seen above, were quite astounding. The noise was reduced and the image rendered twice the size and much sharper. After bringing the rendered image into Photoshop and viewing it at 200%, I ran Topaz DeNoise AI to completely eliminate the little remaining noise in the background. I have no clue as to how the AI (artificial intelligence) can improve and image so dramatically, but all in all, the results were astounding. See the master file below.
|
|
|
This image was created on 14 November 2020 near the jetty at the south end of South Padre Island. I used the handheld handheld Sony FE 600mm f/4 GM OSS lens and the blazingly fast AF King, the Sony Alpha a9 II Mirrorless Digital Camera Body. Exposure determined by Zebras with Exposure Compensation on the rear dial: Multi-metering at +2 1/3 stops: 1/2000 sec. at f/4 in Shutter Priority mode. Auto set the ISO to 250. AWB at 6:28pm with some light clouds on the horizon.
Center Zone AF-C was active at the moment of exposure and performed perfectly. Click on the image to see a larger version.
Brown Pelican tandem diving in front of setting sun
|
The Optimized Image
In addition to the Topaz AI work, note that I leveled the image and used the Patch Tool to eliminate a pole or two that cut into the horizon left to our left of the sun. As you likely have figured out by now, I was quite pleased with the final image. Topaz Gigapixel AI has opened up dramatic new worlds to photographers, especially to those who love to photograph action and flight.
Handholding and the SONY Callus
I mentioned to Patrick last week that after only a few afternoons of handholding the SONY 600GM with the a9 ii that I had developed a nasty callus on the inside of my right middle finger just past the proximal knuckle. He said, “I have that too. That’s the SONY callus.” There is a bit of a knurled protrusion just to the right of the shutter button that causes a callus to form. This area might have been better designed; that is, bean made a bit smoother.
|
|
|
San Diego offers a wealth of very attractive natural history subjects, including and especially the Pacific race of California Brown Pelican. With annual visits spanning more than four decades, I have lots of photographic experience there … Click on the composite to enjoy a larger version.
|
San Diego 2021 COVID-conscious Brown Pelican IPT
January 12 thru the morning session on January 16, 2021. Four full and one-half day: $2299.00. Deposit: $599.00. Limit: 8 photographers/Openings: 6.
Introductory Meet and Greet at 7:00pm on the evening before the IPT begins; MON JAN 11, 2021.
Join me in San Diego to photograph the spectacular breeding plumage Brown Pelicans with their fire-engine red and olive green bill pouches; Brandt’s (nesting with eggs and possibly chicks) and Double-crested Cormorants; breeding plumage Wood and Ring-necked Duck; other duck species possible including Lesser Scaup, Redhead, and Surf Scoter; a variety of gulls including Western, California, and the gorgeous Heermann’s, all in full breeding plumage; shorebirds including Marbled Godwit, Willet, Sanderling and Black-bellied Plover; many others are possible including Least, Western, and Spotted Sandpiper, Whimbrel, Black and Ruddy Turnstone, Semipalmated Plover, and Surfbird; Harbor Seals (depending on the current regulations) and California Sea Lions; and Bird of Paradise flowers. And as you can see by studying the IPT cards, there are some nice bird-scape and landscape opportunities as well. Not to mention a ton of excellent flight photography opportunities and instruction.
Please note: where permitted and on occasion, ducks and gulls may be attracted (or re-located) with offerings of grains or healthy bread.
Learning Exposure, Whether You Like It Or Not
Whether you like it or not, we will be beating the subject of exposure like a dead horse. In every new situation, you will hear my thoughts on the exposure situation along with my thoughts on both Nikon and Canon histograms and the subject of blinkies. Whether you like it or not, you will learn to work in manual mode and to get the right exposure every time as long as a bird gives you ten seconds with the light constant. And you will learn what to do when the light is changing constantly. What you learn about exposure will be one of the great takeaways on every IPT.
|
|
|
Though the pelicans will be the stars of the show on this IPT, there will be many other handsome and captivating subjects in wonderful settings. Click on the composite to enjoy a larger version.
|
It Ain’t Just Pelicans
With gorgeous subjects just sitting there waiting to have their pictures taken, photographing the pelicans on the cliffs is about as easy as nature photography gets. With the winds from the east almost every morning there is usually some excellent flight photography as well. And the pelicans are almost always doing something interesting: preening, scratching, bill pouch cleaning, or squabbling. And then there are those crazy head throws that are thought to be a form of intra-flock communication. You will be guided as to how to make the best of all of those opportunities. And depending on the weather and local conditions and tides, there are a variety of fabulous photo chances available in and around San Diego.
|

|
|
Did I mention that there are lots of great birds and natural history subjects in San Diego in winter? Click on the composite to enjoy a larger version.
|
The San Diego Details
This IPT will include five 3 1/2 hour morning photo sessions, four 2 1/2 hour afternoon photo sessions, four lunches, and after-brunch image review and Photoshop sessions. To ensure early starts, breakfasts will be your responsibility. And so that we can get some sleep, dinners will be on your own as well.
A $599 deposit is required to hold your slot for this IPT. You can send a check (made out to “BIRDS AS ART) to us here: BIRDS AS ART, PO Box 7245, Indian Lake Estates, FL, 3385, or call Jim or Jennifer at the office with a credit card at 863-692-0906. Your balance, payable only by check, is due immediately after you sign up. Please print, complete, and sign the form that is linked to here and shoot it to us along with your deposit check. If you register by phone, please print, complete and sign the form as noted above and either mail it to us or e-mail the scan. If you have any questions, please feel free to contact me via e-mail. If you cancel due to COVID 19 concerns, all of your payments will be refunded.
Travel Insurance
Travel insurance for both big international trips and US-based IPTs is highly recommended as we never know what life has in store for us. I strongly recommend that you purchase quality travel insurance. Travel Insurance Services offers a variety of plans and options. Included with the Elite Option or available as an upgrade to the Basic & Plus Options you can also purchase Cancel for Any Reason Coverage that expands the list of reasons for your canceling to include things such as sudden work or family obligation and even a simple change of mind. My family and I use and depend on the great policies offered by TIS whenever we travel. You can learn more here: Travel Insurance Services. Do note that many plans require that you purchase your travel insurance within 14 days of our cashing your deposit check or running your credit card. Whenever purchasing travel insurance, be sure to read the fine print carefully even when dealing with reputable firms like TSI.
|

|
|
Variety is surely the spice of life in San Diego. Click on the composite to enjoy a larger version.
|
Getting Up Early and Staying Out Late
On all BIRDS AS ART IPTS including and especially the San Diego IPT, we get into the field early to take advantage of unique and often spectacular lighting conditions and we stay out late to maximize the chances of killer light and glorious sunset silhouette situations. We often arrive at the cliffs a full hour before anyone else shows up to check out the landscape and seascape opportunities.
Typos
In all blog posts and Bulletins, feel free to e-mail or to leave a comment regarding any typos or errors. Just be right :).
November 18th, 2020 What’s Up?
We spent our first day near Denver, CO photographing White Pelicans, Green-winged Teal, and Cackling Goose (a small race of Canada goose).
After careful consideration, Anita North and I have – for a variety of reasons — decided to forego the remainder of our planned road trip and head back to Florida soon — we will probably begin heading east this coming Saturday morning. Two of the main factors that influenced our decision were the re-closure of New Mexico (which again is requiring a 14-day quarantine) and the extremely poor photographic conditions at Bosque del Apache NWR. We had planned on a three-week stay in Socorro that would have been the centerpiece of our trip.
Topaz Still on Sale!
Right now Topaz is offering price reductions on the Utility Bundle and the Creator Bundle. The former normally sells for $359.96. It is on sale now for $249.95. Click here, scroll all the way down to the sale, and enter the ARTHUR15 code at checkout to save an additional 15%! The Creator Bundle usually sells for $279.97 and is now on sale for $149.99. Using the ARTHUR15 code at checkout brings the price down to $127.49!
Please Remember
With income from IPTs approaching zero, please, if you enjoy and learn from the blog, remember to use one of my two affiliate programs when purchasing new gear. Doing so just might make it possible for me to avoid having to try to get a job as a Walmart greeter and will not cost you a single penny more. And if you use Bedfords and remember to enter the BIRDSASART code at checkout, you will save 3% on every order and enjoy free second-day air shipping. In these crazy times — I am out at least forty to sixty thousand dollars so far due to COVID 19 (with lots more to come) — remembering to use my B&H link or to shop at Bedfords will help me out a ton and be greatly appreciated. Overseas folks who cannot order from the US because of import fees, duties, and taxes can always help out by clicking here if they see fit.
The BAA Used Gear Page
The Used Gear page continues to be red hot! It is BAA Used Gear Page is the place to sell your used photographic equipment. We will help you to get your gear sold quickly for 20 to 60% or more than what the big guys are offering … Doubt me? Check out the Recent Sales list for the past ten months at the bottom of the page.
BIRDS AS ART is registered in the U.S. Patent and Trademark Office
Great Topaz News!
Folks who use the BAA Topaz link to purchase Sharpen AI, DeNoise AI, or the Utility Bundle (or any other Topaz plugins) will receive a 15% discount by entering the ARTHUR15 code at checkout. To get the discount you must use my link and you must enter the discount code. Be sure to start with this link.
Topaz Stuff
As I said just a while back and have said often many times before, I should have listened sooner. If you, like me, are new to the Topaz party, please use this link to purchase. Right now I can wholeheartedly recommend both Topaz Sharpen AI and Topaz DeNoise AI. Though I have not yet worked with JPEGtoRAW AI or Gigapixel AI, I have installed both of these plug-ins and look forward to trying them on some I-Phone 11 images fairly soon. If you are thinking like me, consider the Utility Bundle that includes all four plug-ins mentioned above at a money-saving price.
Again, those who purchase Sharpen AI or DeNoise AI using my link, can e-mail to request a short Getting Started with Topaz e-Guide. I had a bit of trouble getting the two plug-ins installed and having them appear in the Photoshop Filter Menu. In addition, I will explain how to best learn about the two plug-ins by applying them on a Layer (in Photoshop). I amazed myself yesterday by completing this guide in the car on the way to and from Sebastian. Huge thanks to Anita for doing the driving. Please include a copy of your Topaz order when requesting the guide.
New and Better Bedfords Discount Policy!
You can now save 3% on all of your Bedfords photo gear purchases by entering the BIRDSASART coupon code at checkout. Your discount will be applied to your pre-tax total. In addition, by using the code you will get 2nd day air shipping via Fed Ex.
Grab a Nikon AF-S Teleconverter TC-14E III and save $14.99. Purchase a Canon EOS R5 and your discount will be $116.97. Purchase a Sony FE 600mm f/4 GM OSS lens and save a remarkable $389.94! Your Bedford’s purchase no longer needs to be greater than $1,000.00 for you to receive a discount. The more you spend, the more you save.
|
|
|
122 sold to rave reviews.
The SONY e-Guide by Patrick Sparkman and Arthur Morris
|
The Sony Camera User’s e-Guide (and Videos)
Click here to purchase the guide with one Camera Set-up Video. Be sure to e-mail us by clicking here to specify your camera body so that we can send you a link for the correct video.
Click here to purchase the guide with two Camera Set-up Videos. Be sure to e-mail us by clicking here to specify your two camera bodies so that we can send you links for the correct videos.
Click here to learn more about the SONY e-Guide.
Money Saving Reminder
Many have learned that if you need a hot photo item that is out of stock at B&H and would enjoy free overnight shipping, your best bet is to click here, place an order with Bedfords, and enter the coupon code BIRDSASART at checkout. If an item is out of stock, contact Steve Elkins via e-mail or on his cell phone at (479) 381-2592 (Eastern time). Be sure to mention the BIRDSASART coupon code and use it for your online order. Steve has been great at getting folks the hot items that are out of stock at B&H and everywhere else. The wait lists at the big stores can be a year or longer for the hard to get items. Steve will surely get you your gear long before that. For the past year, he has been helping BAA Blog folks get their hands on items like the SONY a9 ii, the SONY 200-600 G OSS lens, the Canon EOS R5, the Canon RF 100-500mm lens, and the Nikon 500mm PF. Steve is personable, helpful, and eager to please.


Gear Questions and Advice
Too many folks attending BAA IPTs and dozens of photographers whom I see in the field and on BPN, are–out of ignorance–using the wrong gear especially when it comes to tripods and more especially, tripod heads… Please know that I am always glad to answer your gear questions via e-mail. Those questions might deal with systems, camera bodies, accessories, and/or lens choices and decisions.
|
|
|
Both images in this Photo Mechanic screen capture were created on 7 November 2020 at the fabulous morning raptor blind at the Laguna Seca Ranch in Hidalgo County, TX. The last image in this 3-frame sequence is today’s featured image (below). I used the handheld Sony FE 200-600mm f/5.6-6.3 G OSS lens (all at 448mm) and the blazingly fast AF King, the Sony Alpha a9 II Mirrorless Digital camera body. ISO 2500. Exposure determined by Zebras with ISO on the rear wheel: 1/2000 sec. at f/6.3 in Manual mode. AWB at 9:10am on a cloudy-bright morning.
Center Zone AF-C was active at the moment of exposure and performed superbly.
Image #1: Crested Caracara landing sequence Screen Capture
|
The Situation
A mentioned here previously, our first four mornings in the raptor blind at Laguna Seca Ranch were clear and sunny with an unfortunate breeze from the west that had most of the birds landing away from us. The prevailing winds in early November are generally strong from the east. It was foggy and still early on the morning of the seventh. The fog cleared nicely leaving us with the cloudy-bright conditions that I love. But with little wind, most of the birds were coming in too low and were partially obscured by the perch. Many excellent flight images are created by picking out the one bird that does not follow the expected pattern. The bird featured in today’s post flew directly at us at a decent height above the perch. The a9 ii took care of the rest. All three images in the sequence were razor sharp on the bird’s eye.
|
|
|
This image was created on 7 November 2020 at the morning raptor blind at the fabulous Laguna Seca Ranch in Hidalgo County, TX. I used the handheld Sony FE 200-600mm f/5.6-6.3 G OSS lens (at 448mm) and the blazingly fast AF King, the Sony Alpha a9 II Mirrorless Digital camera body. ISO 2500. Exposure determined by Zebras with ISO on the rear wheel: 1/2000 sec. at f/6.3 in Manual mode. AWB at 9:10am on a cloudy-bright morning.
Center Zone AF-C was active at the moment of exposure and performed superbly.
Image #2: Crested Caracara braking to land in full flare
|
Flight Pose: Winner, Winner, Chicken Dinner
With landing birds flying right at you this, is the pose I try for with the wings fully flared as the bird is braking hard. In a perfect world, the bird would have been staring right down the lens barrel instead of slightly to my left. When you get the right pose it is a treat with the SONY a9 series bodies that you do not have to worry about whether the image is sharp …
Image Processing Questions
1- Would you have removed the caracara on the ground? Why or why not?
2- Would you attempt to fill in the sky background that merges with two of the primaries of the bird’s right wing (upper left in the frame as we view it)? Why or why not?
|
|
Image #2A: Topaz DeNoise on the Crested Caracara braking to land in full flare image at 125%
|
Topaz DeNoise on the Crested Caracara braking image
As part of my now-regular workflow, I ran Topaz DeNoise AI on Auto on the whole image. Be sure to click on the image to enlarge it and note the elimination of noise in the background and on the black feathers of the bird’s chest. Note also the increased sharpness and the complete lack of any sharpening halos.
Typos
In all blog posts and Bulletins, feel free to e-mail or to leave a comment regarding any typos or errors. Just be right :).
November 16th, 2020 What’s Up?
On Saturday morning past, we enjoyed another fine photography session in the shallow bay just past the Convention Center on South Padre Island. Once again the American White Pelicans and the Franklin’s Gulls were the stars. We headed back to the jetty at Isla Blanca Park that afternoon. After two great afternoons, this location was pretty much a dud on Friday so we were not expecting much. After a slow start, things really heated up with groups of three to six pelicans diving into the surf right in front of us for two hours. Anita created 3200 images and though she has not finished editing yet, she had several dozen killer images as she waded out waist-deep into the waves with her 200-600. With the car keys in my pocket I stayed close to shore with the 600 GM. I can’t wait to see all her keepers when she is done selecting them. I got a few good ones and a single spectacular sunset silhouette …
We awoke on Sunday planning photograph in the bay again and then drive for 2 1/2 days to Golden, CO to visit BPN friend Brian Sump. It was cloudy and foggy at 6:30am with a super-low tide and very few birds so we turned around, packed up the car, and drove away from our AirBNB at 7:28am. We stayed at a great AirBNB in Lubbock, TX on Sunday night. After leaving the heat and humidity of South Texas, waking up to a clear and cold 42 degree morning in Lubbock was a shock to the system. Break out the hoodies and warm jackets. Today is Monday 16 November. We are headed another 551 miles to the north/northewest and should make our next AirBNB in Lakewood, CO late this afternoon or early evening.
Topaz Still on Sale!
Right now Topaz is offering price reductions on the Utility Bundle and the Creator Bundle. The former normally sells for $359.96. It is on sale now for $249.95. Click here, scroll all the way down to the sale, and enter the ARTHUR15 code at checkout to save an additional 15%! The Creator Bundle usually sells for #279.97 and is now on sale for $149.99. Using the ARTHUR15 code at checkout brings the price down to $127.49!
Please Remember
With income from IPTs approaching zero, please, if you enjoy and learn from the blog, remember to use one of my two affiliate programs when purchasing new gear. Doing so just might make it possible for me to avoid having to try to get a job as a Walmart greeter and will not cost you a single penny more. And if you use Bedfords and remember to enter the BIRDSASART code at checkout, you will save 3% on every order and enjoy free second-day air shipping. In these crazy times — I am out at least forty to sixty thousand dollars so far due to COVID 19 (with lots more to come) — remembering to use my B&H link or to shop at Bedfords will help me out a ton and be greatly appreciated. Overseas folks who cannot order from the US because of import fees, duties, and taxes can always help out by clicking here if they see fit.
The BAA Used Gear Page
The Used Gear page continues to be red hot! It is BAA Used Gear Page is the place to sell your used photographic equipment. We will help you to get your gear sold quickly for 20 to 60% or more than what the big guys are offering … Doubt me? Check out the Recent Sales list for the past ten months at the bottom of the page.
Sony Alpha a Series Body Listings
Sony Alpha a9 Mirrorless Digital Camera Body with Extras!)
Used gear page veteran and SONY-e-Guide reviewer Craig Elson is offering a Sony Alpha a9 Mirrorless Digital camera body in near-mint condition for only $2498.00. The sale includes a like-new Sony VG-C3EM vertical grip (a $348.00 value) and a Mieke MK-X1EM metal bracket hand grip (a $39.99 value that provides improved ergonomics if using an a9 without the VG-C3EM Vertical Grip), the original box, one battery and the charger with the power cord, the micro USB connector cable, the strap, the body cap, the accessory shoe cap, the manuals, a glass LCD screen protector, and insured ground shipping via major courier to continental U.S. addresses only. Your item will not ship until your check clears unless other arrangements are made.
Please contact Craig Elson via e-mail or by phone at 704.904.7953 (Pacific time zone).
The incredible AF system, the frame-rate, and the quality of the 24.2 MP images files of the a9 — my first SONY body — blew me away and quickly put Nikon in the rear view mirror. (By that time,Canon was well-rusted in the junkyard …) The a9 was replaced by the a9 ii with its slightly wider chassis being the only difference between these two great bodies. Oh, there is one more difference: the a9 ii sells for a whopping $4,498.00. You can save a whopping $2,000.00 by being the one to grab Craig’s camera. One more thing, the a9 is pretty much out of stock everywhere … artie
Sony Alpha a7 III Mirrorless Digital Camera Body
James Paula is offering a Sony Alpha a7 III Mirrorless Digital camera body in excellent plus condition for $1098.00. But for several all scratches on the the (flash) hot shoe, the body would be near-mint. It has about 7200 activations and operates flawlessly. The sale includes the front cap, the strap, the battery & charger, the original product box, and insured ground shipping via major courier to lower-48 US addresses only. Your item will not ship until your check clears unless other arrangements are made.
Please contact Jim via e-mail.
Distinguished by its updated sensor design, the Alpha a7 III Mirrorless Digital Camera from Sony is a well-rounded camera suitable for both photo and video applications in a variety of working situations. Refined for improved speed and low-light performance, the full-frame 24.2MP Exmor R BSI CMOS sensor and BIONZ X image processor pair to realize an impressive 10 fps continuous shooting rate and improved autofocus performance for faster, more reliable subject tracking along with wide frame coverage. This updated Fast Hybrid AF System employs a combination of 693 phase-detection points and 425 contrast-detection areas for quicker acquirement of focus in a variety of lighting conditions, and also maintains focus on subjects more effectively. In addition to speed and AF, the processing improvements also help to realize greater image clarity and reduced noise throughout the sensitivity range from ISO 100-51200, which can further be expanded to ISO 50-204800. Video recording capabilities have also been extended for enhanced quality when recording UHD 4K video with the full width of the full-frame sensor to minimize moiré and aliasing. Additionally, benefitting both stills and video operation, the a7 III utilizes a 5-axis SteadyShot INSIDE sensor-shift image stabilization, which is now effective to minimize the appearance of camera shake by up to 5 stops.
Beyond just updates to the imaging system, the a7 III’s body design has also been revised to include a rear 3.0″ 922k-dot touchscreen LCD, which has a tilting design to better support working from high and low angles. A 2.36m-dot Tru-Finder OLED EVF is also featured for bright and clear eye-level monitoring. For greater shooting flexibility, dual SD memory card slots are now featured, and a larger NP-FZ100 battery is also employed to achieve up to approximately 710 shots per charge. Suiting the camera’s use in trying conditions, the magnesium-alloy chassis and weather-sealing also render the a7 III dust- and moisture-resistant. B&H and the manufacturer
This body, which sells new for $1698.00, was the first SONY body to feature a killer AF system. artie
BIRDS AS ART is registered in the U.S. Patent and Trademark Office
Great Topaz News!
Folks who use the BAA Topaz link to purchase Sharpen AI, DeNoise AI, or the Utility Bundle (or any other Topaz plugins) will receive a 15% discount by entering the ARTHUR15 code at checkout. To get the discount you must use my link and you must enter the discount code. Be sure to start with this link.
Topaz Stuff
As I said just a while back and have said often many times before, I should have listened sooner. If you, like me, are new to the Topaz party, please use this link to purchase. Right now I can wholeheartedly recommend both Topaz Sharpen AI and Topaz DeNoise AI. Though I have not yet worked with JPEGtoRAW AI or Gigapixel AI, I have installed both of these plug-ins and look forward to trying them on some I-Phone 11 images fairly soon. If you are thinking like me, consider the Utility Bundle that includes all four plug-ins mentioned above at a money-saving price.
Again, those who purchase Sharpen AI or DeNoise AI using my link, can e-mail to request a short Getting Started with Topaz e-Guide. I had a bit of trouble getting the two plug-ins installed and having them appear in the Photoshop Filter Menu. In addition, I will explain how to best learn about the two plug-ins by applying them on a Layer (in Photoshop). I amazed myself yesterday by completing this guide in the car on the way to and from Sebastian. Huge thanks to Anita for doing the driving. Please include a copy of your Topaz order when requesting the guide.
New and Better Bedfords Discount Policy!
You can now save 3% on all of your Bedfords photo gear purchases by entering the BIRDSASART coupon code at checkout. Your discount will be applied to your pre-tax total. In addition, by using the code you will get 2nd day air shipping via Fed Ex.
Grab a Nikon AF-S Teleconverter TC-14E III and save $14.99. Purchase a Canon EOS R5 and your discount will be $116.97. Purchase a Sony FE 600mm f/4 GM OSS lens and save a remarkable $389.94! Your Bedford’s purchase no longer needs to be greater than $1,000.00 for you to receive a discount. The more you spend, the more you save.
|
|
|
121 sold to rave reviews.
The SONY e-Guide by Patrick Sparkman and Arthur Morris
|
The Sony Camera User’s e-Guide (and Videos)
Click here to purchase the guide with one Camera Set-up Video. Be sure to e-mail us by clicking here to specify your camera body so that we can send you a link for the correct video.
Click here to purchase the guide with two Camera Set-up Videos. Be sure to e-mail us by clicking here to specify your two camera bodies so that we can send you links for the correct videos.
Click here to learn more about the SONY e-Guide.
Money Saving Reminder
Many have learned that if you need a hot photo item that is out of stock at B&H and would enjoy free overnight shipping, your best bet is to click here, place an order with Bedfords, and enter the coupon code BIRDSASART at checkout. If an item is out of stock, contact Steve Elkins via e-mail or on his cell phone at (479) 381-2592 (Eastern time). Be sure to mention the BIRDSASART coupon code and use it for your online order. Steve has been great at getting folks the hot items that are out of stock at B&H and everywhere else. The wait lists at the big stores can be a year or longer for the hard to get items. Steve will surely get you your gear long before that. For the past year, he has been helping BAA Blog folks get their hands on items like the SONY a9 ii, the SONY 200-600 G OSS lens, the Canon EOS R5, the Canon RF 100-500mm lens, and the Nikon 500mm PF. Steve is personable, helpful, and eager to please.


Gear Questions and Advice
Too many folks attending BAA IPTs and dozens of photographers whom I see in the field and on BPN, are–out of ignorance–using the wrong gear especially when it comes to tripods and more especially, tripod heads… Please know that I am always glad to answer your gear questions via e-mail. Those questions might deal with systems, camera bodies, accessories, and/or lens choices and decisions.
|
|
|
This image was created near the jetty at the south end of South Padre Island on 12 November 2020 by Anita North. She used the handheld Sony FE 200-600mm f/5.6-6.3 G OSS lens (at 518mm) and the blazingly fast AF King, the Sony Alpha a9 II Mirrorless Digital camera body. Exposure was determined via Zebra evaluation with ISO on the rear dial as detailed in The Sony Camera User’s e-Guide and One Camera Set-up Video. ISO 3200: 1/3200 sec. at f/6.3 in Manual mode. ABW at 5:11pm on a clear afternoon.
Center Zone Continuous AF was active at the moment of exposure and worked amazingly well. Click on the image to see a larger version.
Image courtesy of and copyright 2020: Anita North
Image #1: Brown Pelican diving into a school of finger mullet in the surf.
|
Finger Mullet
At Sebastian Inlet, the fishing and diving Osprey photography is best when the mossbunker are running. At the inlet at South Padre Island, the fishing and diving pelican photography is best when the finger mullet are running. The prime target of the Sebastian fisherman are snook. At South Padre, we saw several folks land channel bass (redfish) between thirty and forty pounds. As far as the photo action, you are a lot busier with the diving pelicans in Texas than with the diving Ospreys in Florida. We had way too much fun.
When Anita showed me this one I was stunned.
This image was converted in Capture One. Topaz DeNoise AI was applied to the entire image. The head and bill were selected and placed on a layer to which Topaz Sharpen AI was applied.
|
|
|
This image was created near the jetty at the south end of South Padre Island on 12 November 2020 by Anita North. She used the handheld Sony FE 200-600mm f/5.6-6.3 G OSS lens (at 518mm) and the blazingly fast AF King, the Sony Alpha a9 II Mirrorless Digital camera body. Exposure was determined via Zebra evaluation with ISO on the rear dial as detailed in The Sony Camera User’s e-Guide and One Camera Set-up Video. ISO 3200: 1/3200 sec. at f/6.3 in Manual mode. ABW at 5:11pm on a clear afternoon.
Center Zone Continuous AF was active at the moment of exposure and worked amazingly well. Click on the image to see a larger version.
Image courtesy of and copyright 2020: Anita North
Image #2: Brown Pelican just after touch-down in a school of finger mullet in the surf.
|
Which is the Stronger Image?
Today’s first two featured images — both created by Anita North — were captured consecutively: _A938990 and _A938991. You’d have to agree that Anita’s timing and execution for these two were pretty much perfect. I struggled mightily when trying to decide which image was the stronger of the two. I couldn’t make up my mind, so I ran both of them. Please leave a comment and let us know which one of Anita’s two featured images you like best, and why.
|
|
|
This image was created near the jetty at the south end of South Padre Island on 12 November 2020. I used the handheld Sony FE 600mm f/4 GM OSS lens and the blazingly fast AF King, the Sony Alpha a9 II Mirrorless Digital Camera Body. ISO 1000. Exposure determined by Zebras with ISO on the rear dial: 1/2500 sec. at f/4 in Manual mode. RawDigger showed this one as perfect. AWB at 5:05pm on a clear afternoon.
Center Zone AF-C was active at the moment of exposure and performed perfectly. Click on the image to see a larger version.
Image #3: Caspian Tern flipping finger mullet
|
The Crop
A9 ii files tip the scales at 24.2MP. They can easily handle small crops but do not handle large crops as well as the 61-MP monster, the a74 iv. But for flight and action the a9 series bodies (the a9 and the a9 ii) slay the newer a7 series bodies, the a7r iii and the a7r iv because of their superior AF and faster frame rates (20 fps Compressed Raw). The Caspian Tern in this image was flying a good distance from the beach when it dived, caught a fish, and turned to the south. As a result, I cropped away about half of the original pixels. Crops that large always affect the image quality. What to do?
|
|
Image #3A: Caspian Tern flipping finger mullet Topaz Gigapixel AI at 80% magnification
|
One-Stop Shopping with the Amazing Topaz Gigapixel AI!
When we shot hawks with Alan Murphy a few weeks back at Smith Point, TX, he raved about Gigapixel AI. I thought that these two heavily cropped photos –Images #3 and #4, would likely benefit from from a visit to Gigapixel AI. Image #3 was the first one that I did and when the preview on Auto rendered, I was completely stunned. I went with 2X since the TIF file had been cropped about 50%. Even though I mistakenly hit Compressed — I should have left it at Standard — the After image was cleaner and sharper and the noise had been eliminated. Remarkably, because I had hit Compressed, the before and after file sizes were the same. In the future I will stick with Standard, the default setting.
Gigapixel AI will enable you to create larger files from smaller ones, files that can stand up to large crops and to being printed large, all that while sharpening (non-destructively as far as I can see …) and effectively cleaning up the noise.
|
|
|
This image was also created near the jetty at the south end of South Padre Island on 12 November 2020. I used the handheld Sony FE 600mm f/4 GM OSS lens and the blazingly fast AF King, the Sony Alpha a9 II Mirrorless Digital Camera Body. ISO 1000. Exposure determined by Zebras with ISO on the rear dial: 1/2500 sec. at f/4 in Manual mode. RawDigger showed this one as almost perfect with a smattering of OvExp pixels on the side of the fish. AWB at 5:05pm on a clear afternoon.
Center Zone AF-C was active at the moment of exposure and performed perfectly. Click on the image to see a larger version.
Image #4: Caspian Tern with finger mullet
|
a9 ii Frame Rate
The incredible a9 series bodies’ 20 frames per second frame rate with Compressed Raw enables you to capture sharp flight and action sequences that offer a variety of poses and wing positions. Images #3 and #4 were the two most interesting frames of what was a ten-frame sequence; each image was sharply focused on the tern’s eye.
What Makes a Good Flight or Action Image?
Sharpness Alone is No Longer Good Enough
With most major camera systems now offering near-science-fiction-like AF systems along with fast frame rates, folks are finally realizing that creating a sharp flight or action image is only a small part of the equation. The pose, the wing position, the image design (including other elements of the composition — if any), the juxtaposition of two or more subjects, the head angle or angles, the background, and the quality and direction of the light all must be considered when picking your flight and action keepers. Sharpness is nowhere near-enough any more …
|
|
|
San Diego offers a wealth of very attractive natural history subjects, including and especially the Pacific race of California Brown Pelican. With annual visits spanning more than four decades, I have lots of photographic experience there … Click on the composite to enjoy a larger version.
|
San Diego 2021 COVID-conscious Brown Pelican IPT
January 12 thru the morning session on January 16, 2021. Four full and one-half day: $2299.00. Deposit: $599.00. Limit: 8 photographers/Openings: 7.
Introductory Meet and Greet at 7:00pm on the evening before the IPT begins; MON JAN 11, 2021.
Join me in San Diego to photograph the spectacular breeding plumage Brown Pelicans with their fire-engine red and olive green bill pouches; Brandt’s (nesting with eggs and possibly chicks) and Double-crested Cormorants; breeding plumage Wood and Ring-necked Duck; other duck species possible including Lesser Scaup, Redhead, and Surf Scoter; a variety of gulls including Western, California, and the gorgeous Heermann’s, all in full breeding plumage; shorebirds including Marbled Godwit, Willet, Sanderling and Black-bellied Plover; many others are possible including Least, Western, and Spotted Sandpiper, Whimbrel, Black and Ruddy Turnstone, Semipalmated Plover, and Surfbird; Harbor Seals (depending on the current regulations) and California Sea Lions; and Bird of Paradise flowers. And as you can see by studying the IPT cards, there are some nice bird-scape and landscape opportunities as well. Not to mention a ton of excellent flight photography opportunities and instruction.
Please note: where permitted and on occasion, ducks and gulls may be attracted (or re-located) with offerings of grains or healthy bread.
Learning Exposure, Whether You Like It Or Not
Whether you like it or not, we will be beating the subject of exposure like a dead horse. In every new situation, you will hear my thoughts on the exposure situation along with my thoughts on both Nikon and Canon histograms and the subject of blinkies. Whether you like it or not, you will learn to work in manual mode and to get the right exposure every time as long as a bird gives you ten seconds with the light constant. And you will learn what to do when the light is changing constantly. What you learn about exposure will be one of the great takeaways on every IPT.
|
|
|
Though the pelicans will be the stars of the show on this IPT, there will be many other handsome and captivating subjects in wonderful settings. Click on the composite to enjoy a larger version.
|
It Ain’t Just Pelicans
With gorgeous subjects just sitting there waiting to have their pictures taken, photographing the pelicans on the cliffs is about as easy as nature photography gets. With the winds from the east almost every morning there is usually some excellent flight photography as well. And the pelicans are almost always doing something interesting: preening, scratching, bill pouch cleaning, or squabbling. And then there are those crazy head throws that are thought to be a form of intra-flock communication. You will be guided as to how to make the best of all of those opportunities. And depending on the weather and local conditions and tides, there are a variety of fabulous photo chances available in and around San Diego.
|

|
|
Did I mention that there are lots of great birds and natural history subjects in San Diego in winter? Click on the composite to enjoy a larger version.
|
The San Diego Details
This IPT will include five 3 1/2 hour morning photo sessions, four 2 1/2 hour afternoon photo sessions, four lunches, and after-brunch image review and Photoshop sessions. To ensure early starts, breakfasts will be your responsibility. And so that we can get some sleep, dinners will be on your own as well.
A $599 deposit is required to hold your slot for this IPT. You can send a check (made out to “BIRDS AS ART) to us here: BIRDS AS ART, PO Box 7245, Indian Lake Estates, FL, 3385, or call Jim or Jennifer at the office with a credit card at 863-692-0906. Your balance, payable only by check, is due immediately after you sign up. Please print, complete, and sign the form that is linked to here and shoot it to us along with your deposit check. If you register by phone, please print, complete and sign the form as noted above and either mail it to us or e-mail the scan. If you have any questions, please feel free to contact me via e-mail. If you cancel due to COVID 19 concerns, all of your payments will be refunded.
Travel Insurance
Travel insurance for both big international trips and US-based IPTs is highly recommended as we never know what life has in store for us. I strongly recommend that you purchase quality travel insurance. Travel Insurance Services offers a variety of plans and options. Included with the Elite Option or available as an upgrade to the Basic & Plus Options you can also purchase Cancel for Any Reason Coverage that expands the list of reasons for your canceling to include things such as sudden work or family obligation and even a simple change of mind. My family and I use and depend on the great policies offered by TIS whenever we travel. You can learn more here: Travel Insurance Services. Do note that many plans require that you purchase your travel insurance within 14 days of our cashing your deposit check or running your credit card. Whenever purchasing travel insurance, be sure to read the fine print carefully even when dealing with reputable firms like TSI.
|

|
|
Variety is surely the spice of life in San Diego. Click on the composite to enjoy a larger version.
|
Getting Up Early and Staying Out Late
On all BIRDS AS ART IPTS including and especially the San Diego IPT, we get into the field early to take advantage of unique and often spectacular lighting conditions and we stay out late to maximize the chances of killer light and glorious sunset silhouette situations. We often arrive at the cliffs a full hour before anyone else shows up to check out the landscape and seascape opportunities.
Typos
In all blog posts and Bulletins, feel free to e-mail or to leave a comment regarding any typos or errors. Just be right :).
November 14th, 2020 What’s Up?
As we get to know the bay behind the Convention Center on South Padre Island better and better, we are having more and more success each morning. There are lots of birds, including a nice flock of southbound Franklin’s Gulls, all set in still blue water with perfect reflections. Similarly, we are doing quite well on the beach and the jetty at Isla Blanca Park at the south end of the island in the afternoons so we extended our stay an additional two nights. We plan photographing in the bay on Monday morning and then heading up to Golden, Colorado to visit BPN friend Brian Sump.
Today is Saturday 14 November 2020. It is 6:05am and we are heading for the bay in just a bit.
All are invited to let us know which of today’s two featured images they like best (or not), and why.
Topaz Still on Sale!
Right now Topaz is offering price reductions on the Utility Bundle and the Creator Bundle. The former normally sells for $359.96. It is on sale for an amazingly low $199.95. Click here, scroll all the way down to the sale, and enter the ARTHUR15 code at checkout to save an additional 15%! The Creator Bundle usually sells for #279.97 and is now on sale for $249.99. Using the ARTHUR15 code at checkout brings the price down to $212.49!
Please Remember
With income from IPTs approaching zero, please, if you enjoy and learn from the blog, remember to use one of my two affiliate programs when purchasing new gear. Doing so just might make it possible for me to avoid having to try to get a job as a Walmart greeter and will not cost you a single penny more. And if you use Bedfords and remember to enter the BIRDSASART code at checkout, you will save 3% on every order and enjoy free second-day air shipping. In these crazy times — I am out at least forty to sixty thousand dollars so far due to COVID 19 (with lots more to come) — remembering to use my B&H link or to shop at Bedfords will help me out a ton and be greatly appreciated. Overseas folks who cannot order from the US because of import fees, duties, and taxes can always help out by clicking here if they see fit.
The BAA Used Gear Page
The Used Gear page continues to be red hot! It is BAA Used Gear Page is the place to sell your used photographic equipment. We will help you to get your gear sold quickly for 20 to 60% or more than what the big guys are offering … Doubt me? Check out the Recent Sales list for the past eleven months at the bottom of the page.
New Listing
Sony Alpha a9 Mirrorless Digital Camera Body with Extras!)
Used gear page veteran and SONY-e-Guide reviewer Craig Elson is offering a Sony Alpha a9 Mirrorless Digital camera body in near-mint condition for only $2498.00. The sale includes a like-new Sony VG-C3EM vertical grip (a $348.00 value) and a Mieke MK-X1EM metal bracket hand grip (a $39.99 value that provides improved ergonomics if using an a9 without the VG-C3EM Vertical Grip), the original box, one battery and the charger with the power cord, the micro USB connector cable, the strap, the body cap, the accessory shoe cap, the manuals, a glass LCD screen protector, and insured ground shipping via major courier to continental U.S. addresses only. Your item will not ship until your check clears unless other arrangements are made.
Please contact Craig Elson via e-mail or by phone at 704.904.7953 (Pacific time zone).
The incredible AF system, the frame-rate, and the quality of the 24.2 MP images files of the a9 — my first SONY body — blew me away and quickly put Nikon in the rear view mirror. (By that time,Canon was well-rusted in the junkyard …) The a9 was replaced by the a9 ii with its slightly wider chassis being the only difference between these two great bodies. Oh, there is one more difference: the a9 ii sells for a whopping $4,498.00. You can save a whopping $2,000.00 by being the one to grab Craig’s camera. One more thing, the a9 is pretty much out of stock everywhere … artie
BIRDS AS ART is registered in the U.S. Patent and Trademark Office
Great Topaz News!
Folks who use the BAA Topaz link to purchase Sharpen AI, DeNoise AI, or the Utility Bundle (or any other Topaz plugins) will receive a 15% discount by entering the ARTHUR15 code at checkout. To get the discount you must use my link and you must enter the discount code. Be sure to start with this link.
Topaz Stuff
As I said just a while back and have said often many times before, I should have listened sooner. If you, like me, are new to the Topaz party, please use this link to purchase. Right now I can wholeheartedly recommend both Topaz Sharpen AI and Topaz DeNoise AI. Though I have not yet worked with JPEGtoRAW AI or Gigapixel AI, I have installed both of these plug-ins and look forward to trying them on some I-Phone 11 images fairly soon. If you are thinking like me, consider the Utility Bundle that includes all four plug-ins mentioned above at a money-saving price.
Again, those who purchase Sharpen AI or DeNoise AI using my link, can e-mail to request a short Getting Started with Topaz e-Guide. I had a bit of trouble getting the two plug-ins installed and having them appear in the Photoshop Filter Menu. In addition, I will explain how to best learn about the two plug-ins by applying them on a Layer (in Photoshop). I amazed myself yesterday by completing this guide in the car on the way to and from Sebastian. Huge thanks to Anita for doing the driving. Please include a copy of your Topaz order when requesting the guide.
New and Better Bedfords Discount Policy!
You can now save 3% on all of your Bedfords photo gear purchases by entering the BIRDSASART coupon code at checkout. Your discount will be applied to your pre-tax total. In addition, by using the code you will get 2nd day air shipping via Fed Ex.
Grab a Nikon AF-S Teleconverter TC-14E III and save $14.99. Purchase a Canon EOS R5 and your discount will be $116.97. Purchase a Sony FE 600mm f/4 GM OSS lens and save a remarkable $389.94! Your Bedford’s purchase no longer needs to be greater than $1,000.00 for you to receive a discount. The more you spend, the more you save.
|
|
|
121 sold to rave reviews.
The SONY e-Guide by Patrick Sparkman and Arthur Morris
|
The Sony Camera User’s e-Guide (and Videos)
Click here to purchase the guide with one Camera Set-up Video. Be sure to e-mail us by clicking here to specify your camera body so that we can send you a link for the correct video.
Click here to purchase the guide with two Camera Set-up Videos. Be sure to e-mail us by clicking here to specify your two camera bodies so that we can send you links for the correct videos.
Click here to learn more about the SONY e-Guide.
Money Saving Reminder
Many have learned that if you need a hot photo item that is out of stock at B&H and would enjoy free overnight shipping, your best bet is to click here, place an order with Bedfords, and enter the coupon code BIRDSASART at checkout. If an item is out of stock, contact Steve Elkins via e-mail or on his cell phone at (479) 381-2592 (Eastern time). Be sure to mention the BIRDSASART coupon code and use it for your online order. Steve has been great at getting folks the hot items that are out of stock at B&H and everywhere else. The wait lists at the big stores can be a year or longer for the hard to get items. Steve will surely get you your gear long before that. For the past year, he has been helping BAA Blog folks get their hands on items like the SONY a9 ii, the SONY 200-600 G OSS lens, the Canon EOS R5, the Canon RF 100-500mm lens, and the Nikon 500mm PF. Steve is personable, helpful, and eager to please.


Gear Questions and Advice
Too many folks attending BAA IPTs and dozens of photographers whom I see in the field and on BPN, are–out of ignorance–using the wrong gear especially when it comes to tripods and more especially, tripod heads… Please know that I am always glad to answer your gear questions via e-mail. Those questions might deal with systems, camera bodies, accessories, and/or lens choices and decisions.
|
|
|
This image was created near the jetty at the south end of South Padre Island on 12 November 2020. I used the handheld Sony FE 600mm f/4 GM OSS lens and the blazingly fast AF King, the Sony Alpha a9 II Mirrorless Digital Camera Body. ISO 1000. Exposure determined by Zebras with ISO on the rear dial: 1/2000 sec. at f/4 in Manual mode. RawDigger showed this as absolutely perfect. AWB at 6:09pm on a clear afternoon.
Center Zone AF-C was active at the moment of exposure and performed perfectly. Be sure to click on the image to see a larger version.
Image #1: Brown Pelican diving for fish in the surf
|
Handholding the SONY 600 GM
In San Diego last January, I tried handholding the 600 GM and did well. But since the action was non-stop, my left shoulder was hurting bad by the next morning so I quit it. On our first afternoon on the beach at Isla Blanca Park, I decided on a whim to try handholding the 600 again. I had a prolozone shot in each shoulder before we hit the road in late October, and both have been feeling great since then. I have been doing pretty well handholding the six and my shoulder feels fine. The freedom on handholding is a huge plus when you are hurrying up and down the beach to stay on sun angle on groups of diving pelicans and Caspian Terns, and I am doing pretty well at keeping the birds in the frame as well.
Topaz DeNoise AI on Auto and Topaz Sharpen AI//Stabilize (that latter on a selection of the bird’s face) both helped to improve this image.
|
|
|
This image was also created near the jetty at the south end of South Padre Island on 12 November 2020. Again, I used the handheld Sony FE 600mm f/4 GM OSS lens and the blazingly fast AF King, the Sony Alpha a9 II Mirrorless Digital Camera Body. ISO 800. Exposure determined by Zebras with ISO on the rear dial: 1/5000 sec. at f/4.5 in Manual mode. RawDigger showed this one as 2/3 stop too dark as a result of operator error. AWB at 5:44pm on a clear afternoon.
Center Zone AF-C was active at the moment of exposure and performed perfectly. Click on the image to see a larger version.
Image #2: Caspian Tern diving away
|
Diving Away
I am not sure why, but in spite of the fact that this bird is angling away from me, I love this image. The bird seems quite intent on a making a successful dive. I rarely press the shutter button when the birds tail is the closest thing to me, but in this case I am glad that I did. I am working at being more aggressive when photographing flight and action and am pleased with my progress.
I had a bit of bad luck here with the dark form of the curling wave cutting through the bird.
|
|
Image #2A: Topaz DeNoise on the Caspian Tern diving away image at 200%
|
Topaz DeNoise on the Caspian Tern diving away image
As part of my now-regular workflow, I began with Topaz DeNoise AI on Auto. Be sure to click on the image to enlarge it and note the now smooth as a baby’s tush background with the noise completely eliminated. It is worth the time it takes to run DeNoise even on perfectly sharp, perfectly exposed images as they will be rendered that much cleaner and that much sharper.
|
|
Image #2B: Topaz Sharpen AI on the head and bill of the Caspian Tern diving away image at 200%
|
Topaz DeNoise on the head and bill of the Caspian Tern diving away image
A New Sharpen AI Tip
I selected the head and bill of the tern using the Quick Selection Tool, put it on its own layer, and brought that layer into Topaz Sharpen AI. I began with Auto which selected Stabilize. I moved the Noise Suppression slider to zero as I usually do. Because the image looked a a bit crunchy with the Sharpness slider at 50, I moved it to 30 and thought that it looked pretty good.
After hitting Apply, the image opened in Photoshop. I enlarged the image by click-drawing a box around the head with the Zoom Tool and noted that the selection still looked over-sharpened and too crunchy so I simply reduced the opacity of that layer to 50% and everything looked great. The AI in the names of the Topaz plug-ins stands for Artificial Intelligence but at times, we need to depend on HI, human intelligence. By that I mean that are the best to judge your images. Feel free to experiment with the Topaz Plug-ins — the Auto settings are often amazing, but be sure to check your result at 100 or 200% and to make changes as needed.
Typos
In all blog posts and Bulletins, feel free to e-mail or to leave a comment regarding any typos or errors. Just be right :).
November 12th, 2020 What’s Up?
We had a good morning in the bay behind the Convention Center on South Padre Island on Tuesday. There were lots of birds and lots of slick sticky slippery mud. On Wednesday morning we headed early to Laguna Atascosa NWR. There were no birds (and no fence-posts) on the highly touted road to the refuge, and no birds and no water on the refuge itself. As it was blessedly foggy, we headed back to the bay for more birds and more mud. Though the birds are not easy to approach, we both got some good stuff. Anita is missing the Fort DeSoto.
Late-afternoon on Wednesday we decided to pay the $12.00 entry fee to get into Isla Blanca Park at the south end of the island and explore the jetty area. Inlets are often great places for bird photography. It turned out to be the best twelve bucks we’d ever spent. There were several hundred Brown Pelicans (and a few Caspian and Royal Terns as well) diving for bait, and we enjoyed some decent sunset color as well.
Today is Thursday 12 November 2020. We will try again in the bay.
Topaz Still on Sale!
Right now Topaz is offering price reductions on the Utility Bundle and the Creator Bundle. The former normally sells for $359.96. It is on sale for an amazingly low $199.95. Click here, scroll all the way down to the sale, and enter the ARTHUR15 code at checkout to save an additional 15%! The Creator Bundle usually sells for #279.97 and is now on sale for $249.99. Using the ARTHUR15 code at checkout brings the price down to $212.49!
Please Remember
With income from IPTs approaching zero, please, if you enjoy and learn from the blog, remember to use one of my two affiliate programs when purchasing new gear. Doing so just might make it possible for me to avoid having to try to get a job as a Walmart greeter and will not cost you a single penny more. And if you use Bedfords and remember to enter the BIRDSASART code at checkout, you will save 3% on every order and enjoy free second-day air shipping. In these crazy times — I am out at least forty to sixty thousand dollars so far due to COVID 19 (with lots more to come) — remembering to use my B&H link or to shop at Bedfords will help me out a ton and be greatly appreciated. Overseas folks who cannot order from the US because of import fees, duties, and taxes can always help out by clicking here if they see fit.
The BAA Used Gear Page
The Used Gear page continues to be red hot! It is BAA Used Gear Page is the place to sell your used photographic equipment. We will help you to get your gear sold quickly for 20 to 60% or more than what the big guys are offering … Doubt me? Check out the Recent Sales list for the past ten months at the bottom of the page.
Huge Price Drop
Canon EOS-1D X Professional Digital Camera Body/with Extras!
Price dropped $300 on 14 FEB 2020!
Price dropped $400 on 26 JUNE 2020!
Price dropped $200 on 21 AUGUST 2020!
Price dropped $200 on 12 NOVEMBER 2020!
Joe Randle is also offering a used EOS 1D-X camera body in excellent condition for only $1,099.00 (was $2,199.00). The sale includes an extra LP-E4M battery, three Delkin Devices CF1000X UDMA 7 64GB cards, 4 Delkin Devices CF1000X UDMA 7 32 GB cards (all in a nice Pelican CF card case), the interface and stereo AV cables with cable protector, the EOS Digital Solution Disk and Software, instructions Manuals. Insured ground shipping via major courier lower-48 US addresses only. Your item will not ship until your check clears unless other arrangements are made.
Please contact Joe via e-mail or by phone at 1-620.353.8398 (Central time zone).
Two fast, rugged 1D X bodies served as my workhorse cameras for more than four years. I used them to create hundreds of family-jewels-type images. I actually liked the 1D X more than I liked my 1D X IIs … artie
BIRDS AS ART is registered in the U.S. Patent and Trademark Office
Great Topaz News!
Folks who use the BAA Topaz link to purchase Sharpen AI, DeNoise AI, or the Utility Bundle (or any other Topaz plugins) will receive a 15% discount by entering the ARTHUR15 code at checkout. To get the discount you must use my link and you must enter the discount code. Be sure to start with this link.
Topaz Stuff
As I said just a while back and have said often many times before, I should have listened sooner. If you, like me, are new to the Topaz party, please use this link to purchase. Right now I can wholeheartedly recommend both Topaz Sharpen AI and Topaz DeNoise AI. Though I have not yet worked with JPEGtoRAW AI or Gigapixel AI, I have installed both of these plug-ins and look forward to trying them on some I-Phone 11 images fairly soon. If you are thinking like me, consider the Utility Bundle that includes all four plug-ins mentioned above at a money-saving price.
Again, those who purchase Sharpen AI or DeNoise AI using my link, can e-mail to request a short Getting Started with Topaz e-Guide. I had a bit of trouble getting the two plug-ins installed and having them appear in the Photoshop Filter Menu. In addition, I will explain how to best learn about the two plug-ins by applying them on a Layer (in Photoshop). I amazed myself yesterday by completing this guide in the car on the way to and from Sebastian. Huge thanks to Anita for doing the driving. Please include a copy of your Topaz order when requesting the guide.
New and Better Bedfords Discount Policy!
You can now save 3% on all of your Bedfords photo gear purchases by entering the BIRDSASART coupon code at checkout. Your discount will be applied to your pre-tax total. In addition, by using the code you will get 2nd day air shipping via Fed Ex.
Grab a Nikon AF-S Teleconverter TC-14E III and save $14.99. Purchase a Canon EOS R5 and your discount will be $116.97. Purchase a Sony FE 600mm f/4 GM OSS lens and save a remarkable $389.94! Your Bedford’s purchase no longer needs to be greater than $1,000.00 for you to receive a discount. The more you spend, the more you save.
|
|
|
120 sold to rave reviews.
The SONY e-Guide by Patrick Sparkman and Arthur Morris
|
The Sony Camera User’s e-Guide (and Videos)
Click here to purchase the guide with one Camera Set-up Video. Be sure to e-mail us by clicking here to specify your camera body so that we can send you a link for the correct video.
Click here to purchase the guide with two Camera Set-up Videos. Be sure to e-mail us by clicking here to specify your two camera bodies so that we can send you links for the correct videos.
Click here to learn more about the SONY e-Guide.
Money Saving Reminder
Many have learned that if you need a hot photo item that is out of stock at B&H and would enjoy free overnight shipping, your best bet is to click here, place an order with Bedfords, and enter the coupon code BIRDSASART at checkout. If an item is out of stock, contact Steve Elkins via e-mail or on his cell phone at (479) 381-2592 (Eastern time). Be sure to mention the BIRDSASART coupon code and use it for your online order. Steve has been great at getting folks the hot items that are out of stock at B&H and everywhere else. The wait lists at the big stores can be a year or longer for the hard to get items. Steve will surely get you your gear long before that. For the past year, he has been helping BAA Blog folks get their hands on items like the SONY a9 ii, the SONY 200-600 G OSS lens, the Canon EOS R5, the Canon RF 100-500mm lens, and the Nikon 500mm PF. Steve is personable, helpful, and eager to please.


Gear Questions and Advice
Too many folks attending BAA IPTs and dozens of photographers whom I see in the field and on BPN, are–out of ignorance–using the wrong gear especially when it comes to tripods and more especially, tripod heads… Please know that I am always glad to answer your gear questions via e-mail. Those questions might deal with systems, camera bodies, accessories, and/or lens choices and decisions.
|
|
|
This image was created at Fort DeSoto Park in Pinellas County, FL on the morning of 19 OCT 2020. Again, I used the handheld Sony FE 200-600mm f/5.6-6.3 G OSS lens (this one at 600mm) and the blazingly fast AF King, the Sony Alpha a9 II Mirrorless Digital camera body. Exposure was determined via Zebra evaluation with ISO on the rear dial as detailed in The Sony Camera User’s e-Guide and One Camera Set-up Video. ISO 1600: 1/2000 sec. at f/6.3 in Manual mode. The raw file brightness was confirmed as dead-solid perfect by RawDigger. ABW at 7:49 am on a clear morning with just a hint of moisture in the air.
Center Zone Continuous AF was active at the moment of exposure and worked well. Click on the image to see a larger version.
Image #1: Royal Tern preening in butter light with bathing Black Skimmer in background
|
The Unanswered Question
In the Seated Knee-pod versus Lens Hood on the beach (using the articulating rear monitor): Perspectives and Tips. And More Topaz DeNoise AI Auto Tips blog post here, I posted this under the image above:
High Level Shutter Speed Question
Why did I opt to go with a shutter speed of 1/2000 second (along with a relatively high ISO) for each of today’s featured images when I could easily have dropped down to at least 1/1000 second (and cut the ISO by half or more)? The clue is in Image #2.
Alas, not a single reader ventured an answer … Keep reading to learn a ton.
FYI: the image above was by far my favorite of the two featured in the blog post linked to above. I thought it was a very clever juxtaposition and loved the super-low perspective (without having to get sandy and wet)!
As you will see below, I stayed with high shutter speeds so that I could create sharp images of the bathing birds and of the birds taking flight after their baths.
|
|
Bathing bird/sun angle/wind direction diagram
|
Flight Strategy with Northeasterly Winds on Clear Mornings
On the last Fort DeSoto IPT, we had northeasterly winds for all four mornings. South or southeast or east are generally best, but NE is not bad. The lesson that follows was hammered home on that IPT. You are sitting lower left as shown above. The sun is coming over your right shoulder. Just to the left of sun angle is the perfect depth for bathing birds. When you see birds split from the flock to bathe, 9 times out of ten others will bathe in the same small area, the spot where the depth of the water is perfect for a tern, gull, or skimmer bath. After the bath, the birds will almost alway flap in place (as in Image #2), and then take flight right into the wind. By positioning yourself just right of sun angle to the bathing birds, you can photograph single birds in flight right down sun angle as they take flight.
Bathing Bird Strategy
When you see a bird dipping its breast in the water, it will flap its wings in place after its is done bathing. Sometimes they might dip and splash as many as 20-30 times while taking a bath. As a photographer, you are praying the whole time to flap. When they do, they will often rise up out of the water a bit before taking flight and heading for the beach (or other firm ground) to preen. SONY’s Center Zone AF-C does usually does a great job with the flapping and the flight. Note that the wind direction will determine the direction that the birds will flap and the direction that they will take flight. If you spot a bird bathing while facing away from the wind, you can be confident that it will turn around and flap into the wind when it is done dipping and splashing.
|
|
Image #2A: Topaz DeNoise on the Black Skimmer flapping after bath image at 100%
|
Topaz DeNoise on the Black Skimmer flapping after bath image
As part of my now-regular workflow, I began with Topaz DeNoise AI on Auto. It is worth the time it takes to run DeNoise even on perfectly sharp, perfectly exposed images as they will be rendered that much cleaner and that much sharper.
The Payoff
In these situations, the payoff is a decent flight image with the bird angling slightly toward you and right down sun angle. With Image #3, I was a bit unlucky on the placement of the horizon. But I love the sharpness and the wing position.
Same Deal — Even Better!
Another one from the same session but even better. I got luckier with the placement of the horizon and this one is perhaps 1/4 degree off perfect sun angle. Understanding the combined effects of wind direction and sun angle can go a long way toward making you a better flight photographer.
Note: both of the Sandwich Tern images had Topaz DeNoise AI on Auto and
Topaz Sharpen AI//Stabilize (that latter on a selection of the whole bird) applied with great results.
|
|
|
San Diego offers a wealth of very attractive natural history subjects, including and especially the Pacific race of California Brown Pelican. With annual visits spanning more than four decades, I have lots of photographic experience there … Click on the composite to enjoy a larger version.
|
San Diego 2021 COVID-conscious Brown Pelican IPT
January 12 thru the morning session on January 16, 2021. Four full and one-half day: $2299.00. Deposit: $599.00. Limit: 8 photographers/Openings: 7.
Introductory Meet and Greet at 7:00pm on the evening before the IPT begins; MON JAN 11, 2021.
Join me in San Diego to photograph the spectacular breeding plumage Brown Pelicans with their fire-engine red and olive green bill pouches; Brandt’s (nesting with eggs and possibly chicks) and Double-crested Cormorants; breeding plumage Wood and Ring-necked Duck; other duck species possible including Lesser Scaup, Redhead, and Surf Scoter; a variety of gulls including Western, California, and the gorgeous Heermann’s, all in full breeding plumage; shorebirds including Marbled Godwit, Willet, Sanderling and Black-bellied Plover; many others are possible including Least, Western, and Spotted Sandpiper, Whimbrel, Black and Ruddy Turnstone, Semipalmated Plover, and Surfbird; Harbor Seals (depending on the current regulations) and California Sea Lions; and Bird of Paradise flowers. And as you can see by studying the IPT cards, there are some nice bird-scape and landscape opportunities as well. Not to mention a ton of excellent flight photography opportunities and instruction.
Please note: where permitted and on occasion, ducks and gulls may be attracted (or re-located) with offerings of grains or healthy bread.
Learning Exposure, Whether You Like It Or Not
Whether you like it or not, we will be beating the subject of exposure like a dead horse. In every new situation, you will hear my thoughts on the exposure situation along with my thoughts on both Nikon and Canon histograms and the subject of blinkies. Whether you like it or not, you will learn to work in manual mode and to get the right exposure every time as long as a bird gives you ten seconds with the light constant. And you will learn what to do when the light is changing constantly. What you learn about exposure will be one of the great takeaways on every IPT.
|
|
|
Though the pelicans will be the stars of the show on this IPT, there will be many other handsome and captivating subjects in wonderful settings. Click on the composite to enjoy a larger version.
|
It Ain’t Just Pelicans
With gorgeous subjects just sitting there waiting to have their pictures taken, photographing the pelicans on the cliffs is about as easy as nature photography gets. With the winds from the east almost every morning there is usually some excellent flight photography as well. And the pelicans are almost always doing something interesting: preening, scratching, bill pouch cleaning, or squabbling. And then there are those crazy head throws that are thought to be a form of intra-flock communication. You will be guided as to how to make the best of all of those opportunities. And depending on the weather and local conditions and tides, there are a variety of fabulous photo chances available in and around San Diego.
|

|
|
Did I mention that there are lots of great birds and natural history subjects in San Diego in winter? Click on the composite to enjoy a larger version.
|
The San Diego Details
This IPT will include five 3 1/2 hour morning photo sessions, four 2 1/2 hour afternoon photo sessions, four lunches, and after-brunch image review and Photoshop sessions. To ensure early starts, breakfasts will be your responsibility. And so that we can get some sleep, dinners will be on your own as well.
A $599 deposit is required to hold your slot for this IPT. You can send a check (made out to “BIRDS AS ART) to us here: BIRDS AS ART, PO Box 7245, Indian Lake Estates, FL, 3385, or call Jim or Jennifer at the office with a credit card at 863-692-0906. Your balance, payable only by check, is due immediately after you sign up. Please print, complete, and sign the form that is linked to here and shoot it to us along with your deposit check. If you register by phone, please print, complete and sign the form as noted above and either mail it to us or e-mail the scan. If you have any questions, please feel free to contact me via e-mail. If you cancel due to COVID 19 concerns, all of your payments will be refunded.
Travel Insurance
Travel insurance for both big international trips and US-based IPTs is highly recommended as we never know what life has in store for us. I strongly recommend that you purchase quality travel insurance. Travel Insurance Services offers a variety of plans and options. Included with the Elite Option or available as an upgrade to the Basic & Plus Options you can also purchase Cancel for Any Reason Coverage that expands the list of reasons for your canceling to include things such as sudden work or family obligation and even a simple change of mind. My family and I use and depend on the great policies offered by TIS whenever we travel. You can learn more here: Travel Insurance Services. Do note that many plans require that you purchase your travel insurance within 14 days of our cashing your deposit check or running your credit card. Whenever purchasing travel insurance, be sure to read the fine print carefully even when dealing with reputable firms like TSI.
|

|
|
Variety is surely the spice of life in San Diego. Click on the composite to enjoy a larger version.
|
Getting Up Early and Staying Out Late
On all BIRDS AS ART IPTS including and especially the San Diego IPT, we get into the field early to take advantage of unique and often spectacular lighting conditions and we stay out late to maximize the chances of killer light and glorious sunset silhouette situations. We often arrive at the cliffs a full hour before anyone else shows up to check out the landscape and seascape opportunities.
Typos
In all blog posts and Bulletins, feel free to e-mail or to leave a comment regarding any typos or errors. Just be right :).
November 9th, 2020 What’s Up?
On Saturday, we spent our fourth straight morning at the great raptor blind on the Laguna Seca Ranch with Gene Gwin. The day began with some fog so we started with the 600 f/4 lenses in the low light conditions. Yesterday, we paid our first visit to the raptor blind at the Santa Clara Ranch, again with Hector Astorga as our guide. Sunday began mercifully cloudy so again we went with the 600s for the additional speed. But, the 600s are a bit too long for most raptor flight photography at both of the ranches we visited; we had lots of clipped wings … SONY sorely needs to add a lightweight 500mm lens to their line-up; either an f/4 or possibly an even lighter f/4.5 version would have been great at the raptor blinds …
With continuing reports on the poor conditions at the refuge, the lack of water, and the requirement of a negative COVID test to enter New Mexico, Anita and I have decided to cancel our visit to Bosque del Apache NWR. Today is Monday 9 NOV 2020. Amazingly, we decided to take a day off from photography. We will unpack the car completely, wash it, go shopping, do some laundry, clean our photo gear, and repack the X5. We will leave early on Tuesday for a few days at South Padre Island.
Topaz Still on Sale!
Right now Topaz is offering price reductions on the Utility Bundle and the Creator Bundle. The former normally sells for $359.96. It is on sale for an amazingly low $199.95. Click here, scroll all the way down to the sale, and enter the ARTHUR15 code at checkout to save an additional 15%! The Creator Bundle usually sells for #279.97 and is now on sale for $249.99. Using the ARTHUR15 code at checkout brings the price down to $212.49!
Please Remember
With income from IPTs approaching zero, please, if you enjoy and learn from the blog, remember to use one of my two affiliate programs when purchasing new gear. Doing so just might make it possible for me to avoid having to try to get a job as a Walmart greeter and will not cost you a single penny more. And if you use Bedfords and remember to enter the BIRDSASART code at checkout, you will save 3% on every order and enjoy free second-day air shipping. In these crazy times — I am out at least forty to sixty thousand dollars so far due to COVID 19 (with lots more to come) — remembering to use my B&H link or to shop at Bedfords will help me out a ton and be greatly appreciated. Overseas folks who cannot order from the US because of import fees, duties, and taxes can always help out by clicking here if they see fit.
The BAA Used Gear Page
The Used Gear page continues to be red hot! It is BAA Used Gear Page is the place to sell your used photographic equipment. We will help you to get your gear sold quickly for 20 to 60% or more than what the big guys are offering … Doubt me? Check out the Recent Sales list for the past ten months at the bottom of the page.
BIRDS AS ART is registered in the U.S. Patent and Trademark Office
Great Topaz News!
Folks who use the BAA Topaz link to purchase Sharpen AI, DeNoise AI, or the Utility Bundle (or any other Topaz plugins) will receive a 15% discount by entering the ARTHUR15 code at checkout. To get the discount you must use my link and you must enter the discount code. Be sure to start with this link.
Topaz Stuff
As I said just a while back and have said often many times before, I should have listened sooner. If you, like me, are new to the Topaz party, please use this link to purchase. Right now I can wholeheartedly recommend both Topaz Sharpen AI and Topaz DeNoise AI. Though I have not yet worked with JPEGtoRAW AI or Gigapixel AI, I have installed both of these plug-ins and look forward to trying them on some I-Phone 11 images fairly soon. If you are thinking like me, consider the Utility Bundle that includes all four plug-ins mentioned above at a money-saving price.
Again, those who purchase Sharpen AI or DeNoise AI using my link, can e-mail to request a short Getting Started with Topaz e-Guide. I had a bit of trouble getting the two plug-ins installed and having them appear in the Photoshop Filter Menu. In addition, I will explain how to best learn about the two plug-ins by applying them on a Layer (in Photoshop). I amazed myself yesterday by completing this guide in the car on the way to and from Sebastian. Huge thanks to Anita for doing the driving. Please include a copy of your Topaz order when requesting the guide.
New and Better Bedfords Discount Policy!
You can now save 3% on all of your Bedfords photo gear purchases by entering the BIRDSASART coupon code at checkout. Your discount will be applied to your pre-tax total. In addition, by using the code you will get 2nd day air shipping via Fed Ex.
Grab a Nikon AF-S Teleconverter TC-14E III and save $14.99. Purchase a Canon EOS R5 and your discount will be $116.97. Purchase a Sony FE 600mm f/4 GM OSS lens and save a remarkable $389.94! Your Bedford’s purchase no longer needs to be greater than $1,000.00 for you to receive a discount. The more you spend, the more you save.
|
|
|
120 sold to rave reviews.
The SONY e-Guide by Patrick Sparkman and Arthur Morris
|
The Sony Camera User’s e-Guide (and Videos)
Click here to purchase the guide with one Camera Set-up Video. Be sure to e-mail us by clicking here to specify your camera body so that we can send you a link for the correct video.
Click here to purchase the guide with two Camera Set-up Videos. Be sure to e-mail us by clicking here to specify your two camera bodies so that we can send you links for the correct videos.
Click here to learn more about the SONY e-Guide.
Money Saving Reminder
Many have learned that if you need a hot photo item that is out of stock at B&H and would enjoy free overnight shipping, your best bet is to click here, place an order with Bedfords, and enter the coupon code BIRDSASART at checkout. If an item is out of stock, contact Steve Elkins via e-mail or on his cell phone at (479) 381-2592 (Eastern time). Be sure to mention the BIRDSASART coupon code and use it for your online order. Steve has been great at getting folks the hot items that are out of stock at B&H and everywhere else. The wait lists at the big stores can be a year or longer for the hard to get items. Steve will surely get you your gear long before that. For the past year, he has been helping BAA Blog folks get their hands on items like the SONY a9 ii, the SONY 200-600 G OSS lens, the Canon EOS R5, the Canon RF 100-500mm lens, and the Nikon 500mm PF. Steve is personable, helpful, and eager to please.


Gear Questions and Advice
Too many folks attending BAA IPTs and dozens of photographers whom I see in the field and on BPN, are–out of ignorance–using the wrong gear especially when it comes to tripods and more especially, tripod heads… Please know that I am always glad to answer your gear questions via e-mail. Those questions might deal with systems, camera bodies, accessories, and/or lens choices and decisions.
|
|
|
This image was created on the morning of 3 November 2020 at an afternoon songbird blind on the Laguna Seca Ranch in Hidalgo County, TX. I used the Induro GIT 404L/Levered-Clamp FlexShooter Pro-mounted Sony FE 600mm f/4 GM OSS lens and the blazingly fast AF King, the Sony Alpha a9 II Mirrorless Digital Camera Body. Exposure determined by Zebras with ISO on the rear dial: 1/1250 sec. at f/4 in Manual mode. This was a bit of an underexposure. AWB at 5:19pm in the shade.
Tracking Expand Flexible Spot AF-C was active at the moment of exposure and performed perfectly. Click on the image to see a larger version.
Image #1: Great Kiskadee grabbing berry
|
We’ve All Been There …
The light is low. We are anticipating action. We struggle on choosing a fast enough shutter speed balanced with a not-too-high ISO. We often wind up with a RAW file that is a bit too dark and a shutter speed that is not quite fast enough. That is exactly what happened here as the berry set up became enveloped by shade late in the day. RawDigger showed the file to be more than one stop too dark. And there was some motion blur in the head as the bird grabbed the berry.
For the raw conversion in Capture One, I increased the exposure by 1.22 stops (thus increasing the noise), set the Brightness slider to -15, the Highlight slider to -17, and the Shadow slider to +30 to bring up sufficient detail in the dark feathers of the cap (and again increasing the noise levels). All of those changes were made to taste.
It is likely that in the past, before Topaz DeNoise AI and especially before Topaz Sharpen AI came onto the scene, I would have deleted this image. With the lovely raised wing, hitting the delete key would have been done with some remorse. Keep reading to see the miraculous Topaz plug-ins results up close.
|
|
|
Click on the screen capture to view the larger version.
Image #1A: Topaz DeNoise AI on the Great Kiskadee grabbing berry image at 100%.
|
Topaz DeNoise AI on the Great Kiskadee grabbing berry image
As part of my now-regular workflow, I began with Topaz DeNoise AI on Auto on the whole image to clean the noise and sharpen it up just a bit. With most properly exposed images, Auto typically sets the Remove Noise slider to 2 or 3. Here, it chose the relatively high value of 7. Be sure to click on the image to enlarge it and note the completely amazing elimination of noise (especially in the background). At 100%, it is easy to see the motion blur — especially when you take a close look at the bird’s eye.
|
|
|
Click on the screen capture to view a larger version.
Image #1B: Topaz Sharpen AI on the head of the Great Kiskadee (selected) at 100%.
|
Topaz Sharpen AI on the head of the Great Kiskadee (selected).
After running DeNoise AI on the whole image as above, I selected the bird’s head and bill, opened the selection in Topaz Sharpen AI and hit Auto. As I suspected, the plug-in selected Stabilize, indicating that the sharpness problems were indeed caused by motion blur. As I typically do in Sharpen AI, I moved the Noise Suppression slider to zero.
If you enlarge the image and take a good look at the birds eye, and are not totally amazed, I would be flabbergasted. And all that is done without a hint of crunchiness or any sharpening halos. I am not sure how Sharpen AI works but it has something to do with re-aligning the pixels. Whatever it is, it is amazing technology.
I’d have no problem making a 16 X 24″ print of this image or submitting it for publication. As I said, amazing.
Typos
In all blog posts and Bulletins, feel free to e-mail or to leave a comment regarding any typos or errors. Just be right :).
November 7th, 2020 Bosque Bad News?
It’s official. Because of the drought, neither crane pool at Bosque del Apache NWR will be filled with water this season. Photography-wise, that is an absolute crippler. Ed KranePool, the southern-most of the two (former) pools — which has been filled in recent years, has been consistently very good to fantastic in the pre-dawn for as large flocks of white geese dropped in to join hundreds of roosting Sandhill Cranes. From 7am to 8am, the cranes and geese took flight heading for the farm fields to feed. Winds with an easterly component usually provided fabulous opportunities. And just before sunset, the crane pool was the place to be as the cranes returned to their evening roost. In addition, there is presently little water on the refuge. If you visit in the next week or so, please let us know what’s going on.
As New Mexico is once again accepting a negative COVID test within 72 hours for entry, Anita and I are undecided as to whether to get tested and see what’s up at the refuge that holds a very special place in my heart.
What’s Up?
Today is Saturday, 7 November 2020. We are spending yet another morning at the raptor blind at Laguna Seca Ranch with Gene Gwin. In the afternoon, we will photograph at Estero Llano Grande State Park, also in Hildago County. On Sunday we return to Santa Clara Ranch for a farewell visit. We will spend Monday morning at Edinburg Scenic Wetlands and then head a bit north and spend a few days on South Padre Island.
Topaz Still on Sale!
Right now Topaz is offering price reductions on the Utility Bundle and the Creator Bundle. The former normally sells for $359.96. It is on sale for an amazingly low $199.95. Click here, scroll all the way down to the sale, and enter the ARTHUR15 code at checkout to save an additional 15%! The Creator Bundle usually sells for #279.97 and is now on sale for $249.99. Using the ARTHUR15 code at checkout brings the price down to $212.49!
Please Remember
With income from IPTs approaching zero, please, if you enjoy and learn from the blog, remember to use one of my two affiliate programs when purchasing new gear. Doing so just might make it possible for me to avoid having to try to get a job as a Walmart greeter and will not cost you a single penny more. And if you use Bedfords and remember to enter the BIRDSASART code at checkout, you will save 3% on every order and enjoy free second-day air shipping. In these crazy times — I am out at least forty to sixty thousand dollars so far due to COVID 19 (with lots more to come) — remembering to use my B&H link or to shop at Bedfords will help me out a ton and be greatly appreciated. Overseas folks who cannot order from the US because of import fees, duties, and taxes can always help out by clicking here if they see fit.
The BAA Used Gear Page
The Used Gear page continues to be red hot! It is BAA Used Gear Page is the place to sell your used photographic equipment. We will help you to get your gear sold quickly for 20 to 60% or more than what the big guys are offering … Doubt me? Check out the Recent Sales list for the past ten months at the bottom of the page.
Sony Alpha a7 III Mirrorless Digital Camera Body
James Paula is offering a Sony Alpha a7 III Mirrorless Digital camera body in excellent plus condition for $1098.00. But for several all scratches on the the (flash) hot shoe, the body would be near-mint. It has about 7200 activations and operates flawlessly. The sale includes the front cap, the strap, the battery & charger, the original product box, and insured ground shipping via major courier to lower-48 US addresses only. Your item will not ship until your check clears unless other arrangements are made.
Please contact Jim via e-mail.
Distinguished by its updated sensor design, the Alpha a7 III Mirrorless Digital Camera from Sony is a well-rounded camera suitable for both photo and video applications in a variety of working situations. Refined for improved speed and low-light performance, the full-frame 24.2MP Exmor R BSI CMOS sensor and BIONZ X image processor pair to realize an impressive 10 fps continuous shooting rate and improved autofocus performance for faster, more reliable subject tracking along with wide frame coverage. This updated Fast Hybrid AF System employs a combination of 693 phase-detection points and 425 contrast-detection areas for quicker acquirement of focus in a variety of lighting conditions, and also maintains focus on subjects more effectively. In addition to speed and AF, the processing improvements also help to realize greater image clarity and reduced noise throughout the sensitivity range from ISO 100-51200, which can further be expanded to ISO 50-204800. Video recording capabilities have also been extended for enhanced quality when recording UHD 4K video with the full width of the full-frame sensor to minimize moiré and aliasing. Additionally, benefitting both stills and video operation, the a7 III utilizes a 5-axis SteadyShot INSIDE sensor-shift image stabilization, which is now effective to minimize the appearance of camera shake by up to 5 stops.
Beyond just updates to the imaging system, the a7 III’s body design has also been revised to include a rear 3.0″ 922k-dot touchscreen LCD, which has a tilting design to better support working from high and low angles. A 2.36m-dot Tru-Finder OLED EVF is also featured for bright and clear eye-level monitoring. For greater shooting flexibility, dual SD memory card slots are now featured, and a larger NP-FZ100 battery is also employed to achieve up to approximately 710 shots per charge. Suiting the camera’s use in trying conditions, the magnesium-alloy chassis and weather-sealing also render the a7 III dust- and moisture-resistant. B&H and the manufacturer
This body, which sells new for $1698.00, was the first SONY body to feature a killer AF system. artie
BIRDS AS ART is registered in the U.S. Patent and Trademark Office
Great Topaz News!
Folks who use the BAA Topaz link to purchase Sharpen AI, DeNoise AI, or the Utility Bundle (or any other Topaz plugins) will receive a 15% discount by entering the ARTHUR15 code at checkout. To get the discount you must use my link and you must enter the discount code. Be sure to start with this link.
Topaz Stuff
As I said just a while back and have said often many times before, I should have listened sooner. If you, like me, are new to the Topaz party, please use this link to purchase. Right now I can wholeheartedly recommend both Topaz Sharpen AI and Topaz DeNoise AI. Though I have not yet worked with JPEGtoRAW AI or Gigapixel AI, I have installed both of these plug-ins and look forward to trying them on some I-Phone 11 images fairly soon. If you are thinking like me, consider the Utility Bundle that includes all four plug-ins mentioned above at a money-saving price.
Again, those who purchase Sharpen AI or DeNoise AI using my link, can e-mail to request a short Getting Started with Topaz e-Guide. I had a bit of trouble getting the two plug-ins installed and having them appear in the Photoshop Filter Menu. In addition, I will explain how to best learn about the two plug-ins by applying them on a Layer (in Photoshop). I amazed myself yesterday by completing this guide in the car on the way to and from Sebastian. Huge thanks to Anita for doing the driving. Please include a copy of your Topaz order when requesting the guide.
New and Better Bedfords Discount Policy!
You can now save 3% on all of your Bedfords photo gear purchases by entering the BIRDSASART coupon code at checkout. Your discount will be applied to your pre-tax total. In addition, by using the code you will get 2nd day air shipping via Fed Ex.
Grab a Nikon AF-S Teleconverter TC-14E III and save $14.99. Purchase a Canon EOS R5 and your discount will be $116.97. Purchase a Sony FE 600mm f/4 GM OSS lens and save a remarkable $389.94! Your Bedford’s purchase no longer needs to be greater than $1,000.00 for you to receive a discount. The more you spend, the more you save.
|
|
|
120 sold to rave reviews.
The SONY e-Guide by Patrick Sparkman and Arthur Morris
|
The Sony Camera User’s e-Guide (and Videos)
Click here to purchase the guide with one Camera Set-up Video. Be sure to e-mail us by clicking here to specify your camera body so that we can send you a link for the correct video.
Click here to purchase the guide with two Camera Set-up Videos. Be sure to e-mail us by clicking here to specify your two camera bodies so that we can send you links for the correct videos.
Click here to learn more about the SONY e-Guide.
Money Saving Reminder
Many have learned that if you need a hot photo item that is out of stock at B&H and would enjoy free overnight shipping, your best bet is to click here, place an order with Bedfords, and enter the coupon code BIRDSASART at checkout. If an item is out of stock, contact Steve Elkins via e-mail or on his cell phone at (479) 381-2592 (Eastern time). Be sure to mention the BIRDSASART coupon code and use it for your online order. Steve has been great at getting folks the hot items that are out of stock at B&H and everywhere else. The wait lists at the big stores can be a year or longer for the hard to get items. Steve will surely get you your gear long before that. For the past year, he has been helping BAA Blog folks get their hands on items like the SONY a9 ii, the SONY 200-600 G OSS lens, the Canon EOS R5, the Canon RF 100-500mm lens, and the Nikon 500mm PF. Steve is personable, helpful, and eager to please.


Gear Questions and Advice
Too many folks attending BAA IPTs and dozens of photographers whom I see in the field and on BPN, are–out of ignorance–using the wrong gear especially when it comes to tripods and more especially, tripod heads… Please know that I am always glad to answer your gear questions via e-mail. Those questions might deal with systems, camera bodies, accessories, and/or lens choices and decisions.
|
|
|
This image was created on 5 November 2020 at the Laguna Seca Ranch in Hidalgo County, TX. I used the handheld Sony FE 200-600mm f/5.6-6.3 G OSS lens (at 600mm) and the blazingly fast AF King, the Sony Alpha a9 II Mirrorless Digital camera body. ISO 1000. Exposure determined by Zebras with ISO on the rear wheel: 1/2500 sec. at f/6.3 in Manual mode. AWB at 9:14am on a sunny morning with just a hint of moisture in the air.
Center Zone AF-C was active at the moment of exposure and performed superbly. Click the image to see a larger version.
Image #1: Crested Caracara banking
|
The Laguna Seca Caracara Experience
Gene Gwin, a top-gun fighter pilot, flew McDonnell Douglas F-4 Phantom IIs and McDonnell Douglas F-15 Eagles in the US Air Force for 21 years and then worked as a commercial pilot first for America West and then for American Airlines for 15 years. He has owned and operated Laguna Seca Ranch for the past 11 years. He has developed the ranch as a superb destination for local and visiting bird photographers. Early on, he sought and took advice from Alan Murphy and other professionals; as a result, distant backgrounds and smartly designed blinds rule the roost at Laguna Seca. We have spent all four of our mornings photographing Crested Caracaras perched and in flight at the three side-by-side raptor blinds, each at a different level (including one at ground level). You can either stand or sit in each blind to achieve your desired perspective. With limited visitation due to COVID-19, Anita and I have enjoyed complete freedom to move from blind to blind at will.
Each morning we have enjoyed from 40-50 caracaras flying in to partake of a feast of frozen chicken and ground beef deftly served up by Gene. The record for a single day is more than 100 caracaras. Our host is quiet and understated, but has always been quick to share his knowledge of bird behavior and flight patterns. He is quick also to respond to requests to changes in the arrangement of the perches. In short, he is a super-host!
|
|
|
This image, the next frame in the sequence, was of course also created on 5 November 2020 at the Laguna Seca Ranch in Hidalgo County, TX. I used the handheld Sony FE 200-600mm f/5.6-6.3 G OSS lens (at 600mm) and the blazingly fast AF King, the Sony Alpha a9 II Mirrorless Digital camera body. ISO 1000. Exposure determined by Zebras with ISO on the rear wheel: 1/2500 sec. at f/6.3 in Manual mode. AWB at 9:14am on a sunny mooning with just a hint of moisture in the air.
Center Zone AF-C was active at the moment of exposure and performed superbly. Click the image to see a larger version.
Image #2: Crested Caracara wings down turning bank
|
The SONY 200-600/a9 ii Kills for Caracara Flight Photography!
In the pre-dawn light and very early light we have done well on perched birds with the tripod-mounted 600mm f/4GM lens with the a7r IV (with and without the 1.4X teleconverter). Once the sun is up, there has been a ton of great flight photography, most with the handheld 200-600 G lens and the a9 ii. This has been the first chance that I have had to give this combo a thorough flight photography test. I switched from Canon to Nikon in hopes of becoming a better flight photographer and I improved quite a bit. Then I switched from Nikon to SONY in hopes of becoming a better flight photographer and am now confident that I have. Due 100% to the amazing AF and frame-rate capabilities of the a9 ii and the versatility and handhold-ability of the 2-6.
From our first four mornings, I have at least three dozen family jewel-type images as good as the two featured in today’s blog. That despite the fact that the usually brisk (and ideal for flight photography) east wind has been missing in action, replaced by a light breeze from the northwest. With wind-against-sun conditions most of the birds have been landing away from us and away from the light. By studying the flight patterns and trying to anticipate banking birds and birds landing toward us, we have enjoyed great success. Most amazingly, out of more than three thousand flight images, I had only a handful that were not sharply focused on the bird’s eye …
If you would like to visit Laguna Seca click on the preceding link to get in touch with Gene and be sure to mention BIRDS AS ART. My understanding is that the caracara photography is best in the excellent in all but the summer months. Gene will be able to guide you on that. We love the flight photography on Gene’s ranch so much that we are already thinking about stopping by on our way back to Florida!
|
|
|
Click on the screen capture to view the larger version.
Image #2A: Topaz Sharpen AI on the Crested Caracara wings down turning bank image at 100%.
|
Topaz Sharpen AI on the Crested Caracara wings down turning bank image
Though this image was quite clean and noise-free (thanks to the lessons learn via RawDigger) I began as usual by running Topaz DeNoise AI on Auto on the whole image to clean up the remaining background noise and sharpen things up just a bit. The Auto settings were spot on for this one. Next I selected the whole bird and ran Topaz Sharpen AI. Auto set Stabilize. I left the Sharpen setting and as usual moved the Noise Suppression slider to zero. I compared various options before settling on those noted in the previous sentence.
|
|
|
San Diego offers a wealth of very attractive natural history subjects, including and especially the Pacific race of California Brown Pelican. With annual visits spanning more than four decades, I have lots of photographic experience there … Click on the composite to enjoy a larger version.
|
San Diego 2021 COVID-conscious Brown Pelican IPT
January 12 thru the morning session on January 16, 2021. Four full and one-half day: $2299.00. Deposit: $599.00. Limit: 8 photographers/Openings: 7.
Introductory Meet and Greet at 7:00pm on the evening before the IPT begins; MON JAN 11, 2021.
Join me in San Diego to photograph the spectacular breeding plumage Brown Pelicans with their fire-engine red and olive green bill pouches; Brandt’s (nesting with eggs and possibly chicks) and Double-crested Cormorants; breeding plumage Wood and Ring-necked Duck; other duck species possible including Lesser Scaup, Redhead, and Surf Scoter; a variety of gulls including Western, California, and the gorgeous Heermann’s, all in full breeding plumage; shorebirds including Marbled Godwit, Willet, Sanderling and Black-bellied Plover; many others are possible including Least, Western, and Spotted Sandpiper, Whimbrel, Black and Ruddy Turnstone, Semipalmated Plover, and Surfbird; Harbor Seals (depending on the current regulations) and California Sea Lions; and Bird of Paradise flowers. And as you can see by studying the IPT cards, there are some nice bird-scape and landscape opportunities as well. Not to mention a ton of excellent flight photography opportunities and instruction.
Please note: where permitted and on occasion, ducks and gulls may be attracted (or re-located) with offerings of grains or healthy bread.
Learning Exposure, Whether You Like It Or Not
Whether you like it or not, we will be beating the subject of exposure like a dead horse. In every new situation, you will hear my thoughts on the exposure situation along with my thoughts on both Nikon and Canon histograms and the subject of blinkies. Whether you like it or not, you will learn to work in manual mode and to get the right exposure every time as long as a bird gives you ten seconds with the light constant. And you will learn what to do when the light is changing constantly. What you learn about exposure will be one of the great takeaways on every IPT.
|
|
|
Though the pelicans will be the stars of the show on this IPT, there will be many other handsome and captivating subjects in wonderful settings. Click on the composite to enjoy a larger version.
|
It Ain’t Just Pelicans
With gorgeous subjects just sitting there waiting to have their pictures taken, photographing the pelicans on the cliffs is about as easy as nature photography gets. With the winds from the east almost every morning there is usually some excellent flight photography as well. And the pelicans are almost always doing something interesting: preening, scratching, bill pouch cleaning, or squabbling. And then there are those crazy head throws that are thought to be a form of intra-flock communication. You will be guided as to how to make the best of all of those opportunities. And depending on the weather and local conditions and tides, there are a variety of fabulous photo chances available in and around San Diego.
|

|
|
Did I mention that there are lots of great birds and natural history subjects in San Diego in winter? Click on the composite to enjoy a larger version.
|
The San Diego Details
This IPT will include five 3 1/2 hour morning photo sessions, four 2 1/2 hour afternoon photo sessions, four lunches, and after-brunch image review and Photoshop sessions. To ensure early starts, breakfasts will be your responsibility. And so that we can get some sleep, dinners will be on your own as well.
A $599 deposit is required to hold your slot for this IPT. You can send a check (made out to “BIRDS AS ART) to us here: BIRDS AS ART, PO Box 7245, Indian Lake Estates, FL, 3385, or call Jim or Jennifer at the office with a credit card at 863-692-0906. Your balance, payable only by check, is due immediately after you sign up. Please print, complete, and sign the form that is linked to here and shoot it to us along with your deposit check. If you register by phone, please print, complete and sign the form as noted above and either mail it to us or e-mail the scan. If you have any questions, please feel free to contact me via e-mail. If you cancel due to COVID 19 concerns, all of your payments will be refunded.
Travel Insurance
Travel insurance for both big international trips and US-based IPTs is highly recommended as we never know what life has in store for us. I strongly recommend that you purchase quality travel insurance. Travel Insurance Services offers a variety of plans and options. Included with the Elite Option or available as an upgrade to the Basic & Plus Options you can also purchase Cancel for Any Reason Coverage that expands the list of reasons for your canceling to include things such as sudden work or family obligation and even a simple change of mind. My family and I use and depend on the great policies offered by TIS whenever we travel. You can learn more here: Travel Insurance Services. Do note that many plans require that you purchase your travel insurance within 14 days of our cashing your deposit check or running your credit card. Whenever purchasing travel insurance, be sure to read the fine print carefully even when dealing with reputable firms like TSI.
|

|
|
Variety is surely the spice of life in San Diego. Click on the composite to enjoy a larger version.
|
Getting Up Early and Staying Out Late
On all BIRDS AS ART IPTS including and especially the San Diego IPT, we get into the field early to take advantage of unique and often spectacular lighting conditions and we stay out late to maximize the chances of killer light and glorious sunset silhouette situations. We often arrive at the cliffs a full hour before anyone else shows up to check out the landscape and seascape opportunities.
Typos
In all blog posts and Bulletins, feel free to e-mail or to leave a comment regarding any typos or errors. Just be right :).
November 5th, 2020 What’s Up?
Still uncertain as to whether or not we will be visiting Bosque, Anita and I decided to spend some extra time in the Rio Grande Valley and possibly head back up the Texas coast for a bit. On Sunday and Monday we spent two great days in the songbird blinds at the Santa Clara Ranch north of Rio Grande City with the talented, skilled, and hard-working Hector Astorga as our guide. On Tuesday we moved to Laguna Seca Ranch in Hidalgo County with old friend Ruth Hoyt as our guide. We killed on caracaras in the morning and a slow afternoon ended in spectacular fashion as a male cardinal and two Great Kiskadees finally found the red berry set-up.
Wednesday at Laguna Seca was pretty much a repeat of the previous day with lots of great caracara flight in the morning despite little wind and some Green Jays visiting the set-up and the berries late in the day. Today is Thursday 4 November 2020 and we will be heading back to the raptor blind early for another session with the Crested Caracaras.
If you have a half a moment, please leave a comment and let us know which of today’s four featured images you like best. And why.
Topaz Still on Sale!
Right now Topaz is offering price reductions on the Utility Bundle and the Creator Bundle. The former normally sells for $359.96. It is on sale for an amazingly low $199.95. Click here, scroll all the way down to the sale, and enter the ARTHUR15 code at checkout to save an additional 15%! The Creator Bundle usually sells for #279.97 and is now on sale for $249.99. Using the ARTHUR15 code at checkout brings the price down to $212.49!
Please Remember
With income from IPTs approaching zero, please, if you enjoy and learn from the blog, remember to use one of my two affiliate programs when purchasing new gear. Doing so just might make it possible for me to avoid having to try to get a job as a Walmart greeter and will not cost you a single penny more. And if you use Bedfords and remember to enter the BIRDSASART code at checkout, you will save 3% on every order and enjoy free second-day air shipping. In these crazy times — I am out at least forty to sixty thousand dollars so far due to COVID 19 (with lots more to come) — remembering to use my B&H link or to shop at Bedfords will help me out a ton and be greatly appreciated. Overseas folks who cannot order from the US because of import fees, duties, and taxes can always help out by clicking here if they see fit.
The BAA Used Gear Page
The Used Gear page continues to be red hot! It is BAA Used Gear Page is the place to sell your used photographic equipment. We will help you to get your gear sold quickly for 20 to 60% or more than what the big guys are offering … Doubt me? Check out the Recent Sales list for the past ten months at the bottom of the page.
BIRDS AS ART is registered in the U.S. Patent and Trademark Office
Great Topaz News!
Folks who use the BAA Topaz link to purchase Sharpen AI, DeNoise AI, or the Utility Bundle (or any other Topaz plugins) will receive a 15% discount by entering the ARTHUR15 code at checkout. To get the discount you must use my link and you must enter the discount code. Be sure to start with this link.
Topaz Stuff
As I said just a while back and have said often many times before, I should have listened sooner. If you, like me, are new to the Topaz party, please use this link to purchase. Right now I can wholeheartedly recommend both Topaz Sharpen AI and Topaz DeNoise AI. Though I have not yet worked with JPEGtoRAW AI or Gigapixel AI, I have installed both of these plug-ins and look forward to trying them on some I-Phone 11 images fairly soon. If you are thinking like me, consider the Utility Bundle that includes all four plug-ins mentioned above at a money-saving price.
Again, those who purchase Sharpen AI or DeNoise AI using my link, can e-mail to request a short Getting Started with Topaz e-Guide. I had a bit of trouble getting the two plug-ins installed and having them appear in the Photoshop Filter Menu. In addition, I will explain how to best learn about the two plug-ins by applying them on a Layer (in Photoshop). I amazed myself yesterday by completing this guide in the car on the way to and from Sebastian. Huge thanks to Anita for doing the driving. Please include a copy of your Topaz order when requesting the guide.
New and Better Bedfords Discount Policy!
You can now save 3% on all of your Bedfords photo gear purchases by entering the BIRDSASART coupon code at checkout. Your discount will be applied to your pre-tax total. In addition, by using the code you will get 2nd day air shipping via Fed Ex.
Grab a Nikon AF-S Teleconverter TC-14E III and save $14.99. Purchase a Canon EOS R5 and your discount will be $116.97. Purchase a Sony FE 600mm f/4 GM OSS lens and save a remarkable $389.94! Your Bedford’s purchase no longer needs to be greater than $1,000.00 for you to receive a discount. The more you spend, the more you save.
|
|
|
120 sold to rave reviews.
The SONY e-Guide by Patrick Sparkman and Arthur Morris
|
The Sony Camera User’s e-Guide (and Videos)
Click here to purchase the guide with one Camera Set-up Video. Be sure to e-mail us by clicking here to specify your camera body so that we can send you a link for the correct video.
Click here to purchase the guide with two Camera Set-up Videos. Be sure to e-mail us by clicking here to specify your two camera bodies so that we can send you links for the correct videos.
Click here to learn more about the SONY e-Guide.
Money Saving Reminder
Many have learned that if you need a hot photo item that is out of stock at B&H and would enjoy free overnight shipping, your best bet is to click here, place an order with Bedfords, and enter the coupon code BIRDSASART at checkout. If an item is out of stock, contact Steve Elkins via e-mail or on his cell phone at (479) 381-2592 (Eastern time). Be sure to mention the BIRDSASART coupon code and use it for your online order. Steve has been great at getting folks the hot items that are out of stock at B&H and everywhere else. The wait lists at the big stores can be a year or longer for the hard to get items. Steve will surely get you your gear long before that. For the past year, he has been helping BAA Blog folks get their hands on items like the SONY a9 ii, the SONY 200-600 G OSS lens, the Canon EOS R5, the Canon RF 100-500mm lens, and the Nikon 500mm PF. Steve is personable, helpful, and eager to please.


Gear Questions and Advice
Too many folks attending BAA IPTs and dozens of photographers whom I see in the field and on BPN, are–out of ignorance–using the wrong gear especially when it comes to tripods and more especially, tripod heads… Please know that I am always glad to answer your gear questions via e-mail. Those questions might deal with systems, camera bodies, accessories, and/or lens choices and decisions.
|
|
|
I-Phone 11 image.
The TwinShooter in Action — front view
|
The TwinShooter in Action — front view
Above is a bird’s eye view of the TwinShooter in action. The SONY 600mm f/4GM lens is on our left, the SONY 200-600 G lens on our right.
|
|
|
I-Phone 11 image.
The TwinShooter in Action — rear view
|
The TwinShooter in Action — front view
Above is a view of the TwinShooter in action at one of the ground-level morning songbird blinds at Santa Clara. The SONY 600mm f/4GM lens is on our right, the SONY 200-600 G lens on our left. Note that in reality the two lenses are perfectly parallel to each other as seen in the front view above. The distortion is the result of using the I-Phone 11 image at 1/2X, a wide angle setting. We photographed subjects ranging in size from the tiny Painted Bunting to the much bigger Green Jay to the big fat White-tipped Dove to Cottontail Rabbit to a young White-tailed Deer buck with a nice set of antlers. This set-up gives me coverage of from 200 to 600mm at f/6.3 along with 600mm at f/4, 840mm at f/5.6, and — as you will see below — 1200mm at f/8.
I first mentioned the TwinShooter when I introduced the FlexShooter Pro in the blog post here.. At the time, I was quite confident that I would never use a TwinShooter, in part because I thought that it would be quite clunky and difficult to work from. I could not have been more wrong.
I set up the tripod as I usually do in a blind — two legs forward parallel to and pressed against the lower front wall of the blind, and the other shortened leg pointed back at me. Once the tripod is firmly in place, I center the floating bubble in the scribed circle on the sliver ball and set the tension on the Silver Bullet Knob. This allows smooth panning with either lens while everything stays perfect level. Then I mount the 600 on the right as my primary weapon and the 200-600 on the left for larger subjects or shorter focal lengths (as needed). The last step is to balance the rig, usually by moving the 600 GM back a bit. Once your two lenses are set-up and balanced, the Levered-clamp FlexShooter or the FlexShooter Pro makes handling either lens a dream — smooth as silk and always square to the world.
|
|
The iPhone Photography e-Guide
To order your copy of the iPhone Photography e-Guide, please click here.
The PDF is sent link by e-mail for downloading: the file is relatively huge at 216 MB.
|
Hard to Believe
Yes, Cliff has a great eye and wonderfully creative vision. Yet it is still hard for me to believe that he can make so many great images with “just“ an i-phone. Almost more amazingly Cliff captures with his iPhone and does all of his post-processing on the phone! In this great new e-Guide written for BIRDS AS ART you will learn to use set up you iPhone quickly and efficiently and how to use it. In addition, there are dozens and dozens of tips on Cliff’s favorite apps and his favorite gear. Scroll down to the bottom to see the Table of Contents.
The iPhone Photography e-Guide: $20.00.
To order your copy of the iPhone Photography e-Guide please click here.
Dr. Cliff Oliver
Dr. Cliff Oliver is an award-winning photographer, former photography instructor for the San Diego Natural History Museum, cutting-edge integrative health care professional, and international workshop leader. He created and taught the first 5-day immersion iPhone photography workshop at Hollyhock, Canada’s premier Leadership Learning Center. He teaches quarterly iPhone photography classes at the Athenaeum Music & Arts Library School of the Arts (these include Art on the iPhone, iPhoneography, Portraits and Selfies, and Practicing in the Field). His images have been on the cover of WildBird magazine, on display at Scripps Oceanography Institute, and been honored with multiple first-place finishes in the International Exhibition of Photography Del Mar. The San Diego Natural History Museum’s, “Birds of the World” centennial exhibit featured several of his images. One of his iPhone images received an honorable mention in the Athenaeum 23rd annual juried exhibition. He has displayed images at Art Speaks: Expressions of Hope and Healing and has produced a series of books, called Zen I, II, III, IV, V, VI and VII that feature original images that promote inner peace. The last 4 books feature only images taken on the iPhone. He teaches individuals and groups the skills of capturing iPhone/mobile photographs and then how to create personalized works of art.
To see some of Cliff’s iPhone images, click here. Learn more about Cliff and what he does on his Center for Balance website here. And don’t forget, if I had never met Cliff I would be pushing up daisies somewhere. To request my Health Basics File that contains the whole story, please shoot me an e-mail by clicking here..
What the heck is a TwinShooter? Two for the Price of One!
If you work in a situation where you are seated in a blind, under cover, or somewhere in the field where you need two tripod-mounted lenses side by side, always level, and instantly available, then the TwinShooter was made for you. It sells for $209.00 US plus shipping. We are currently sold out. We are expecting new stock in a week to ten days. At present, we are accepting phone orders only. Please call Jim any weekday at 863-692-0906 to secure one from our next batch. Your credit card will not be billed until your order is shipped.
|
|
|
This image was created on 1 November 2020 at the Santa Clara Ranch north of Rio Grande City with Hector Astorga as our guide. I used the Induro GIT 304/Levered-clamp FlexShooter/TwinShooter-mounted Sony FE 600mm f/4 GM OSS lens and the 61-MP Sony Alpha a7R IV Mirrorless Digital Camera Body. ISO 2000. Exposure determined by Zebras with ISO on the rear dial: 1/320 sec. at f/4.4 in Manual mode. AWB at 7:14am before the sun came up on what would be a clear morning.
Tracking Flexible Spot AF-C was active at the moment of exposure and performed to perfection. Click the image to see a larger version.
Image #1: Northern Mockingbird drinking
|
Working with Soft Pre-dawn Light
In the soft, sweet light of pre-dawn I usually will go to the 600 f/4GM wide open at f/4 to take advantage of its speed. I love the soft, no-shadows look.
|
|
|
Click on the screen capture to view the larger version.
Image #1A: Topaz DeNoise AI on the ISO 2000 Northern Mockingbird drinking image at 100%.
|
Topaz DeNoise AI on the ISO 2000 Northern Mockingbird drinking image
As part of my now regular workflow, I began with Topaz DeNoise AI on Auto on the whole image to clean up the noise and sharpen it up just a bit. Here, the Auto settings were spot on. Be sure to click on the image to enlarge it and note the complete elimination of noise in the background.
Getting Wider When Needed
Here, 600 would have been too long a focal length; it would not have been possible to include the whole bird along with its whole reflection. Switching from one lens to another is a snap; you can often do so without even shifting your position in the chair. One big advantage of the TwinShooter solution is that with your auxiliary zoom lens already in place, you will not be scaring off shy subjects when you stick a second lens out of the blind …
840mm on the TwinShooter
For this image made in sweet, late afternoon light, I was working on the TwinShooter with the 600 GM and the 1.4X TC. Note the inclusion of the shadow in the image design. That was determined both by the focal length and my position in the blind.
After running Topaz DeNoise AI at Auto on the whole image as the first step in my workflow, I selected the bird’s face and upper body with the Quick Selection Tool and applied Topaz Sharpen AI to that layer only. As I usually do, I roughly doubled the sharpening setting while moving the Noise Suppression slider to zero.
1200mm on the TwinShooter
Once the sun was on the birds on our first morning, I went super-tight with the 2X TC on the 600 GM to best isolate the bathing birds that were facing right at me right down sun angle.
|
|
|
San Diego offers a wealth of very attractive natural history subjects, including and especially the Pacific race of California Brown Pelican. With annual visits spanning more than four decades, I have lots of photographic experience there … Click on the composite to enjoy a larger version.
|
San Diego 2021 COVID-conscious Brown Pelican IPT
January 12 thru the morning session on January 16, 2021. Four full and one-half day: $2299.00. Deposit: $599.00. Limit: 8 photographers/Openings: 7.
Introductory Meet and Greet at 7:00pm on the evening before the IPT begins; MON JAN 11, 2021.
Join me in San Diego to photograph the spectacular breeding plumage Brown Pelicans with their fire-engine red and olive green bill pouches; Brandt’s (nesting with eggs and possibly chicks) and Double-crested Cormorants; breeding plumage Wood and Ring-necked Duck; other duck species possible including Lesser Scaup, Redhead, and Surf Scoter; a variety of gulls including Western, California, and the gorgeous Heermann’s, all in full breeding plumage; shorebirds including Marbled Godwit, Willet, Sanderling and Black-bellied Plover; many others are possible including Least, Western, and Spotted Sandpiper, Whimbrel, Black and Ruddy Turnstone, Semipalmated Plover, and Surfbird; Harbor Seals (depending on the current regulations) and California Sea Lions; and Bird of Paradise flowers. And as you can see by studying the IPT cards, there are some nice bird-scape and landscape opportunities as well. Not to mention a ton of excellent flight photography opportunities and instruction.
Please note: where permitted and on occasion, ducks and gulls may be attracted (or re-located) with offerings of grains or healthy bread.
Learning Exposure, Whether You Like It Or Not
Whether you like it or not, we will be beating the subject of exposure like a dead horse. In every new situation, you will hear my thoughts on the exposure situation along with my thoughts on both Nikon and Canon histograms and the subject of blinkies. Whether you like it or not, you will learn to work in manual mode and to get the right exposure every time as long as a bird gives you ten seconds with the light constant. And you will learn what to do when the light is changing constantly. What you learn about exposure will be one of the great takeaways on every IPT.
|
|
|
Though the pelicans will be the stars of the show on this IPT, there will be many other handsome and captivating subjects in wonderful settings. Click on the composite to enjoy a larger version.
|
It Ain’t Just Pelicans
With gorgeous subjects just sitting there waiting to have their pictures taken, photographing the pelicans on the cliffs is about as easy as nature photography gets. With the winds from the east almost every morning there is usually some excellent flight photography as well. And the pelicans are almost always doing something interesting: preening, scratching, bill pouch cleaning, or squabbling. And then there are those crazy head throws that are thought to be a form of intra-flock communication. You will be guided as to how to make the best of all of those opportunities. And depending on the weather and local conditions and tides, there are a variety of fabulous photo chances available in and around San Diego.
|

|
|
Did I mention that there are lots of great birds and natural history subjects in San Diego in winter? Click on the composite to enjoy a larger version.
|
The San Diego Details
This IPT will include five 3 1/2 hour morning photo sessions, four 2 1/2 hour afternoon photo sessions, four lunches, and after-brunch image review and Photoshop sessions. To ensure early starts, breakfasts will be your responsibility. And so that we can get some sleep, dinners will be on your own as well.
A $599 deposit is required to hold your slot for this IPT. You can send a check (made out to “BIRDS AS ART) to us here: BIRDS AS ART, PO Box 7245, Indian Lake Estates, FL, 3385, or call Jim or Jennifer at the office with a credit card at 863-692-0906. Your balance, payable only by check, is due immediately after you sign up. Please print, complete, and sign the form that is linked to here and shoot it to us along with your deposit check. If you register by phone, please print, complete and sign the form as noted above and either mail it to us or e-mail the scan. If you have any questions, please feel free to contact me via e-mail. If you cancel due to COVID 19 concerns, all of your payments will be refunded.
Travel Insurance
Travel insurance for both big international trips and US-based IPTs is highly recommended as we never know what life has in store for us. I strongly recommend that you purchase quality travel insurance. Travel Insurance Services offers a variety of plans and options. Included with the Elite Option or available as an upgrade to the Basic & Plus Options you can also purchase Cancel for Any Reason Coverage that expands the list of reasons for your canceling to include things such as sudden work or family obligation and even a simple change of mind. My family and I use and depend on the great policies offered by TIS whenever we travel. You can learn more here: Travel Insurance Services. Do note that many plans require that you purchase your travel insurance within 14 days of our cashing your deposit check or running your credit card. Whenever purchasing travel insurance, be sure to read the fine print carefully even when dealing with reputable firms like TSI.
|

|
|
Variety is surely the spice of life in San Diego. Click on the composite to enjoy a larger version.
|
Getting Up Early and Staying Out Late
On all BIRDS AS ART IPTS including and especially the San Diego IPT, we get into the field early to take advantage of unique and often spectacular lighting conditions and we stay out late to maximize the chances of killer light and glorious sunset silhouette situations. We often arrive at the cliffs a full hour before anyone else shows up to check out the landscape and seascape opportunities.
Typos
In all blog posts and Bulletins, feel free to e-mail or to leave a comment regarding any typos or errors. Just be right :).
November 2nd, 2020 What’s Up?
Anita North and I spent Saturday morning exploring the oilfield roads around High Island, TX. We lucked out by running into a guy named Christian Taylor. He promptly and graciously invited us onto his property. Sandwiched between the Gulf and Anahuac NWR, his large tract of land is filled with numerous ponds filled with numerous birds. As you will see below, we had a good morning. After shooting we headed back to our Anahuac AirBNB, packed up, and headed for Rockport, TX. With wind against sun, we decided to continue on to the Santa Clara Ranch north of Rio Grande City. We had a great day of shooting at two ground-level songbird blinds thanks to our guide, Hector Astorga. Hector, the winner of four Texas Valley Land Fund photo competitions, is a skilled and accomplished photographer along with being a super-nice guy. Photography-wide, Sunday was the most productive day of our trip by far.
Today is Monday 2 November 2020 — can you believe it — November? We will he heading back to the morning songbird blind at 6:15am. Did you remember the time change?
Topaz Still on Sale!
Right now Topaz is offering price reductions on the Utility Bundle and the Creator Bundle. The former normally sells for $359.96. It is on sale for an amazingly low $199.95. Click here, scroll all the way down to the sale, and enter the ARTHUR15 code at checkout to save an additional 15%! The Creator Bundle usually sells for #279.97 and is now on sale for $249.99. Using the ARTHUR15 code at checkout brings the price down to $212.49!
Please Remember
With income from IPTs approaching zero, please, if you enjoy and learn from the blog, remember to use one of my two affiliate programs when purchasing new gear. Doing so just might make it possible for me to avoid having to try to get a job as a Walmart greeter and will not cost you a single penny more. And if you use Bedfords and remember to enter the BIRDSASART code at checkout, you will save 3% on every order and enjoy free second-day air shipping. In these crazy times — I am out at least forty to sixty thousand dollars so far due to COVID 19 (with lots more to come) — remembering to use my B&H link or to shop at Bedfords will help me out a ton and be greatly appreciated. Overseas folks who cannot order from the US because of import fees, duties, and taxes can always help out by clicking here if they see fit.
The BAA Used Gear Page
The Used Gear page continues to be red hot! It is BAA Used Gear Page is the place to sell your used photographic equipment. We will help you to get your gear sold quickly for 20 to 60% or more than what the big guys are offering … Doubt me? Check out the Recent Sales list for the past ten months at the bottom of the page.
Canon EOS 5D Mark II Digital SLR Camera Body with Extras!
Price Reduced $100 on 2 NOV 2020!
Stuart Hahn is offering a Canon 5D Mark II in excellent plus condition for $484.00 (was $585.00). The LCDs have been protected with screen protectors since day one. The sale includes everything that came with the camera originally, a RRS L bracket, and insured ground shipping via major courier to lower-48 US addresses only. Your item will not ship until your check clears unless other arrangements are made.
Please contact Stu via e-mail or by phone at 1-916-485-1630 (Pacific time zone).
Stu Hahn was the first-ever seller on the Used Gear Page many years ago when he parted with his Canon 500mm f/4L IS lens, the “old five.” This 5D II body would be ideal for a budding landscape or Urbex photographer, as well as for some looking for a great body to convert to IR. My 5D II was expertly converted by Kolari Vision. It is also a good body for bird and nature photography; I used mine as a back-up for my old 1D Mark IV bodies. It served me very well in that capacity in the Southern Ocean a while back when I foolishly used my two 1D IVs in a driving rainstorm for two hours with the expected result. That 5D II saved the trip for me. Stu’s body is priced to sell. artie
BIRDS AS ART is registered in the U.S. Patent and Trademark Office
Great Topaz News!
Folks who use the BAA Topaz link to purchase Sharpen AI, DeNoise AI, or the Utility Bundle (or any other Topaz plugins) will receive a 15% discount by entering the ARTHUR15 code at checkout. To get the discount you must use my link and you must enter the discount code. Be sure to start with this link.
Topaz Stuff
As I said just a while back and have said often many times before, I should have listened sooner. If you, like me, are new to the Topaz party, please use this link to purchase. Right now I can wholeheartedly recommend both Topaz Sharpen AI and Topaz DeNoise AI. Though I have not yet worked with JPEGtoRAW AI or Gigapixel AI, I have installed both of these plug-ins and look forward to trying them on some I-Phone 11 images fairly soon. If you are thinking like me, consider the Utility Bundle that includes all four plug-ins mentioned above at a money-saving price.
Again, those who purchase Sharpen AI or DeNoise AI using my link, can e-mail to request a short Getting Started with Topaz e-Guide. I had a bit of trouble getting the two plug-ins installed and having them appear in the Photoshop Filter Menu. In addition, I will explain how to best learn about the two plug-ins by applying them on a Layer (in Photoshop). I amazed myself yesterday by completing this guide in the car on the way to and from Sebastian. Huge thanks to Anita for doing the driving. Please include a copy of your Topaz order when requesting the guide.
New and Better Bedfords Discount Policy!
You can now save 3% on all of your Bedfords photo gear purchases by entering the BIRDSASART coupon code at checkout. Your discount will be applied to your pre-tax total. In addition, by using the code you will get 2nd day air shipping via Fed Ex.
Grab a Nikon AF-S Teleconverter TC-14E III and save $14.99. Purchase a Canon EOS R5 and your discount will be $116.97. Purchase a Sony FE 600mm f/4 GM OSS lens and save a remarkable $389.94! Your Bedford’s purchase no longer needs to be greater than $1,000.00 for you to receive a discount. The more you spend, the more you save.
|
|
|
119 sold to rave reviews.
The SONY e-Guide by Patrick Sparkman and Arthur Morris
|
The Sony Camera User’s e-Guide (and Videos)
Click here to purchase the guide with one Camera Set-up Video. Be sure to e-mail us by clicking here to specify your camera body so that we can send you a link for the correct video.
Click here to purchase the guide with two Camera Set-up Videos. Be sure to e-mail us by clicking here to specify your two camera bodies so that we can send you links for the correct videos.
Click here to learn more about the SONY e-Guide.
Money Saving Reminder
Many have learned that if you need a hot photo item that is out of stock at B&H and would enjoy free overnight shipping, your best bet is to click here, place an order with Bedfords, and enter the coupon code BIRDSASART at checkout. If an item is out of stock, contact Steve Elkins via e-mail or on his cell phone at (479) 381-2592 (Eastern time). Be sure to mention the BIRDSASART coupon code and use it for your online order. Steve has been great at getting folks the hot items that are out of stock at B&H and everywhere else. The wait lists at the big stores can be a year or longer for the hard to get items. Steve will surely get you your gear long before that. For the past year, he has been helping BAA Blog folks get their hands on items like the SONY a9 ii, the SONY 200-600 G OSS lens, the Canon EOS R5, the Canon RF 100-500mm lens, and the Nikon 500mm PF. Steve is personable, helpful, and eager to please.


Gear Questions and Advice
Too many folks attending BAA IPTs and dozens of photographers whom I see in the field and on BPN, are–out of ignorance–using the wrong gear especially when it comes to tripods and more especially, tripod heads… Please know that I am always glad to answer your gear questions via e-mail. Those questions might deal with systems, camera bodies, accessories, and/or lens choices and decisions.
The Oilfields
I wanted to create an image showing the birds and the pumping machinery. 840mm turned out to be a good focal length. I chose my perspective carefully to frame the small flock of spoonbills with the oilfield apparatus. There was no need for ISO 1000; I should have been at ISO 400 or 500 with a correspondingly lower shutter speed of 1/800 or 1/1000 second.
The Strategy
We spotted a mudflat spit filled with gulls and terns. The gulls included laughing, ring-billed, and several Franklin’s. The terns were Forster’s and Caspians. The mudflats were quite slippery so we made our way onto an opposite point of land and sat down behind our lowered tripods. The flock would occasionally take flight giving us good chances as the birds circled around to land. We were a bit off sun angle but the southeast wind had the birds fairly well lit as they landed toward us.
The Shorebirds
There was a nice selection of shorebirds on Christian’s property. Those included lots of Willets along with some Least Sandpipers, Short-billed Dowitchers, and a few Greater Yellowlegs. The bird in Image #3 landed right in front of us.
The Caspian Terns!
Being the largest birds in the flock, the Caspian Terns provided the very best flight opportunities. As I have never done very well on this species, they were a special treat for me. With the SONY gear, shooting at 1200mm is routinely successful. On Sunday, the 600 GM/2X TC/a9 ii combination made our day a success.
|
|
|
Click on the screen capture to view the larger version.
Image #1A: Topaz DeNoise AI on the Caspian Tern braking to descend image at 100%.
|
Topaz DeNoise AI on the Caspian Tern braking to descend image at 100%
As part of my now regular workflow, I began with Topaz DeNoise AI on Auto on the whole image to clean up the noise and sharpen it up just a bit. Here, the Auto settings were spot on. Be sure to click on the image to enlarge it and note the complete elimination of noise in the sky.
|
|
|
San Diego offers a wealth of very attractive natural history subjects, including and especially the Pacific race of California Brown Pelican. With annual visits spanning more than four decades, I have lots of photographic experience there … Click on the composite to enjoy a larger version.
|
San Diego 2021 COVID-conscious Brown Pelican IPT
January 12 thru the morning session on January 16, 2021. Four full and one-half day: $2299.00. Deposit: $500.00. Limit: 8 photographers/Openings: 7.
Introductory Meet and Greet at 7:00pm on the evening before the IPT begins; MON JAN 11, 2021.
Join me in San Diego to photograph the spectacular breeding plumage Brown Pelicans with their fire-engine red and olive green bill pouches; Brandt’s (nesting with eggs and possibly chicks) and Double-crested Cormorants; breeding plumage Wood and Ring-necked Duck; other duck species possible including Lesser Scaup, Redhead, and Surf Scoter; a variety of gulls including Western, California, and the gorgeous Heermann’s, all in full breeding plumage; shorebirds including Marbled Godwit, Willet, Sanderling and Black-bellied Plover; many others are possible including Least, Western, and Spotted Sandpiper, Whimbrel, Black and Ruddy Turnstone, Semipalmated Plover, and Surfbird; Harbor Seals (depending on the current regulations) and California Sea Lions; and Bird of Paradise flowers. And as you can see by studying the IPT cards, there are some nice bird-scape and landscape opportunities as well. Not to mention a ton of excellent flight photography opportunities and instruction.
Please note: where permitted and on occasion, ducks and gulls may be attracted (or re-located) with offerings of grains or healthy bread.
Learning Exposure, Whether You Like It Or Not
Whether you like it or not, we will be beating the subject of exposure like a dead horse. In every new situation, you will hear my thoughts on the exposure situation along with my thoughts on both Nikon and Canon histograms and the subject of blinkies. Whether you like it or not, you will learn to work in manual mode and to get the right exposure every time as long as a bird gives you ten seconds with the light constant. And you will learn what to do when the light is changing constantly. What you learn about exposure will be one of the great takeaways on every IPT.
|
|
|
Though the pelicans will be the stars of the show on this IPT, there will be many other handsome and captivating subjects in wonderful settings. Click on the composite to enjoy a larger version.
|
It Ain’t Just Pelicans
With gorgeous subjects just sitting there waiting to have their pictures taken, photographing the pelicans on the cliffs is about as easy as nature photography gets. With the winds from the east almost every morning there is usually some excellent flight photography as well. And the pelicans are almost always doing something interesting: preening, scratching, bill pouch cleaning, or squabbling. And then there are those crazy head throws that are thought to be a form of intra-flock communication. You will be guided as to how to make the best of all of those opportunities. And depending on the weather and local conditions and tides, there are a variety of fabulous photo chances available in and around San Diego.
|

|
|
Did I mention that there are lots of great birds and natural history subjects in San Diego in winter? Click on the composite to enjoy a larger version.
|
The San Diego Details
This IPT will include five 3 1/2 hour morning photo sessions, four 2 1/2 hour afternoon photo sessions, four lunches, and after-brunch image review and Photoshop sessions. To ensure early starts, breakfasts will be your responsibility. And so that we can get some sleep, dinners will be on your own as well.
A $599 deposit is required to hold your slot for this IPT. You can send a check (made out to “BIRDS AS ART) to us here: BIRDS AS ART, PO Box 7245, Indian Lake Estates, FL, 3385, or call Jim or Jennifer at the office with a credit card at 863-692-0906. Your balance, payable only by check, is due immediately after you sign up. Please print, complete, and sign the form that is linked to here and shoot it to us along with your deposit check. If you register by phone, please print, complete and sign the form as noted above and either mail it to us or e-mail the scan. If you have any questions, please feel free to contact me via e-mail. If you cancel due to COVID 19 concerns, all of your payments will be refunded.
Travel Insurance
Travel insurance for both big international trips and US-based IPTs is highly recommended as we never know what life has in store for us. I strongly recommend that you purchase quality travel insurance. Travel Insurance Services offers a variety of plans and options. Included with the Elite Option or available as an upgrade to the Basic & Plus Options you can also purchase Cancel for Any Reason Coverage that expands the list of reasons for your canceling to include things such as sudden work or family obligation and even a simple change of mind. My family and I use and depend on the great policies offered by TIS whenever we travel. You can learn more here: Travel Insurance Services. Do note that many plans require that you purchase your travel insurance within 14 days of our cashing your deposit check or running your credit card. Whenever purchasing travel insurance, be sure to read the fine print carefully even when dealing with reputable firms like TSI.
|

|
|
Variety is surely the spice of life in San Diego. Click on the composite to enjoy a larger version.
|
Getting Up Early and Staying Out Late
On all BIRDS AS ART IPTS including and especially the San Diego IPT, we get into the field early to take advantage of unique and often spectacular lighting conditions and we stay out late to maximize the chances of killer light and glorious sunset silhouette situations. We often arrive at the cliffs a full hour before anyone else shows up to check out the landscape and seascape opportunities.
Typos
In all blog posts and Bulletins, feel free to e-mail or to leave a comment regarding any typos or errors. Just be right :).
October 31st, 2020
|
|
|
I-Phone group-selfie courtesy of and copyright 2020: Alan Murphy. Click on the image to view a larger version.
Image #Zero: The hopeful raptor photographers on Friday morning.
From your left to right: Alan Murphy, Anita North (in ghillie sui with glasses), Bill Carpenter, and yours truly (in ghillie suit).
The back of the morning blind, the front of the afternoon blog, and the decoy owl on a pole are visible to our left of Bill.
|
What’s Up?
Despite limited success on our first cold-front day in Alan Murphy’s hawk blind at Smith Point, TX, the challenge and the potential were so great and the company so good that we decided to stay in Anahuac and forego three days in Rockport. Thursday morning was the first day of the cold front with the emphasis on cold. Though I had on my lined dungarees, a hooded sweatshirt, and my second heaviest parka, I froze as we were battered by the west/northwest wind (with gusts up to 30mph) right in our faces. We had a halfway decent chance or two on some American Ketrels but that was about it. We retreated to the nearby A and D Cafe, a local hole-in-the wall on Barbara L street, and enjoyed a fabulous lunch prepared by Marissa, the owner, waitress, and chef. The chips and salsa were great. We shared a plate of ground beef nachos followed by fish and shrimp tacos. It was my first restaurant meal since early March. We were the only patrons and Marissa wore a mask. During the afternoon session we had a one good chance on a young Cooper’s Hawk. Everyone got a few good images. At the end of the day, both Alan and his friend Bill Carpenter were amazed by the lack of birds and action and felt that with the winds forecast to shift to the north on Friday that we would finally have a great hawk flight with lots of photography action.
On Friday we got to witness migration live and in person. The winds had shifted to the northeast and conditions were dead-solid-perfect for a great morning of hawk photography. We saw large flocks of White Pelicans and Wood Storks deciding whether or not to cross the bay and continue on to Galveston. Some did. We watched kettles of Turkey Vultures and Broad-winged hawks along with a few other raptors do the same.We saw small groups of Snow Geese headed south high overhead. Lots of southbound migrant passerines including Ruby-throated Hummingbird, Yellow-romper Warbler, Ruby-crowned Kinglet, Pine Siskin, and Eastern Phoebe streamed along the bayshore or flitted in the surrounding bushes. But raptors again were few and far between. A single Coopers Hawk was interested in the owl and everyone but me got a few good images. The sun broke through just as the bird flew at the owl. I tried to change my exposure and never got off a single image.
We decided to pack up and turn tail on the hawks. Bill had to head home to get back to work. Anita, and Alan and I enjoyed another great lunch at A and D. We were thrilled to learn Alan Murphy’s life story. When we were done, I shared some images with Alan. He was quite amazed by many of them and, shared that he had been inspired early on by others. Words like that from someone as skilled, as accomplished, as talented, as successful, and as hard-working as Alan are quite meaningful to an old codger like me. We said our goodbyes and thanked Alan for his incredible generosity and for sharing his considerable knowledge with us. Bill was equally gracious. Not realizing that he was skipping lunch I did not get a chance to thank him again and say goodbye. Alan and the Gulf Coast Bird Observatory hawk watcher’s surmised that the hurricane-related rain along the east coast of North America had stopped the southbound raptors in their tracks.
On Saturday afternoon Anita and I enjoyed a somewhat slow afternoon at Anahuac NWR. Today is 31 October 2020. We will photograph on some of the oil-field roads around High Island in the morning and then head back to our AirBNB in Anahuac. We should be on the road by 10:30 am headed for a short afternoon of bird photography at Rockport. That trip is about four hours. When we leave Rockport we will be headed for the Santa Clara Ranch north of Rio Grande City, TX where we will be staying at the ranch for two days of photography. The last leg of our journey is about three hours …
Topaz on Sale!
Right now Topaz is offering price reductions on the Utility Bundle and the Creator Bundle. The former normally sells for $359.96. It is on sale for an amazingly low $199.95. Click here, scroll all the way down to the sale, and enter the ARTHUR15 code at checkout to save an additional 15%! The Creator Bundle usually sells for #279.97 and is now on sale for $249.99. Using the ARTHUR15 code at checkout brings the price down to $212.49!
Please Remember
With income from IPTs approaching zero, please, if you enjoy and learn from the blog, remember to use one of my two affiliate programs when purchasing new gear. Doing so just might make it possible for me to avoid having to try to get a job as a Walmart greeter and will not cost you a single penny more. And if you use Bedfords and remember to enter the BIRDSASART code at checkout, you will save 3% on every order and enjoy free second-day air shipping. In these crazy times — I am out at least forty to sixty thousand dollars so far due to COVID 19 (with lots more to come) — remembering to use my B&H link or to shop at Bedfords will help me out a ton and be greatly appreciated. Overseas folks who cannot order from the US because of import fees, duties, and taxes can always help out by clicking here if they see fit.
The BAA Used Gear Page
The Used Gear page continues to be red hot! It is BAA Used Gear Page is the place to sell your used photographic equipment. We will help you to get your gear sold quickly for 20 to 60% or more than what the big guys are offering … Doubt me? Check out the Recent Sales list for the past ten months at the bottom of the page.
BIRDS AS ART is registered in the U.S. Patent and Trademark Office
Great Topaz News!
Folks who use the BAA Topaz link to purchase Sharpen AI, DeNoise AI, or the Utility Bundle (or any other Topaz plugins) will receive a 15% discount by entering the ARTHUR15 code at checkout. To get the discount you must use my link and you must enter the discount code. Be sure to start with this link.
Topaz Stuff
As I said just a while back and have said often many times before, I should have listened sooner. If you, like me, are new to the Topaz party, please use this link to purchase. Right now I can wholeheartedly recommend both Topaz Sharpen AI and Topaz DeNoise AI. Though I have not yet worked with JPEGtoRAW AI or Gigapixel AI, I have installed both of these plug-ins and look forward to trying them on some I-Phone 11 images fairly soon. If you are thinking like me, consider the Utility Bundle that includes all four plug-ins mentioned above at a money-saving price.
Again, those who purchase Sharpen AI or DeNoise AI using my link, can e-mail to request a short Getting Started with Topaz e-Guide. I had a bit of trouble getting the two plug-ins installed and having them appear in the Photoshop Filter Menu. In addition, I will explain how to best learn about the two plug-ins by applying them on a Layer (in Photoshop). I amazed myself yesterday by completing this guide in the car on the way to and from Sebastian. Huge thanks to Anita for doing the driving. Please include a copy of your Topaz order when requesting the guide.
New and Better Bedfords Discount Policy!
You can now save 3% on all of your Bedfords photo gear purchases by entering the BIRDSASART coupon code at checkout. Your discount will be applied to your pre-tax total. In addition, by using the code you will get 2nd day air shipping via Fed Ex.
Grab a Nikon AF-S Teleconverter TC-14E III and save $14.99. Purchase a Canon EOS R5 and your discount will be $116.97. Purchase a Sony FE 600mm f/4 GM OSS lens and save a remarkable $389.94! Your Bedford’s purchase no longer needs to be greater than $1,000.00 for you to receive a discount. The more you spend, the more you save.
|
|
|
119 sold to rave reviews.
The SONY e-Guide by Patrick Sparkman and Arthur Morris
|
The Sony Camera User’s e-Guide (and Videos)
Click here to purchase the guide with one Camera Set-up Video. Be sure to e-mail us by clicking here to specify your camera body so that we can send you a link for the correct video.
Click here to purchase the guide with two Camera Set-up Videos. Be sure to e-mail us by clicking here to specify your two camera bodies so that we can send you links for the correct videos.
Click here to learn more about the SONY e-Guide.
Money Saving Reminder
Many have learned that if you need a hot photo item that is out of stock at B&H and would enjoy free overnight shipping, your best bet is to click here, place an order with Bedfords, and enter the coupon code BIRDSASART at checkout. If an item is out of stock, contact Steve Elkins via e-mail or on his cell phone at (479) 381-2592 (Eastern time). Be sure to mention the BIRDSASART coupon code and use it for your online order. Steve has been great at getting folks the hot items that are out of stock at B&H and everywhere else. The wait lists at the big stores can be a year or longer for the hard to get items. Steve will surely get you your gear long before that. For the past year, he has been helping BAA Blog folks get their hands on items like the SONY a9 ii, the SONY 200-600 G OSS lens, the Canon EOS R5, the Canon RF 100-500mm lens, and the Nikon 500mm PF. Steve is personable, helpful, and eager to please.


Gear Questions and Advice
Too many folks attending BAA IPTs and dozens of photographers whom I see in the field and on BPN, are–out of ignorance–using the wrong gear especially when it comes to tripods and more especially, tripod heads… Please know that I am always glad to answer your gear questions via e-mail. Those questions might deal with systems, camera bodies, accessories, and/or lens choices and decisions.
I Cease to Be Amazed …
I recently communicated with AEPi Beta Pi fraternity brother Marty Stein. We had not spoken in nearly 50 years. After I left a phone message, I e-mailed Marty. He wrote back, A. Morris. ICTBA! That was AEPi-speak for I Cease to Be Amazed!
I cease to be amazed by the SONY 600 GM/2X TC/a9 ii performance for birds in flight as well as by the high ISO performance. Who would have thought that creating sharp images of birds in flight at 1200mm in sweet light at high ISOs would ever be a reality? Not me for sure.
What’s Not To Like?
I really love the painterly quality of the background in this image. I like the image design and the two wing positions are pretty good. There is, however, one thing about the image that bugs me. If you see anything that bugs you, please leave a comment and we can see if we are on the same page.
|
|
|
Click on the screen capture to view the larger version.
Image #1A: Topaz DeNoise AI on the Black-bellied Whistling Ducks landing image at 100%.
|
Topaz DeNoise AI on the landing whistling ducks image at 100%
As part of my now regular workflow, I began with Topaz DeNoise AI on Auto on the whole image to clean the noise sharpen it up just a bit. It looked pretty good but by moving the Reduce Noise slider from 2 to 3 the background looked even smoother without destroying any detail so I went with that. Be sure to click on the image to enlarge it and note the complete elimination of noise especially on the background.
|
|
|
Click on the image to view a larger version.
Image #1B: Topaz Sharpen AI on the upper duck (selected) at 100%.
|
Topaz Sharpen AI on the upper duck (selected)
After running DeNoise AI on the whole image, I made a careful selection of the upper duck and applied Topaz Sharpen AI to the that layer only. Auto selected stabilize indicating that 1/2000 sec. was not quite enough to freeze the duck and did an amazing job of lining up the pixels to reduce the effects of motion blur. Lastly, I moved the Noise Suppression slider to zero.
Typos
In all blog posts and Bulletins, feel free to e-mail or to leave a comment regarding any typos or errors. Just be right :).
|
|


