May 5th, 2012
EOS-1DX, EOS-5D Mark III, & EOS-1D Mark IV Thoughts
This post was prompted by a recent e-mail from IPT-veteran Mike Cristina who asked, “Do the quality of the files of the 5D Mark III at 22MP compensate for the extra magnification of the 1DM4 at 16MP? Same question for the 1DX. And what about the fact that neither the 5D Mark III or the 1D Mark IV will autofocus at f/8.
The short answer is that pixel-wise, the math is close with the edge to the 1D Mark IV and that pixel-wise the 1D Mark IV is the clear winner over the long anticipated 1DX. I love the files from my Mark IV bodies and I love the files from my 5D Mark III bodies. I have never created an image with the EOS-1DX. Have never even held one in my hands. The issue of no practical autofocus at f/8 is a fact of life that each of us will have to consider. And once the 500 f/4L IS II and the 600 f/4L IS II are on the scene, the ability of the Mark IV to AF with the 2X III teleconverters will become an even more important issue especially for those who photograph in areas where it is difficult to get close to the birds. That said, there is no way that I can decide if a 5D III or a 1DX is a good camera for you. I can share my thoughts and my strategies and the images that I create but in the end you must do your homework and make the decision for yourself.
|
|
|
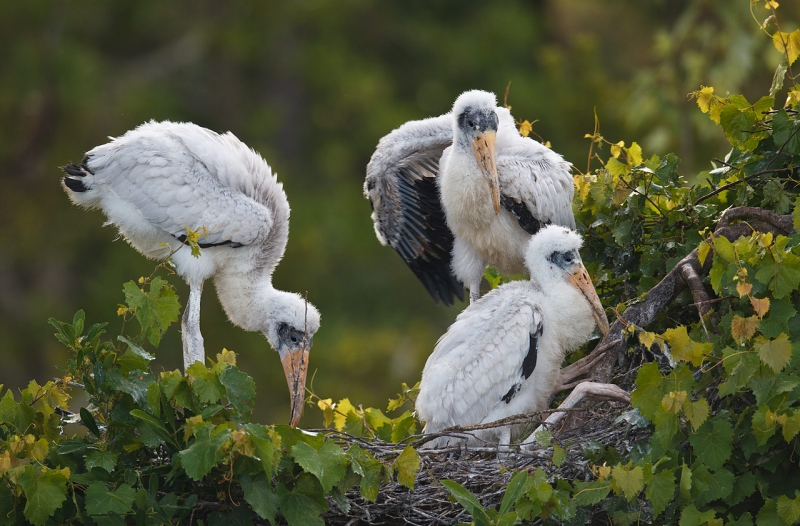
These Wood Stork chicks were photographed with the tripod-mounted Canon 800mm f/5.L IS lens and the Canon EOS-1D Mark IV. ISO 400. Evaluative metering at +1/3 stop: 1/250 sec. at f/6.3 in Manual mode.
Central sensor AI Servo/Rear Focus AF and re-compose. Click here if you missed the Rear Focus Tutorial. Click on the image for a larger version.
Here I went to the 800/Mark IV to fill the frame with the subjects with the prime lens alone thanks to the Mark IV’s 1.3 crop factor.
|
After the rather simple analysis above things become far more complex. For example, the Canon EOS-7D wins the pixels-on-the-subject contest by miles, but most serious photographers far prefer image files from the 1D MIII or MIV bodies or from any of the 5D bodies by a large margin. There is a lot more to a quality file than pixels on the subject. In general larger pixels equal less noise. Some image sensors simply provide cleaner more detailed image files than others no matter the pixel count. The 1DX (18 mp), the clear loser in the pixel count wars to both the 5D III and the 1D IV, has a brand new sensor that offers 16-channel, dual line readout as compared to 8-channel, single line designs in the previous generation of chips. This offers improved low-light capability with a faster capture speeds of 12 fps. And surely improved image quality as well. For a comprehensive overview/preview of the Canon EOS-1DX see the dpreview.com feature here.
So if the pixel advantage goes to the 1D Mark IV that can autofocus down to f/8 what the heck am I doing with a 5D Mark III? As regular readers know I feel that the new autofocus system in the 5D III is the best ever in any Canon camera body. I make a higher percentage of sharp flight images than ever before and I love the various AF Area Selections modes. I appreciate the light weight of the 5D III when it is hanging on my shoulder with the 70-200 f/2.8L IS IS. In addition, in situations where getting close to the birds is not a concern, the full frame 5D III will give me considerably more pixels on the subject by a factor of 22 to 16.
So where does the EOS-1DX fit into the picture? With the new improved sensor and image files, with the same basic AF system as the 5D III, with a blazing 12 frames per second frame rate, and with pro body heft and feel, the new body will surely be a superb flight photography camera. I will be ordering one through the Canon Explorer of Light program as soon as I am able to do so.
Right now I will continue to use my EOS-1D Mark IV when I need the reach, usually with the 800mm f/5.6L IS and often with the 1.4X III TC and I will use the EOS-5D MIII for flight and action photography and when working with easily approachable birds and animals. And I will be eagerly awaiting the release of the EOS-1DX. You can find additional info on my current gear strategy here. If you would like to try to understand the pixels on the subject math see the BPN thread here.
|
|
|
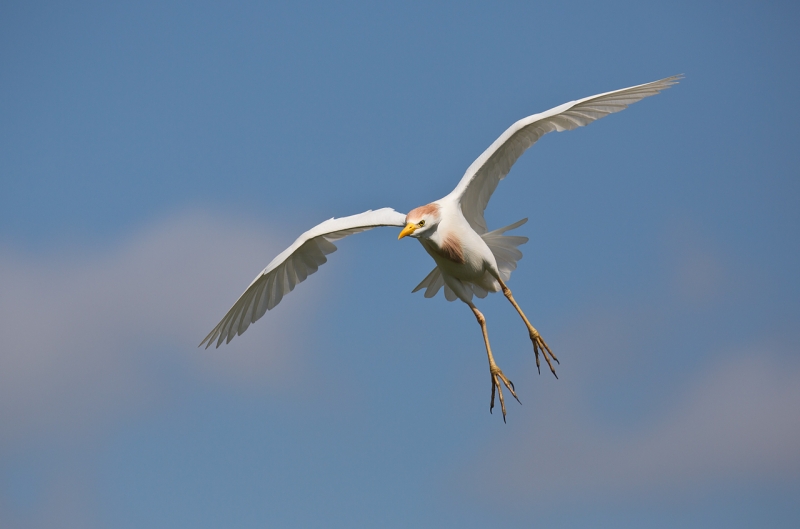
This Cattle Egret flight image was created with the Canon 70-200mm f/2.8L IS II lens, the 2XIII teleconverter (hand held at 335mm), and the Canon EOS-5D Mark III. ISO 400. Evaluative metering -1/3 stop: 1/3200 sec. at f/5.6 in Manual mode.
Central Sensor Surround/AI Servo Rear Focus AF active at the moment of exposure. Click here if you missed the Rear Focus Tutorial. Be sure to click on the image to see a larger version.
|
If you are a doubter be sure to check out “Is the EOS-5D Mark III–2X III Teleconverter–70-200f/2.8L IS II a Viable Combination?” here.
Question and Questions
Which of the three images above do you like best? Be sure to let us know why. And feel free to post any questions that you might have on any Canon camera bodies.
B&H Double Rebates Include the 5D Mark III
Click here. Select one of four current Canon camera bodies–both the EOS-5D Mark III and the EOS-7D are in the group. Add a lens–there are 30 in the group, a Series III teleconverter, or a Speedlite, and enjoy large double rebates. The lenses include lots of my favorites: the 70-200mm f/4 L IS, the 70-200mm f/2.8L IS II, the circle lens, the 180 macro, and the 300mm f/4L IS. You can check the specs on all Canon telephoto lenses here. This double rebate offer expires on April 2, 2012.
Shopper’s Guide.
Support both the Bulletins and the Blog by making all your B & H purchases here.
Below is a list of the gear talked about in this blog post. Thanks a stack to all who have used the Shopper’s Guide links to purchase their gear as a thank you for all the free information that we bring you on the Blog and in the Bulletins. Before you purchase anything be sure to check out the advice in our Shopper’s Guide.
Canon 800mm f/5.6L IS lens. Right now this is my all time favorite super-telephoto lens.
Canon 70-200mm f/2.8L IS II lens. Man, I am loving this lens on my shoulder with the 2XIII teleconverter. I also use it a lot–depending on the situation–with the 1.4X III TC.
Canon EF 1.4X III TC. This new TC is designed to work best with the new Series II super-telephoto lenses.
Canon EOS-5D Mark III. Man, I am in love with this camera body. Both the files and the AF system are superb.
Canon EOS-1D Mark IV professional digital camera body. The very best professional digital camera body that I have ever used.
Speedlite 600EX-RT. Canon’s latest greatest professional flash has more features than I will ever use or need. Learn more about the new flash by scrolling down here.
And from the BAA On-line Store:
LensCoats. I have a LensCoat on each of my big lenses to protect them from nicks and thus increase their re-sales value. All my big lens LensCoat stuff is in Hardwood Snow pattern.
LegCoat Tripod Leg Covers. I have four tripods active and each has a Hardwood Snow LegCoat on it to help prevent further damage to my tender shoulders 🙂 And you will love them in mega-cold weather….
GT3532 LS. This one replaces the GT3530LS Tripod and will last you a lifetime. I’ll be commenting on this new model soon. In short, I like it.
Mongoose M3.6 Tripod Head. Right now this is the best tripod head around for use with lenses that weigh less than 9 pounds. For heavier lenses, check out the Wimberley V2 head.
CR-80 Replacement Foot for Canon 800. When using the 800 on a Mongoose as I do, replacing the lens foot with this accessory lets the lens sit like a dog whether pointed up or down and prevents wind-blown spinning of your lens on breezy days by centering the lens directly over the tripod.
Double Bubble Level. You will find one in my camera’s hot shoe whenever I am not using flash.
The Lens Align Mark II. I use the Lens Align Mark II pretty much religiously to micro-adjust all of my gear an average of once a month and always before a major trip. Enjoy our free comprehensive tutorial here.
BreezeBrowser. I do not see how any digital photographer can exist without this program.
May 4th, 2012 Stuff: Catching Up
|
|
|
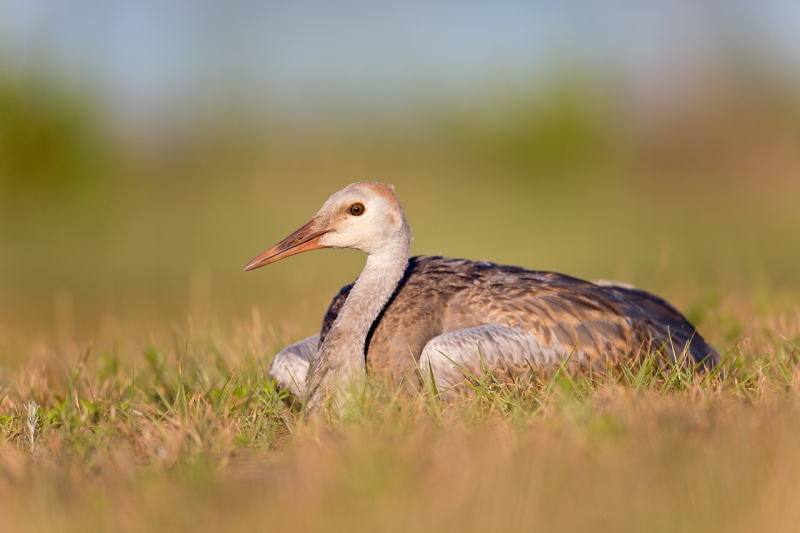
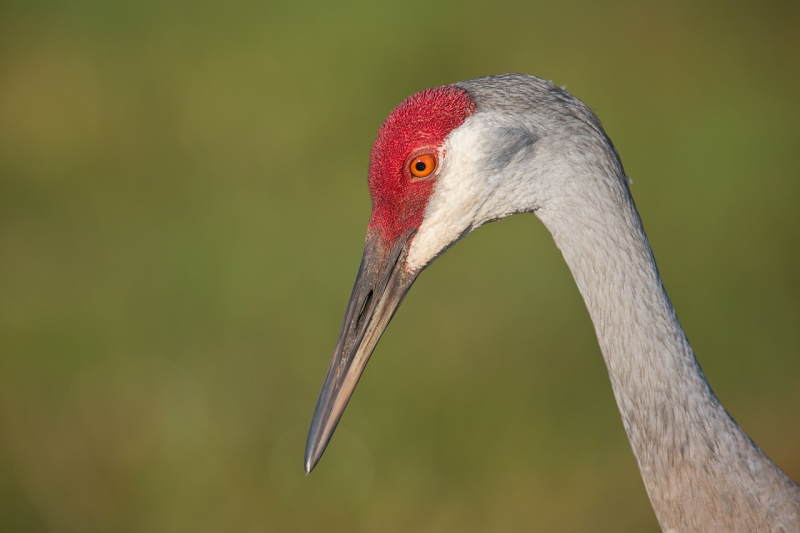
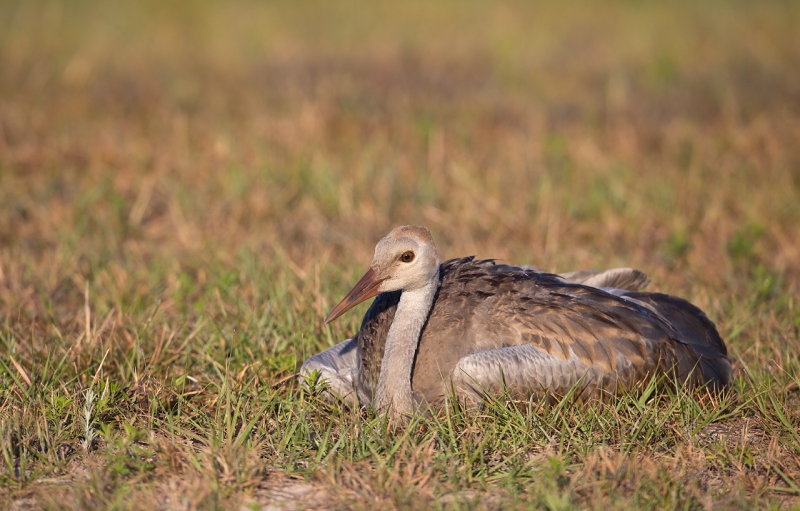
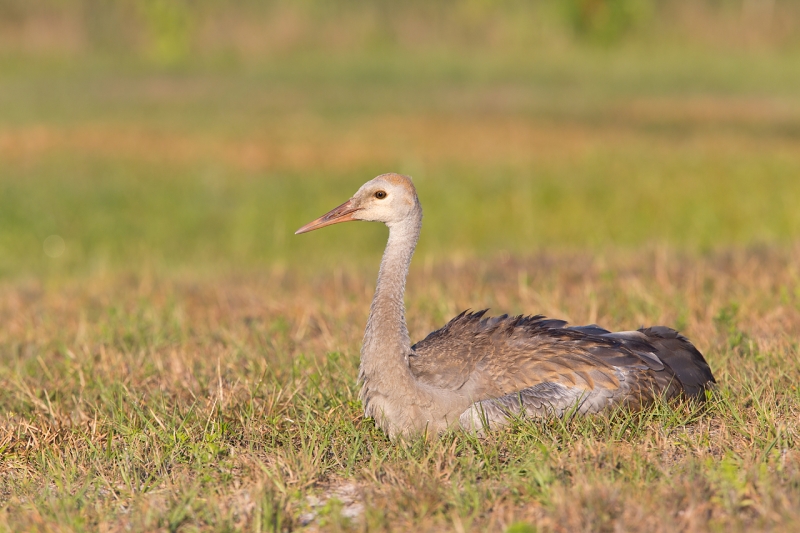
Sandhill Crane, colt lying on grass, Indian Lake Estates, FL. With the Canon 800mm f/5.L IS lens and the Canon EOS-5D Mark III supported by a BLUBB on ground. ISO 400. Evaluative metering +1/3 stop: 1/1250 sec. at f/5.6 in Manual mode–early morning light at 7:45 am.
|
Lying Down on the Job
In Lying Down on the Job, my favorite of the first three photographs was image #2 above.
Why? The intimate perspective, the sharpness, the fact that the light appeared sweeter than in Image #1 even though that image was made a few minutes earlier, and mostly because of the halo of out-of-focus vegetation in the foreground and background that envelop the subject. In addition I love the strip of blue sky at the top. Note that I positioned the bird’s head to fall between the two large out-of-focus green bushes just above the bird in the distant background. That was not an accident. Lastly, the tiny silver stalk in the lower left corner of the frame balances the composition nicely with the gray tones of the young crane.
I do find the small out-of-place feather on the back of the colt’s head (in the image above) to be somewhat distracting and should have removed it.
I love the head portrait too for it’s sharpness, the lovely green background, and the out-of-the-ordinary pose. For me my overall favorite of the four would be #2 over #4 by a small margin as I have been trying for years for something like #2. Lots of folks were on the same page as me choosing #2 and #4 as their faves.
You can read my responses to the many comments on the crane images by scrolling down here.
Juxtapositions in Black
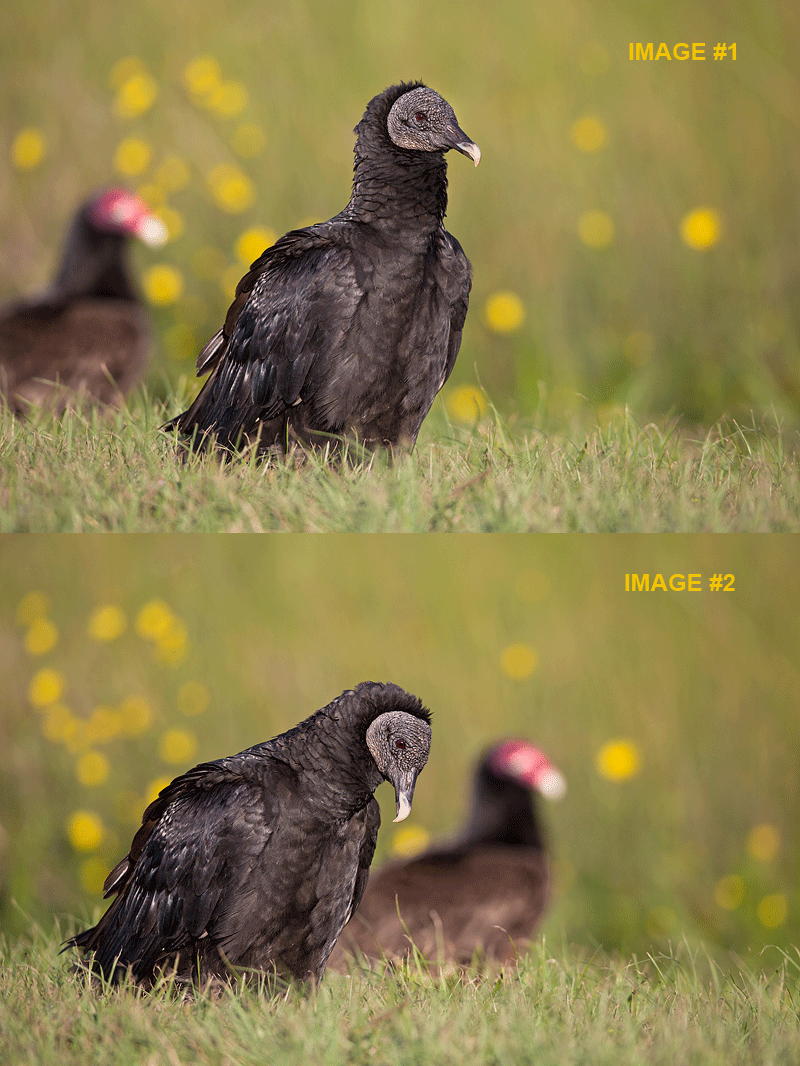
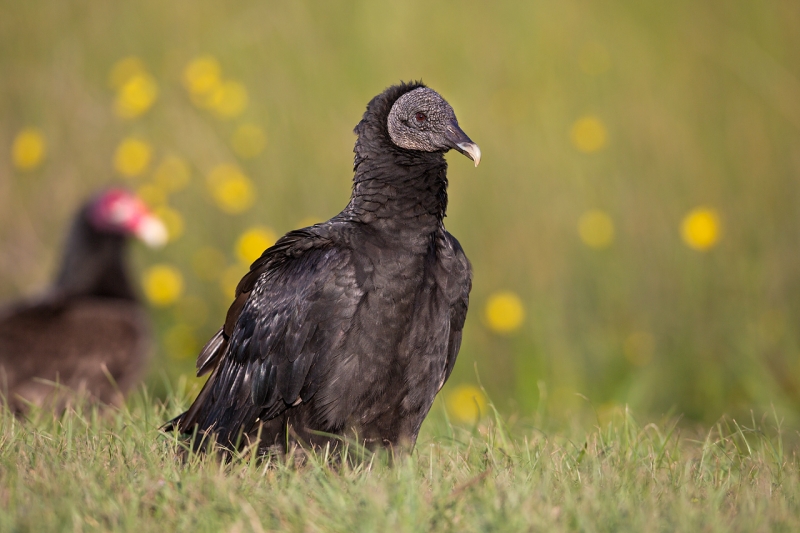
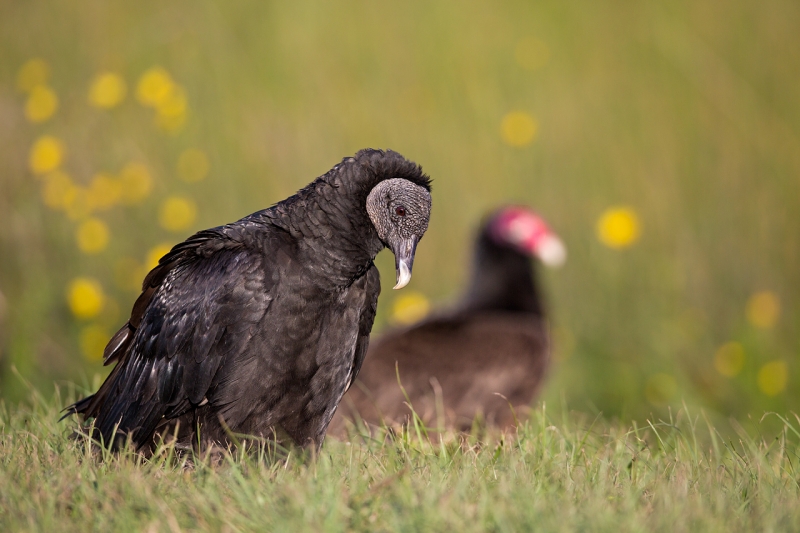
In Juxtapositions in Black most folks preferred the second image but there was some late support for the first image. I agreed with either no one or everyone as I feel that both images are examples of successful juxtaposition-type images. When I saw the Turkey Vulture walking behind the Black Vulture I knew that there might be an opportunity for a juxtaposition type image. When it stopped just to the left of the Black Vulture, I created Image 1. Then the TV continued to walk to my right (its left). I should have made an image when the TV was almost directly behind the BV. It would have been a good example of a bad image. As the TV continued to pass the BV I created Image 2.
In Image 1 you might imagine that the BV is the more dominant bird with the Black Vulture standing tall and upright and looking large and the Turkey Vulture behind it and looking small and rather insignificant. In Image 2 the BV’s posture might be construed as a submissive one and the TV might be seen as the dominant bird. Unlike many of the folks who commented, I do like both compositions. And yes Juan Carlos, I love the o-o-f yellow flowers in each image.
Why Stop There?
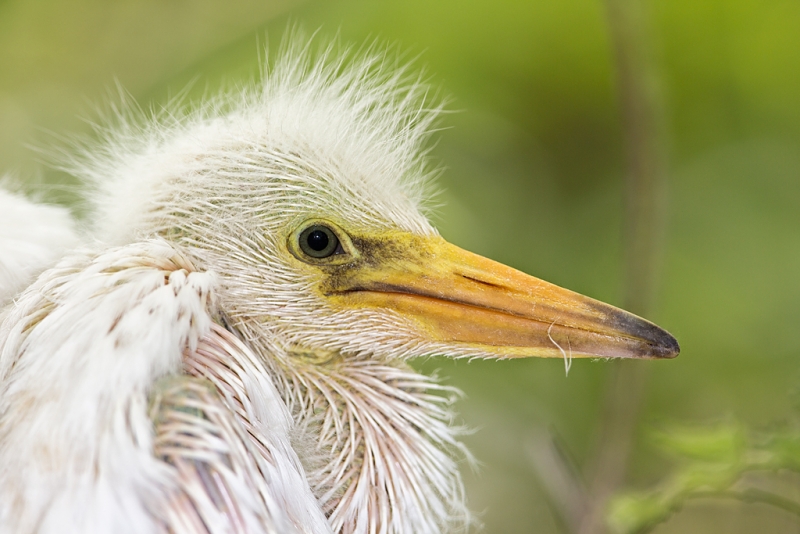
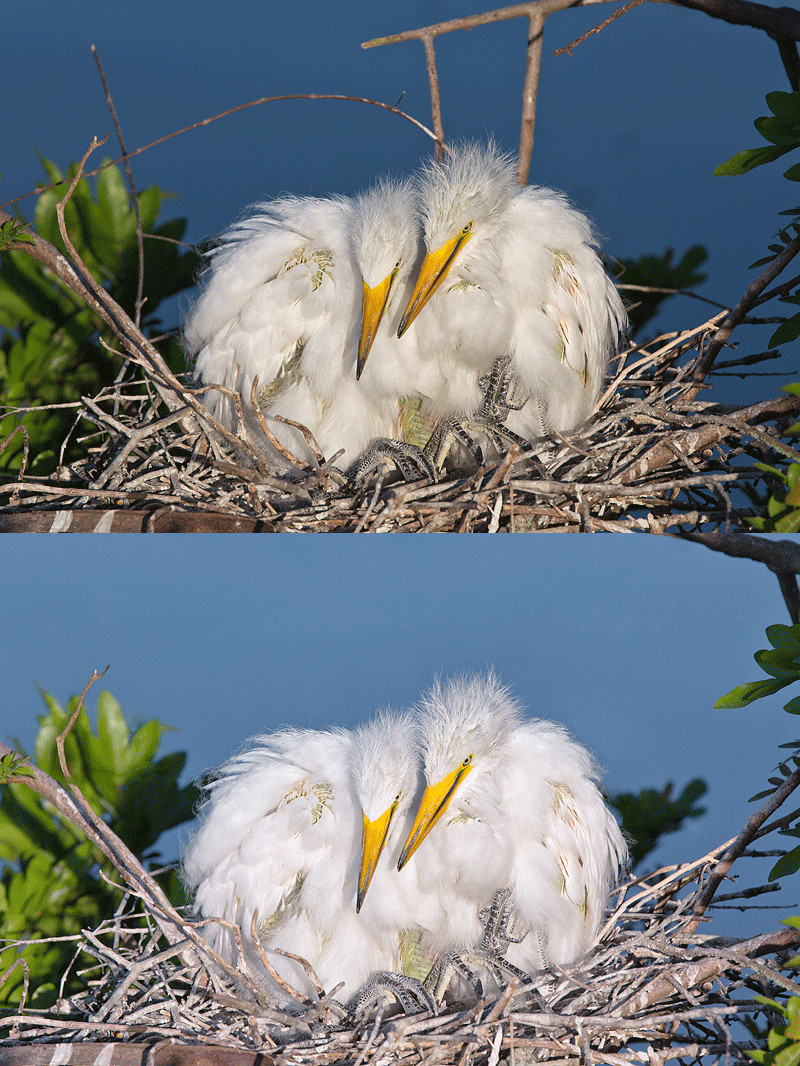
In Why Stop There? several folks who responded hit the nail on the head as to why I left the single feather strand. Hats off to Dennis Zaebst who was the first one to offer a pretty much perfect answer: Nice Shot Artie. I think you left the single feather so the juvenile bird would appear as natural as possible, while the rest of the cleanup was done to avoid distraction from the main subject. The single remaining feather does not detract, and allows one to see the bird as it was at the time. My buddy Charles Scheffold said the same thing in different words: The feather adds interest whereas the other stuff just makes it look like a dirty bill. I like it. The only thing that I would add is that though I do lots of clean-up, recently I have been striving too avoid too perfect….
Folks who use a Better Beamer with their telephoto lenses will want to read my comments on when and why to remove the Beamer’s Fresnel screen. Most folks have no clue. See my comments in green in response to Charles Scheffold’s May 2, 2012 2:26pm comment.
Today’s Question
Does anyone know why Fresnel is capitalized in Fresnel lens or Fresnel screen? Or how to pronounce it? Double points if you did not have to do a Google search. 🙂
MIDWAY 2013 SINGLE OPENING
Due to a cancellation, there is now a single opening on the formerly sold out Midway trip. Click here for details and photos. Call 863-692-0906 or e-mail immediately if you are good to go.
| [Not a valid template] |
|
Painted Bunting, male, Santa Clara Ranch, Starr County, TX This image was created with the tripod-mounted Canon 800mm f/5.L IS lens, the EF 25mm Extension Tube, and the Canon EOS-1D Mark IV. ISO 400. Evaluative metering +1 stop: 1/100 sec. at f/5.6. Fill flash at -3 stops with the 580 EX II Speedlite and a Better Beamer.
The extension tube allows for close focus inside the minimum focusing distance of the lens.
We got to photograph several male Painted Buntings on my first visit to Santa Clara. When you are working at 1/100 sec. as I was here, it is imperative that the subject not move during the exposure….
|
Cheap, Short-Notice, Practically Private Instruction at the Santa Clara Ranch, near McCook, TX
I am looking for no more than four photographers to join me and two other leaders (one of whom is named Denise Ippolito) at the ground level water hole blinds on the Santa Clara Ranch near McCook, TX. Amazingly, Google Maps has never heard of McCook, TX. But not to worry, it is on Mapquest 🙂 I first visited Beto Gutierrez’s ranch in early May 2010. You can learn more about that visit here or check out the ranch here.
With the three leaders the likely group size will be six–one student per leader, but might–depending on the level of interest–wind up at 8. You would need to be in McAllen, TX on the late afternoon of Monday May 14, 2012. If you are on our flight to McAllen (United 1621) know that we might stop to do some giant sunflower photography on the way to the ranch which is about an hour west of McAllen. There will be morning and afternoon photography sessions on Tuesday & Wednesday, May 15 and 16th and a final shorter session on the morning of Thursday May 17th. The three leaders will be flying out of McAllen on the 1:27 United flight to Houston.
We will have a variety of songbirds coming to the water along with some snakes and possibly a few mammals that will surely include Mexican Ground Squirrel. Bird species will likely include Painted Bunting, Northern Cardinal, Black-crested (Mexican) Titmouse, Bronzed Cowbird, Long-billed Thrasher, Northern Mockingbird, Mourning Dove, and Olive Sparrow. As migration is underway we may very well be in for a surprise or two. Other possibilities include Green Jay, Lark Sparrow, Pyrrhuloxia, Groove-billed Ani, and Audubon’s Oriole among others.
What’s included: lodging in the simple but modern ranch-house which has ac and wi-fi! Blind fees. Image sharing and individual and small group Photoshop lessons. We will share the cost of a shopping trip and all will get to experience some BIRD AS ART home cooking (unless the want to do some cooking themselves). I don’t cook breakfasts. 🙂 Lunches and dinners will be healthy and simple but oh so good.
What’s not included: ground and ranch transportation and the shared cost of the food. We would be glad to try to set you up with a car pool partner.
Recommended gear: a minimum of a 500mm f/4 lens with both teleconverters and an extension tube. A sturdy tripod along with a Mongoose M3.6 or a Wimberley V2 head, your flash, a Better Beamer, and a flash bracket. An intermediate telephoto would be a huge plus if we are lucky enough to have deer, armadillo, opossum, collared peccary, or dare I even say it aloud–a bobcat come in for a drink. There might be some flowers around….
Cheap, Short-Notice Practically Private Instruction at the Santa Clara Ranch, near McCook, TX. May 14-17, 2012. 2 FULL and one half-day (includes lodging and blind fees): $999. Limit: 5/Openings: 4)
To register or to check on availability please call me immediately at 863-692-0906 and e-mail as well. If there is no answer and you wish to leave a message please call 863-692-0906. A non-refundable $500 is required and may be placed by credit card.
Click here to see the original post and several additional images.
Shopper’s Guide
Below is a list of the gear used to create the images above. Thanks a stack to all who have used the Shopper’s Guide links to purchase their gear as a thank you for all the free information that we bring you on the Blog and in the Bulletins. Before you purchase anything be sure to check out the advice in our Shopper’s Guide.
Canon 800mm f/5.6L IS lens. Right now this is my all time favorite super-telephoto lens.
Canon 300mm f/2.8 L IS II lens. The 300 f/2.8 L IS II with the 1.4X III TC is a killer flight combination.
1.4X III TC. The new Series III 1.4X was designed to work best with the new Series II super-telephoto lenses.
2X III teleconverter. The new 2X TC is sharper than the older Series II 2X TC and is designed to work best with the Series II super-telephoto lenses–two out and two more coming sometime in 2012.
Speedlite 600EX-RT. Canon’s latest greatest professional flash has more features than I will ever use or need. Click here and scroll down for lots more info on the new flash.
Canon EOS-5D Mark III. Man, I am in love with this camera body. Both the files and the AF system are superb.
Canon EOS-1D Mark IV professional digital camera body. The very best professional digital camera body that I have ever used.
And from the BAA On-line Store:
BLUBB. I personally designed the Big Lens Ultimate BeanBag and have it made in the good old US of A. This large beanbag is ideal when working with super-telephoto lenses from your vehicle. Beware of cheaper and much inferior copycat rip-offs; you get what you pay for just like your Daddy said.
LensCoats. I have a LensCoat on each of my big lenses to protect them from nicks and thus increase their re-sales value. All my big lens LensCoat stuff is in Hardwood Snow pattern.
Double Bubble Level. You will find one in my camera’s hot shoe whenever I am not using flash.
The Lens Align Mark II. I use the Lens Align Mark II pretty much religiously to micro-adjust all of my gear an average of once a month and always before a major trip. Enjoy our free comprehensive tutorial here.
BreezeBrowser. I do not see how any digital photographer can exist without this program.
May 2nd, 2012
|
|
|
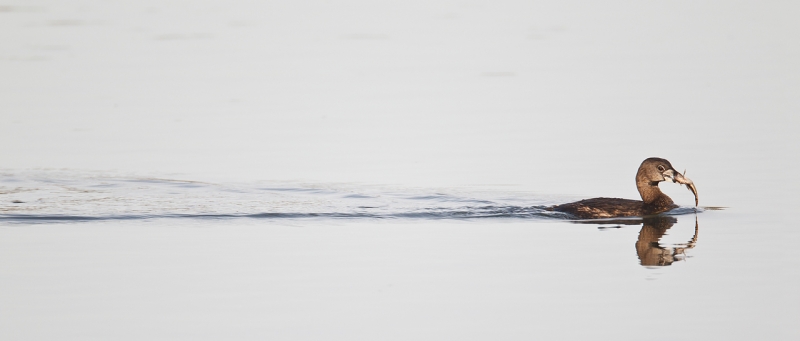
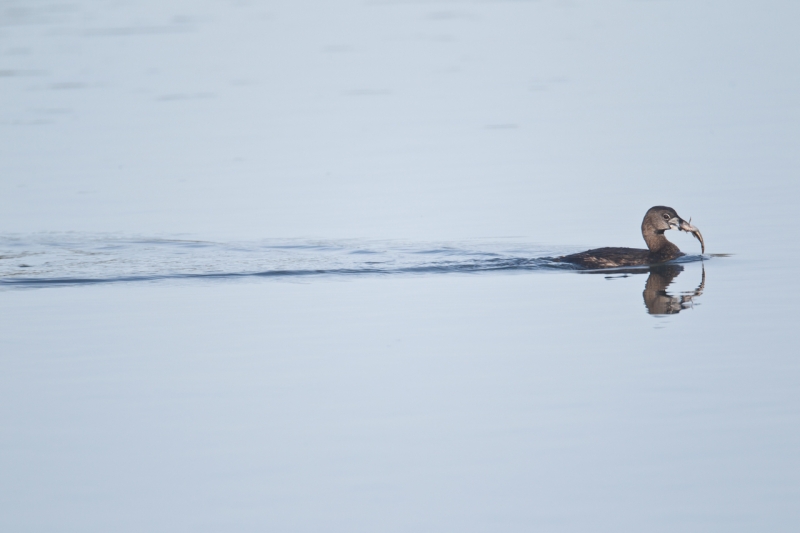
This Pied-billed Grebe with a small fish was photographed with the tripod-mounted Canon 800mm f/5.L IS lens, the 1.4X III TC, and the Canon EOS-1D Mark IV. ISO 400. Evaluative metering at +2 stops: 1/400 sec. at f/8 in Manual mode.
Central sensor (by necessity) AI Servo/Rear Focus AF active at the moment of exposure. Click here if you missed the Rear Focus Tutorial. Click on the image for a larger version.
|
The Wake Shot
When this small-in-the-frame pied-billed swam by parallel to our position on the Morro Bay IPT I called out to the group, “Focus on the wake and put the bird in the far right side of the frame.” Until after the fact when I had time to show them the resulting image on the LCD on the back of the camera pretty much nobody understood exactly what I was talking about. Thus, “The Wake Shot” blog post. And lots of lessons.
Wake shot opportunities are few and far between. You need still water and a bird swimming parallel to your position. The fish here was a big extra.
|
|
|
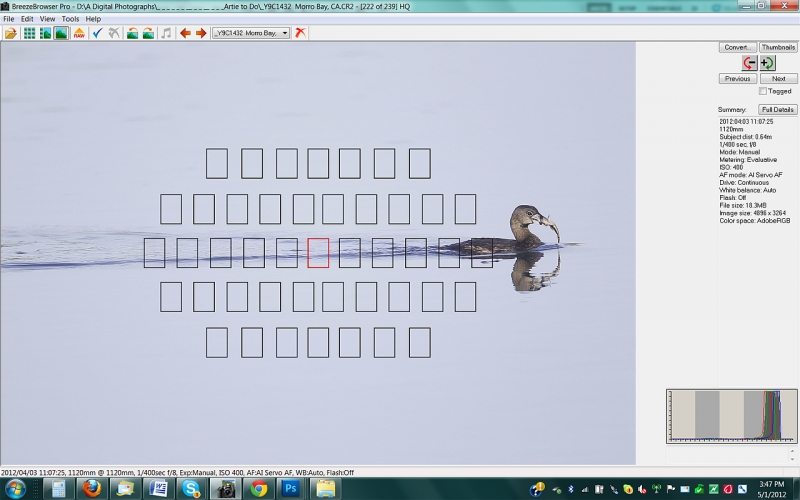
This is the BreezeBrowser main view page screen capture for the RAW image. To be able to see the active sensor click on “Show Focus Points” in the “View” drop-down menu or hit Shift+Control+F. That’s one shortcut that I do not use as one I click on Show Focus Points is sticks. Coming soon: How to Run Breezebrowser on a Mac.
Note as usual 🙂 the perfect histogram with the data well to the right as is proper for an overall light-toned image. In The Art of Bird Photography II (ABP II: 916 pages on CD only) I teach you to get the right exposure using digital capture every time. And best of all, it is simple.
|
The BreezeBrowser main view page screen capture above shows exactly where I placed the central sensor in order to create the composition that I wanted. If you think about it there was not better place in the frame to put the bird in the original capture. The central sensor is the only sensor available when using the 800/1.4X III/Mark IV combination.
|
|
|
This JPEG represents the original RAW capture for the featured image that opens this blog post. All the extra space above and below made the pano crop an obvious one. With some detail in the water in the upper left I opted to go with 2/3 above, 1/3 below.
|
The large BLUE cast was removed with an Average Blur Color Balance adjustment. The image was leveled (my Bubble Level was in my pocket!) by drawing a line with the Ruler Tool from the back of the head to the reflection of the back of the head and hitting my “Image/Rotate/Arbitrary” keyboard shortcut: Control + ? and then hitting OK. Both of these killer techniques are detailed in Digital Basics that includes my complete Digital Workflow and dozens of other great Photoshop tips. Digital Basics actually includes several techniques for eliminating color casts and several techniques for leveling an image. Choices are good and with color casts one method often works well where others fail. Digital Basics also teaches you how to create your very own keyboard shortcuts and includes a list of all of them that I use.
|
|
|
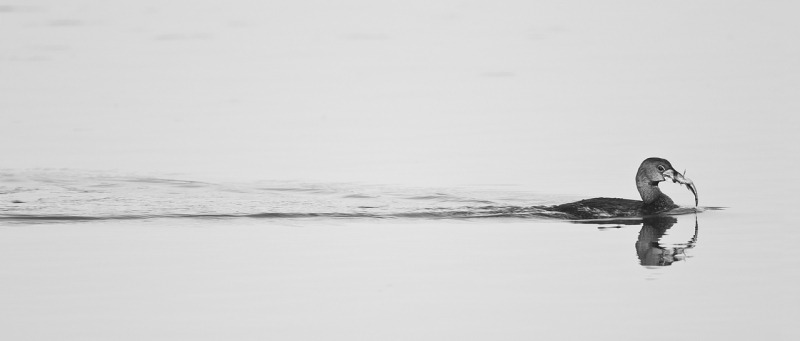
This B&W version was created with NIK Silver Efex Pro using the Neutral pre-set (for the first time ever). Once you load the image in Silver Efex Pro it is easy to click on the various pre-sets to determine which looks best with a given iamge. My usual favorites are High Structure, High Contrast Red Filter, and Wet Rocks.
|
NIK 15% Discount
As regular readers here know, NIK Color Efex Pro has drastically changed my digital workflow. Remember that you can save 15% on all NIK products by clicking here and entering BAA in the Promo Code box at check-out. Then hit Apply to see your savings. You can download a trial copy that will work for 15 days and allow you to create full sized images.
Shopper’s Guide.
Support both the Bulletins and the Blog by making all your B & H purchases here.
Below is a list of the gear used to create the images in this blog post. Thanks a stack to all who have used the Shopper’s Guide links to purchase their gear as a thank you for all the free information that we bring you on the Blog and in the Bulletins. Before you purchase anything be sure to check out the advice in our Shopper’s Guide.
Canon 800mm f/5.6L IS lens. Right now this is my all time favorite super-telephoto lens.
Canon EF 1.4X III TC. This new TC is designed to work best with the new Series II super-telephoto lenses.
Canon EOS-1D Mark IV professional digital camera body. The very best professional digital camera body that I have ever used.
And from the BAA On-line Store:
LensCoats. I have a LensCoat on each of my big lenses to protect them from nicks and thus increase their re-sales value. All my big lens LensCoat stuff is in Hardwood Snow pattern.
LegCoat Tripod Leg Covers. I have four tripods active and each has a Hardwood Snow LegCoat on it to help prevent further damage to my tender shoulders 🙂 And you will love them in mega-cold weather….
Gitzo GT3530LS Tripod. This one will last you a lifetime.
Mongoose M3.6 Tripod Head. Right now this is the best tripod head around for use with lenses that weigh less than 9 pounds. For heavier lenses, check out the Wimberley V2 head.
CR-80 Replacement Foot for Canon 800. When using the 800 on a Mongoose as I do, replacing the lens foot with this accessory lets the lens sit like a dog whether pointed up or down and prevents wind-blown spinning of your lens on breezy days by centering the lens directly over the tripod.
Double Bubble Level. You will find one in my camera’s hot shoe whenever I am not using flash.
The Lens Align Mark II. I use the Lens Align Mark II pretty much religiously to micro-adjust all of my gear an average of once a month and always before a major trip. Enjoy our free comprehensive tutorial here.
BreezeBrowser. I do not see how any digital photographer can exist without this program.
April 29th, 2012
Beginning Bird Photography Lessons
I created this image this morning while working with a private client. Ann is a beginning bird photographer. But very smart and a quick study. She arrived knowing when and why to use AI Servo AF and when and why to use One-Shot. She knew how add or subtract light while working in Av mode and knew how to view the histogram. She did not know how to evaluate a histogram or the importance of having at least some data in the fifth (highlight) box. And she had blinkies turned off. We educated her in short order. To start I let her work with the 300mm f/2.8 L IS II lens and the 2X III teleconverter with her Canon EOS-7D, all on a Mongoose M3.6 and a Gitxo 3530 LS tripod. (Note: the 3530 LS has been replaced by the GT3532 LS.)
Within a few minutes she had learned to produce good if not perfect histograms. Once I showed her how, she was a natural at holding the big lens to ensure sharp images and she had a good eye for composition. After an hour I set her up with a 70-200mm f.4 L IS and a 1.4X III TC. She took to hand holding it correctly immediately by bracing her elbows on the boardwalk railings.
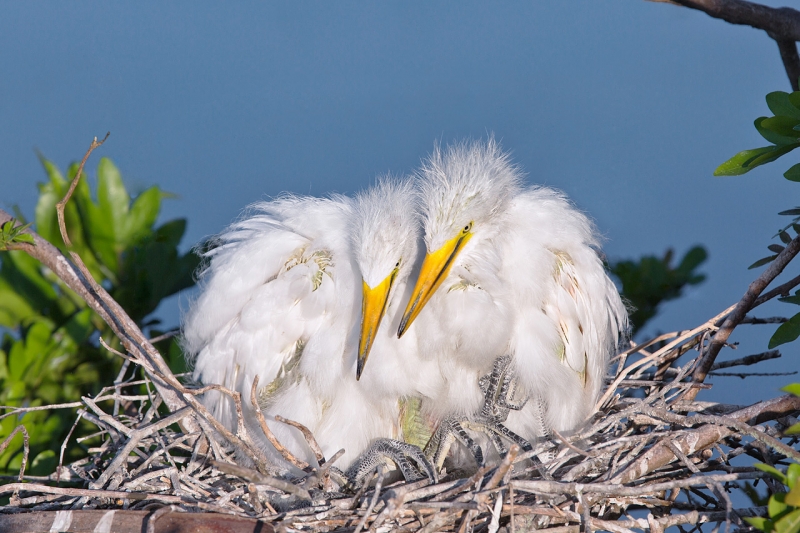
She went off by herself making images and honing her newly learn skills. I photographed for a while on my own and then went off the see if she needed any additional help. She had found a wide open Snowy Egret nest with two medium sized chicks! I taught her how to use the pop-up flash in a rather dark situation. Then it was my turn. After hand holding my 70-200mm f/2.8L IS II for a while I went to the 300 with the 2X on a tripod so that I could create some head portraits. As there was a branch blocking the flash as it sat on the 4th Generation Design Integrated Flash Arm. Ann kindly agreed to hold the flash and point it at the bird.
Voila!
Why Stop There?
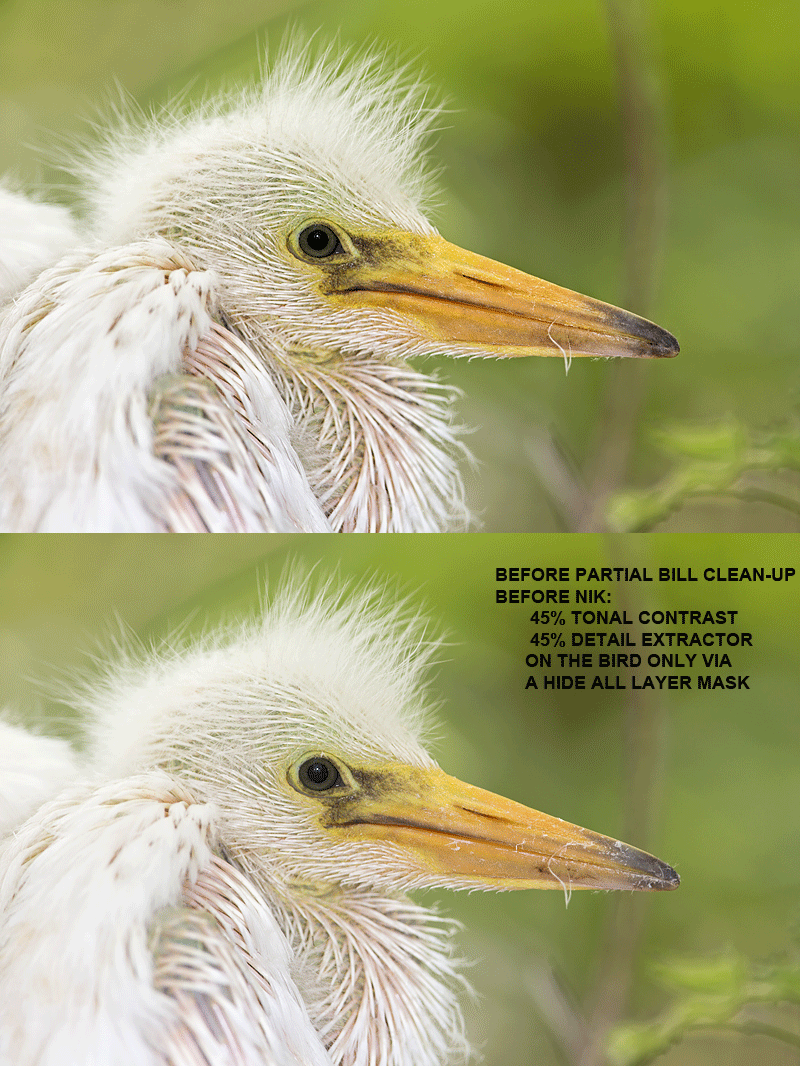
As you can see by viewing the animated GIF above, I did considerable bill clean-up but opted to leave the single sliver of feather. Why? Clean-up as usual was with the Patch Tool, the Spot Healing Brush, and a series of small Quick Masks. All are described in detail in Digital Basics.
NIK 15% Discount
As regular readers here know, NIK Color Efex Pro has drastically changed my digital workflow. Remember that you can save 15% on all NIK products by clicking here and entering BAA in the Promo Code box at check-out. Then hit Apply to see your savings. You can download a trial copy that will work for 15 days and allow you to create full sized images.
|
|
|
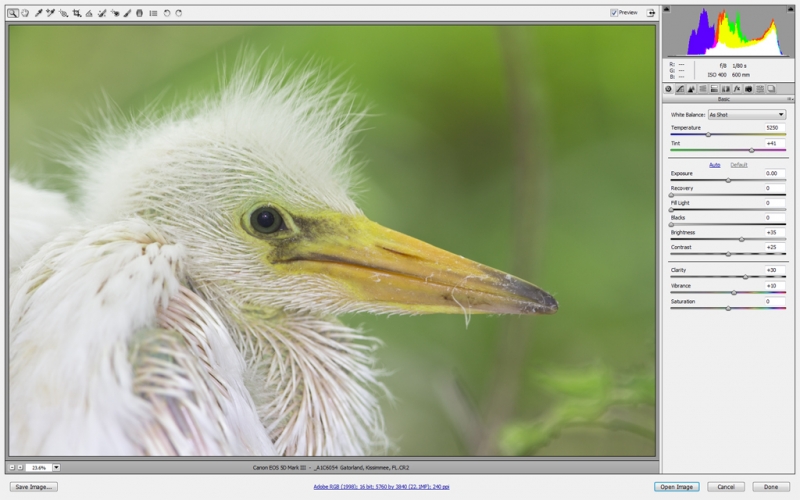
This Adobe Camera RAW screen capture shows my default values. Note the pretty darned good histogram right out of the box…. Click on the image to enlarge it–it’s a lot easier to read then.
|
Canon Speedlite 600EX-RT
Today was the first chance that I had to use my new flash, the Speedlite 600EX-RT, Canon’s most powerful-ever flash. The controls are a bit different from the last several Speedlites so I actually had to read the flash manual. But just enough to get started….
Here are the listed features:
- Wireless Radio Multiple Flash SystemTTL
- E-TTL II & A-TTL Compatible
- GN 197′ (60 m) @ ISO100
- Exceptionally Dust- and Water-Resistant
- Zoom Flash Head: 20-200mm
- Range Dot Matrix LCD Panel and Backlit Button
- Color Filter Holder for Gelatin Filters
- 18 Custom Functions
- Full 180-Degree Swivel in Each Direction
- AF Assist Beam
I obviously have a lot more studying to do. What intrigued me the most were the comprehensive easy-to-follow instructions for Multi/Stroboscopic Flash that includes a section on calculating the shutter speed. I have a good plan for using this feature for bird photography at some point in the future. Maybe on Midway…. See pages 33-35 of the Instructional Manual.
Shopper’s Guide.
Support both the Bulletins and the Blog by making all your B & H purchases here.
Below is a list of the gear talked about in this blog post. Thanks a stack to all who have used the Shopper’s Guide links to purchase their gear as a thank you for all the free information that we bring you on the Blog and in the Bulletins. Before you purchase anything be sure to check out the advice in our Shopper’s Guide.
Canon 300mm f/2.8 L IS II lens. Both on my Southern Oceans and Japan trip this lens proved to be ideal on a tripod for both birds and wildlife with both the 1.4X and 2X III TCs. All images were super-sharp and the lens was light enough for hand-holding from any type of watercraft.
2X III teleconverter. The new 2X TC is sharper than the older Series II 2X TC and is designed to work best with the Series II super-telephoto lenses–two out and two more coming sometime in 2012.
70-200mm f.4 L IS. Ann is planning on buying one of these lightweight, relatively inexpensive beauties as her starter lens. Teamed with a 1.4X III TC and her Canon EOS-7D she will have a decent effective reach of 448mm (or 9.96X magnification).
Canon EOS 5D Mark II Digital Camera. Canon’s lightweight full frame body is perfect for serious landscape photography and worked out great for wildlife on my Southern Oceans voyage.
Speedlite 600EX-RT. Canon’s latest greatest professional flash has more features than I will ever use or need.
And from the BAA On-line Store:
LensCoats. I have a LensCoat on each of my big lenses to protect them from nicks and thus increase their re-sales value. All my big lens LensCoat stuff is in Hardwood Snow pattern.
LegCoat Tripod Leg Covers. I have four tripods active and each has a Hardwood Snow LegCoat on it to help prevent further damage to my tender shoulders 🙂 And you will love them in mega-cold weather….
GT3532 LS. This one replaces the GT3530LS Tripod and will last you a lifetime.
Mongoose M3.6 Tripod Head. Right now this is the best tripod head around for use with lenses that weigh less than 9 pounds. For heavier lenses, check out the Wimberley V2 head.
Double Bubble Level. You will find one in my camera’s hot shoe whenever I am not using flash.
Better Beamer. Triples flash output. Saves battery power. Increases range. Folds flat for travel. And lots more.
4th Generation Design Integrated Flash Arm. Lightweight and efficient; what more could you ask for?
The Lens Align Mark II. I use the Lens Align Mark II pretty much religiously to micro-adjust all of my gear an average of once a month and always before a major trip. Enjoy our free comprehensive tutorial here.
Canon EOS-1D Mark IV User’s Guide. Learn to use your Mark IV the way that I use mine. Also available for the 7D and the Mark III here.
BreezeBrowser. I do not see how any digital photographer can exist without this program.
April 27th, 2012
|
|
|
Black Vulture and Turkey Vulture, Indian Lake Estates, FL. With the Canon 800mm f/5.L IS lens and the Canon EOS-5D Mark III supported by a BLUBB on the door frame with the window lowered. ISO 400. Evaluative metering -1/3 stop: 1/800 sec. at f/8 in Av mode: 8:04 am.
Lens micro-adjustment: +4. Read the Lens Align Mark II Micro-adjusting tutorial. Coming soon: non-tethered micro-adjustments.
Central Sensor/AI Servo Rear Focus AF and re-compose. Click here if you missed the Rear Focus Tutorial. Click here to learn to set up Rear Focus on your 5D Mark II. Click on the image for a larger version.
|
Juxtapositions in Black…
jux·ta·po·si·tion [juhk-stuh-puh-zish-uhn] noun
1. an act or instance of placing close together or side by side, especially for comparison or contrast.
When I first began photographing birds I strove to make images with only a single bird in the frame. It was years before I realized the power of including a second out of focus bird or animal in a pleasing position in the frame. Today I look for potential juxtapositions any time there are two subjects anywhere near each other. You need to think and act fast as juxtapositions often last only a second or two.
There are four nice juxtaposition images in The Art of Bird Photography II on pages 216, 228, 249, and 913. And here is a relevant excerpt from ABP II:
In many instances, an out-of-focus bird in the background is distracting. If the photographer, however, takes great care in the placement of the second bird in the frame and considers its posture as well as its position, then the second bird may serve as somewhat of a mirrored (though pleasingly out-of-focus) repetition of the subject. When attempting this, strive for compositional balance as well. The results can be most pleasing. Imagine two Caspian Terns on a sandy beach. It is a cloudy day, so light angle is not of paramount importance. Working in vertical format, you notice that the bird to the rear appears above and slightly to your right of the closer bird. You need to put some separation between the two birds so you take a large, slow step to your right. You
re-frame the image and notice that the closer bird is in the lower left part of the frame, while the bird in the back now appears in the upper right. The juxtaposition of the two birds is perfect: you have achieved compositional balance. You have created a pleasing image by changing your position, and thus your perspective.
The above is just one of hundreds of lessons that can help you improve your bird and nature photography. ABP II on CD only: 916 pages with more than 900 color photographs; everything that I learned about bird photography from 1998 through 2006 :).
|
|
|
Black Vulture and Turkey Vulture, Indian Lake Estates, FL. With the Canon 800mm f/5.L IS lens and the Canon EOS-5D Mark III supported by a BLUBB on the door frame with the window lowered. ISO 400. Evaluative metering -1/3 stop: 1/800 sec. at f/8 in Av mode: 8:04 am.
Lens micro-adjustment: +4. Read the Lens Align Mark II Micro-adjusting tutorial. Coming soon: non-tethered micro-adjustments.
Central Sensor/AI Servo Rear Focus AF and re-compose. Click here if you missed the Rear Focus Tutorial. Click here to learn to set up Rear Focus on your 5D Mark II. Click on the image for a larger version.
|
Questions and More
Why -1/3 stop exposure compensation?
Would f/22 have sharpened up the Turkey Vulture?
What do you like or dislike in each image?
What would you have done differently?
Which of the two images do you like best? And why?
Support the creation of both the Bulletins and the blog by making all your B & H purchases here.
Shopper’s Guide
Below is a list of the gear used to create the image above. Thanks a stack to all who have used the Shopper’s Guide links to purchase their gear as a thank you for all the free information that we bring you on the Blog and in the Bulletins. Before you purchase anything be sure to check out the advice in our Shopper’s Guide.
Canon 800mm f/5.6L IS lens. Right now this is my all time favorite super-telephoto lens.
1.4X III TC. The new Series III 1.4X was designed to work best with the new Series II super-telephoto lenses.
Canon EOS-5D Mark III. Man, I am in love with this camera body. Both the files and the AF system are superb.
And from the BAA On-line Store:
BLUBB. I personally designed the Big Lens Ultimate BeanBag and have it made in the good old US of A. This large beanbag is ideal when working with super-telephoto lenses from your vehicle. Beware of cheaper and much inferior copycat rip-offs; you get what you pay for just like your Daddy said.
LensCoats. I have a LensCoat on each of my big lenses to protect them from nicks and thus increase their re-sales value. All my big lens LensCoat stuff is in Hardwood Snow pattern.
Double Bubble Level. You will find one in my camera’s hot shoe whenever I am not using flash.
The Lens Align Mark II. I use the Lens Align Mark II pretty much religiously to micro-adjust all of my gear an average of once a month and always before a major trip. Enjoy our free comprehensive tutorial here.
BreezeBrowser. I do not see how any digital photographer can exist without this program.
April 26th, 2012
|
|
|
Sandhill Crane, colt lying on grass, Indian Lake Estates, FL. With the Canon 800mm f/5.L IS lens and the Canon EOS-5D Mark III supported by a BLUBB on the door frame with the window lowered. ISO 400. Evaluative metering +1/3 stop: 1/640 sec. at f/8 in Av mode–early morning light at 7:39 am.
|
Lying Down on the Job
We had a house guest last night, Dan Cadieux, crack Avian Forum moderator at BPN. He arrived yesterday for two photography sessions, an afternoon and a morning. And dinner. This morning was particularly good with lots of cranes, Cattle Egrets, Limpkins, and Wild Turkeys.
Let’s call the image above Image 1. We opted to stay in the vehicle and make a few images as the resting cranes will often stand up if you get out of the car.
|
|
|
Sandhill Crane, colt lying on grass, Indian Lake Estates, FL. With the Canon 800mm f/5.L IS lens and the Canon EOS-5D Mark III supported by a BLUBB on ground. ISO 400. Evaluative metering +1/3 stop: 1/1250 sec. at f/5.6 in Manual mode–early morning light at 7:45 am.
|
We both exited the vehicle slowly. I was surprised when the young crane in Image 2 remained on the ground snapping at an occasional mayfly.
|
|
|
Sandhill Crane, colt lying on grass, Indian Lake Estates, FL. With the hand held Canon 800mm f/5.L IS lens and the Canon EOS-5D Mark III. ISO 400. Evaluative metering +1/3 stop: 1/640 sec. at f/8 in Av mode–early morning light at 7:45 am.
|
While Dan remained on the ground, I grabbed my 300 and walked towards the birds. Image 3 above was created while I was kneeling.
To create Image 4, I stooped over to get the green background that I wanted.
Which Do You Like Best?
Which of the first three images do you like best? And why? Which of the four images do you like best? And why?
Short Notice/Individual or Very Small Group Instruction near Olando, FL this Weekend
Join me at a killer central Florida rookery either Friday, Saturday, or Sunday, April 27, 28, or 29 for a morning, afternoon, or a whole day of photographic instruction. Morning sessions: 7-10am/$300 single. $200 each for two. Limit 2. Afternoon sessions: 3:30pm to 6:30pm/$300 single. $200 each for two. Limit 2. Full day: $550 single. $375 each for two. Limit 2. The full day includes lunch and image review. In all cases I reserve the right to add a second photographer unless you wish to pay the difference :).
Learn to see and think like a pro, to evaluate various photographic situations, and to use light properly. I will be letting you know what I think of your gear set-up, your sharpness techniques, and your shooting style. And sharing the very best nests with you and explaining why they are the very best nests :). Though a minimum of a 500mm f/4 lens with both teleconverters is ideal, folks with lenses as short as a 70-200 will benefit greatly. Please e-mail for additional details if you are seriously interested in joining me. Or try me at 863-692-2806 or on my cell at 863-221-2372. artie
Shopper’s Guide
Below is a list of the gear used to create the images above. Thanks a stack to all who have used the Shopper’s Guide links to purchase their gear as a thank you for all the free information that we bring you on the Blog and in the Bulletins. Before you purchase anything be sure to check out the advice in our Shopper’s Guide.
Canon 800mm f/5.6L IS lens. Right now this is my all time favorite super-telephoto lens.
Canon 300mm f/2.8 L IS II lens. The 300 f/2.8 L IS II with the 1.4X III TC is a killer flight combination.
1.4X III TC. The new Series III 1.4X was designed to work best with the new Series II super-telephoto lenses.
Canon EOS-5D Mark III. Man, I am in love with this camera body. Both the files and the AF system are superb.
And from the BAA On-line Store:
BLUBB. I personally designed the Big Lens Ultimate BeanBag and have it made in the good old US of A. This large beanbag is ideal when working with super-telephoto lenses from your vehicle. Beware of cheaper and much inferior copycat rip-offs; you get what you pay for just like your Daddy said.
LensCoats. I have a LensCoat on each of my big lenses to protect them from nicks and thus increase their re-sales value. All my big lens LensCoat stuff is in Hardwood Snow pattern.
Double Bubble Level. You will find one in my camera’s hot shoe whenever I am not using flash.
The Lens Align Mark II. I use the Lens Align Mark II pretty much religiously to micro-adjust all of my gear an average of once a month and always before a major trip. Enjoy our free comprehensive tutorial here.
BreezeBrowser. I do not see how any digital photographer can exist without this program.
April 24th, 2012 Canon Telephoto Lens Specifications, Info, and Links; Bookmark This Page!
With so many great Canon telephoto lenses to choose from, so many just introduced, and a few more tantalizingly on the horizon, it can be difficult to find the data that you need to make informed choices. I have often spent more than an hour looking for the weight of this or that lens, searching for the minimum focusing distances of the various 300s, or converting grams to pounds and ounces or meters to feet. I spent the last two days, superbly assisted by Peter Kes, creating the table below. Be sure to bookmark the page as a favorite and visit it whenever you need some info on Canon telephoto lenses. In the past, I might have needed to do several online searches and visit two or three sites to come up with the info that is now at your fingertips in one neat package.
Notes: the active links take you to the B&H listing for the product. Purchase there to thank us for our efforts here and elsewhere. The inactive links are for discontinued lenses. The old 600, the 600mm f/4L IS, is actually discontinued but some remain in stock. We offer the weights in pounds and kilograms for the convenience of our many international visitors. MFD is the minimum focusing distance of the lens. We offer that in feet and meters, again for the convenience of our many international visitors. Magnif is of course the magnification of the lens at the closest focusing distance, the mfd. All of the lenses take one of three filters, a 67mm, a 77mm, or the 52mm drop-in filters (that go in the filter slots of the big lenses). Year indicates the year that the lens was first offered for sale.
Note: I strongly recommend against the use of skylight or other “protective” filters on any intermediate telephoto lens. They degrade image quality and often hamper autofocus accuracy.
You can find some additional helpful links in the text below the chart. Enjoy.
| CANON EF lens |
D/” |
D/cm |
l/” |
l/cm |
wt/lb |
wt/kg |
mfd/ft |
mfd/m |
mag |
filter |
year |
| 200mm f/2.0 L IS |
5.0″ |
12.7cm |
8.2″ |
20.83cm |
5.6 lb |
2.5 kg |
6.23′ |
1.9m |
0.12x |
52mm
drop-in |
2008 |
| 70-200mm f/4 L IS |
3.0″ |
7.62cm |
6.8″ |
17.27cm |
1.67 lb |
760g |
3.94′ |
1.2m |
0.21x |
67mm |
2006 |
| 70-200mm f/2.8 L IS II |
3.5″ |
8.89cm |
7.8″ |
19.81cm |
3.28 lb |
1.49 kg |
3.94′ |
1.2m |
0.21x |
77mm |
2010 |
| 70-200mm f/2.8 L IS |
3.5″ |
8.89cm |
7.8″ |
19.81cm |
2.9 lb |
1.31 kg |
4.9′ |
1.5m |
0.17x |
77mm |
2001 |
| 28-300mm L IS |
3.6″ |
9.14cm |
7.2″ |
18.29cm |
3.7 lb |
1.67 kg |
2.3′ |
0.7m |
0.3x |
77mm |
2004 |
| 70-300mm L IS |
3.5″ |
8.89cm |
5.6″ |
14.22cm |
2.31 lb |
1.05 kg |
3.9′ |
1.2m |
0.21x |
67mm |
2010 |
| 300mm f/4.0 L IS |
3.5″ |
8.89cm |
8.7″ |
22.10cm |
2.63 lb |
1.19 kg |
4.93′ |
1.5m |
0.24x |
77mm |
1997 |
| 300mm f/2.8 L IS II |
5.0″ |
12.70cm |
9.8″ |
24.89cm |
5.19 lb |
2.35 kg |
6.6′ |
2m |
0.18x |
52mm
drop-in |
2011 |
| 300mm f/2.8 L IS |
5.0″ |
12.70cm |
9.8″ |
24.89cm |
5.63 lb |
2.55 kg |
8.2′ |
2.5m |
0.13x |
52mm
drop-in |
1999 |
| 100-400mm f/4.5-5.6L IS II USM |
3.7″ |
9.40cm |
7.6″ |
19.30cm |
3.5 lb |
1.59 kg |
3.2′ |
97.54cm |
0.31x |
77mm |
2014 |
| 100-400mm L IS |
3.6″ |
9.14cm |
7.4″ |
18.80cm |
3.04 lb |
1.38 kg |
5.9′ |
1.8m |
0.20x |
77mm |
1998 |
| 200-400mm f/4L IS USM |
5.04″ |
12.80cm |
14.41″ |
36.60cm |
7.98 lb |
3.62 kg |
6.6′ |
2m |
0.15x 0.21x |
52mm
drop-in |
2013 |
| 400mm f/5.6 L |
3.5″ |
8.89cm |
10.1″ |
25.65cm |
2.76 lb |
1.25 kg |
11.48′ |
3.5m |
0.12x |
77mm |
1993 |
| 400mm f/4.0 DO IS |
5.0″ |
12.70cm |
9.1″ |
23.11cm |
4.28 lb |
1.94 kg |
11.48′ |
3.5m |
0.12x |
52mm
drop-in |
2001 |
| 400mm f/4.0 DO IS II |
5.0″ |
12.70cm |
9.1″ |
23.11cm |
4.63 lb |
2.1 kg |
10.83′ |
3.3m |
0.12x |
52mm
drop-in |
2014 |
| 400mm f/2.8 L IS II |
6.42″ |
16.31cm |
13.5″ |
34.29cm |
8.49 lb |
3.85 kg |
8.89′ |
3 m |
0.17x |
52mm
drop-in |
2011 |
| 400mm f/2.8 L IS |
6.42″ |
16.31cm |
13.5″ |
34.29cm |
11.85 lb |
5.37 kg |
8.86 ft |
3.7 m |
0.15x |
52mm
drop-in |
1999 |
| 500mm f/4.0 L IS II |
5.75″ |
14.60cm |
15.08″ |
38.30cm |
7.04 lb |
3.19 kg |
12.14′ |
3.7m |
0.15x |
52mm
drop-in |
2012 |
| 500mm f/4.0 L IS |
5.75″ |
14.60cm |
15.08″ |
38.30cm |
8.54 lb |
3.87 kg |
14.77 ft |
4.5 m |
0.12x |
52mm
drop-in |
1999 |
| 600mm f/4.0 L IS II |
6.6″ |
16.76cm |
17.6″ |
44.70cm |
8.65 lb |
3.92 kg |
14.77′ |
4.5m |
0.15x |
52mm
drop-in |
2012 |
| 600mm f/4.0 L IS |
6.6″ |
16.76cm |
18″ |
45.72cm |
11.83 lb |
5.36 kg |
18.04′ |
5.5m |
0.12x |
52mm
drop-in |
1999 |
| 800mm f/5.6 L IS |
6.4″ |
16.26cm |
18.1″ |
45.97cm |
9.92 lb |
4.5 kg |
19.68′ |
6m |
0.12x |
52mm
drop-in |
2008 |
For the complete Canon EF lens line-up click here.
For additional information on all Canon Super Telephoto lenses and teleconverters click here.
Questions
Lens questions are of course welcome. Please leave a comment if you wish to learn more.
Support both the Bulletins and the Blog by making all your B & H purchases here.
April 23rd, 2012
|
|
|
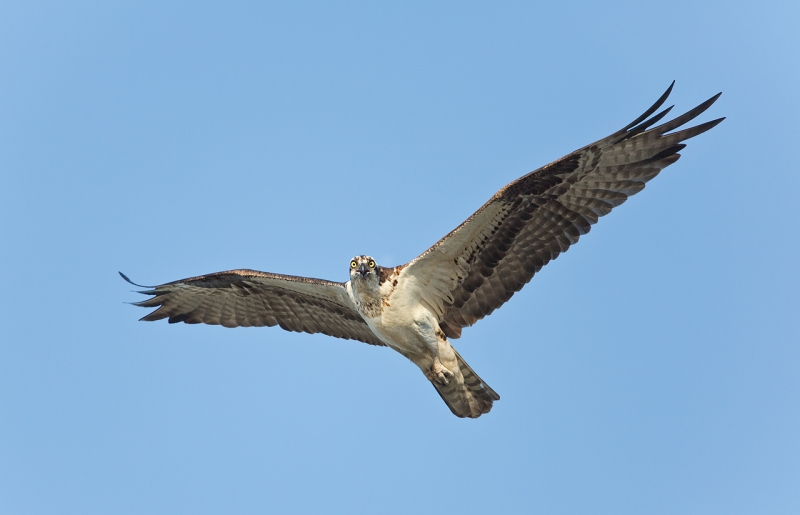
This Osprey was photographed down by the lake near my home in Indian Lake Estates, FL with the hand held Canon 300mm f/2.8 L IS II lens, the 1.4X III TC, and the Canon EOS-5D Mark III. ISO 400. Evaluative metering +1 1/3 stops off the sky: 1/2000 sec. at f/4 in Manual mode.
Central Sensor/AF Areas Expand/AI Servo Rear Focus AF active at the moment of exposure. Click here if you missed the Rear Focus Tutorial. Click here to learn to set up Rear Focus on your 5D Mark II. Click on the image for a larger version.
|
Doomsday???/Important Contest News
Well, as you might have figured out by now it is not doomsday, but it is the very last day to enter the BIRDS AS ART 1st International Bird Photography Competition. You have till 11:59 pm tonight–Monday April 23, 2012–to register for the contest. Over the weekend 27 more folks decided to see how their images stacked up against some of the best in the world and take a stab at some of the great prizes in the $22,000+ prize pool. If you registered and paid over the weekend please be patient. You will receive your instructions via e-mail no later than this evening; Jim and Peter have been swamped. If you have trouble uploading your images because of high traffic on the server uploading one at a time will likely alleviate the problem. Good luck to all!
No More Days Left to Enter the Competition!
Qualifying B&H Purchases Made Today Still Get You In!
Only Seven Days Left to Upload Your Photos!
Although you may upload your images until 11:59pm eastern time on April 30, 2012, the very last day for registering for the contest and for making eligible B&H purchases will be today, Monday, April 23, 2012. This gives us time to process your registrations and verify your B&H purchases and gives you time to upload your images successfully. Good luck to all.
The BIRDS AS ART 1st International Bird Photography Competition has been going great guns. Additional folks are getting in on the fun each day. And many folks who had previously finished their entries have been taking advantage of the extension by uploading even stronger images. Thanks to those who responded to my Hand of Man pleas; it is now one of our strongest categories. While each of the following categories has some very strong images there is still room for improvement: Small in the Frame/Environmental, Pleasing Blurs, Youth, and especially Captive (photographs of captive, zoo, pet, or rehab birds).
Those of you who have been in the dark can learn more about the BIRDS AS ART 1st International Bird Photography Competition here or by visiting the main contest page here.
Save Your B&H Receipts
Do save your e-mail receipts for eligible B&H purchases made after Monday, April 23 as you will be able to use them for entry into the BIRDS AS ART 2nd International Bird Photography Competition; details will be announced in several months. Please remember, only B&H purchases made using the product-specific BAA B&H affiliate links in the Bulletins or on the blog or the more general link here qualify. See additional details by scrolling down to item 2 here. If in doubt, simply start your B&H searches by clicking here:
More Canon EOS-5D Mark III Flight Images
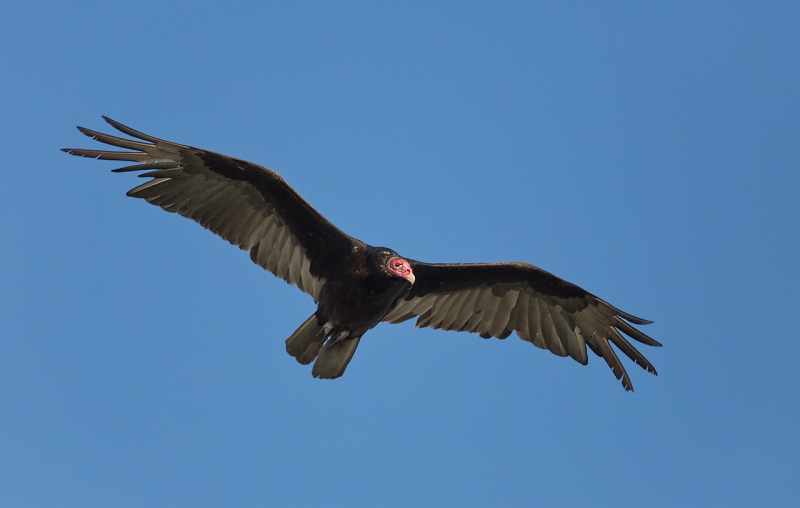
I photographed at a central Florida rookery on Sunday morning with friend Clemens van der Werf. Once I got home I took a nap and worked on BPN for a while. In late afternoon I noticed that it had gotten quite windy with the passing of the storm. I grabbed the 300 f/2.8 LI S II, added the 1.4X III TC, mounted the 5D III and headed down to the lake to see what was flying. Though I stuck out on Black Vultures I go to work with my fast becoming beloved Canon EOS-5D Mark III on both Osprey and Turkey Vulture.
Be sure to click on each image to see the larger version so that you can get a better appreciation of the beautiful 5D III image files. And click here for my in-depth review of the Canon 300mm f/2.8L IS lens.
It funny, the more I photograph birds the more I realize how much I love bird photography….
I continue to be impressed with the 5D III’s deadly accurate AF system. I will be sharing everything that I learn about the 5D III in the upcoming User’s Guide. I hope to actually start writing this afternoon.
|
|
|
This Turkey Vulture was also photographed down by the lake near my home in Indian Lake Estates, FL with the hand held Canon 300mm f/2.8 L IS II lens, the 1.4X III TC, and the Canon EOS-5D Mark III. ISO 400. Evaluative metering +1 stop off the sky: 1/3200 sec. at f/4 in Manual mode.
Central Sensor/AF Areas Expand/AI Servo Rear Focus AF active at the moment of exposure. Click here if you missed the Rear Focus Tutorial. Click here to learn to set up Rear Focus on your 5D Mark II. Click on the image for a larger version.
|
NIK Color Efex Pro
Both of the flight images here had the underwing detail revealed with a 50% opacity NIK Color Efex Pro he Detail Extractor layer that was modified with a Layer Mask. Learn the basics of Layer Masking in APTATS II. Click here and here for some great Color Efex Pro tutorials.
NIK 15% Discount
You can save 15% on all NIK products by clicking here and entering BAA in the Promo Code box at check-out. Then hit Apply to see your savings. You can download a trial copy that will work for 15 days and allow you to create full sized images.
BIRDS AS ART BULLETIN #407
BIRDS AS ART BULLETIN #407 is now online and can be accessed in beautiful white on black format here.
- CONTEST UPDATE
- MORRO BAY IPT REPORT
- Tualatin River Bird Festival, Sherweood, Oregon
- Cheesemans’ Ecology Safaris International Trips
- POSSE NEWS/DENISE IPPOLITO
- MIDWAY 2013: JUST TWO SLOTS OPEN!
- IPT UPDATES
Shopper’s Guide
Below is a list of the gear used to create the image above. Thanks a stack to all who have used the Shopper’s Guide links to purchase their gear as a thank you for all the free information that we bring you on the Blog and in the Bulletins. Before you purchase anything be sure to check out the advice in our Shopper’s Guide.
Canon 300mm f/2.8 L IS II lens. The 300 f/2.8 L IS II with the 1.4X III TC is a killer flight combination.
1.4X III TC. The new Series III 1.4X was designed to work best with the new Series II super-telephoto lenses.
Canon EOS-5D Mark III. Man, I am in love with this camera body. Both the files and the AF system are superb.
And from the BAA On-line Store:
LensCoats. I have a LensCoat on each of my big lenses to protect them from nicks and thus increase their re-sales value. All my big lens LensCoat stuff is in Hardwood Snow pattern.
The Lens Align Mark II. I use the Lens Align Mark II pretty much religiously to micro-adjust all of my gear an average of once a month and always before a major trip. Enjoy our free comprehensive tutorial here.
BreezeBrowser. I do not see how any digital photographer can exist without this program.
April 21st, 2012
|
|
|
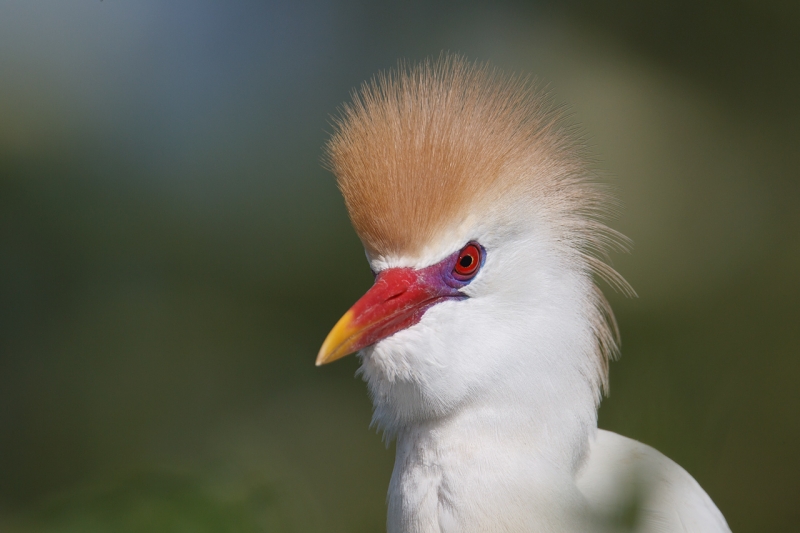
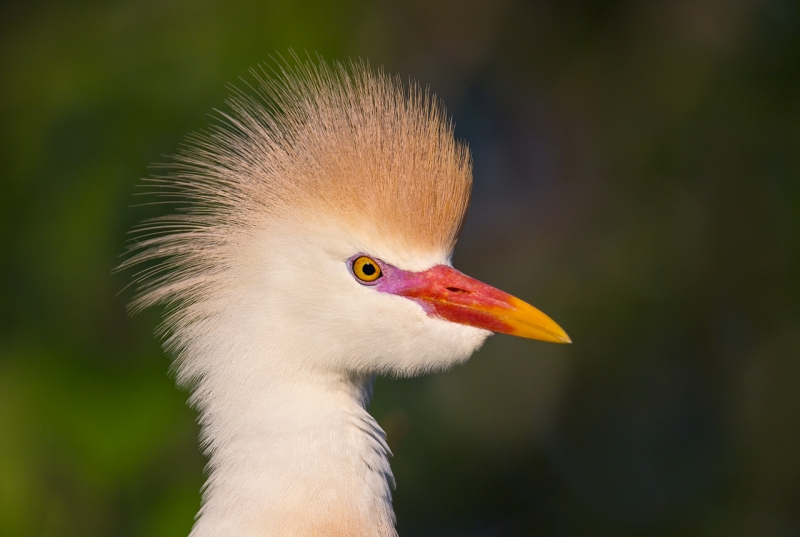
Cattle Egret, mega-breeding plumage. This image was created with the tripod-mounted Canon 800mm f/5.L IS lens, the 2XIII teleconverter, and the Canon EOS-5D Mark III. ISO 400. Evaluative metering at zero confirmed by histogram check: 1/640 sec. at f/11 in Manual mode–early morning light at 7:56 am.
I love the soft light, the exquisite sharpness, the multi-colored background, and the bright colors of the soft parts. The soft parts include the lores–the skin in front of the eye, the bill, and the feet (that are of course not seen here). These bright colors are the result of increased hormonal flow during the breeding season. Lores, bill, and additional clean-up work was done; see below for details.
See immediately below for AF info. Wait: autofocus with an f/5.6 lens and a 2X TC with a camera that focuses only to f/5.6…. How can that be??? As I said, read on for the AF info 🙂
|
Pushing the Limits with the Canon EOS-5D Mark III–2X III Teleconverter–800mm f/5.6L IS Combination
Many folks are asking, “Won’t you miss the 1.3 crop factor of your Mark IV body and its ability to focus to f/8?” The answer, as detailed in part in Gear Strategy here, is yes, at times. But…. Whenever I can get close with the 5D III I wind up with a lot more pixels on the bird. With tame birds that works out to a 22.3 megapixel to 16.1 megapixel advantage for the 5D III. If my math is correct that works out to a 38 1/2 per cent increase in pixels on the subject. Not to mention that I love the 5D III files and that those files exhibit at least a half stop better high ISO noise control than Mark IV files. When working with skittish or otherwise unapproachable subjects the MIV has a small advantage. Throw in a teleconverter and that becomes a large advantage. Again, see the Gear Strategy post here.
However, by knowing your gear inside and out you can push the limits of your lens/camera set-up. When I saw the drop-dead gorgeous Cattle Egret in mege-breeding plumage I knew that I wanted to capture a full frame head portrait. And I wanted it with everyone of my newly available 22.3 megapixels. Do understand that you need a qualifying situation…. This bird was one of a pair that sat for a few minutes at a time so rather than go to the Mark IV with the 1.4X TC on the 800 I went for the whole nine yards. I mounted the 2X III TC on the 800 in front of the 5D Mark III. I made sure that AF Mode was set to Live Mode. Then I framed the image through the viewfinder and pre-focused. Then I turned on Live View, pressed the * button for Rear Focus AF, and made a series of images. Additional important details on this technique will be included in the 5D Mark III User’s Guide and the update of the EOS-1D Mark IV User’s Guide. (It will take me a while to get to the latter.)
If the bird changes its position or moves to a new perch, you need to start from scratch. Live Mode/Live View AF works only with static subject. BTW, the image above was not a result of luck; I created 4-7 sharp keepers of this and several other pose/background combinations.
Have you ever seen a more beautiful individual of this species?
|
|
|
This JPEG represents the original capture from which the image above was created.
|
Bill clean-up was done with the Patch Tool, the Clone Stamp Tool, and the Spot Healing Brush, all as described in detail in Digital Basics. The old wound on the chin was covered with a warped Quick Mask as described in detail in APTATS I.
Important Contest News
Only Two Days Left to Enter the Competition!
Only Two Days Left to Make Your Qualifying B&H Purchases!
Only Nine Days Left to Upload Your Photos!
While you may upload images until 11:59pm eastern time on April 30, 2012, the very last day for registering for the contest and for making eligible B&H purchases will be Monday, April 23, 2012. This will give us time to process your registrations and verify your B&H purchases and will give you time to upload your images successfully. Good luck to all.
The BIRDS AS ART 1st International Bird Photography Competition has been going great guns. Additional folks are getting in on the fun each day. And many folks who had previously finished their entries have been taking advantage of the extension by uploading even stronger images. Thanks to those who responded to my Hand of Man pleas; it is now one of our strongest categories. While each of the following categories has some very strong images there is still room for improvement: Small in the Frame/Environmental, Pleasing Blurs, Youth, and especially Captive (photographs of captive, zoo, pet, or rehab birds).
Those of you who have been in the dark can learn more about the BIRDS AS ART 1st International Bird Photography Competition here or by visiting the main contest page here.
Save Your B&H Receipts
Do save your e-mail receipts for eligible B&H purchases made after Monday, April 23 as you will be able to use them for entry into the BIRDS AS ART 2nd International Bird Photography Competition; details will be announced in several months. Please remember, only B&H purchases made using the product-specific BAA B&H affiliate links in the Bulletins or on the blog or the more general link here qualify. See additional details by scrolling down to item 2 here. If in doubt, simply start your B&H searches by clicking here:
Earn Free Contest Entries and Support both the Bulletins and the Blog by making all your B & H purchases here.
More and more folks are earning multiple contest entries with their B & H purchases. See here for details on that. Eleven great categories, 34 winning and honored images, and prize pools valued in excess of $20,000. Click here to visit the competition home page.
Shopper’s Guide
Below is a list of the gear used to create the images in today’s post. Thanks a stack to all who have used the Shopper’s Guide links to purchase their gear as a thank you for all the free information that we bring you on the Blog and in the Bulletins. Before you purchase anything be sure to check out the advice in our Shopper’s Guide.
Canon 800mm f/5.6L IS lens. Right now this is my all time favorite super-telephoto lens.
2XIII teleconverter. This TC is noticeably sharper and is designed to work best with the new Series II teleconverters.
Canon EOS-5D Mark III. Man, I am in love with this camera body. Both the files and the AF system are superb.
And from the BAA On-line Store:
LensCoats. I have a LensCoat on each of my big lenses to protect them from nicks and thus increase their re-sales value. All my big lens LensCoat stuff is in Hardwood Snow pattern.
LegCoat Tripod Leg Covers. I have four tripods active and each has a Hardwood Snow LegCoat on it to help prevent further damage to my tender shoulders 🙂 And you will love them in mega-cold weather….
Gitzo GT3530LS Tripod. This one will last you a lifetime.
Mongoose M3.6 Tripod Head. Right now this is the best tripod head around for use with lenses that weigh less than 9 pounds. For heavier lenses, check out the Wimberley V2 head.
CR-80 Replacement Foot for Canon 800. When using the 800 on a Mongoose as I do, replacing the lens foot with this accessory lets the lens sit like a dog whether pointed up or down and prevents wind-blown spinning of your lens on breezy days by centering the lens directly over the tripod.
Double Bubble Level. You will find one in my camera’s hot shoe whenever I am not using flash.
The Lens Align Mark II. I use the Lens Align Mark II pretty much religiously to micro-adjust all of my gear an average of once a month and always before a major trip. Enjoy our free comprehensive tutorial here.
BreezeBrowser. I do not see how any digital photographer can exist without this program.
April 19th, 2012
|
|
|
This image was created with the hand held Canon 70-200mm f/2.8L IS II lens, the 2XIII teleconverter (hand held at 400mm), and the Canon EOS-5D Mark III. ISO 400. Evaluative metering +2/3 stop: 1/2500 sec. at f/5.6 in Manual mode.
AI Servo Rear Focus AF active at the moment of exposure. Click here if you missed the Rear Focus Tutorial. Be sure to click on the image to see the spectacular larger version.
|
Free 5DIII Info
Many folks have e-mailed asking how to set up rear focus on the Canon EOS-5D Mark III. It is a bit hidden in the extensive Menu/Custum Functions screens. Here’s how you do it:
The last item on the 2nd Custom Function (C.Fn3: Display/Operation–Orange) Menu is Custom Controls. Select Custom Controls by scrolling down with the thumb wheel and then hit Set.
The first item in the left hand column is Shutter Button half-press. The default there is Metering and AF start. With the orange outline around this first item Press Set. You will see the orange outline around the Metering/AF symbol. Turn the thumb wheel one click clockwise that the orange outline is around the metering (only) symbol. Now press set again.
Next, scroll down to the second item in the first column, the AF-ON button. The default there is Metering/AF. Press set and turn the thumb wheel one click clockwise so that the orange box is around the * (exposure lock) symbol. Now press Set again. Only one more to go. Turn the thumb wheel one click in the clockwise direction to highlight the * button. The default there is the * button, i.e., exposure lock. Now press the Set button, turn the thumb wheel clockwise one click so that the Metering/AF symbol is outlined in orange. Press Set one last time and touch the shutter button lightly to exit the menu screen and you are good to go.
Metering will become active when you press the shutter button halfway but the camera will not focus. (That’s what rear focus is all about.) Focus by pushing the star button–the second button in from the upper right back corner of the body. And release the shutter button to create an image by fully depressing the shutter button. On the rare occasion that you need to lock the exposure you will use the AF-ON button as we have effectively switched the functions of the AF-ON and the star buttons.
When using rear focus you want to be in AI Servo AF all the time. You have One-Shot AF available by pressing the star button to set focus. You can then release the star button and recompose. To follow a swimming, walking, running, or flying bird simply press and hold the star button. In either situation, simply press the shutter button fully to create an image or press and hold the shutter button down fully to create a series of images. Remember: if you lift your thumb off the star button the AF system will stop tracking.
Two years ago I went to rear focus full time with all camera bodies and have never looked back. You can read the original rear focus tutorial here.
This is the type of information that will be available in spades in the upcoming EOS-5D Mark III User’s Guide. I hope to have it completed in one month but may be offering a pre-publication version at a discount soon.
|
|
|
This image was created with the Canon 70-200mm f/2.8L IS II lens and the 1.4X III TC (hand held at 115mm) with the Canon EOS-5D Mark III. ISO 400. Evaluative metering + 1/3 stops: 1/800 sec. at f/6.3 in Manual mode.
Central Sensor/AI Servo Rear Focus AF and re-compose. My elbows were braced on the railing to ensure that the lens did not move in relation to the subject after focus was set…. Click here if you missed the Rear Focus Tutorial. Be sure to click on the image to see a larger version.
|
Important Contest News
Only Four Days Left to Enter the Competition!
Only Four Days Left to Make Your Qualifying B&H Purchases!
Only Eleven Days Left to Upload Your Photos!
While you may upload images until 11:59pm eastern time on April 30, 2012, the very last day for registering for the contest and for making eligible B&H purchases will be Monday, April 23, 2012. This will give us time to process your registrations and verify your B&H purchases and will give you time to upload your images successfully. Good luck to all.
The BIRDS AS ART 1st International Bird Photography Competition has been going great guns. Additional folks are getting in on the fun each day. And many folks who had previously finished their entries have been taking advantage of the extension by uploading even stronger images. Thanks to those who responded to my Hand of Man pleas; it is now one of our strongest categories. While each of the following categories has some very strong images there is still room for improvement: Small in the Frame/Environmental, Pleasing Blurs, Youth, and especially Captive (photographs of captive, zoo, pet, or rehab birds).
Those of you who have been in the dark can learn more about the BIRDS AS ART 1st International Bird Photography Competition here or by visiting the main contest page here.
Save Your B&H Receipts
Do save your e-mail receipts for eligible B&H purchases made after Monday, April 23 as you will be able to use them for entry into the BIRDS AS ART 2nd International Bird Photography Competition; details will be announced in several months. Please remember, only B&H purchases made using the product-specific BAA B&H affiliate links in the Bulletins or on the blog or the more general link here qualify. See additional details by scrolling down to item 2 here. If in doubt, simply start your B&H searches by clicking here:
Earn Free Contest Entries and Support both the Bulletins and the Blog by making all your B & H purchases here.
More and more folks are earning multiple contest entries with their B & H purchases. See here for details on that. Eleven great categories, 34 winning and honored images, and prize pools valued in excess of $20,000. Click here to visit the competition home page.
Shopper’s Guide
Below is a list of the gear used to create the images in today’s post. Thanks a stack to all who have used the Shopper’s Guide links to purchase their gear as a thank you for all the free information that we bring you on the Blog and in the Bulletins. Before you purchase anything be sure to check out the advice in our Shopper’s Guide.
Canon 70-200mm f/2.8L IS II lens. Man, I am loving this lens on my shoulder with the 2XIII teleconverter. I also use it a lot–depending on the situation–with the 1.4X III TC.
Canon EOS-5D Mark III. Man, I am in love with this camera body. Both the files and the AF system are superb. I cannot wait to get to Morro Bay.
And from the BAA On-line Store:
The Lens Align Mark II. I use the Lens Align Mark II pretty much religiously to micro-adjust all of my gear an average of once a month and always before a major trip. Enjoy our free comprehensive tutorial here.
BreezeBrowser. I do not see how any digital photographer can exist without this program.
April 18th, 2012
|
|
|
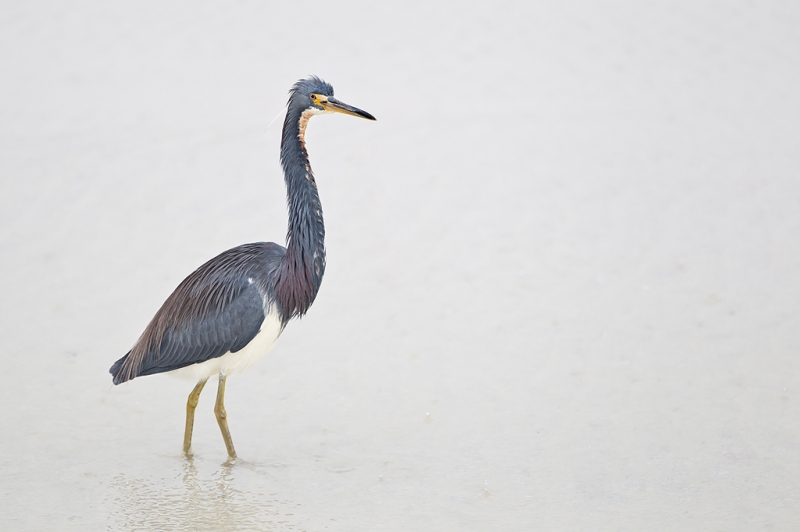
When photographing tall birds in horizontal format keep the bird well back in the frame. Here there is about four times more room in front of the bird than behind. Using the central sensor and placing the bird in the middle of the frame in situations like this is a criminal offense. You can choose a sensor off to one side of the frame, use One-Shot AF(S in Nikon) and recompose, or use central sensor AI Servo (C in Nikon)/Rear Focus and re-compose. Do not try to stuff a tall bird into a horizontal frame; be sure to leave a decent amount of room above and below the bird–usually a bit more above.
Tricolored Heron, Little Estero Lagoon, Fort Myers Beach, FL Image created with Canon 70-200mm f/2.8L IS II lens, the 1.4X III TC (hand held at 255mm), and the Canon EOS-1D Mark IV. ISO 250. Evaluative metering at +2 stops: 1/300 sec. at f/4 in Tv mode.
|
Bird Photography Composition Basics
Five simple rules are presented here. Learn them and your work will improve immeasurably. Think about them every time that you point your lens at a bird. Or a bear. Or at anything else. The principles outlined here hold true even when you are photographing your kids or your grandchildren. Break them when you dare, but only when you have a good reason for doing so. If you do not own these principles, bookmark this page and keep coming back until you do.
|
|
|
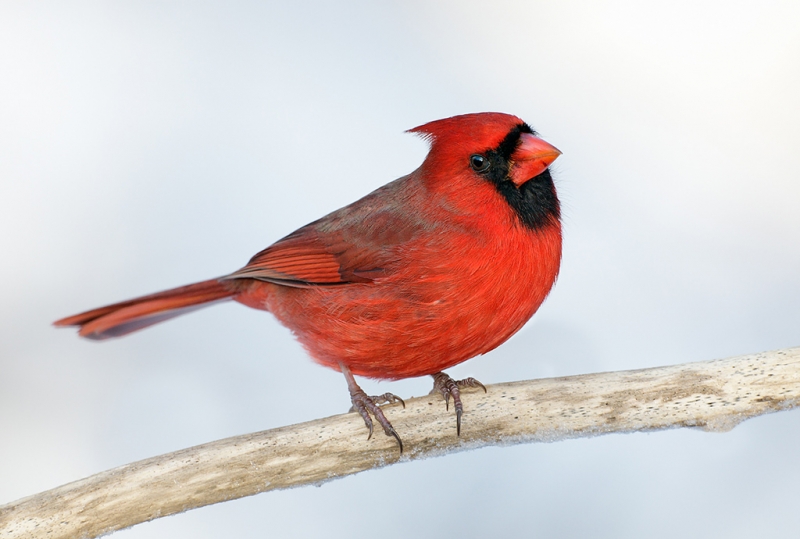
When photographing a large in the frame bird in horizontal format, leave three to five times as much space from the bird’s bill to the frame-edge than from the end of the tail to the opposite frame-edge. In sort, nobody gives a rat’s ass what’s going on behind the bird. In general, leave at least a bit more room above the bird than below.
Northern Cardinal, Elizabeth A. Morton NWR, Noyack, NY. This image was created with the tripod-mounted Canon 800mm f/5.L IS lens and the Canon EOS-1D Mark IV. ISO 800. Evaluative metering +2 2/3 stops off the snow: 1/160 sec. at f/8 in Manual mode.
|
Motivation
My motivation for writing this piece arose from the frustration of seeing so many folks on Bird Photographers.Net and during BIRDS AS ART Instructional Photo Tour critiquing sessions who simply do not understand the basics of image design. These principles are covered in detail in the original “The Art of Bird Photography.” Often when I suggest that folks purchase the book and study the basics of composition they say, “I have that book. It’s great.” That leaves me scratching my head…. Many folks think that buying the latest/greatest camera body and a $10,000 lens will transform them into a skilled bird photographer when what they really need to do is work harder by studying and practicing.
|
|
|
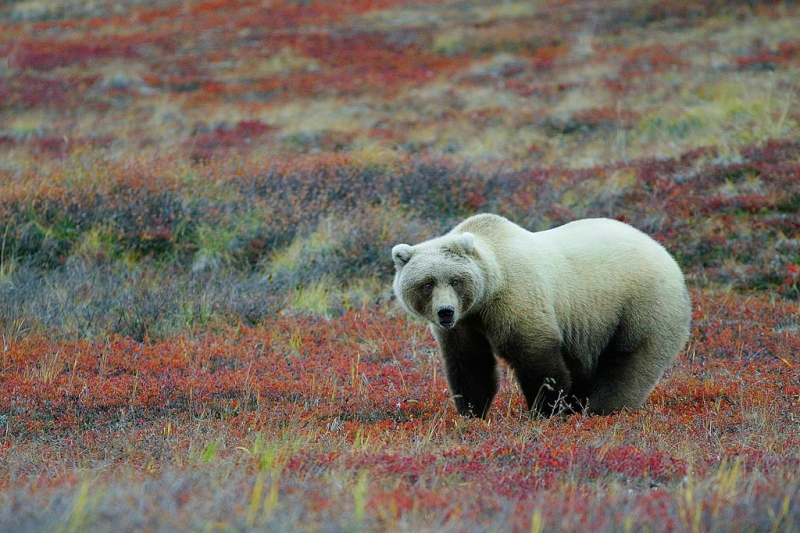
The rule of thirds has been guiding artists for centuries for good reason: it works. In nature photography it works especially well when your relatively small-in-the-frame subject is surrounded by beautiful habitat. Divide the frame in thirds horizontally and vertically and place the subject on or near one of the four intersecting points.
Grizzly Bear, Denali National Park, AK. Image created with hand held Canon 300mm f/4L IS lens and the EOS-1D (this oldie now replaced by the Canon EOS-1D Mark IV). ISO 400. Evaluative metering -1/3 stop: 1/640 sec. at f/4 in Av mode. (Ah, I have learned a ton about digital exposure since I created this image in 2004….)
|
Study!
If you have already mastered the principles covered here then do consider purchasing “The Art of Bird Photography II,” copying it to the hard drive of your laptop, and studying Chapter II, Advanced Composition and Image Design (pages 163-254 including 97 images with our legendary educational captions). See the ABP II screen capture below.
|
|
|
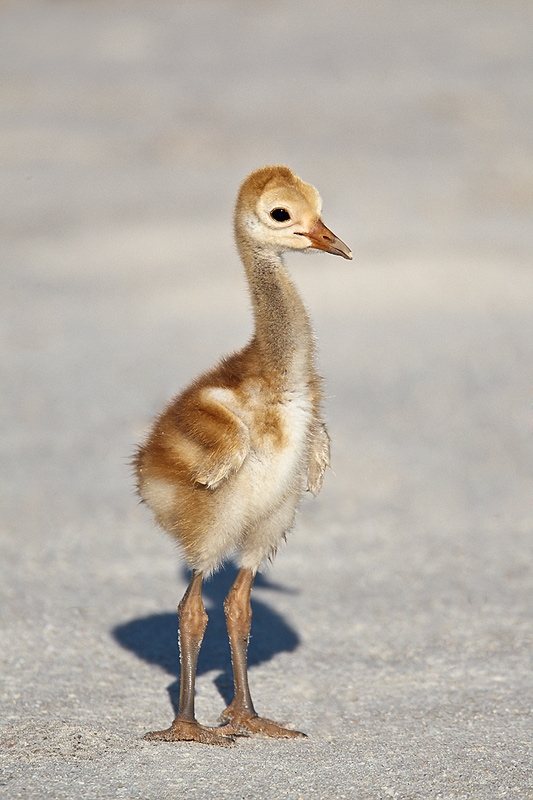
Tall, relatively large–in-the-frame birds (even baby ones) need to be in vertical frames. If they are looking at you they usually work best dead center. If they are looking to one side, you can place them a bit back in the frame as I did here. Be sure to leave well more room above their heads than below their feet. Note here that there is twice as much room above the bird than below. And be sure not to clip the virtual feet, feet that are hidden by tall grass or shallow water.
Sandhill Crane chick, Indian Lake Estates, FL, with the tripod-mounted Canon 800mm f/5.L IS lens, the 1.4X III TC, and the Canon EOS-1D Mark IV. ISO 400. Evaluative metering at +1 stop: 1/1250 sec. at f/8 in Av mode.
|
Staggering
The amount of information and instruction in the original ABP and the all-new continuation, ABP II is simply staggering. Oh how I wish that I had had these two books when I was struggling to learn bird photography in the ten years that followed August 1983. Today, you can save $10 by purchasing the two book bundle here.
|
|
|
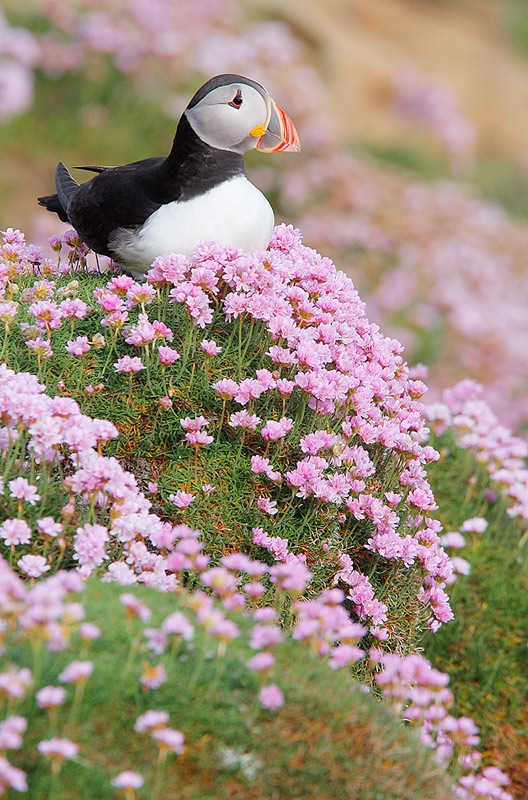
Small-in-the-frame subjects must be placed in the corners of vertical frames. This type of image works best when you wish to show off a beautiful setting.
Atlantic Puffin, Saltee Island, Ireland with the hand held Canon 400mm f.4L IS DO lens and the EOS-40D (now replaced with the Canon EOS-7D. ISO 400. Evaluative metering at +1/3 stop: 1/500 sec. at f/0 in Av mode.
|
Improve
By studying the material presented here, learning to use your camera’s AF system to it fullest capabilities, and looking at as many good and great photographs as possible, you too can begin producing images that feature pleasing, interesting, and dramatic compositions.
|
|
|
Pages 203/204 screen capture from ABP II’s Advanced Composition and Image Design Gallery. Most of the chapters in ABP II are followed by extensive galleries that review the material covered in the text. Click on the screen capture to see a larger version.
|
Important Contest News
Only Five Days Left to Enter the Competition!
Only Five Days Left to Make Your Qualifying B&H Purchases!
Only Twelve Days Left to Upload Your Photos!
While you may upload images until 11:59pm eastern time on April 30, 2012, the very last day for registering for the contest and for making eligible B&H purchases will be Monday, April 23, 2012. This will give us time to process your registrations and verify your B&H purchases and will give you time to upload your images successfully. Good luck to all.
The BIRDS AS ART 1st International Bird Photography Competition has been going great guns. Additional folks are getting in on the fun each day. And many folks who had previously finished their entries have been taking advantage of the extension by uploading even stronger images. Thanks to those who responded to my Hand of Man pleas; it is now one of our strongest categories. While each of the following categories has some very strong images there is still room for improvement: Small in the Frame/Environmental, Pleasing Blurs, Youth, and especially Captive (photographs of captive, zoo, pet, or rehab birds).
Those of you who have been in the dark can learn more about the BIRDS AS ART 1st International Bird Photography Competition here or by visiting the main contest page here.
Save Your B&H Receipts
Do save your e-mail receipts for eligible B&H purchases made after Monday, April 23 as you will be able to use them for entry into the BIRDS AS ART 2nd International Bird Photography Competition; details will be announced in several months. Please remember, only B&H purchases made using the product-specific BAA B&H affiliate links in the Bulletins or on the blog or the more general link here qualify. See additional details by scrolling down to item 2 here. If in doubt, simply start your B&H searches by clicking here:
Earn Free Contest Entries and Support both the Bulletins and the Blog by making all your B & H purchases here.
More and more folks are earning multiple contest entries with their B & H purchases. See here for details on that. Eleven great categories, 34 winning and honored images, and prize pools valued in excess of $20,000. Click here to visit the competition home page.
Shopper’s Guide
Below is a list of the gear used to create the images in today’s post. Thanks a stack to all who have used the Shopper’s Guide links to purchase their gear as a thank you for all the free information that we bring you on the Blog and in the Bulletins. Before you purchase anything be sure to check out the advice in our Shopper’s Guide.
Canon 800mm f/5.6L IS lens. Right now this is my all time favorite super-telephoto lens.
Canon 70-200mm f/2.8L IS II lens. Man, I am loving this lens on my shoulder with the 2XIII teleconverter. I also use it a lot–depending on the situation–with the 1.4X III TC.
Canon EF 1.4X III TC. This new TC is designed to work best with the new Series II super-telephoto lenses.
Canon 300mm f/4L IS lens. This lightweight, close-focusing telephoto lens is still manufactured. With the 1.4X III TC it makes a great starter lens for beginning bird photographers, especially those with 1.6 crop factor bodies like the Canon EOS-7D.
Canon 400mm f.4L IS DO lens. A lightweight image stabilized telephoto lens that is easily hand held by most folks, great from any kind of boat, and super for flight photography. Works well with both Series III teleconverters.
Canon EOS-1D Mark IV professional digital camera body. The very best professional digital camera body that I have ever used.
And from the BAA On-line Store:
LensCoats. I have a LensCoat on each of my big lenses to protect them from nicks and thus increase their re-sales value. All my big lens LensCoat stuff is in Hardwood Snow pattern.
LegCoat Tripod Leg Covers. I have four tripods active and each has a Hardwood Snow LegCoat on it to help prevent further damage to my tender shoulders 🙂 And you will love them in mega-cold weather….
Gitzo GT3530LS Tripod. This one will last you a lifetime.
Mongoose M3.6 Tripod Head. Right now this is the best tripod head around for use with lenses that weigh less than 9 pounds. For heavier lenses, check out the Wimberley V2 head.
CR-80 Replacement Foot for Canon 800. When using the 800 on a Mongoose as I do, replacing the lens foot with this accessory lets the lens sit like a dog whether pointed up or down and prevents wind-blown spinning of your lens on breezy days by centering the lens directly over the tripod.
Double Bubble Level. You will find one in my camera’s hot shoe whenever I am not using flash.
The Lens Align Mark II. I use the Lens Align Mark II pretty much religiously to micro-adjust all of my gear an average of once a month and always before a major trip. Enjoy our free comprehensive tutorial here.
BreezeBrowser. I do not see how any digital photographer can exist without this program.
April 15th, 2012
|
|
|
This image was created with the hand held Canon 70-200mm f/2.8L IS II lens, the 2XIII teleconverter (hand held at 400mm), and the Canon EOS-5D Mark III. ISO 200. Thought that I was at ISO 400….: 1/400 sec. at f/11 in Manual mode.
AI Servo Rear Focus AF active at the moment of exposure. Click here if you missed the Rear Focus Tutorial. Be sure to click on the image to see the spectacular larger version.
|
Is the EOS-5D Mark III–2X III Teleconverter–70-200f/2.8L IS II a Viable Combination?
In a word. Yes. The combination is incredibly sharp. In addition, I tried it a bit for flight photography with somewhat mixed results in very difficult conditions; there were no hangers. I am not sure how I got to ISO 200 but I love the end result above. See the animated GIF below for image clean-up details. NIK Color Efex Pro Tonal Contrast at 30% and White Neutralizer at 60%.
Image clean-up involved a combination of Clone Stamp Tool and Patch Tool work to execute the Divide and Conquer strategy and a series of flopped and warped Quick Masks that were fine tuned with Layer Masks. All as described in detail in Digital Basics and Robert’s O’Toole’s APTATS I (Quick Masks) and APTATS II (Layer Masks). I first lightened the image during ACR conversion and then again using the Curves filter in NIK Color Efex Pro. As soon as I saw the shade of blue water I knew that White Neutralizer would make it sing.
As regular readers know NIK’s Color Efex Pro 4 is now an integral part of my workflow. Click here for an excellent NIK Color Efex Pro Tutorial. And remember, you can save 15% on all NIK products by clicking here and entering BAA in the Promo Code box at check-out. Then hit Apply to see your savings. You can download a trial copy that will work for 15 days and allow you to create full sized images.
Contest Update
The BIRDS AS ART 1st International Bird Photography Competition has been going great guns. Additional folks are getting in on the fun each day. And many folks who had previously finished their entries have been taking advantage of the extension by uploading even stronger images. Thanks to those who responded to my Hand of Man pleas; it is now one of our strongest categories. While each of the following categories has some very strong images there is still room for improvement: Small in the Frame/Environmental, Pleasing Blurs, Youth, and especially Captive (photographs of captive, zoo, pet, or rehab birds).
Those of you who have been in the dark can learn more about the BIRDS AS ART 1st International Bird Photography Competition here or by visiting the main contest page here.
Important Contest News
While you may upload images until 11:59pm eastern time on April 30, 2012, the very last day for registering for the contest and for making eligible B&H purchases will be Monday, April 23, 2012. This will give us time to process your registrations and verify your B&H purchases and will give you time to upload your images successfully. Good luck to all.
Do save your e-mail receipts for eligible B&H purchases made after Monday, April 23 as you will be able to use them for entry into the BIRDS AS ART 2nd International Bird Photography Competition; details will be announced in several months. Please remember, only B&H purchases made using the product-specific BAA B&H affiliate links in the Bulletins or on the blog or the more general link here qualify. See additional details by scrolling down to item 2 here. If in doubt, simply start your B&H searches by clicking here:
Earn Free Contest Entries and Support both the Bulletins and the Blog by making all your B & H purchases here.
More and more folks are earning multiple contest entries with their B & H purchases. See here for details on that. Eleven great categories, 34 winning and honored images, and prize pools valued in excess of $20,000. Click here to visit the competition home page.
Shopper’s Guide
Below is a list of the gear used to create the images in today’s post. Thanks a stack to all who have used the Shopper’s Guide links to purchase their gear as a thank you for all the free information that we bring you on the Blog and in the Bulletins. Before you purchase anything be sure to check out the advice in our Shopper’s Guide.
Canon 70-200mm f/2.8L IS II lens. Man, I am loving this lens on my shoulder with the 2XIII teleconverter. I also use it a lot–depending on the situation–with the 1.4X III TC.
Canon EOS-5D Mark III. Man, I am in love with this camera body. Both the files and the AF system are superb. I cannot wait to get to Morro Bay.
And from the BAA On-line Store:
The Lens Align Mark II. I use the Lens Align Mark II pretty much religiously to micro-adjust all of my gear an average of once a month and always before a major trip. Enjoy our free comprehensive tutorial here.
BreezeBrowser. I do not see how any digital photographer can exist without this program.
April 13th, 2012
|
|
|
The Western Gulls were eating blood-filled who-knows-whats every afternoon. They would land with them, squeeze them till they burst creating a shower of what seemed to be blood, take flight, and eventually swallow them. This image was created with the tripod-mounted Canon 800mm f/5.L IS lens and the Canon EOS-5D Mark III. ISO 400. Evaluative metering +1 stop off the sky: 1/2000 sec. at f/5.6 in Manual mode.
Central Sensor–Expand AF area/AI Servo Rear Focus AF active at the moment of exposure. Click here if you missed the Rear Focus Tutorial.
The 5D Mark III is my go-to flight photography body. The new AF system is superb. Click on the image for a larger version.
|
EOS-5D MII–EOS-1D Mark IV Gear Strategy
Here is my current gear strategy:
Whenever possible I will use my EOS-5D Mark III for all flight photography whether with the 800mm f/5.6L IS or the 70-200mm f/2.8L IS with or without the 1.4XIII TC. 5D MIII AF is that good.
When working with birds at relatively close range I will use my EOS-5D Mark III with the 800mm f/5.6L IS lens as my everyday go-to rig.
When I need more reach I will use the EOS-1D Mark IV with the 1.4X III TC on the 800.
|
|
|
This tiny Pied-billed Grebe was photographed with the tripod-mounted Canon 800mm f/5.L IS lens, the 1.4X III TC, and the Canon EOS-1D Mark IV. ISO 400. Evaluative metering at +2/3 stop: 1/160 sec. at f/8 in Manual mode.
Central sensor (by necessity) AI Servo/Rear Focus AF active at the moment of exposure. Click here if you missed the Rear Focus Tutorial. Click on the image for a larger version.
Here I went to the 800/1.4X III/Mark IV combo for maximum reach.
|
How I Do It
In order to implement this strategy I will use one of the two options that I used in Morro Bay:
1- Head afield with the 5D III on the 800 on the tripod with the EOS-1D Mark IV in one of the large front pockets of my Xtrahand vest with the 1.4X III TC attached. When and if I need more focal length I will simply remove the 5DIII and mount the 1D IV.
2- Head afield with the 5D III on the 800 on the tripod with the EOS-1D Mark IV and the 1.4X III TC on the 70-200mm f/2.8L IS lens on my shoulder via a Black Rapid RS-7 strap. When I need more focal length I will simply switch the camera bodies.
|
|
|
To create this Western Grebe image I used the Canon 800mm f/5.L IS lens and the Canon EOS-1D Mark IV. ISO 400. Evaluative metering at zero: 1/640 sec. at f/10 in Manual mode.
Central sensor on the grebe’s neck/AI Servo/Rear Focus AF active at the moment of exposure. Click here if you missed the Rear Focus Tutorial. Click on the image for a larger version.
|
Right after photographing the Pied-billed Grebe the sun came out and this Western Grebe swam into range. Being a much larger bird I simply took off the 1.4X III TC and held it in my left hand as I photographed.
|
|
|
This image was created with the hand held Canon 70-200mm f/2.8L IS II lens, the 1.4X III TC (at 280mm), and the Canon EOS-1D Mark IV. ISO 250. Evaluative metering at +1 stops: 1/250 sec. at f/4.5 in Tv mode.
Central Sensor/AI Servo Rear Focus and recompose. Click here if you missed the Rear Focus Tutorial. Click on the image to enjoy a larger version.
|
Having the 70-200 along with both camera bodies and a 1.4XIII TC gives me a wide range of focal lengths that I can use to create bird-scapes like the one above. When I saw the Willets flying in I focused on the closet bird on the beach and let the showy sandpipers fly into prime position before making a series of images.
|
|
|
The Western Gull image was created with the tripod-mounted Canon 800mm f/5.L IS lens and the Canon EOS-5D Mark III. ISO 400. Evaluative metering +1 1/3 stops off the sky: 1/2000 sec. at f/5.6 in Manual mode.
Central Sensor–Expand AF area/AI Servo Rear Focus AF active at the moment of exposure. Click here if you missed the Rear Focus Tutorial. Click on the image for a larger version. Click on the image for a larger version.
|
The 5D MIII AF system worked well for flight even with backgrounds other than sky as you can see here. Working in Manual mode is the key to success when the background might change from sky to hillside in an instant. The exposure at the moment the shutter was released here was probably about -1/3 stop as framed.
|
|
|
This Black Turnstone image was created with the tripod-mounted Canon 800mm f/5.L IS lens and the Canon EOS-5D Mark III. ISO 400. Evaluative metering +1/3 stop: 1/800 sec. at f/9 in Manual mode.
Central Sensor/AI Servo Rear Focus AF and recompose. Click here if you missed the Rear Focus Tutorial. Click on the image for a larger version.
|
My young co-leader Adian Briggs brought us to a rocky area along the coast. Over time we found both Black Turnstone and Black Oystercatcher. When he said the the birds would be approachable I went with the 5D III/800 combo and left everything else in the car. It turned out to be the perfect move.
|
|
|
This image was created with the hand held Canon 70-200mm f/2.8L IS II lens and the Canon EOS-5D Mark III. ISO 400. Evaluative metering at +2 1/3 stops: 1/4000 sec. at f/2.8 in Manual mode.
Central Sensor–Expand AF area/AI Servo Rear Focus AF active at the moment of exposure. Click here if you missed the Rear Focus Tutorial. Click on the image for a larger version.
|
When we spent a few minutes tossing bread to the gulls in the shadow of Morro Rock I grabbed the 70-200 and the 5D III and went to work. It performed superbly even creating sharp on the eye images every time even at the wide open aperture.
Rejoinder
The strategy above is my current strategy. If you meet me in the field tomorrow I might be doing something different. Why? I am learning more about my new camera every day and things may change rapidly.
By the way, I would expect that folks with either a 500 or 600mm f/4L IS lens who own both a 5D III and Mark IV might employ a similar strategy with their 2X teleconverters….
Which Image Do You Like Best?
Take a moment to let us know which image you like best, and why you like it.
Contest Update
The BIRDS AS ART 1st International Bird Photography Competition has been going great guns. Additional folks are getting in on the fun each day. And many folks who had previously finished their entries have been taking advantage of the extension by uploading even stronger images. Thanks to those who responded to my Hand of Man pleas; it is now one of our strongest categories. While each of the following categories has some very strong images there is still room for improvement: Small in the Frame/Environmental, Pleasing Blurs, Youth, and especially Captive (photographs of captive, zoo, pet, or rehab birds).
Those of you who have been in the dark can learn more about the BIRDS AS ART 1st International Bird Photography Competition here or by visiting the main contest page here.
Important Contest News
While you may upload images until 11:59pm eastern time on April 30, 2012, the very last day for registering for the contest and for making eligible B&H purchases will be Monday, April 23, 2012. This will give us time to process your registrations and verify your B&H purchases and will give you time to upload your images successfully. Good luck to all.
Do save your e-mail receipts for eligible B&H purchases made after Monday, April 23 as you will be able to use them for entry into the BIRDS AS ART 2nd International Bird Photography Competition; details will be announced in several months. Please remember, only B&H purchases made using the product-specific BAA B&H affiliate links in the Bulletins or on the blog or the more general link here qualify. See additional details by scrolling down to item 2 here. If in doubt, simply start your B&H searches by clicking here:
Earn Free Contest Entries and Support both the Bulletins and the Blog by making all your B & H purchases here.
More and more folks are earning multiple contest entries with their B & H purchases. See here for details on that. Eleven great categories, 34 winning and honored images, and prize pools valued in excess of $20,000. Click here to visit the competition home page.
Shopper’s Guide
Below is a list of the gear used to create the images in today’s post. Thanks a stack to all who have used the Shopper’s Guide links to purchase their gear as a thank you for all the free information that we bring you on the Blog and in the Bulletins. Before you purchase anything be sure to check out the advice in our Shopper’s Guide.
Canon 800mm f/5.6L IS lens. Right now this is my all time favorite super-telephoto lens.
Canon 70-200mm f/2.8L IS II lens. Man, I am loving this lens on my shoulder with the 2XIII teleconverter. I also use it a lot–depending on the situation–with the 1.4X III TC.
Canon EF 1.4X III TC. This new TC is designed to work best with the new Series II super-telephoto lenses.
Canon EOS-5D Mark III. Man, I am in love with this camera body. Both the files and the AF system are superb.
Canon EOS-1D Mark IV professional digital camera body. The very best professional digital camera body that I have ever used.
And from the BAA On-line Store:
LensCoats. I have a LensCoat on each of my big lenses to protect them from nicks and thus increase their re-sales value. All my big lens LensCoat stuff is in Hardwood Snow pattern.
LegCoat Tripod Leg Covers. I have four tripods active and each has a Hardwood Snow LegCoat on it to help prevent further damage to my tender shoulders 🙂 And you will love them in mega-cold weather….
Gitzo GT3530LS Tripod. This one will last you a lifetime.
Mongoose M3.6 Tripod Head. Right now this is the best tripod head around for use with lenses that weigh less than 9 pounds. For heavier lenses, check out the Wimberley V2 head.
CR-80 Replacement Foot for Canon 800. When using the 800 on a Mongoose as I do, replacing the lens foot with this accessory lets the lens sit like a dog whether pointed up or down and prevents wind-blown spinning of your lens on breezy days by centering the lens directly over the tripod.
Double Bubble Level. You will find one in my camera’s hot shoe whenever I am not using flash.
The Lens Align Mark II. I use the Lens Align Mark II pretty much religiously to micro-adjust all of my gear an average of once a month and always before a major trip. Enjoy our free comprehensive tutorial here.
BreezeBrowser. I do not see how any digital photographer can exist without this program.
April 12th, 2012
|
|
|
Join me on Midway and photograph three species of albatross until your arms are too tired to lift your rig…. Click on the composite image to enjoy a larger version.
|
MIDWAY 2013
MIDWAY ATOLL BAA IPT: March 25, 2013 (from Honolulu, Oahu, HI) 7-FULL DAYS OF PHOTOGRAPHY: $7995 ALL INCLUSIVE FROM HNL. Limit: 14/Openings 3.
There are only three slots open right now…. The trip schedule is now etched in stone and we are good to go. The price is firm barring any fuel surcharges. This might very well be the last year for tourism to this amazing spot….
The group will fly to Midway from the Charter Aircraft Hangar on the late afternoon of March 25, 2013. You will need to be in Honolulu by late morning on the 25th. For safety’s sake, I will be arriving in Honolulu on March 24 to avoid missing the charter flight. You should do the same. If you plan to arrive on the 25th and are delayed, you will miss the charter flight and will not be able to get to Midway. Period. If you do choose to arrive on the 24th as advised, the hotel is on your dime.
We will arrive at Midway after dark on the 25th. We will leave Midway well after dark on April 1 arriving in Honolulu during the very early morning of April 2, usually between 1 and 2 am. The cost of a hotel day-room is included in the trip. If you need late check-out (after noon on the 2nd) that will be on your dime too. Most flights back to the US are red-eyes.
We will enjoy seven full days of photography. We will enjoy hundreds of thousands of nesting albatrosses both Laysan and Black-footed. We will see and photograph (and video if you like) chicks of all sizes and the incredibly intricate courtship displays of both species. You will be able to create head portraits of both species with a 70-200 lens. We will enjoy hours of albatross flight photography. The morning runway flight photography is incredible. It is likely that we will see and get to photograph the exceedingly rare Short-tailed Albatross (though briefly because of access restrictions). We will see and photograph White (formerly Fairy) Tern as well as Red-tailed Tropicbird. After lunch on sunny days the skies in front of the Clipper House will be filled with courting Red-tailed Tropicbirds. Other likely subjects include Lasyan Duck, Pacific Golden-Plover and Bristle-thighed Curlew. Those who bring their flashes will be able to photograph Bonin’s Petrel after dark. I will likely leave my flash at home as there are severe weight restrictions on this trip; each of us will be limited to about 60 pounds total.
|
|
|
This Laysan Albatross chick was photographed with the Canon 70-200mm f/2.8L IS II lens, the 1.4X III TC (hand held at 250mm), and the Canon EOS-1D Mark IV. ISO 400. Evaluative metering -1/3 stop: 1/800 sec. at f/7.1 in Av mode. I needed to under-expose to prevent burning the rim lit feathers.
Central Sensor/AI Servo Rear Focus AF active at the moment of exposure. Click here if you missed the Rear Focus Tutorial. Click on the image to enjoy a larger version.
Imagine that here I needed to zoom out!
|
We will make a one day boat trip, about a 15 minute ride, to Eastern Island where we will see and photograph nesting Red-footed Booby and nesting Great Frigatebird with inflated red gular pouches. Grey-backed Tern and several other species are possible. And of course there will be zillions of nesting Laysan Albatrosses there. We can expect two species of noddy on the trip, Brown and Black–I think that the Black Noddies are more likely on Eastern Island. Both islands are rife with historical significance, derelict buildings and hangars, and artifacts; the naval battle of Midway was the turning point in World War II.
|
|
|
Midway is a world renowned wildlife photography destination that ranks right up there with Antarctica, East Africa, Japan in winter, and the Galapagos. And like the Galapagos, most of the wildlife is inordinately tame. Click on the composite image to enjoy a larger version.
|
In order to cover the huge expense of the round-trip charter aircraft to and from Midway Island this trip needs to fill in order to run. In the almost unimaginable event that this minimum is not met, or if the trip is denied government approval, your deposit will of course be refunded in full. It is otherwise non-refundable. Once the trip is confirmed you will be advised to purchase trip cancellation insurance. I do expect this trip to fill in very short order. A waiting list will be created for those who are late to respond. Please hold off purchasing plane tickets until you hear that the trip is a go. Do note that while many trips are advertised as once in a lifetime, this one may very well be that once in a lifetime opportunity as there is constant talk that each season may be the very last.
What’s included? The round trip charter airfare from HNL to Midway and back, all lodging and meals on Midway. The food, both American and Thai, is killer good so do not plan on losing any weight, all associated national park fees as well as transport via large golf cart. For the most part we will stay together as a group. Those wishing to photograph on their own with some restrictions may rent bikes. Also included is in-the-field instruction. Informal image sharing and Photoshop instruction will be available most days for those sitting next to me or looking over my shoulder in the lobby of Charley Barracks early mornings, evenings, and during break time. I do try to catch a short nap each day.
What’s not included: The cost of the airfare from your home to and from HNL. Your meals in Honolulu. The cost of your hotel room on March 24th and late check out if needed on April 2. Personal items and souvenirs purchased on Midway.
If you are a happy camper and wish to register for this trip please call us at 863-692-0906 immediately. If no answer do not leave a message but do send an e-mail to me at mailaddress. You will be given instructions for sending a deposit check for $800 to us here: Arthur Morris/BIRDS AS ART, PO Box 7245 (mail) or 4041 Granada Drive (courier), Indian Lake Estates, FL 33855. Your deposit is non-refundable.
For the folks who have never traveled with us, please remember, happy campers only. If you are a bitter and unhappy person we do not care to travel with you. If you are pleasant, fun, easy to get along with and know how to act in the field with a group, we would be delighted to have you along.
|
|
|
This Laysan Albatross was photographed in flight over the lagoon that surrounds the atoll. The black storm cloud was a rare bonus. I used the
Canon 70-200mm f/2.8L IS II lens, the 1.4X III TC (hand held at 118mm), and the Canon EOS-1D Mark IV. ISO 1000. Evaluative metering -1/3 stop: 1/1000 sec. at f/5.6 in Manual mode.
Central Sensor/AI Servo Rear Focus AF and re-compose. Click here if you missed the Rear Focus Tutorial. Click on the image to enjoy a larger version.
Note the waves breaking over the reef that surrounds the atoll.
|
April 10th, 2012
|
|
|
This Common Loon molting to breeding plumage was photographed well after the sun had gone behind the hills in Morro Bay CA with the tripod-mounted Canon 800mm f/5.L IS lens and the Canon EOS-5D Mark III. ISO 3200. Evaluative metering +1 1/3 stops: 1/80 sec. at f/5.6 in Av mode.
Lower Central Sensor–Expand AF area/AI Servo Rear Focus AF active at the moment of exposure. Click here if you missed the Rear Focus Tutorial. Click on the image for a larger version.
|
ISO 3200
I had a chance to create some high ISO images on the recently concluded Morro Bay IPT. I started this blog post with the ISO 3200 image above as it contains lots of black and dark tones where noise is often a serious problem for many. The very best way to minimize noise with any camera body is to expose well to the right as I did here; see the histogram lower right in the BreezeBrowser Main View page screen capture below. I exposed so far to the right that I actually had some blinkies on the breast. They can be seen below (slightly enhanced) as solid black. I made sure to click “Show Flashing Highlights” on the Breezebrowser Main View page under View. The not really “blown” highlights were easily recovered by moving the Recovery Slider to the right during the RAW conversion in ACR as described in detail in Digital Basics (along with my complete digital workflow and dozens of great Photoshop tips).
For this image I ran Noise Reduction during the ACR conversion after first enlarging the image to 100%. On the Detail tab (the third tab from left to right) I set the following under Noise Reduction by trial and error while clicking preview on and off:
Luminance: 25
Luminanace Detail: 50
Luminance Contrast: 50
Color: 25
Color Detail: 50
Please understand that I am in no way expert in this area. I simply experimented and went with what looked good at 100%.
Be sure to click on the image to see the 1280 wide version and let me know what you think of the noise levels for ISO 3200.
BTW, I went with ISO 3200 as the 1/80 sec. shutter speed is pretty much close to an absolute minimum with a slowly swimming loon…. I am often asked, “What’s the highest ISO you will use?” I always answer, “The one that gets me the shutter speed that I need.”
| [Not a valid template] |
|
As above, this screen capture of a BreezeBrowser main view page shows how far to the right I pushed the exposure in an effort to minimize noise. You can learn the basics of digital exposure and histograms in the “Exposure Simplified” section of ABP II. And you can learn why I use BreezeBrowser every day for sorting, editing (selecting the keepers), and storing my images by clicking here.
|
ISO 1600
The next image was created earlier in the trip than the loon image above at ISO 1600.
|
|
|
This Long-billed Curlew image was created with the tripod-mounted Canon 800mm f/5.L IS lens and the Canon EOS-5D Mark III. ISO 400. Evaluative metering +2 1/3 stops: 1/500 sec. at f/5.6 in Manual mode.
Left Central Sensor–Expand AF area/AI Servo Rear Focus AF active at the moment of exposure. Click here if you missed the Rear Focus Tutorial. Click on the image for a larger version.
|
| [Not a valid template] |
|
This is the histogram for the image above. Note the bulk of the data all the way to the right….
|
Noise with overall light-toned images is generally less problematic than in images with dark tones. None-the-less many of the Morro Bay IPT folks were totally amazed by the lack of noise when they viewed the original image file at 100%. Only my default Noise Reduction setting (Color: 25) was applied during conversion. Click on the image to see a larger size and let us know what you think for the noise levels. Remember, the best way to reduce noise levels is to expose to the right.
Important Contest News/Deadline Extended
While you may upload images until 11:59pm eastern time on April 30, 2012, the very last day for registering for the contest and for making eligible B&H purchases will be Monday, April 23, 2012. This will give us time to process your registrations and verify your B&H purchases and will give you time to upload your images successfully. Good luck to all.
Do save your e-mail receipts for eligible B&H purchases made after Monday, April 23 as you will be able to use them for entry into the BIRDS AS ART 2nd International Bird Photography Competition; details will be announced in several months. Please remember, only B&H purchases made using the product-specific BAA B&H affiliate links in the Bulletins or on the blog or the more general link here qualify. See additional details by scrolling down to item 2 here. If in doubt, simply start your B&H searches by clicking here:
BAA Bulletin #405
BAA Bulletin #405 is on line and may be accessed in dramatic black and white format here. Be sure to scroll down and check out the two spectacular Judge’s Favorite images.
- MIDWAY 2013
- CONTEST UPDATE
- THE BLOG IS THE BOMB
- POSSE NEWS/ROBERT AMORUSO
- IPT UPDATES
Earn Free Contest Entries and Support both the Bulletins and the Blog by making all your B & H purchases here.
More and more folks are earning multiple contest entries with their B & H purchases. See here for details on that. Eleven great categories, 34 winning and honored images, and prize pools valued in excess of $20,000. Click here to visit the competition home page.
Shopper’s Guide
Below is a list of the gear used to create the images in today’s post. Thanks a stack to all who have used the Shopper’s Guide links to purchase their gear as a thank you for all the free information that we bring you on the Blog and in the Bulletins. Before you purchase anything be sure to check out the advice in our Shopper’s Guide.
Canon 800mm f/5.6L IS lens. Right now this is my all time favorite super-telephoto lens.
Canon EOS-5D Mark III. Except when I need extreme focal length, I have been using my 5D III on the 800 a ton. And loving it.
And from the BAA On-line Store:
LensCoats. I have a LensCoat on each of my big lenses to protect them from nicks and thus increase their re-sales value. All my big lens LensCoat stuff is in Hardwood Snow pattern.
LegCoat Tripod Leg Covers. I have four tripods active and each has a Hardwood Snow LegCoat on it to help prevent further damage to my tender shoulders 🙂 And you will love them in mega-cold weather….
Gitzo GT3530LS Tripod. This one will last you a lifetime.
Mongoose M3.6 Tripod Head. Right now this is the best tripod head around for use with lenses that weigh less than 9 pounds. For heavier lenses, check out the Wimberley V2 head.
CR-80 Replacement Foot for Canon 800. When using the 800 on a Mongoose as I do, replacing the lens foot with this accessory lets the lens sit like a dog whether pointed up or down and prevents wind-blown spinning of your lens on breezy days by centering the lens directly over the tripod.
Double Bubble Level. You will find one in my camera’s hot shoe whenever I am not using flash.
The Lens Align Mark II. I use the Lens Align Mark II pretty much religiously to micro-adjust all of my gear an average of once a month and always before a major trip. Enjoy our free comprehensive tutorial here.
BreezeBrowser. I do not see how any digital photographer can exist without this program.
April 8th, 2012 Seven Miles Off Topic: Powerless?
A few years back I was not very happy with the nine LaCie hard drives that I had purchased. Something like seven of them failed within months, two of those twice. I called and said, “I have a big on-line presence and I can hurt you. I want a full refund.” “Sorry, no. The best we can so is repair them.”
So I ran an item or two in a Bulletin and asked folks who had had problems with LaCie drives to e-mail me. Many did. I shared all of the negative comments via the Bulletin and forwarded the Bulletins to my contact at LaCie. In short order I had my refund….
So when I received the pass-along e-mail from friend Joan Masson, I just had to share it with you here. Note: Joanie sends me about a dozen each week. Most get deleting instantly especially the political ones. But this one will strike a chord with most of us.
Getting Even With United Airlines
A musician named Dave Carroll had difficulty with United Airlines. United apparently damaged his treasured Taylor guitar ($3500) during a flight. Dave spent over 9 months trying to get United to pay for damages caused by baggage handlers to his custom Taylor guitar. During his final exchange with the United Customer Relations Manager, he stated that he was left with no choice other than to create a music video for YouTube exposing their lack of cooperation.
The manager responded: “Good luck with that one, pal.”
So he posted a retaliatory video on YouTube. The video has since received over 10 million hits. United Airlines contacted the musician and attempted
settlement in exchange for pulling the video. Naturally his response was: “Good luck with that one, pal.”
Here’s a link to the video http://www.youtube.com/watch?v=5YGc4zOqozo
The original video went totally viral with 11,764,355 views as of 6:10pm eastern time on Sunday, 4-8-12.
The song is cleverly written and the video is pretty darned cool. As for the song and the music, I love it. Dave Carroll comes of as a very nice young man. With brother Don, he is a member of a two man musical group, Sons of Maxwell which who performs both traditional Celtic folk music and original compositions with a pop-folk sound. While doing some on-line research I learned that the song we first posted on You Tube in July 2009; where was I? You can find lots more info and some great links on Wikipedia here.
There were two follow-up videos that you can find on the original You Tube link above. Most times that I visit You Tube I spend at least a half hour following and listening to the links.
The neatest thing of all is that Dave Carroll’s career got a huge boost from the media storm that followed the release of the video. This from his bio:
Dave Carroll is an award winning singer-songwriter, professional speaker and social media innovator based in Halifax, Nova Scotia Canada. He began his music career with his brother Don in the band Sons of Maxwell and has been enjoying success as a solo artist for the last two years. For two decades, Dave has charmed fans with his approach to music. His ability to extract the essence of a message and craft it into song is a rare gift that is attracting fans of all ages while his sense of humour and disarmingly warm stage presence makes each live experience a memorable one for audiences around the world.
Known as a master storyteller, Dave’s incredible talent was introduced to millions when his 2009 YouTube music video ‘United Breaks Guitars’ became a worldwide sensation. The song chronicled his experience in the customer service process with United Airlines. His creative use of social media to share that message has reached over 150 million people. United Breaks Guitars was named one of the five most important videos in Google’s History.
The United Breaks Guitars trilogy has awakened companies everywhere to the importance of focusing on the customer and on delivering exceptional customer experience. Dave Carroll is a musician with a message, demonstrating the power one voice can have in today’s socially driven world. Dave has become internationally famous as one of the world’s top media relations innovators & customer experience authorities. He is also widely sought after as a content creator & songwriter.
Dave is co-founder of Gripevine.com; if you have a complaint against a company or corporation you may be able to have them resolved by clicking here.
If anyone heard of this in 2009 or is otherwise familiar with Dave or the group, please leave a comment and let us know.
April 7th, 2012
|
|
|
Image #1 was created with the tripod-mounted Canon EF 180mm f/3.5L macro lens and the Canon EOS-5D Mark III. ISO 400. Evaluative metering at zero: 1/500 sec. at f/6.3 in Av mode.
Central sensor Rear Focus/AI Servo AF and recompose. Click on the image to see a larger version.
|
Home Safe
I flew home from California yesterday getting home at about 7pm. Morro Bay was great. And so was the IPT.
Unexpected…
There were some nice patches of California Poppies in and around Morro Bay. We saw them every day on the way to and from the birds. And we had some great birds. On the last morning of the IPT I got back to the room at about 9:45am. We were meeting for lunch at Giovanni’s at 11. I was tired and was looking forward to my nap. But those poppies–all in perfect bloom–had looked so, so beautiful that I grabbed the macro lens, the diffuser, and the reflector, and went out to spend an hour photographing flowers. You gotta love it.
For image #1 I used my big reflector/diffuser to block the wind and diffused the direct sunlight with a slightly smaller one. By scrolling down here you can find a variety of collapsible models. I’ve been saying for years that most flower images could be drastically improved by shading or diffusing direct sunlight. And bouncing some light back in with a reflector can make the images even stronger.
|
|
|
Image #2 was also created with the tripod-mounted Canon EF 180mm f/3.5L macro lens and the Canon EOS-5D Mark III. ISO 400. Evaluative metering +2/3 stop: 1/200 sec. at f/5.6 in Av mode.
Central sensor Rear Focus/AI Servo AF and recompose. Click on the image to see a larger version.
|
For the image above I raised the tripod so as to include a bit of background and then went with a pano crop. I shaded the blossom with my body and bounced a bit of light back in with the gold side of the reflector.
Inspired by stuff that I learned from Denise Ippolito’s “The Softer Side of Macro” I got down on the ground and took a look at the backlit flowers. For this one I got pretty close to the minumum focusing distance of the lens. As autofocus with this lens is very poor at best in low contrast situations I pre-focused manually on the pink edge of the sepal and tried to make an image or two each time that my breathing and body movement brought that edge into sharp focus. It learned that technique from a George Lepp seminar that I attended years ago. For all of these images it was important to check the RGB histogram to avoid burning one of the color channels. I love that Canon finally got around to putting a thin white line around the histogram box on the 5D Mark III so that outdoor photographers can actually see the ends of the histogram while in the field….
Again inspired by “The Softer Side of Macro” I employed stronger backlight for this image of the whole flower. Focusing was achieved as in image #3.
Which Do You Like Best?
Take a moment to leave a comment and let us know which image you like best. And least. And why. I have a clear #1 and a clear #2.
Contest Deadline Extended
The contest deadline has been extended until April 30, 2012. In case you missed the big news, click here.
Earn Free Contest Entries and Support both the Bulletins and the Blog by making all your B & H purchases here.
More and more folks are earning multiple contest entries with their B & H purchases. See here for details on that. Eleven great categories, 34 winning and honored images, and prize pools valued in excess of $20,000. Click here to visit the competition home page.
Shopper’s Guide
Below is a list of the gear used to create the images in today’s post. Thanks a stack to all who have used the Shopper’s Guide links to purchase their gear as a thank you for all the free information that we bring you on the Blog and in the Bulletins. Before you purchase anything be sure to check out the advice in our Shopper’s Guide.
Canon EF 180mm f/3.5L macro lens. I love the narrow angle of view and longer working distances that come with Canon’s telephoto macro lens.
Canon EOS-5D Mark III. Except when I need extreme focal length, I have been using my 5D III on the 800 a ton. And loving it.
And from the BAA On-line Store:
LensCoats. I have a LensCoat on each of my big lenses to protect them from nicks and thus increase their re-sales value. All my big lens LensCoat stuff is in Hardwood Snow pattern.
LegCoat Tripod Leg Covers. I have four tripods active and each has a Hardwood Snow LegCoat on it to help prevent further damage to my tender shoulders 🙂 And you will love them in mega-cold weather….
Gitzo GT3530LS Tripod. This one will last you a lifetime.
Mongoose M3.6 Tripod Head. Right now this is the best tripod head around for use with lenses that weigh less than 9 pounds. For heavier lenses, check out the Wimberley V2 head.
Double Bubble Level. You will find one in my camera’s hot shoe whenever I am not using flash.
The Lens Align Mark II. I use the Lens Align Mark II pretty much religiously to micro-adjust all of my gear an average of once a month and always before a major trip. Enjoy our free comprehensive tutorial here.
BreezeBrowser. I do not see how any digital photographer can exist without this program.
April 5th, 2012
|
|
|
This image of a huge breaking wave was created at 7:23 am on April 1, 2012 just north of Morro Rock with the with the tripod-mounted Canon 800mm f/5.6L IS lens and the Canon EOS-1D Mark IV. ISO 400. Evaluative metering +1 2/3 stops: 1/800 sec. at f/5.6 in Manual mode.
Central Sensor/AI Servo Rear Focus active at the moment of exposure. Click here if you missed the Rear Focus Tutorial. Click on the image to enjoy a larger version.
|
Keep or Delete?
Would you keep or delete the image above? Before you answer, there are several important concepts to understand:
1-With images of over-all light-toned scenes made when the sun is at less than full strength you generally need to add at least two stops of light to get some data half way into the right most box of the histogram.
2-When you expose such images properly they will (properly) look washed out on the back of your camera and then again on your computer monitor.
3-Such properly exposed digital images have huge potential.
4-The reason that you need to expose to the right in these low light/overall light-toned situations is to produce files with the greatest amount of information. If you do not believe me, simply photograph the pre-dawn sky at -1 stop and then again at +3 stops. Now download the images and compare the file size…. Let me know what you learn.
The optimized image that I created from the image above appears below and was first published in this recent blog post: “Frozen and Battered.” If you missed that one click here.
|
|
|
This is the optimized image created from the image capture above.
|
Magic?
Nope. There was no magic involved. The image was converted in ACR as described in detail in Digital Basics. Note: if you set the Black point by moving the Black slider to the right while holding down the Alt key (the Command key for Mac) and your image looks too dark or too contrasty simply move it back to the left to taste.
After converting the RAW file to a TIFF and bringing it into Photoshop I brought the image into NIK Color Efex Pro. I ran Tonal Contrast at 80% and Detail Extractor at 50%. I guess that that might qualify as magic as it really juiced up the image. I used a large soft brush to erase the NIK effects from the sky; you almost never want to run Detail Extractor on the sky and the same is usually true of Tonal Contrast….
BTW, though I saw the top image while looking at the back of the camera I saw the optimized image in my mind’s eye. Heck I visualized it as I looked through the viewfinder. And even though the image on the back of the camera looked totally washed out I loved it from the moment I saw it :).
ps: I kept it!
NIK
As regular readers know NIK’s Color Efex Pro 4 is now an integral part of my workflow. You can save 15% on all NIK products by clicking here and entering BAA in the Promo Code box at check-out. Then hit Apply to see your savings. You can download a trial copy that will work for 15 days and allow you to create full sized images.
Contest Deadline Extended
The contest deadline has been extended until April 30, 2012. In case you missed the big news, click here.
Earn Free Contest Entries and Support both the Bulletins and the Blog by making all your B & H purchases here.
More and more folks are earning multiple contest entries with their B & H purchases. See here for details on that. Eleven great categories, 34 winning and honored images, and prize pools valued in excess of $20,000. Click here to visit the competition home page.
Shopper’s Guide
Below is a list of the gear used to create the images in today’s post. Thanks a stack to all who have used the Shopper’s Guide links to purchase their gear as a thank you for all the free information that we bring you on the Blog and in the Bulletins. Before you purchase anything be sure to check out the advice in our Shopper’s Guide.
Canon 800mm f/5.6L IS lens. Right now this is my all time favorite super-telephoto lens.
Canon EOS-1D Mark IV professional digital camera body. The very best professional digital camera body that I have ever used.
And from the BAA On-line Store:
LensCoats. I have a LensCoat on each of my big lenses to protect them from nicks and thus increase their re-sales value. All my big lens LensCoat stuff is in Hardwood Snow pattern.
LegCoat Tripod Leg Covers. I have four tripods active and each has a Hardwood Snow LegCoat on it to help prevent further damage to my tender shoulders 🙂 And you will love them in mega-cold weather….
Gitzo GT3530LS Tripod. This one will last you a lifetime.
Mongoose M3.6 Tripod Head. Right now this is the best tripod head around for use with lenses that weigh less than 9 pounds. For heavier lenses, check out the Wimberley V2 head.
CR-80 Replacement Foot for Canon 800. When using the 800 on a Mongoose as I do, replacing the lens foot with this accessory lets the lens sit like a dog whether pointed up or down and prevents wind-blown spinning of your lens on breezy days by centering the lens directly over the tripod.
Double Bubble Level. You will find one in my camera’s hot shoe whenever I am not using flash.
The Lens Align Mark II. I use the Lens Align Mark II pretty much religiously to micro-adjust all of my gear an average of once a month and always before a major trip. Enjoy our free comprehensive tutorial here.
BreezeBrowser. I do not see how any digital photographer can exist without this program.
April 4th, 2012
|
|
|
This Long-billed Curlew image was created with the tripod-mounted Canon 800mm f/5.L IS lens and the Canon EOS-5D Mark III. ISO 400. Evaluative metering +2/3 stop: 1/2000 sec. at f/5.6 in Manual mode.
Central Sensor–right side Expand AF area/AI Servo Rear Focus active at the moment of exposure. Click here if you missed the Rear Focus Tutorial. Click on the image for a larger version.
The bird was moved down and back in the frame using the Layer Masking techniques that I learned from Robert O’Toole’s APTATS II.
|
Target Acquired; Results as Expected
When I decided to return to Morro Bay, I had one bird in mind: North America’s largest shorebird, Long-billed Curlew. They are plentiful here in late fall, winter, and early spring. And they are relatively tame. Even on the coldest, windiest day in memory, we got some nice images of our target species. And we have continued to do so on the rather pleasant mornings and the unseasonably cold, windy afternoons. What can I say? I love shorebirds, especially the large showy ones.
|
|
|
This image was created with the tripod-mounted Canon 800mm f/5.L IS lens and the Canon EOS-5D Mark III. ISO 400. Evaluative metering +2/3 stop: 1/1250 sec. at f/5.6 in Manual mode.
Central Sensor–far right side Expand AF area/AI Servo Rear Focus active at the moment of exposure. Click here if you missed the Rear Focus Tutorial. Click on the image for a larger version.
|
The instructor (hey, that’s me!), said, and I quote: “Watch for a breaking wave in the background. The worst place for them is behind the bird’s head; they are best positioned on the same level as or just below the bird’s feet.” The sand crab in the bird’s beak and the splashes around the bird’s legs here are big pluses.
|
|
|
This image was created with from ground level with me behind the tripod with the legs splayed. Canon 800mm f/5.L IS lens and the Canon EOS-5D Mark III. ISO 400. Evaluative metering +2/3 stop: 1/2000 sec. at f/5.6 in Manual mode.
Central Sensor–far right side Expand AF area/AI Servo Rear Focus active at the moment of exposure. Click here if you missed the Rear Focus Tutorial. Click on the image for a larger version. As you can see, I am loving my 5D Mark III.
|
Contest Deadline Extended
The contest deadline has been extended until April 30, 2012. In case you missed the big news, click here.
Earn Free Contest Entries and Support both the Bulletins and the Blog by making all your B & H purchases here.
More and more folks are earning multiple contest entries with their B & H purchases. See here for details on that. Eleven great categories, 34 winning and honored images, and prize pools valued in excess of $20,000. Click here to visit the competition home page.
Shopper’s Guide
Below is a list of the gear used to create the images in today’s post. Thanks a stack to all who have used the Shopper’s Guide links to purchase their gear as a thank you for all the free information that we bring you on the Blog and in the Bulletins. Before you purchase anything be sure to check out the advice in our Shopper’s Guide.
Canon 800mm f/5.6L IS lens. Right now this is my all time favorite super-telephoto lens.
Canon EOS-5D Mark III. Except when I need extreme focal length, I have been using my 5D III on the 800 a ton. And loving it.
And from the BAA On-line Store:
BLUBB. The BLUBB (Big Lens Ultimate BeanBag) is the world’s finest big lens beanbag. There are knock-offs for half the price but you will be wasting your money….
LensCoats. I have a LensCoat on each of my big lenses to protect them from nicks and thus increase their re-sales value. All my big lens LensCoat stuff is in Hardwood Snow pattern.
LegCoat Tripod Leg Covers. I have four tripods active and each has a Hardwood Snow LegCoat on it to help prevent further damage to my tender shoulders 🙂 And you will love them in mega-cold weather….
Gitzo GT3530LS Tripod. This one will last you a lifetime.
Mongoose M3.6 Tripod Head. Right now this is the best tripod head around for use with lenses that weigh less than 9 pounds. For heavier lenses, check out the Wimberley V2 head.
CR-80 Replacement Foot for Canon 800. When using the 800 on a Mongoose as I do, replacing the lens foot with this accessory lets the lens sit like a dog whether pointed up or down and prevents wind-blown spinning of your lens on breezy days by centering the lens directly over the tripod.
Double Bubble Level. You will find one in my camera’s hot shoe whenever I am not using flash.
The Lens Align Mark II. I use the Lens Align Mark II pretty much religiously to micro-adjust all of my gear an average of once a month and always before a major trip. Enjoy our free comprehensive tutorial here.
BreezeBrowser. I do not see how any digital photographer can exist without this program.
April 2nd, 2012
|
|
|
This image was created with the tripod-mounted Canon 70-200mm f/2.8L IS II lens, the 1.4X III TC (at 280mm), and the Canon EOS-5D Mark III. ISO 100. Evaluative metering at +2 stops: 1/4 sec. at f/4 in Tv mode.
Central Sensor–Expand AF area/AI Servo Rear Focus active at the moment of exposure. Click here if you missed the Rear Focus Tutorial. Click on the image to enjoy a larger, more spectacular version.
Where do I wish I had pointed the lens. And why???
|
Frozen and Battered
On Sunday morning past I led a Master Class In-the-Field Workshop for the Morro Bay Photo Expo for 15 eager but very cold folks. When I arrived in Morro Bay on Friday afternoon I was shocked at how cold and damp it was. On the morning of the workshop it was clear and cold, 48 degrees to be exact. Though the surf was huge as predicted, things were not too bad. The winds were about 15mph from the west northwest when I created the image above at 6:57am.
|
|
|
This image of a huge breaking wave was created at 7:23 am with the with the tripod-mounted Canon 800mm f/5.6L IS lens and the Canon EOS-1D Mark IV. ISO 400. Evaluative metering +1 2/3 stops: 1/800 sec. at f/5.6 in Manual mode.
Central Sensor/AI Servo Rear Focus active at the moment of exposure. Click here if you missed the Rear Focus Tutorial. Click on the image to enjoy a larger version.
|
With the increasingly strong winds behind them, the waves got bigger just after the sun cleared the hills to the east. Folks estimated the largest waves like this one to be in excess of twenty feet tall.
|
|
|
This image was created at 9:03 am with the with the tripod-mounted Canon 800mm f/5.6L IS lens and the Canon EOS-1D Mark IV. ISO 400. Evaluative metering +2/3 stop: 1/1600 sec. at f/5.6 in Manual mode.
I used a left sensor/AI Servo Rear Focus that was active at the moment of exposure. Click here if you missed the Rear Focus Tutorial. Click on the image to enjoy a larger version.
|
Just after I created the image above the winds really picked up with gusts to 30mph. The birds pretty much disappeared.
|
|
|
This image was created with a borrowed Canon 70-200mm f/2.8L IS II lens (hand held at 150mm) and a borrowed EOS-5D Mark II. ISO 100. Evaluative metering +1/3 stop: 1/125 sec. at f/20 in Av mode.
All AF points active/shutter button AI Servo AF. Click on the image to enjoy a larger, more spectacular version. NIK Color Efex Pro Tonal Contrast plus NIK Silver Efex Pro High Structure pre-set.
|
With no birds around it was time to switch to soup from a stone mode and teach the boys and girls a bit about creative vision when times are tough :). At 10:30 we called it a wrap. The winds continued to increase….
| [Not a valid template] |
|
This image was created at 4:22 pm with the Canon 800mm f/5.L IS lens, the 1.4X III TC, and the Canon EOS-1D Mark IV. ISO 400. Evaluative metering at +1/3 stop: 1/400 sec. at f/10 in Manual mode.
Central sensor (by necessity) AI Servo/Rear Focus AF on the kelp which was on the same plane as the otter’s eye active at the moment of exposure. Click here if you missed the Rear Focus Tutorial.
|
Having stayed in touch via e-mail with the incoming IPT group I met up with most of them at 3pm. Aidan and I thought that with the strong west winds that the otters might be in close to the road on the inlet side of Morro Rock. And we would be in the lee of the now very strong west wind. Good plan…. But the wind was whipping around the Rock and buffeting us from behind. Everyone was cold. Even when we got low down in the rocks the dirt swirled around and sand-blasted our eyes. It was almost impossible to photograph. Heck, at was almost impossible to stand. Twice I came close to be knocked over when I changed position. And the stronger the wind got the colder I became. When I had visited Morro Bay in 2009 in January it was warm and sunny and with the IPT in spring, I came woefully unprepared clothing-wise…. The sand scoured our hands and all unprotected areas of skin. We estimated gusts of 50 mph or more.
As cute as the otters were we gave up on them just before 5pm and headed for the beach. Even though we were on an open, exposed beach the force of the winds was a bit less as there was no Morro Rock created vortex. Or so it seemed.
With our backs to the wind we had a great afternoon with a pond full of bathing and roosting gulls and a single Long-billed Curlew. We finally quit at 7pm and headed for the motel and the IPT’s introductory slide program at 8pm. Every local whom we talked too the next day stated emphatically that they had never experience the wind and waves of the previous day, even those who had been in the area for forty years. You gotta love it. Monday was sunny and relatively mild.
| [Not a valid template] |
|
This image was created at 6:17 pm with the Canon 800mm f/5.L IS lens and the Canon EOS-5D Mark III. ISO 400. Evaluative metering at zero: 1/2500 sec. at f/5.6 in Manual mode.
Central Sensor–Expand AF area/AI Servo Rear Focus active at the moment of exposure. Click here if you missed the Rear Focus Tutorial.
Click on the image for a larger version.
|
It was a treat to photograph breeding plumage California Gull in the sweet light. At one point a rogue wave driven by the high winds sent all of us running in an effort to keep our boots dry…. It was a fitting end to a very challenging day.
Note: the more I learn about and use my 5D III the more I am loving it.
Earn Free Contest Entries and Support both the Bulletins and the Blog by making all your B & H purchases here.
More and more folks are earning multiple contest entries with their B & H purchases. See here for details on that. Eleven great categories, 34 winning and honored images, and prize pools valued in excess of $20,000. Click here to visit the competition home page.
Shopper’s Guide
Below is a list of the gear used to create the images in today’s post. Thanks a stack to all who have used the Shopper’s Guide links to purchase their gear as a thank you for all the free information that we bring you on the Blog and in the Bulletins. Before you purchase anything be sure to check out the advice in our Shopper’s Guide.
Canon 800mm f/5.6L IS lens. Right now this is my all time favorite super-telephoto lens.
Canon 70-200mm f/2.8L IS II lens. Man, I am loving this lens on my shoulder with the 2XIII teleconverter. I also use it a lot–depending on the situation–with the 1.4X III TC.
Canon EF 1.4X III TC. This new TC is designed to work best with the new Series II super-telephoto lenses.
Canon EOS-5D Mark III. Man, I am in love with this camera body. Both the files and the AF system are superb. I cannot wait to get to Morro Bay.
Canon EOS-1D Mark IV professional digital camera body. The very best professional digital camera body that I have ever used.
And from the BAA On-line Store:
BLUBB. The BLUBB (Big Lens Ultimate BeanBag) is the world’s finest big lens beanbag. There are knock-offs for half the price but you will be wasting your money….
LensCoats. I have a LensCoat on each of my big lenses to protect them from nicks and thus increase their re-sales value. All my big lens LensCoat stuff is in Hardwood Snow pattern.
LegCoat Tripod Leg Covers. I have four tripods active and each has a Hardwood Snow LegCoat on it to help prevent further damage to my tender shoulders 🙂 And you will love them in mega-cold weather….
Gitzo GT3530LS Tripod. This one will last you a lifetime.
Mongoose M3.6 Tripod Head. Right now this is the best tripod head around for use with lenses that weigh less than 9 pounds. For heavier lenses, check out the Wimberley V2 head.
CR-80 Replacement Foot for Canon 800. When using the 800 on a Mongoose as I do, replacing the lens foot with this accessory lets the lens sit like a dog whether pointed up or down and prevents wind-blown spinning of your lens on breezy days by centering the lens directly over the tripod.
Double Bubble Level. You will find one in my camera’s hot shoe whenever I am not using flash.
The Lens Align Mark II. I use the Lens Align Mark II pretty much religiously to micro-adjust all of my gear an average of once a month and always before a major trip. Enjoy our free comprehensive tutorial here.
BreezeBrowser. I do not see how any digital photographer can exist without this program.
|
|

